The Cameo Camper Renovation: 3D Panel Wall Part 1
Update: This is part one of a series. Don’t forget to check out part two.
Hey y’all! You may have seen glimpses of the topic of today’s post and even asked us about it on Instagram and Facebook. We’re happy to be back and even more excited to finally share the really cool project that adds some extra wow factor to the inside of our vintage camper.
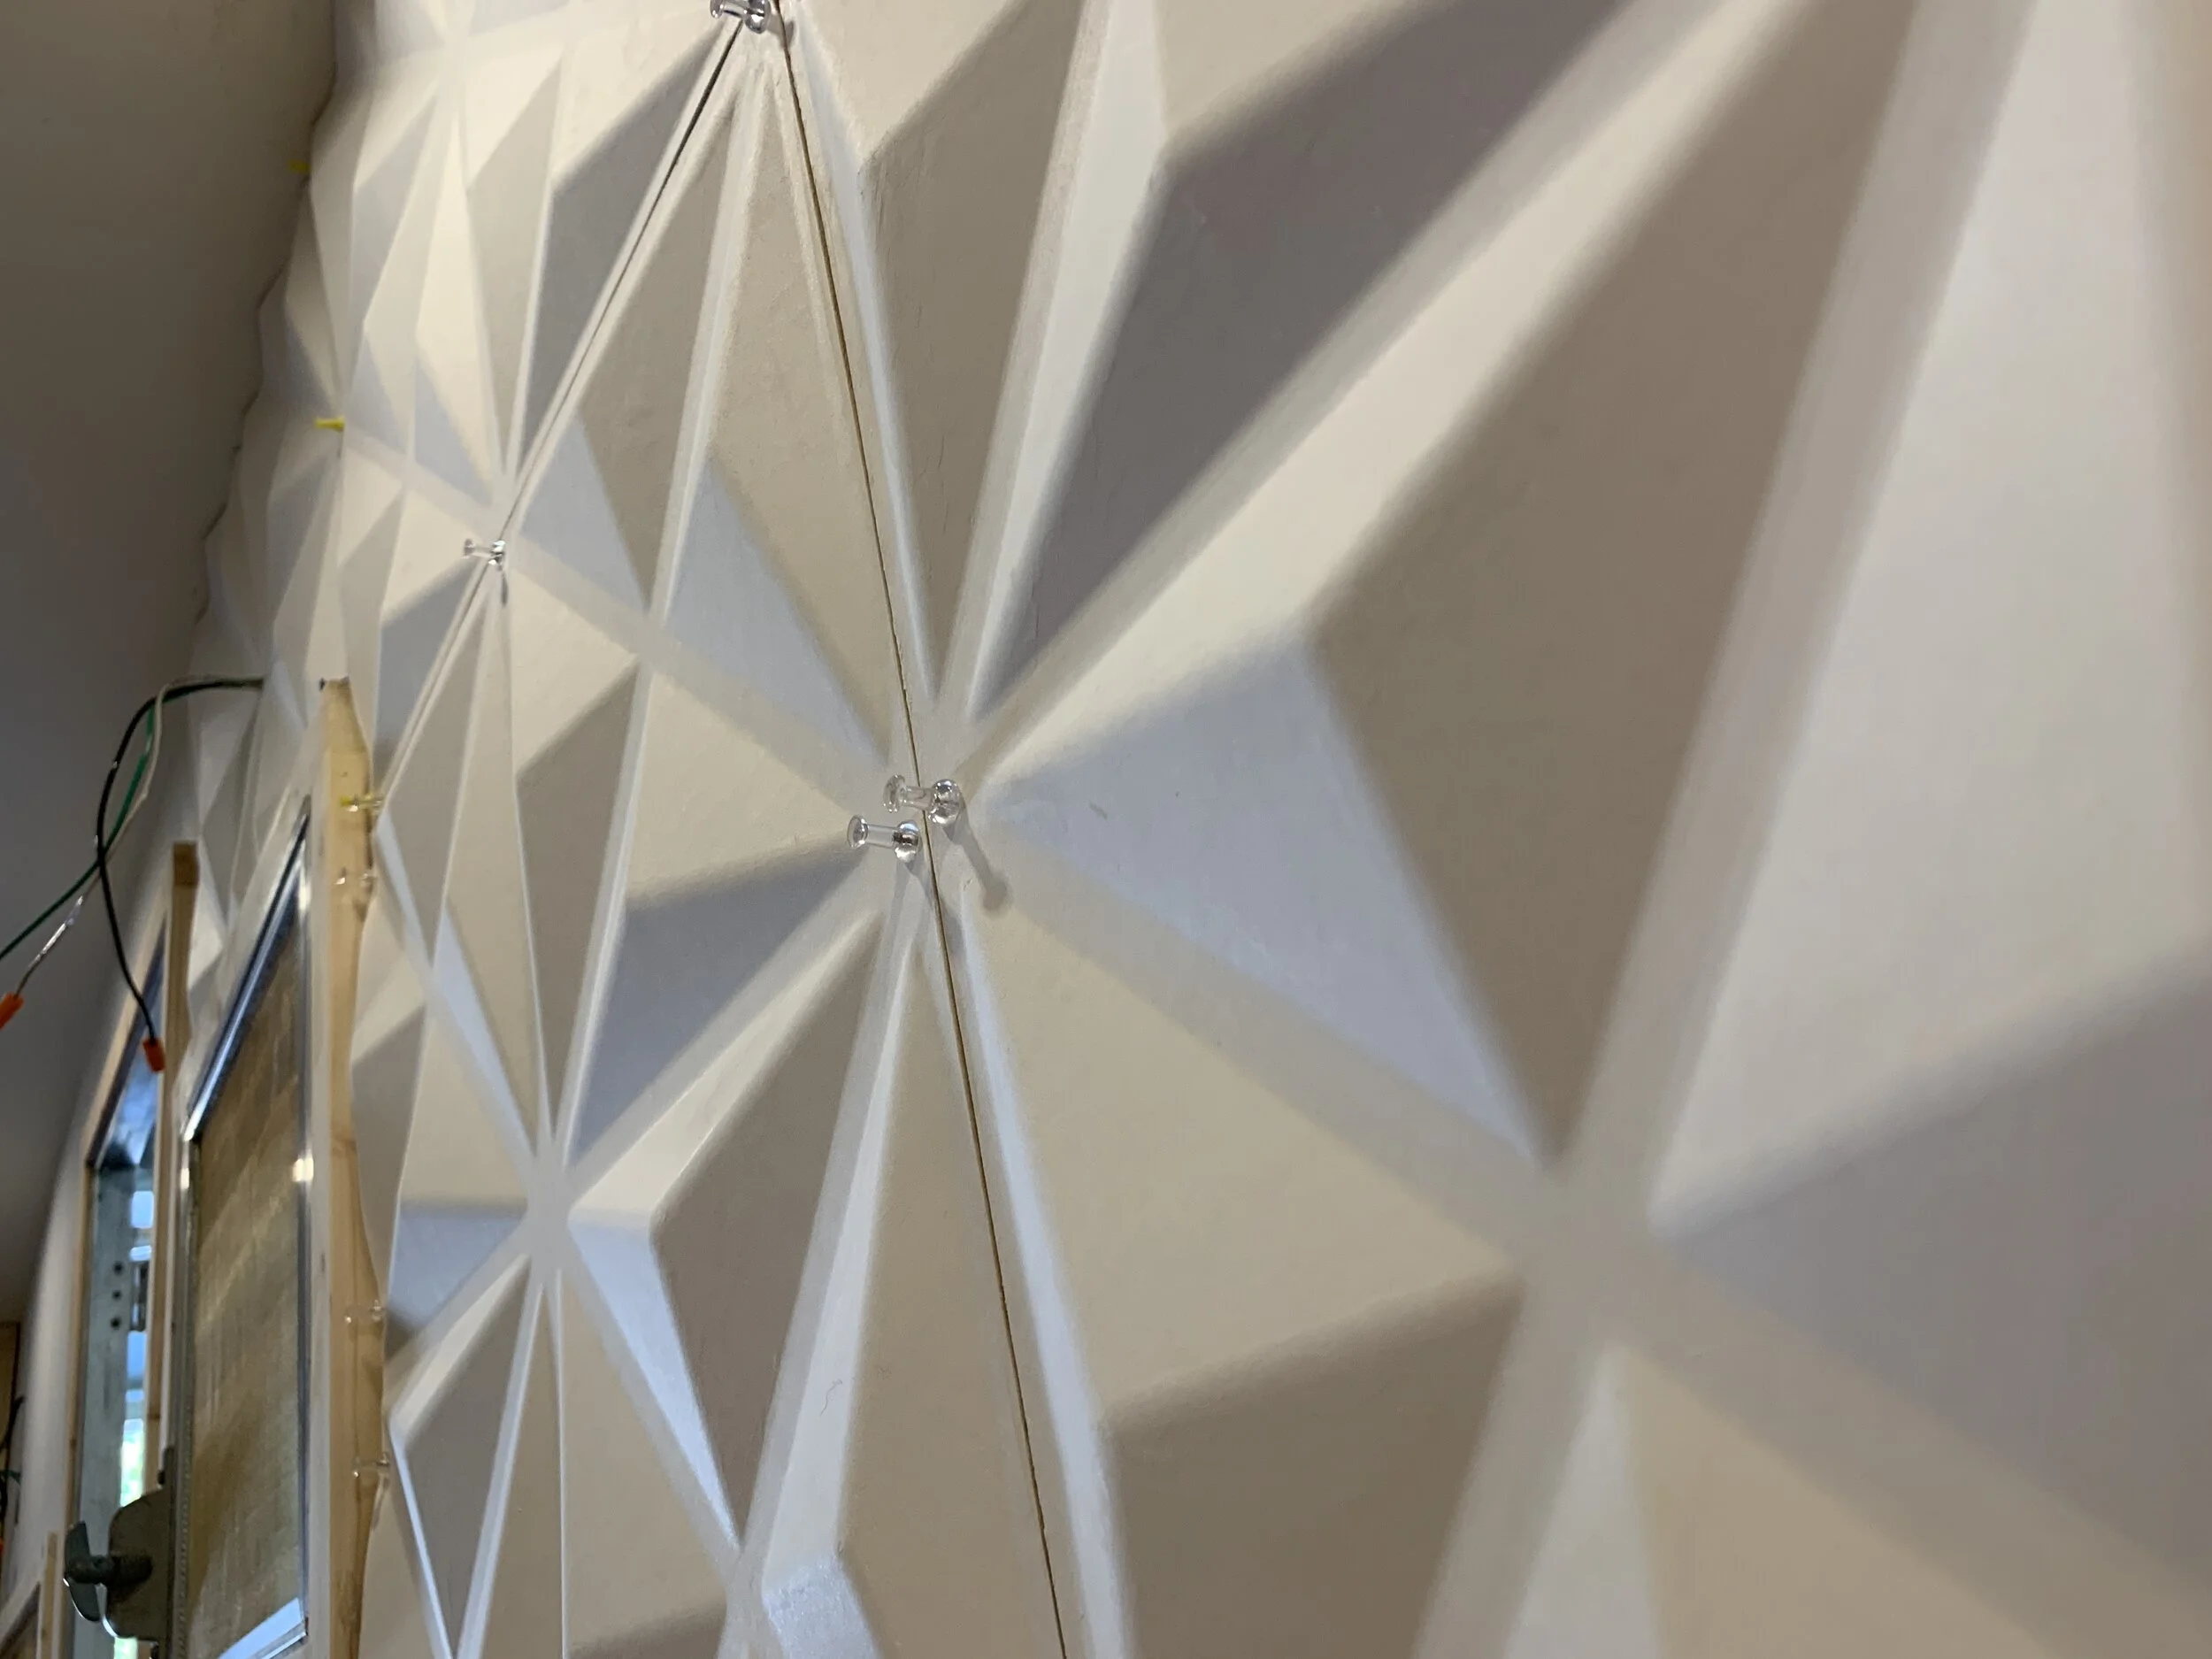
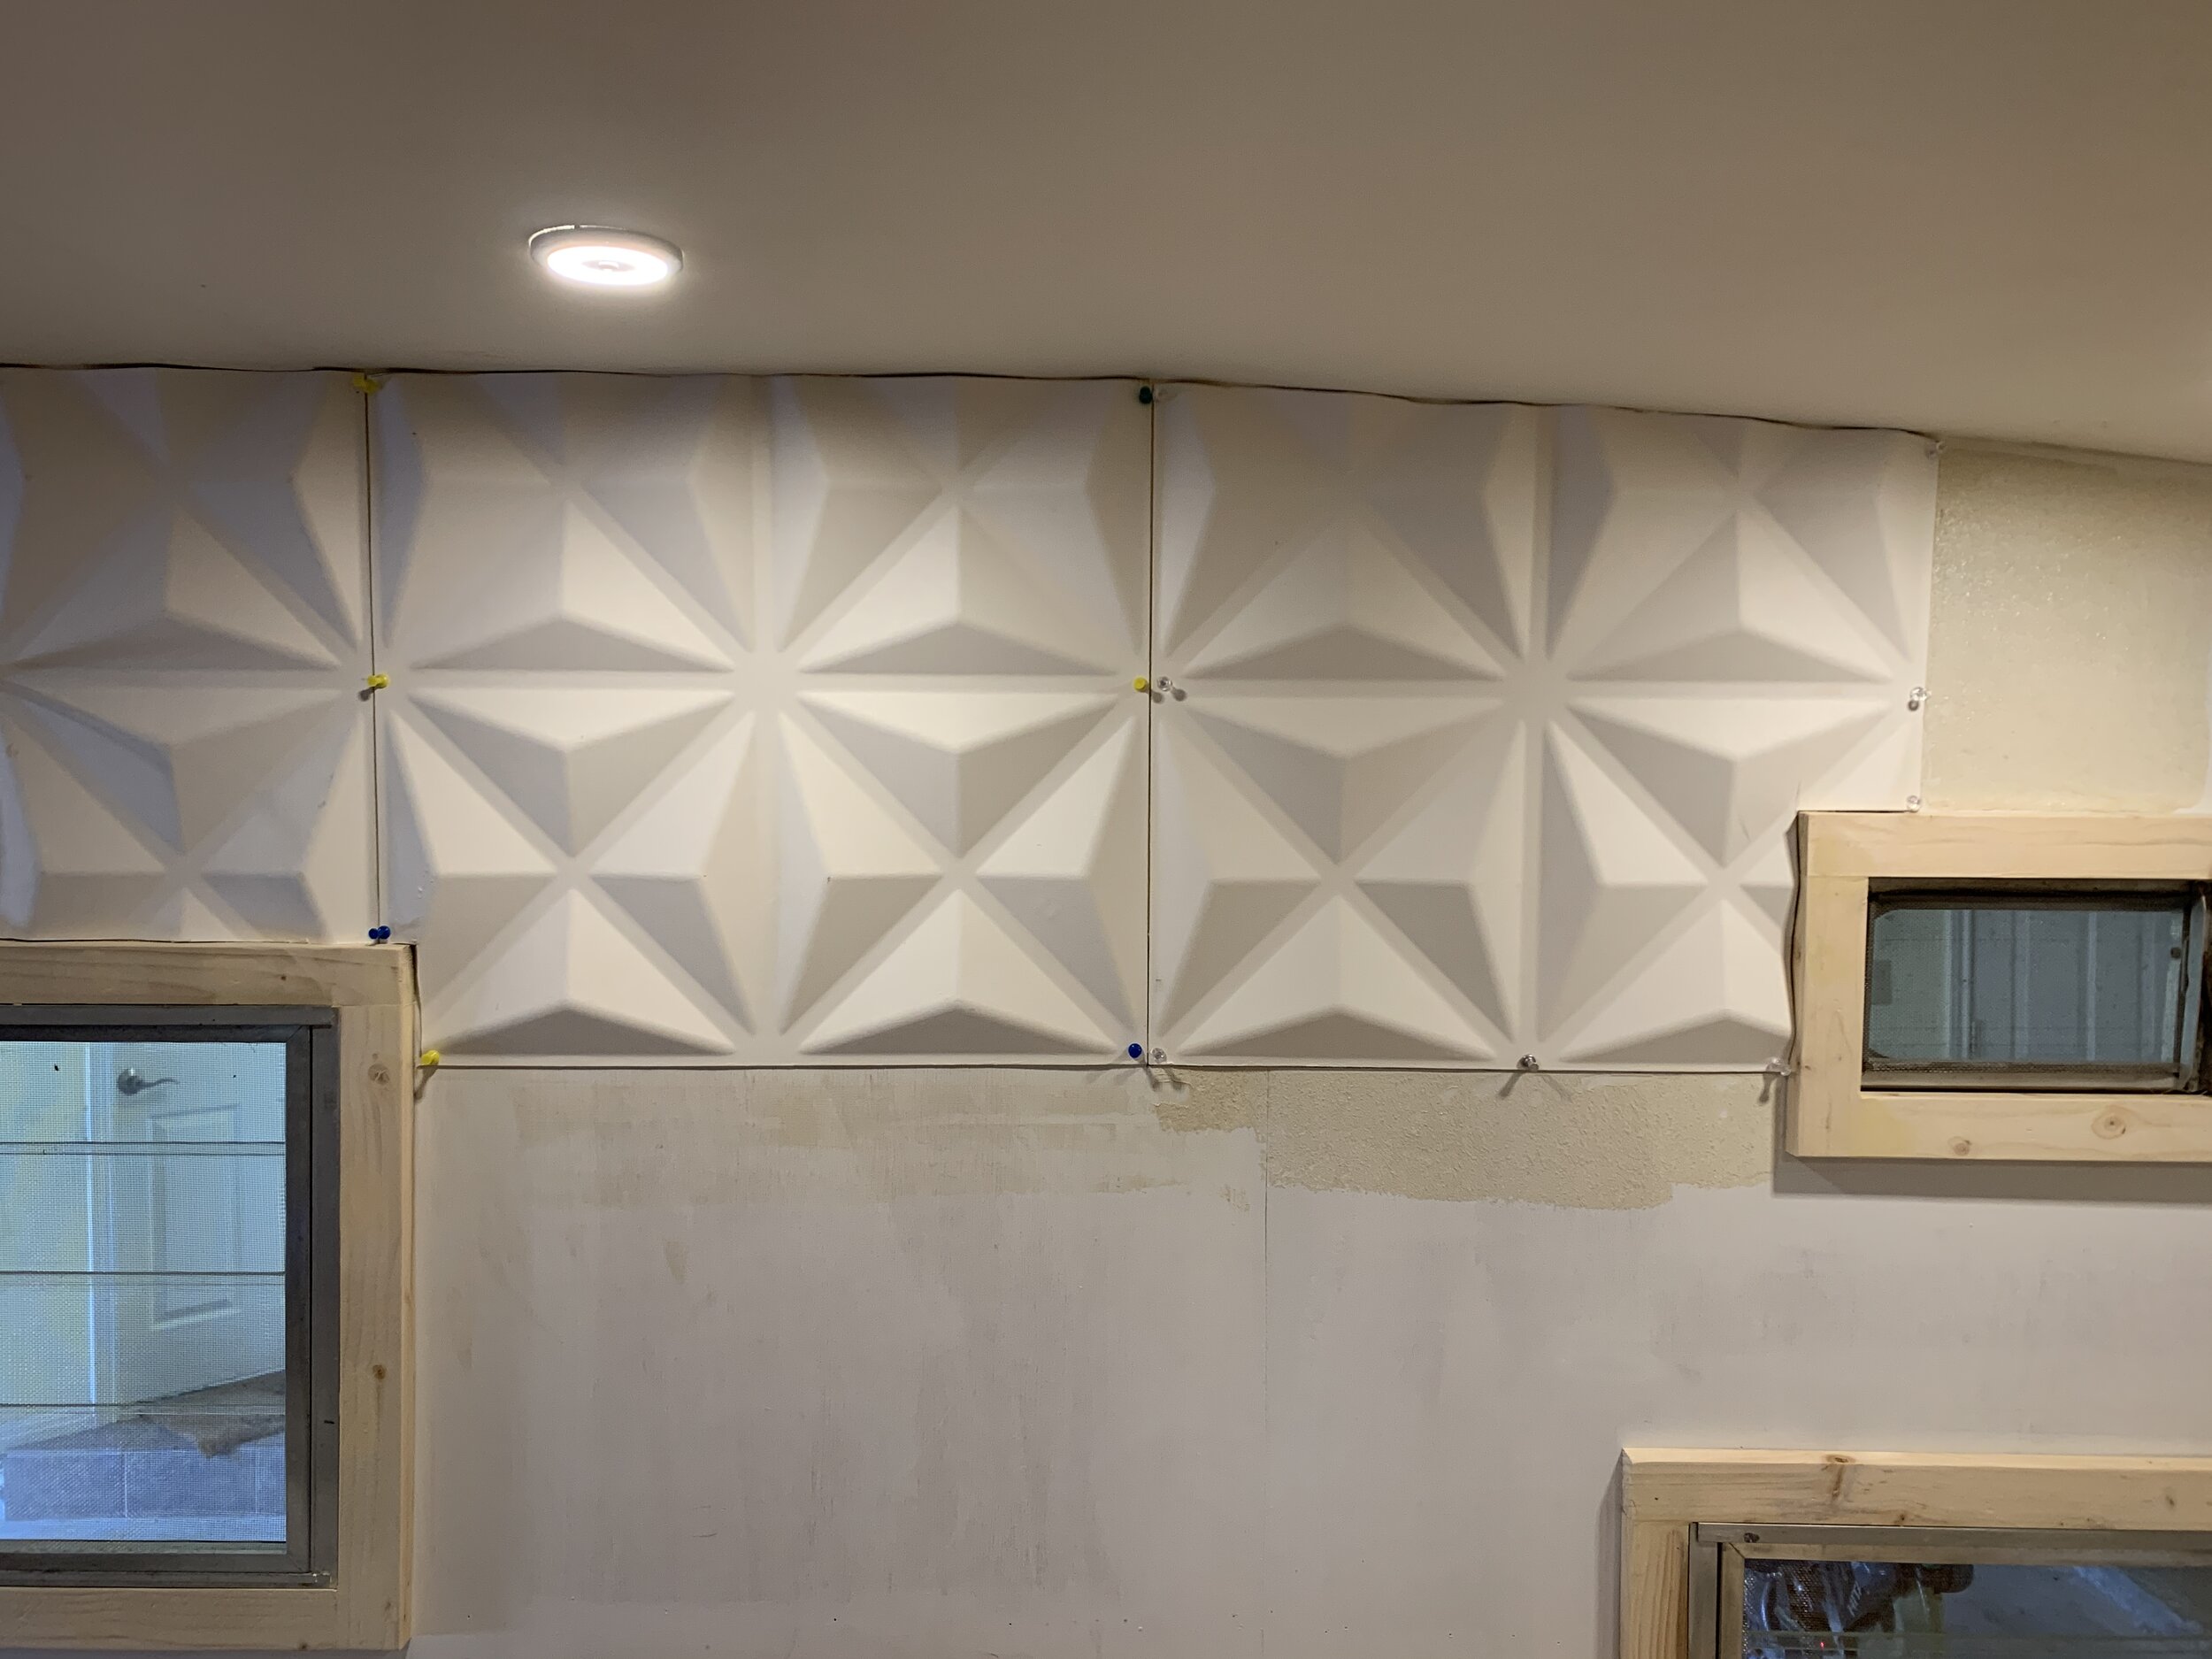
First a picture because I just. can’t. help. myself.

: : : : S W O O N : : : :
what is that wall + where can I get it?
Short answer
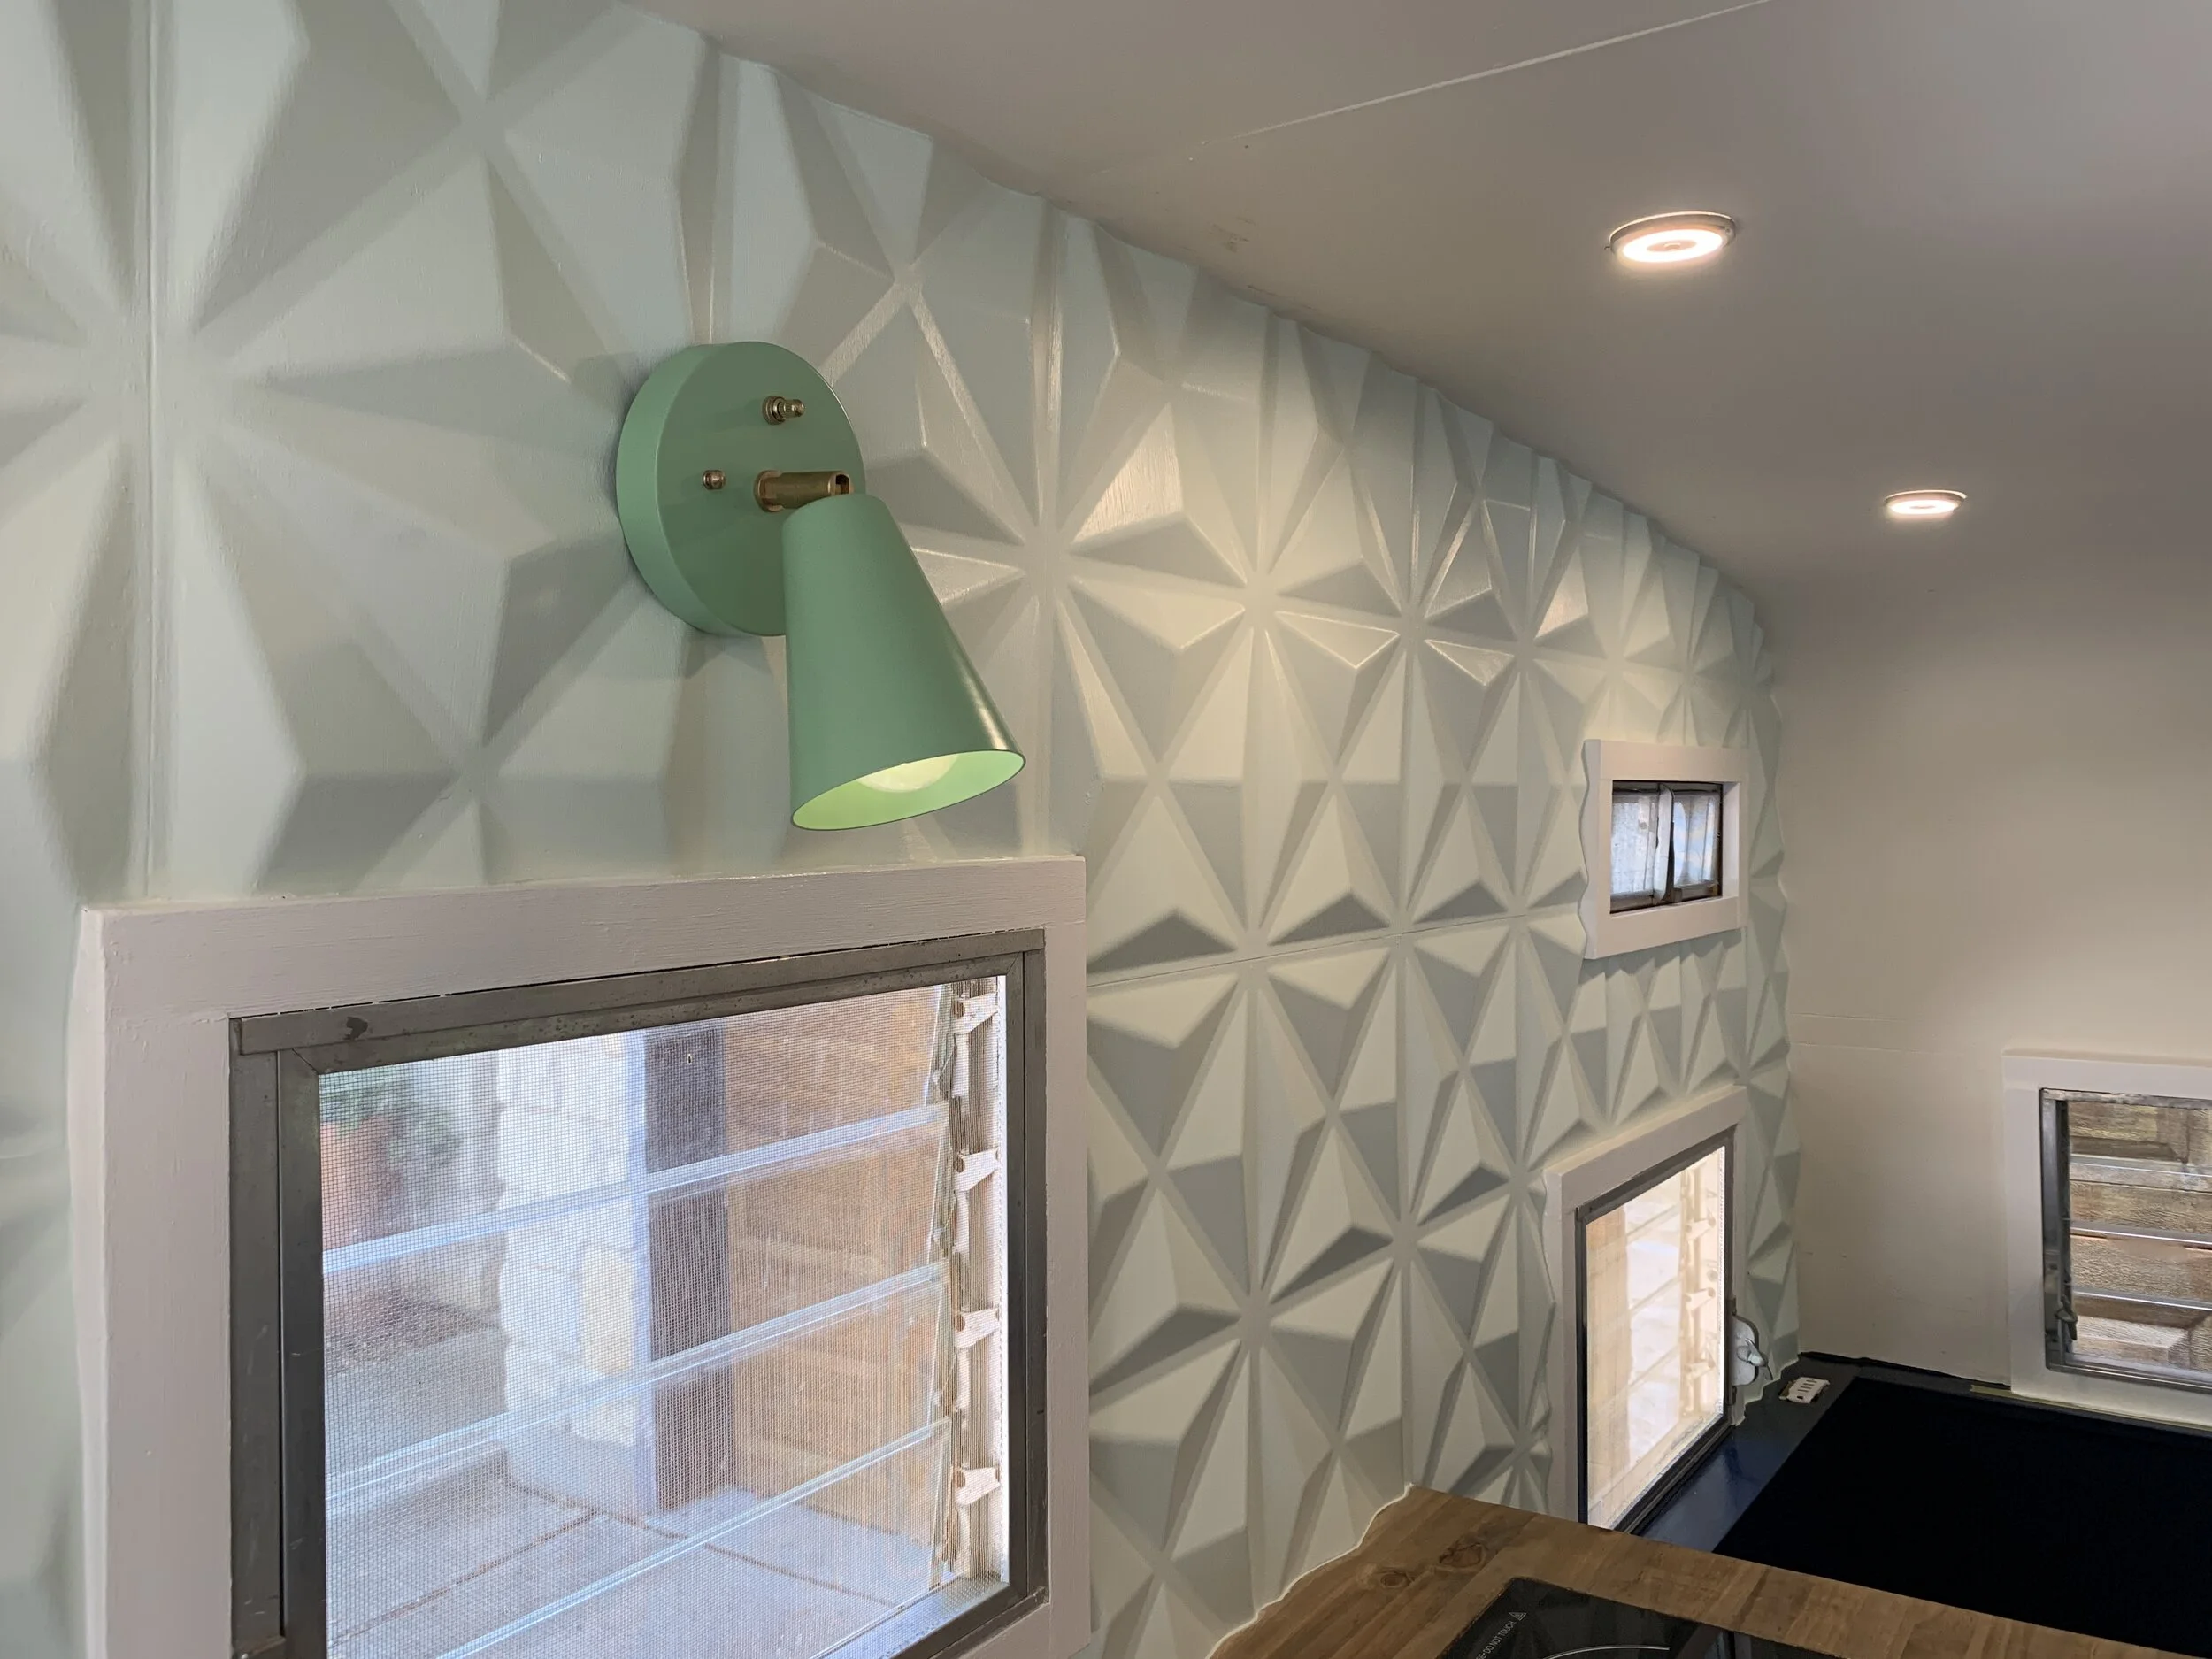
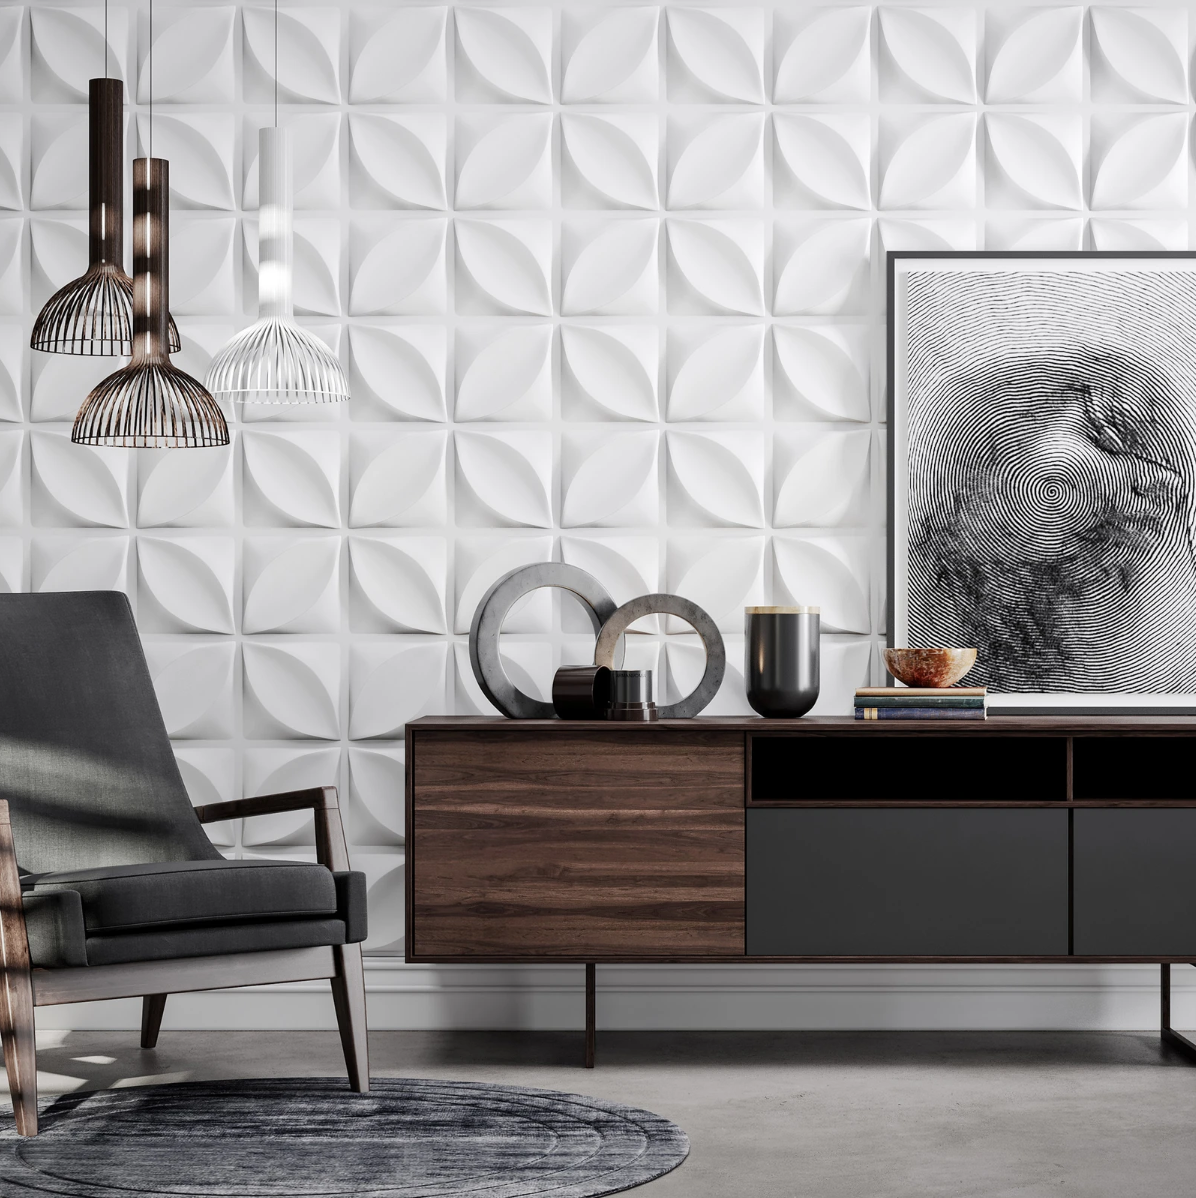
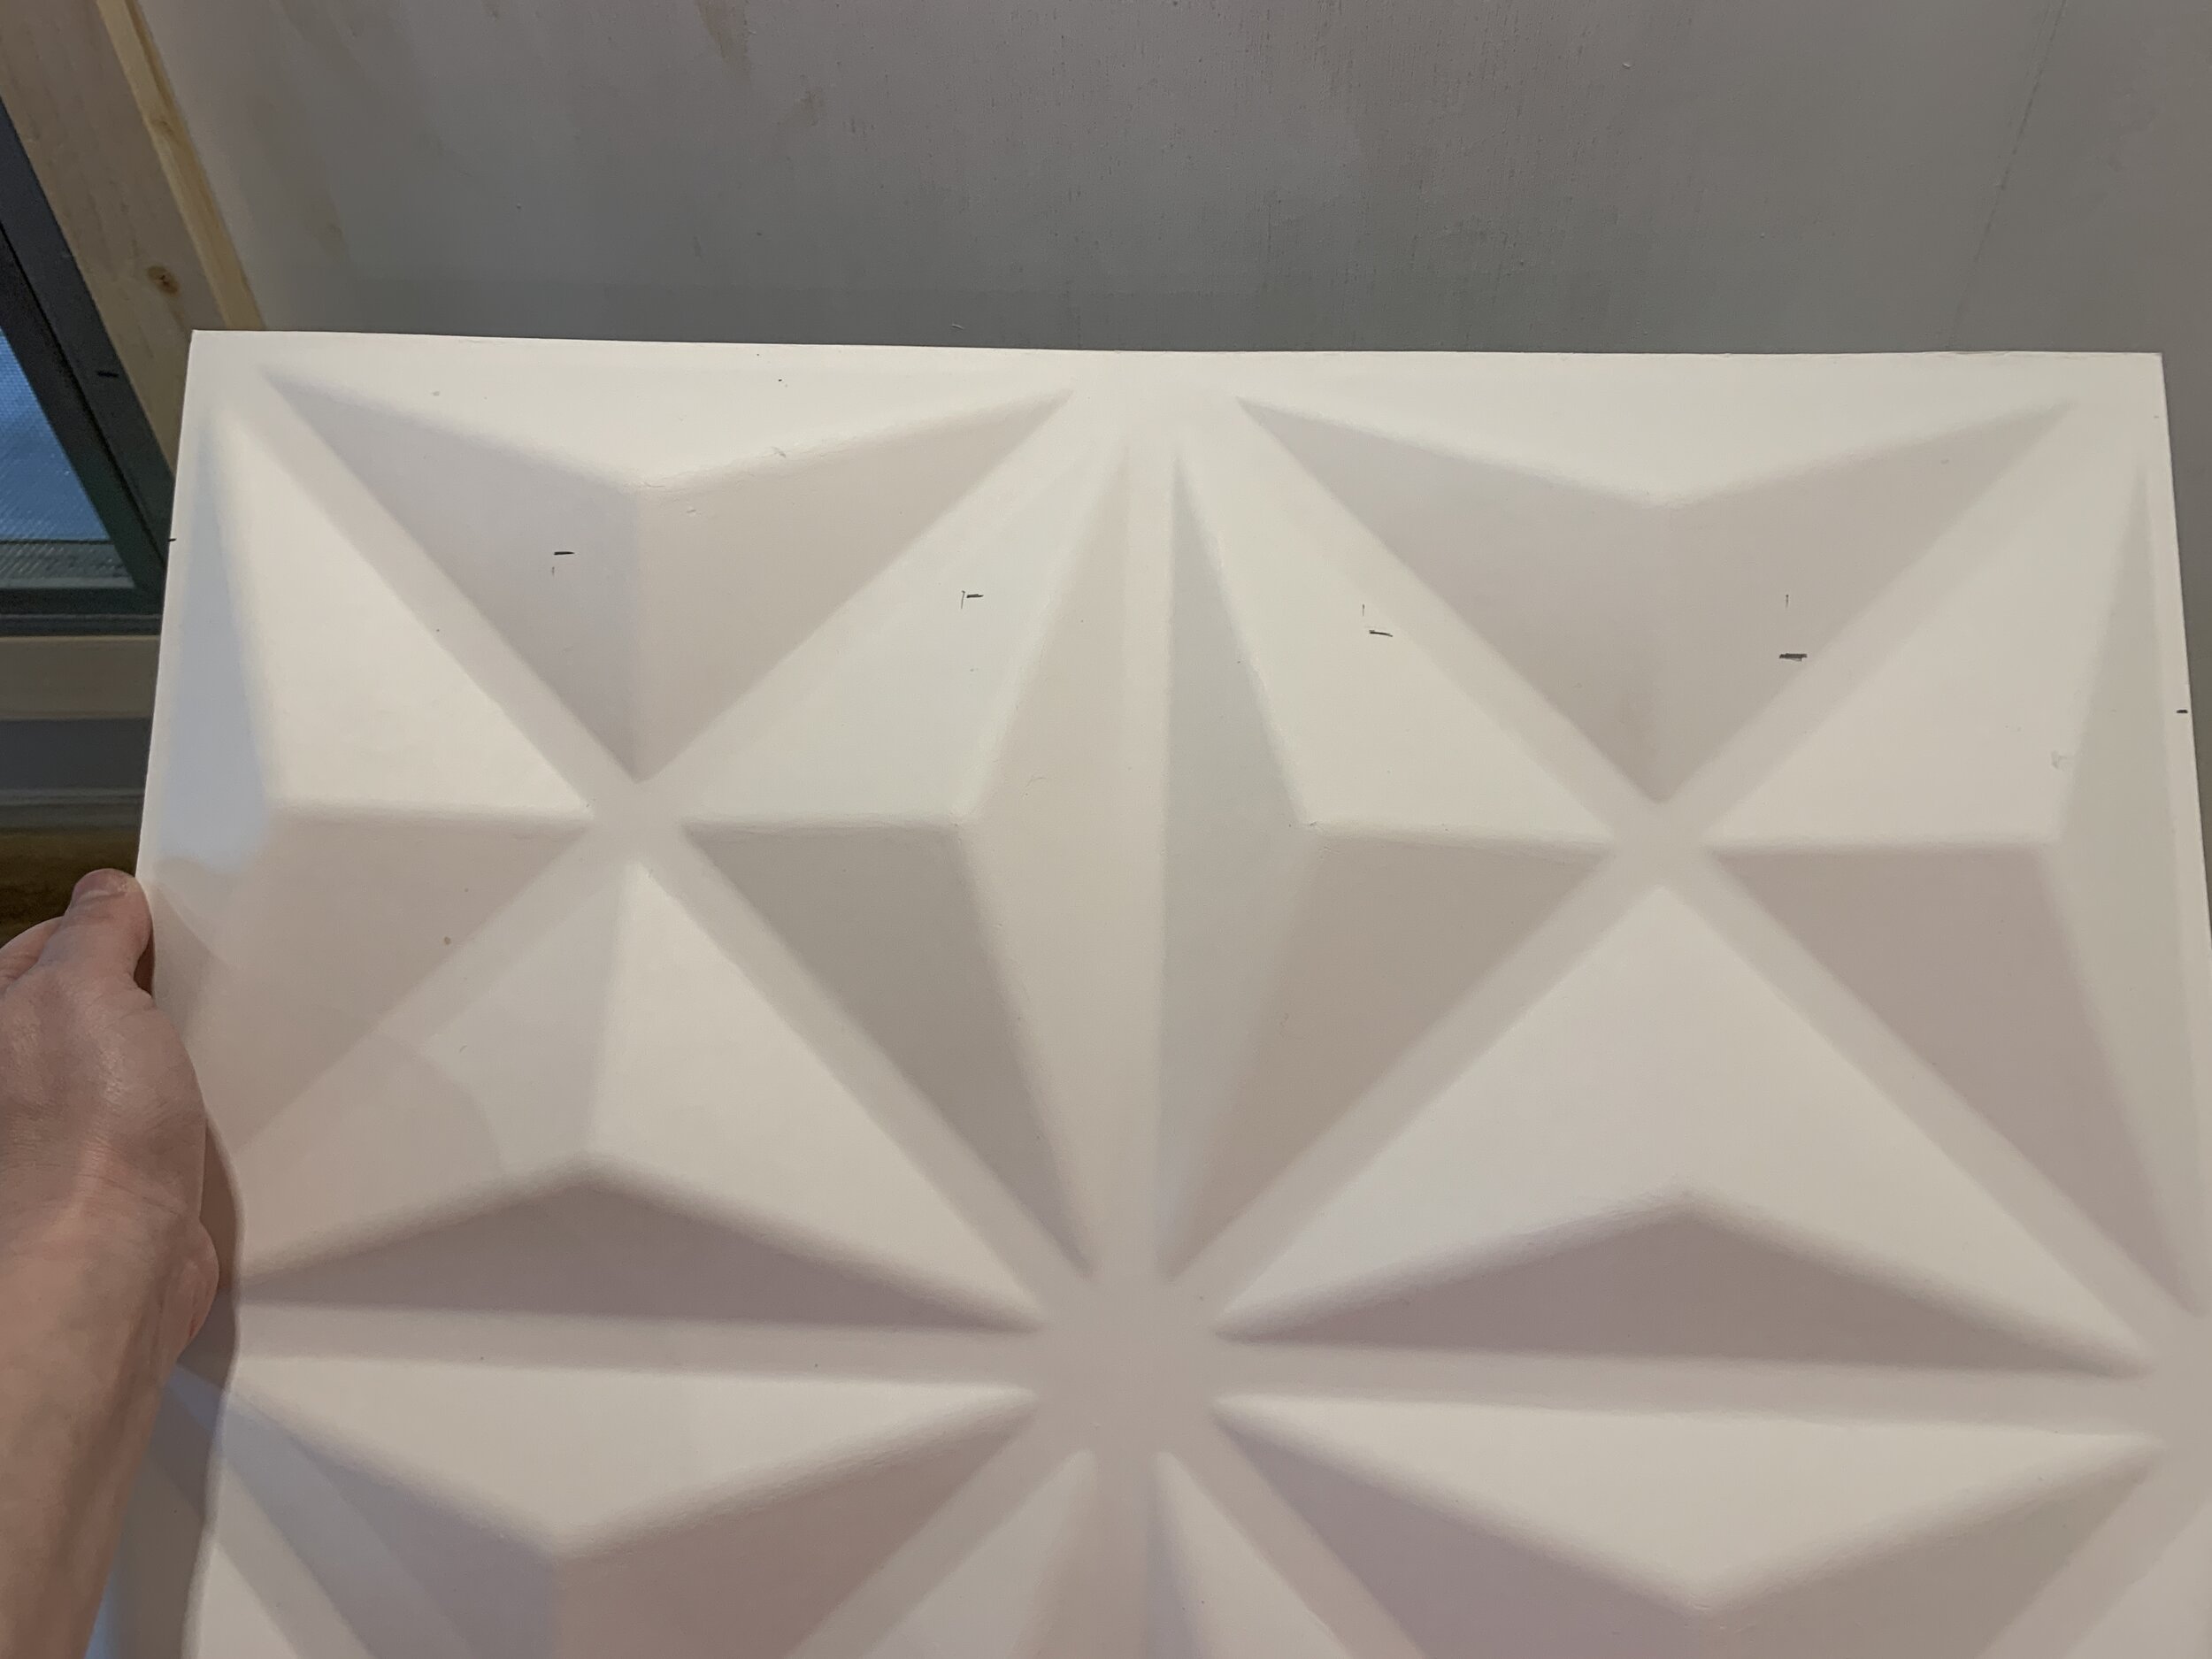
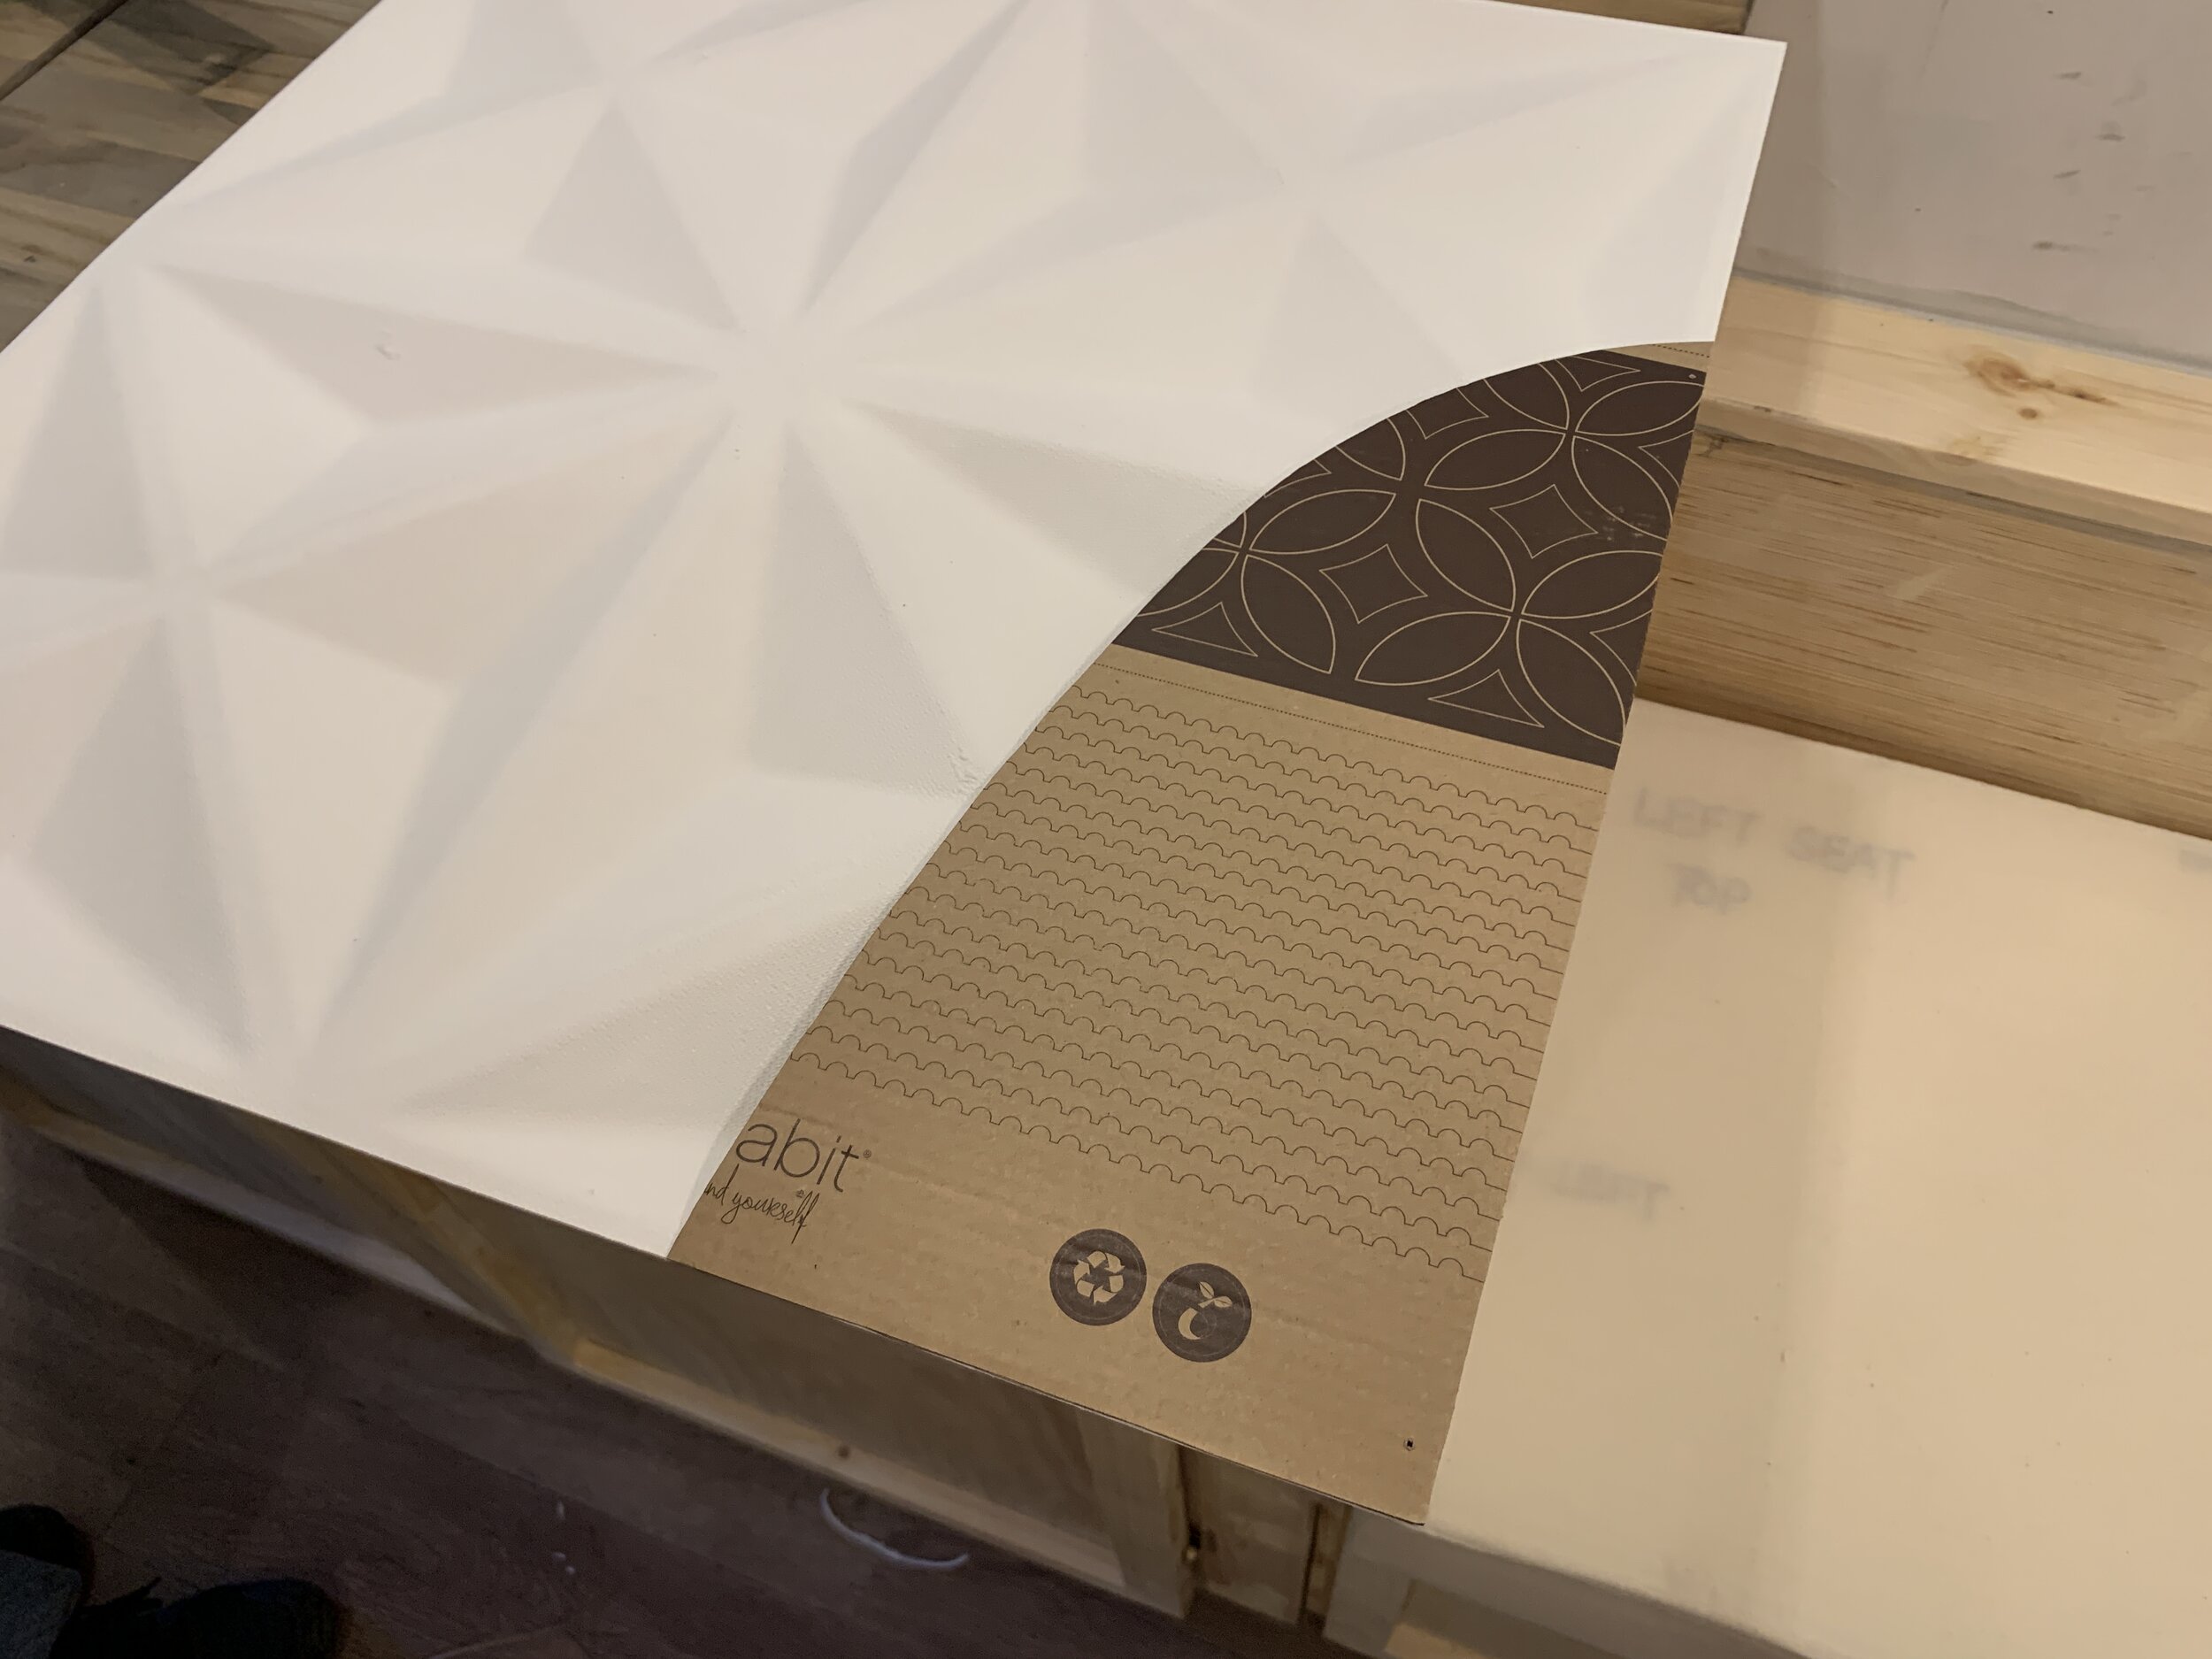
This super cool wall is made up of Inhabit 3D wall panels (more specifically the 3D Wall Flats). The panels come in all sorts of patterns, and while we ordered samples of the three patterns below, we ultimately decided on the first, Facet, design pattern. They’re ultra-lightweight. They’re flexible. They’re made from eco-friendly sugarcane pulp. They’re beautiful. They’re awesome. And you can find them here.

Inhabit 3D Wall Flats in the Facet pattern. (Product shot from www.InhabitLiving.com … this is not our dog.)

Longer answer
According to their website, Inhabit’s 3D wall flat panels are “made from 100% Bagasse molded paper pulp with no chemical fillers, plastics, VOC’s and urea-formaldehyde. Bagasse is a fibrous residue remaining after sugarcane stalks are crushed to extract their juice. The fibrous residue used as the raw material is pre-consumer waste.” All that means it’s an eco-friendly green (and beautiful!) product… which we can get down with any day of the week.
Aside from being environmentally friendly, we love that they’re lightweight (about 275 grams/0.6 pounds each), and though neutral (bright white) are far from boring. And they can be painted any color so it’s truly sky’s (and your imagination’s) the limit with these bad boys.
I’m sold. how are they installed?
This is where you should know we had a little trial and error and took the recommended install method as more of a suggestion. After reading the installation instructions on their website, we knew we’d likely need/want to modify our approach slightly since our vintage travel trailer is essentially a moving, shifting box on wheels that will be affected by weather and temperature changes (unlike a climate-controlled home that’s unlikely to expand and contract as the seasons change). So that meant we probably shouldn’t use the recommended (and totally inflexible) Sheetrock Durabond to fill the gaps.
The following breaks down what needs to be done regardless of install location, followed by what’s recommended by the manufacturer, and then finally the details of exactly what we did. (Full disclosure: We haven’t completed the wall yet or travelled with the wall panels installed. We will do a follow up with this, and everything, down the road to let you know how everything is holding up!)

Before installing anywhere
Measure the space to determine square footage. Each box of 12 panels covers 32.3 sq. ft. Like the general rule with flooring, we ordered 10% more than what we measured to make sure we had plenty to cover us on any bad cuts and wasted panels. (Spoiler alert: we had bad cuts and wasted panels.)
Order panels.
Get the rest of your materials – see our complete shopping list below.
When panels arrive, let them acclimate to the space they’ll be installed in for at least 48 hours.
The basic steps to install 3d wall panels in a home (according to Inhabit)
When we say basic we mean super simplified, just to give you an idea of how we changed it for our specific needs. If you’re installing in a home, please read their more detailed instructions for a flawless finish.
Look at your space and plan the panel layout.
Cut panels to size.
Use low-moisture, clay-based wallpaper adhesive to glue them to your wall/ceiling, temporarily securing them with finish nails* until the glue is dried.
Once dry, remove nails and fill holes with Sheetrock Durabond/spackle*.
*Note: These are the things Inhabit recommends that we adjusted for our specific situation. Because we are installing these in a travel trailer (read: a space that is not climate controlled and shifts and moves) we made some adjustments 1) to make sure we didn’t blast nails/holes into and through our metal exterior, and 2) for added flexibility without cracking.
How to install 3D wall panels in a camper

oUR 3D WALL PANEL INSTALLation Shopping list
Clay-based wallpaper adhesive, thoroughly mixed with a stir stick
Putty knife – for scooping it out of the tub and into the tray + scraping excess adhesive from the wall
6” textured mini rollers + tray – we learned it’s important to choose a roller with some nap to it to help pick up all that good adhesive. We initially used a smooth foam cabinet roller and the first attempt to hang our first panel didn’t work since there wasn’t enough adhesive applied.
Scissors – we used a basic pair of old kitchen scissors that have been relegated to our tool bag for stuff like cutting sandpaper. You could use a saw, but we found the miter saw made a rough, torn edge when compared to the scissors and was not successful for trimming thin strips when we needed to shave for a perfect fit.
Drill + drill bit – large enough to fit your scissor tips into for things like light fixtures, outlets, etc. that need to be made in the inside of a panel.
Sandpaper – we used anywhere from 80-120 grit to smooth cut edges as needed, depending on what we already had. If you go too coarse it will gauge the edge; too fine and it won’t do much of anything.
Speed square + T-square + level + tape measure – for marking out your cuts
Pencil
White lint-free rags – for wiping excess adhesive. We recommend white so you don’t accidentally transfer color and stain the panels.
Push pins, the kind that stick out (not the flat, thumbtack kind) – to hold the panels in place while the adhesive dries
Hammer – for the push pins. (Trust me, your thumbs will thank you.)
Needle nose pliers – to remove push pins. (Seriously, your thumbs will thank you.)
Our 3d wall panel install
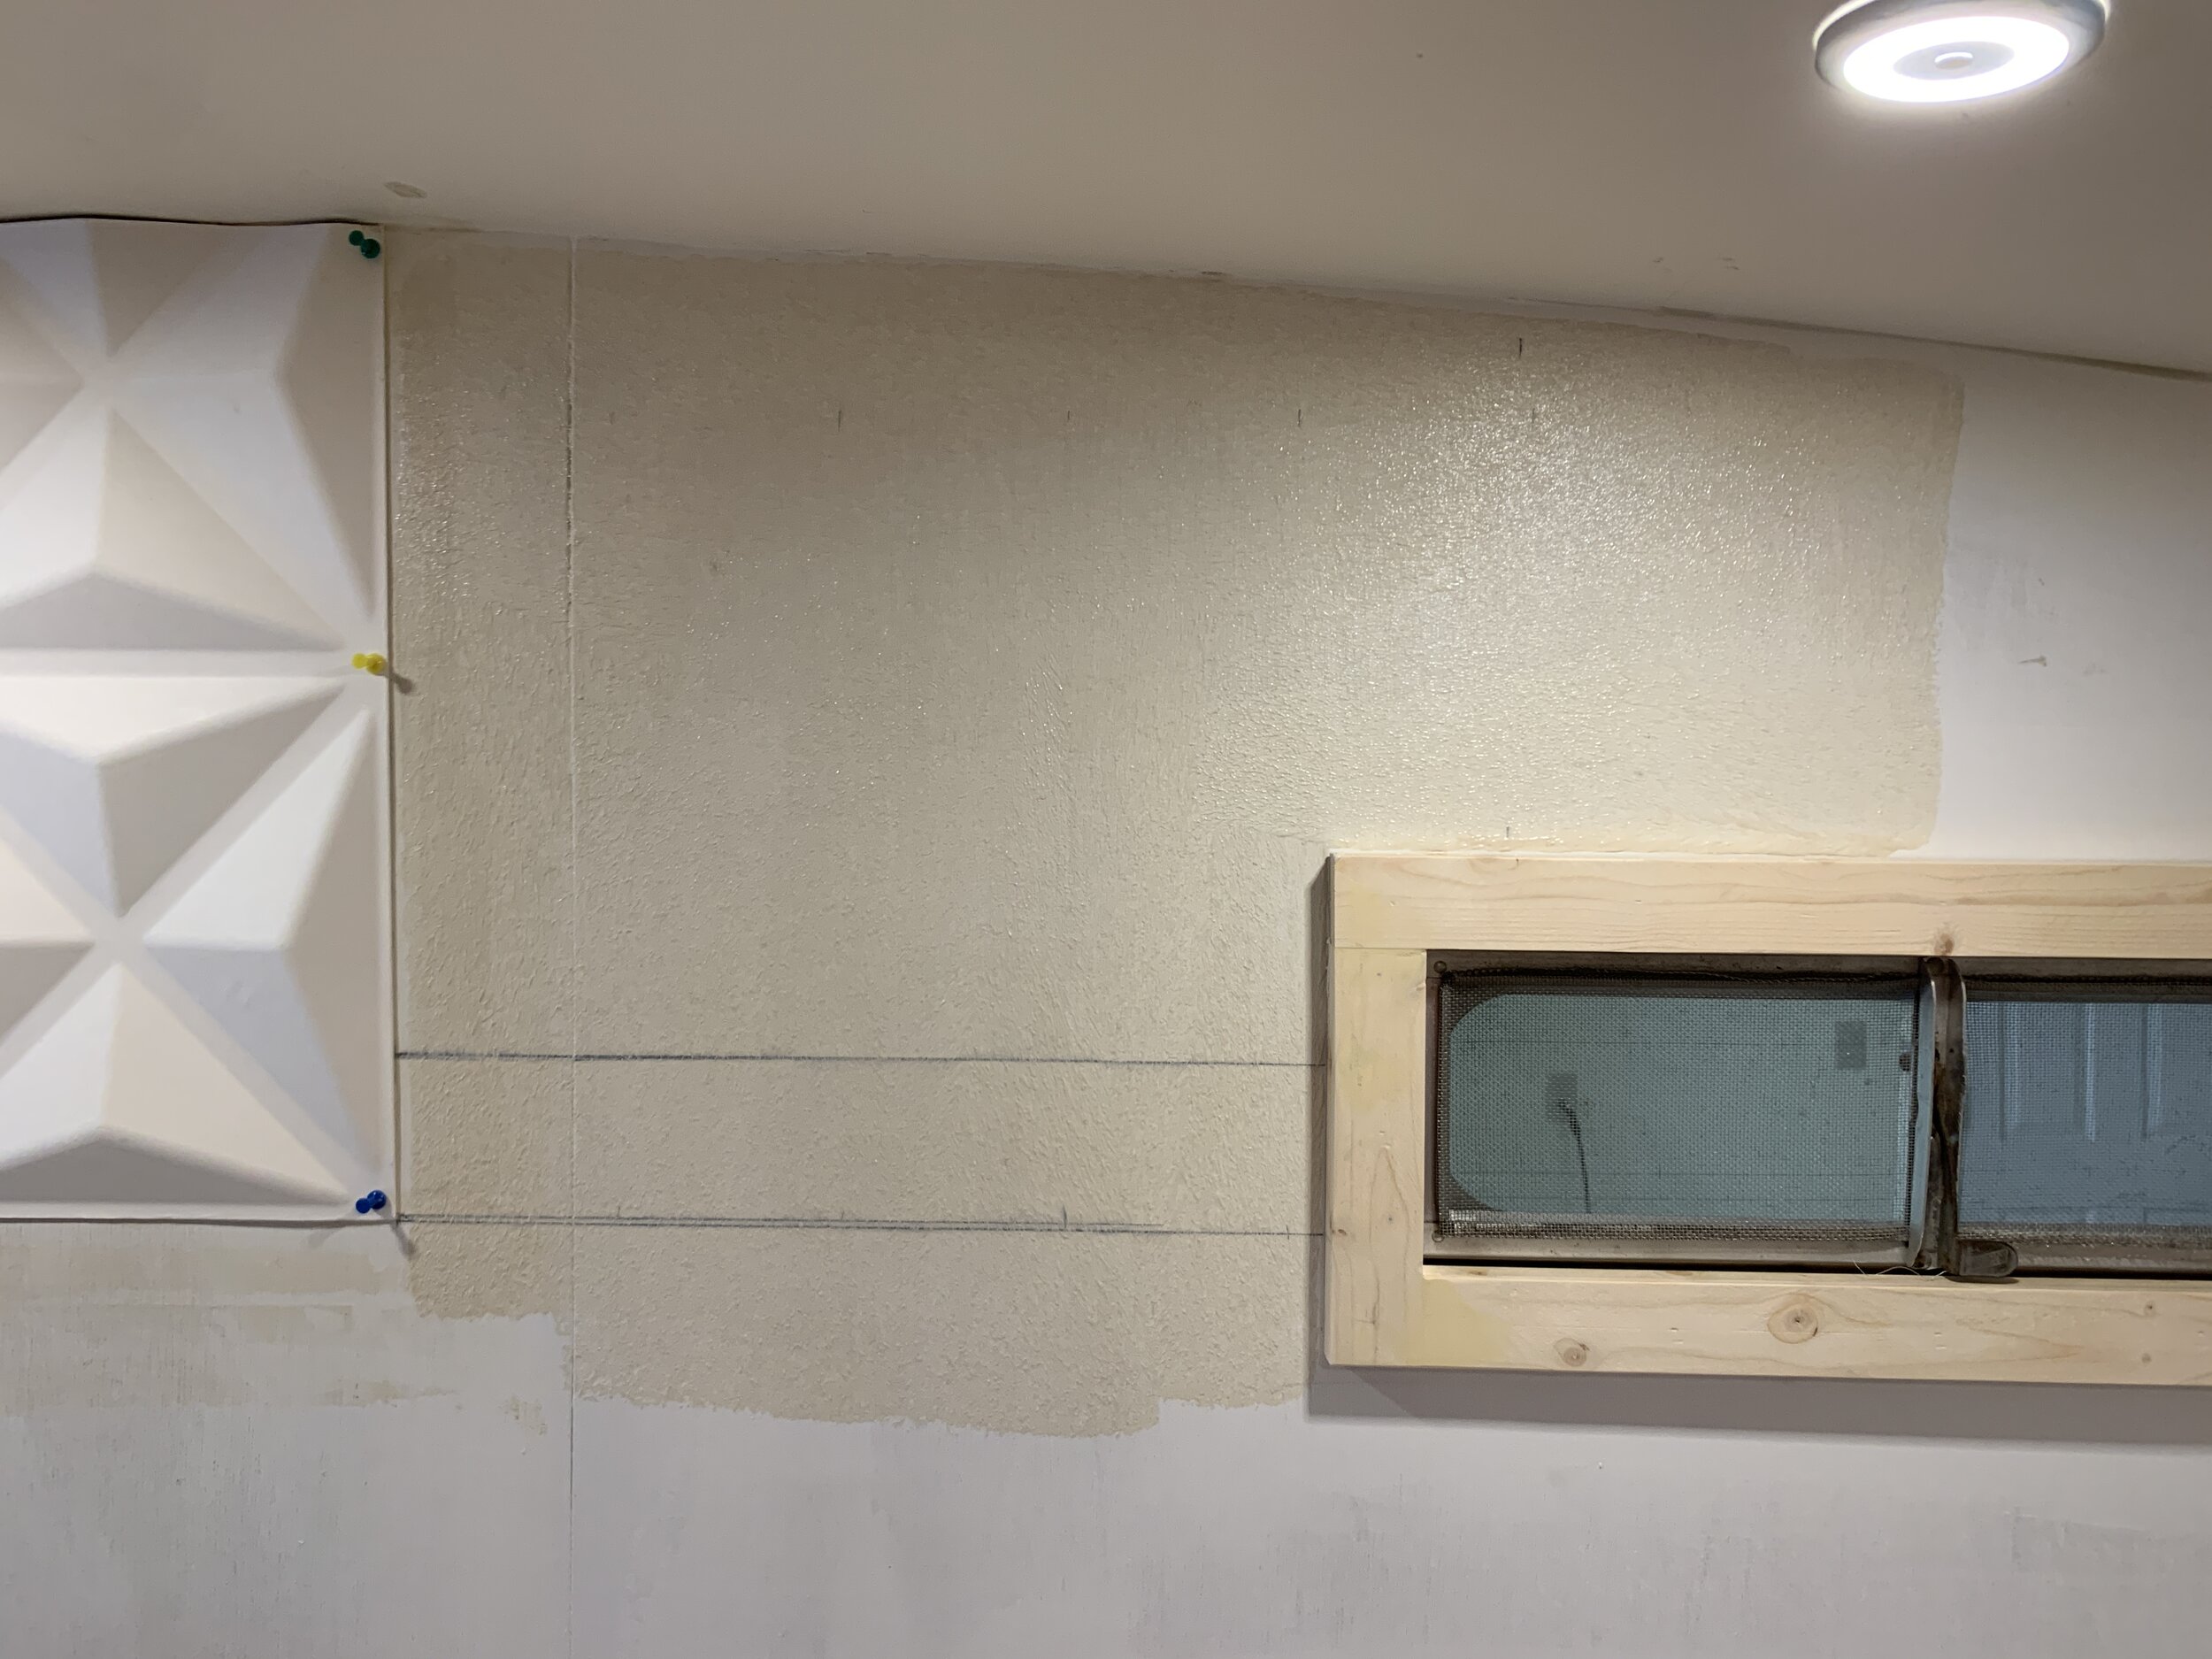
We installed the wall panels on top of our already primed and painted plywood walls. After our install, I don’t think it would be successful to install these over just studs and insulation/without a flat wall underneath first.
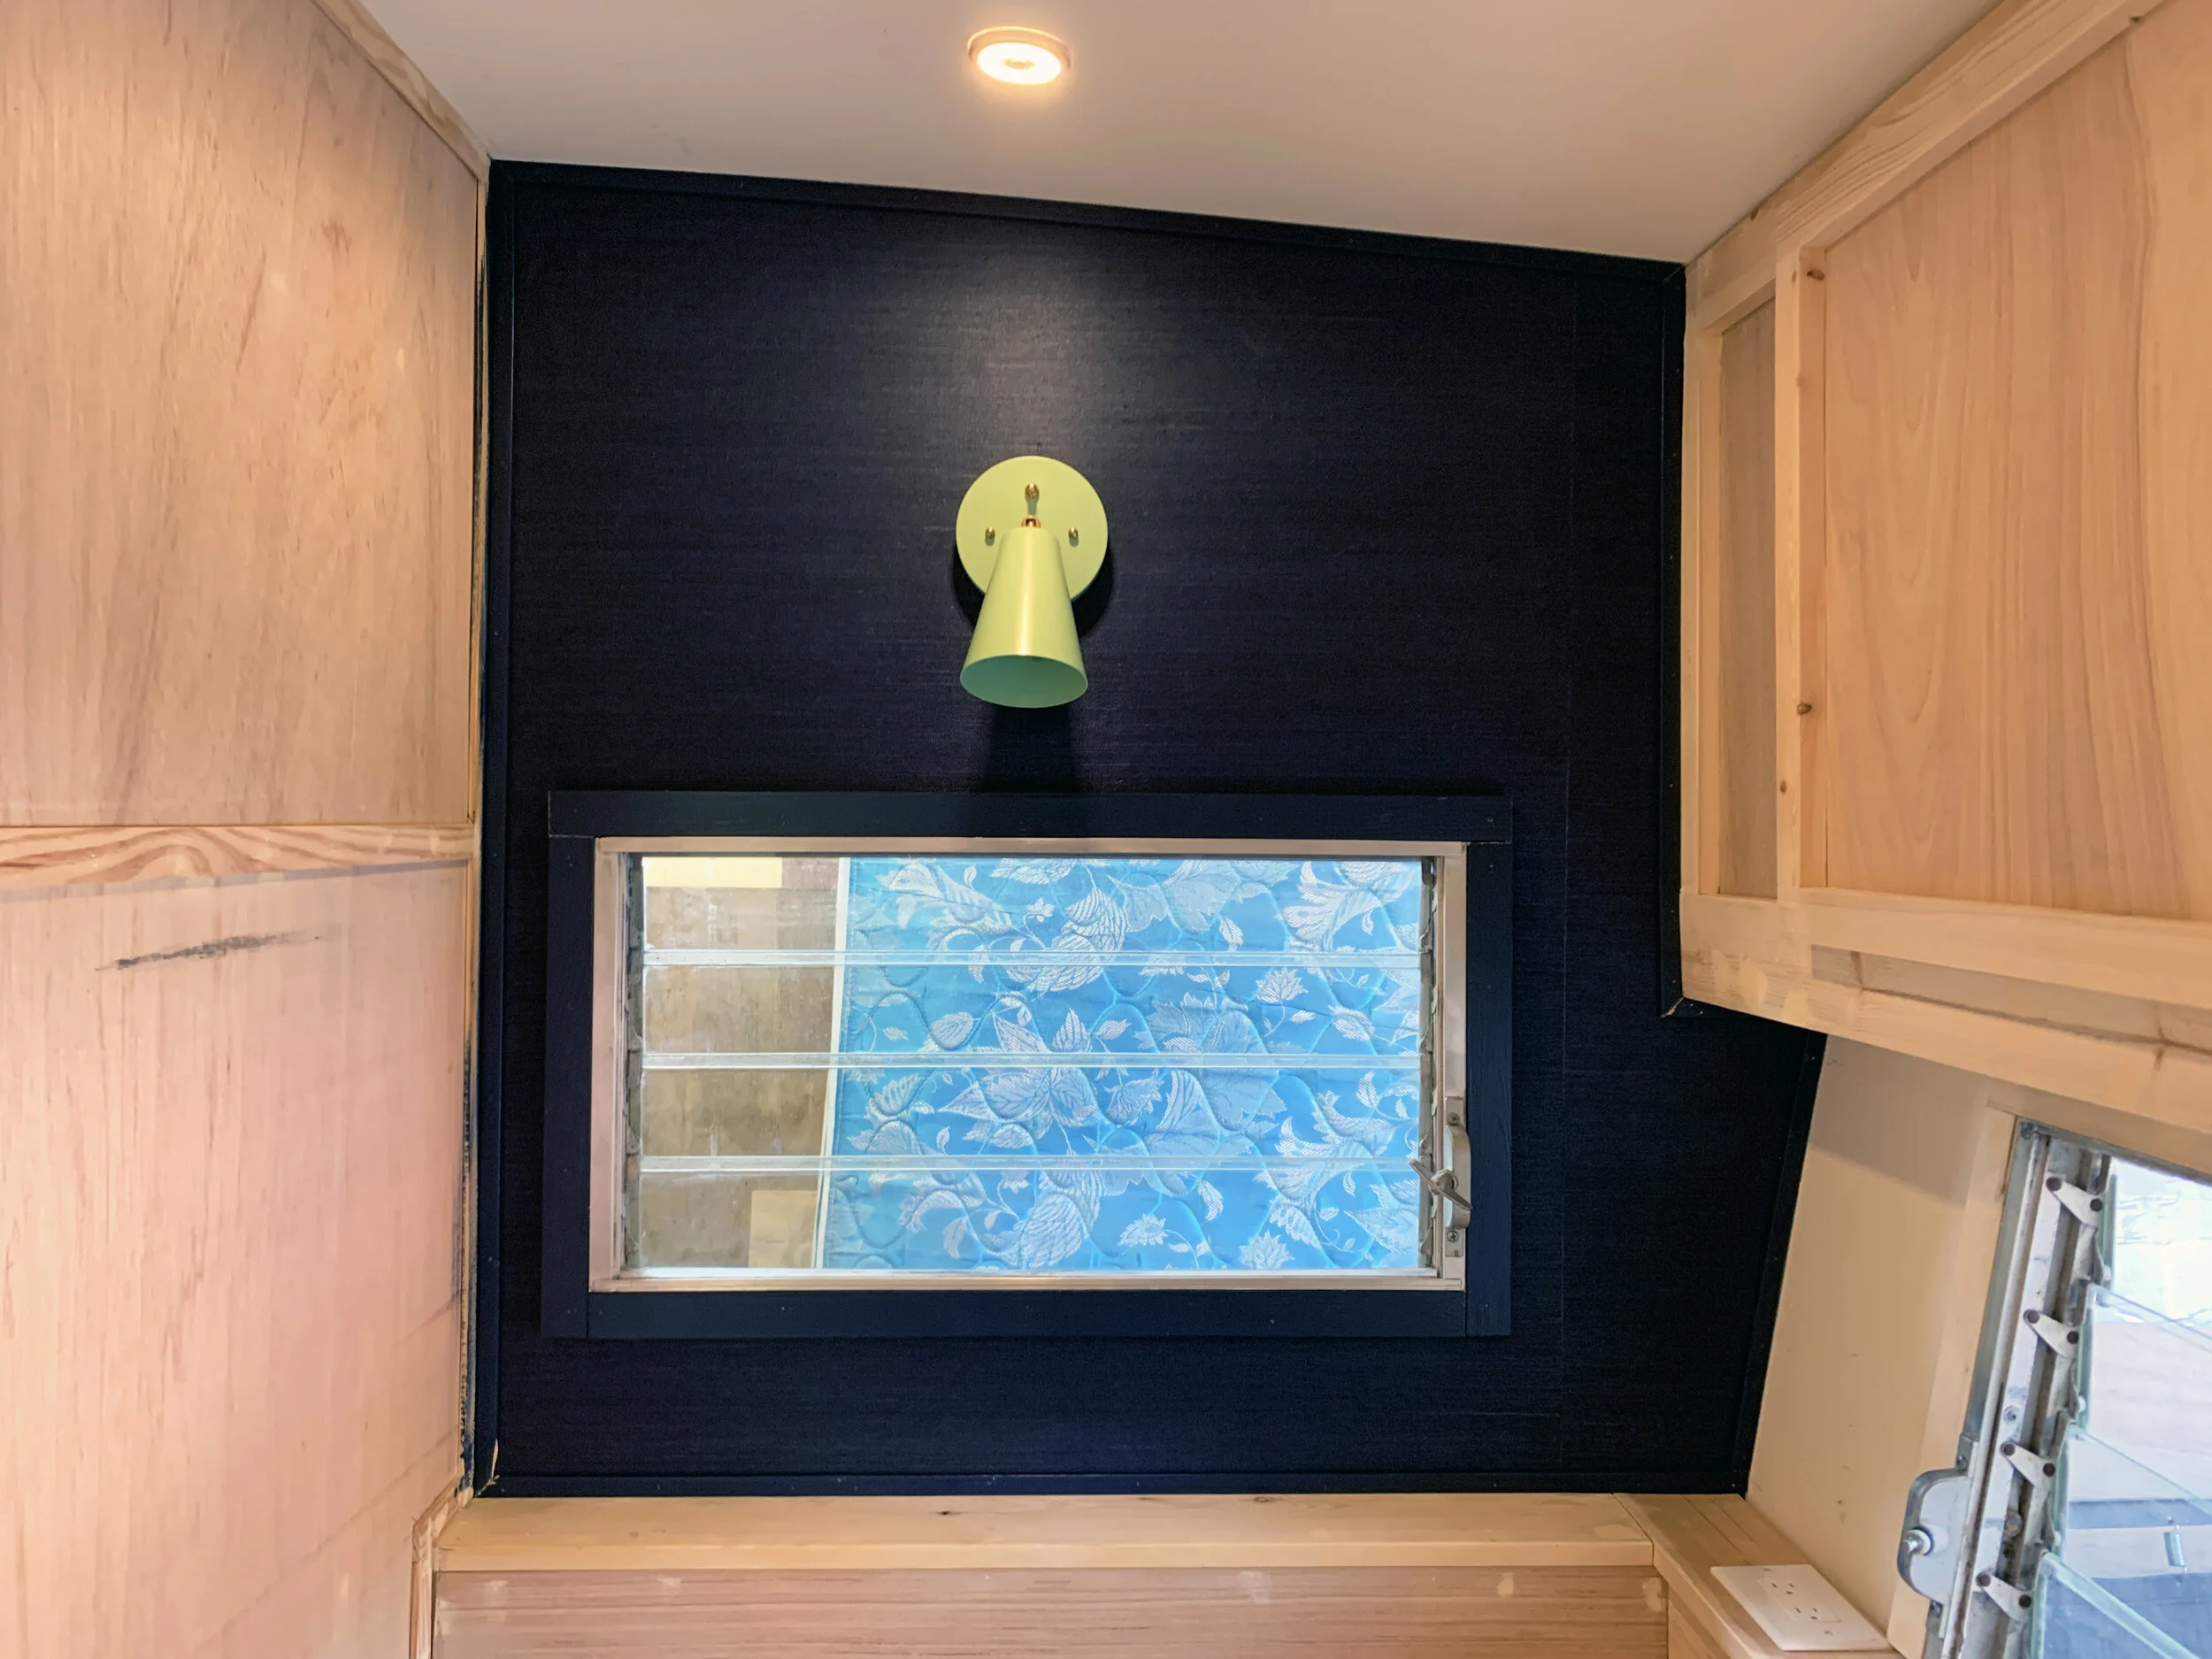
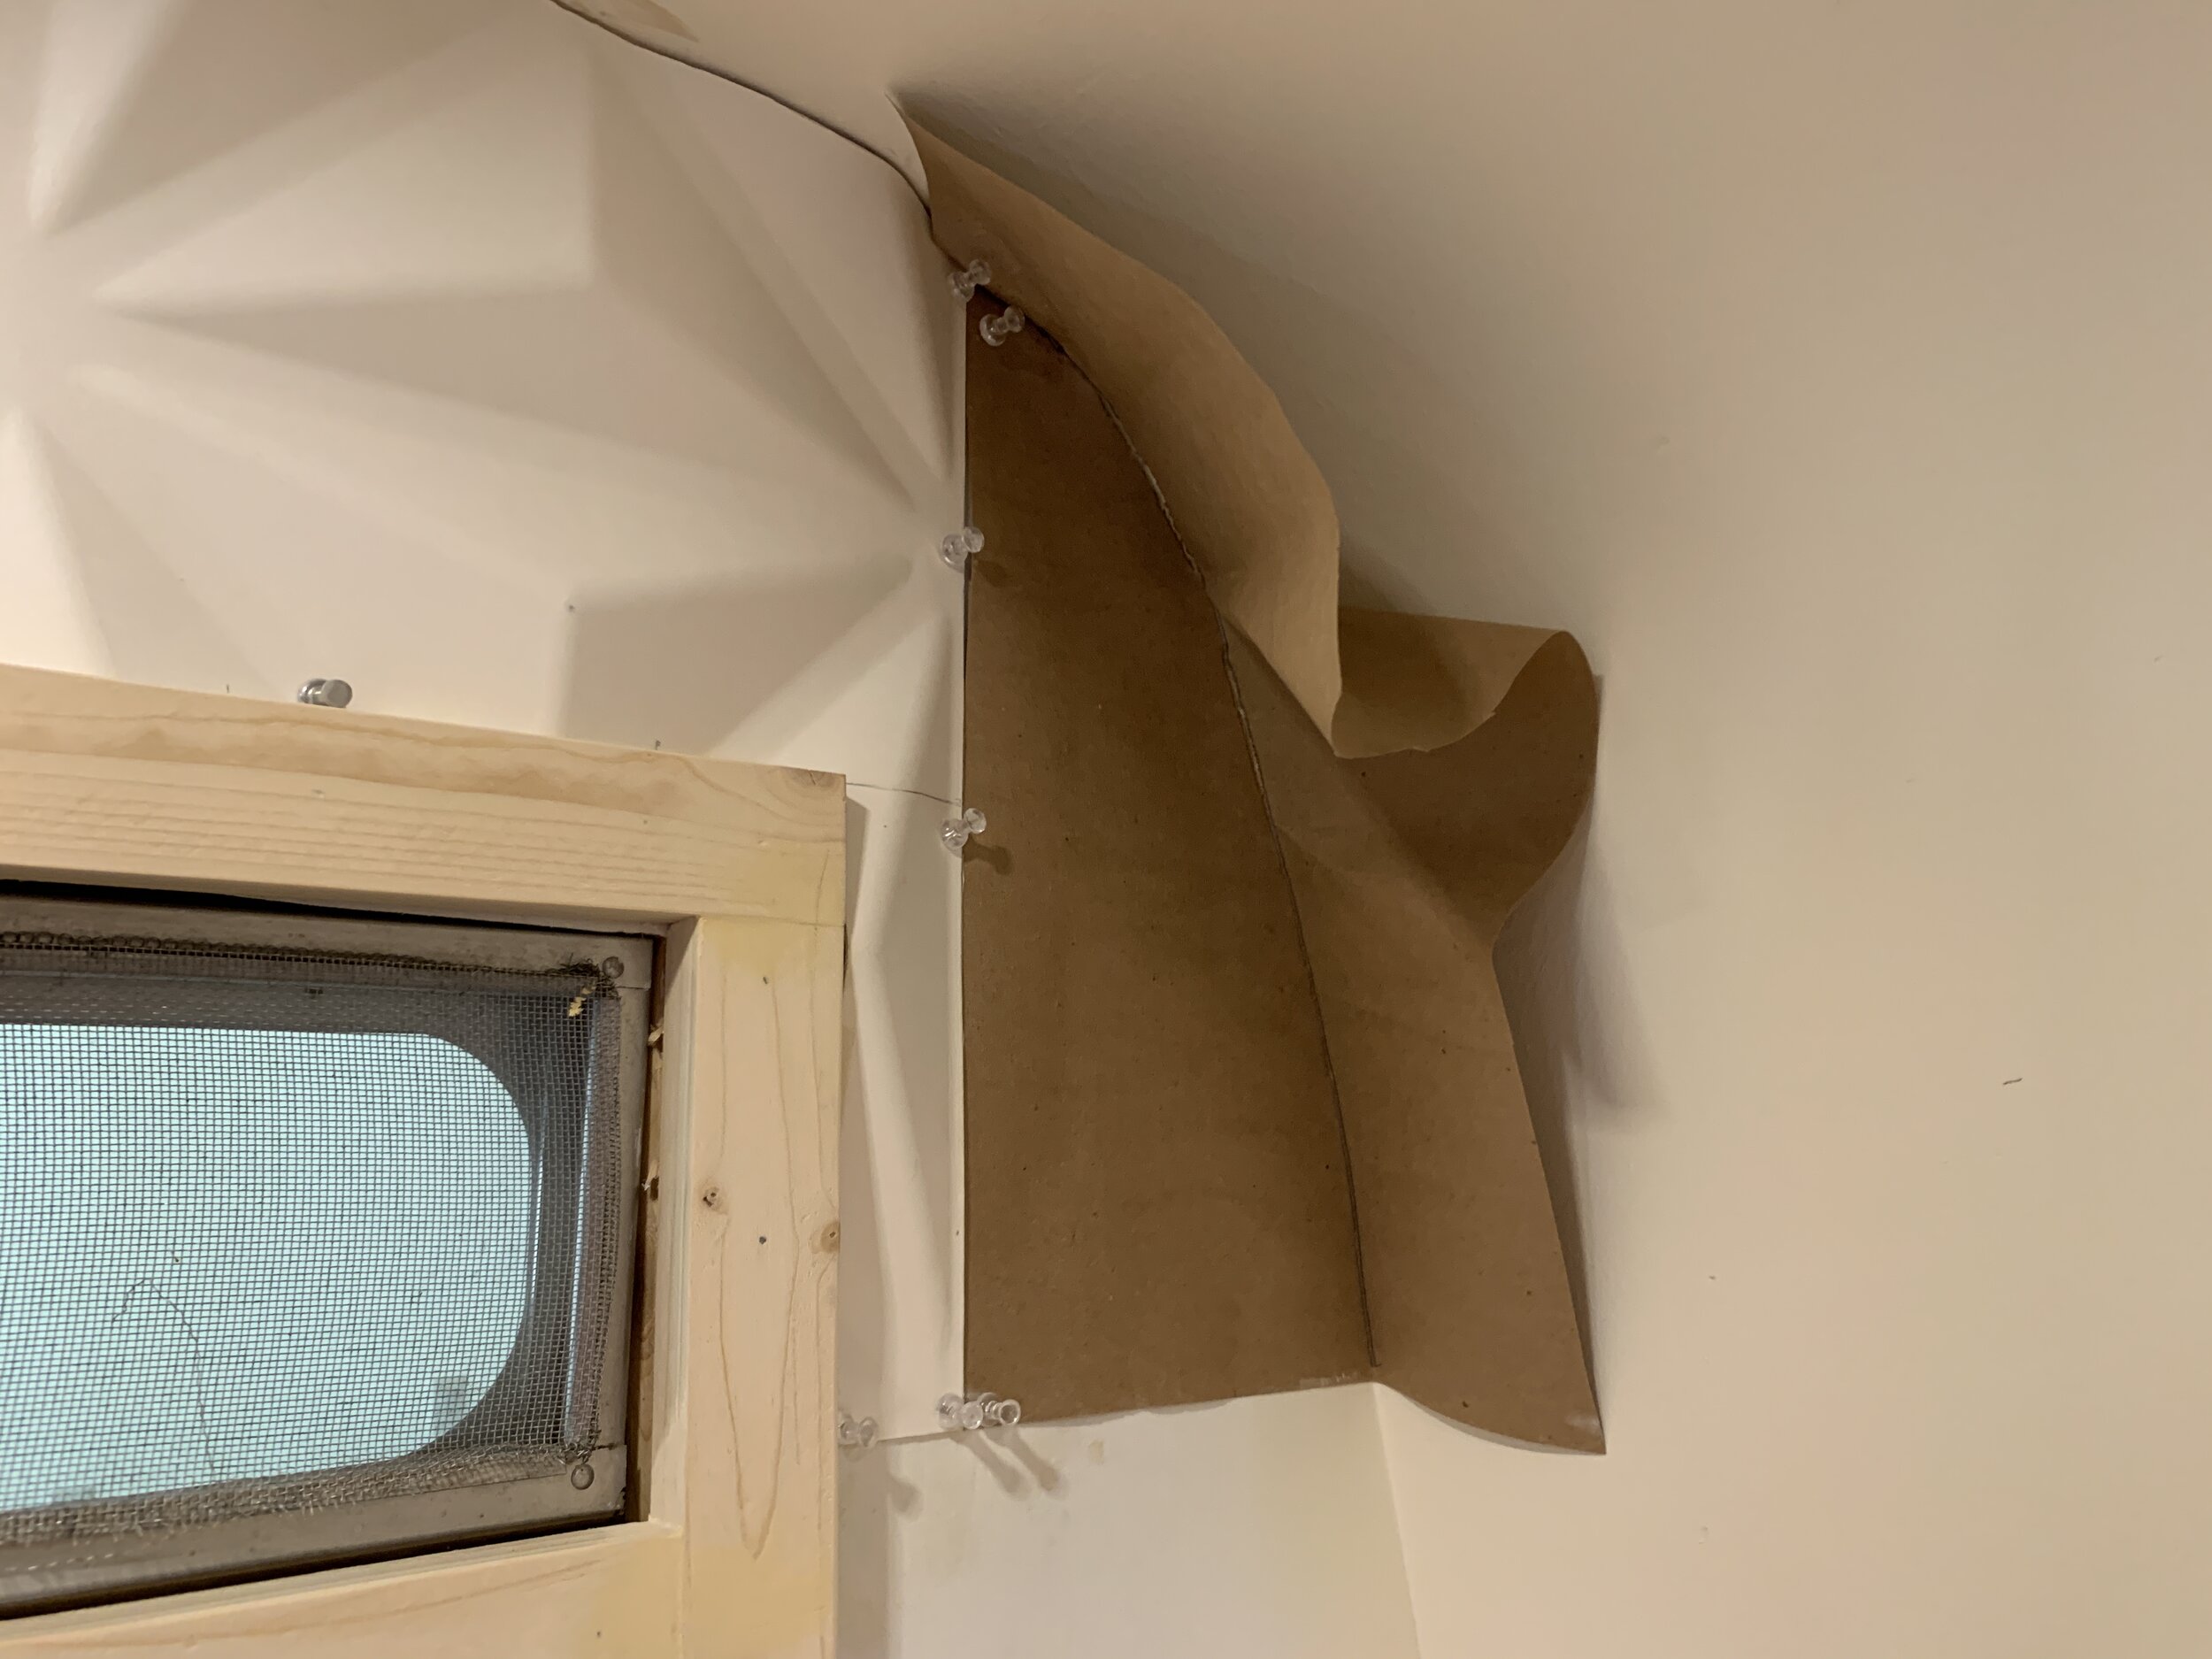
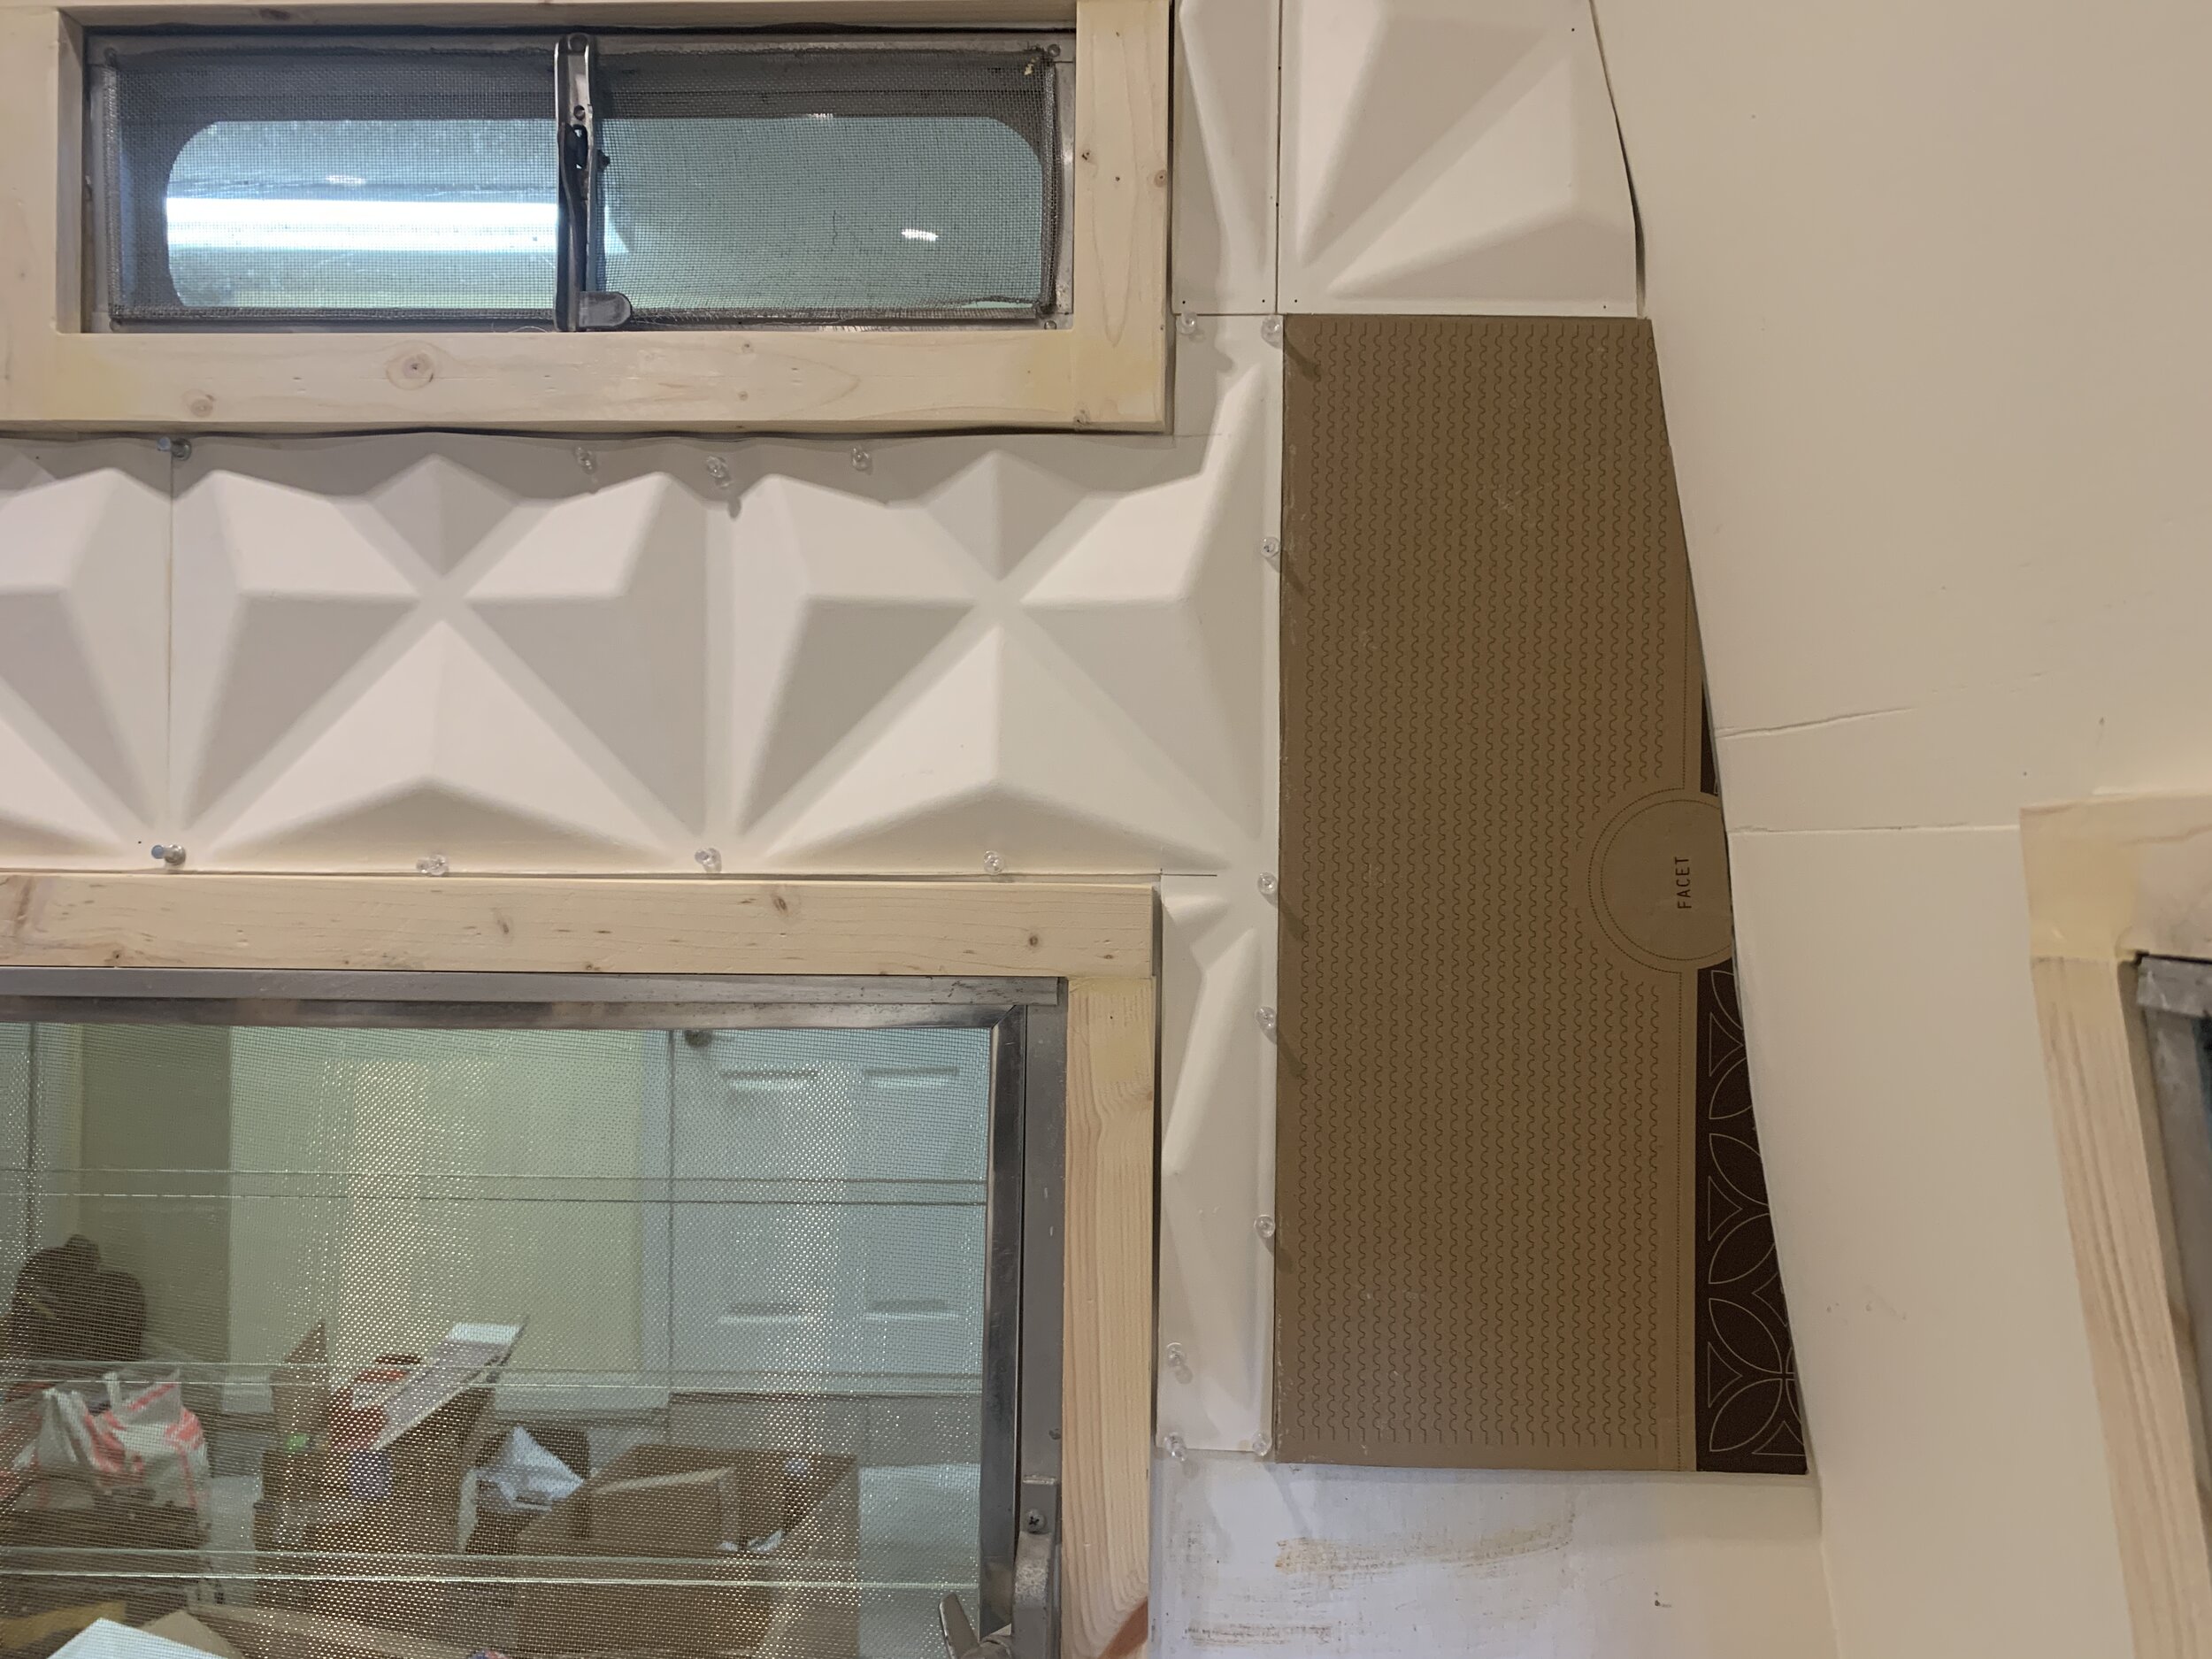
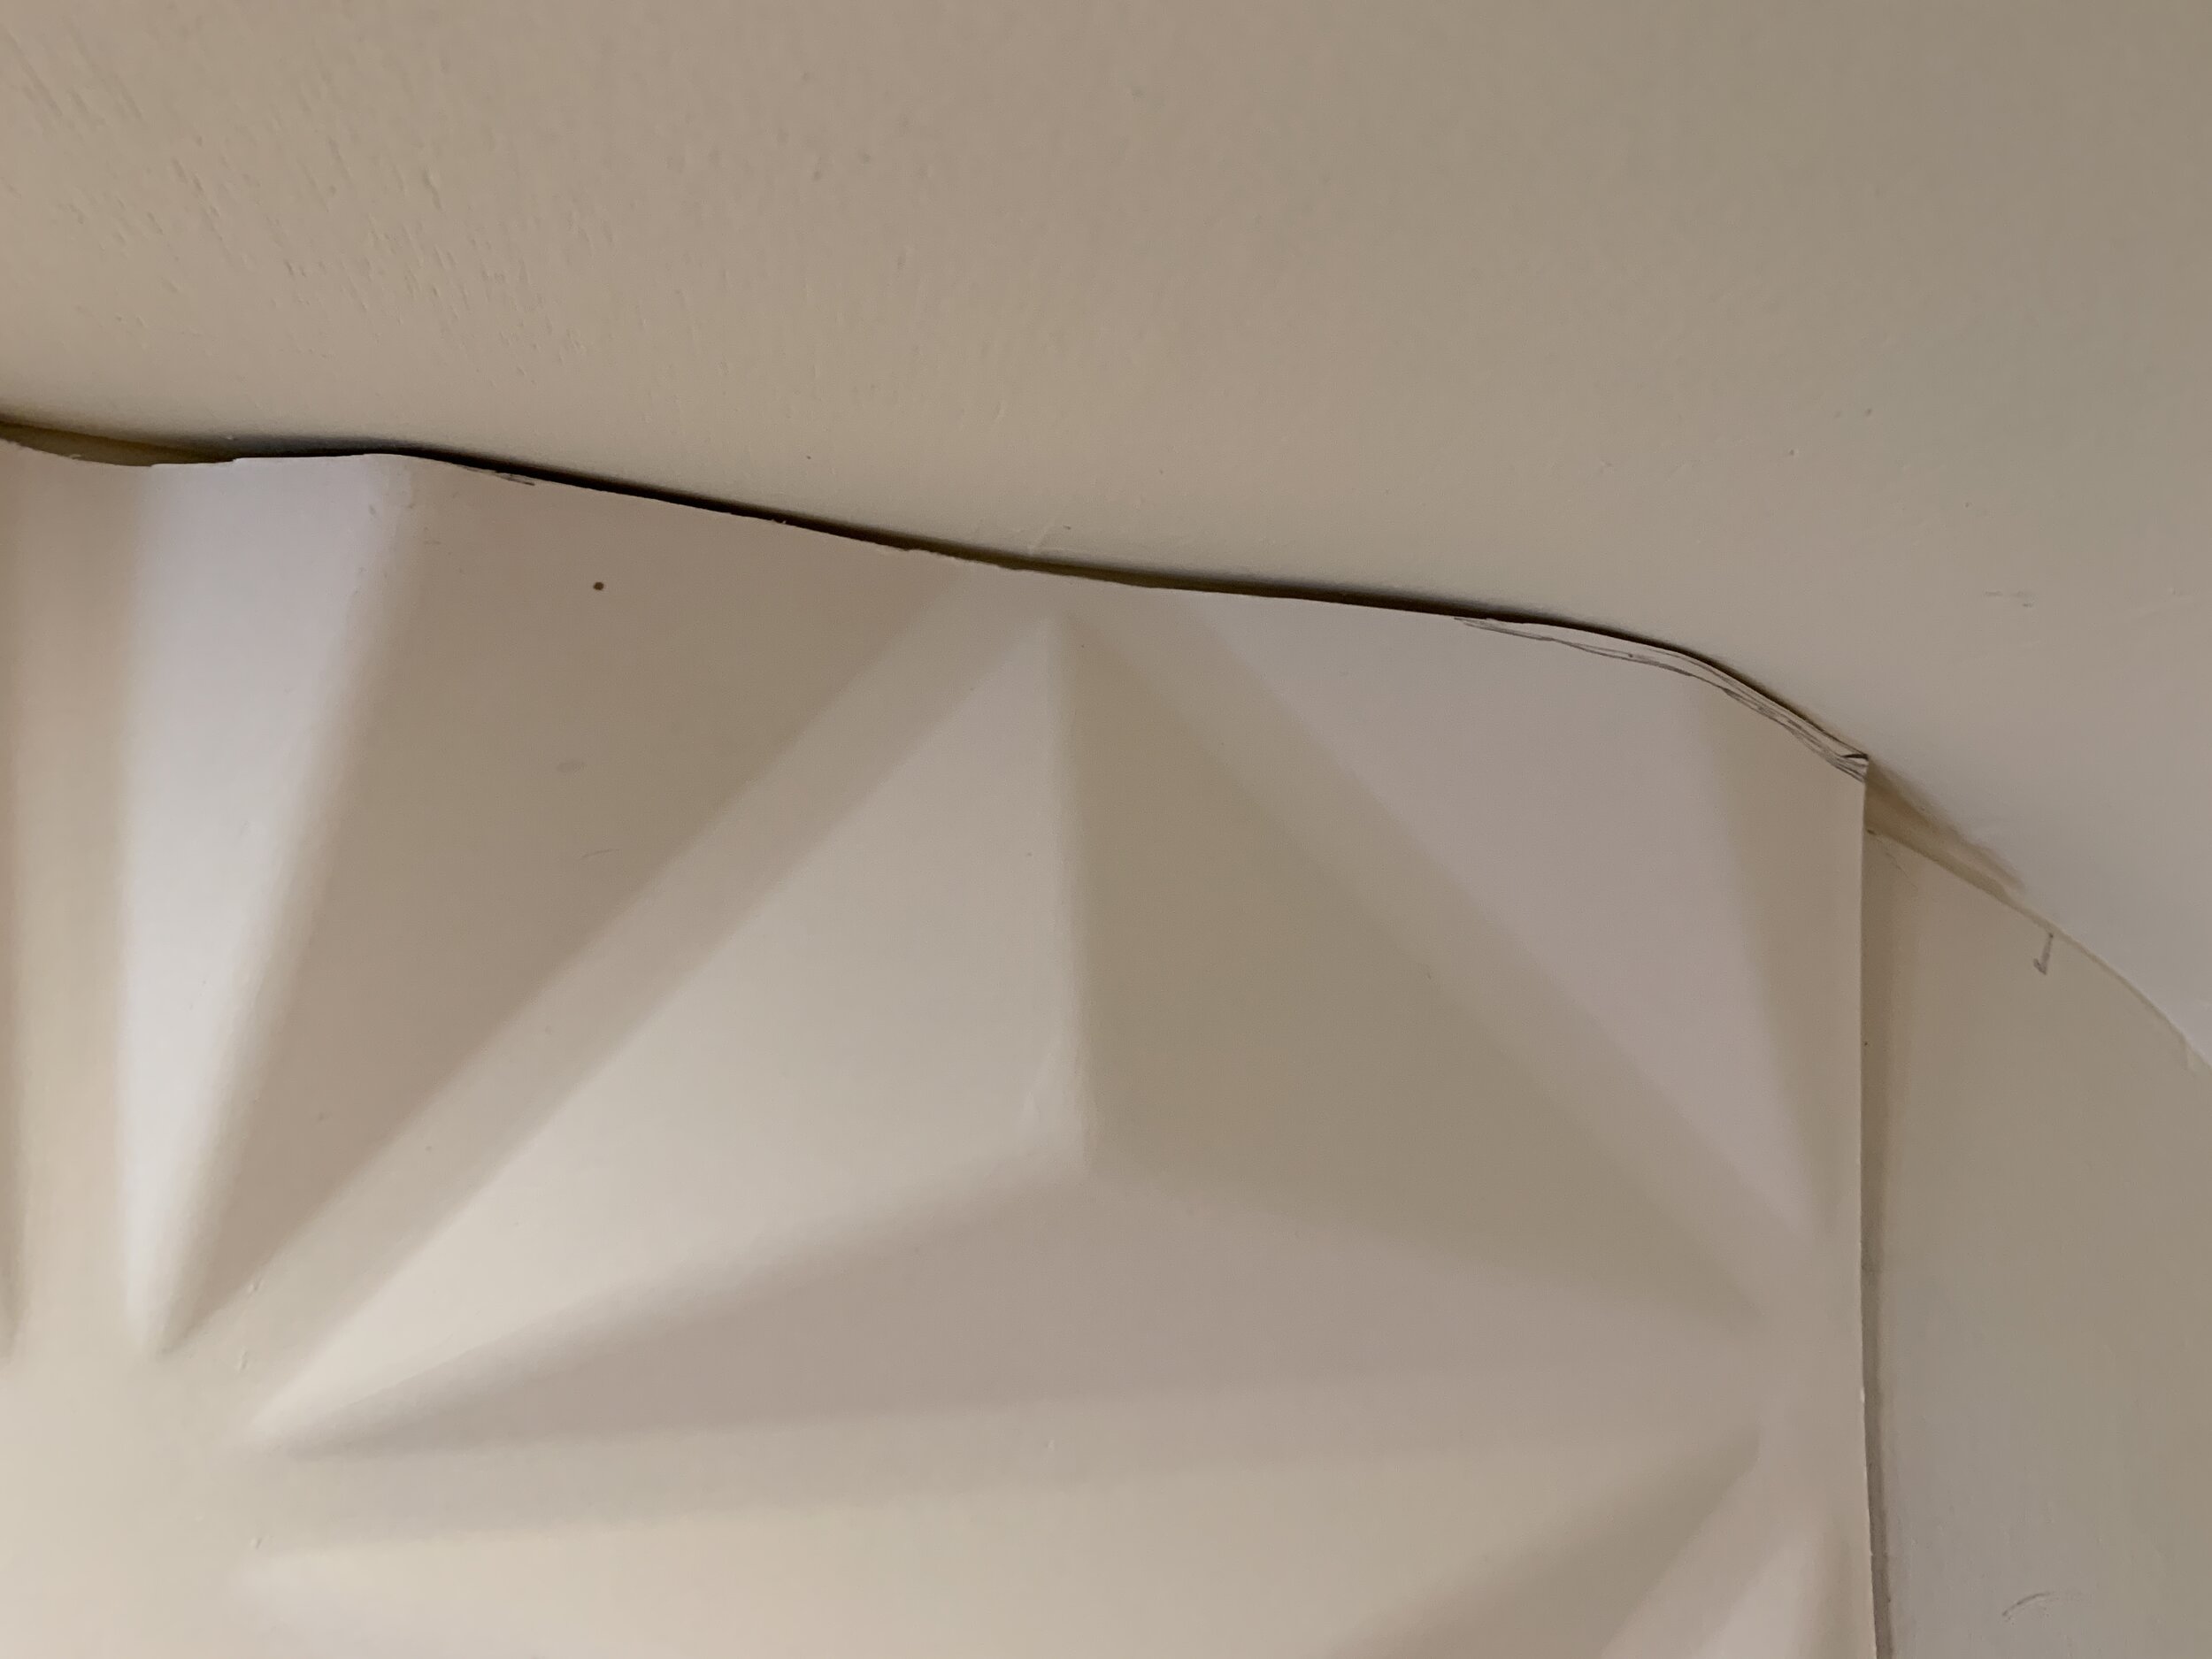
1. Figure out where to start. We chose to place the first panel centered over the sink/window so our to-be-installed wall sconce light would be framed nicely by and sit symmetrically on the panel pattern. In our case, our first panel needed to be trimmed on top and bottom and would end up “sitting” on the top of our window ledge, which helped us get our level line. If you don’t have a level reference point like the top or side of a window, find your horizontal and/or vertical level and mark out a starting line on your wall to help set an edge of your first panel. It is very important to get this first panel aligned right since all of the other panels will build off of it. If this is off, the whole thing could look squiffy in the end.

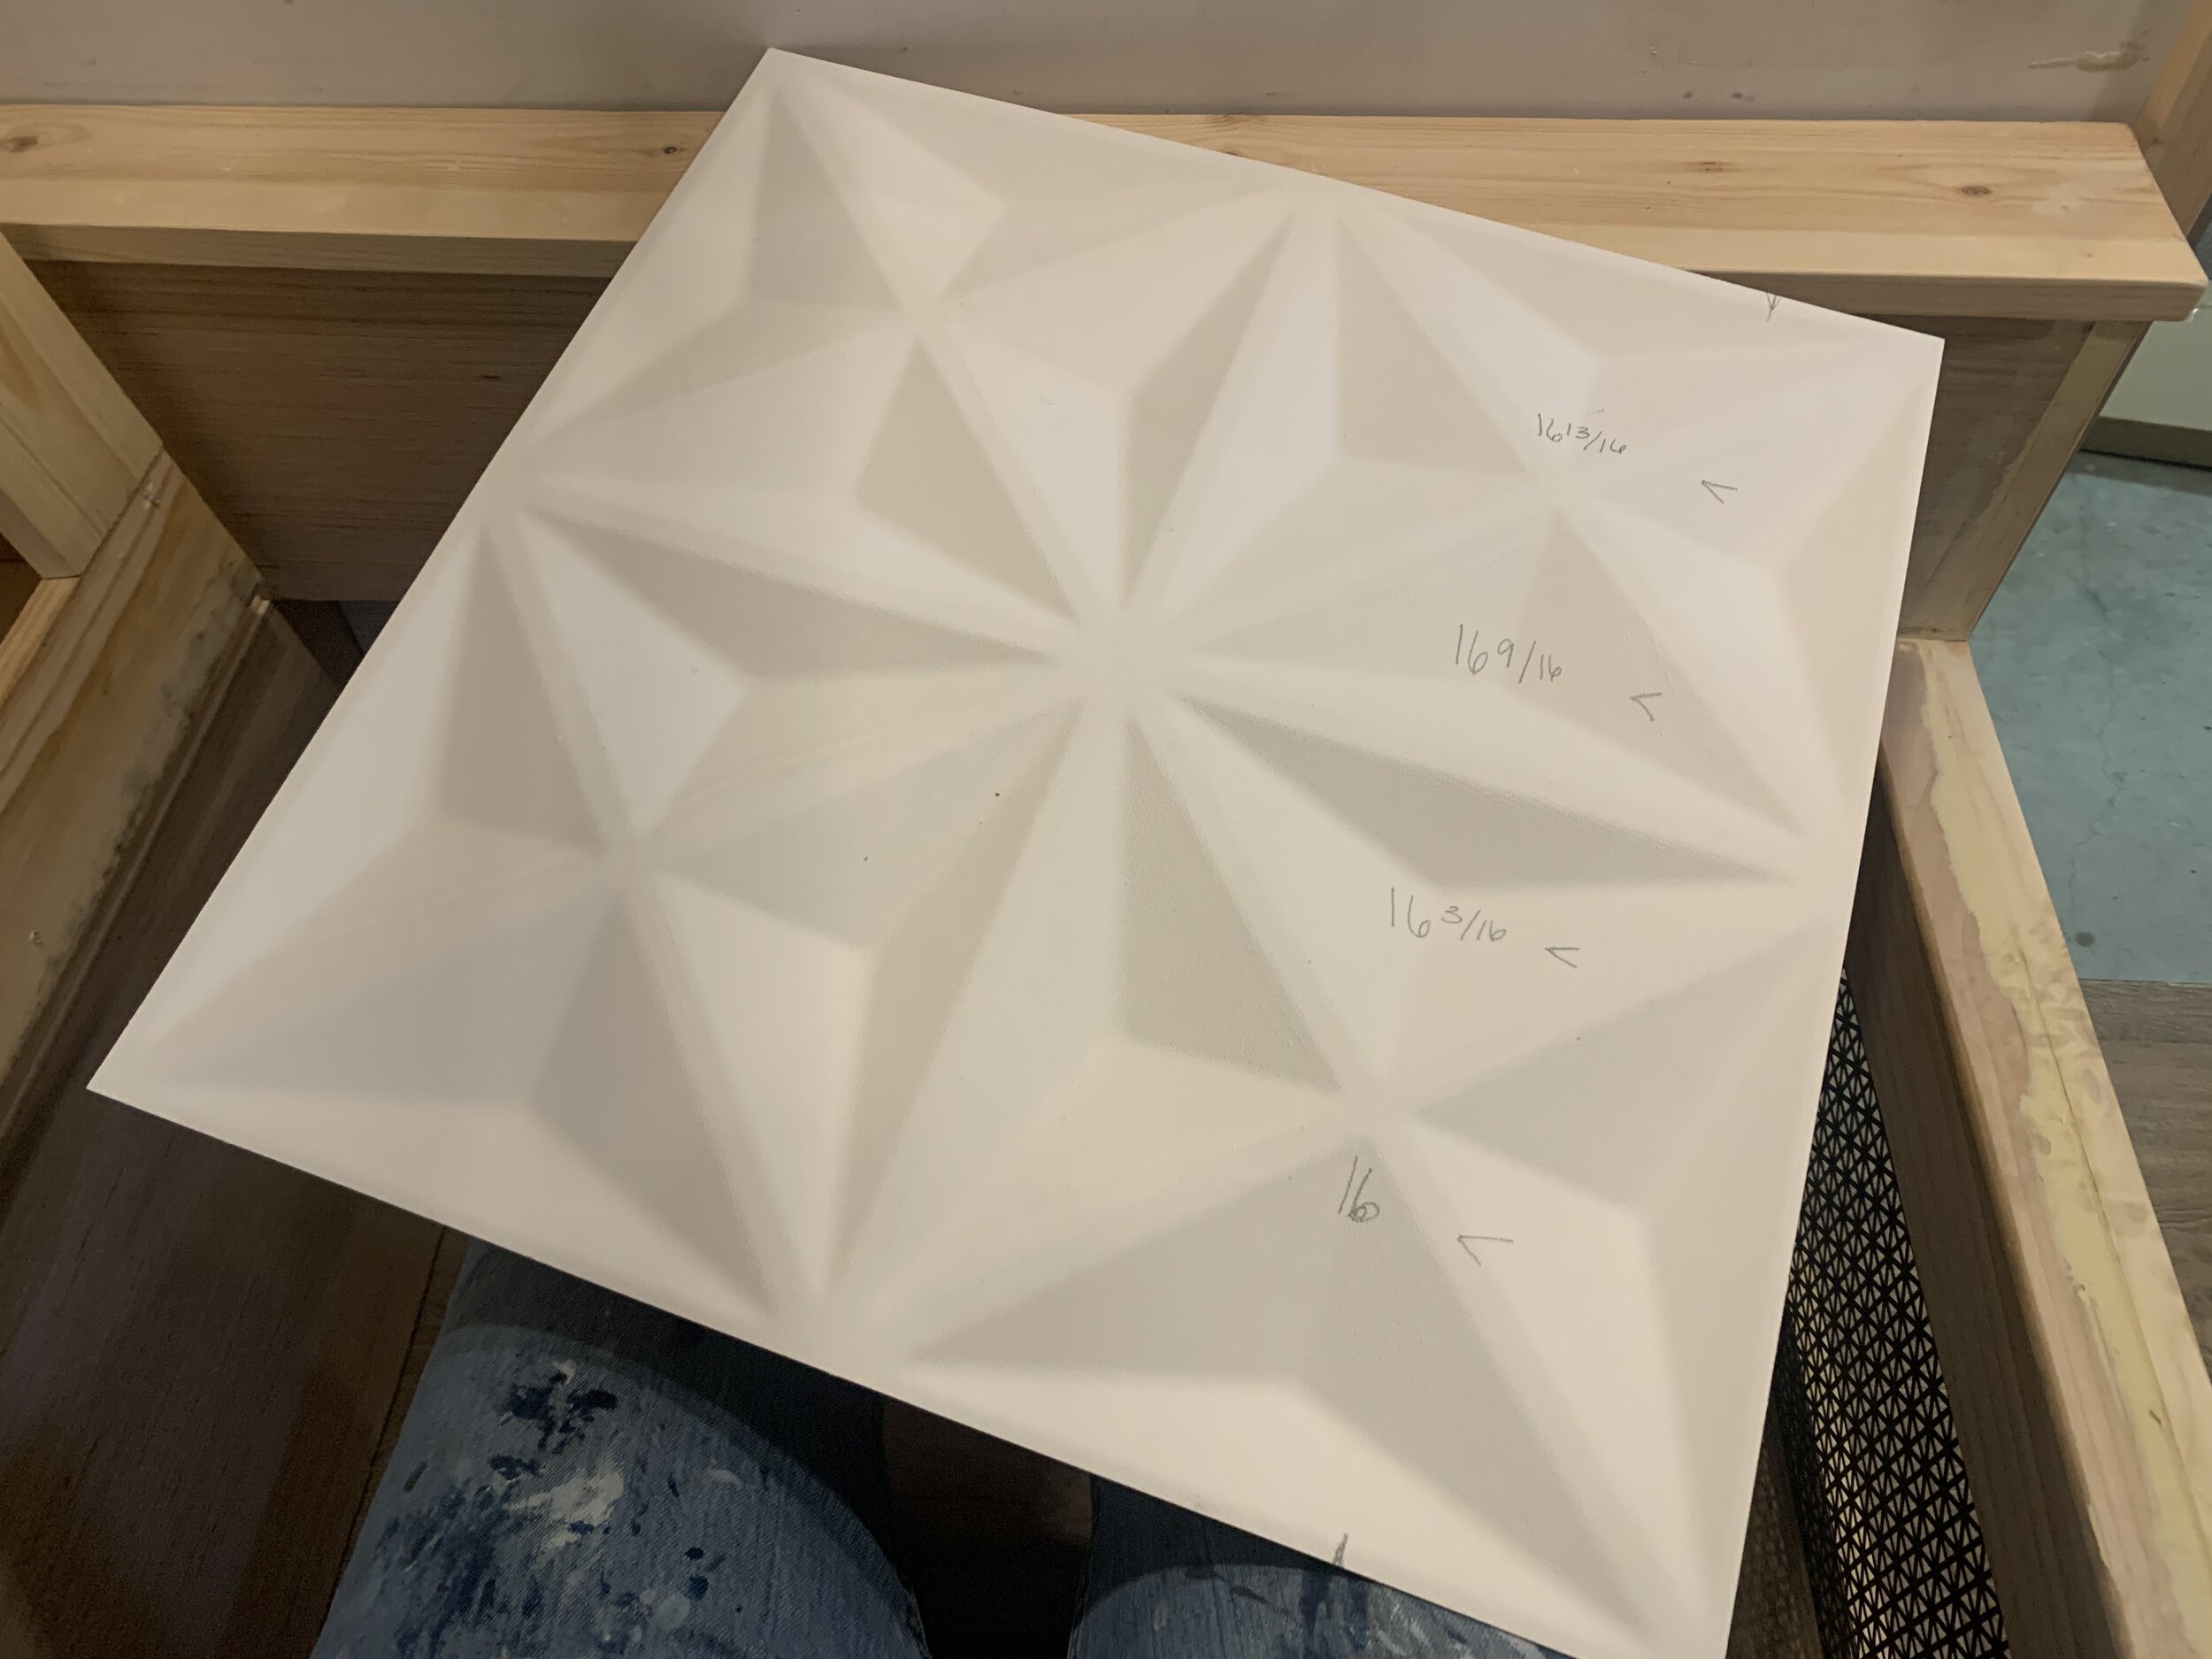
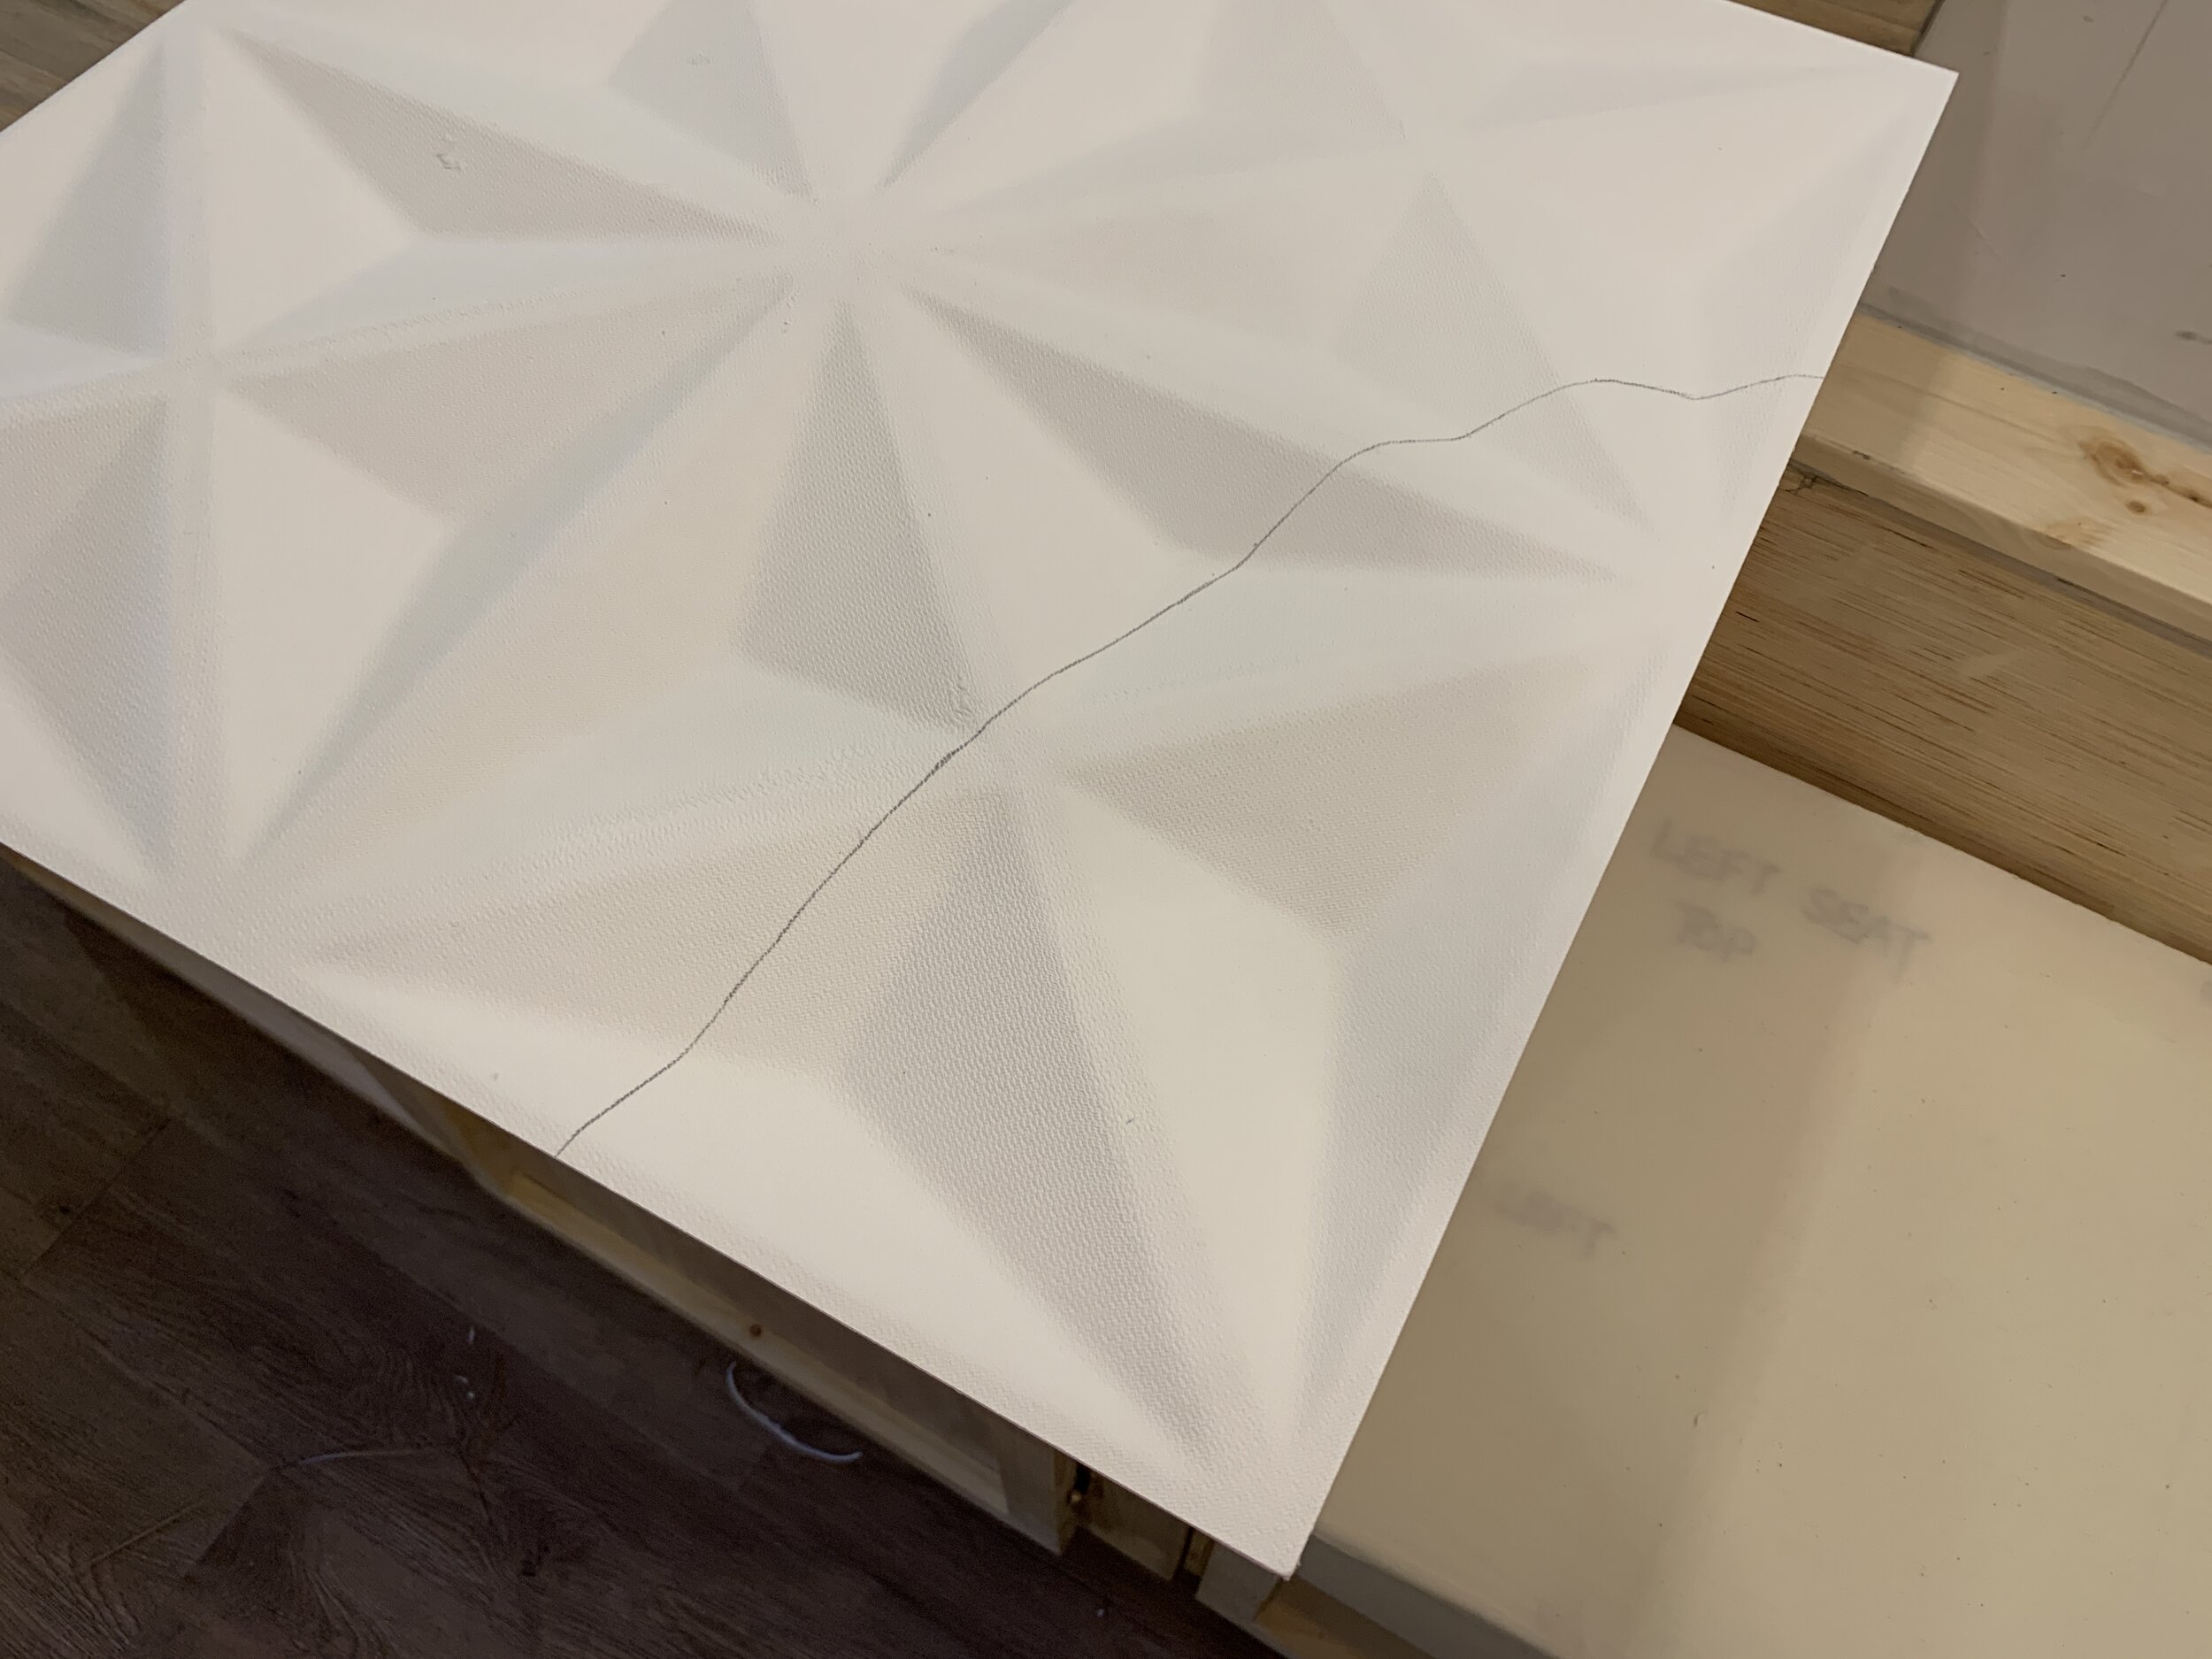
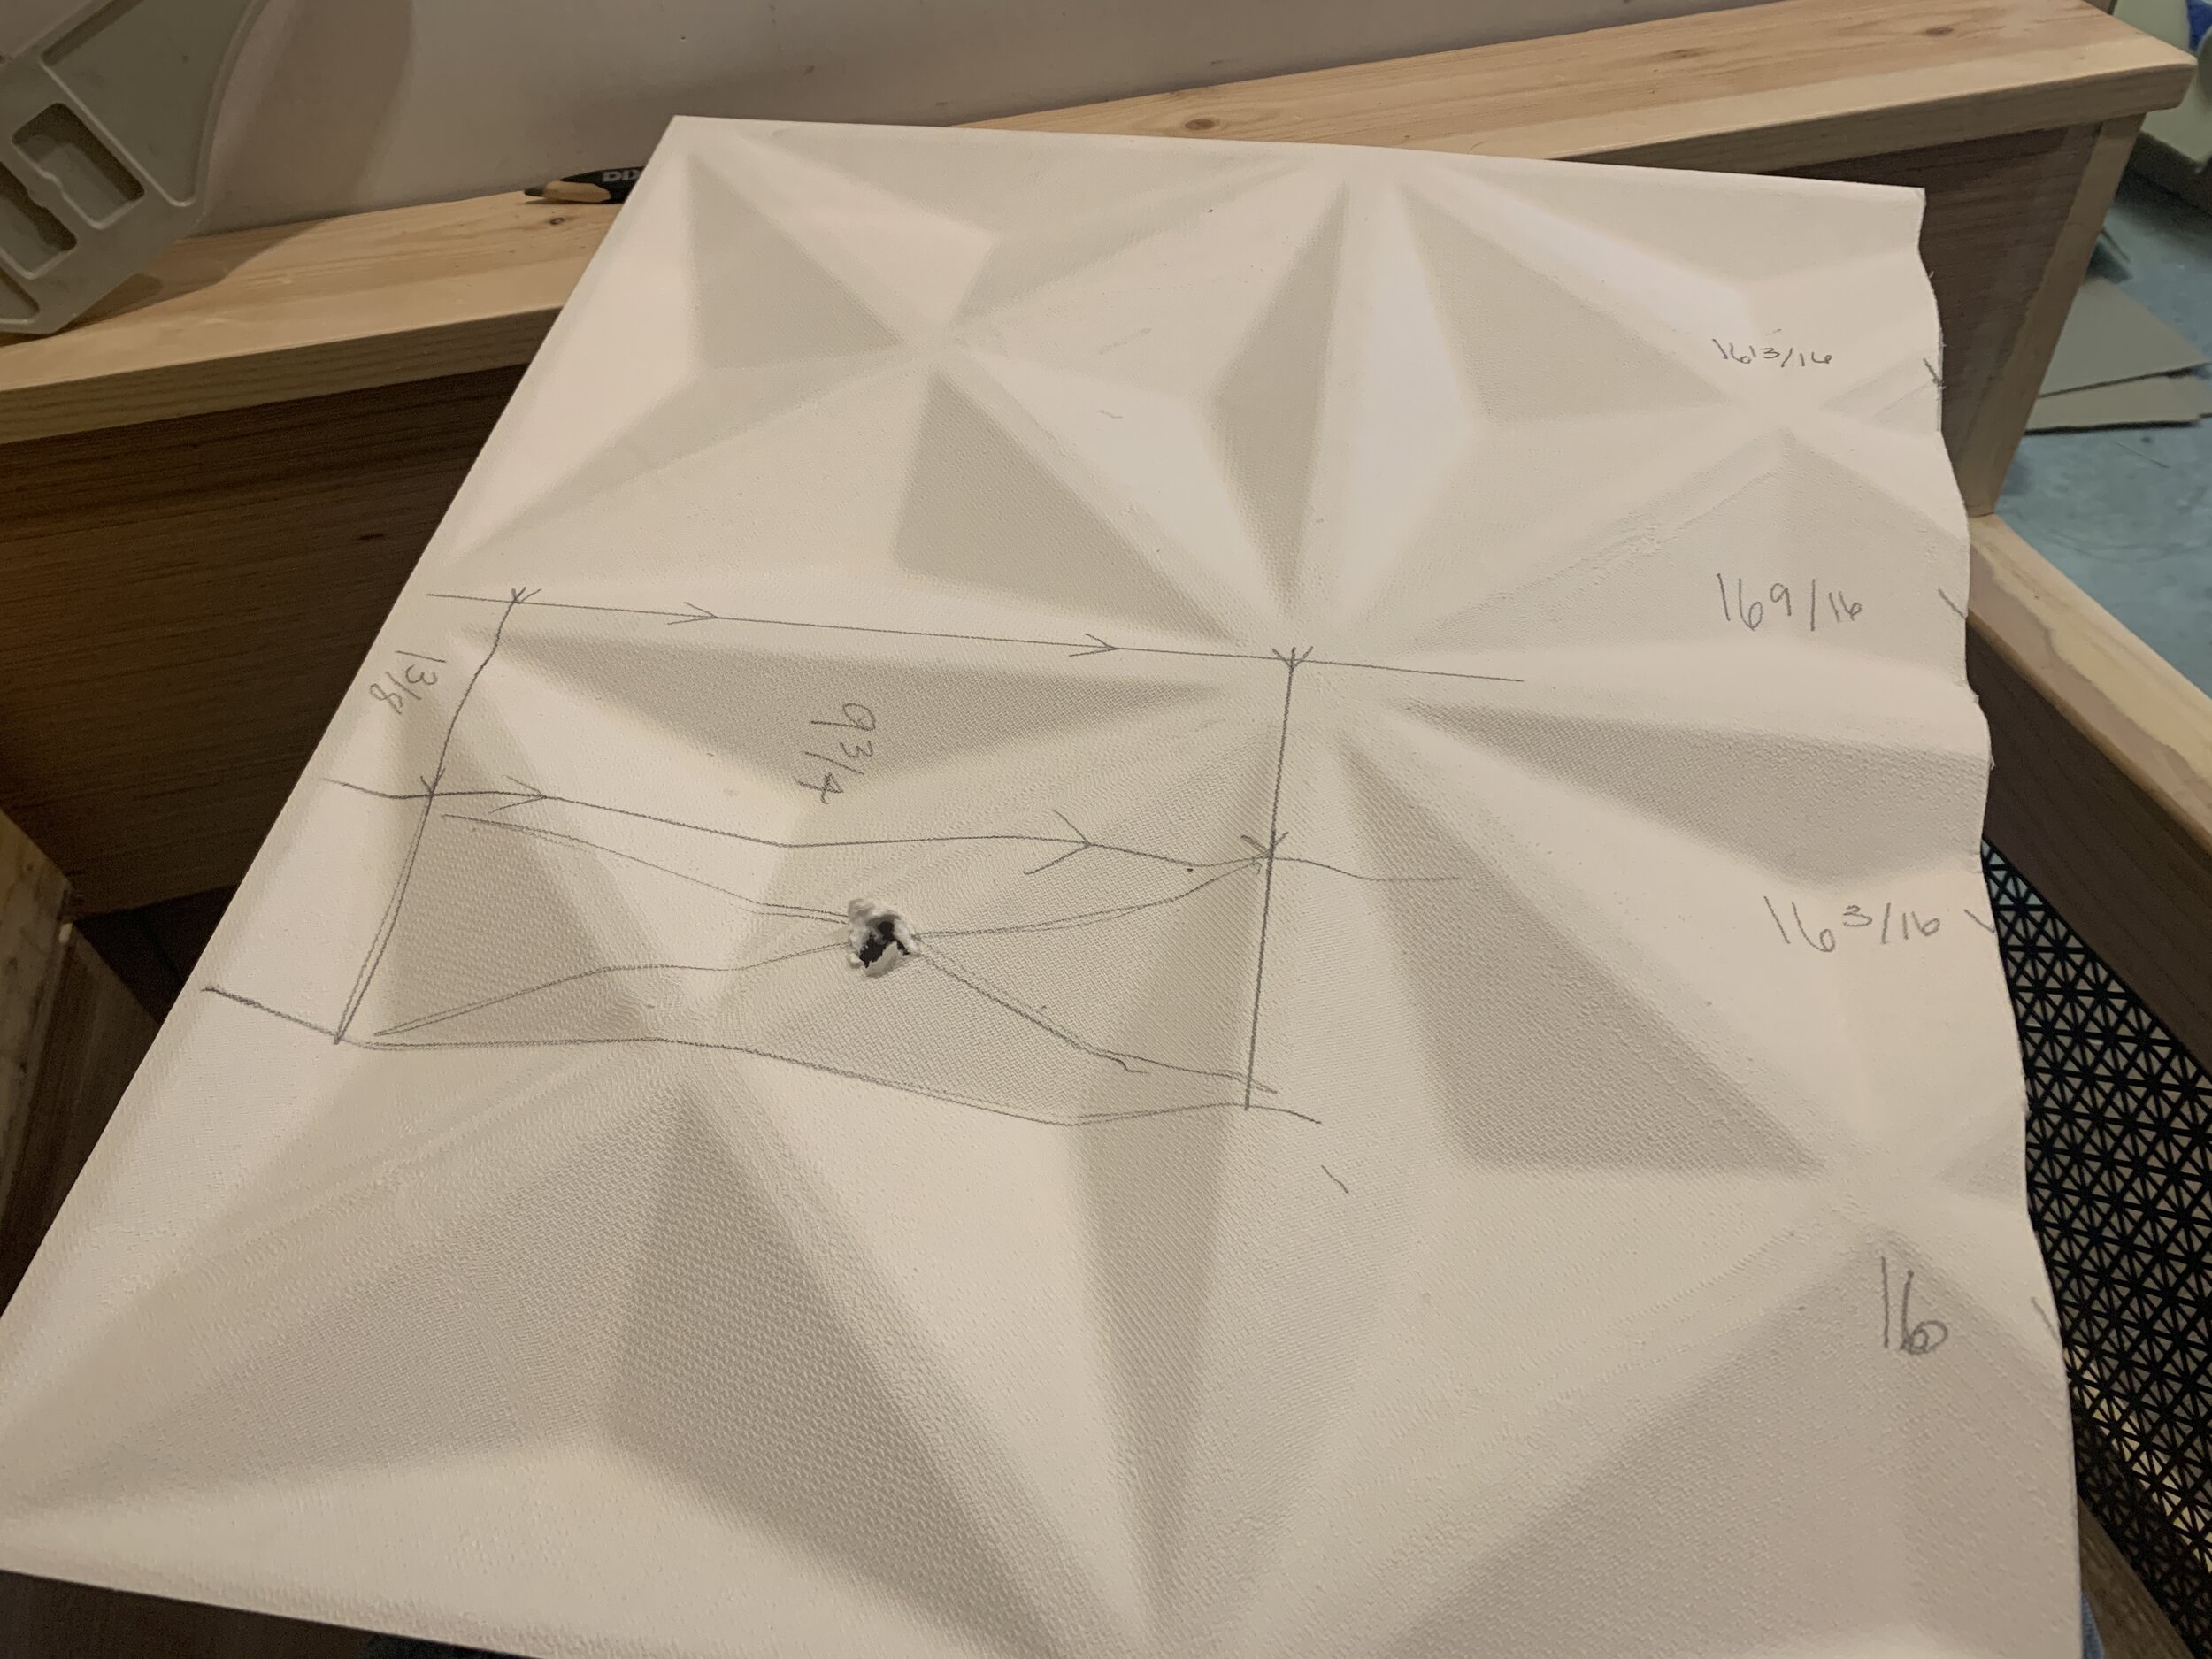
2. Measure, mark and trim panel, if needed. We started out marking our cut lines on the front of the panels, but learned we preferred to mark the backside of the panels with our pencil. The backside is textured and helps the pencil not slip when marking across all of the different angles, plus it keeps the front cleaner. It really helped us to keep the pencil at a consistent angle while marking out so we didn’t accidentally get a wavy line.

3. Dry fit the panel in place to check fit before applying adhesive. Trim with scissors, if needed, and re-fit and trim until it fits how you want.
4. Gently file any rough cut edges with sandpaper. We found it worked best for us to file at about a 90-degree-angle – perpendicular to the panel – and in one direction only (from the finished side toward the back of the panel to knock the cut/paper “burrs” backward toward the wall-side of the panel).
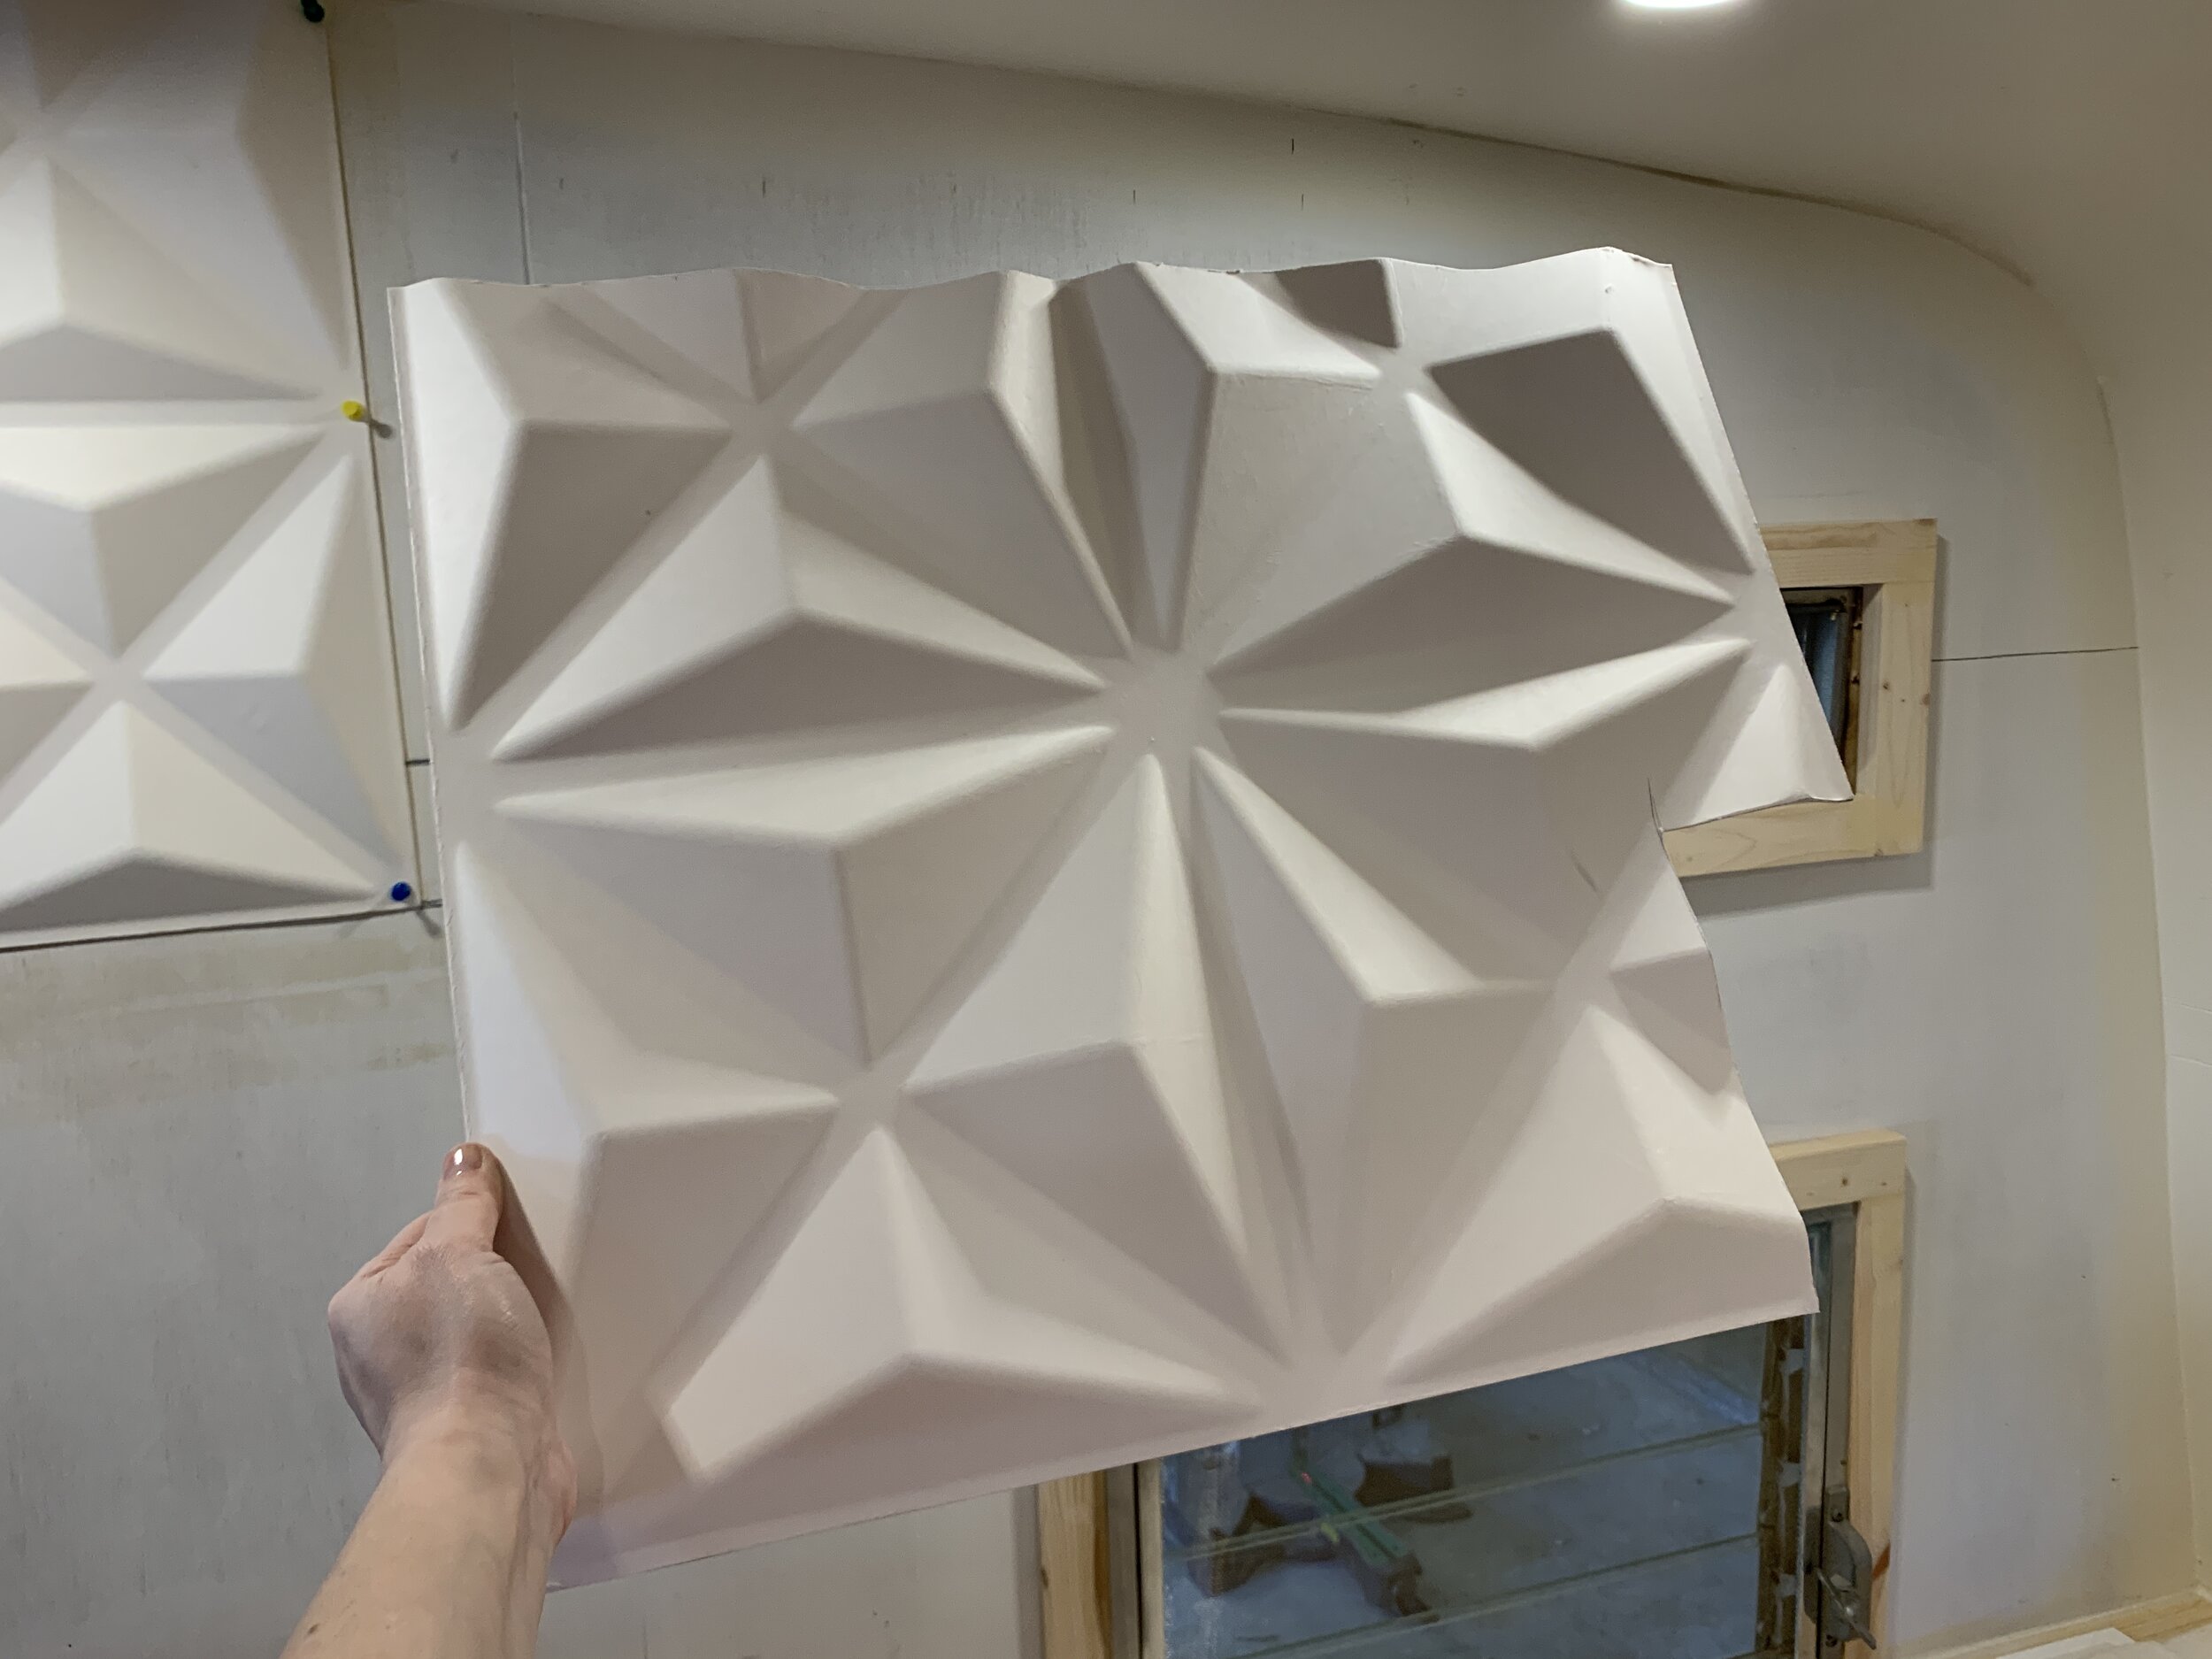
5. Apply the adhesive to the wall and the back of the panel. Make sure you roll on a healthy, but even, amount to both. Our first attempt (shown above) didn’t work because we didn’t put enough on. It’s only held on by the finish nails we put in on the left side of the panel. Since each panel takes some time to measure, custom cut and dry fit, we suggest only putting enough adhesive on the wall to cover an area a little larger than the panel you’re currently working on.
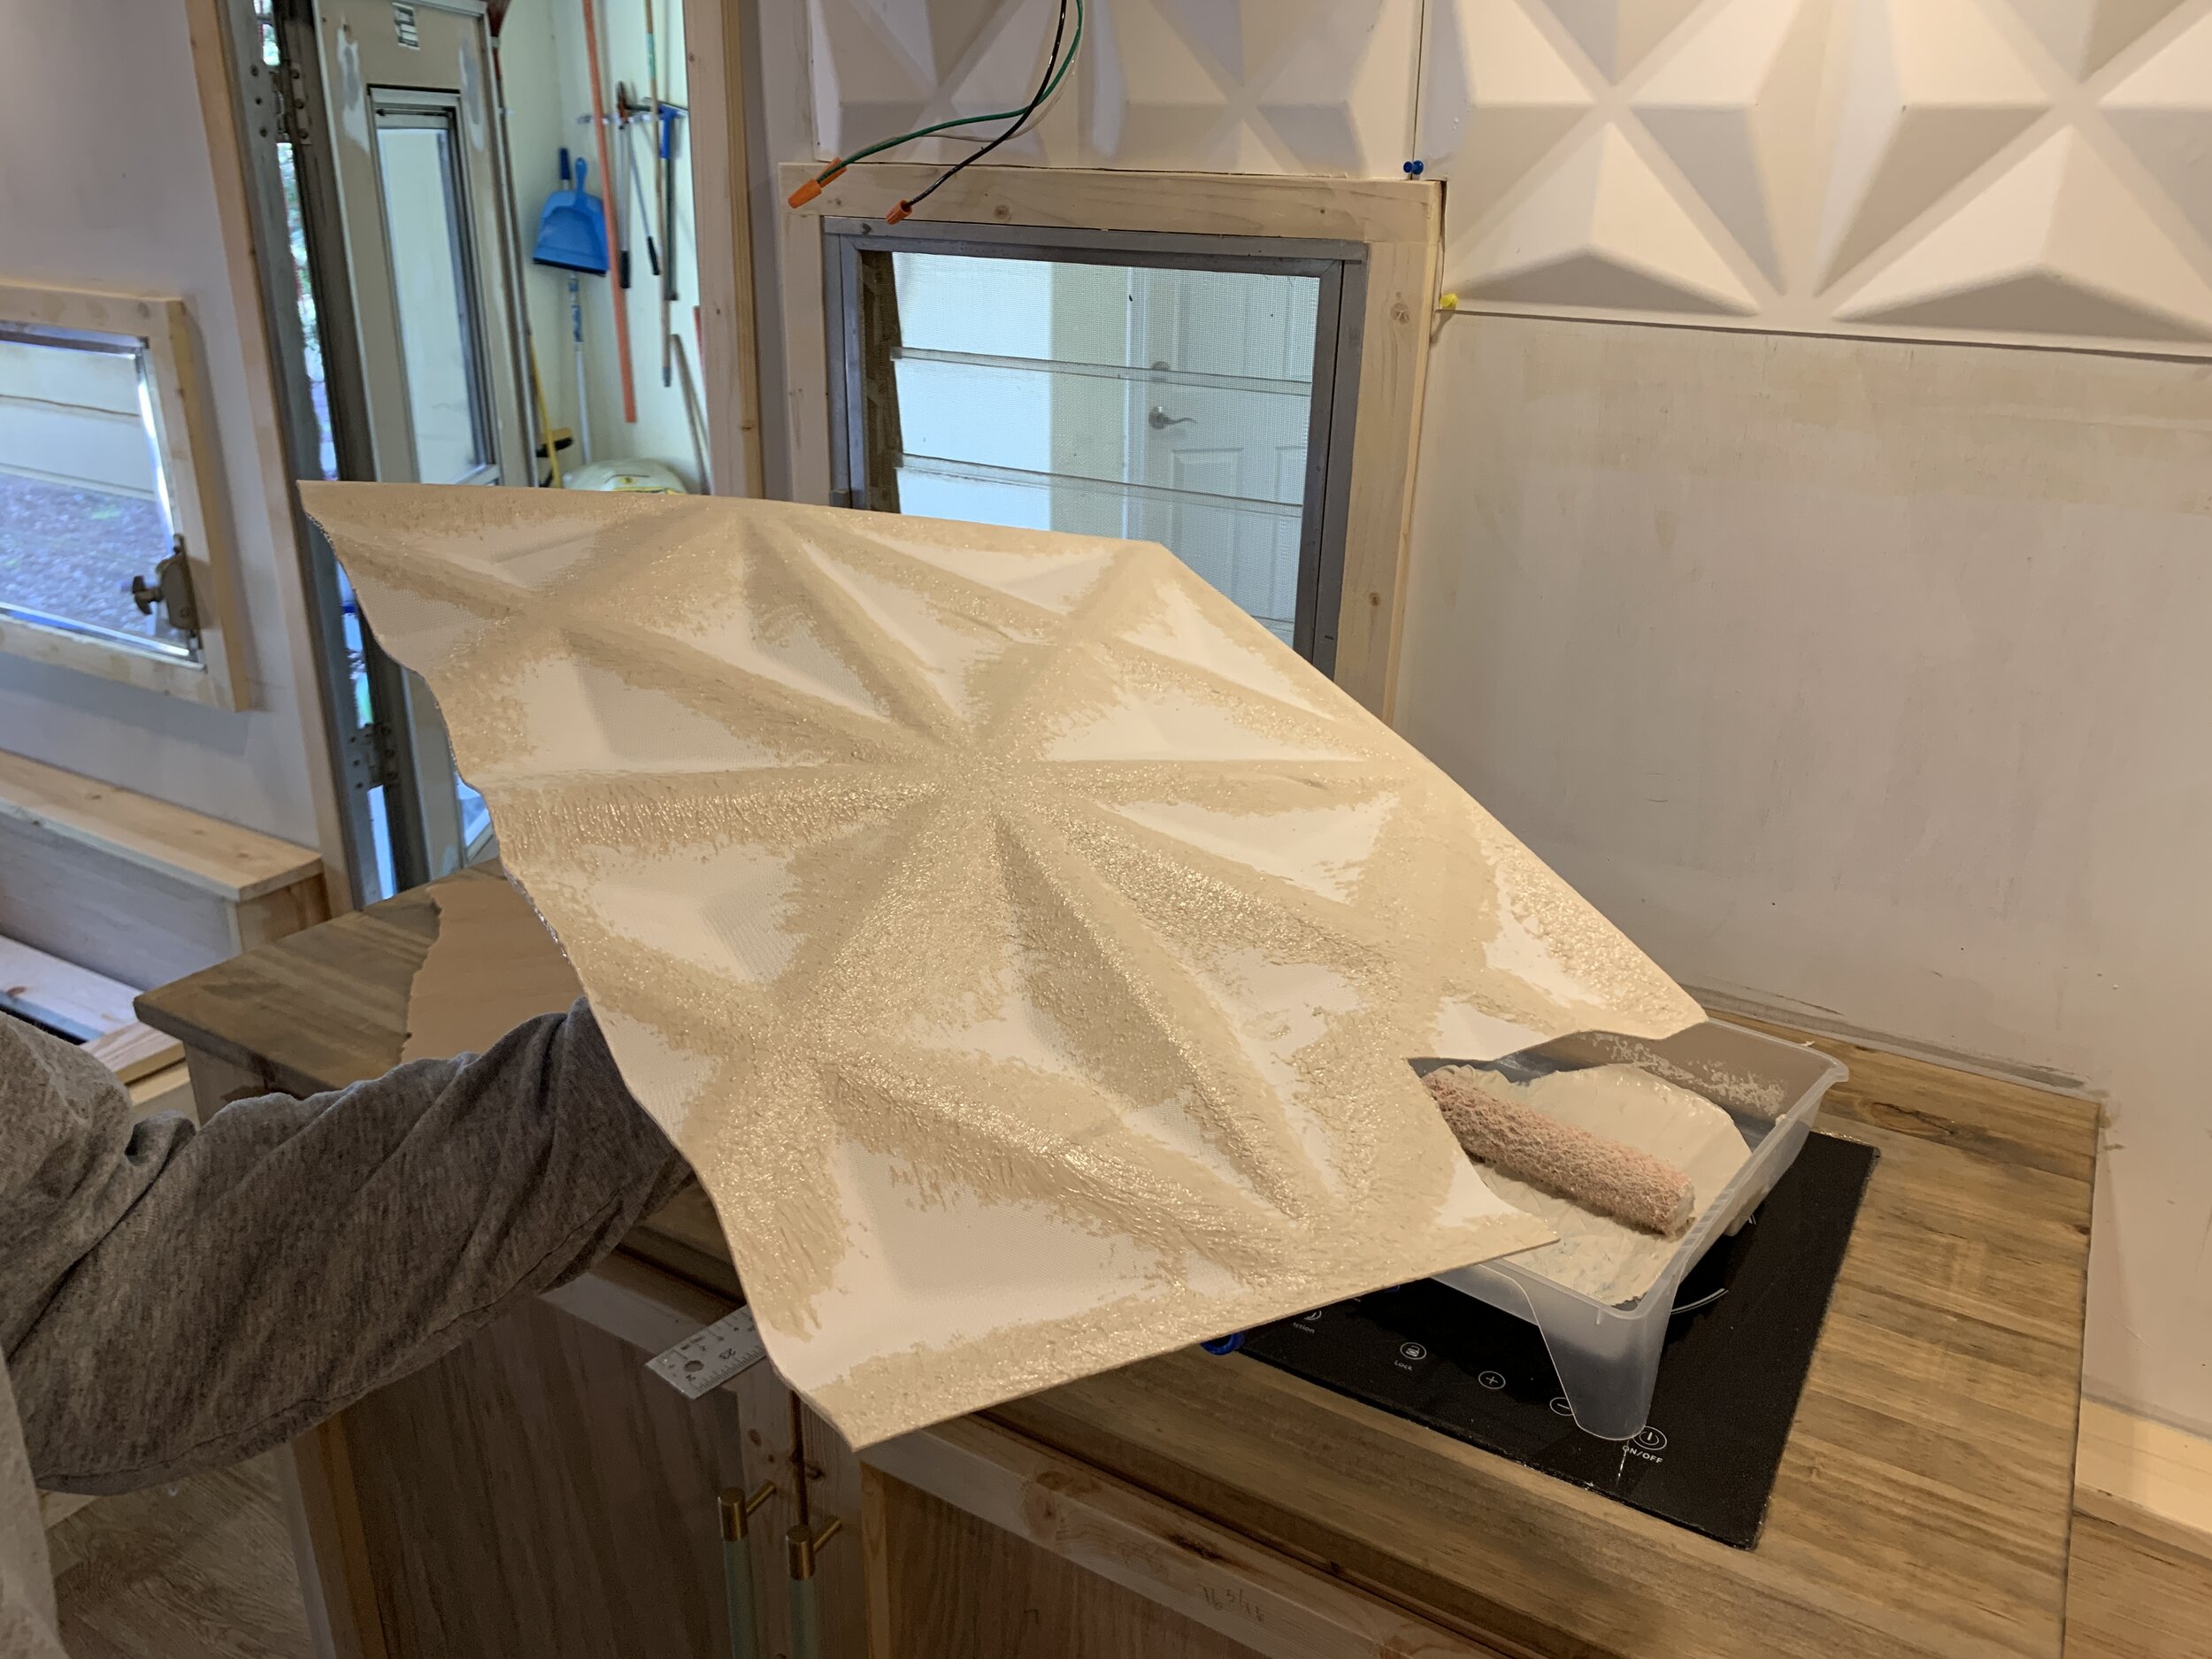
6. Quickly and carefully wipe off any adhesive from the front of the panel. We used a slightly damp rag. Minimize wiping back and forth on the front of the panel as much as possible. They’re durable, but the more you wipe the more you risk peeling and roughing up the smooth texture.
7. Stick it to the wall. It’s important to (with clean hands) push down on the areas of the panel that make contact with the wall for maximum contact. If you do this (and apply enough adhesive) the panels will stick no problem.
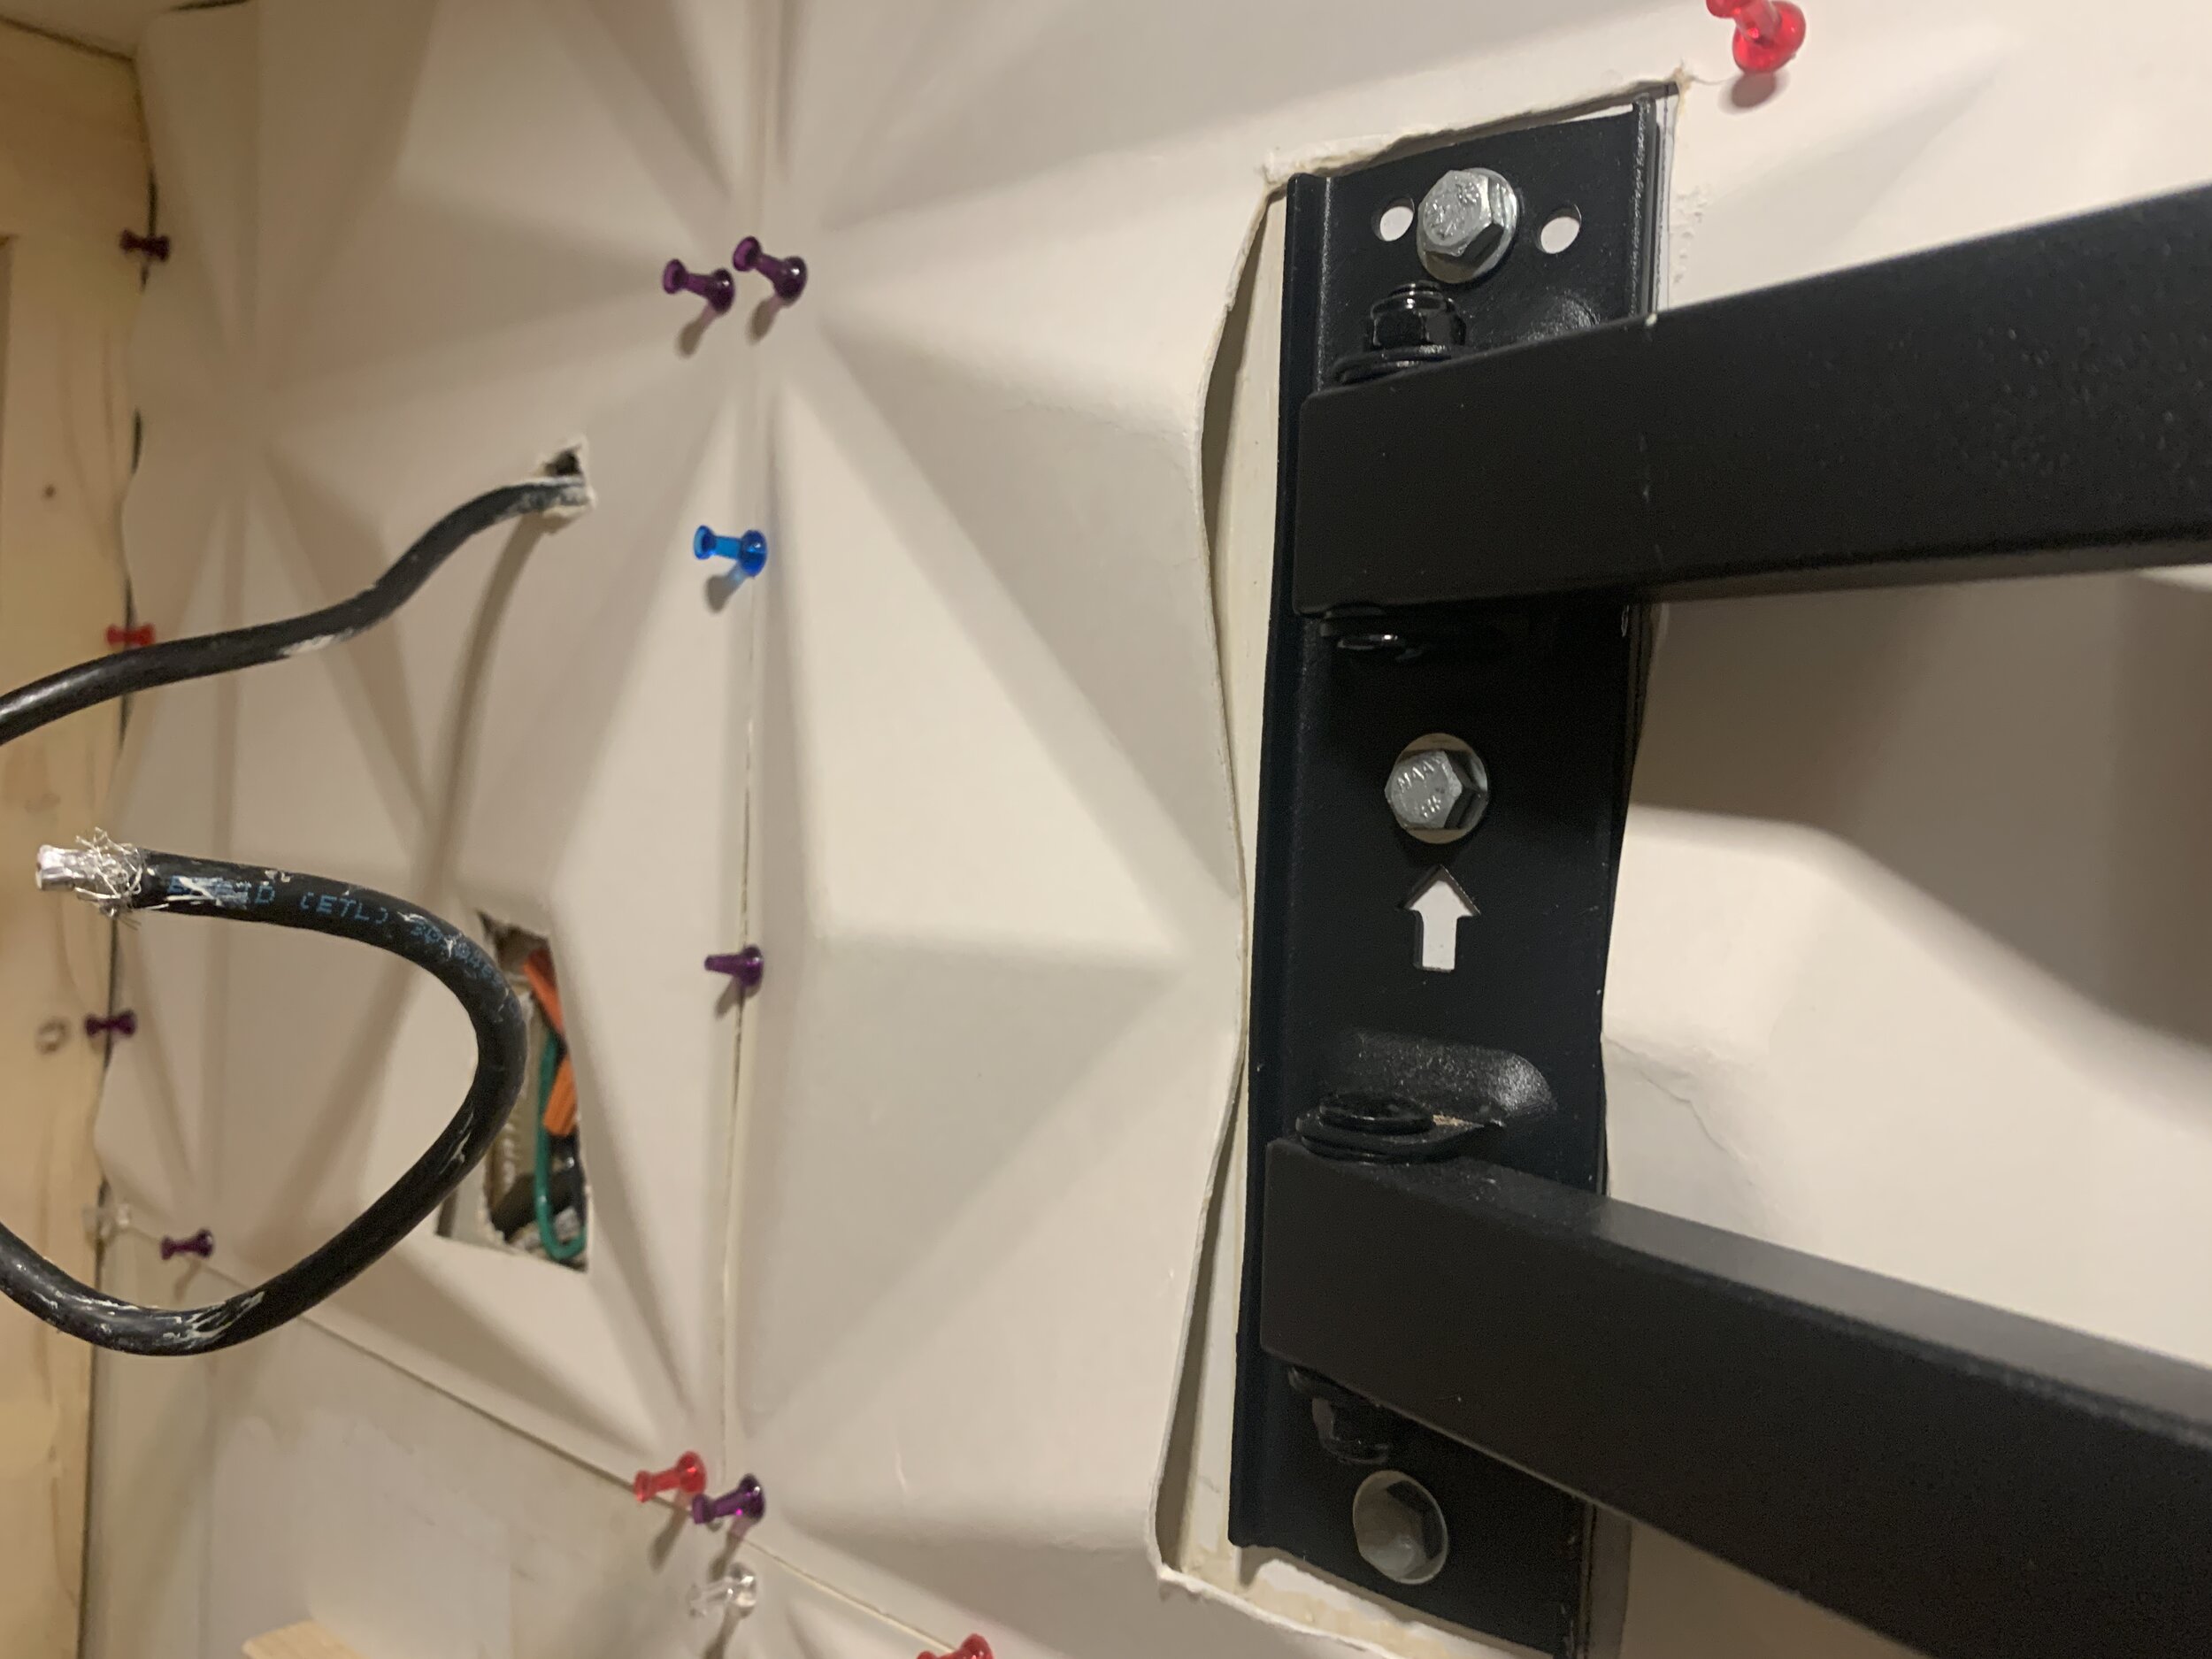
8. Hold it up with push pins. Stick the push pins through in the low areas of the panel (the areas you just pressed on by hand in step 7). We tried to keep the push pins as straight as possible to minimize dinging the raised pattern or indenting the panel. We initially tried to secure them with our nail gun but didn’t feel they were very effective and we were nervous we’d do more harm than good, between possibly damaging the electrical lines inside the wall and perforating the exterior aluminum. (And we don’t want to have to fill any more exterior holes!!)

9. Scrape off the excess adhesive. Each panel took a while to install. So we didn’t get crusty adhesive, we made sure to use our putty knife to carefully scrape the extra adhesive on the wall around each panel after we hung it so the area was clean for the next panel’s dry fitting. You may not need to, but it worked well for us, kept a nice clean work area and saved us some product.
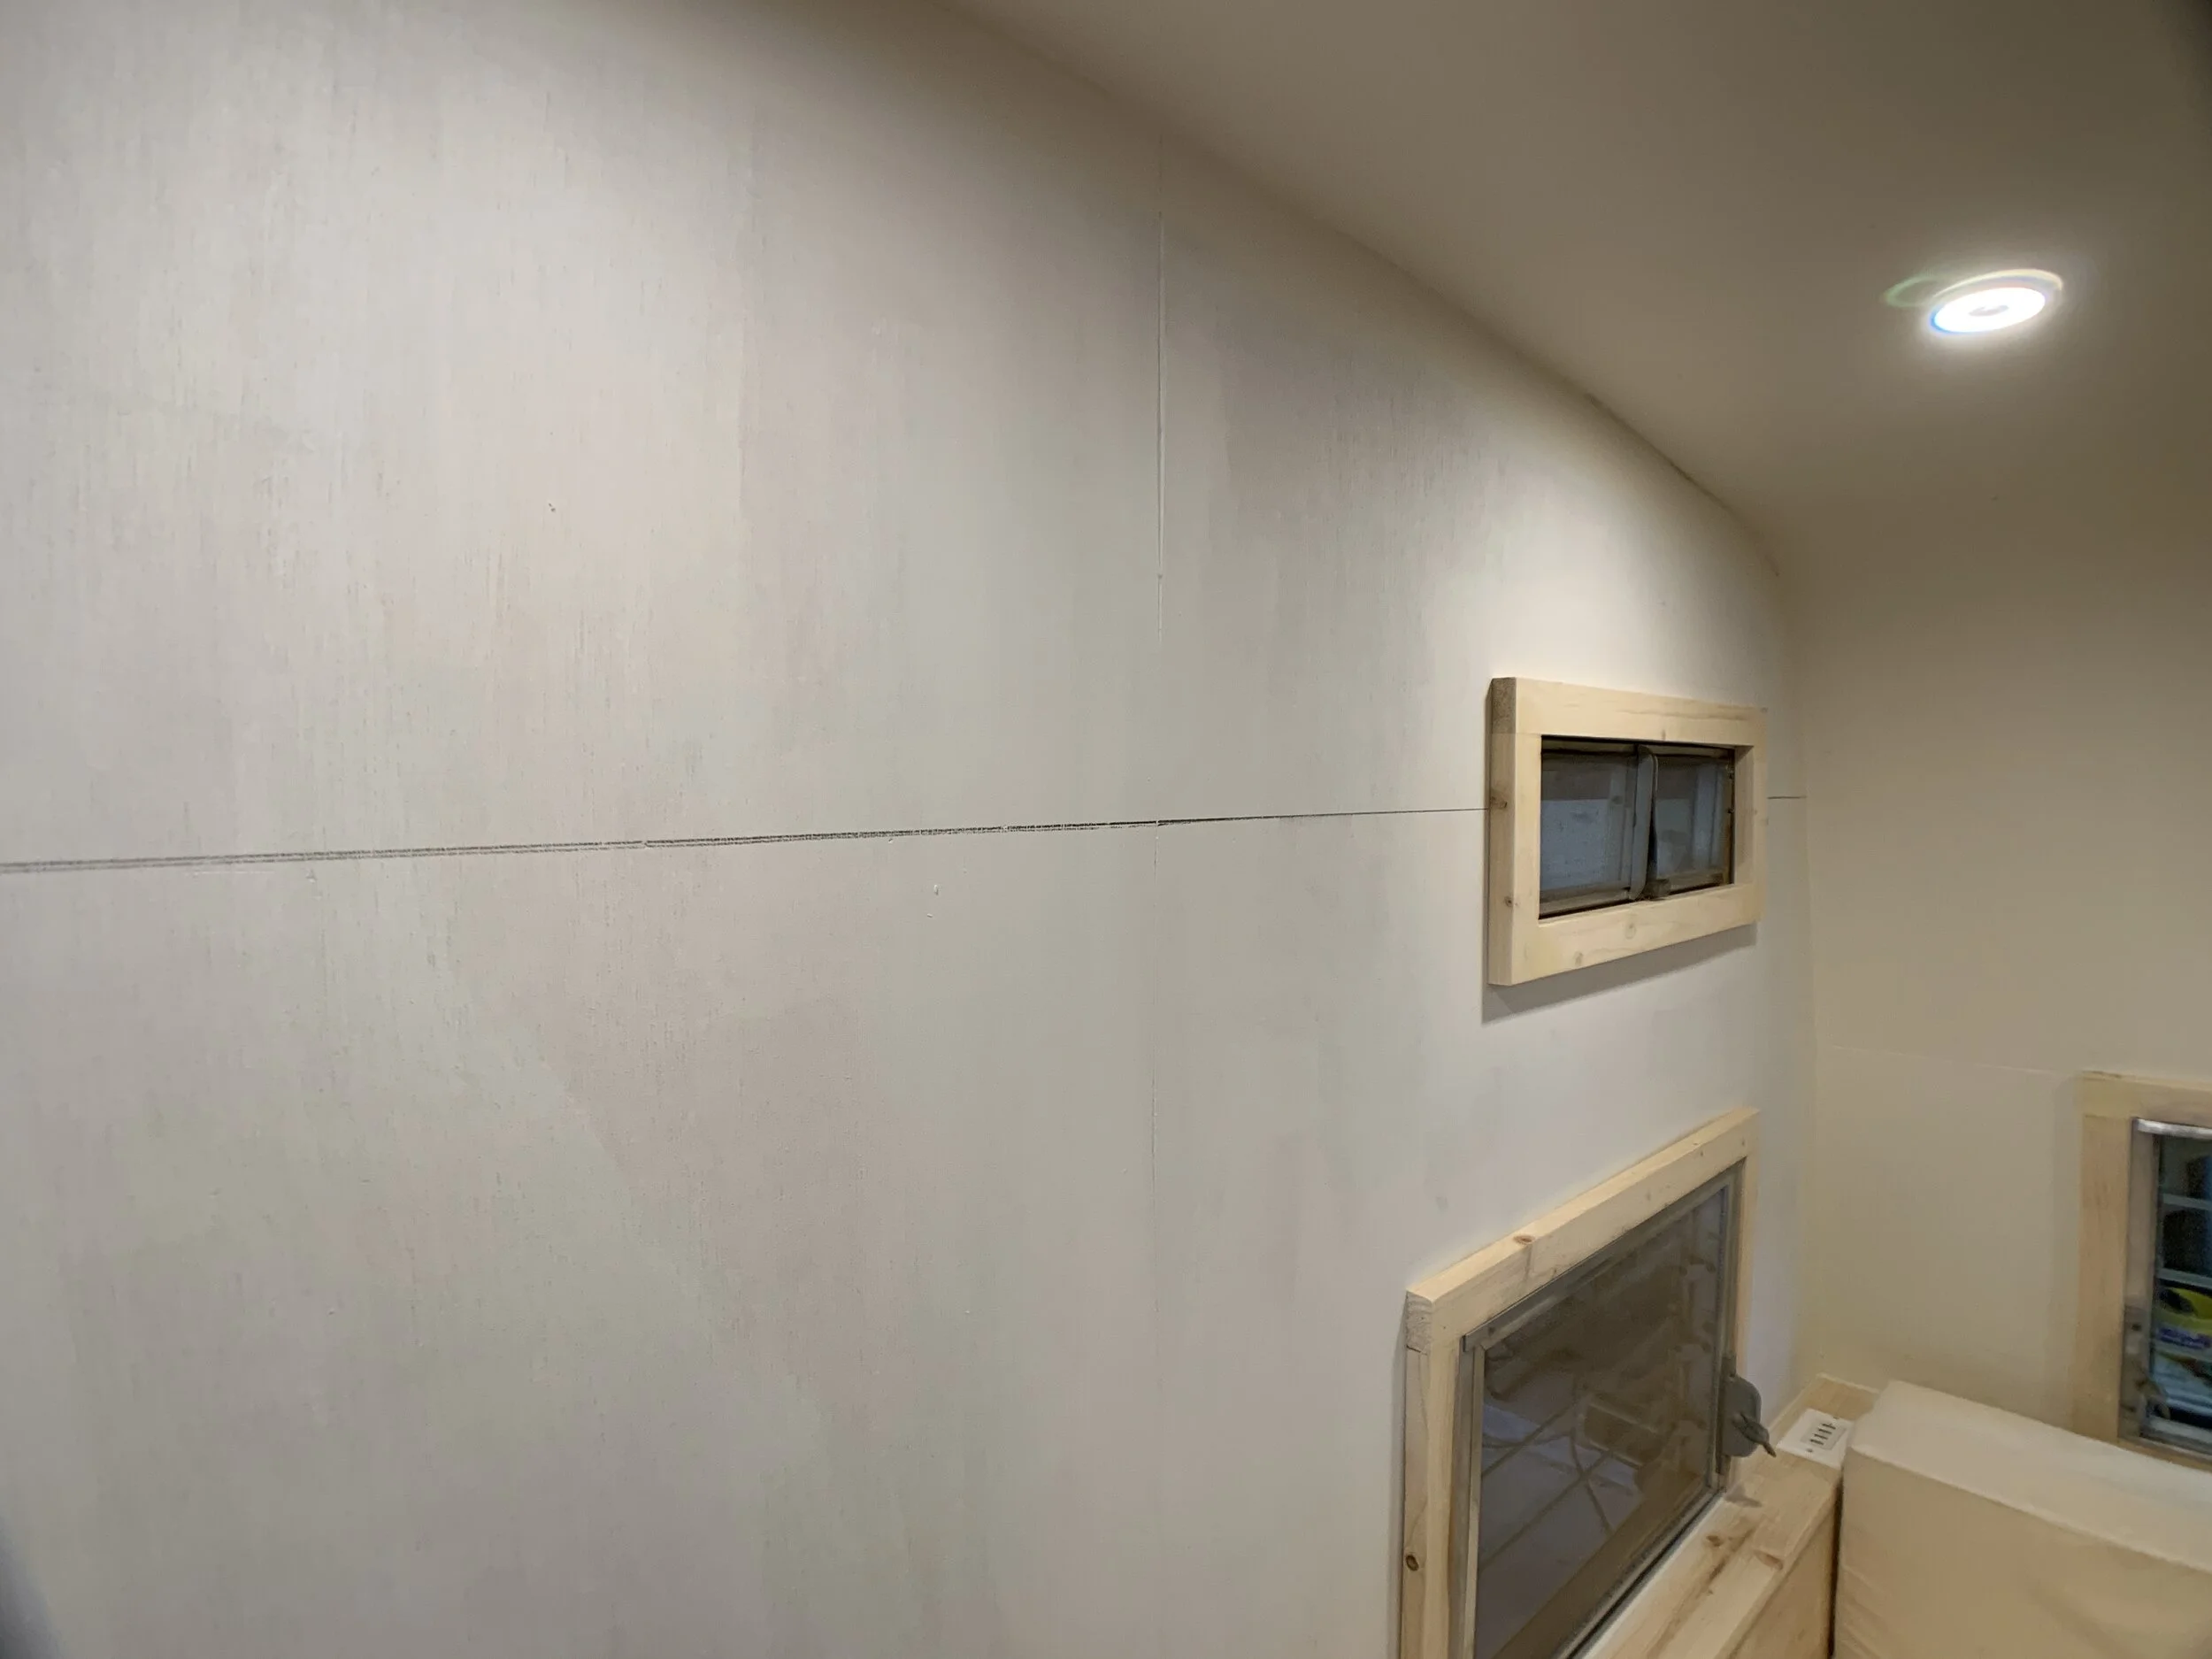
10. Use the first panel to mark out lines for the next row/column of panels. We had to notch out our second panel (to the right of panel one) around the window so we had to do this after panel two, but as soon as you can, mark out a horizontal or vertical line to help guide the next ones in the row or column, depending on which direction you’re going.
11. Repeat steps 1-9, as needed, for the install of each of your panels.
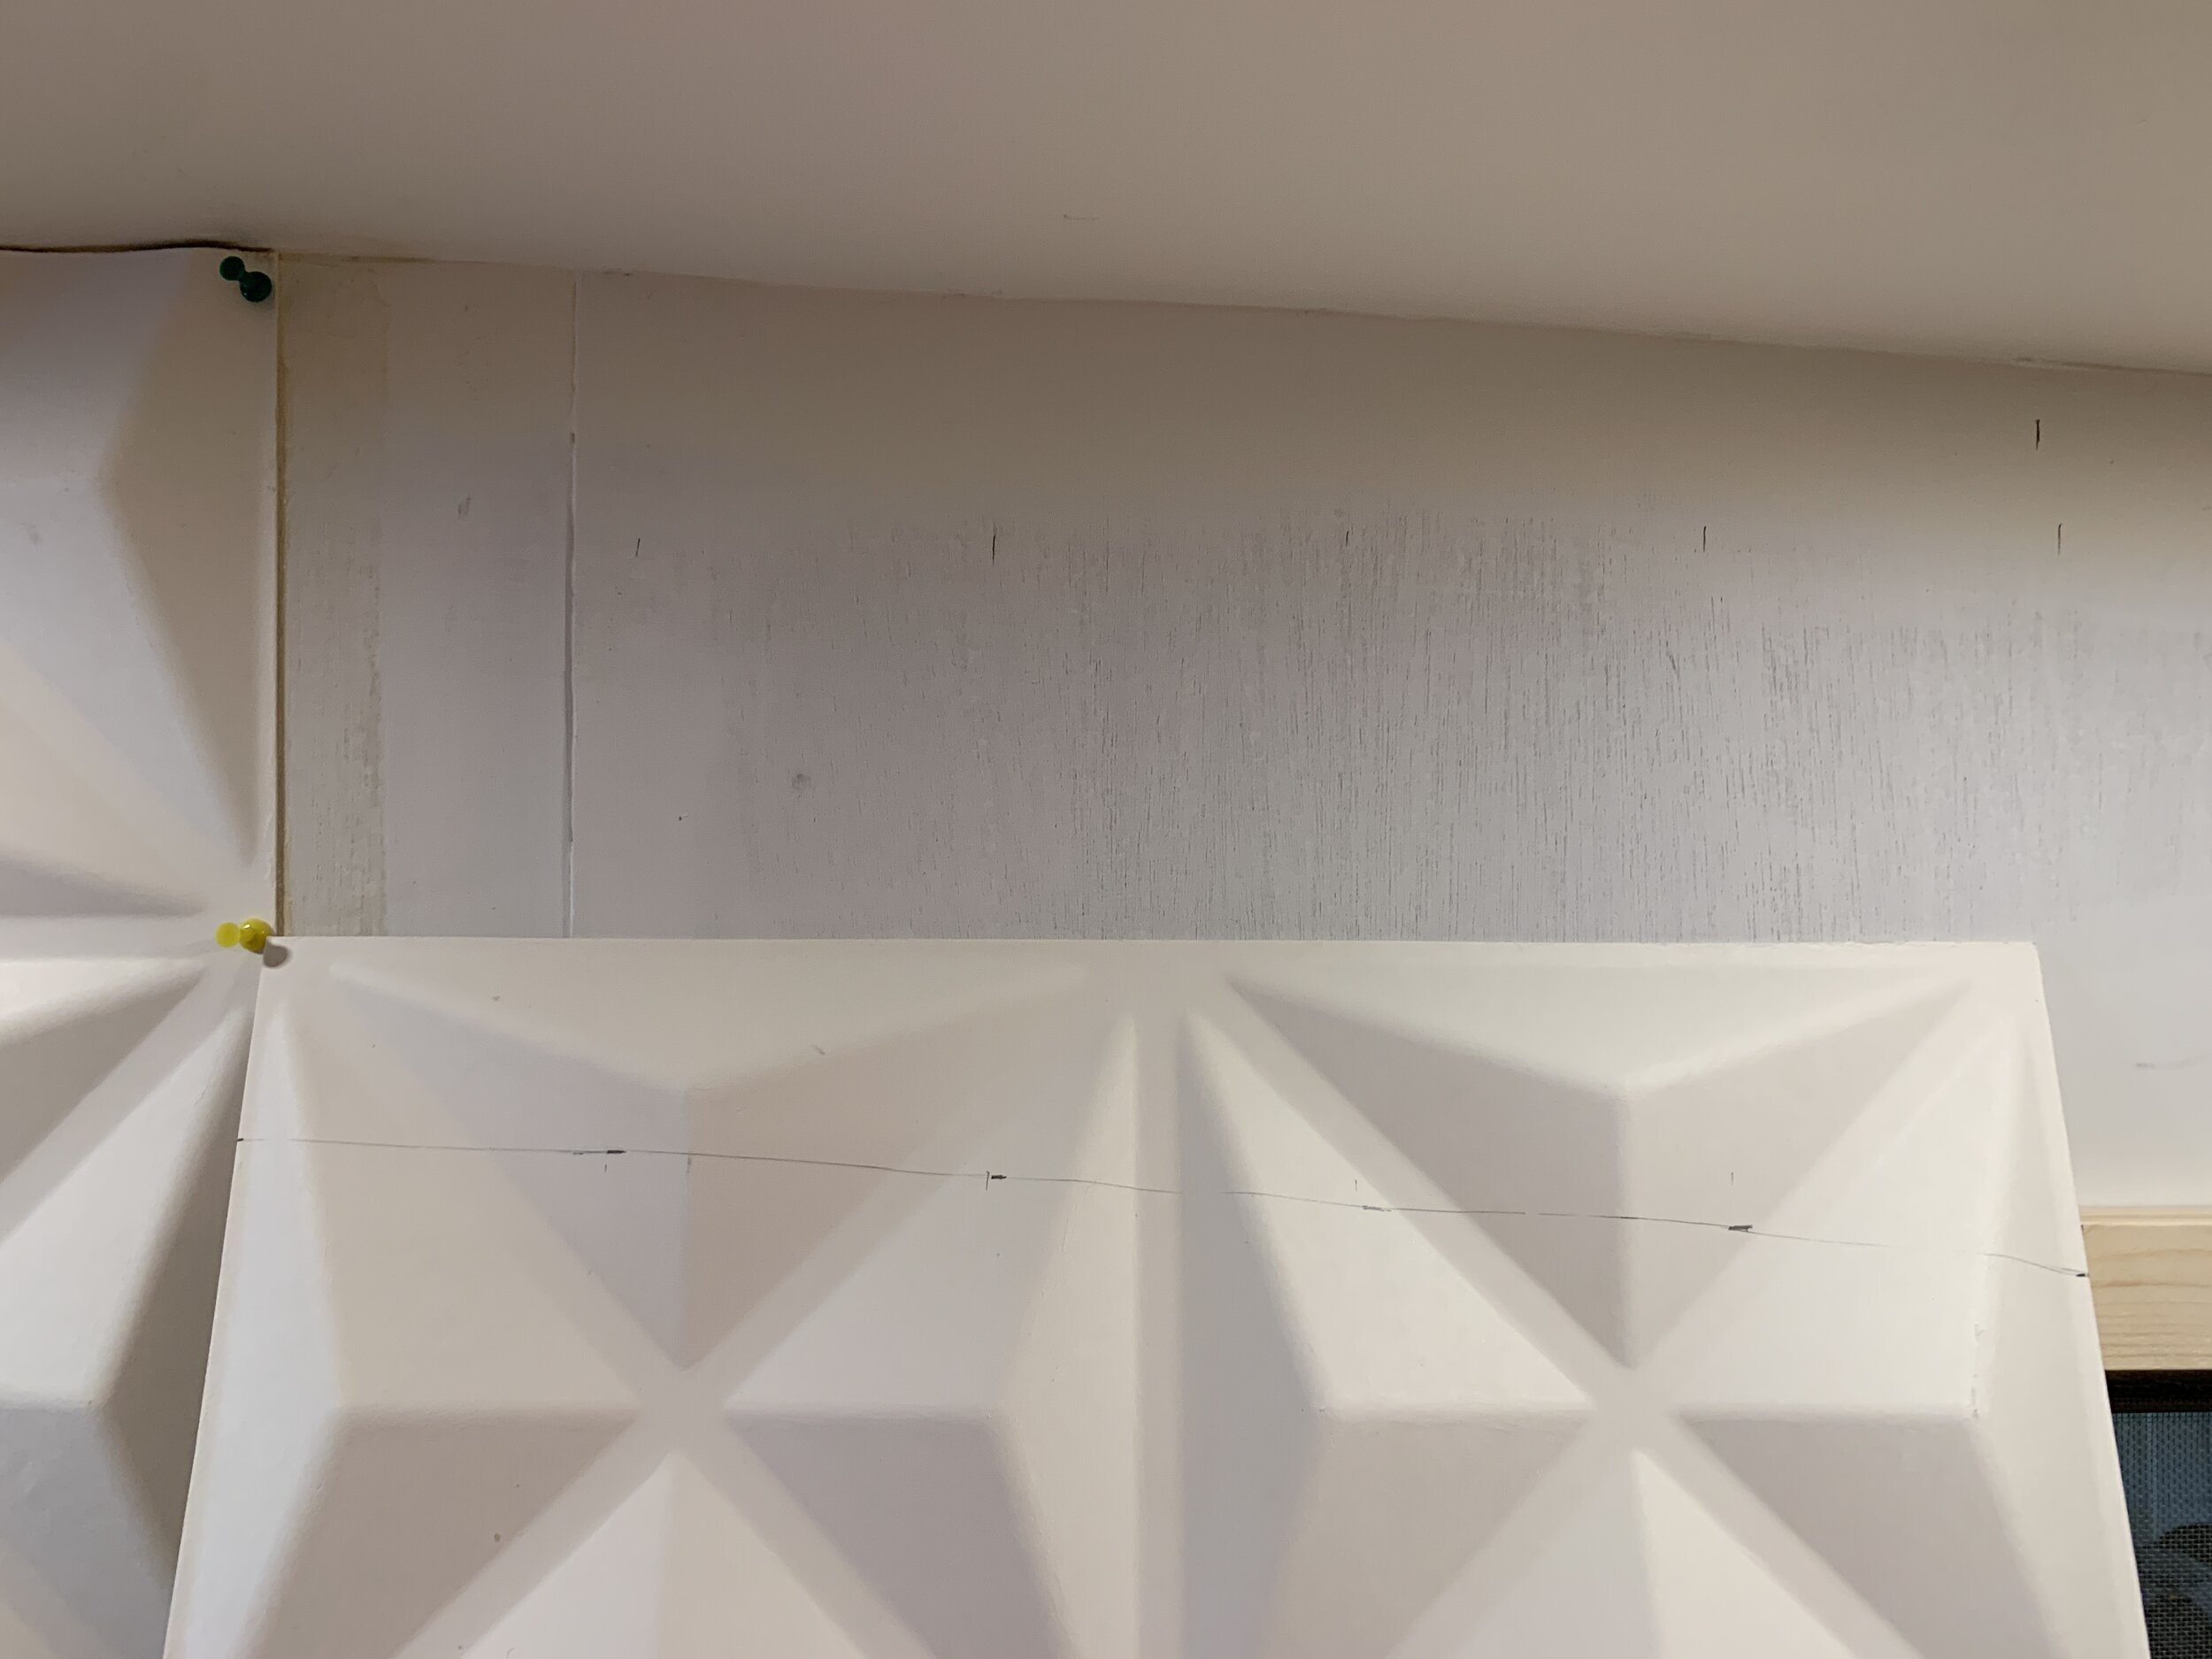
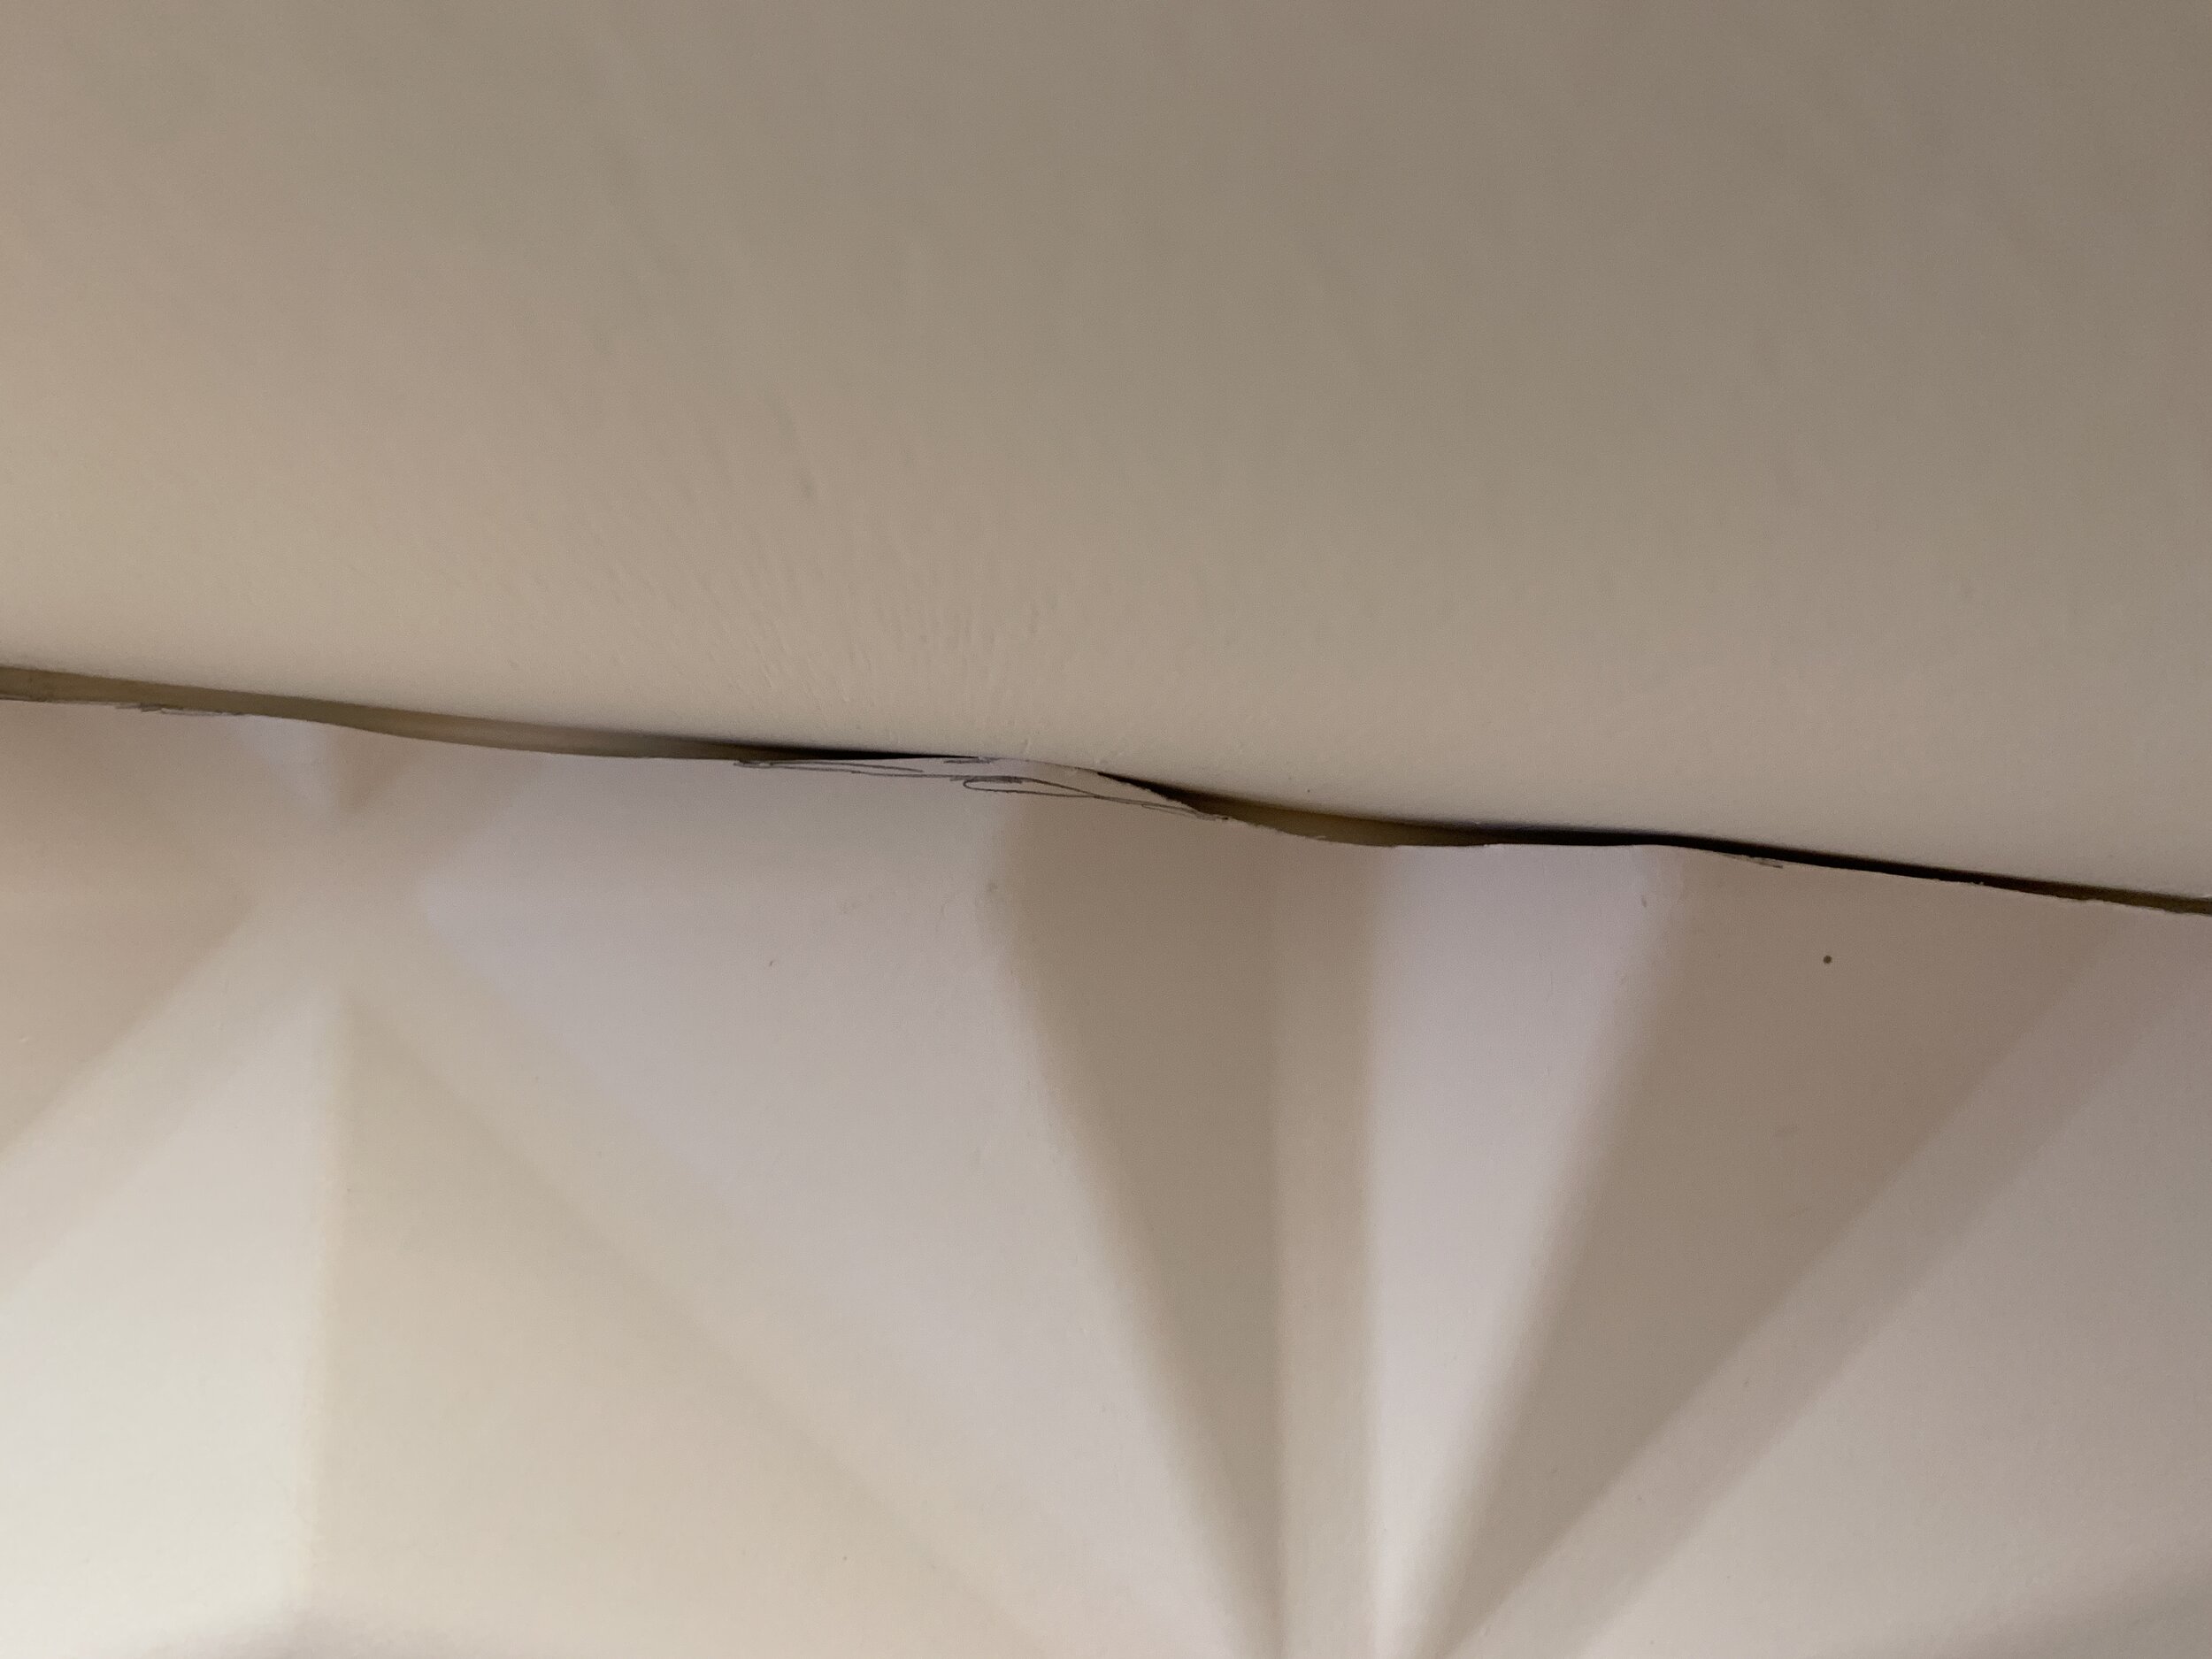
12. Leave a small gap between panels for expansion and filling. Because of the nature of our install (a flexible, temperature-changing space) and because we wanted as seamless a finish as possible, we opted to leave a small (approximately 1/16”) gap in between each of our panels that we’d later fill to hide the seams. (We’ll cover the finish work in a second post.)

13. Remove the push pins when dry. We left our wall to cure at least overnight before carefully and gently removing the push pins with needle nose pliers.

tips, tricks, lessons + stats
Getting those weird shapes just right
When trying to figure out our cuts – like how to follow the curved ceiling – we used a combination of tricks.
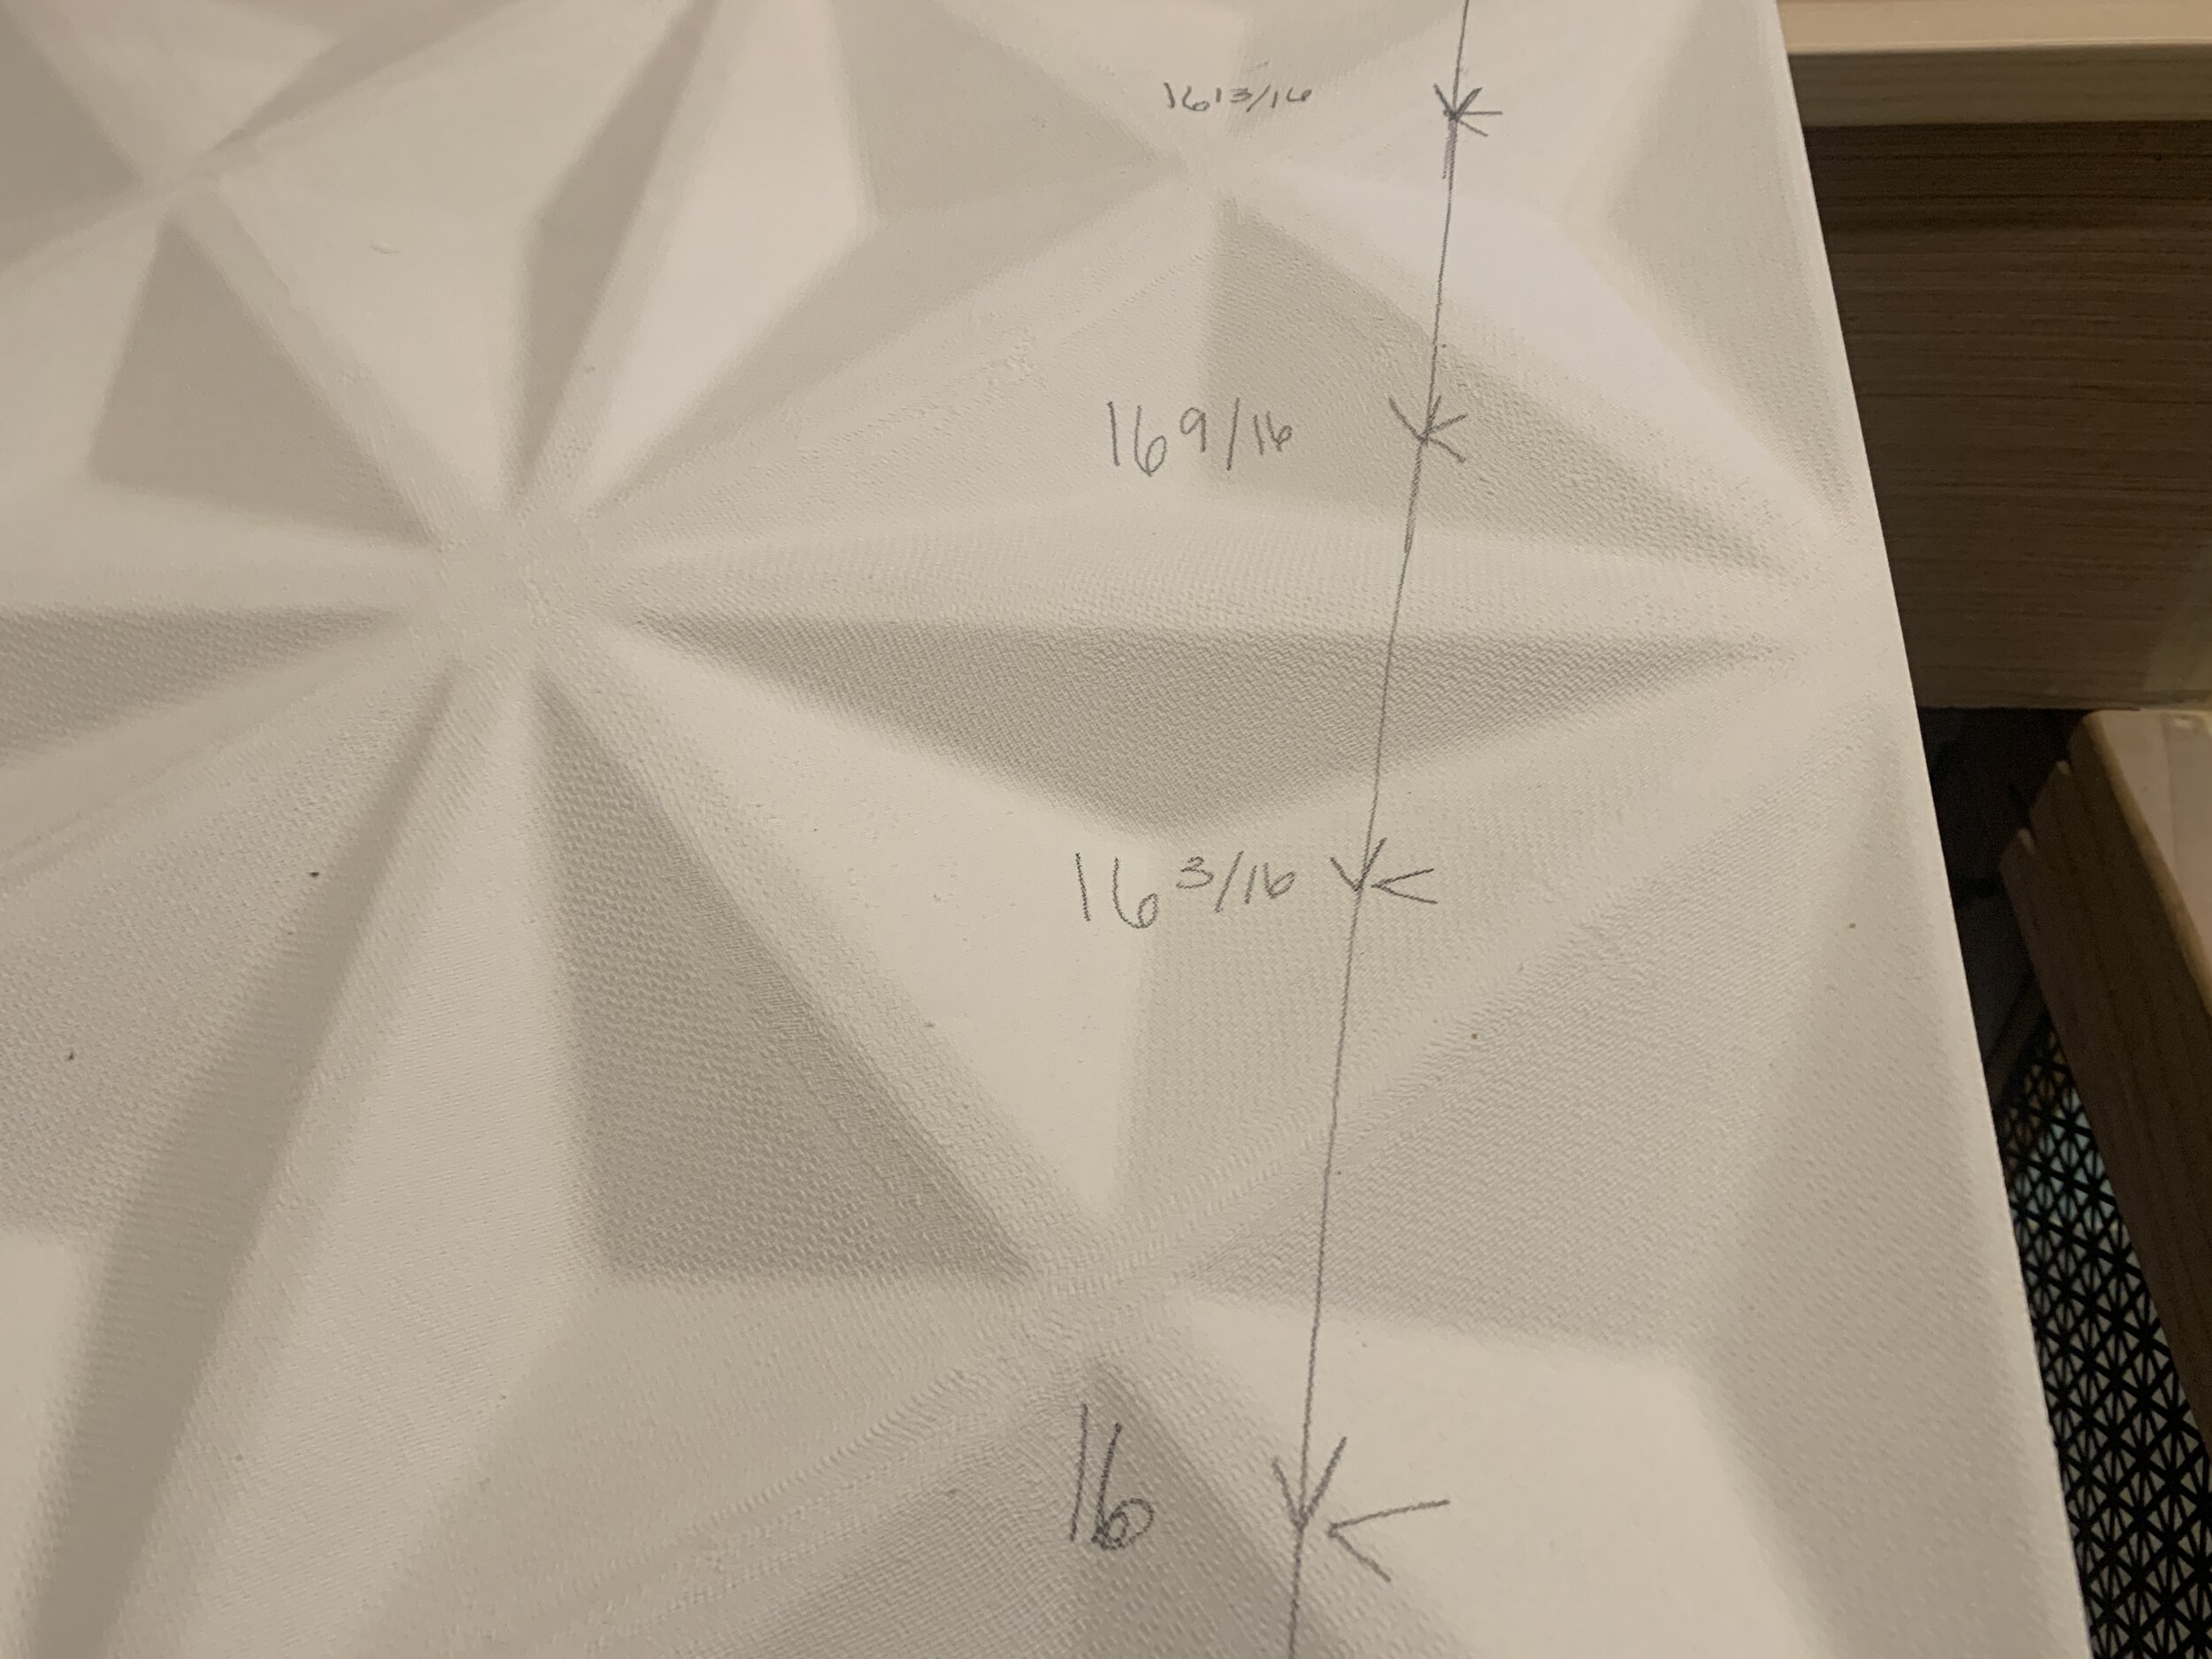
One trick we used was to make marks every 4” on the back of our panel, and take measurements from the same side every 4” on the wall. (For example, if you marked your panel every 4” from right to left, mark your wall from right to left".) The closer you mark your increments, the more accurate it will be since you’ll have more date points. Thankfully our ceiling curve was very slight so we were able to go every 4”. If we had a tight curve, we’d go with more frequent measurements (like every 1”, e.g.).
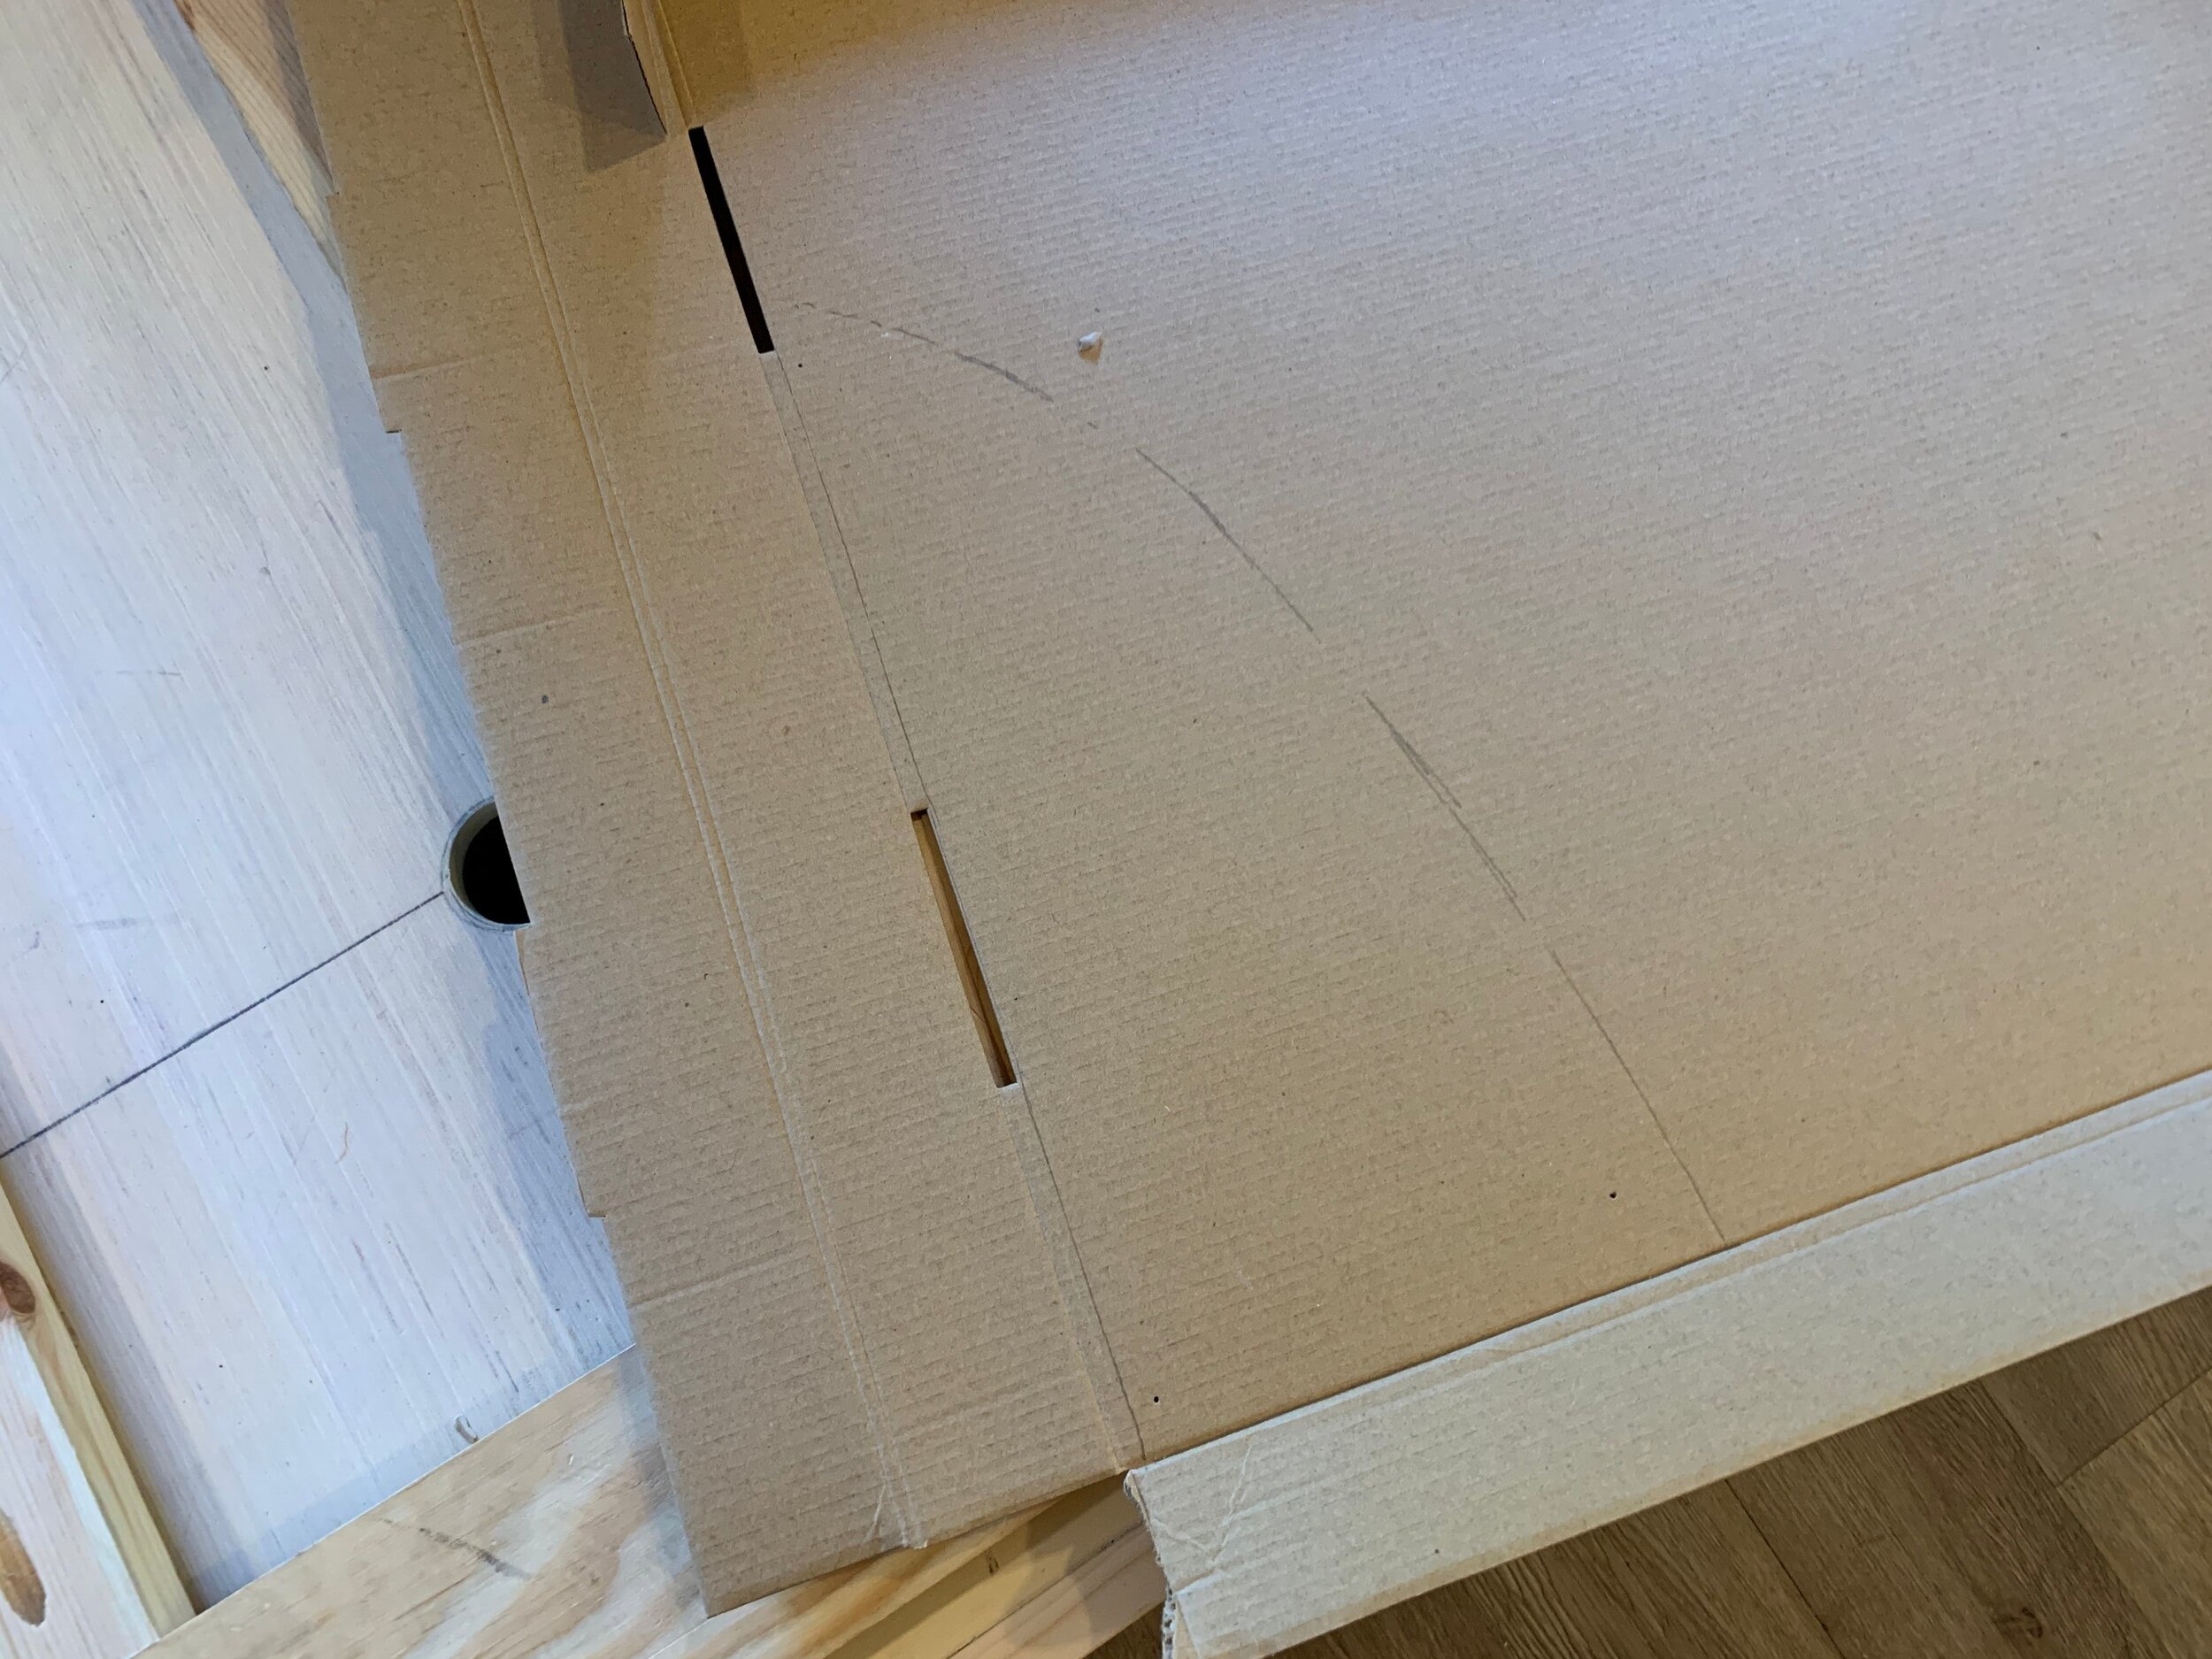
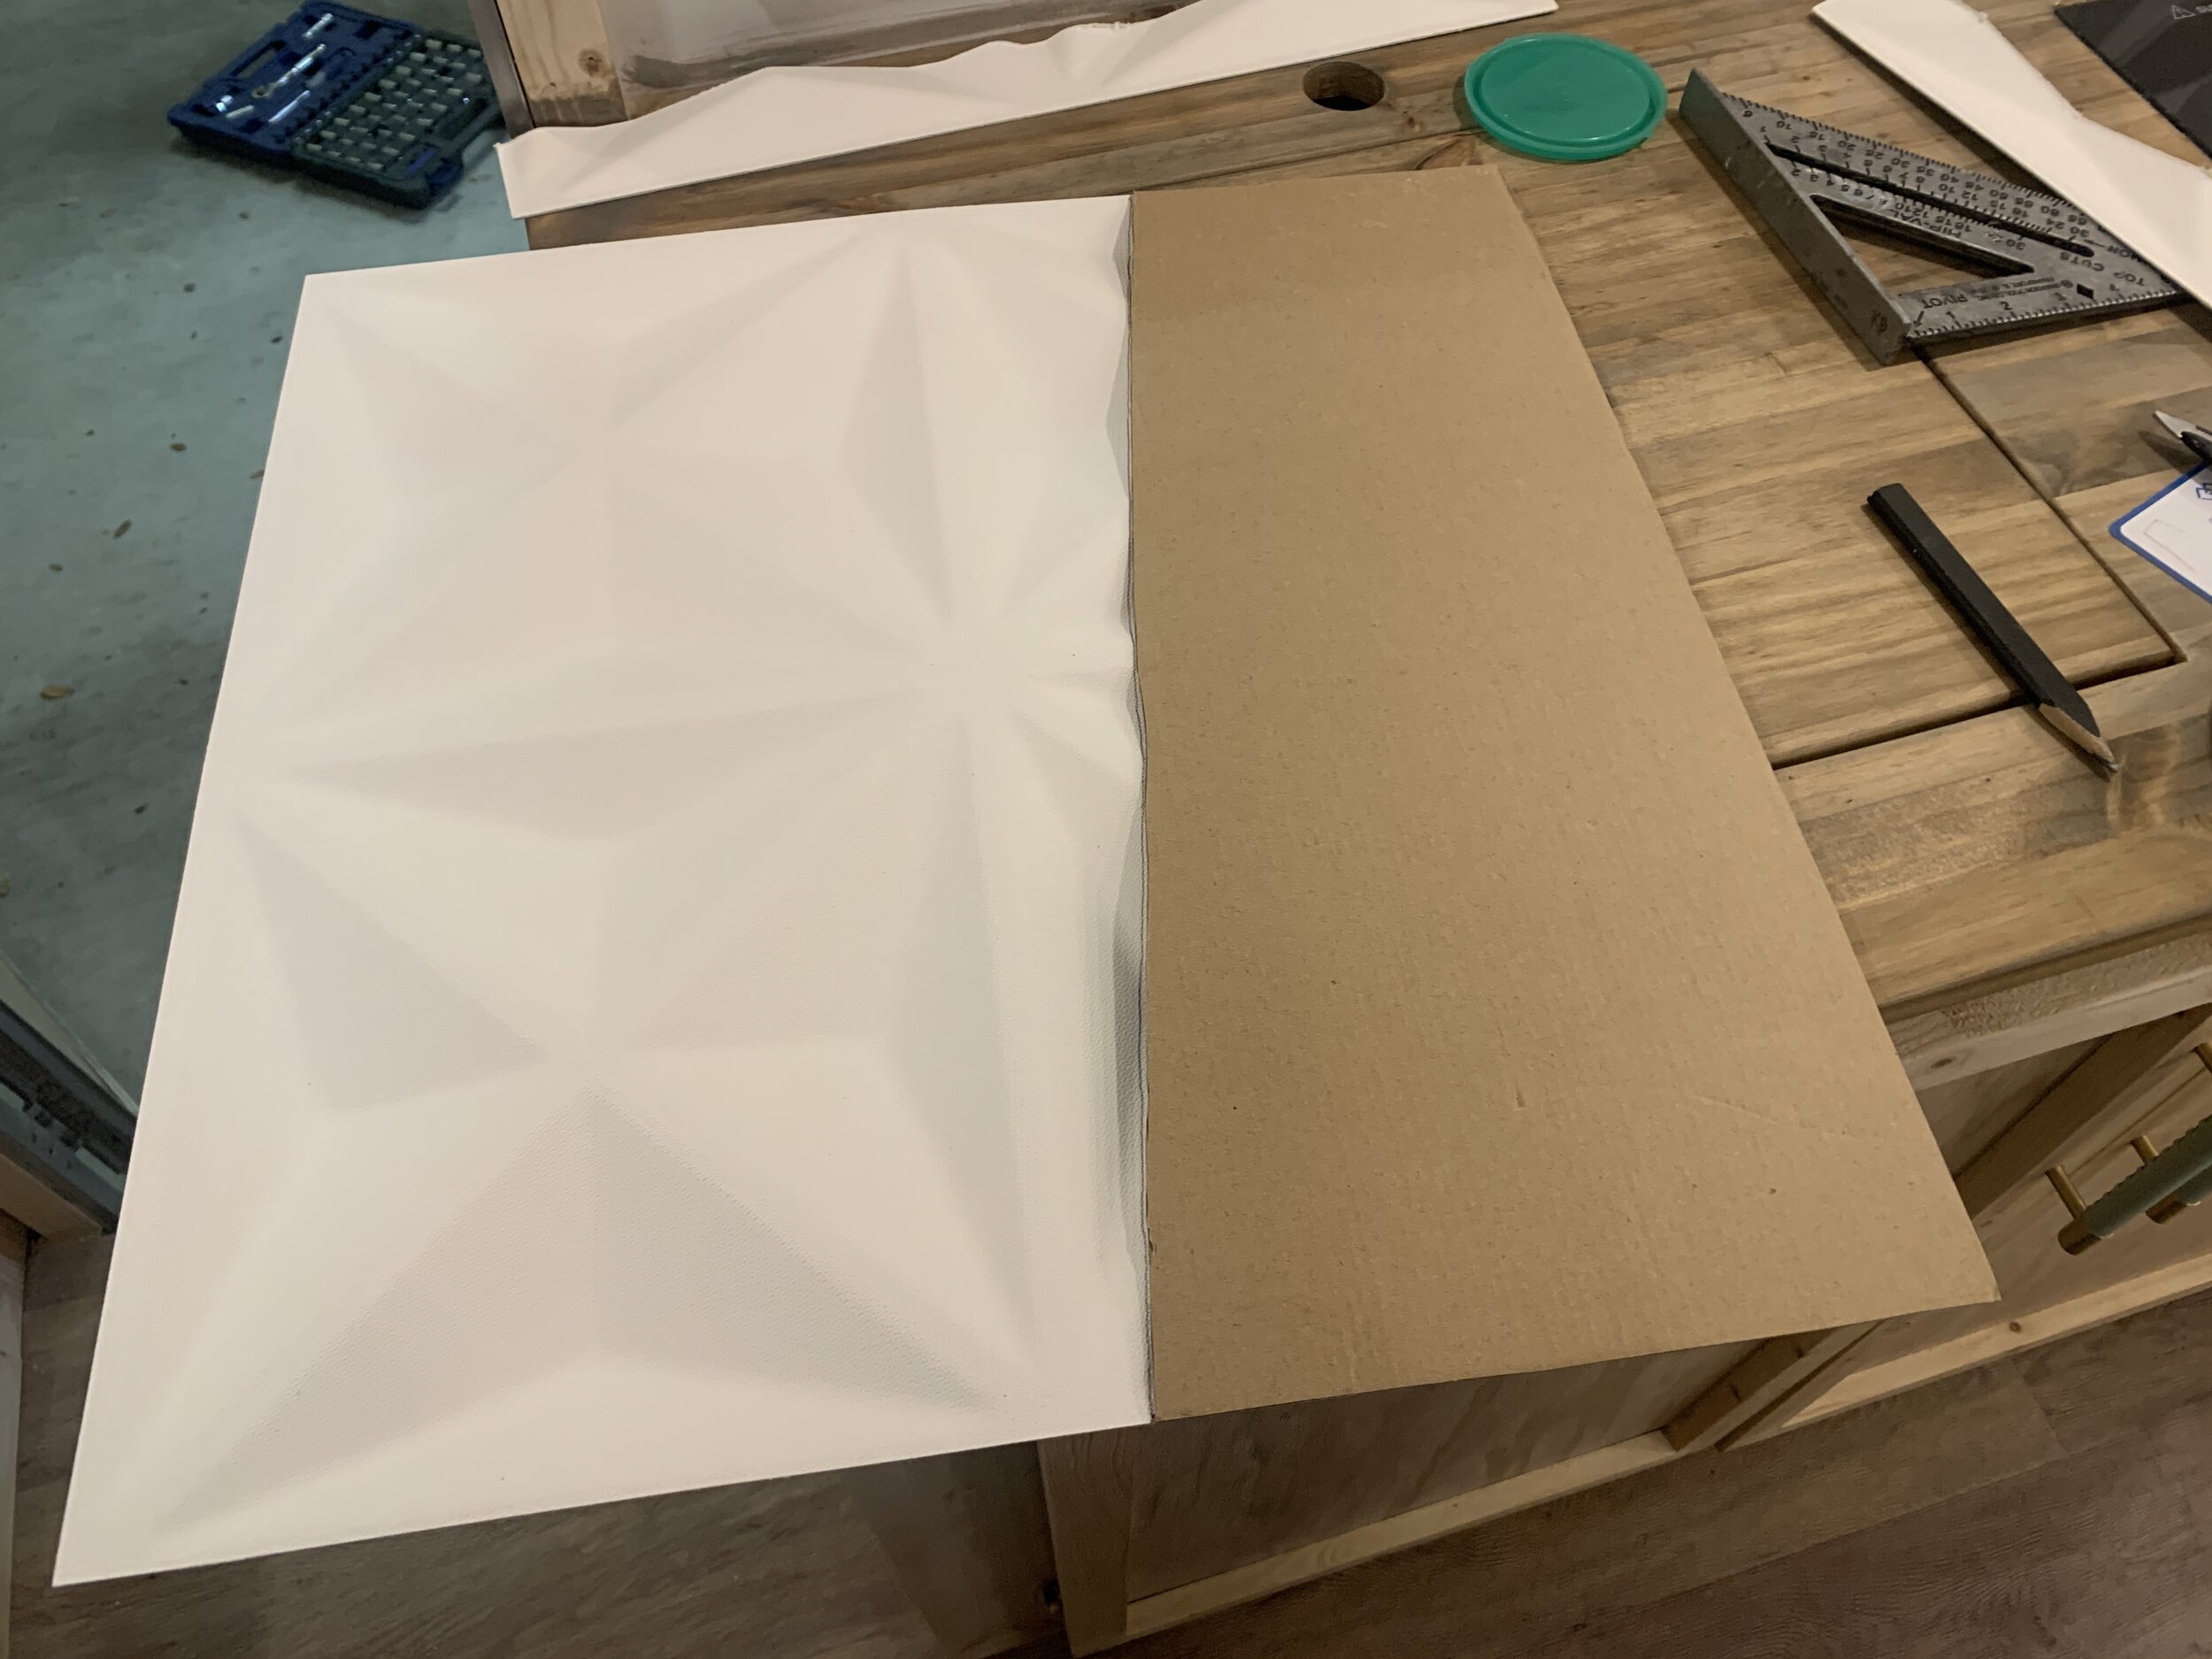
The other thing we did was fit a template. We used pieces of brown paper (the roll we bought waaaay back when to protect our floors after install) as well as pieces of cardboard we cut from the wall flat boxes. After we got the perfect size and shape on our template piece(s), we traced it out onto the back of our panel.
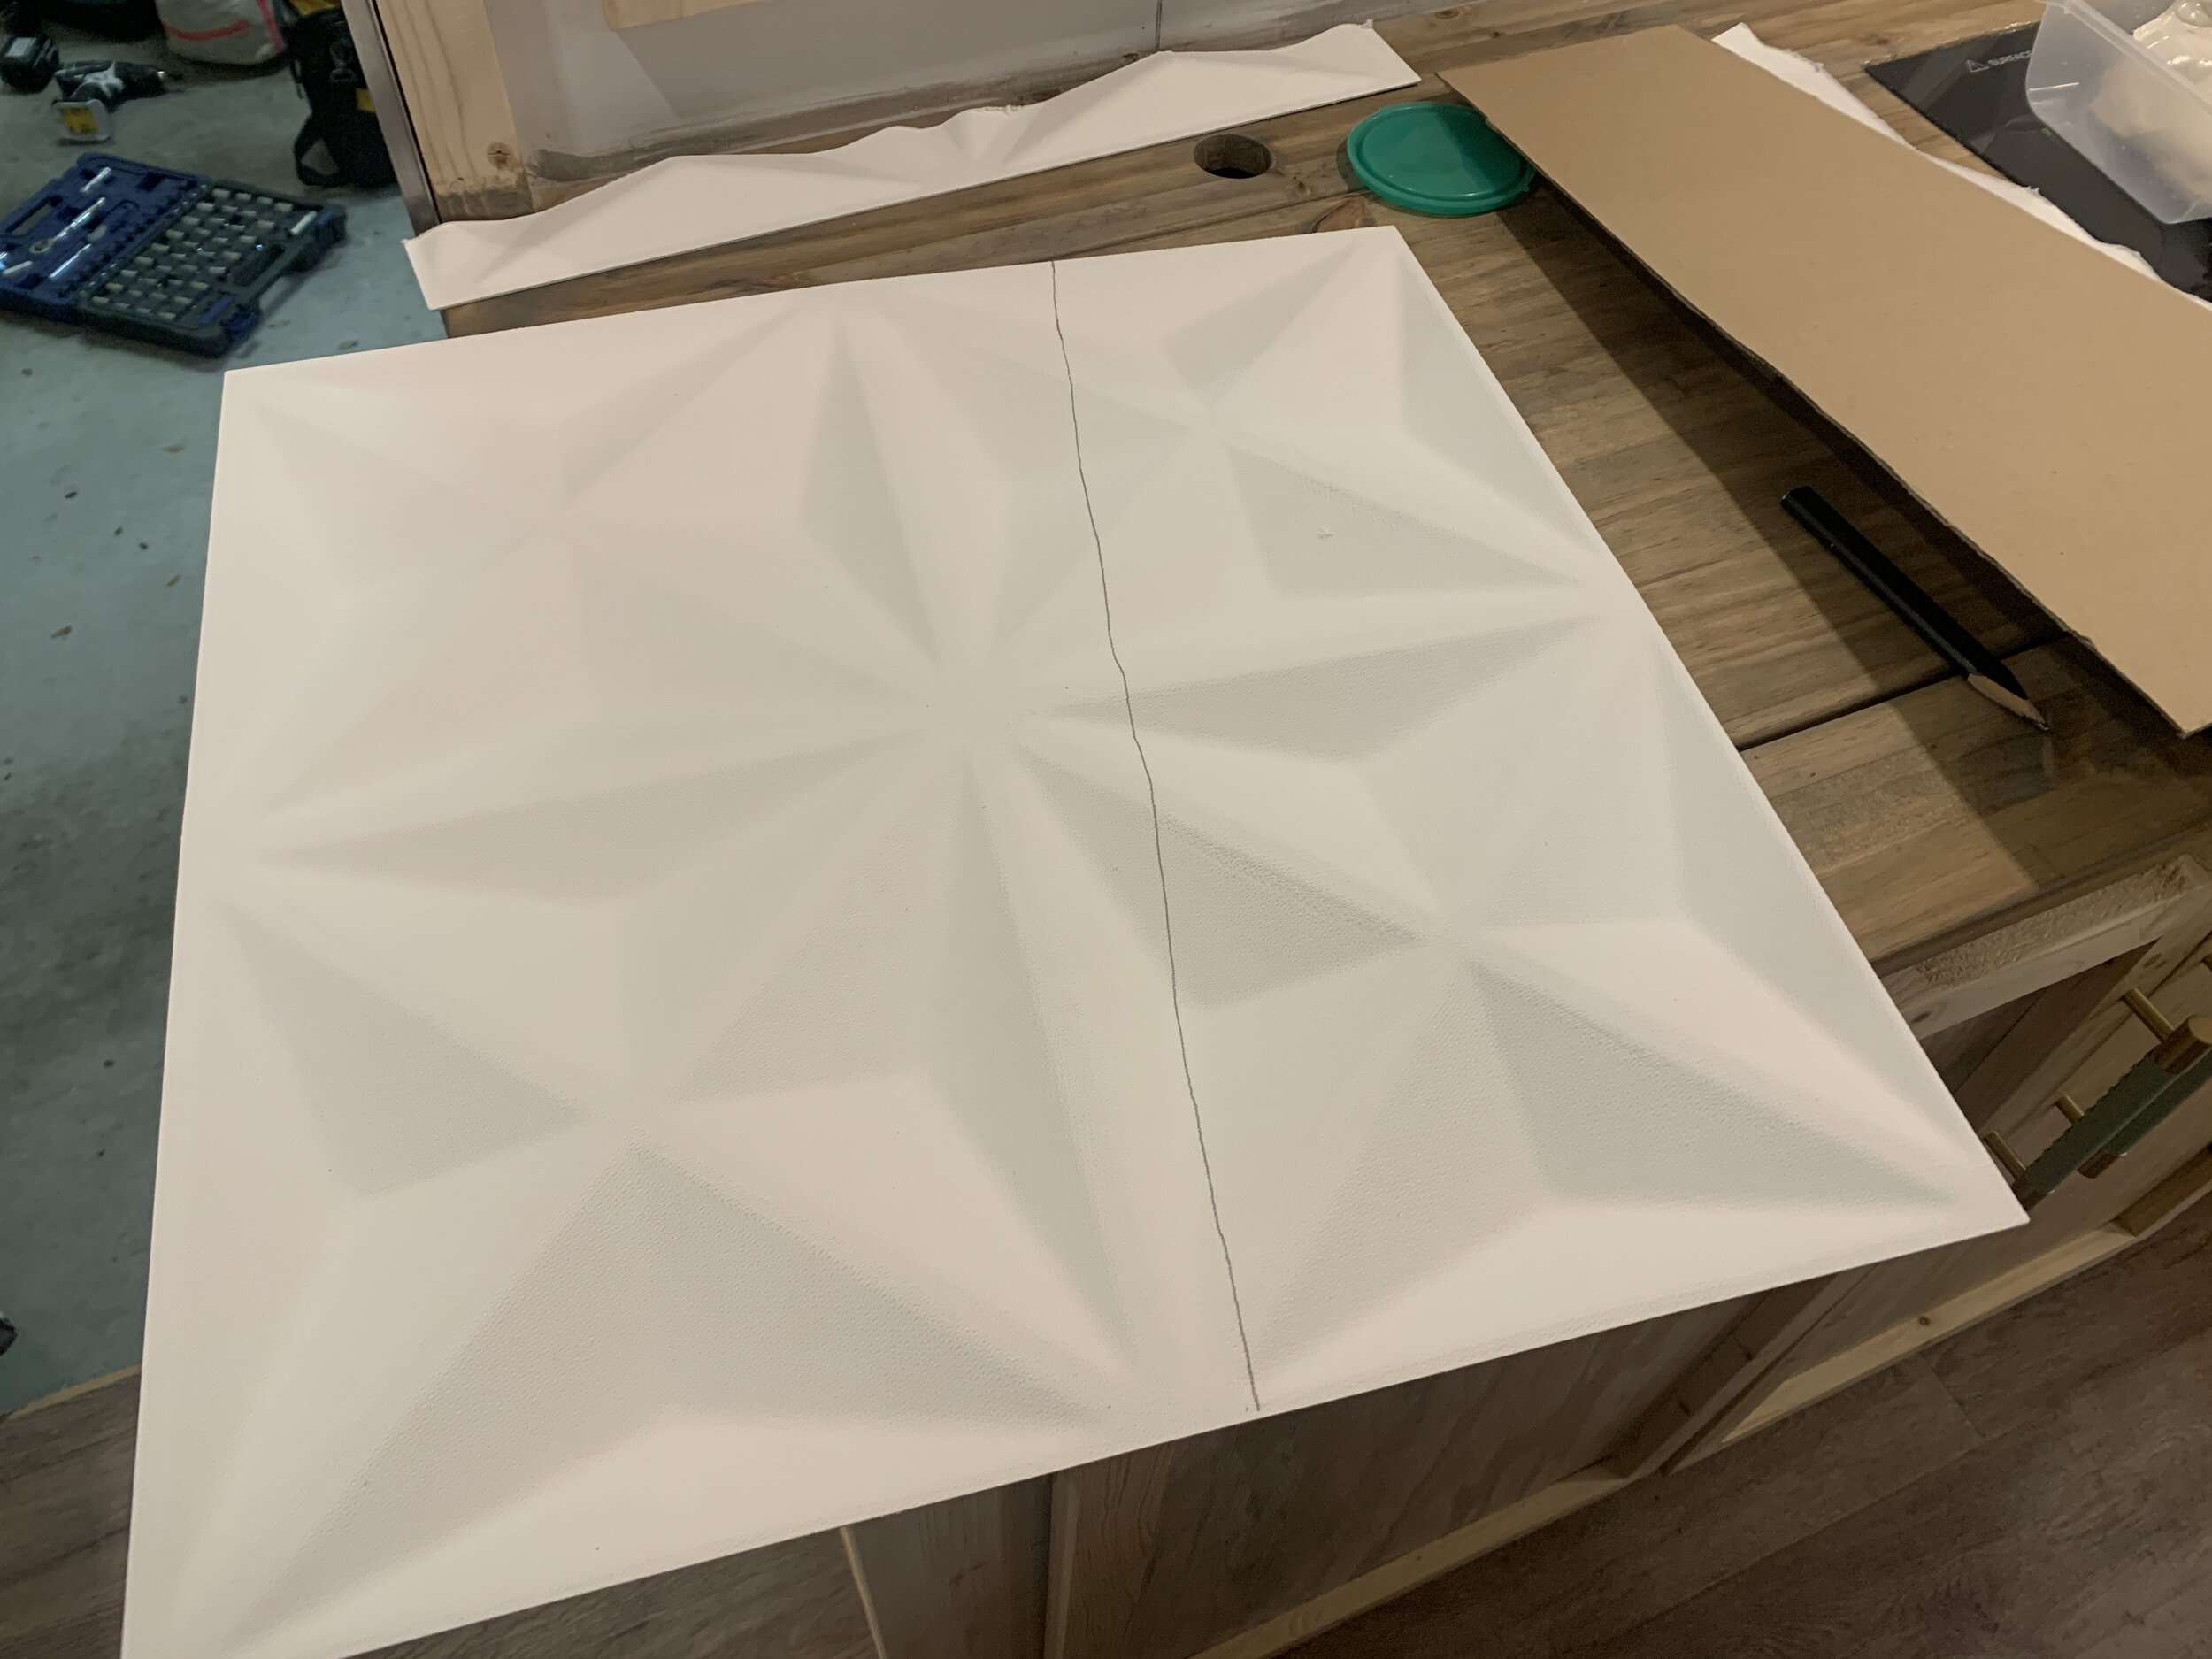
Lastly, when we had a cut that was just a little off, we just held up the panel and figured out where it was hitting and trimmed as needed with scissors until it fit perfectly.
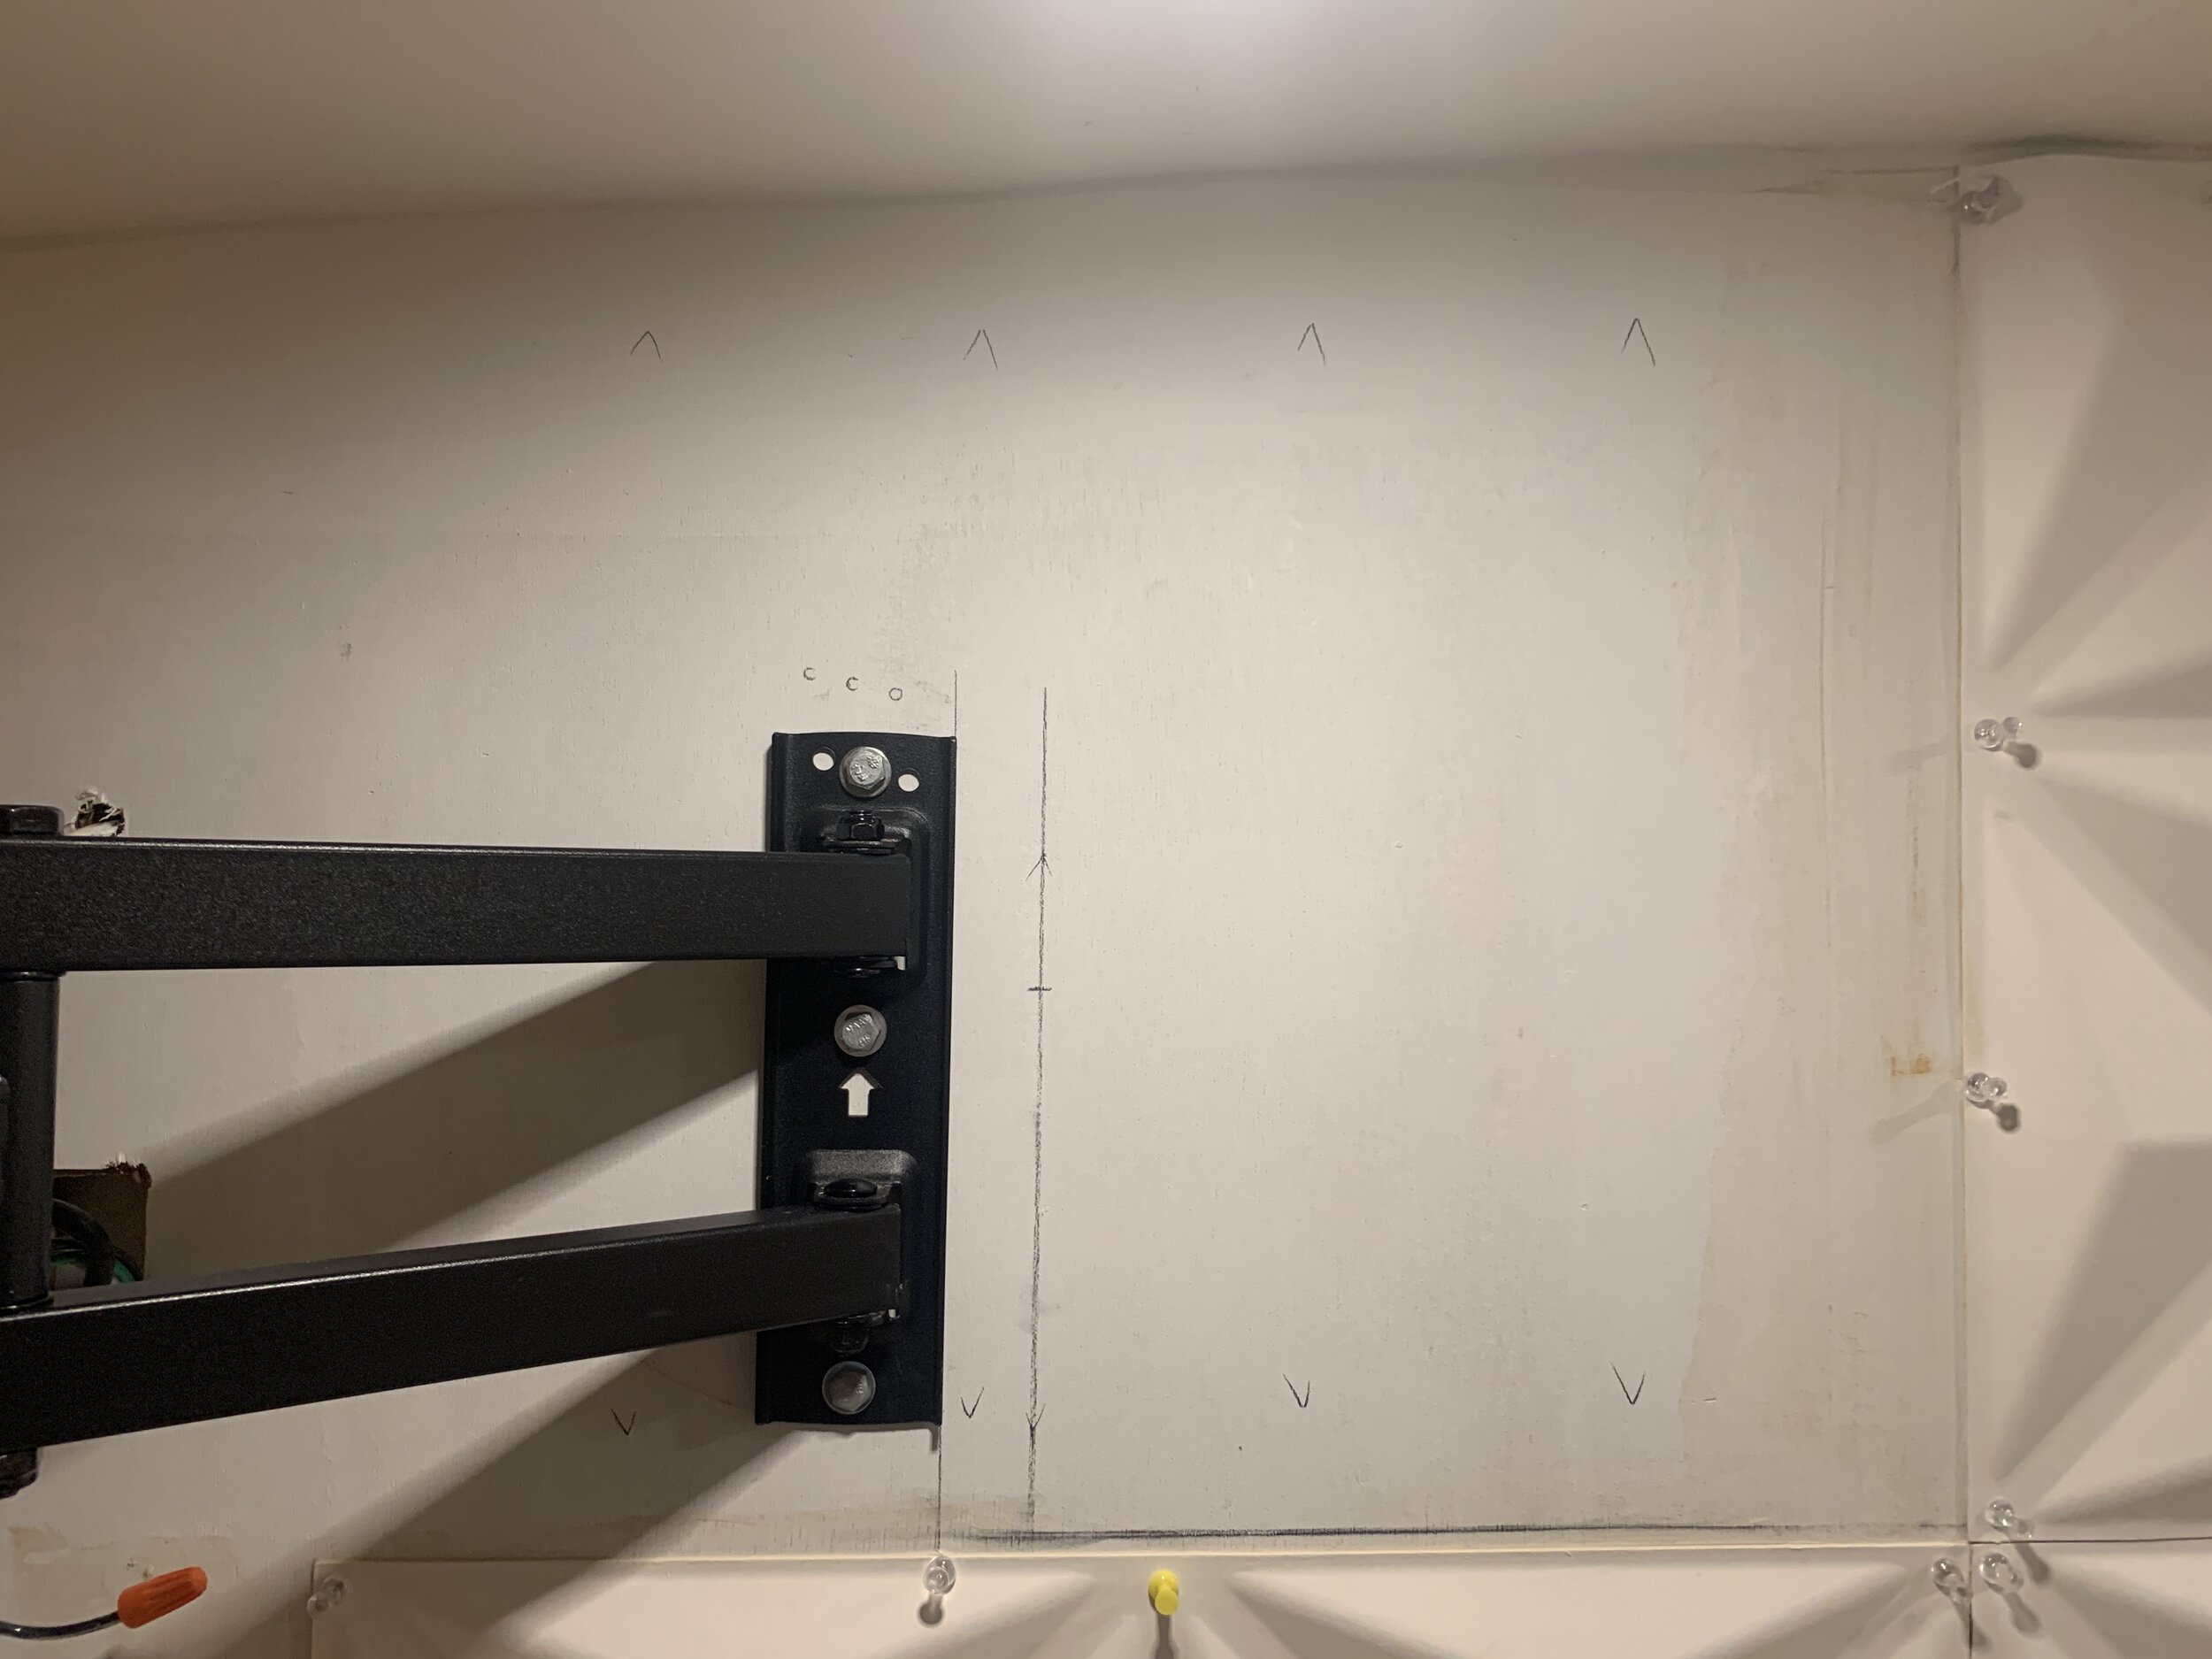
Cutting holes in panels
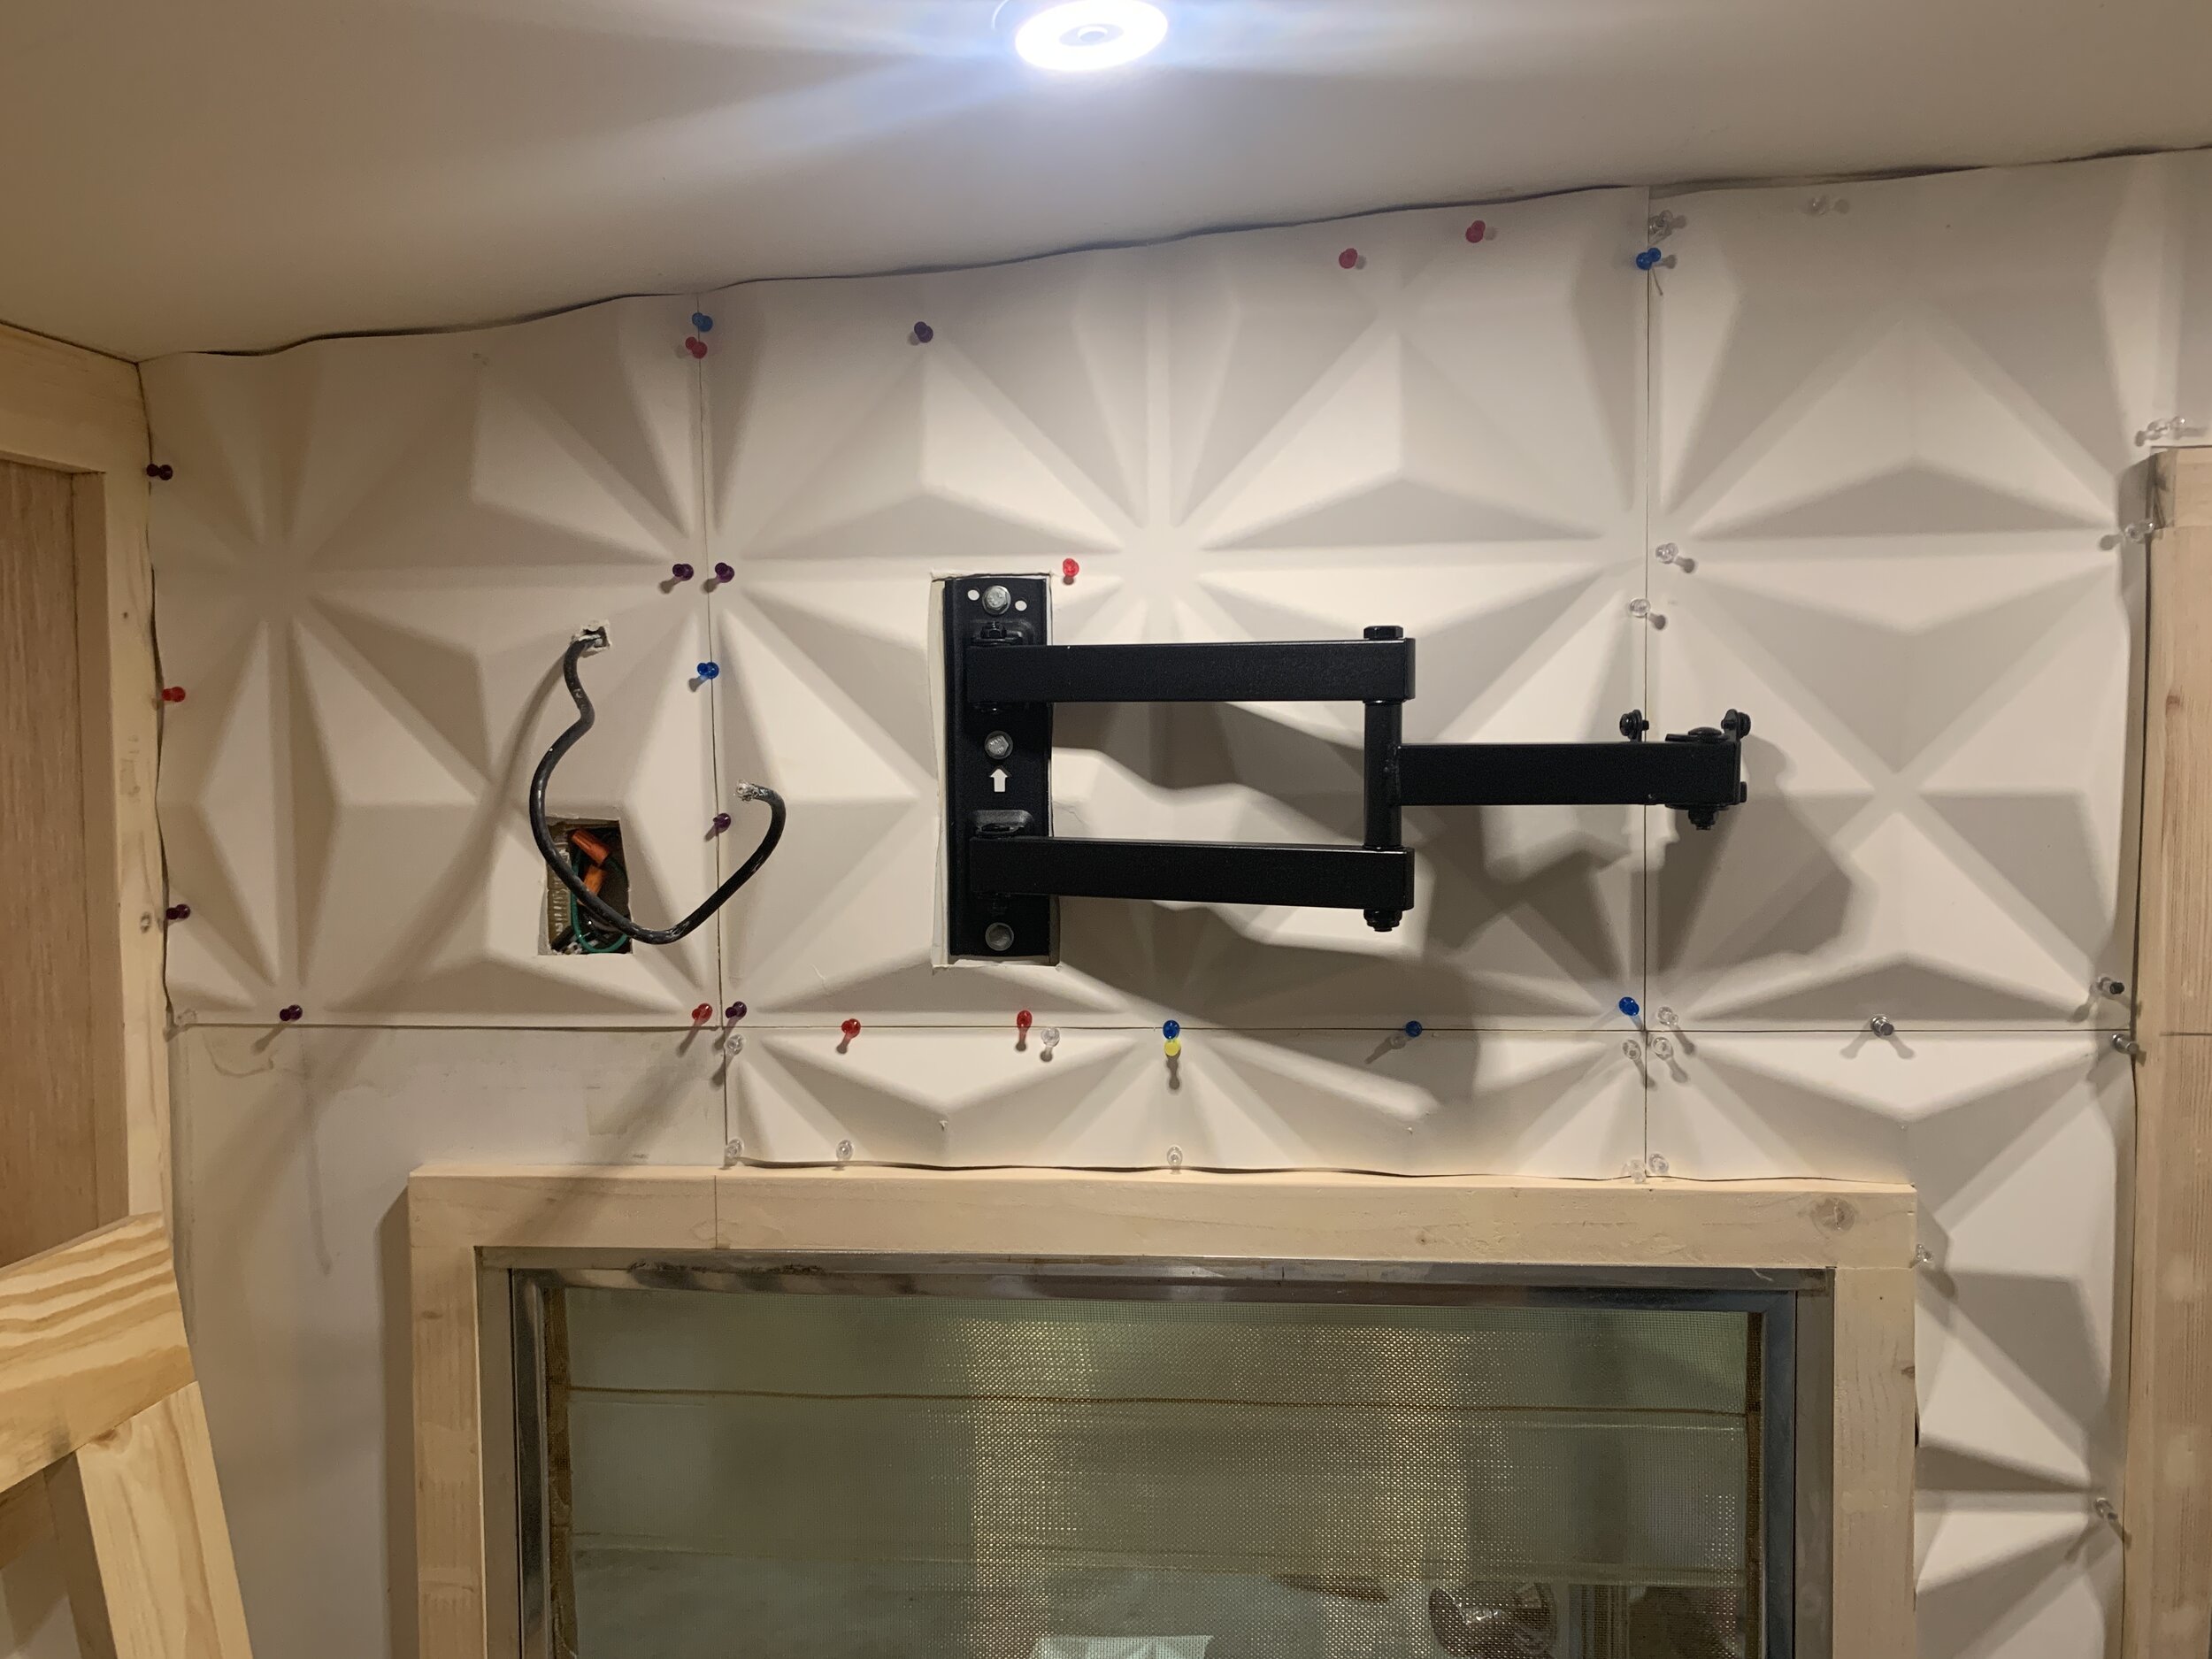
We installed a TV mount and had to cut a space for it (and an electrical outlet) in the inside of a couple panels. To do that, after marking out the location, we used a large drill bit to make a pilot hole big enough for our scissors to fit in. Then we just cut along the lines and sanded the edges like normal.
Check early, check often
As we worked, especially the later we got in the day, we caught ourselves making dumb mistakes. Because literally not one of our 26 wall panels is a whole piece, we had a lot of puzzle piecing to do and about three times realized we’d cut out the wrong part of the panel. (Often areas that required a center portion of the panel around a window or the door and we just brain farted and hacked into the side.) Don’t forget to take a step back every panel or so and make sure your pattern is what you think it is.
This is also your friendly reminder as to why the extra 10% is important. You never think you’ll make mistakes, and then you do.
Don’t blast holes in your wall
We have already covered this, but I think it’s worth mentioning again because after the amount of time we spent patching hundreds of holes we definitely did not want to damage the now-waterproof exterior. The push pins worked great. Push pins > finish nails. (In this case. I’m still totally ride or die for my cordless Dewalt brad nailer and will use it any time I get the chance.)

Our first wall panel after our initial attempt. The holes on the bottom/left are from when we tried to use the nail gun to hold the panel in place while it dried. We switched to push pins after we came back the following weekend when this picture was taken. Fun fact: the left side of this particular wall panel is hiding a hump in the wall from the back of our porch light. With this 3D wall, you’d never be able to tell this section of wall was wonky.
3D wall panel install stats
There are 26 panels total on this one wall.
Not one panel is a whole piece. They all needed some kind of cut made to them.
It took us about 30 minutes per panel for install (not including the days of finish work that’s currently still happening).
(That’s an estimated 780 minutes. Or 13 hours. Not that anyone is counting…)
We lost count of the amount of push pins we used during install.

It may seem like we’ve done this install in a weird order, since our cabinets still aren’t painted and we’ve installed the sink but not done any plumbing. In the continuing we should do A before B, B before C, but C before A routine we’ve had going on throughout the entire renovation process, we didn’t want to block access to the wall with the faucet or accidentally sling panel adhesive, etc. on the fixtures and painted cabinets so we opted to do the wall first.
Coming up on the blog, we’ll share the second part of the 3D wall install – the finish work, and when we get there, the paint job – as well as another different but equally beautiful feature wall we’ve got going on in the camper. In real life, we’re currently painting the furniture (!!) … and still haven’t started plumbing.
So what do you think so far? We’re dying to know if you love it as much as we do!