The Cameo Camper Renovation: Tiling a Wet Bath Floor
Hey y’all – welcome back! Or, if this is your first time here, welcome! We’re so happy you’ve found us!
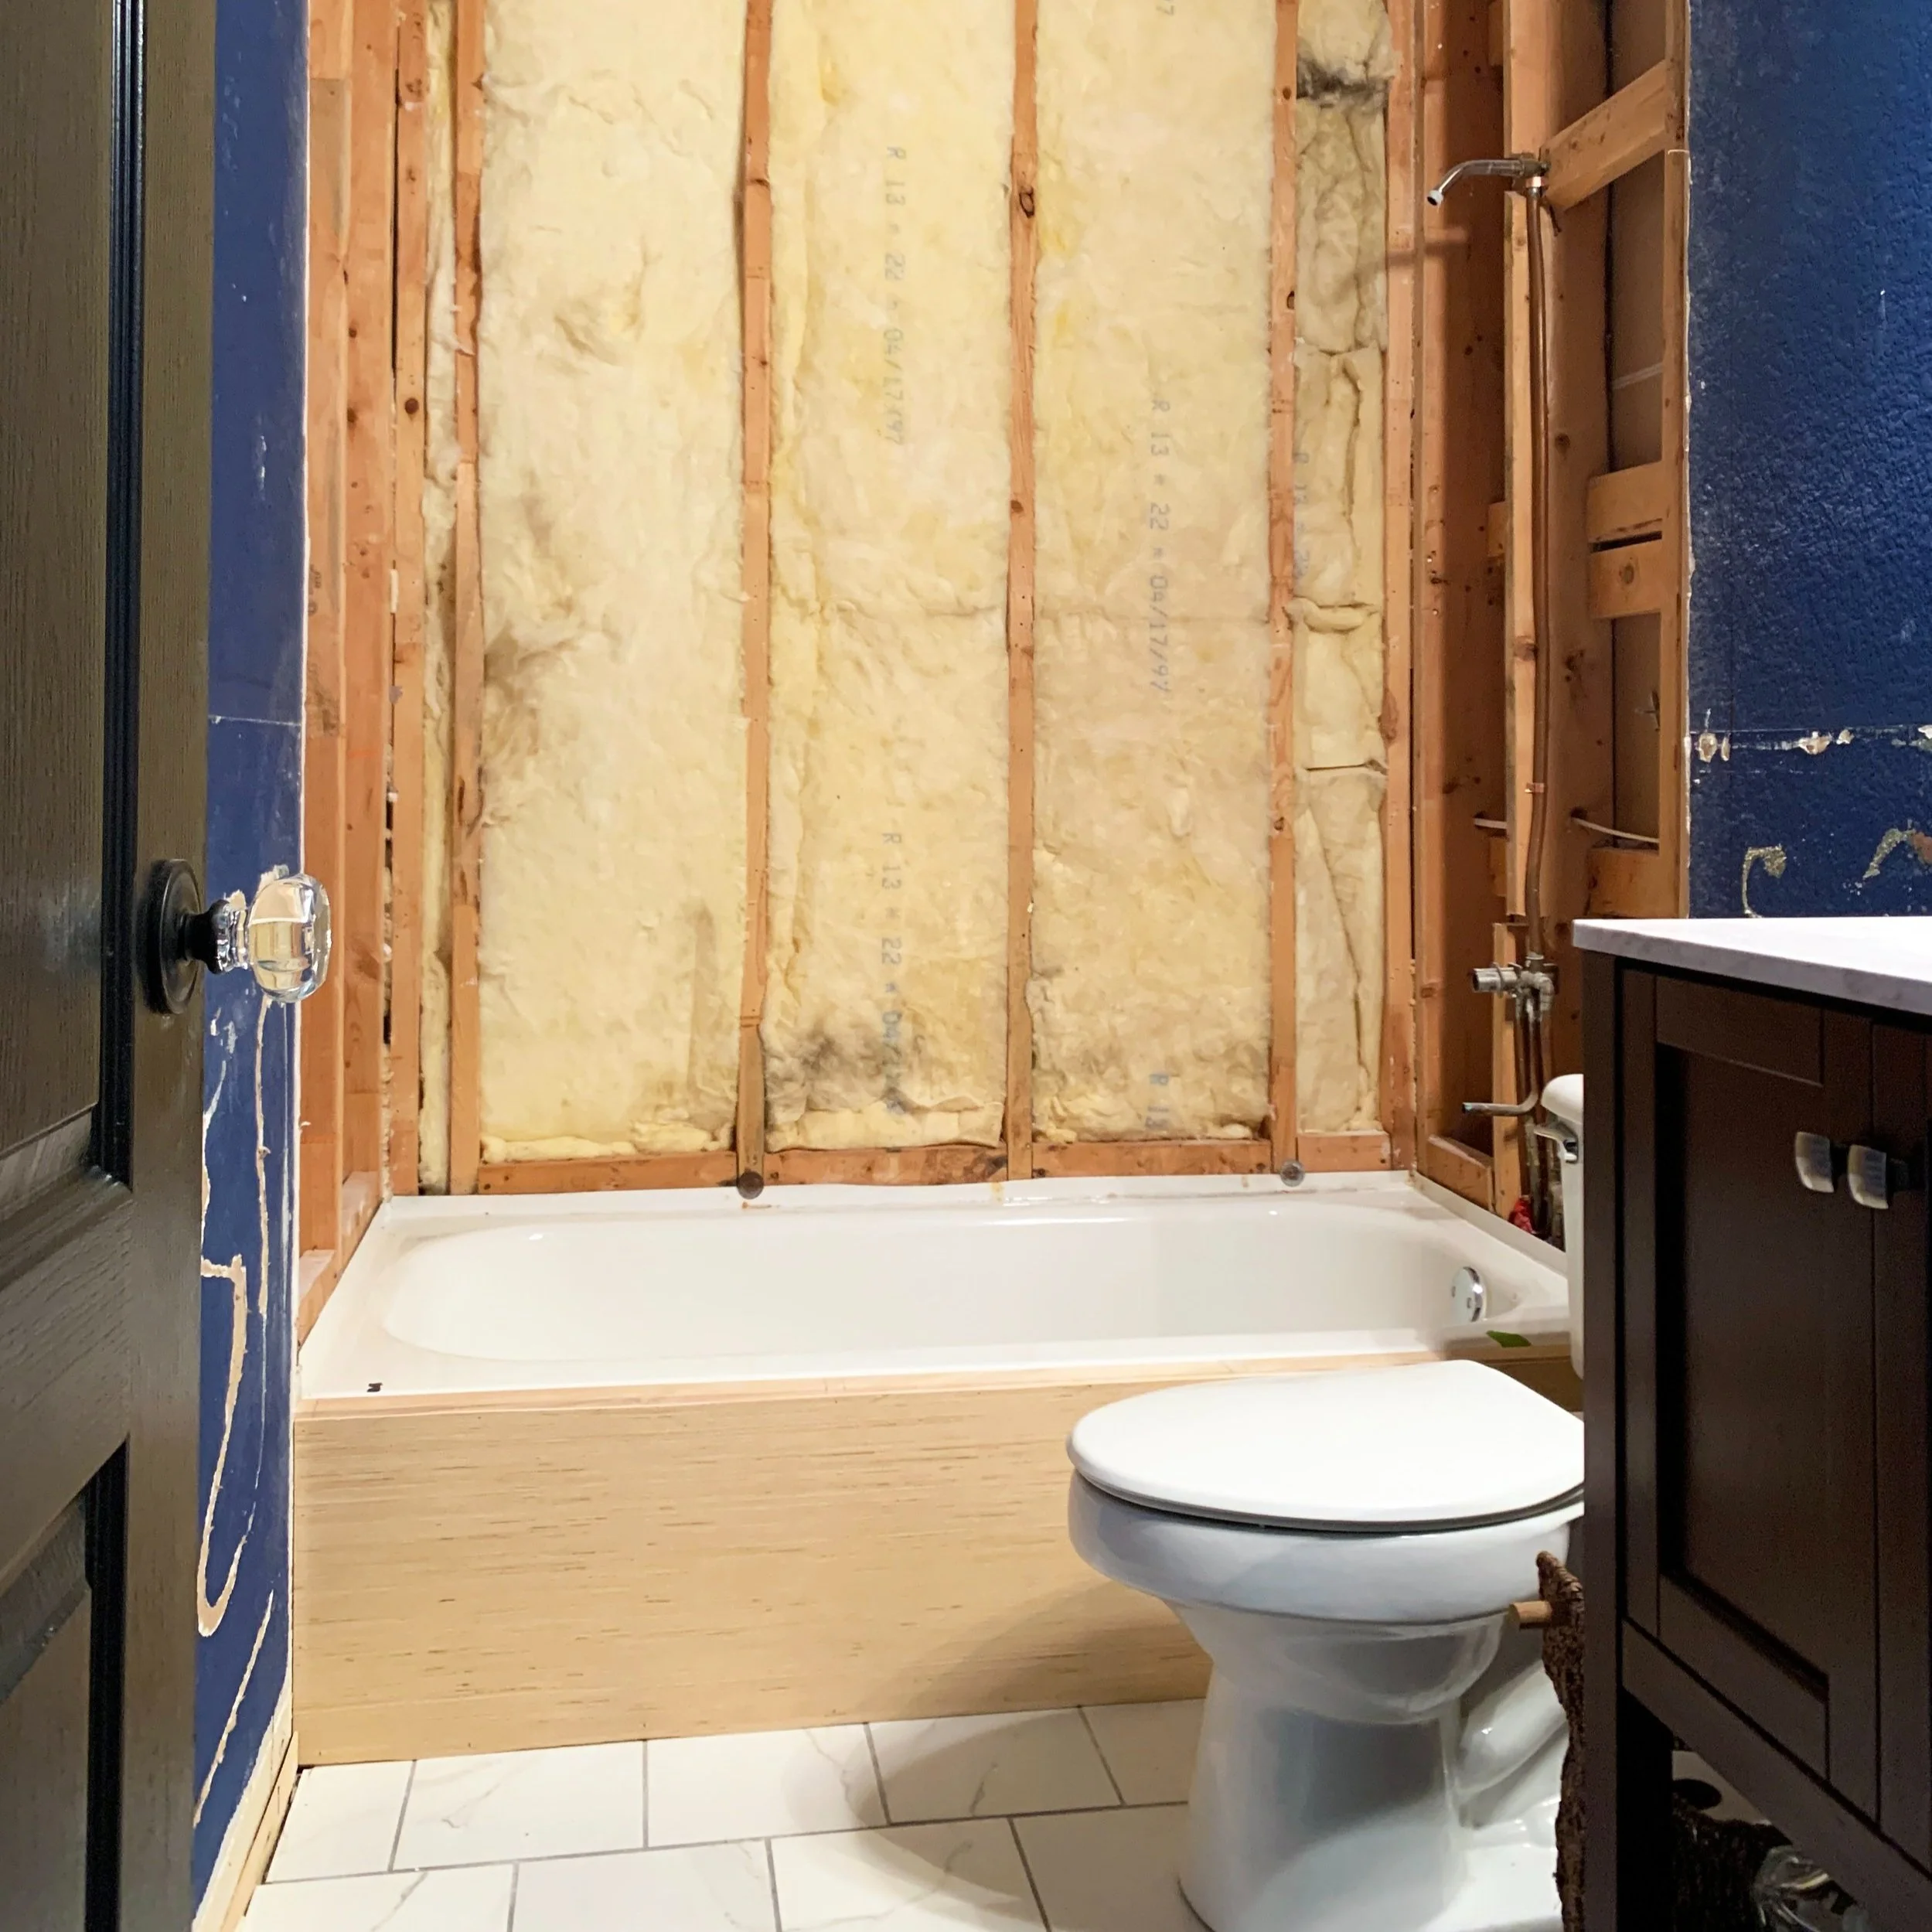
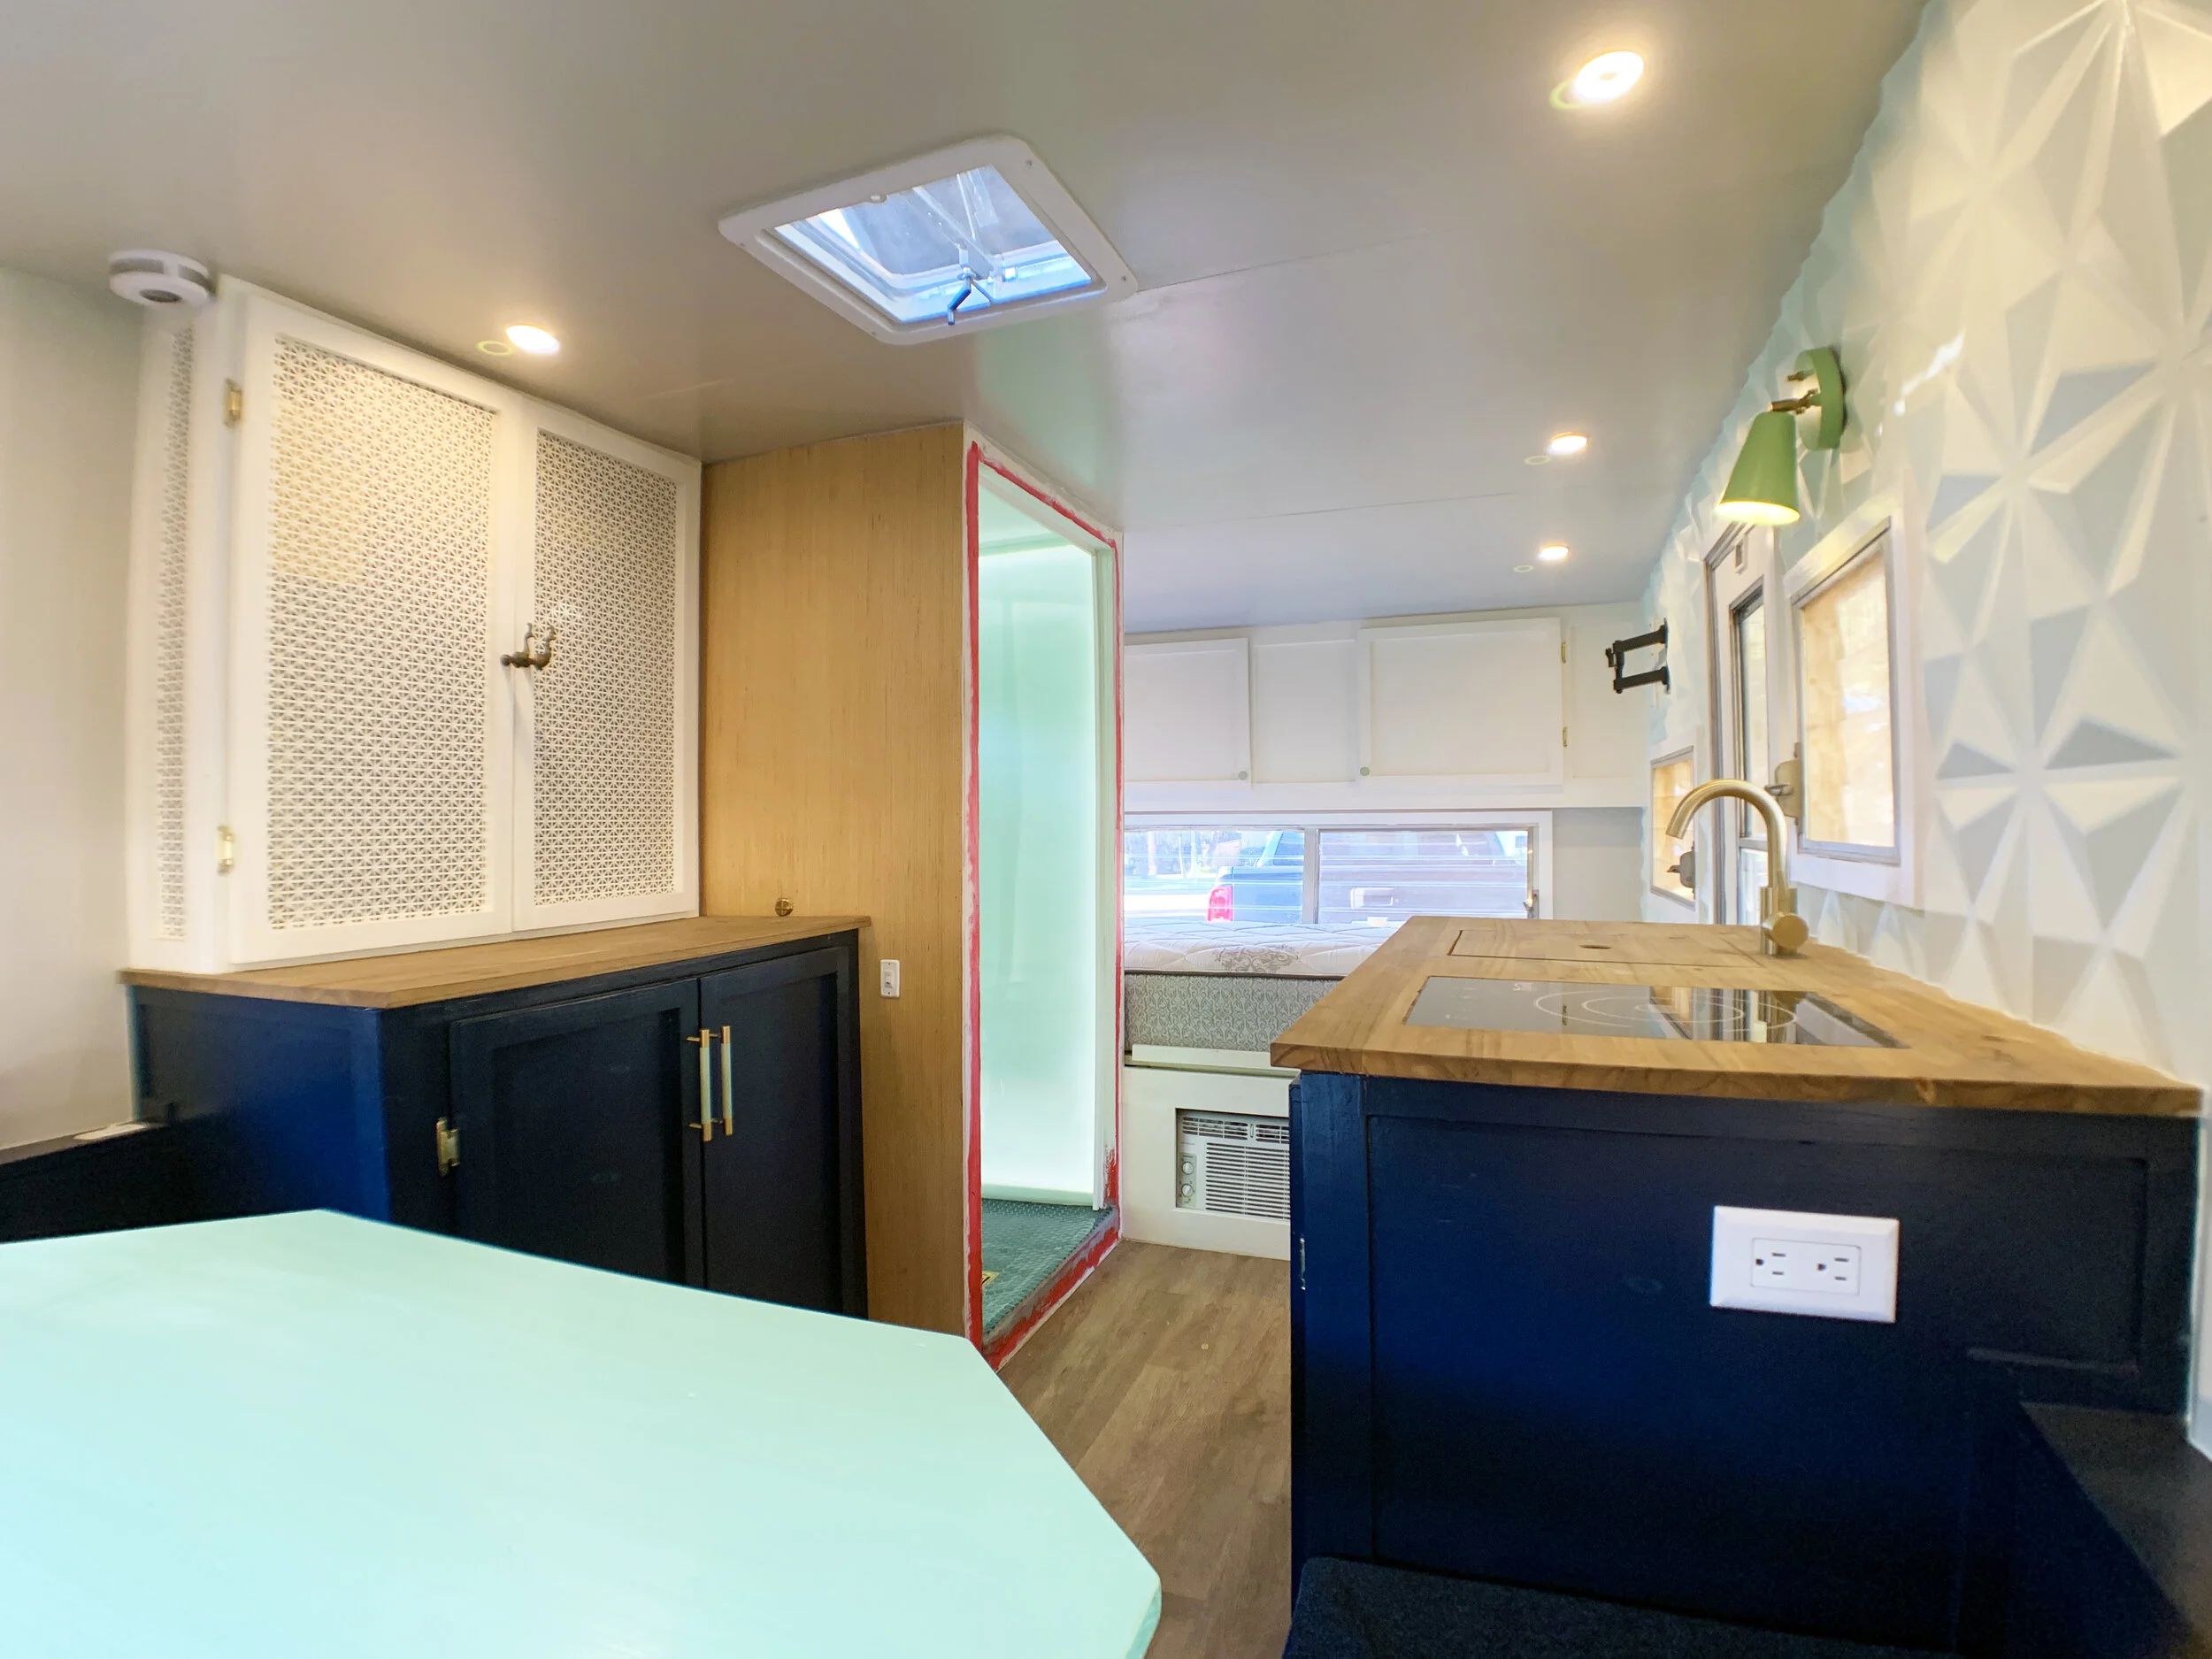
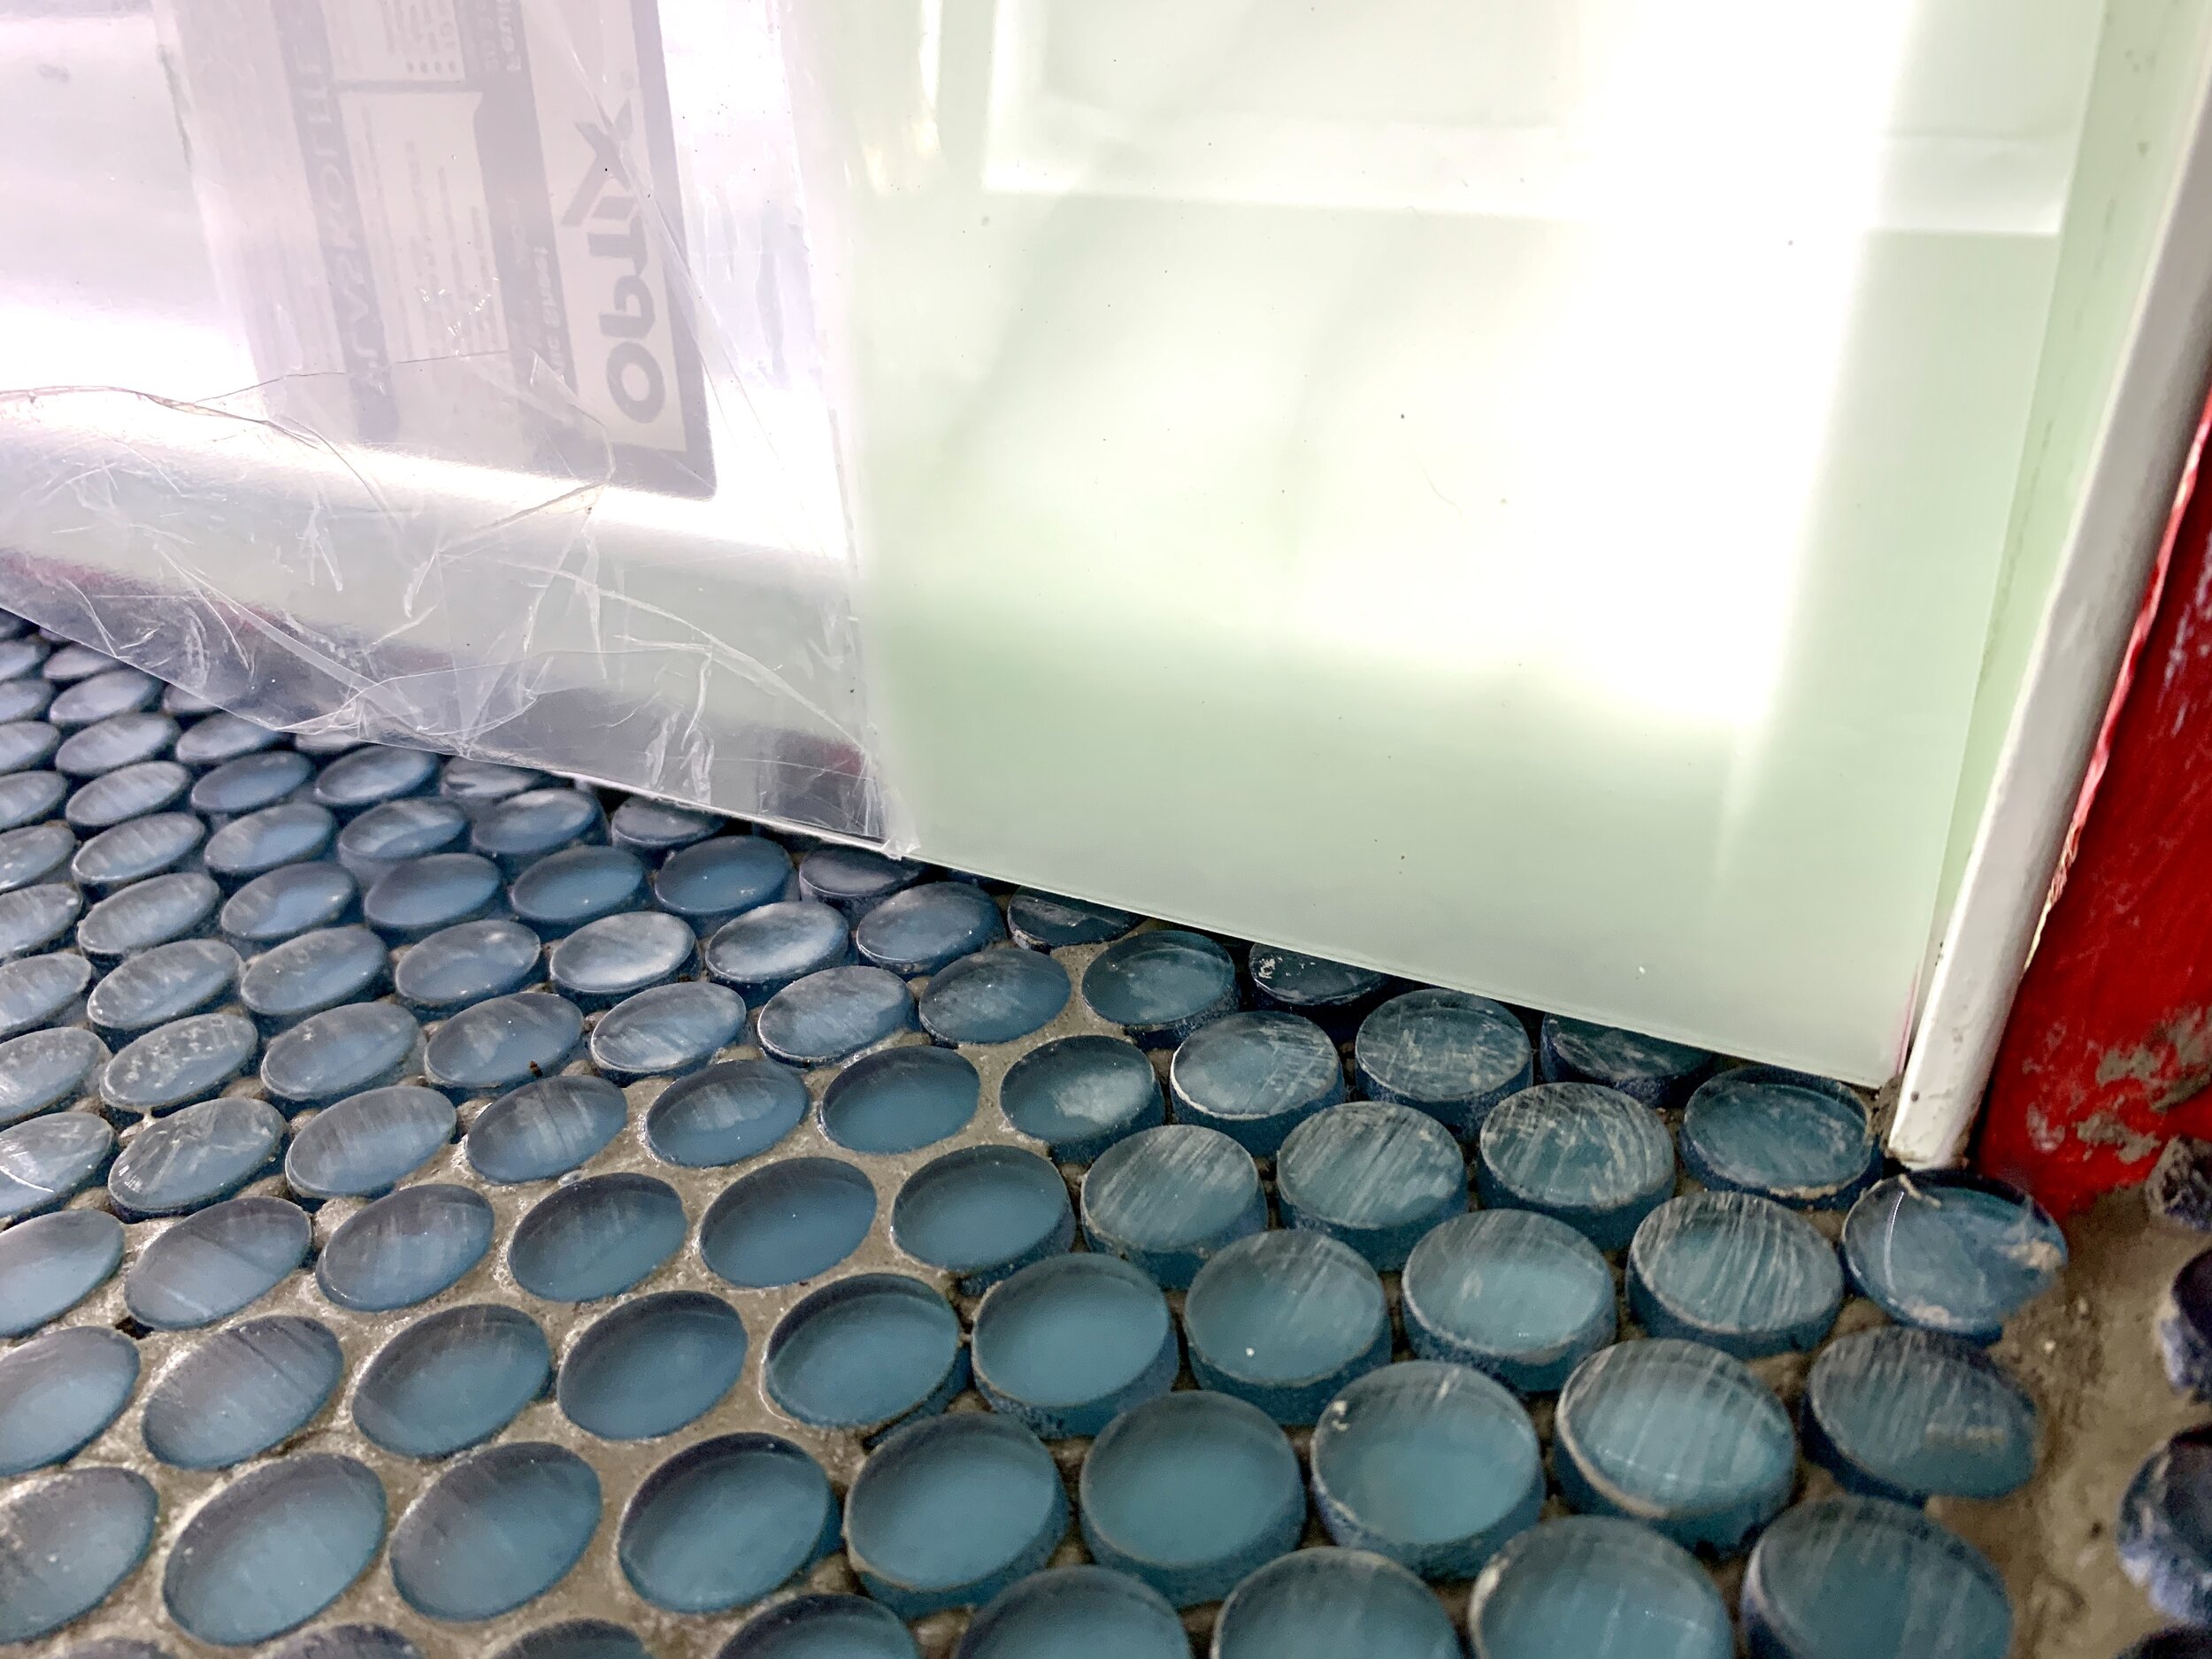
Today we’re sharing how we tiled our camper floor – complete with a mini-fail and what we did to fix it so you hardly would even notice, (plus a sneak peek at what we’re doing for the interior wet bath/shower walls for those of you with eagle eyes).
If you missed how we built our sloped, mortar-free wet bath shower floor and how we waterproofed it, you can find those posts here:
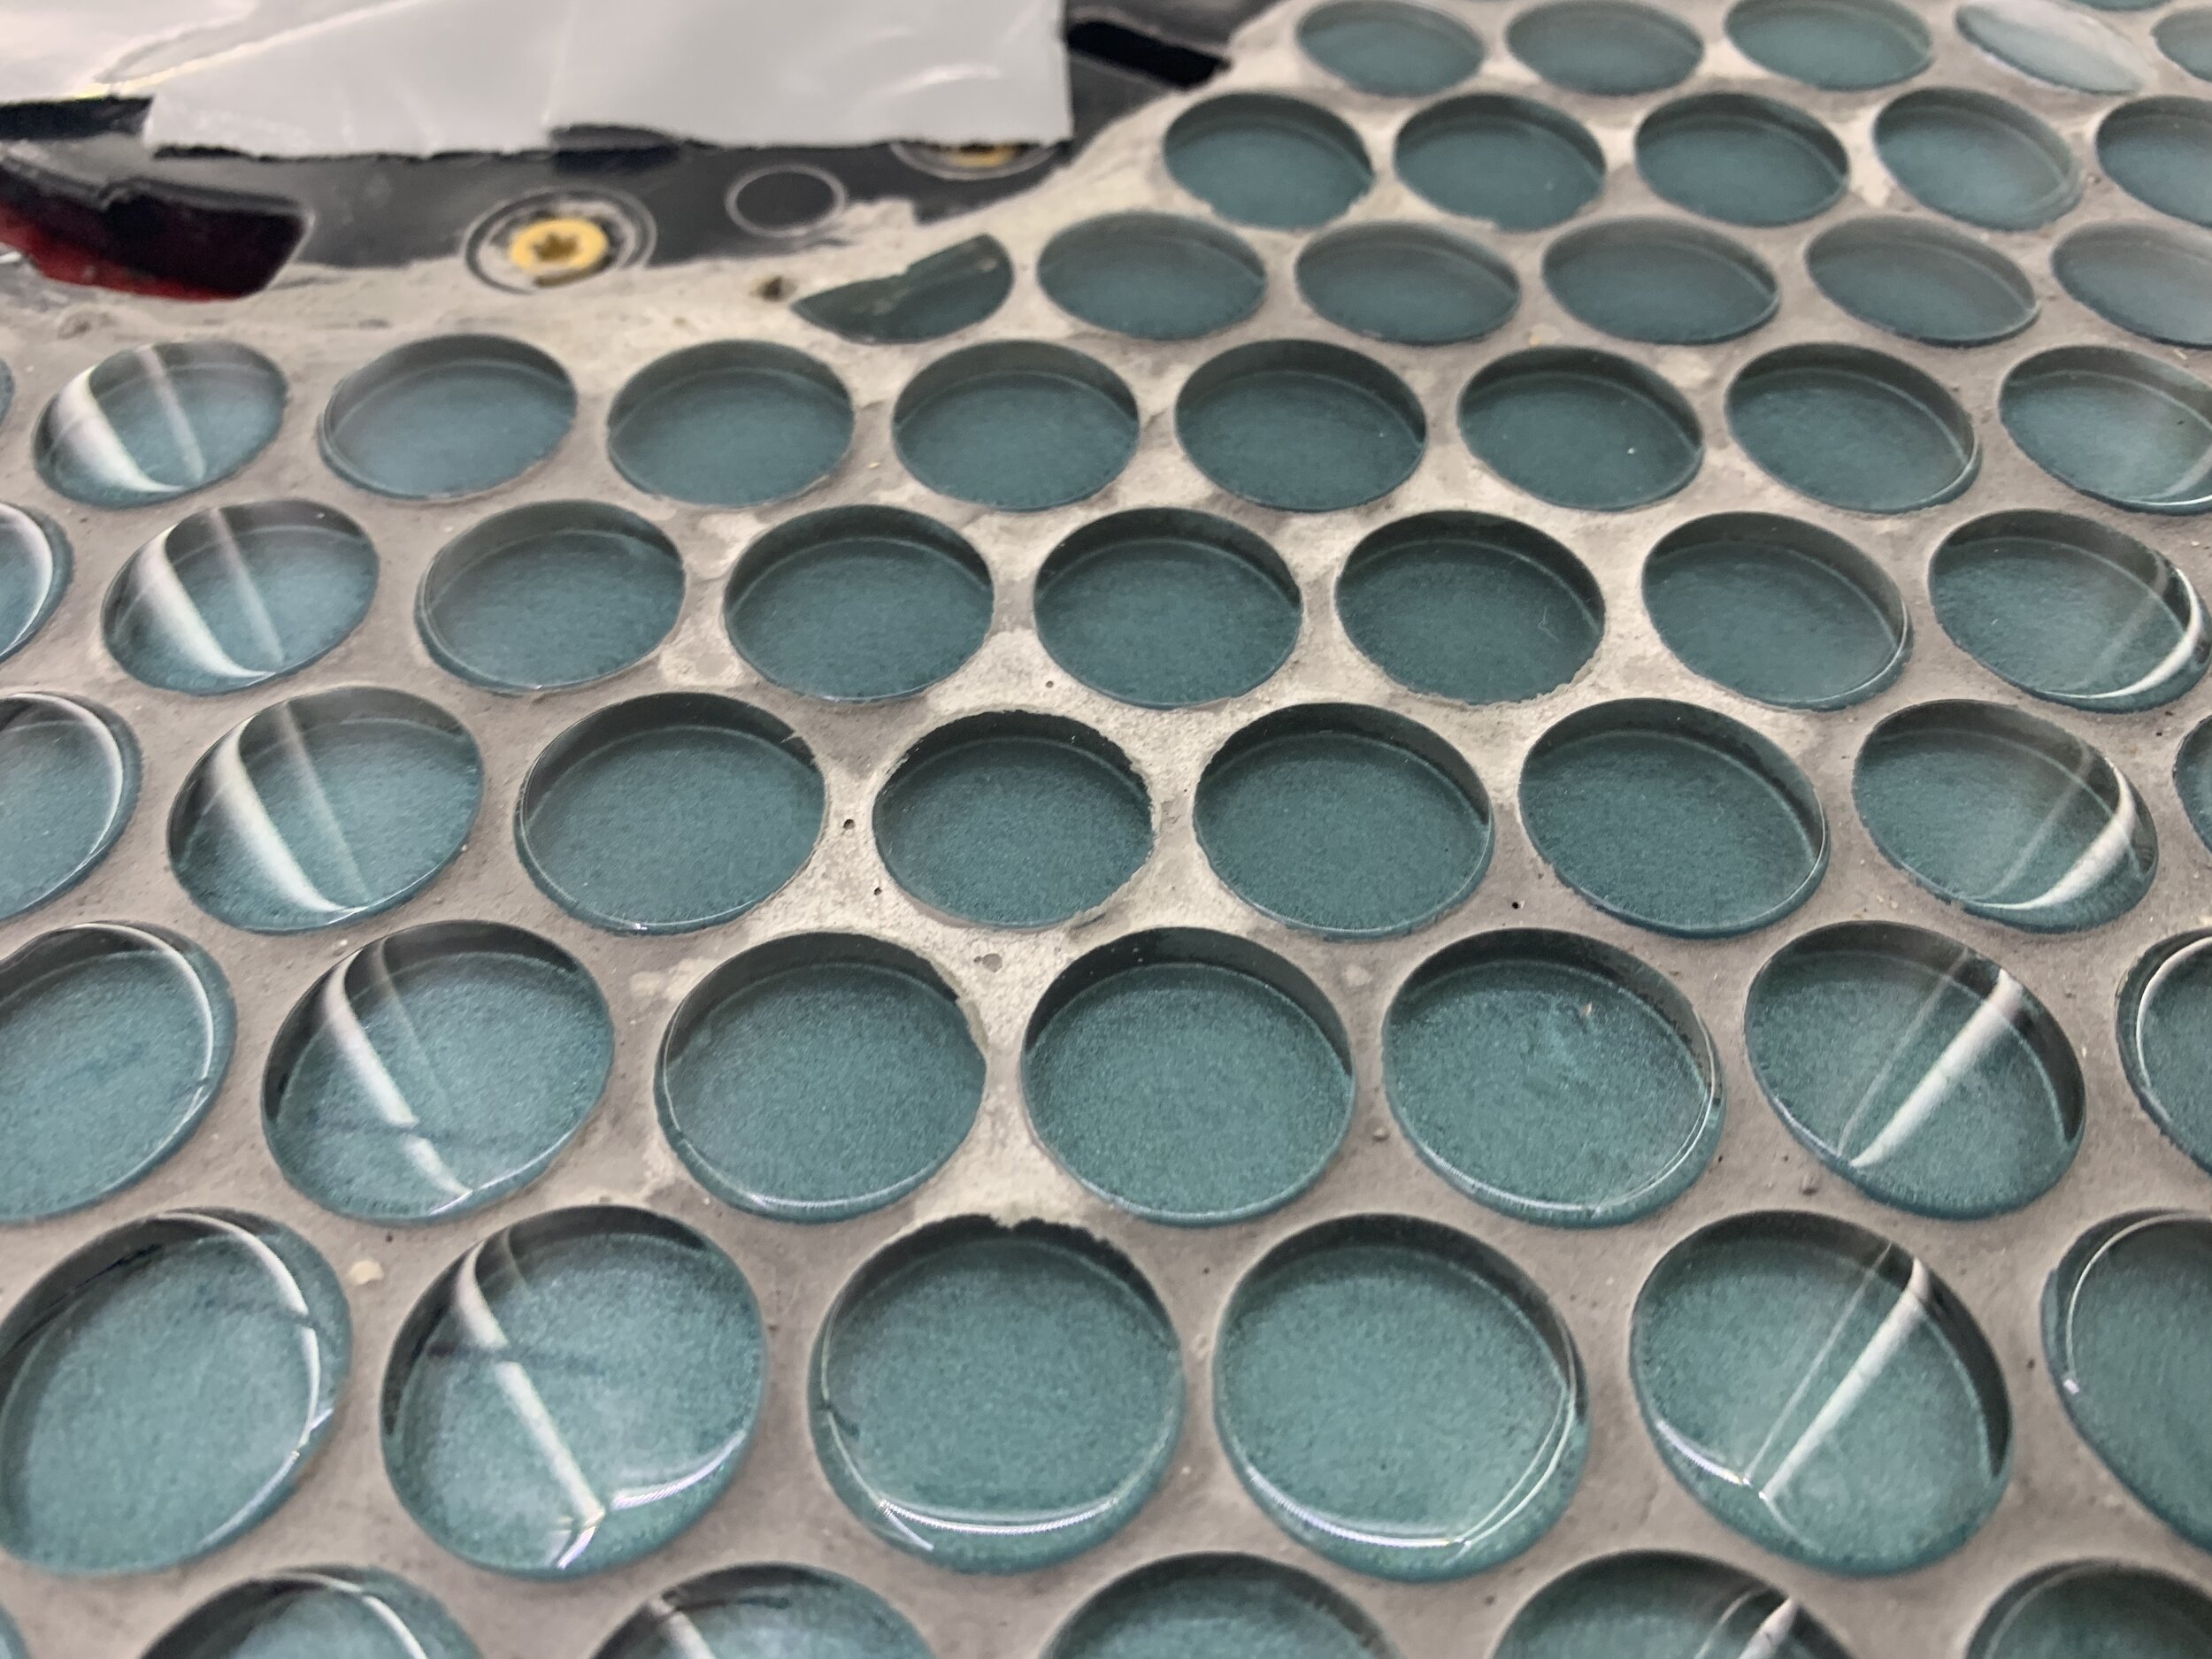
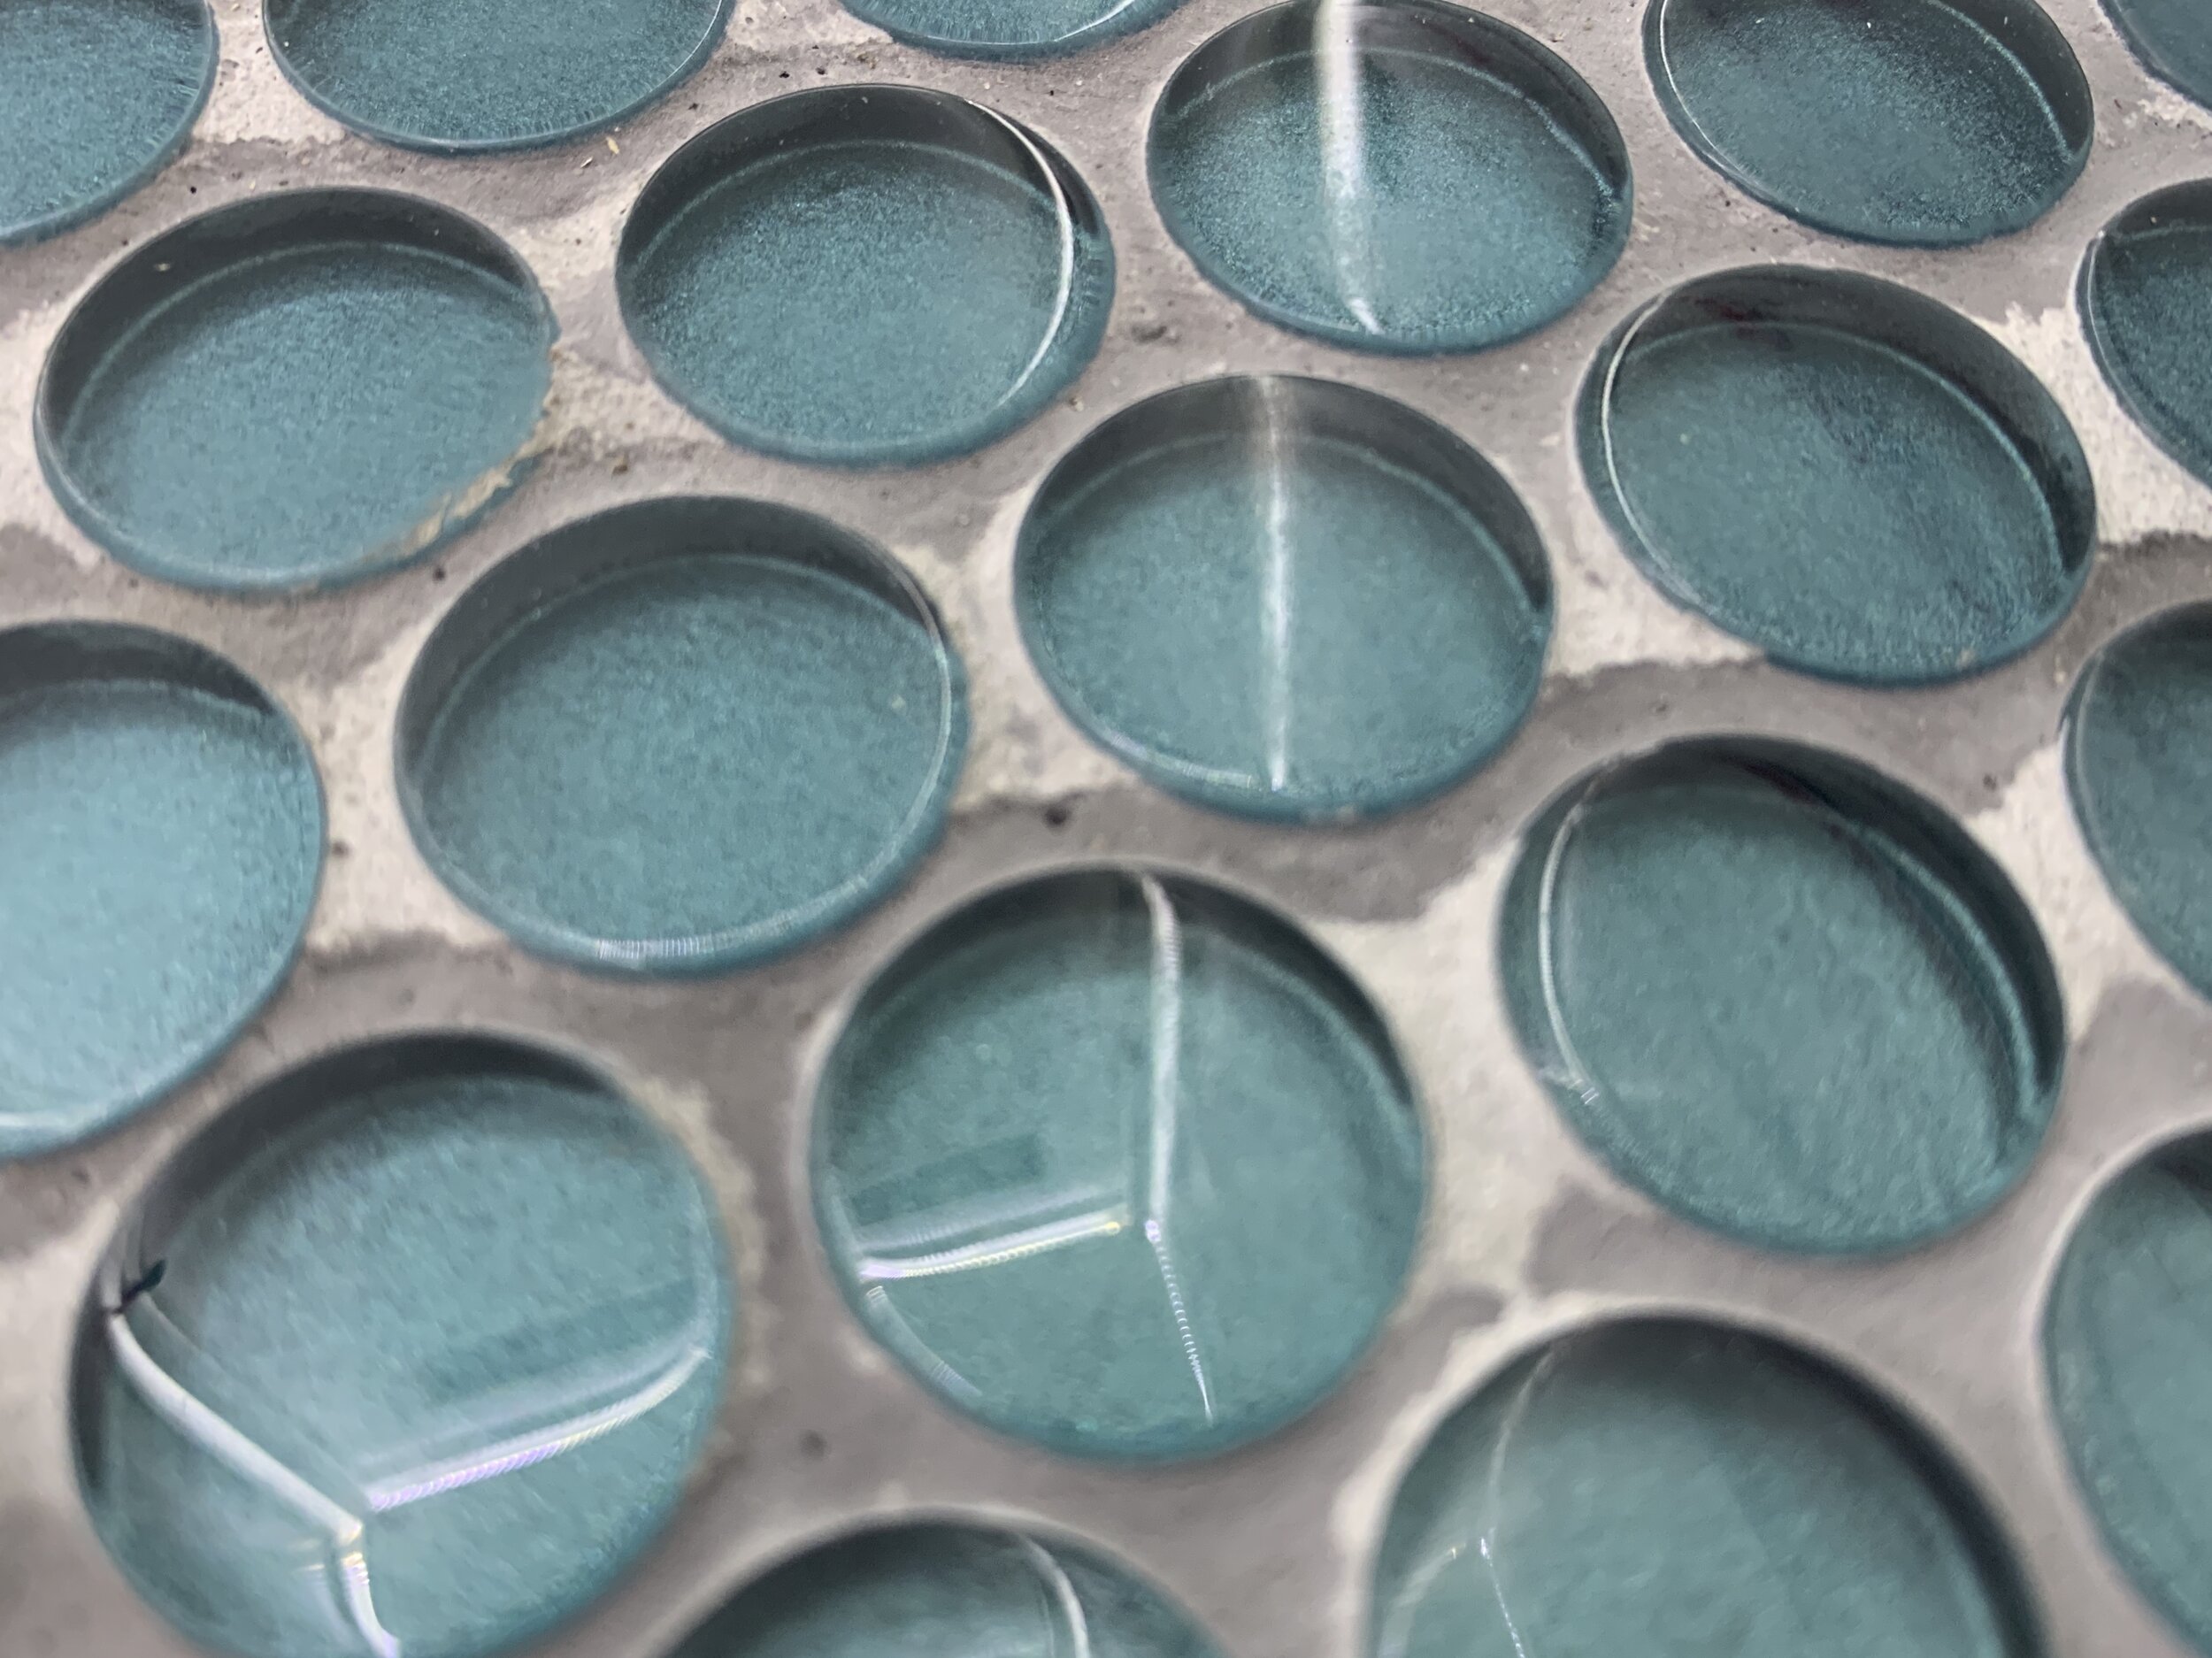
First, this glass penny tile just makes my little design heart pitter patter. The deep blue-green teal color, the shiny glass and the overall retro-meets-modern aesthetic … it’s just giving me ALL the feels. I love how the color doesn’t really match with what we’ve done so far, but that it goes with the mint greens and navy blues we’ve got going on in and around the camper.
Our wet bath shower floor shopping list:
This, of course, is in addition to what we needed for the pan build and waterproofing steps.
Tile – use whatever you’d like, but just know the smaller the tile, the better for a sloped shower floor since it can transition easier between levels. We went with penny tile, which stylistically bridges the gap between vintage and modern so nicely and functionally has a lot of grout lines – which helps the floor not be super slippery (especially since we went with glass, which might otherwise be an odd choice for a wet floor!).
Safety glasses
Tile nippers – because we used glass penny tile, we needed to buy a set of tile nippers specifically for glass. If you just have ceramic tile nippers you need to get nippers for that. We first tried to use a wet saw (like we’ve always used for tiles that aren’t on a mesh backing, like 12x12”, 8x12”, etc.) and the mesh backing for the penny tile is too flexible to get a good, clean (and safe!) cut. Not to mention if the mesh tile backing is wet for too long, the adhesive will soften and the tiles will start falling off making your job harder on install. Which reminds us, don’t peel off the tiles on the sheet and install them one by one! We’ve heard of a contractor doing this on a someone’s project and it only makes it harder on you – the mesh is there for a reason!
Box knife – for cutting the mesh backing
Flexible thinset – we went with this flexible stuff since we’re in a moving space and (as we’ve read in our research) will make a regularly-tiled floor crack.
Notched tile trowel (1/4” square notch) – this depends on what your specific tile size is, but likely with a shower floor with small tiles it’ll be a 1/4” notch. If you can’t accidentally steal one off of a loved one, you can find a good one at the link above.
2 large 5-gallon buckets + lots of clean water – yes you need two. One is to mix thinset, (and then grout) and another is for fresh water while you have the other one full of thinset/grout
Flat margin trowel – We don’t have this exact one since ours is so old and I’m pretty sure accidentally stolen from my mom during all the times we’ve tiled together over the years (sorry mom if you’re reading this.) It’s good to have for mixing and “plopping” thinset/grout in areas where you need it and is a definite must for tiling projects.
Grout mixing paddle* – (if you have a corded drill!) Technically you could do all the mixing by hand with the above flat margin trowel, but it. is. exhausting. If you have a corded drill this is the way to go. If not, be prepared to sweat and definitely maybe skip arm day for a while.
*Corded drill – optional, but we have one like this that we LOVE. We say corded drill because they have a lot more power and mastic/thinset/grout mixing is A LOT for a cordless drill to handle (and actually how we burned up a battery when we did the flip house years ago. This is the reason we now have a corded drill.)
Rubber grout trowel – This one is pretty darn close to the one in our garage. I’m pretty sure we also long-term borrowed this tool from my mom, which is really making me realize I might be an accidental clepto…
Grout – we went with an un-sanded grout since our tile is glass, which can scratch with sanded grout.
Large plastic drinking cup, or other small-ish mixing bucket – since this is such a small space, we used a Rudy’s BBQ cup and it worked great. You won’t need as big of a container for grout as you do for thinset.
Large soft sponges – for cleaning your tile/wiping away grout
White lint-free rags – good for “buffing” the haze off the tile once the grout is set
Okay, now that would normally be it, but since we’re not perfect humans and made some noticeable booboos (that were driving me cuckoo bananas) we also did a little bit of fixing after we were done and used these also:
Grout paint + sealer – we used the color Pearl Gray (which matched our grout color pretty perfectly!)
White lint-free rags – 3 or more, for wiping and buffing
Tiling our camper shower floor
This started off as a “real quick” after-work-one-evening project.
(Narrator: Little did they know it would not be “real quick”.)
Do as we say not as we do:
It took longer than expected, probably because we needed to add more thinset in areas than we initially thought (a continuation of our drain slope debacle we mentioned in part 1 and part 2 of our pan build – please please please learn from our slope trials and tribulations!) This required that the grout layer needed to be thicker than normal, which required a little more drying time before we could actually lay the tile. If you listened to us from the beginning and get a slope that’s not too sloped so your finished drain is at a nice height, you should have no problems or need to add extra thinset around the drain area and therefore shouldn’t be tiling in the driveway until around 10 p.m. like us. (We live an exciting life, I know.)
Planning the tile layout
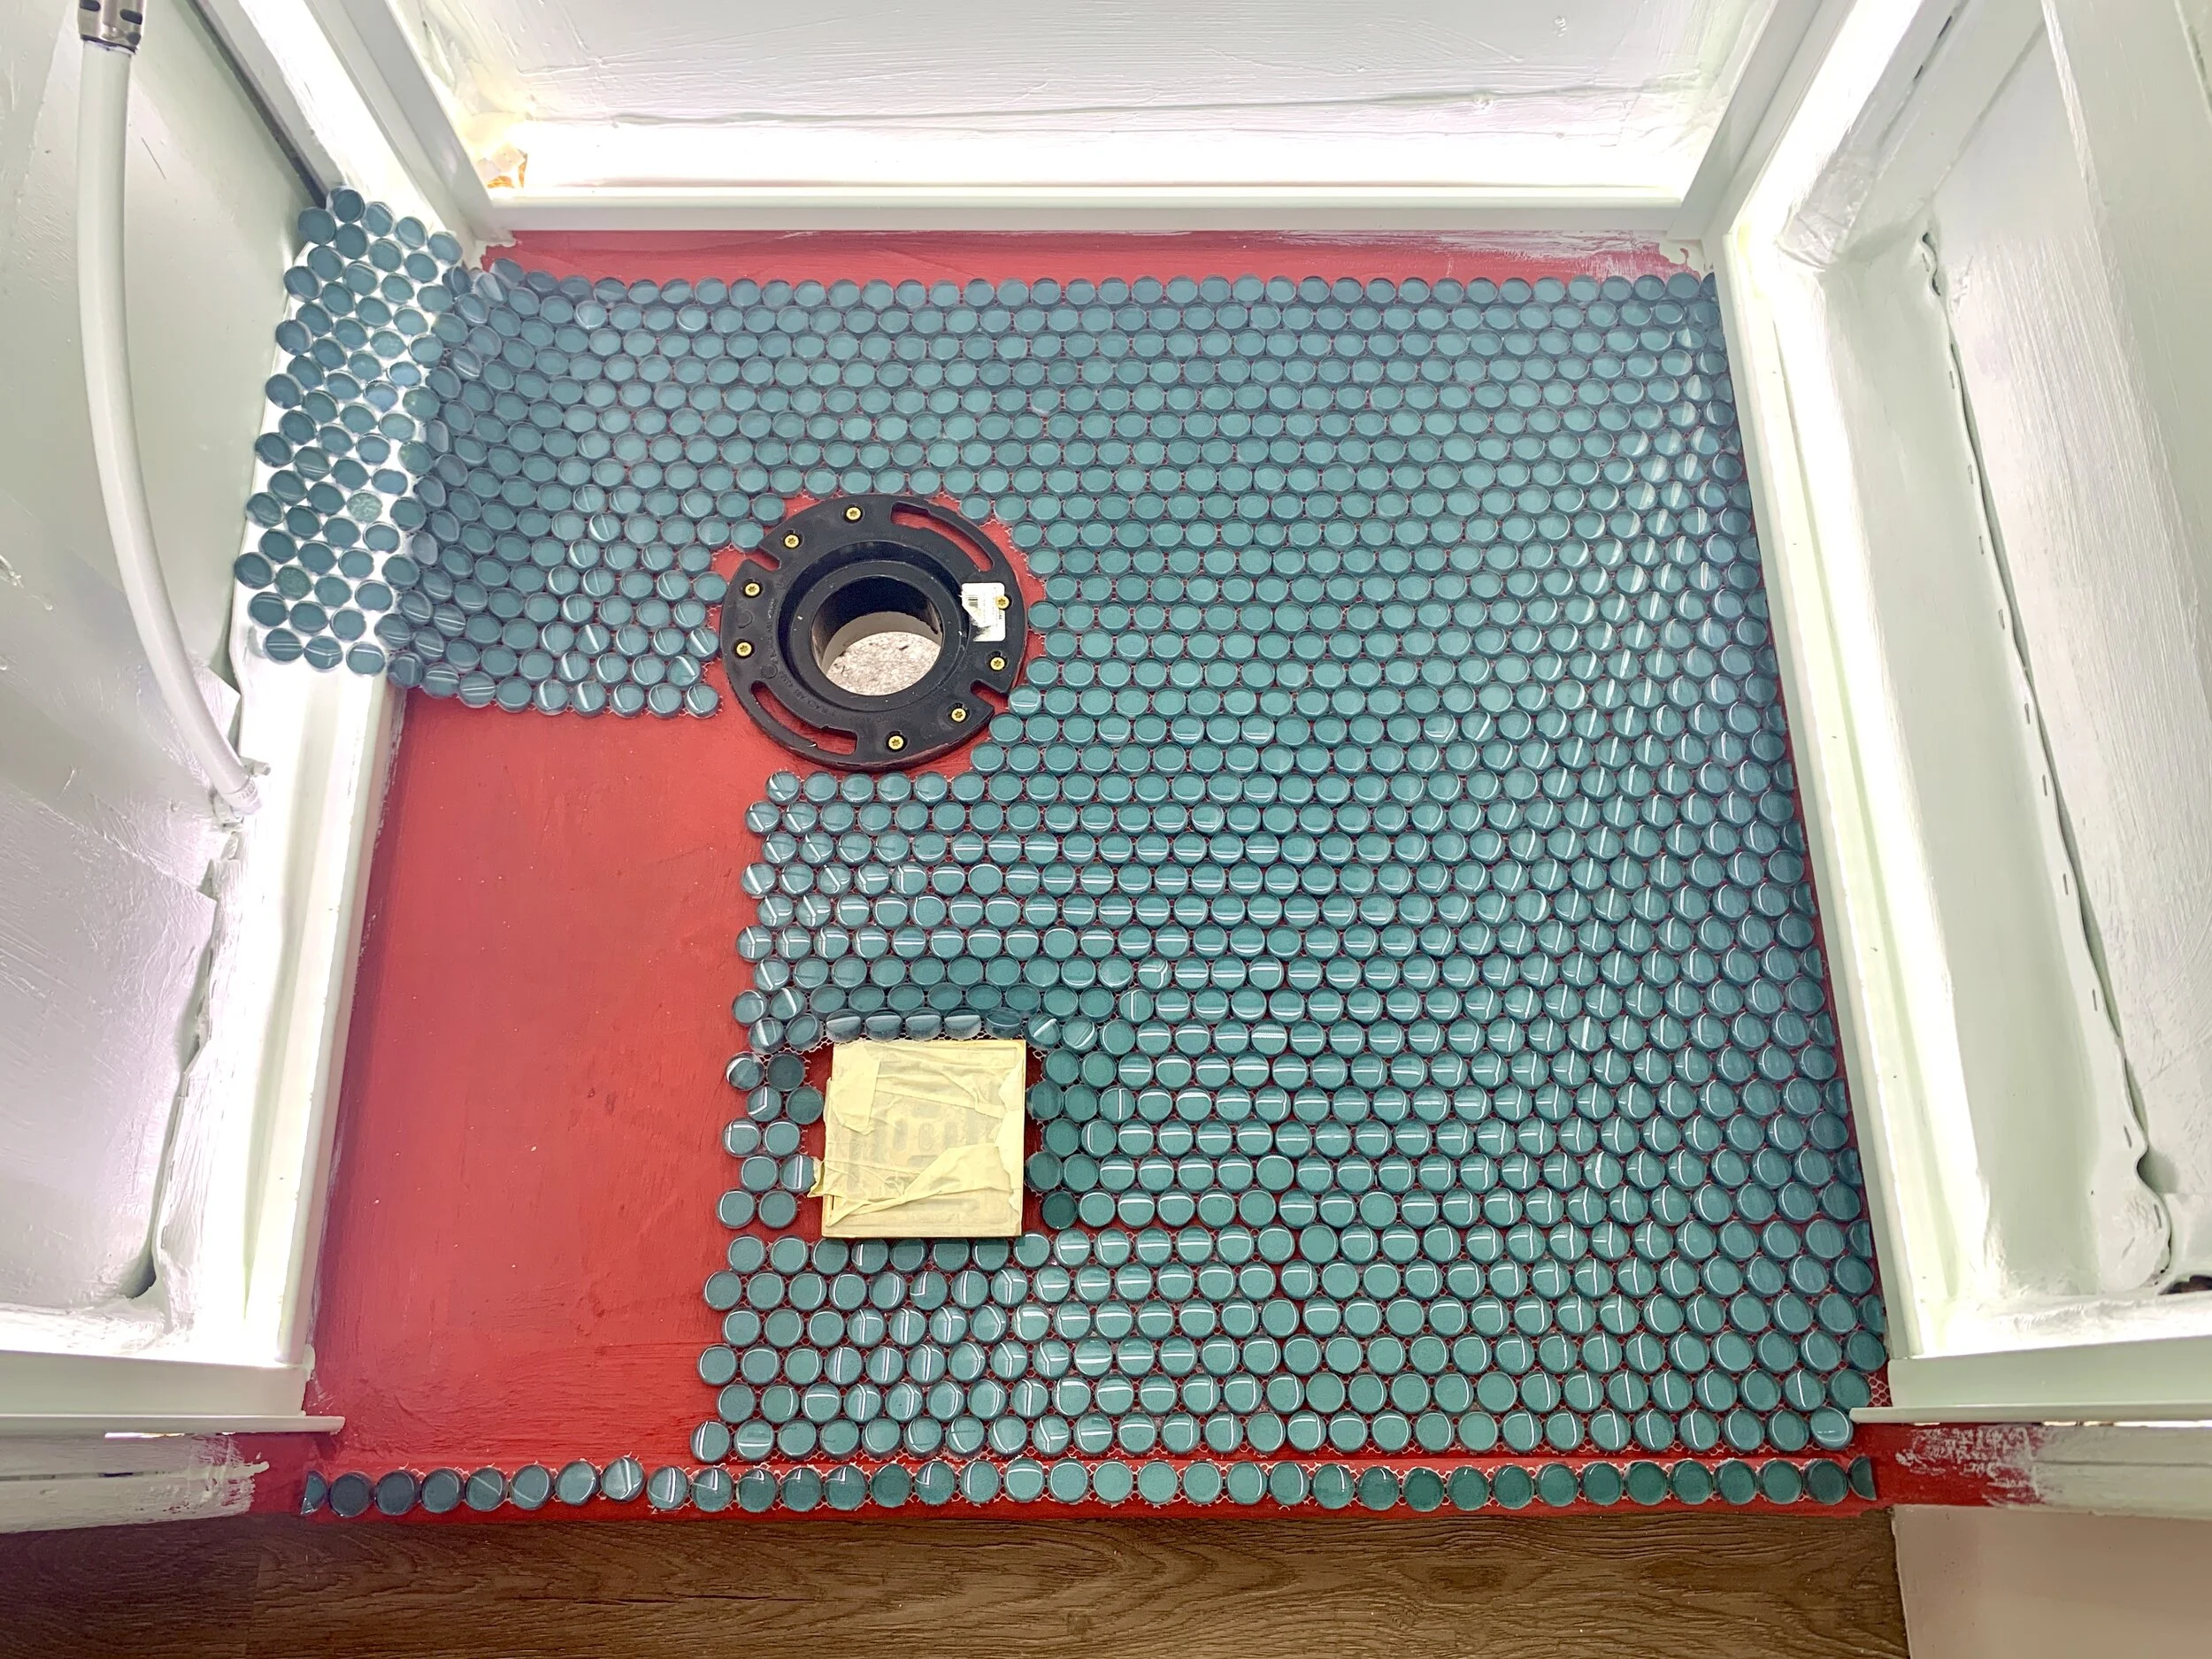
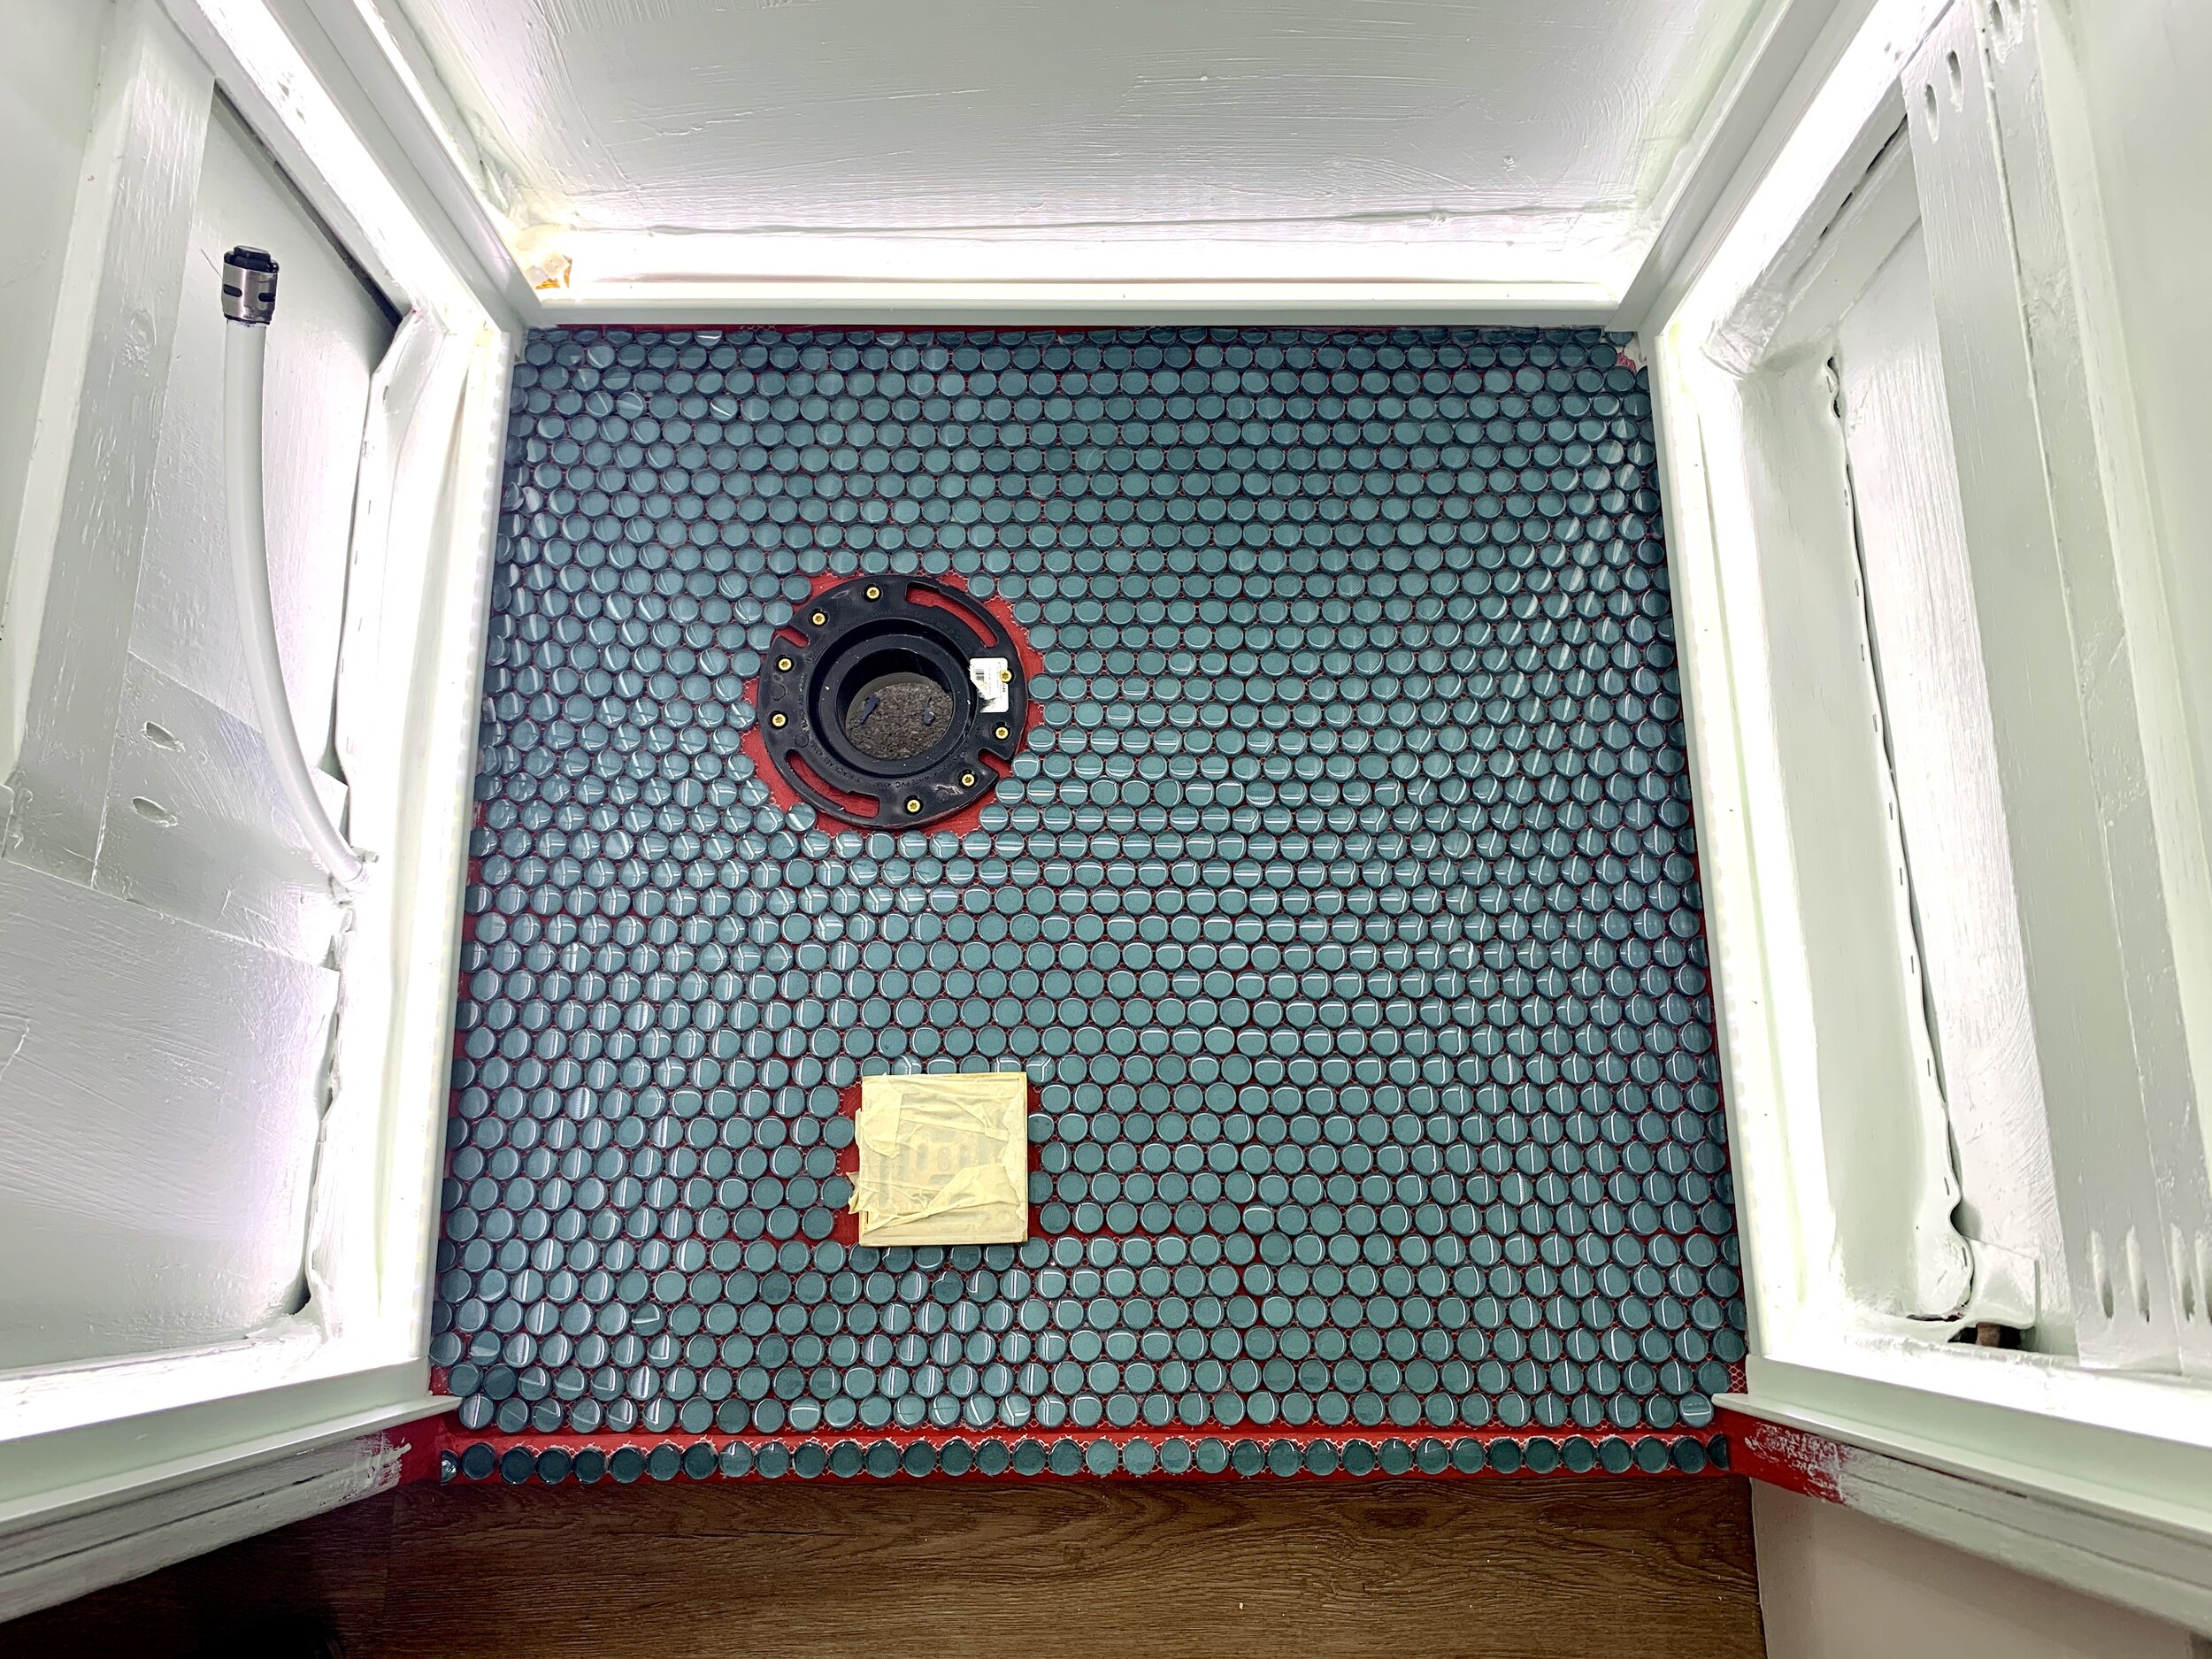
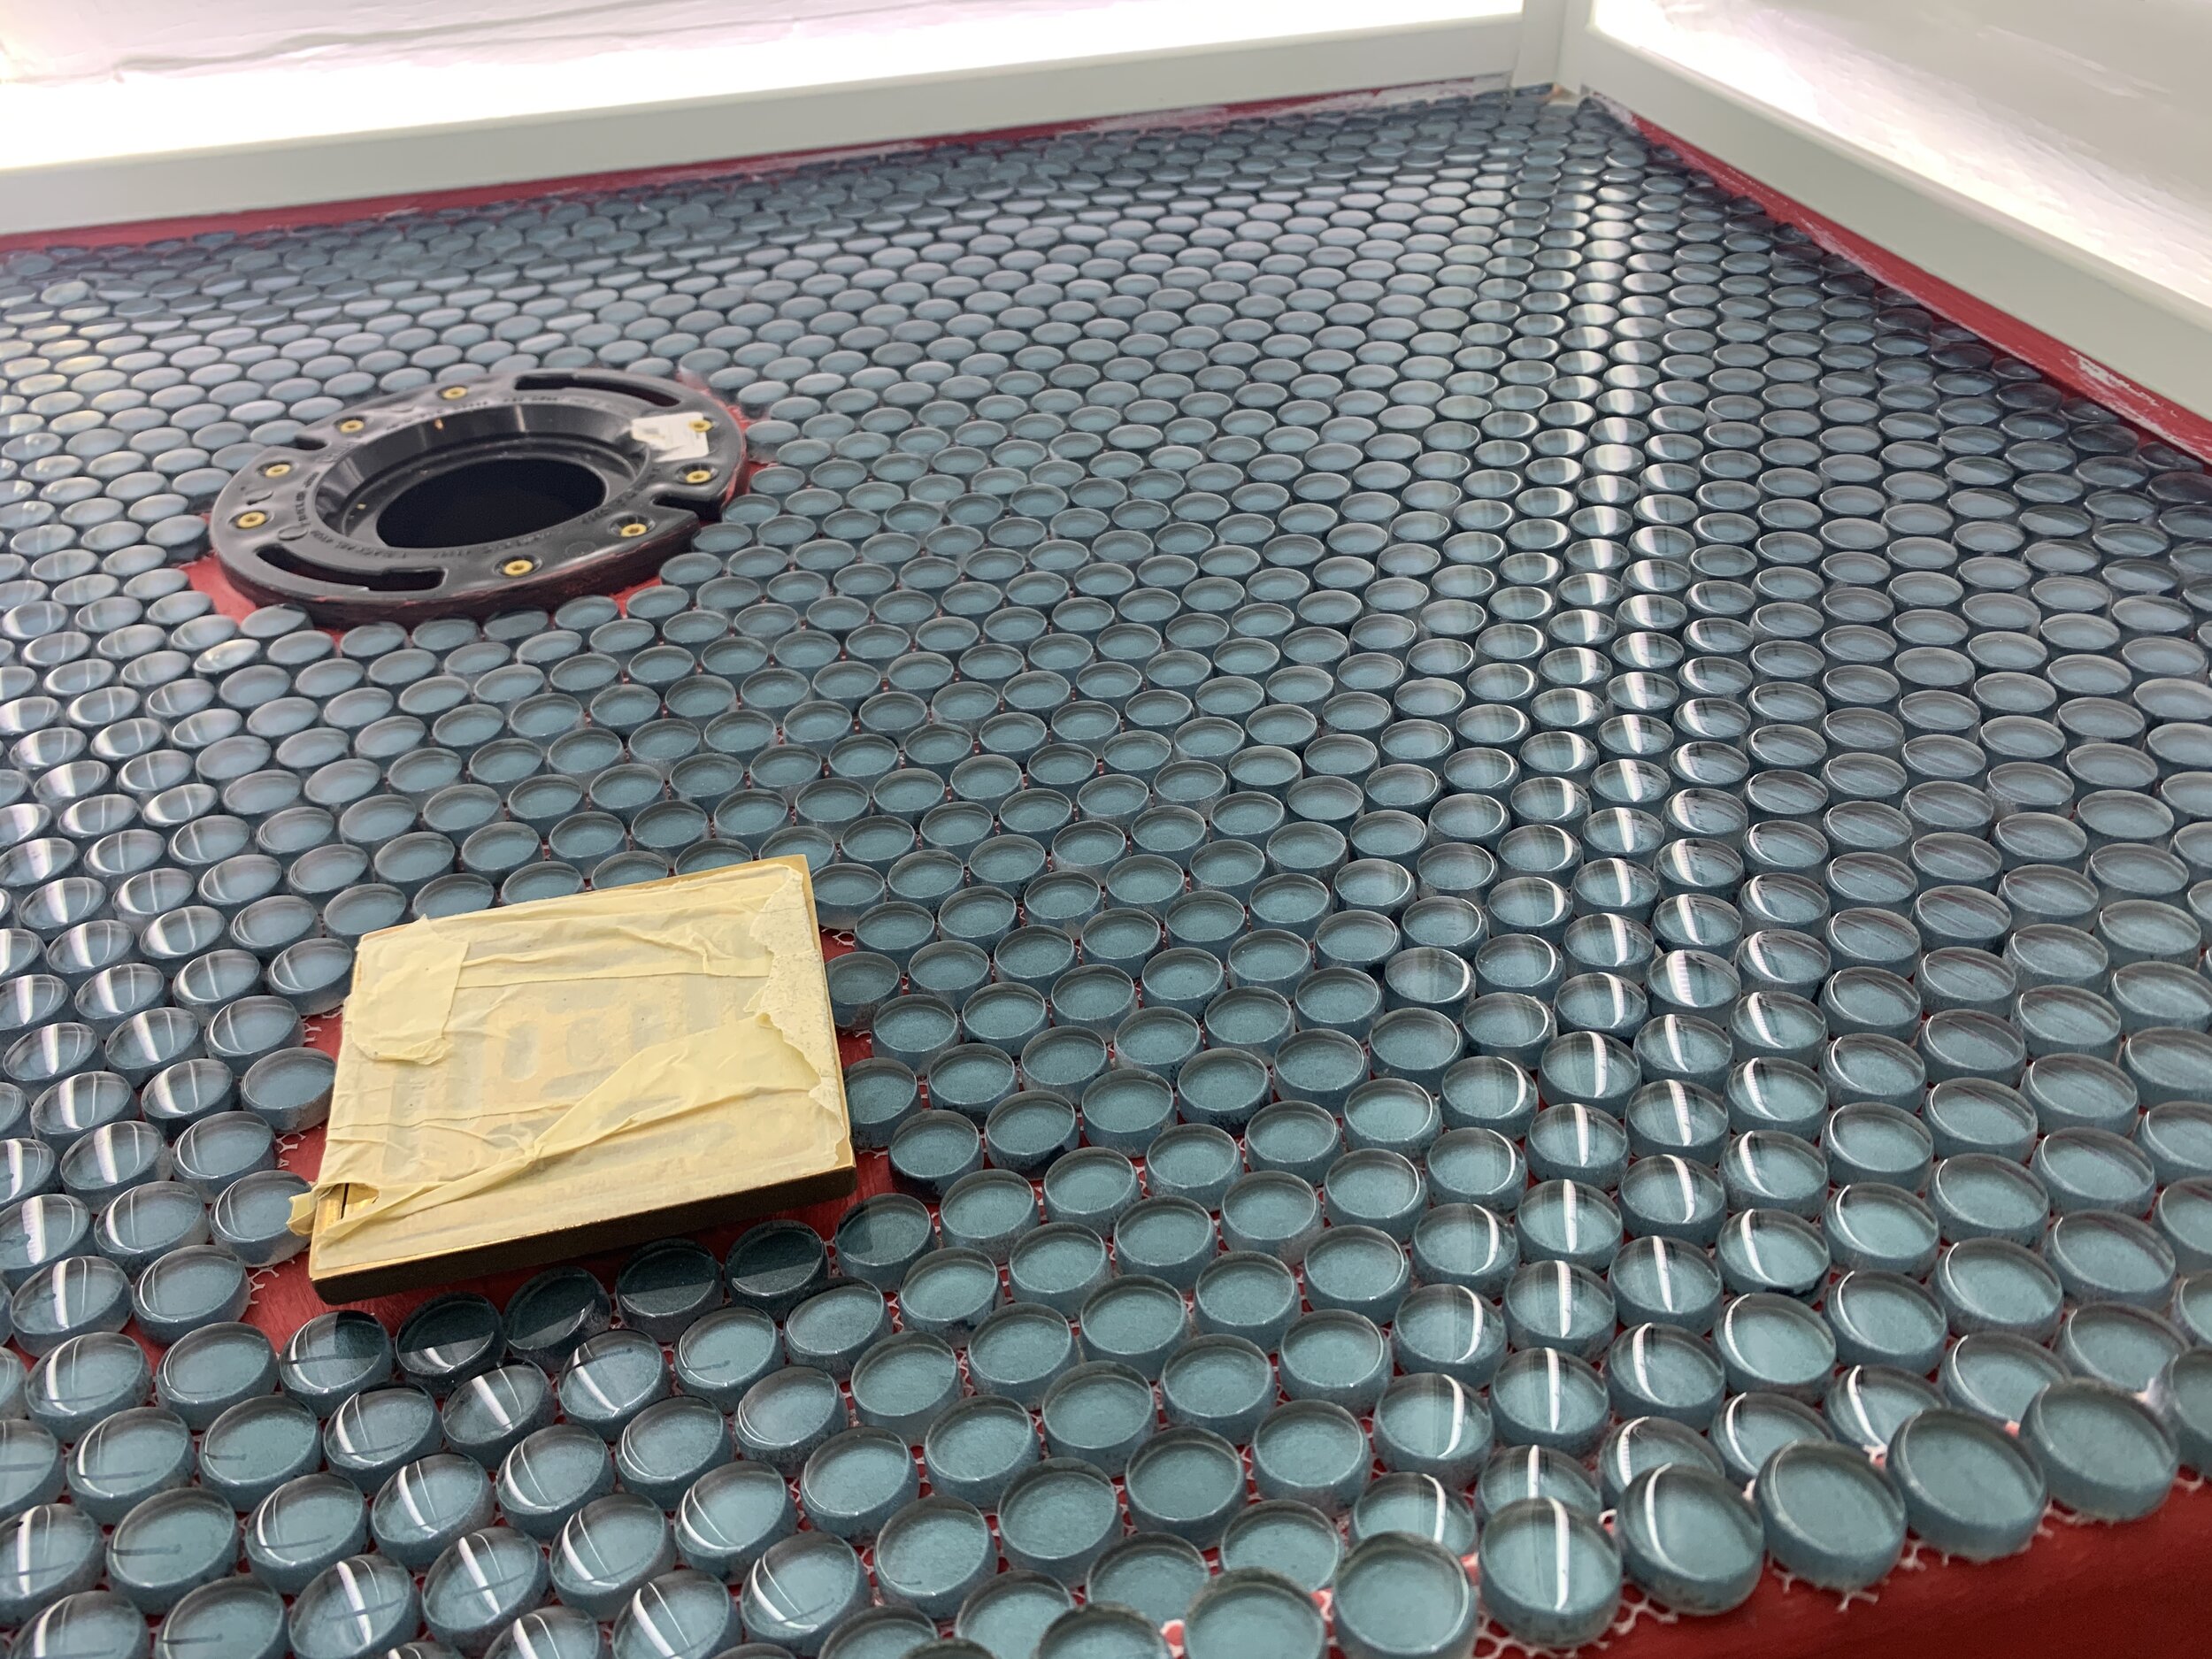
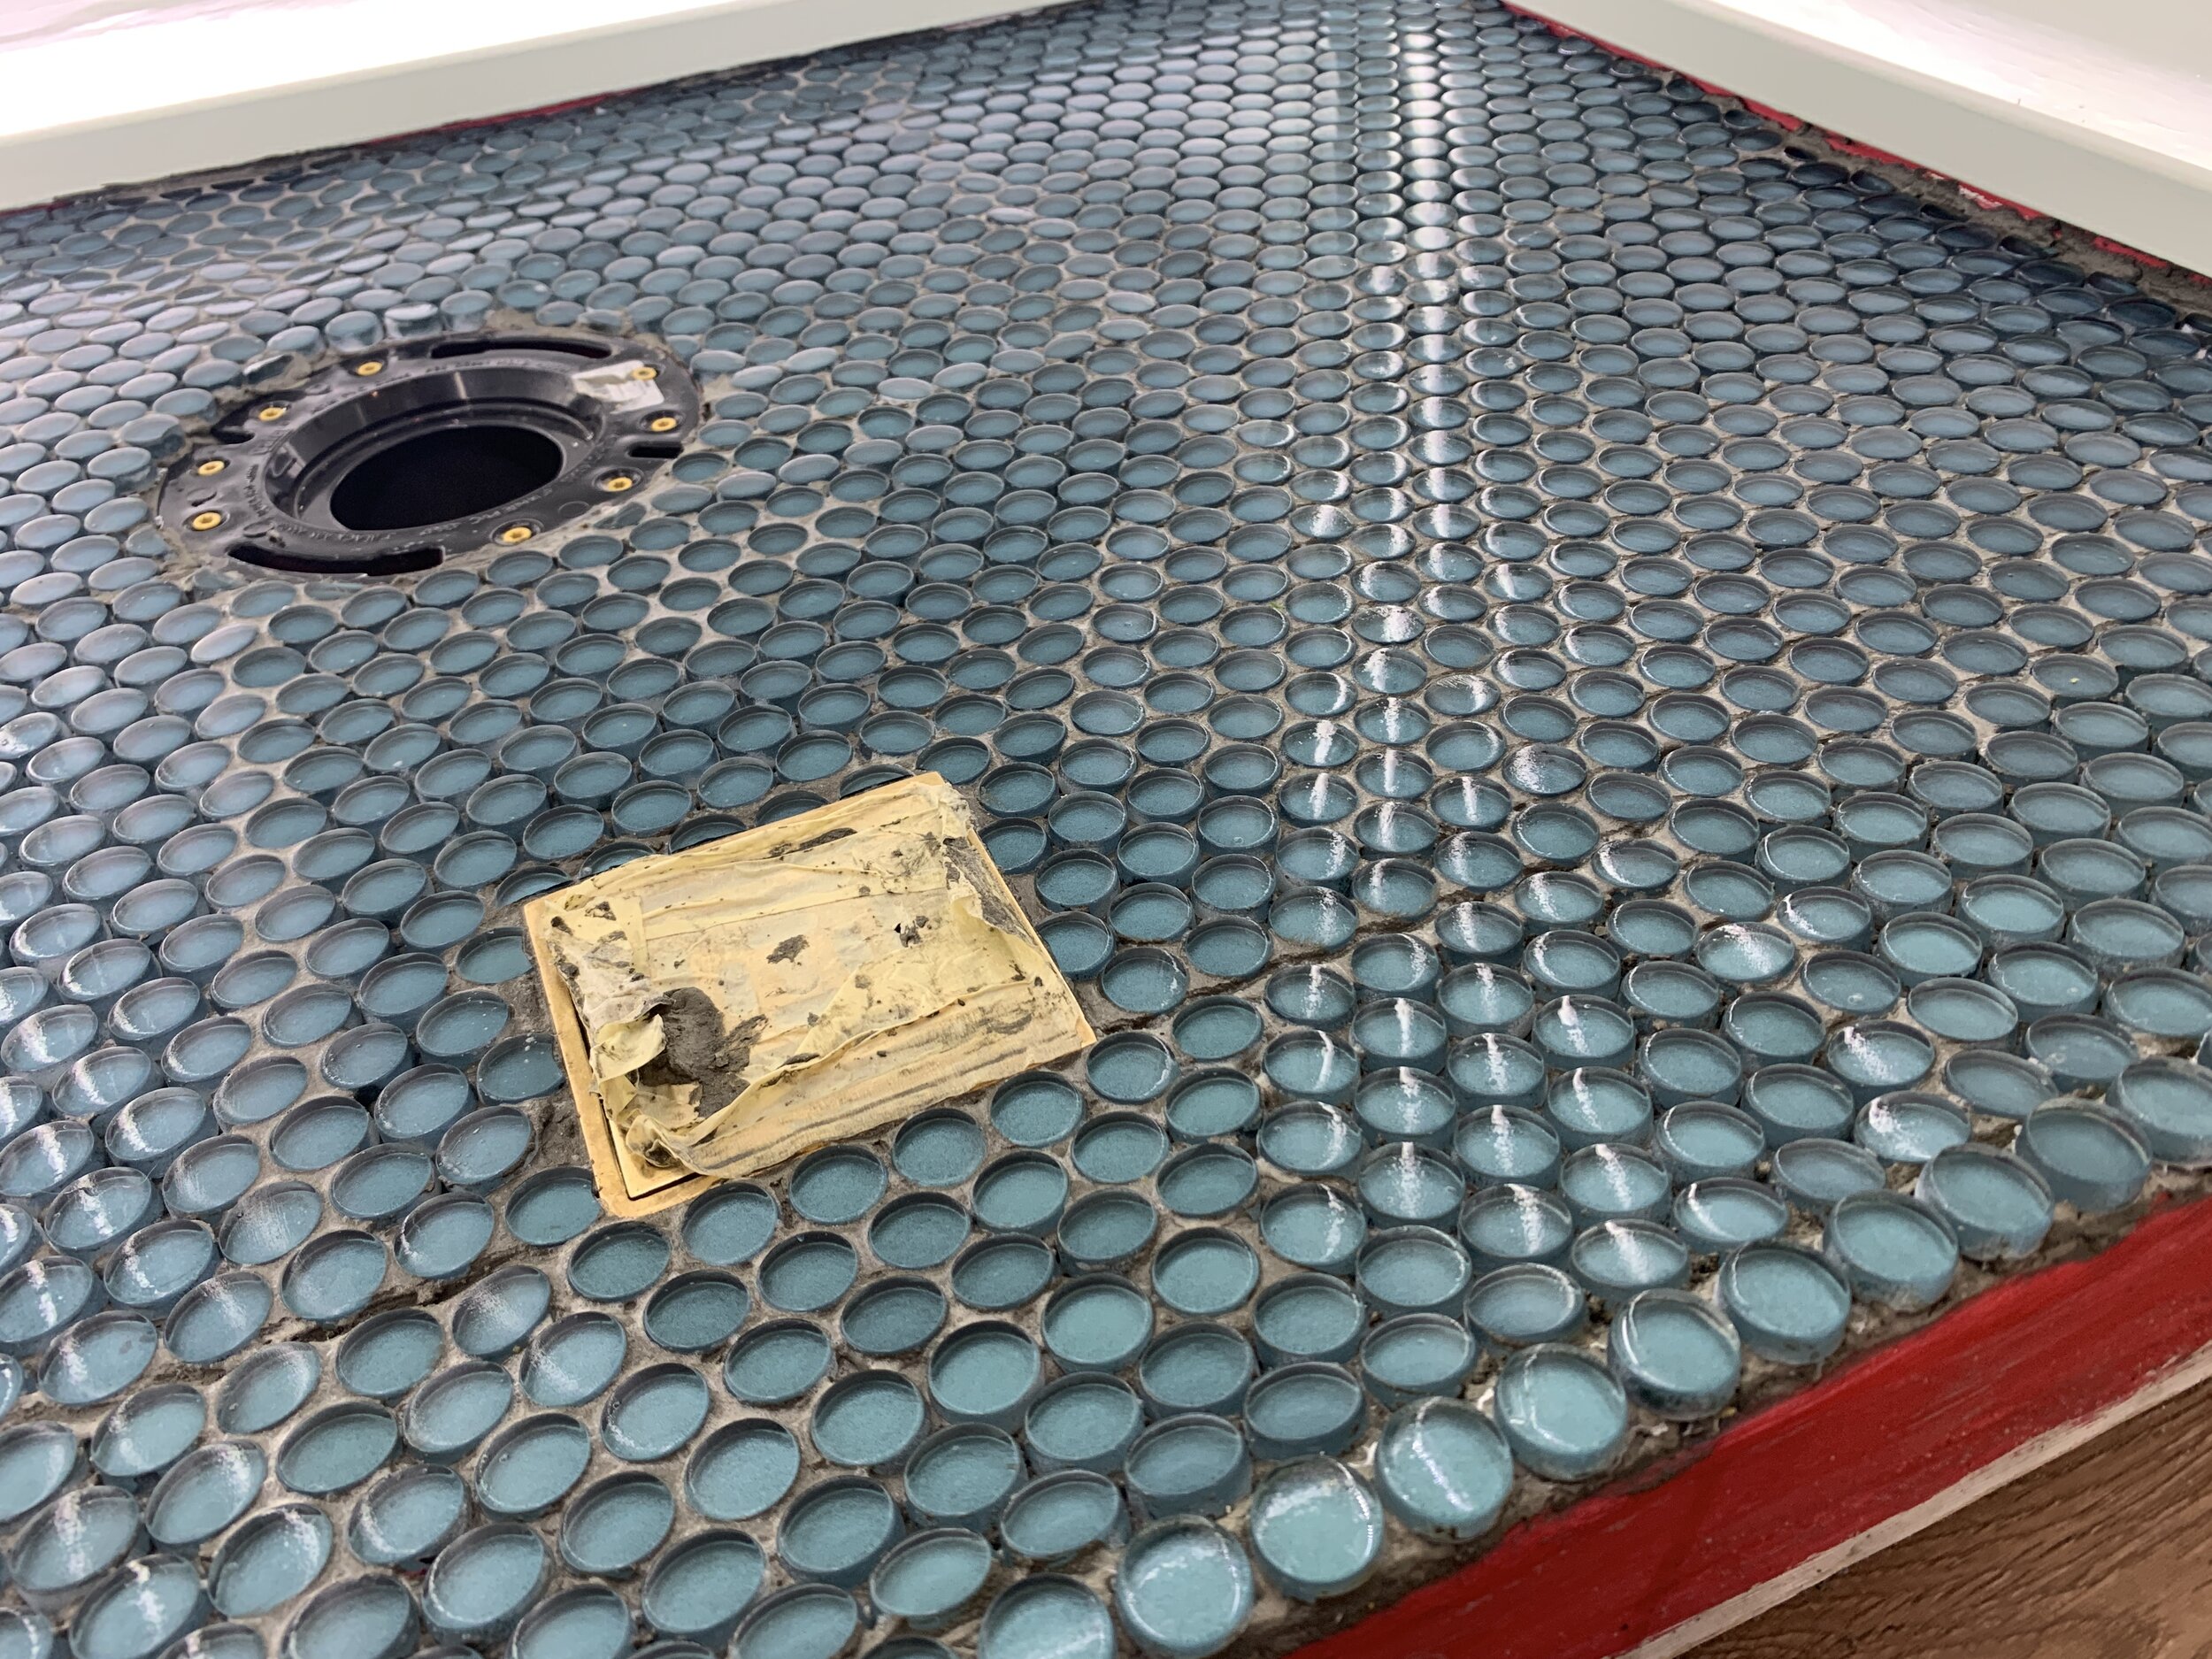
First, we dry fit our tile, laying it out on the shower floor and cutting the perimeter pieces as needed with the nippers (cutting instructions below). Around our two drains, we used a box knife to carefully cut the mesh backing to remove tiles as needed.
Once we had it all laid out, we carefully transferred and recreated the shower floor layout outside on a piece of cardboard so Nick could quickly and easily bring in tiles as needed while I worked.

Cutting glass penny tile
We learned with some practice that to get the best cut with the nippers we made sure to get the metal wheel dead center on the tile and push down on the handles. (Even though glass nippers have a wheel blade, you don’t need to roll it and score a line or anything. Just place it and clamp down to get a clean line.)
So, I could’ve sworn I took photos of us cutting the tile, but I guess not because I cannot find them anywhere. This is the YouTube video we used to learn how to do it, starting at 1:05.
Laying glass penny tile
With the floor dry fit, pieces cut and whole layout transferred and recreated outside, we began mixing the thinset. We followed the instructions on the thinset bag for mixing and waiting times. This is a great time to turn on the tunes, get yourself a drink, and maybe have some pizza on hand.

There may or may not be wine in this YETI. Gotta stay hydrated while you work, y’all.
In a normal tile-laying session, it’s pretty straightforward:

It’s important to clean the floor first – we vacuumed it well to make sure the floor was free from debris.
Then, starting from the back and moving forward, we started pouring/plopping blobs of the flexible thinset down on the floor with the flat margin trowel and then used it and the flat side of the notched trowel to kind of level/smooth it in to cover the small area we were working in. It will depend on tile and room size, but for this project I went ahead and applied to the whole floor since it was such a small space, all of our pieces were already ready to go out in the driveway, and we were trying to additionally correct some slope with this thinset. Normally, say for a bathroom in our house, I only apply enough thinset to cover and extend beyond at least one tile, or in the case of penny tile, one 12x12” tile mat. You have to be careful with how much you want to apply so the thinset doesn’t dry before you’re ready for the area.
We used the notched side of the trowel and pulling toward us, scraped it against the floor to create defined ridges. If the notches don’t hold their shape and start puddling out, it’s not ready for tile and needs to dry some more. For any areas missing thinset, I just added more thinset with the flat margin trowel and re-notched until there were no bald areas. Bald areas = air pockets and those are a no-no in tile. (If you’ve ever noticed “hollow” sounding spots in your tile floors, it’s probably an air pocket, which are more susceptible to breaking easily, especially if anything gets dropped on it.)
Then, working from the back right area and moving forward, we lined up the tile according to the dry fit layout and gently placed it down on the notched thinset. It’s important to work so that you don’t lock yourself into a room, or in this case work from the front toward the back where you’ll need to lean on wet tile to lay another section.
We used the rubber trowel to tap it down to make sure it all make good contact with the thinset and that the mesh square was all laying flat with no waves or ripples.
We repeated steps 2-5 with the rest of the tile sheets, making sure we kept the spacing in between sheets consistent with the spacing in between the penny tiles to help camouflage the seams.
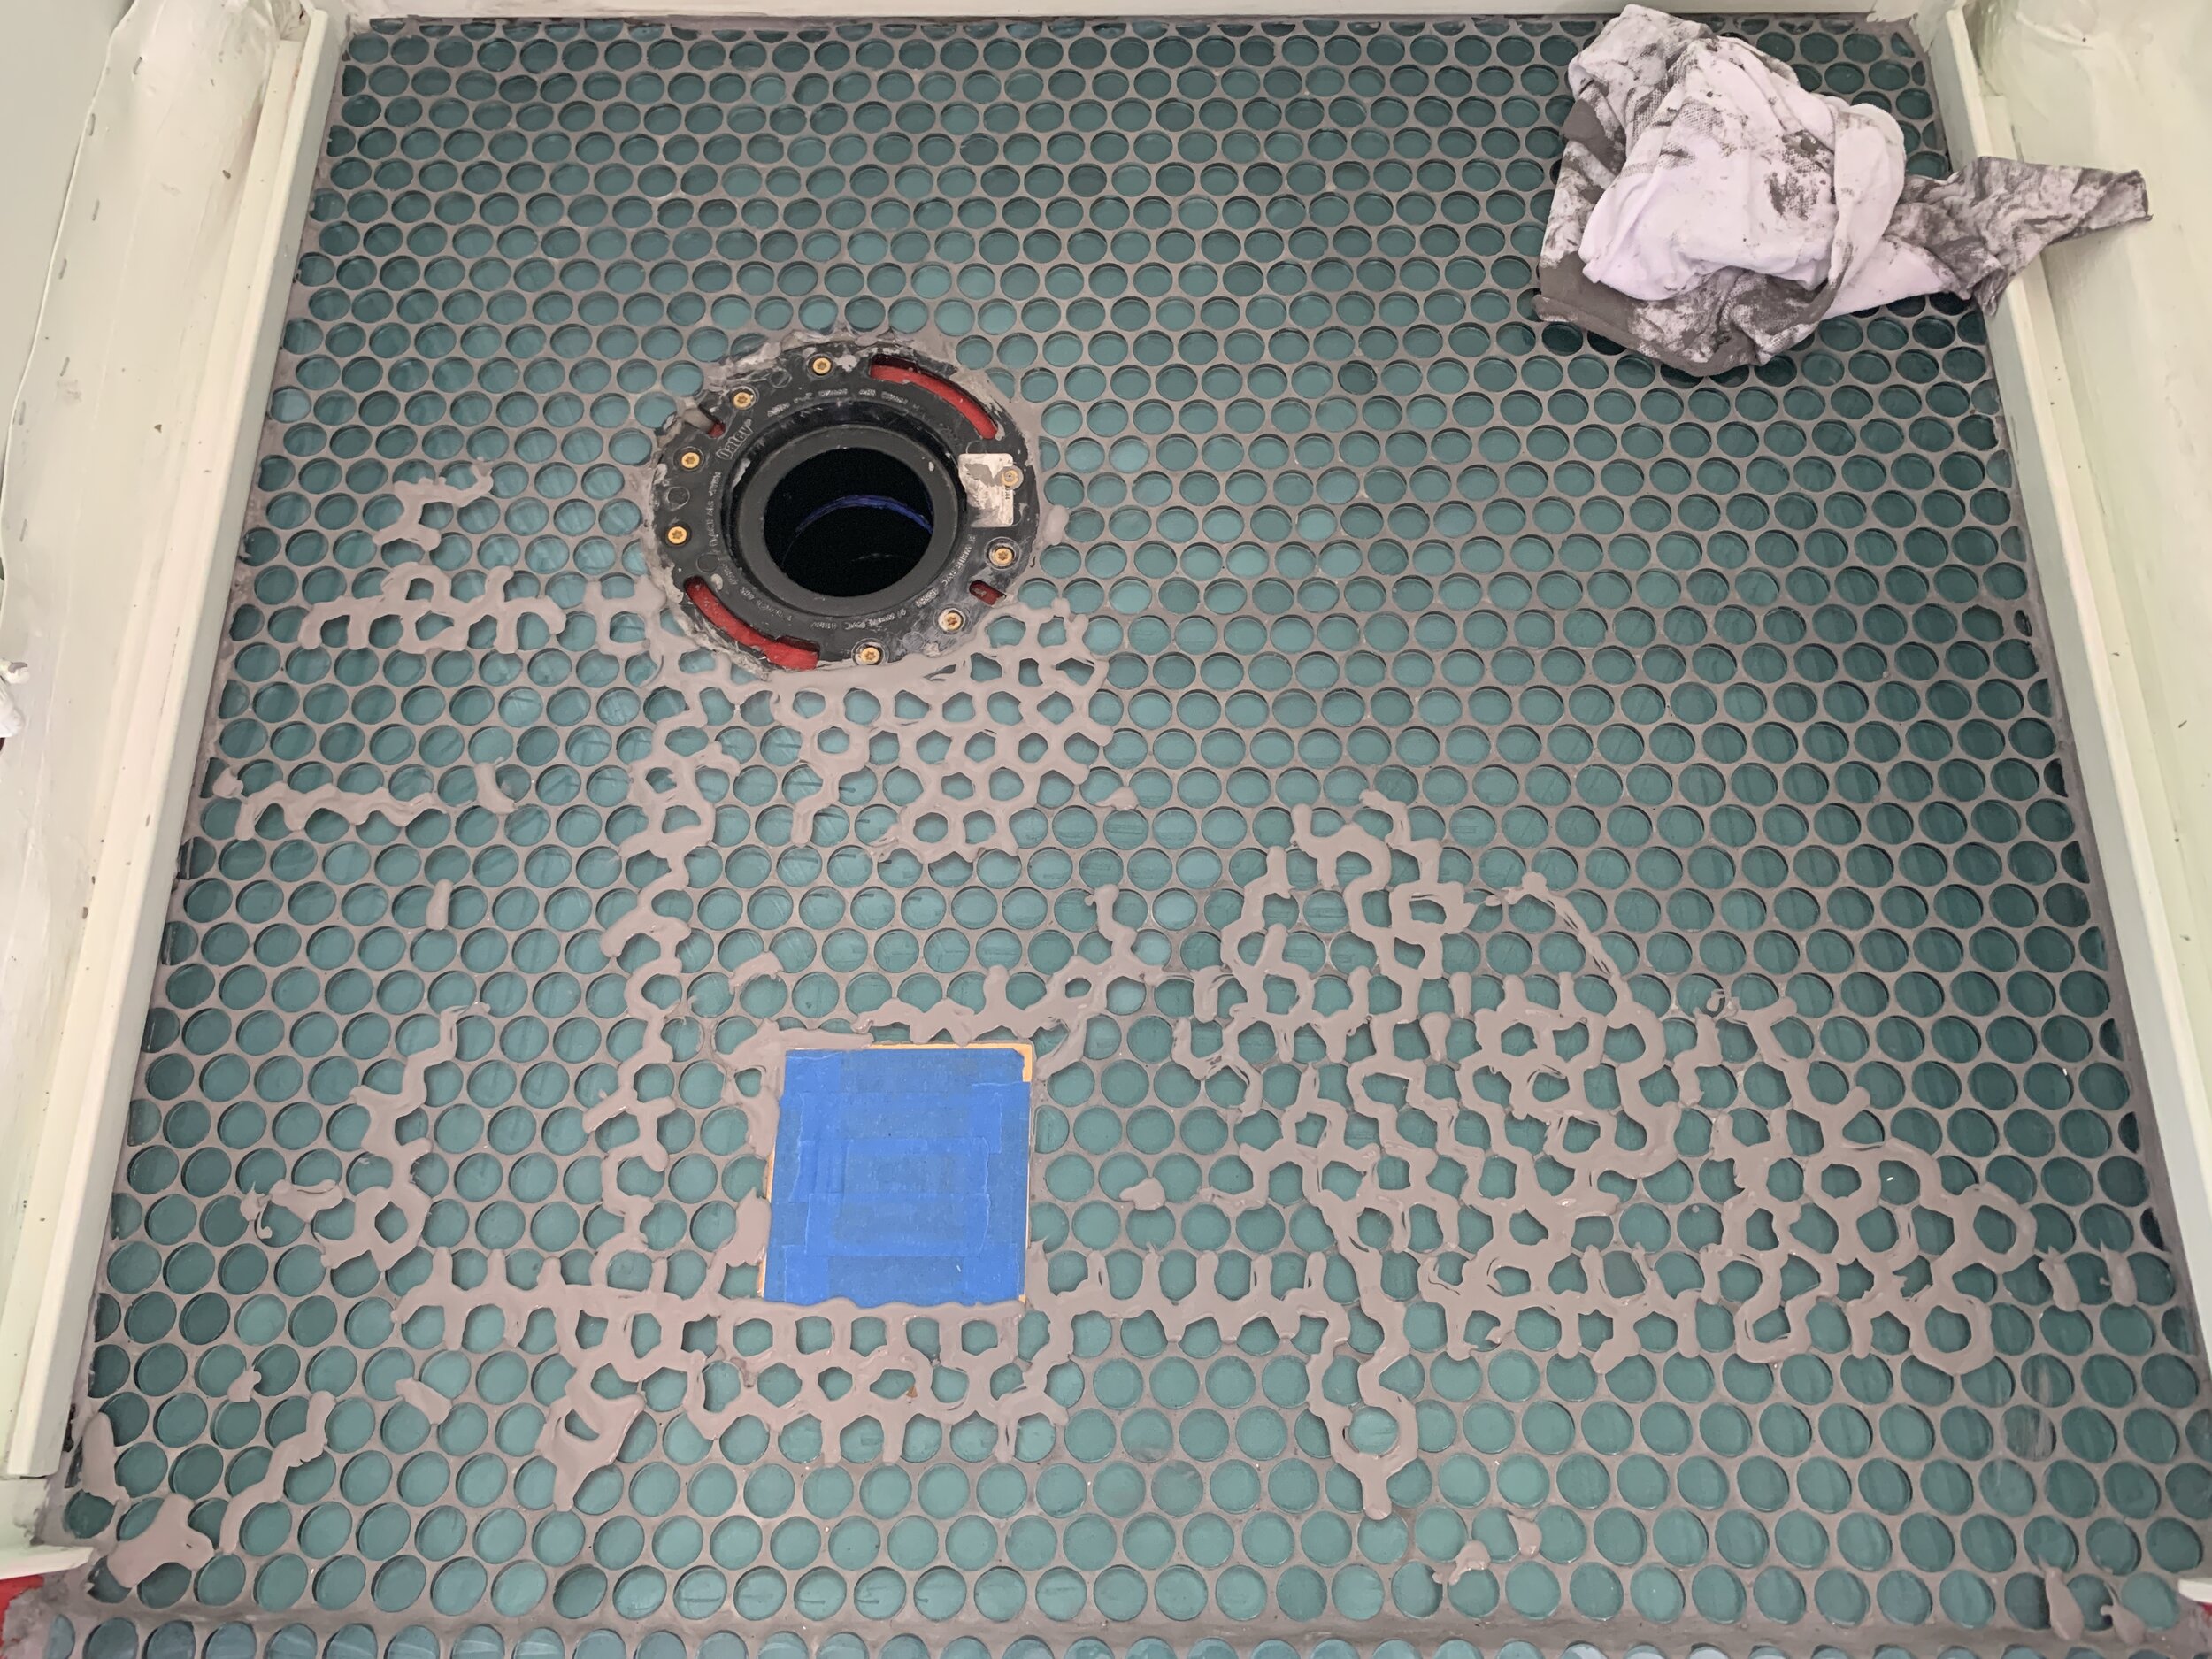
Now, because our thinset was laid a little thicker than it should have been, the weight of our tile made the tile dip and sink down in some areas. This caused thinset in some of the areas to squish through the mesh backing more than it should’ve. It should come through the mesh slightly, but still leave plenty of room on top for grout to fill the gaps. The next morning after the thinset was hard but still not completely set and rock hard, I used a plastic caulk removing tool we had on hand to scrape thinset out of some of the grout lines so that there was a channel for grout to be pushed into.
Grouting our camper shower floor
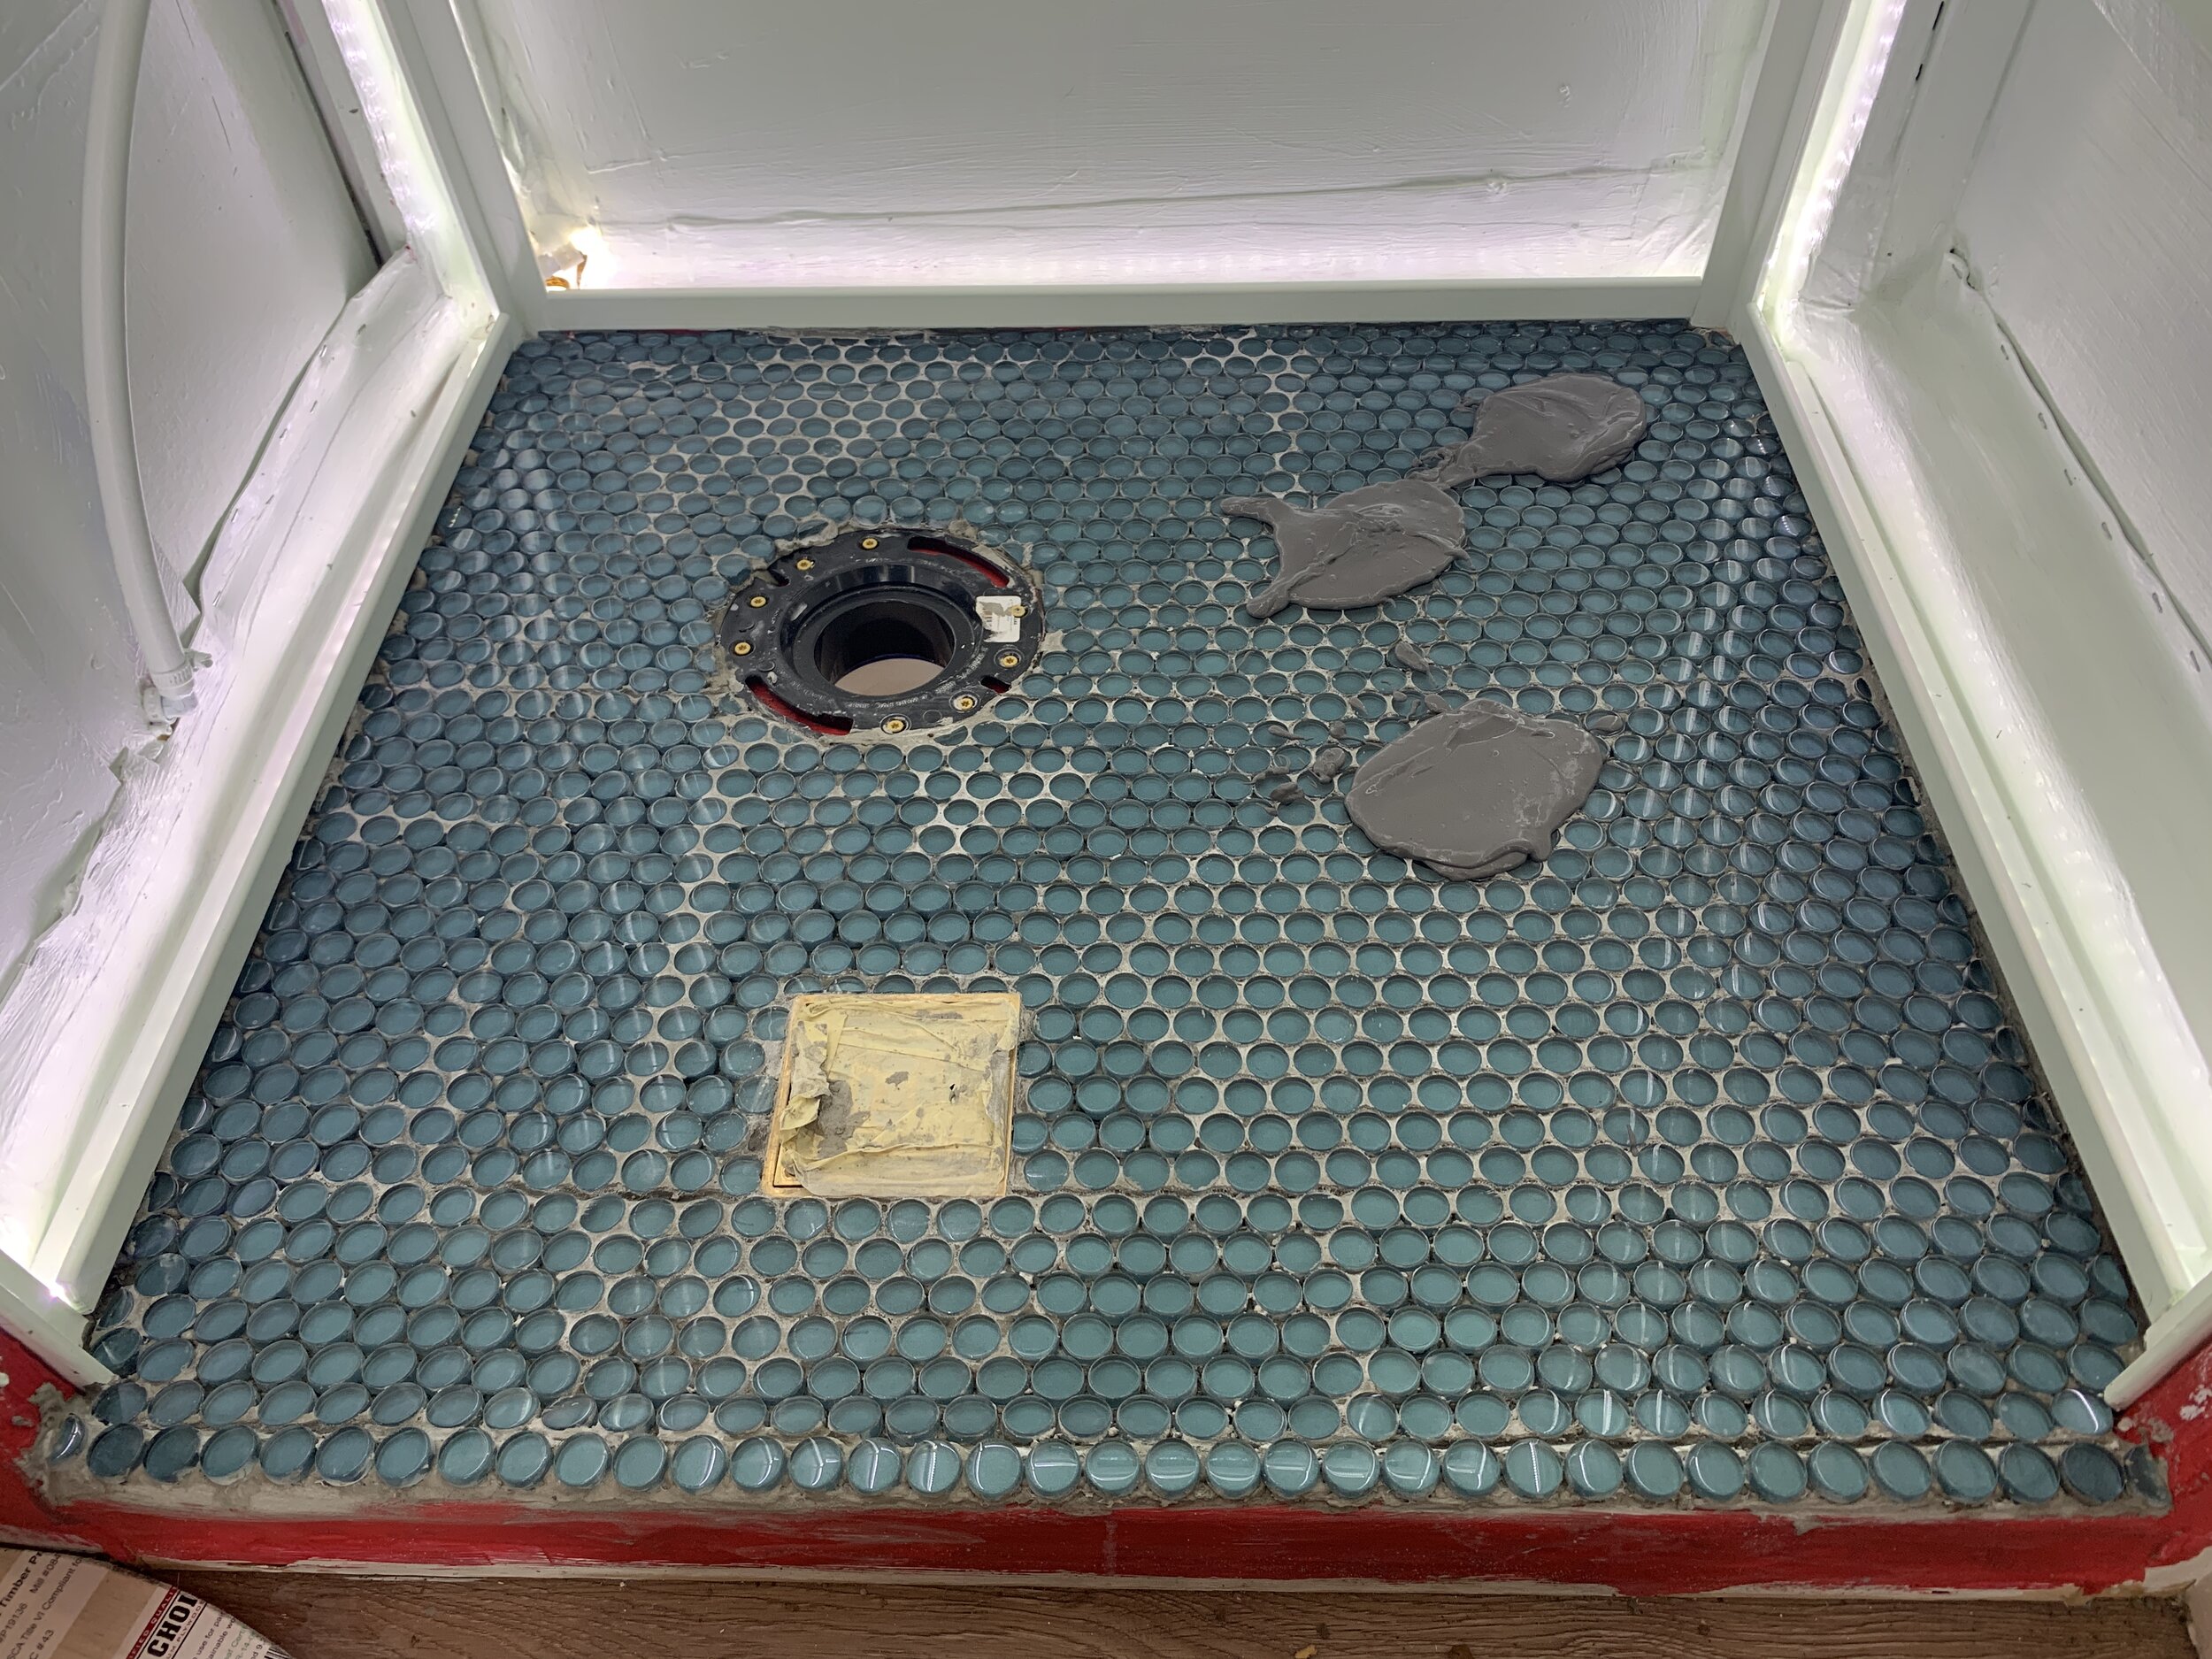
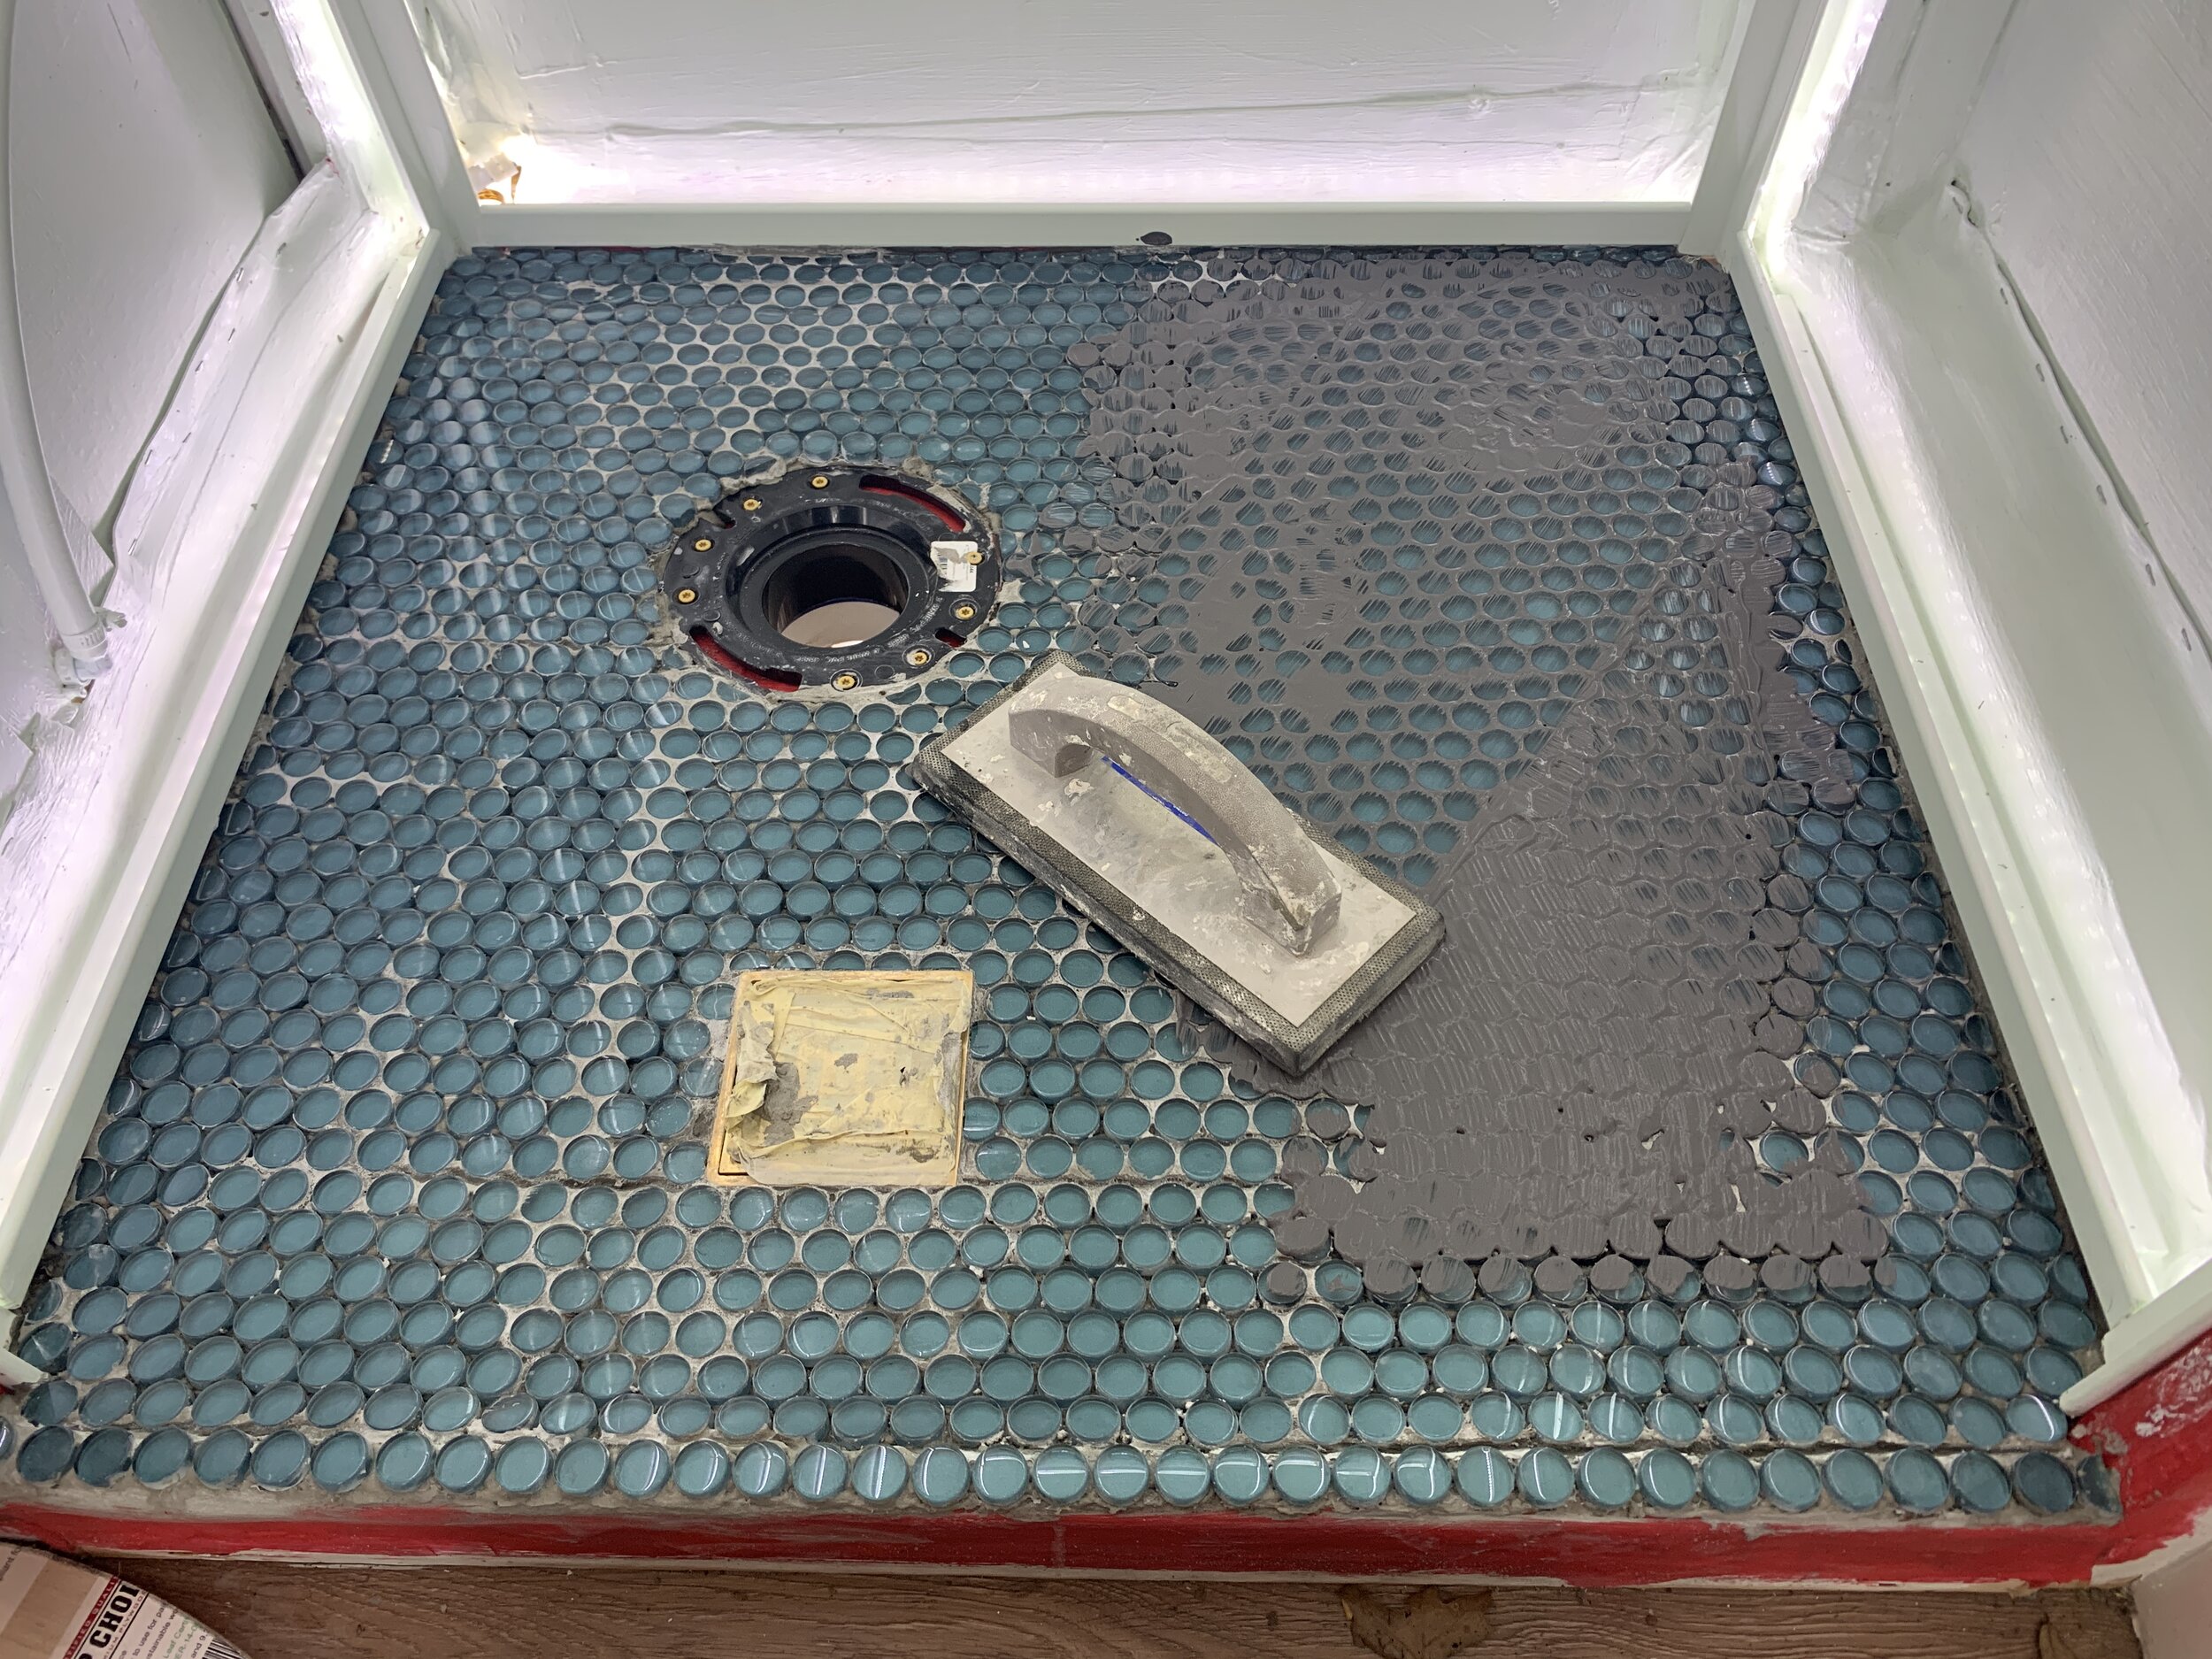
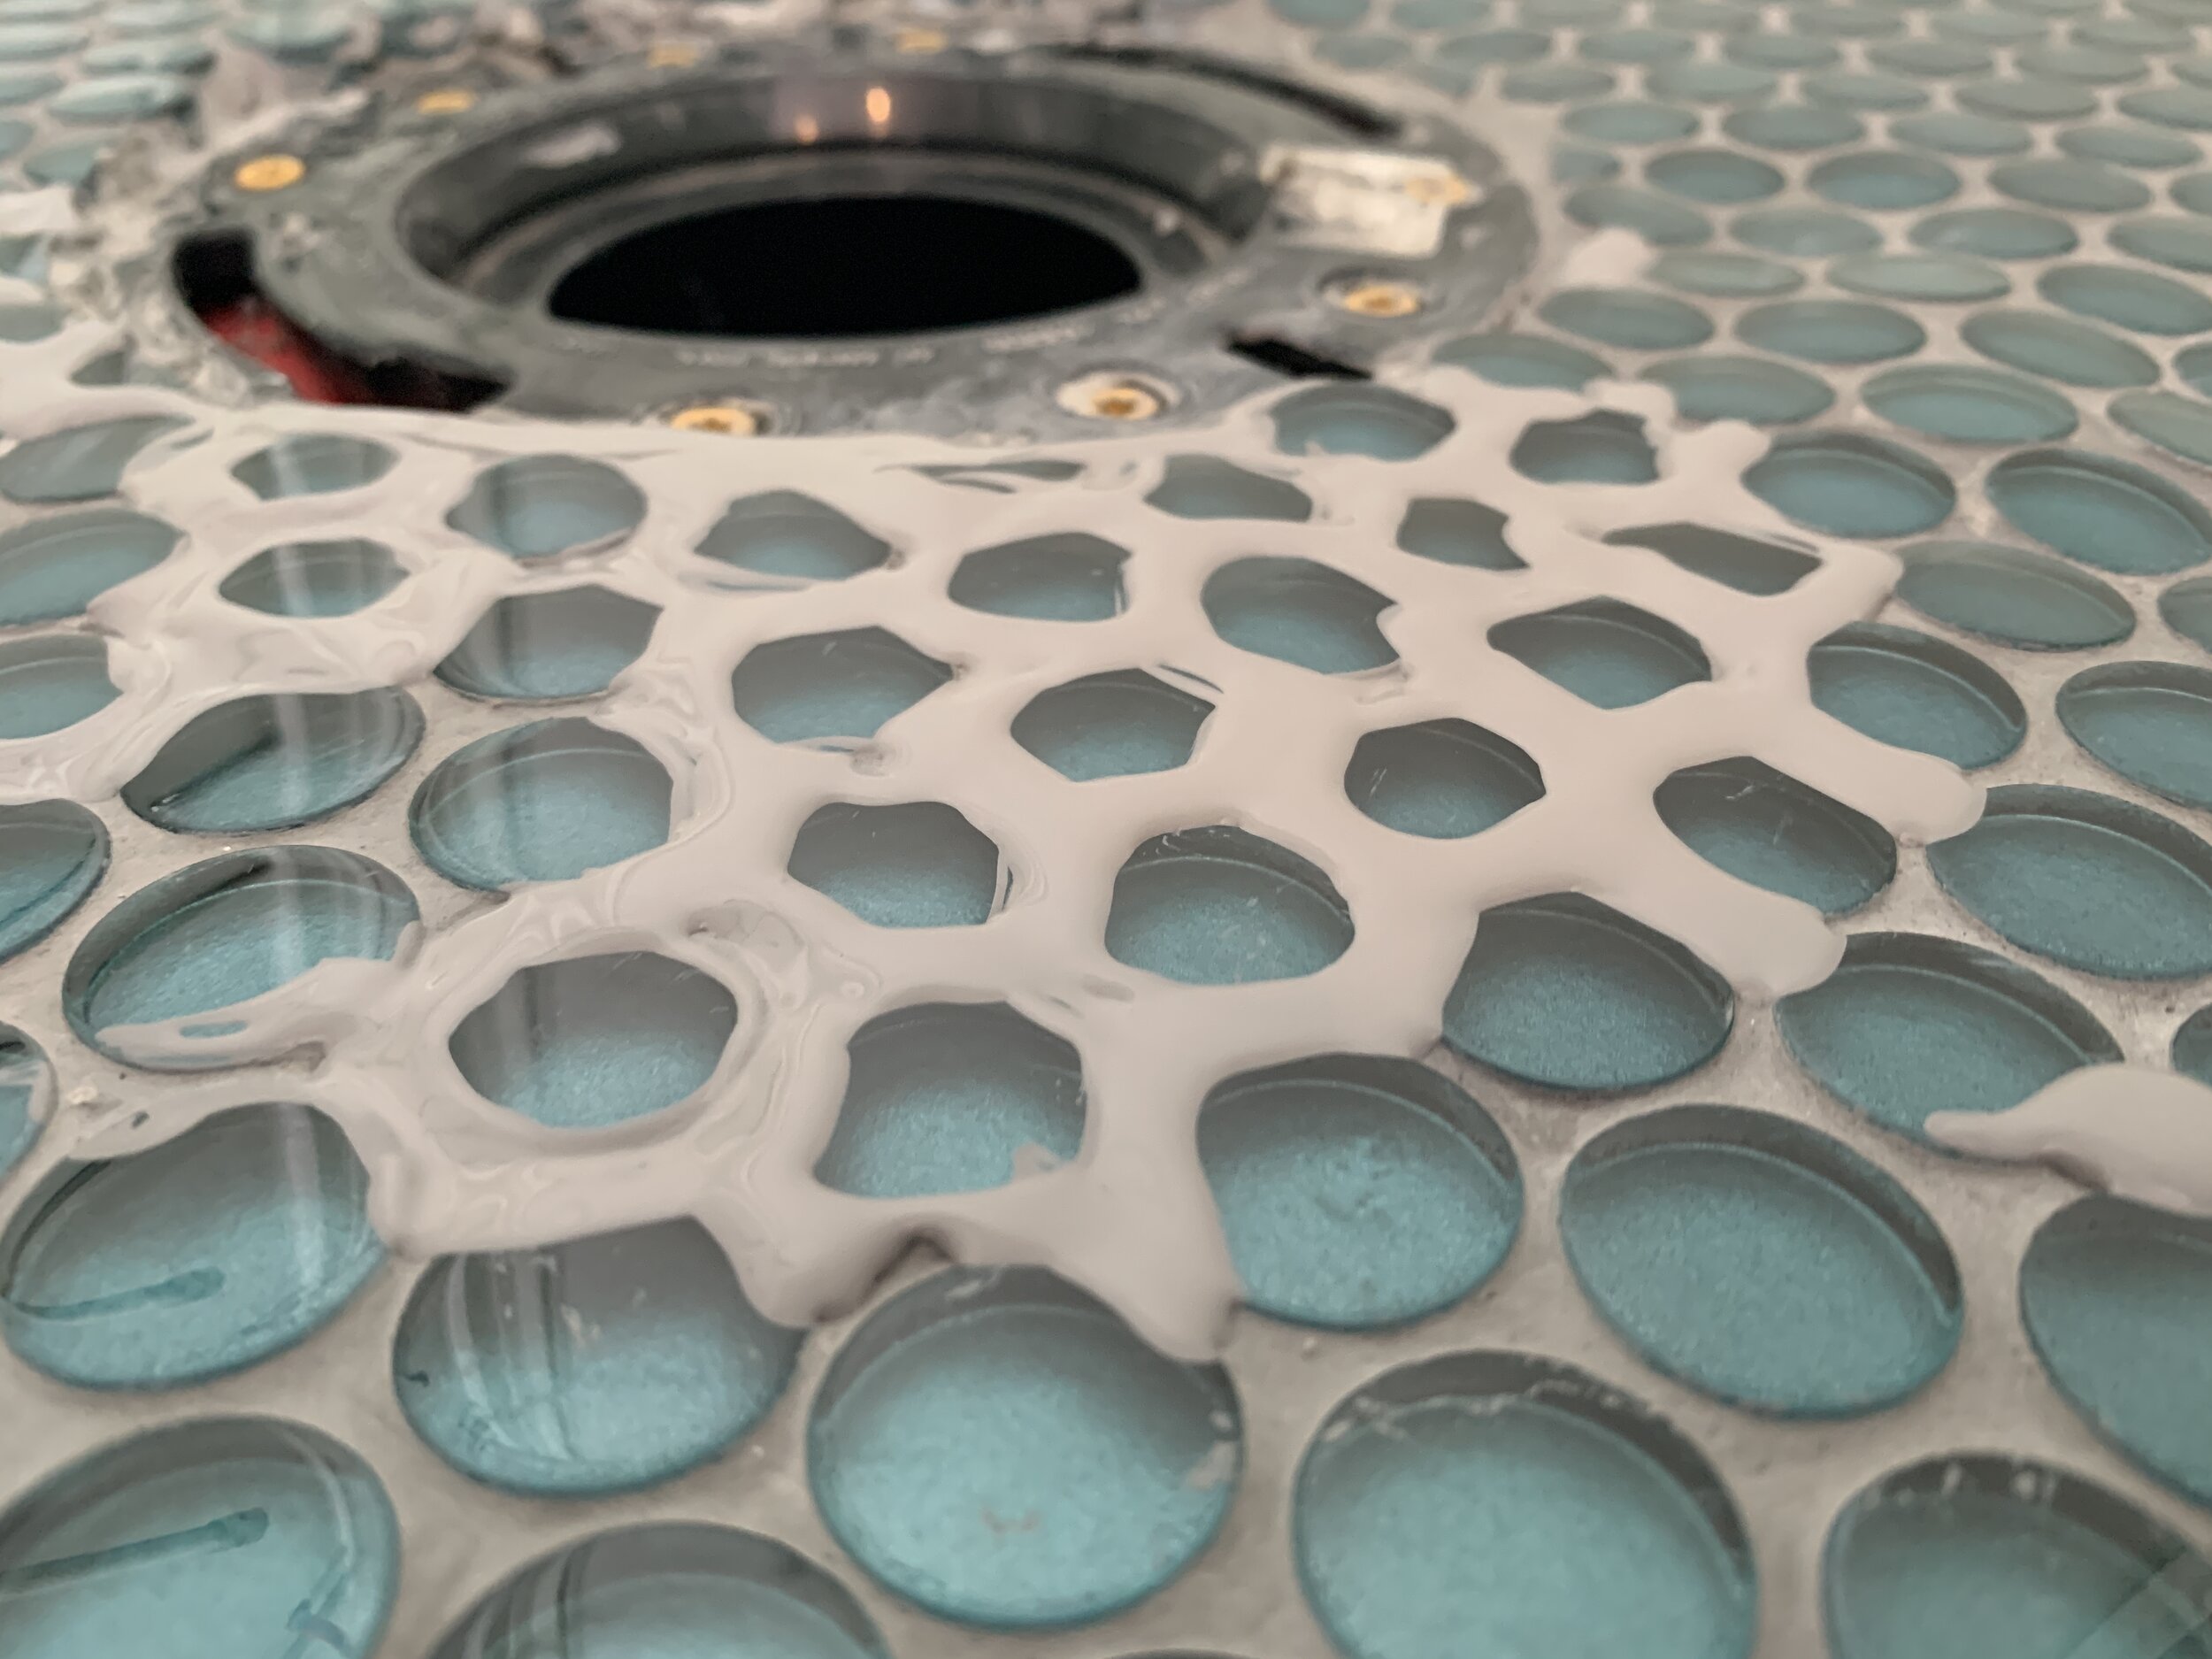
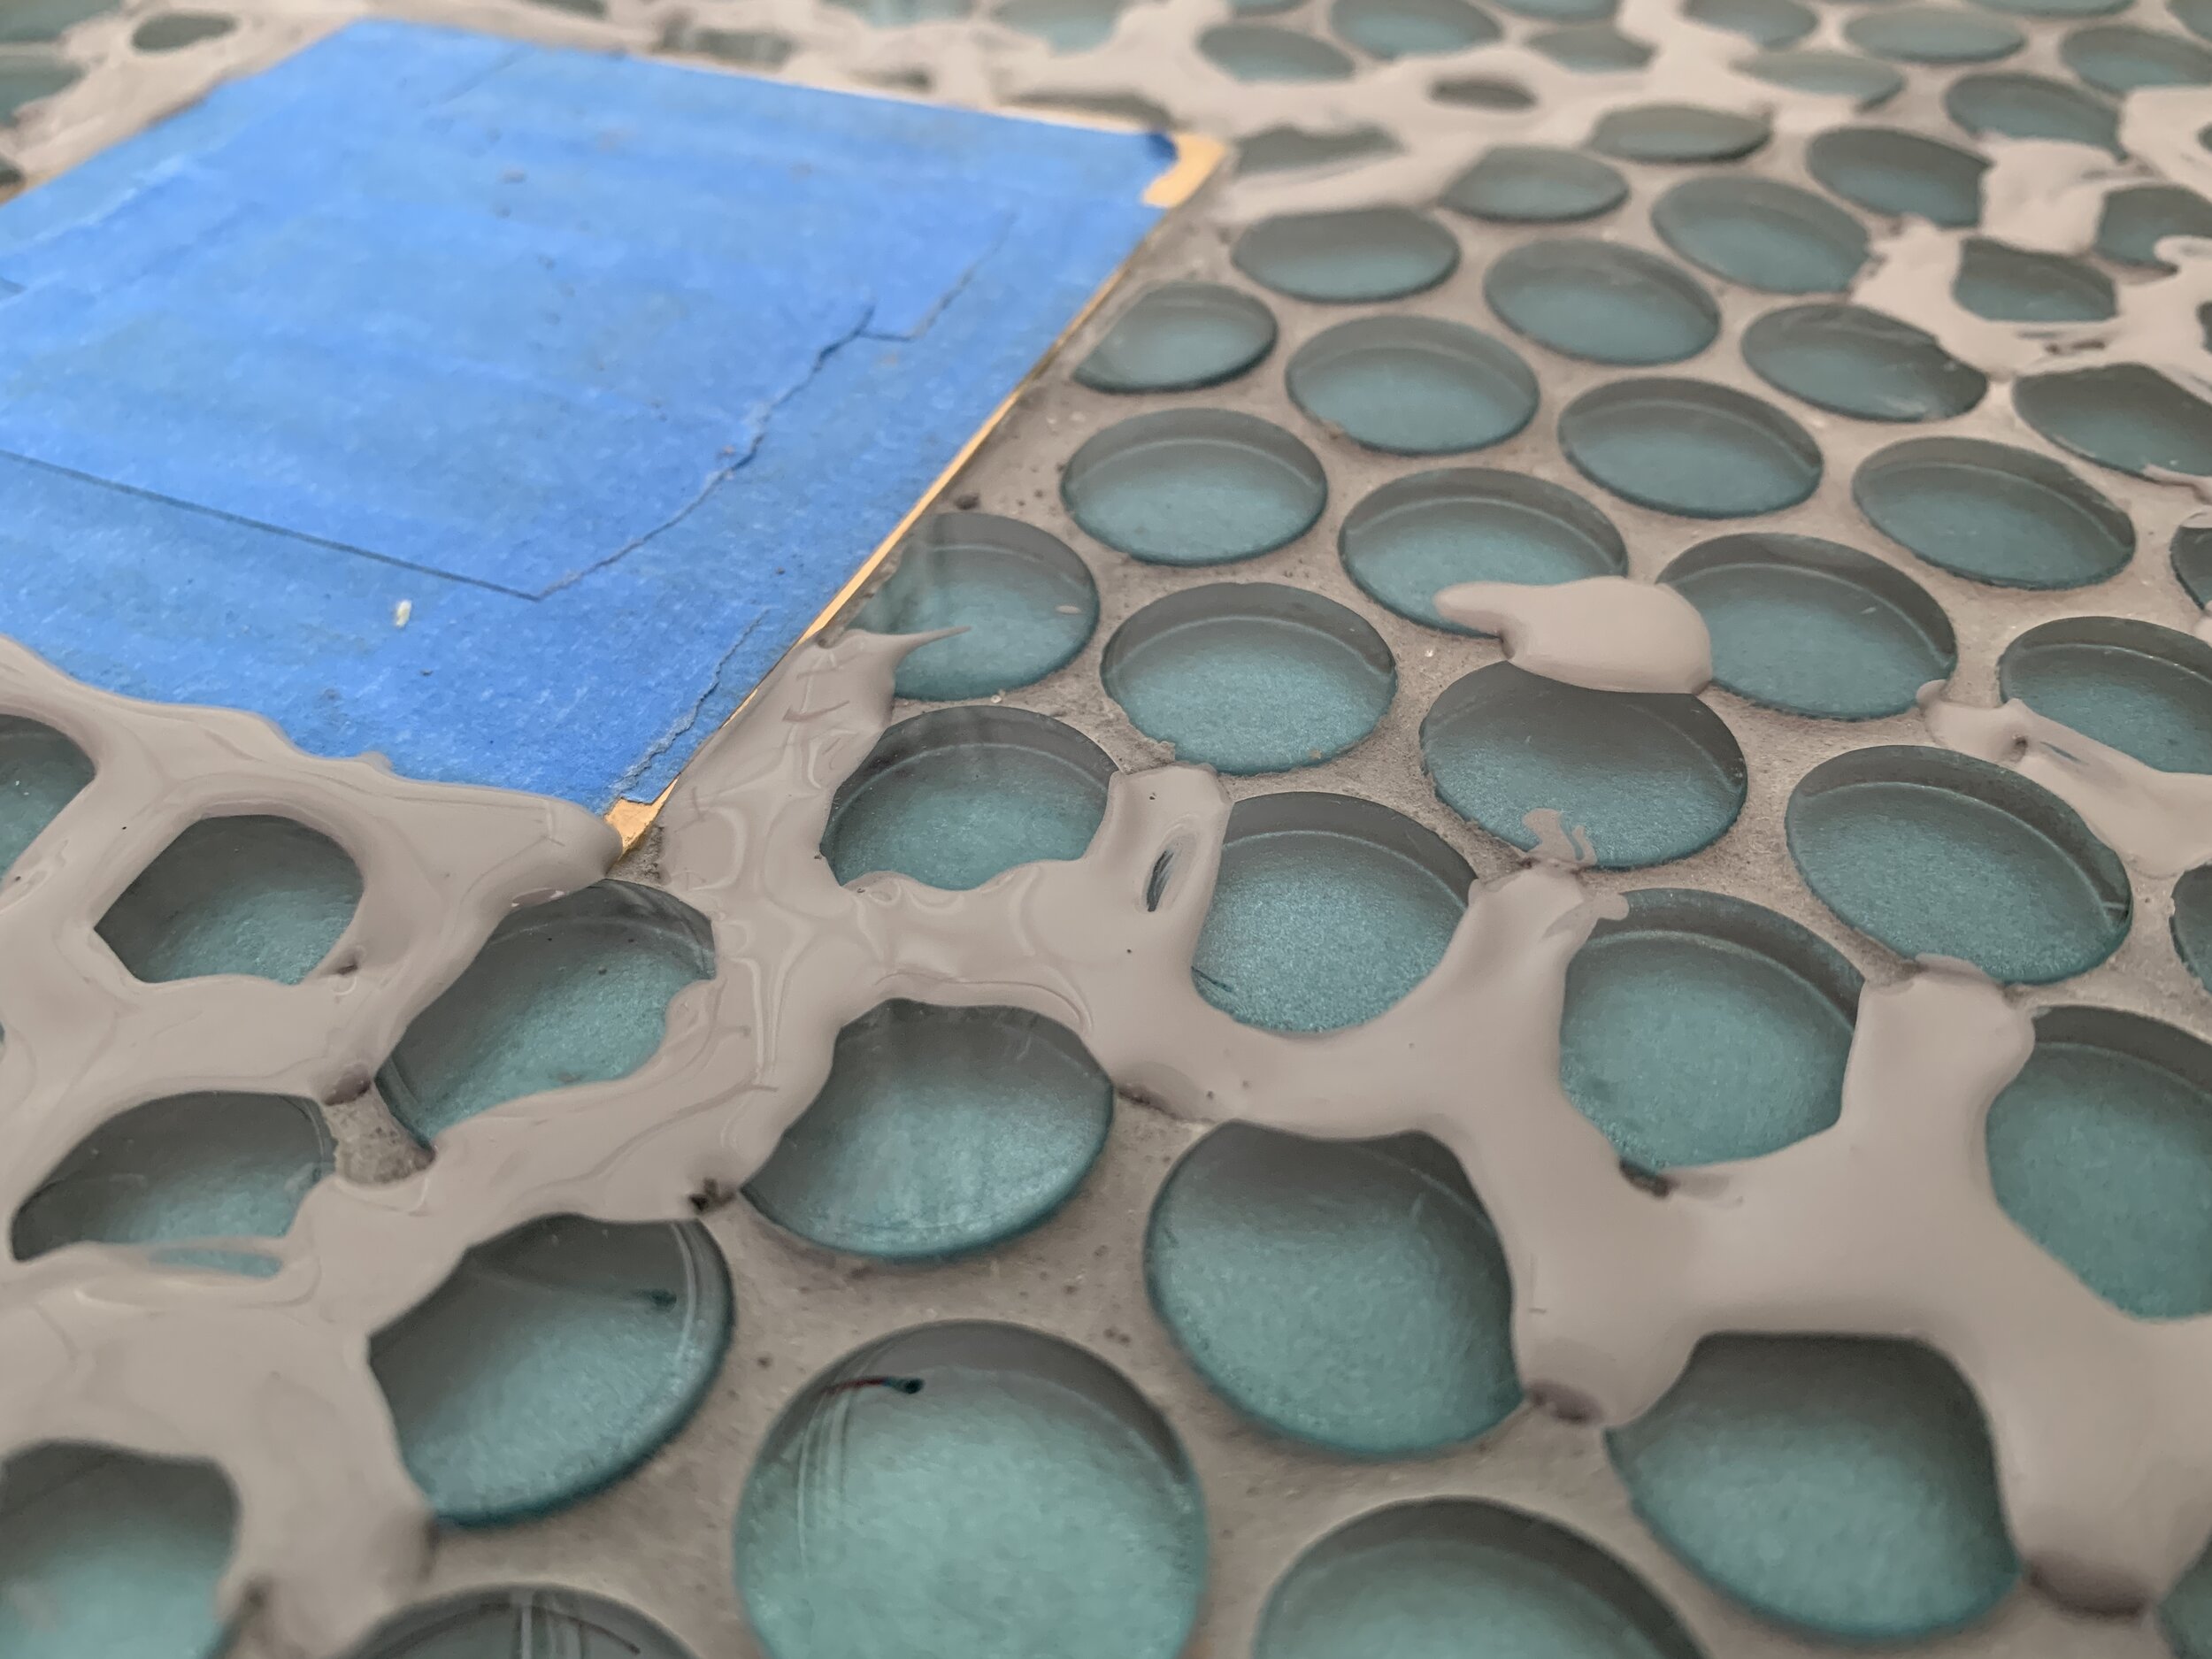
The next evening after the thinset was hard, we grouted. After mixing the grout following the instructions on the bag, we plopped grout on top of the tile in various areas in the shower, again working our way from the back to the front and used the rubber trowel at about a 45-degree angle to push the grout down into the gaps. Pushing and wiping the trowel in all different directions to get into every gap, we worked quickly to fill every crevice and fill any air holes we noticed.

After the grout is slightly dried (according to the instructions on the grout bag) we used our sponges and clean water to carefully remove wet grout from the top of the floor surface. This part takes a lot of patience, clean water, and passes with the sponge.
You must get all of the grout off of the tile. Once it hardens, it is near impossible to remove from the tops of the tile. Haze on top of the tile is different than chunks of grout. Wipe and wipe and wipe some more.

Once the grout was drier and set even more, we used a soft white lint-free rag to carefully hand polish the tops of each penny tile to a high shine. Since it was still wet (and therefore a little darker than the finished product) we let the grout dry another day before we accepted what we worried had happened.

Fixing our patchy grout
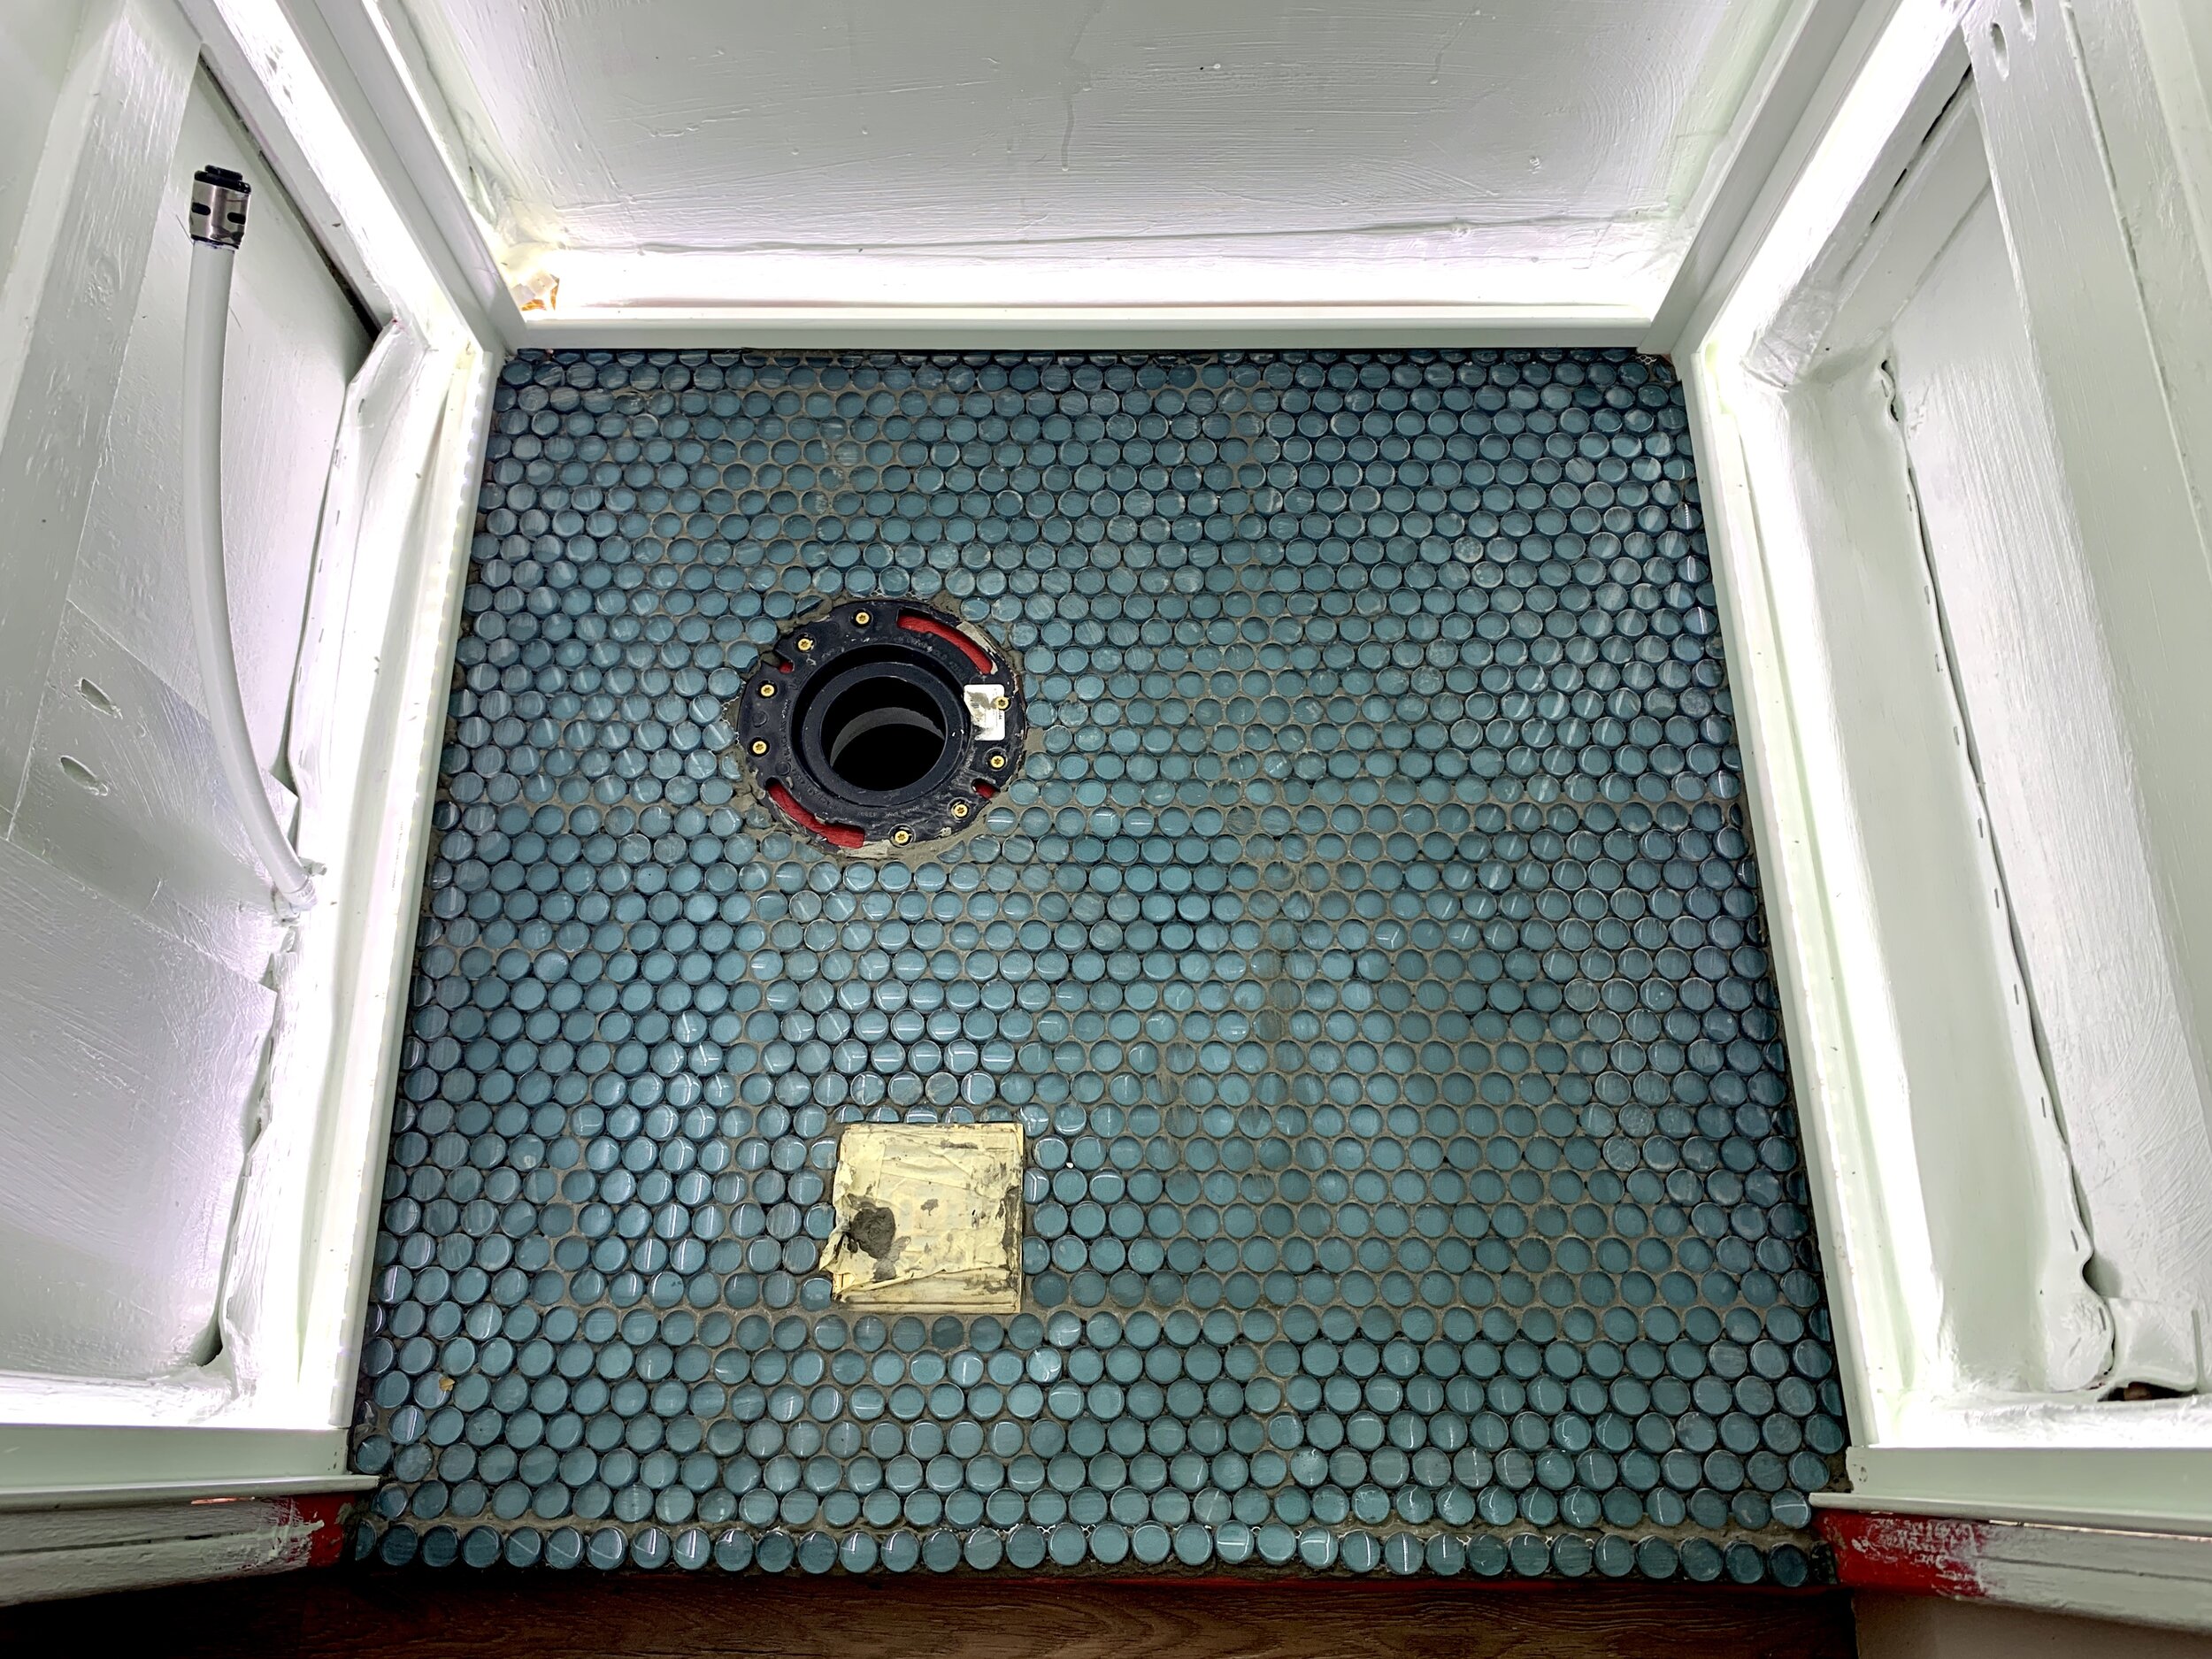
It’s about this time after our grout was officially dry (so it had lightened as much as it was going to lighten), that we confirmed what we feared and I stressed about for the entire evening and day after – our lighter gray thinset was obviously peeking through the darker grout in a blotchy way that screams “this was a DIY fail!”. I couldn’t see anything else and was so disheartened.

Now, this here fail is why I didn’t show how our grouted floor looked weeks ago. Frankly, I was embarrassed to show it to you, and really wanted to have a redemptive, “If this happens to you, don’t fret” solution. It just took me some time for the aha! moment to hit me in the dome one day.
This is not a good look.
Thankfully, I’d had previous experience and good luck with using grout paint in the past (to bring our dingy white guest bathroom shower grout back to sparkling new) so we thought “Why not? It only costs about $10 and it can’t possibly look worse than it does now”. (Now, I guess that’s not entirely true – we could really do more damage to it and make it look heinous I’m sure, but I just couldn’t stand seeing my beautiful peacock-colored glass penny rounds look so cringey.)
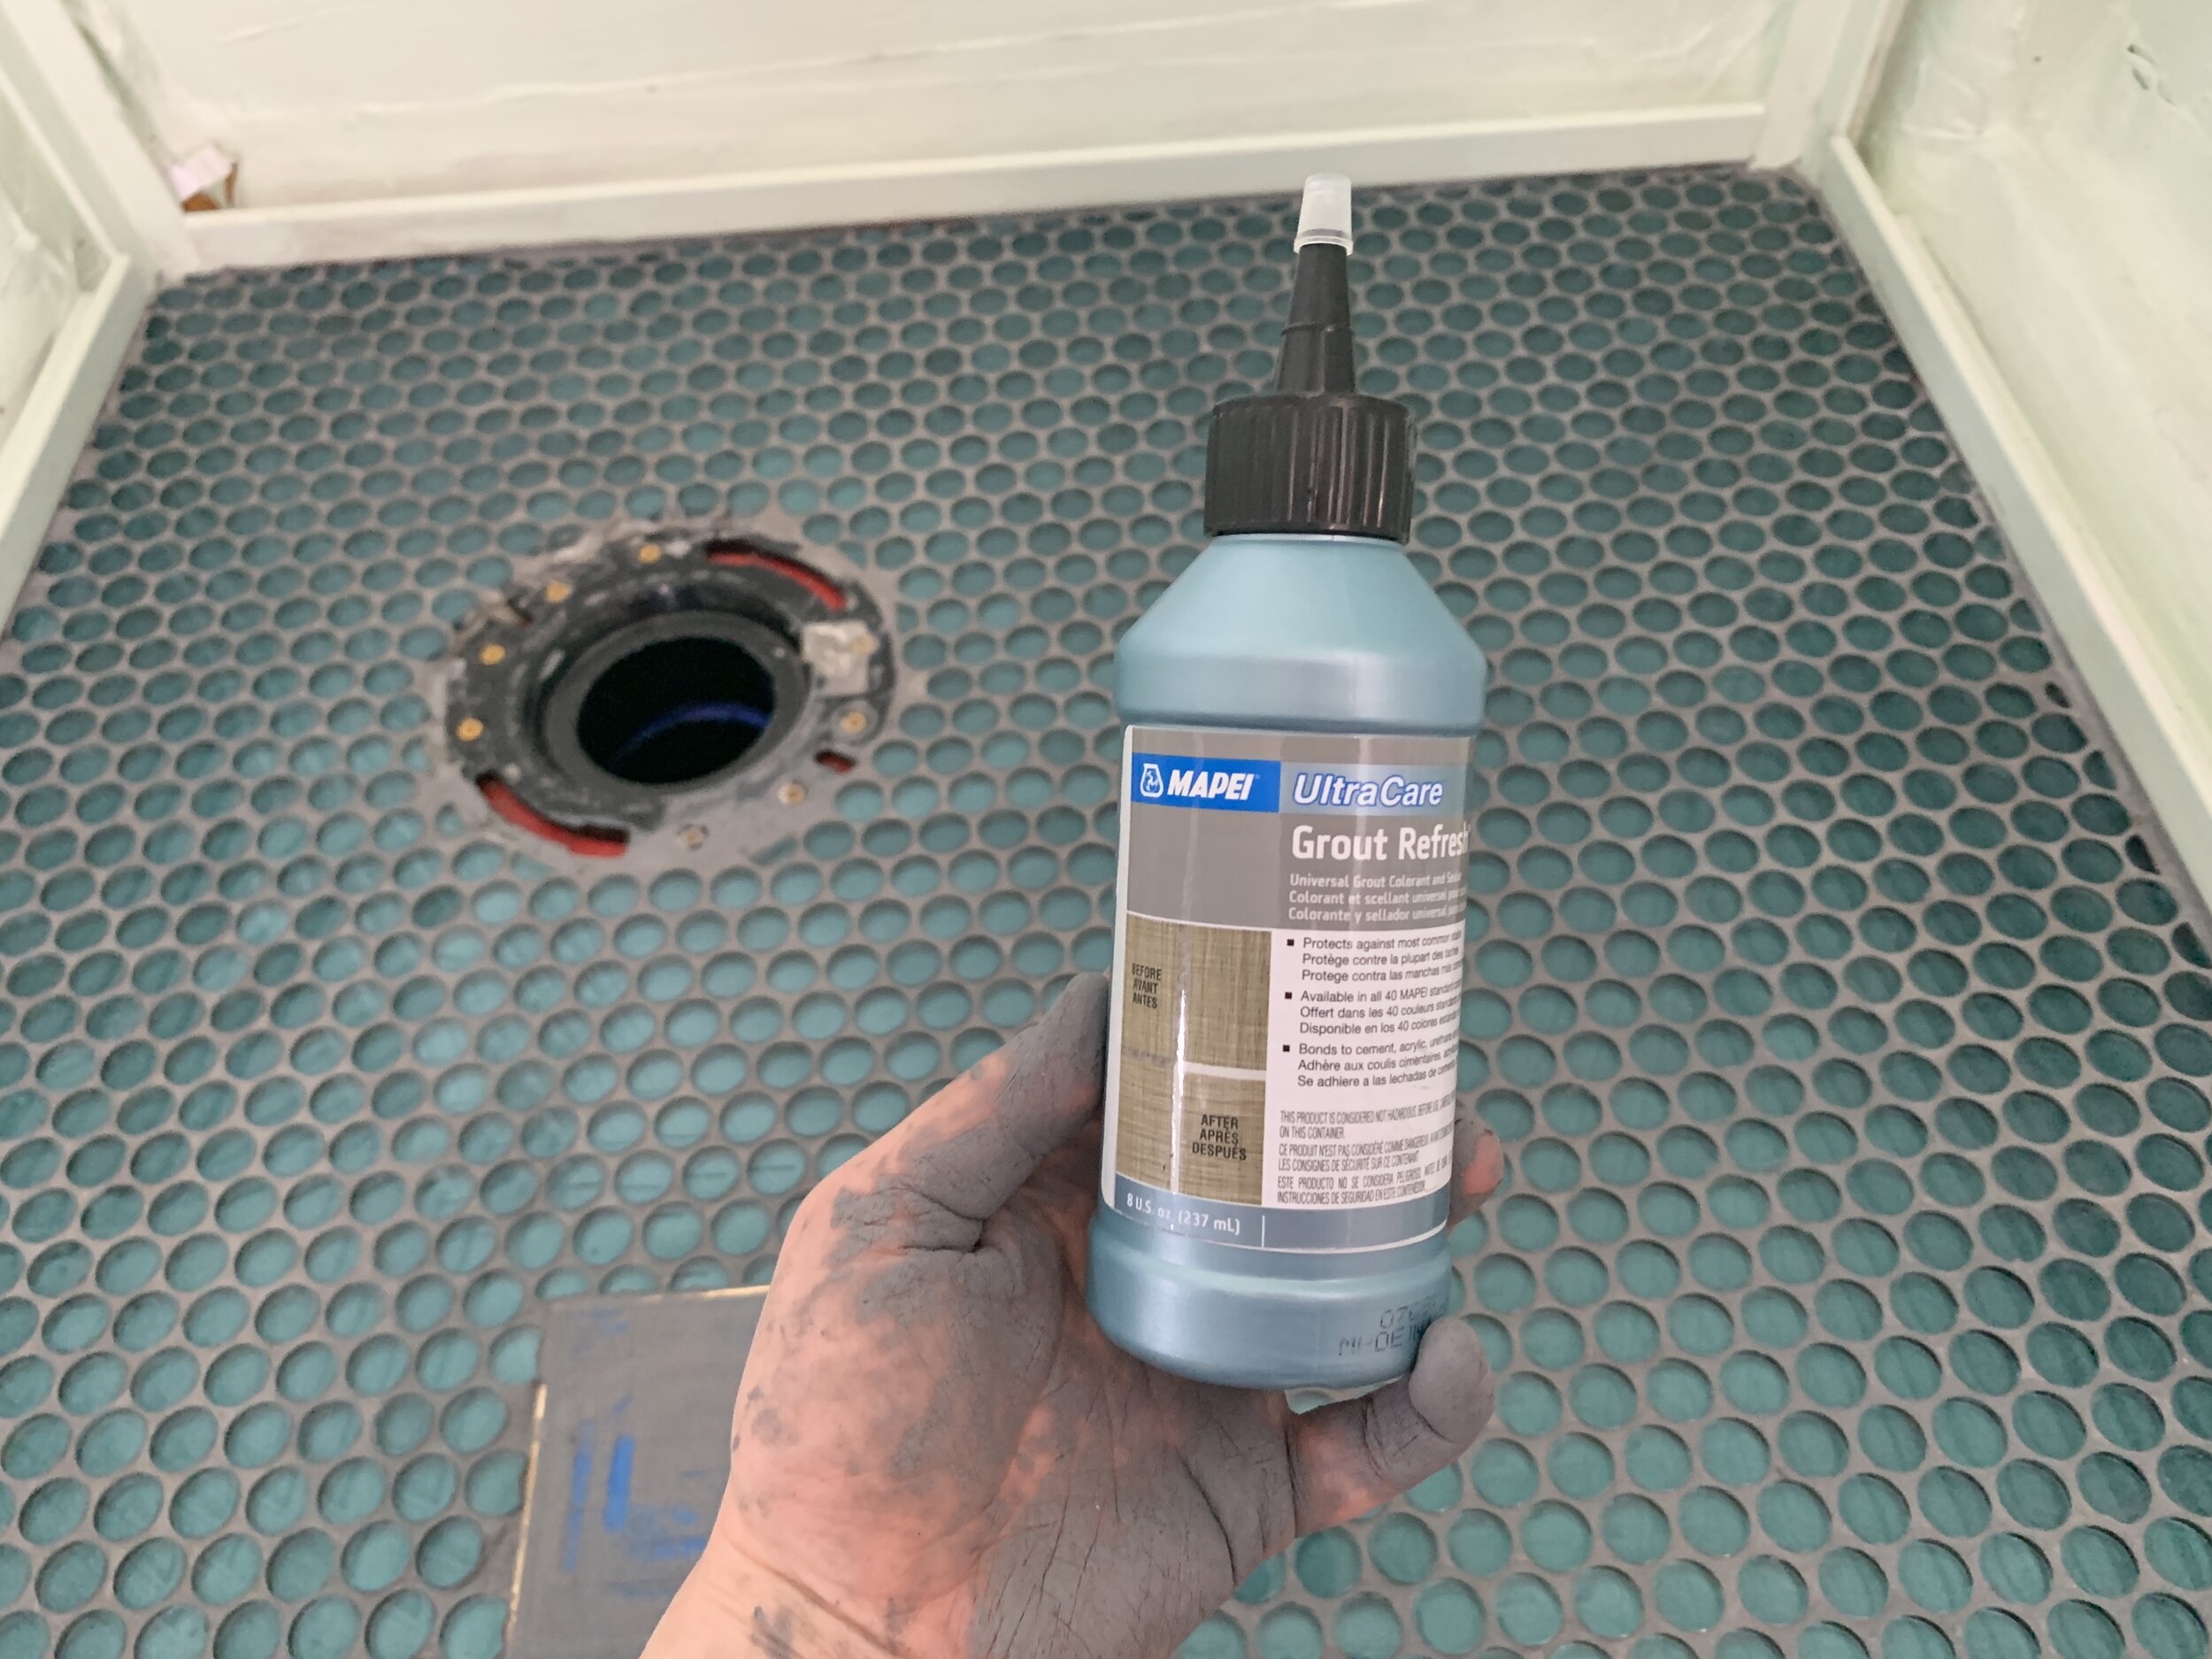

This stuff saved us today. Yes, today. As in I did this 6 hours before typing this very sentence. (I told you all I was waiting for was a successful fix to share this floor with you!)
After a vigorous shake of the bottle to mix it all together per the instructions, we cut off the tip and squeezed it on super easily (using the “dry method” mentioned in the instructions under the label on the bottle since we have glass tiles). We only used it on the light thinset-peeking-through areas to see how it would match up to our grout color and let it sit for the full 5 minutes before wiping it off with a lint-free rag. After the initial removal of goopy paint (it’s thick so it doesn’t really soak in like a stain does in wood), we used a cleaner dry rag to quickly remove the paint from the top of the tile and buff it to high shine. It doesn’t say, but I would suggest you not leave a haze on the tile – polish these bad boys up immediately in case it stays on there forever.

Great news! The Pearl Gray grout paint + sealer matched perfectly to our gray grout. Score! (I haven’t even done the full floor – just the light areas – but you’d never know by looking at the after photos below since it goes so well.)

After weeks of uncertainty and stressing out about how this beautiful (yet unfinished) shower was already a big ol’ flop, I am so pleased with how it looks today and my vibes can best be expressed by this:

What do you think? Did we totally redeem ourselves?

Shower floor – before grout paint

Shower floor – after grout paint
Quick check-in
Do you like when we share our fails (and hopefully redemptions)?
One thing I continue to hear from people afraid to do their own projects is that they don’t know how and are worried they’re going to “mess up”. Though the thought of being perfect and having a flawless Instagram like so many others is appealing, I always try to be as transparent with y’all as possible so you know we all make mistakes. Nick and I are super real and though we DIY a lot, almost none of our projects go off without some sort of hitch or without us needing to pivot to plan B (and sometimes we get way farther down the alphabet).
The real “trick” is not being afraid to fail and learn and pivot as you go. I swear, I find we learn so much more from our failures than our successes.
Is there anything you want to see more of? Anything that’s completely different?
We’d love to hear from you in the comments below!