The Cameo Camper Renovation: Prepping + painting the exterior
Update: Since our original post, I realized I never mentioned how much paint + primer we actually used.
According to my notes (I think from the time I called Sherwin Williams to research), 1 gallon Sher-Cryl HPA ≈ 300 square feet.
Amounts actually needed to cover our 14’ camper / 17’ trailer:
Primer: 1 gallon of the DTM Acrylic Primer/Finish – painting 2 coats on each wall and the whole roof. (We bought 2 gallons and have 1 full gallon leftover.)
Off-white paint: 1 gallon of the Greek Villa Sher-Cryl HPA High Performance Acrylic semi-gloss paint – painting 2 coats on the roof and top half of each wall. (We bought 2 gallons and have 1 full gallon leftover + a tiny amount of the first gallon left.)
Navy paint: 2 gallons of In the Navy Sher-Cryl HPA High Performance Acrylic semi-gloss paint – painting 4 coats on the bottom half of each wall and the trailer tongue. (We bought 2 gallons and have a small amount left in our second gallon to use for paint touch ups.)

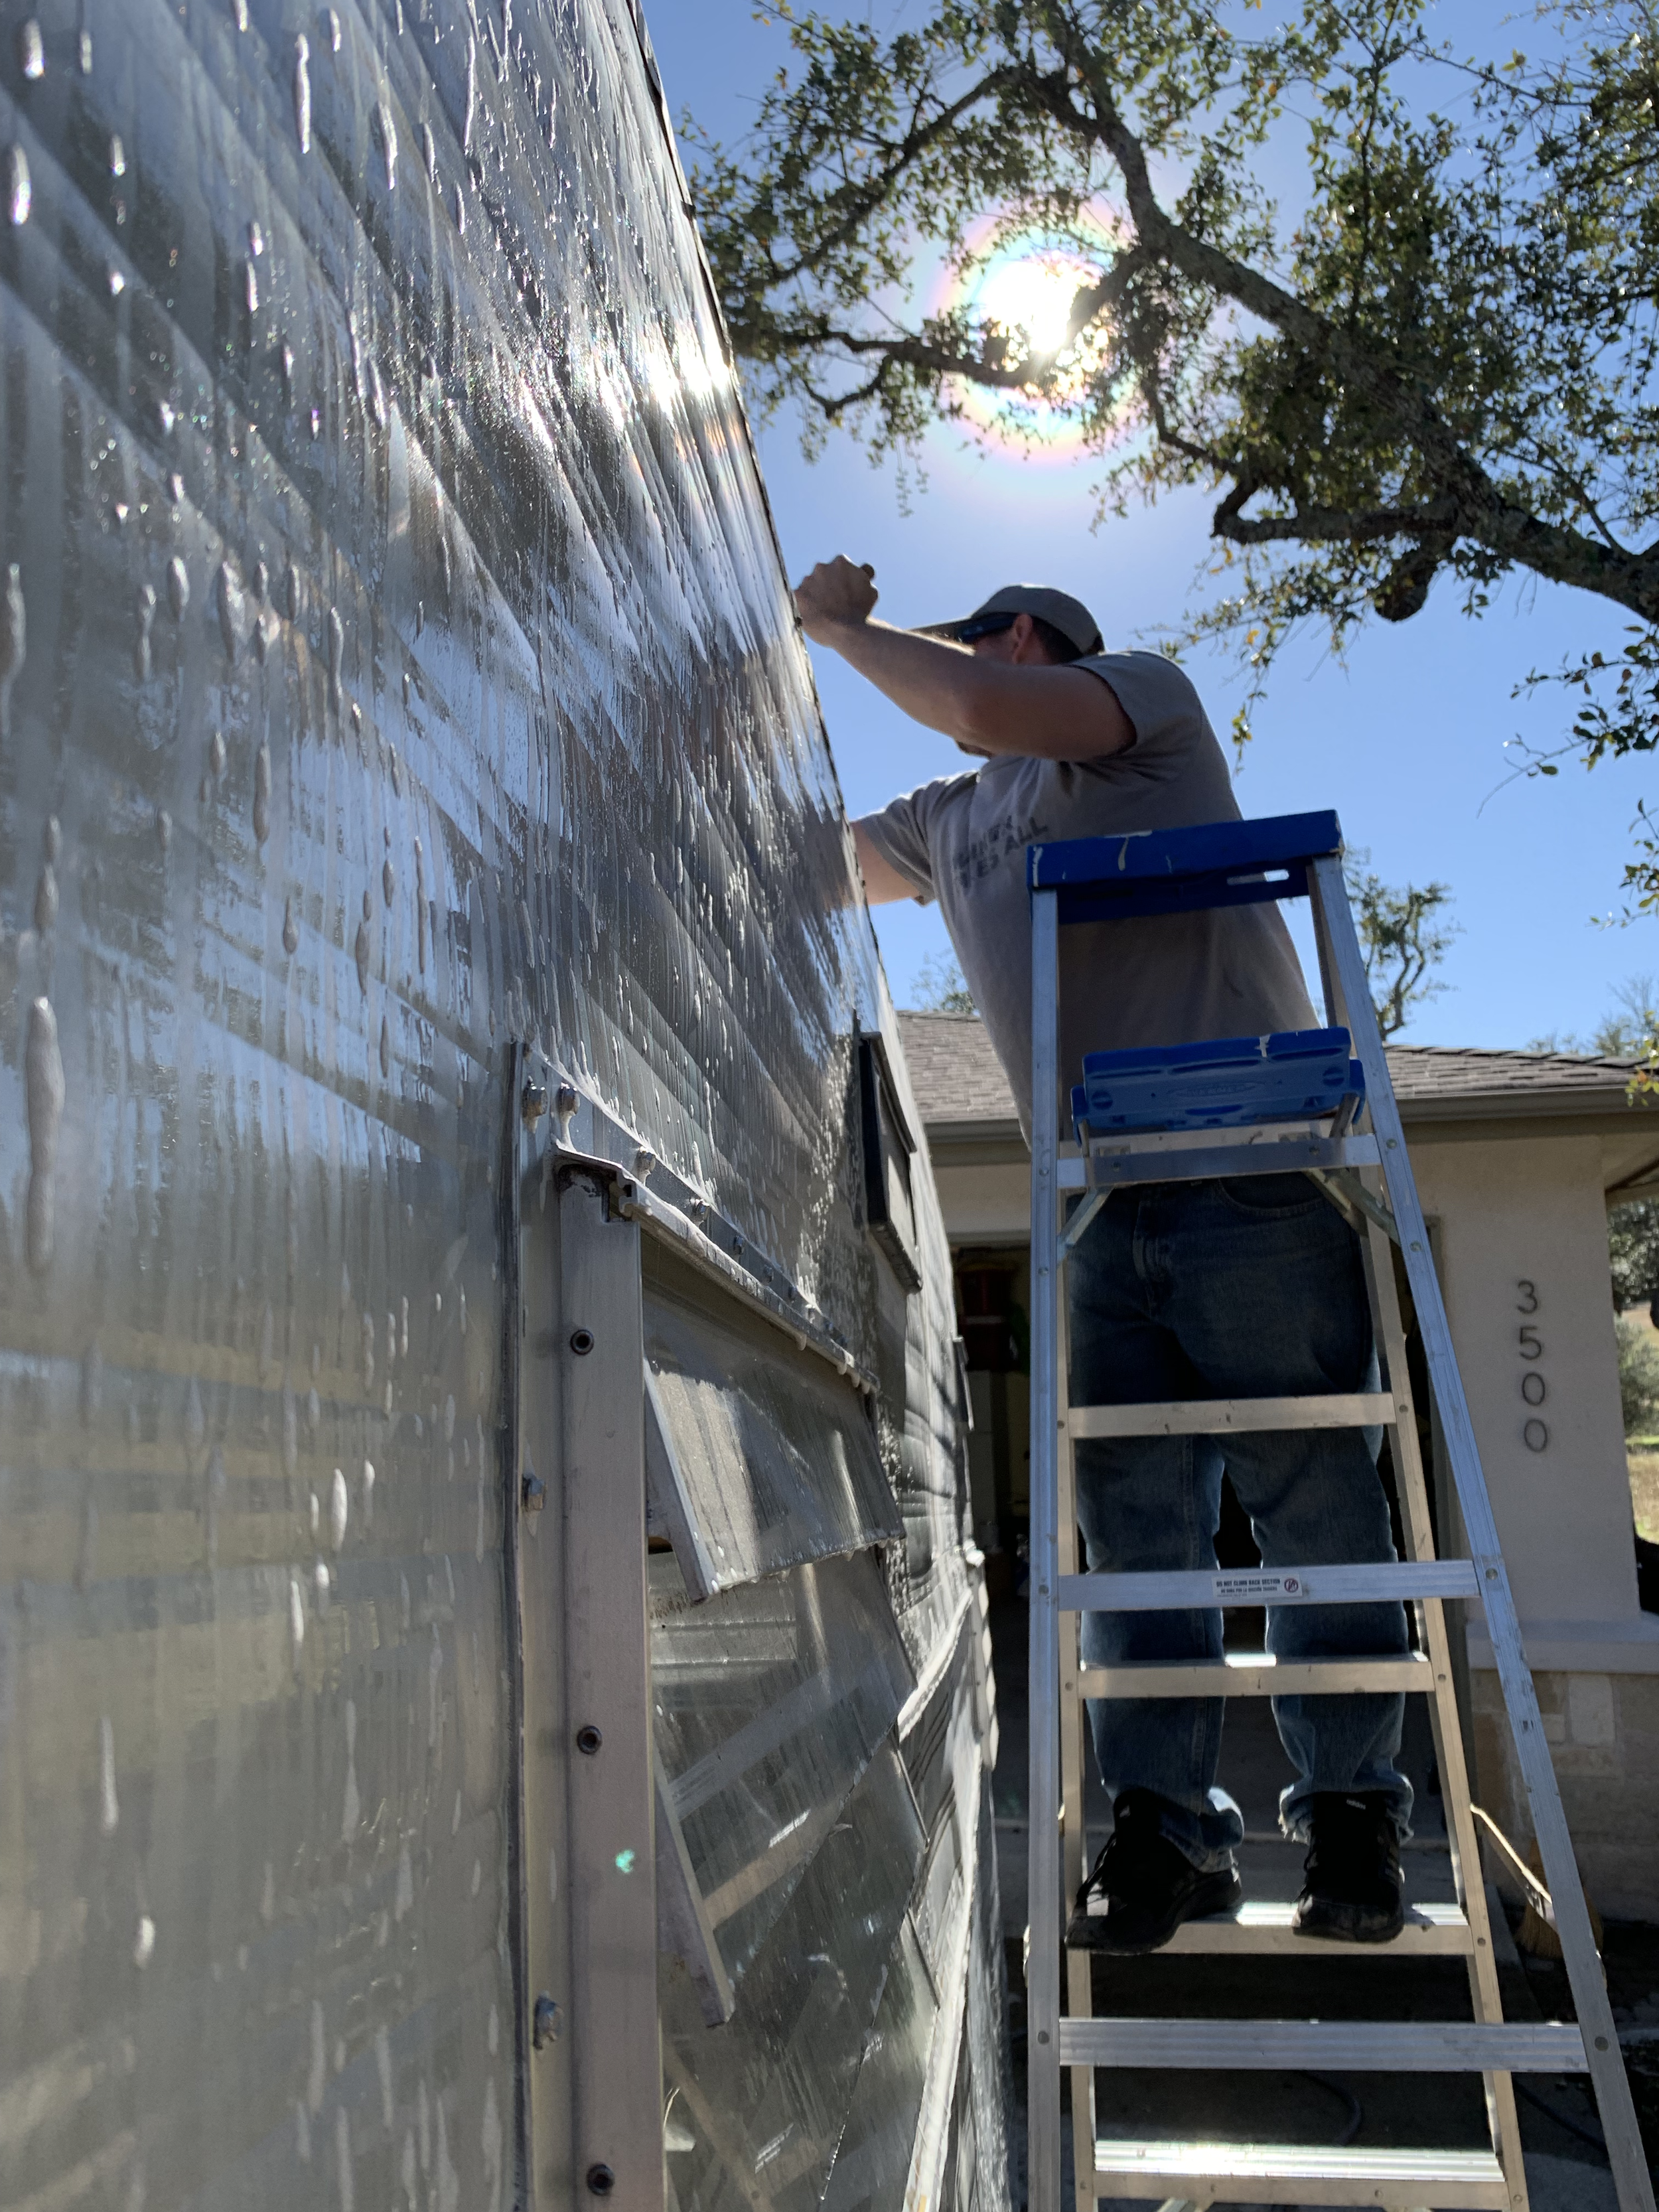
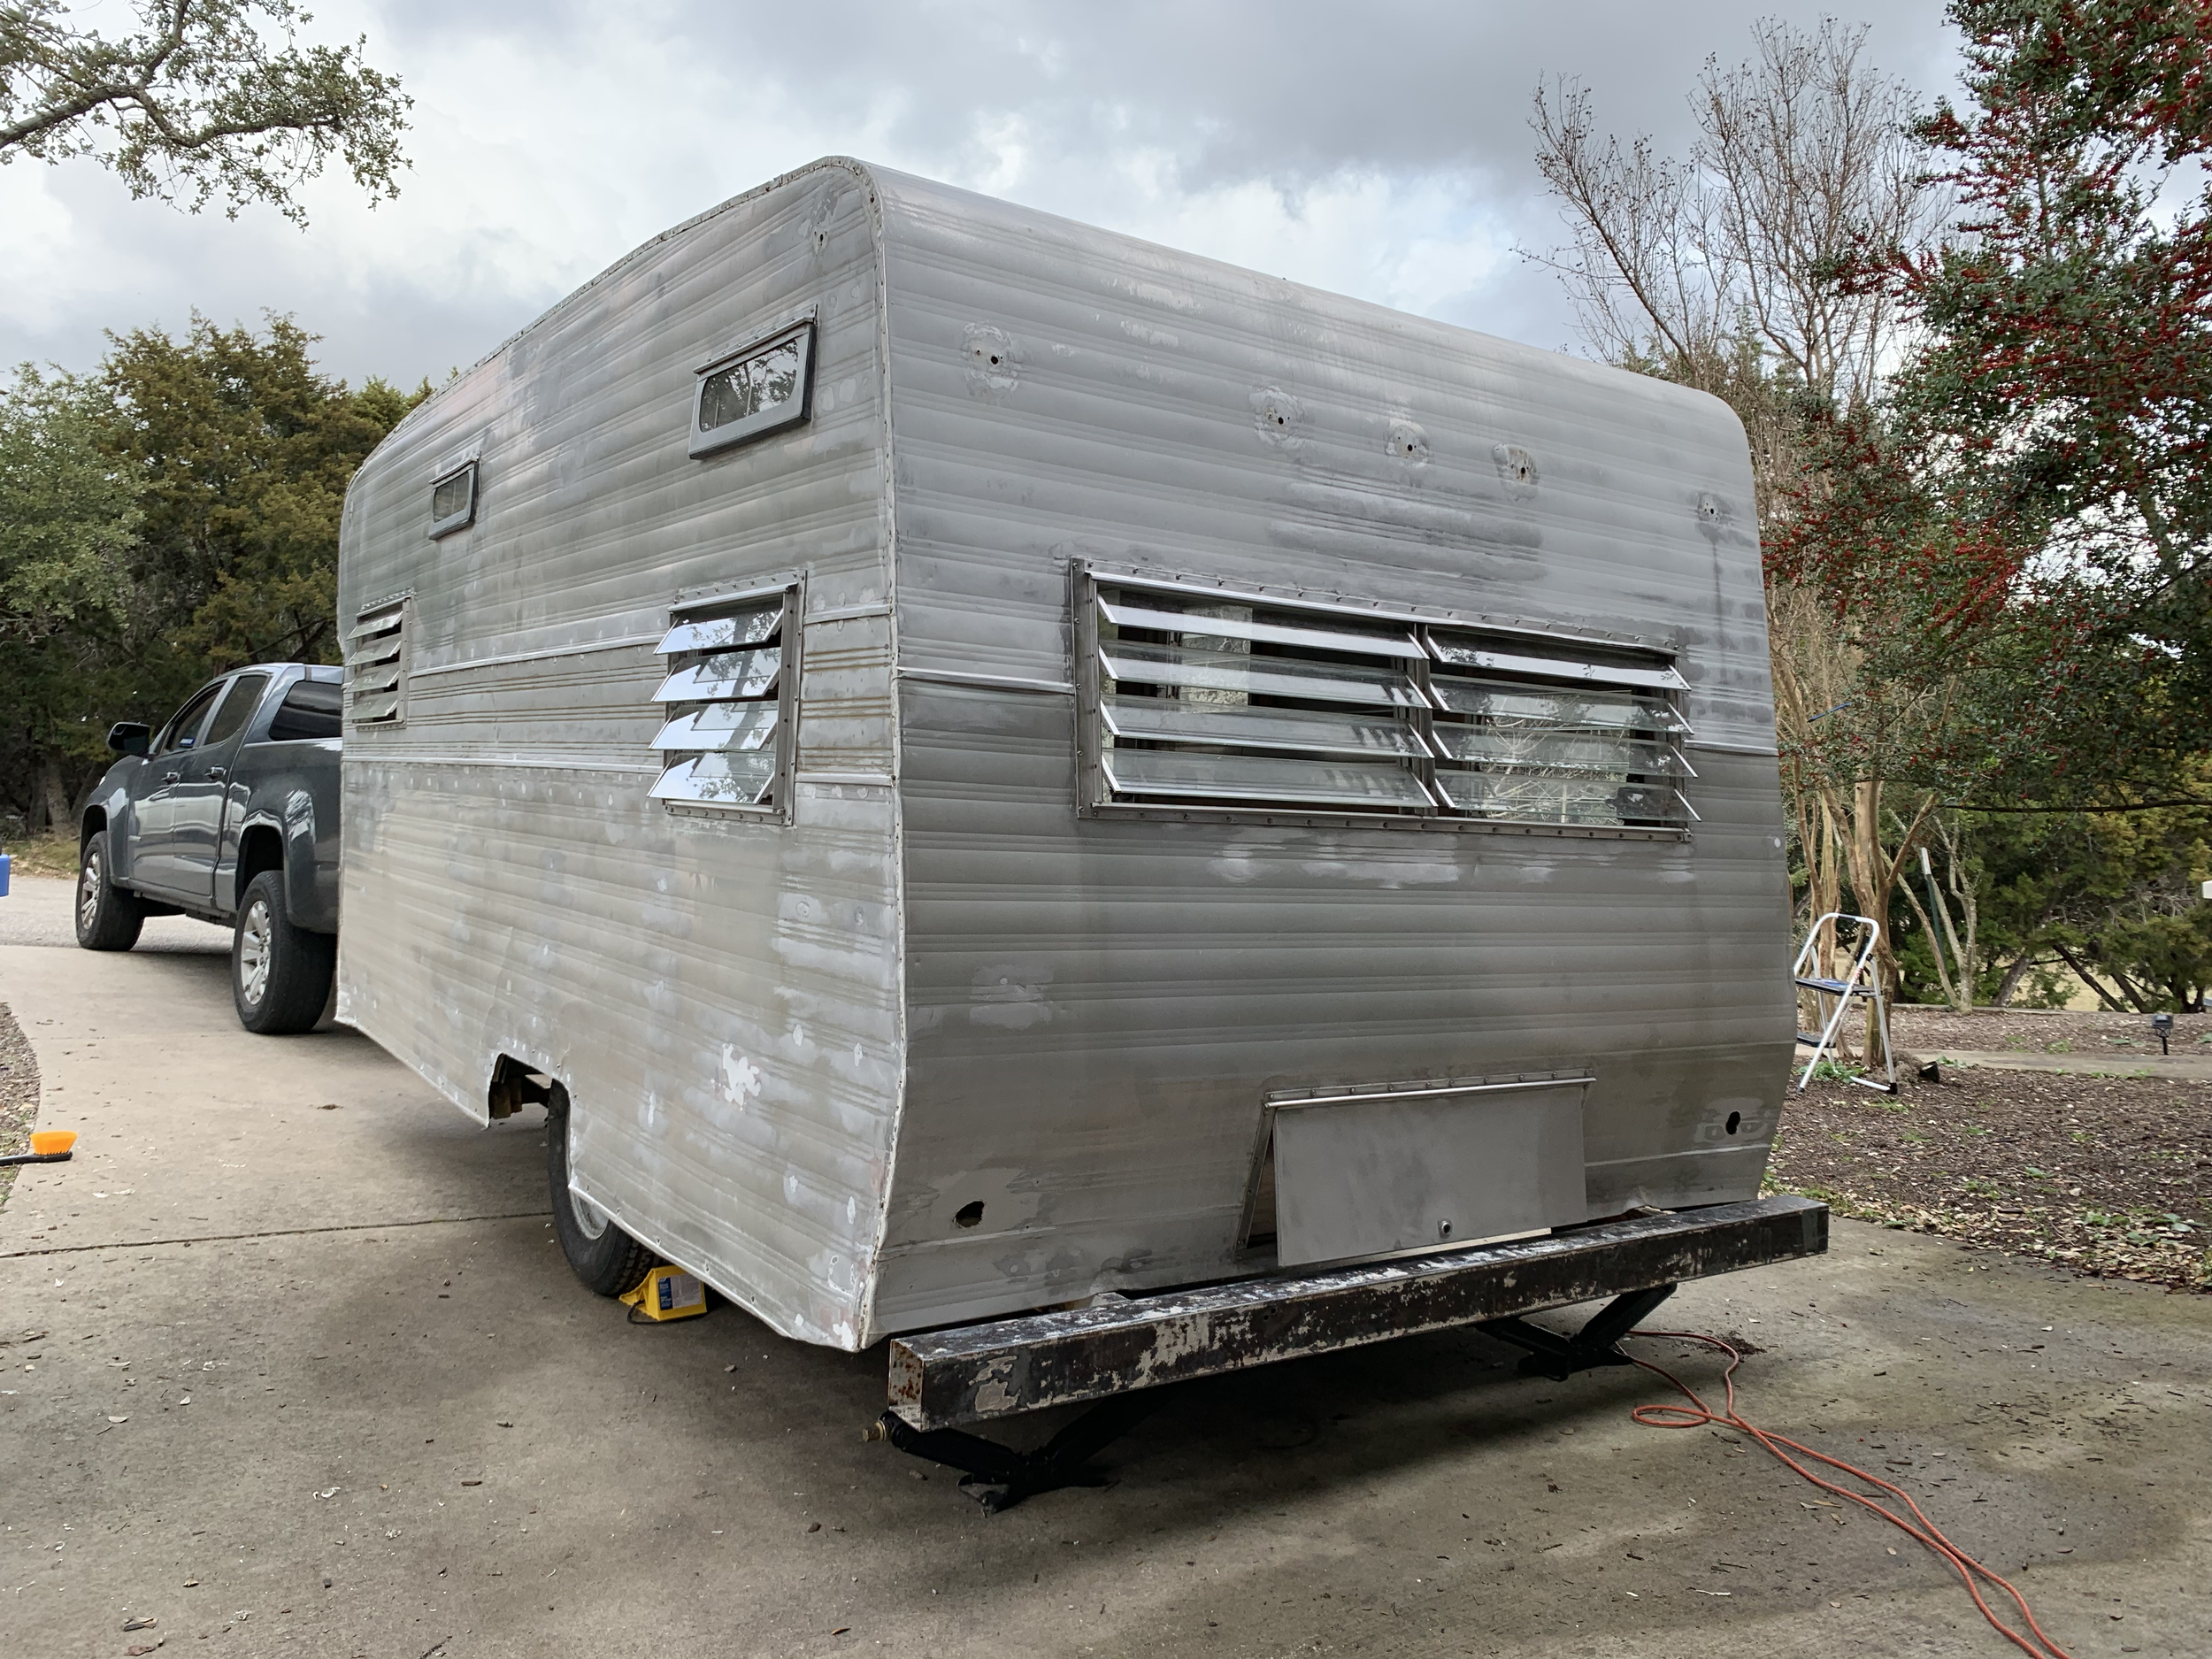
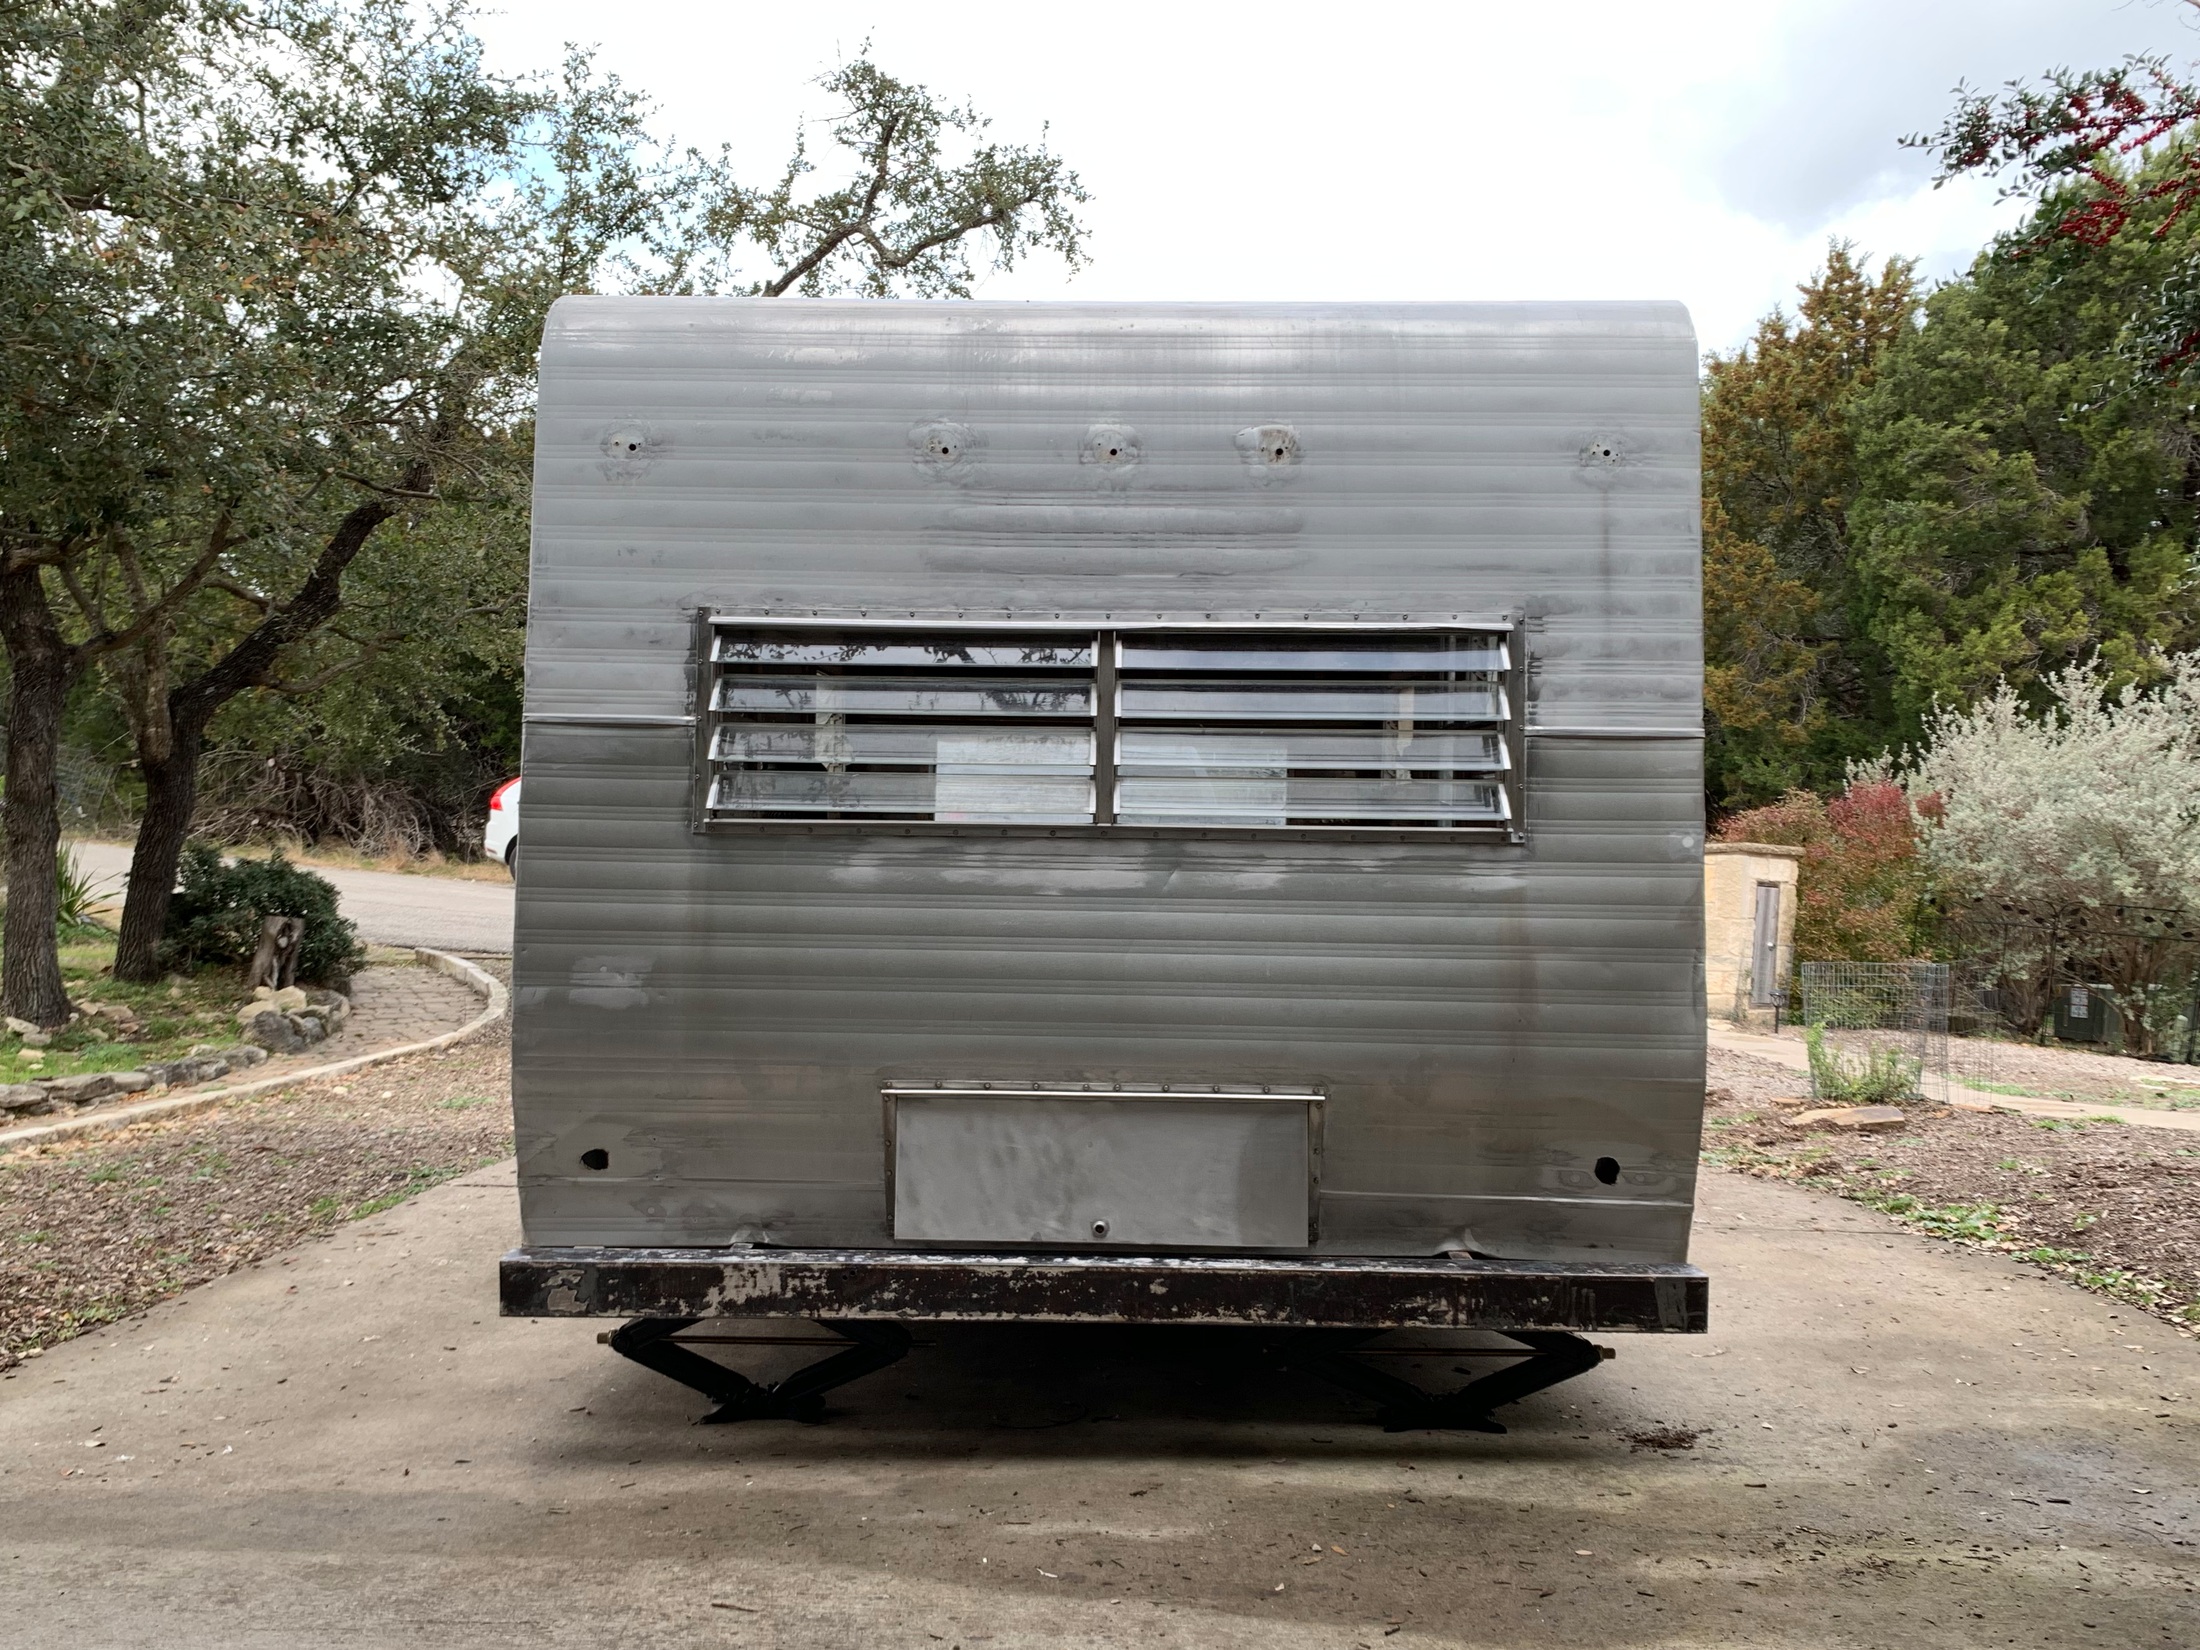
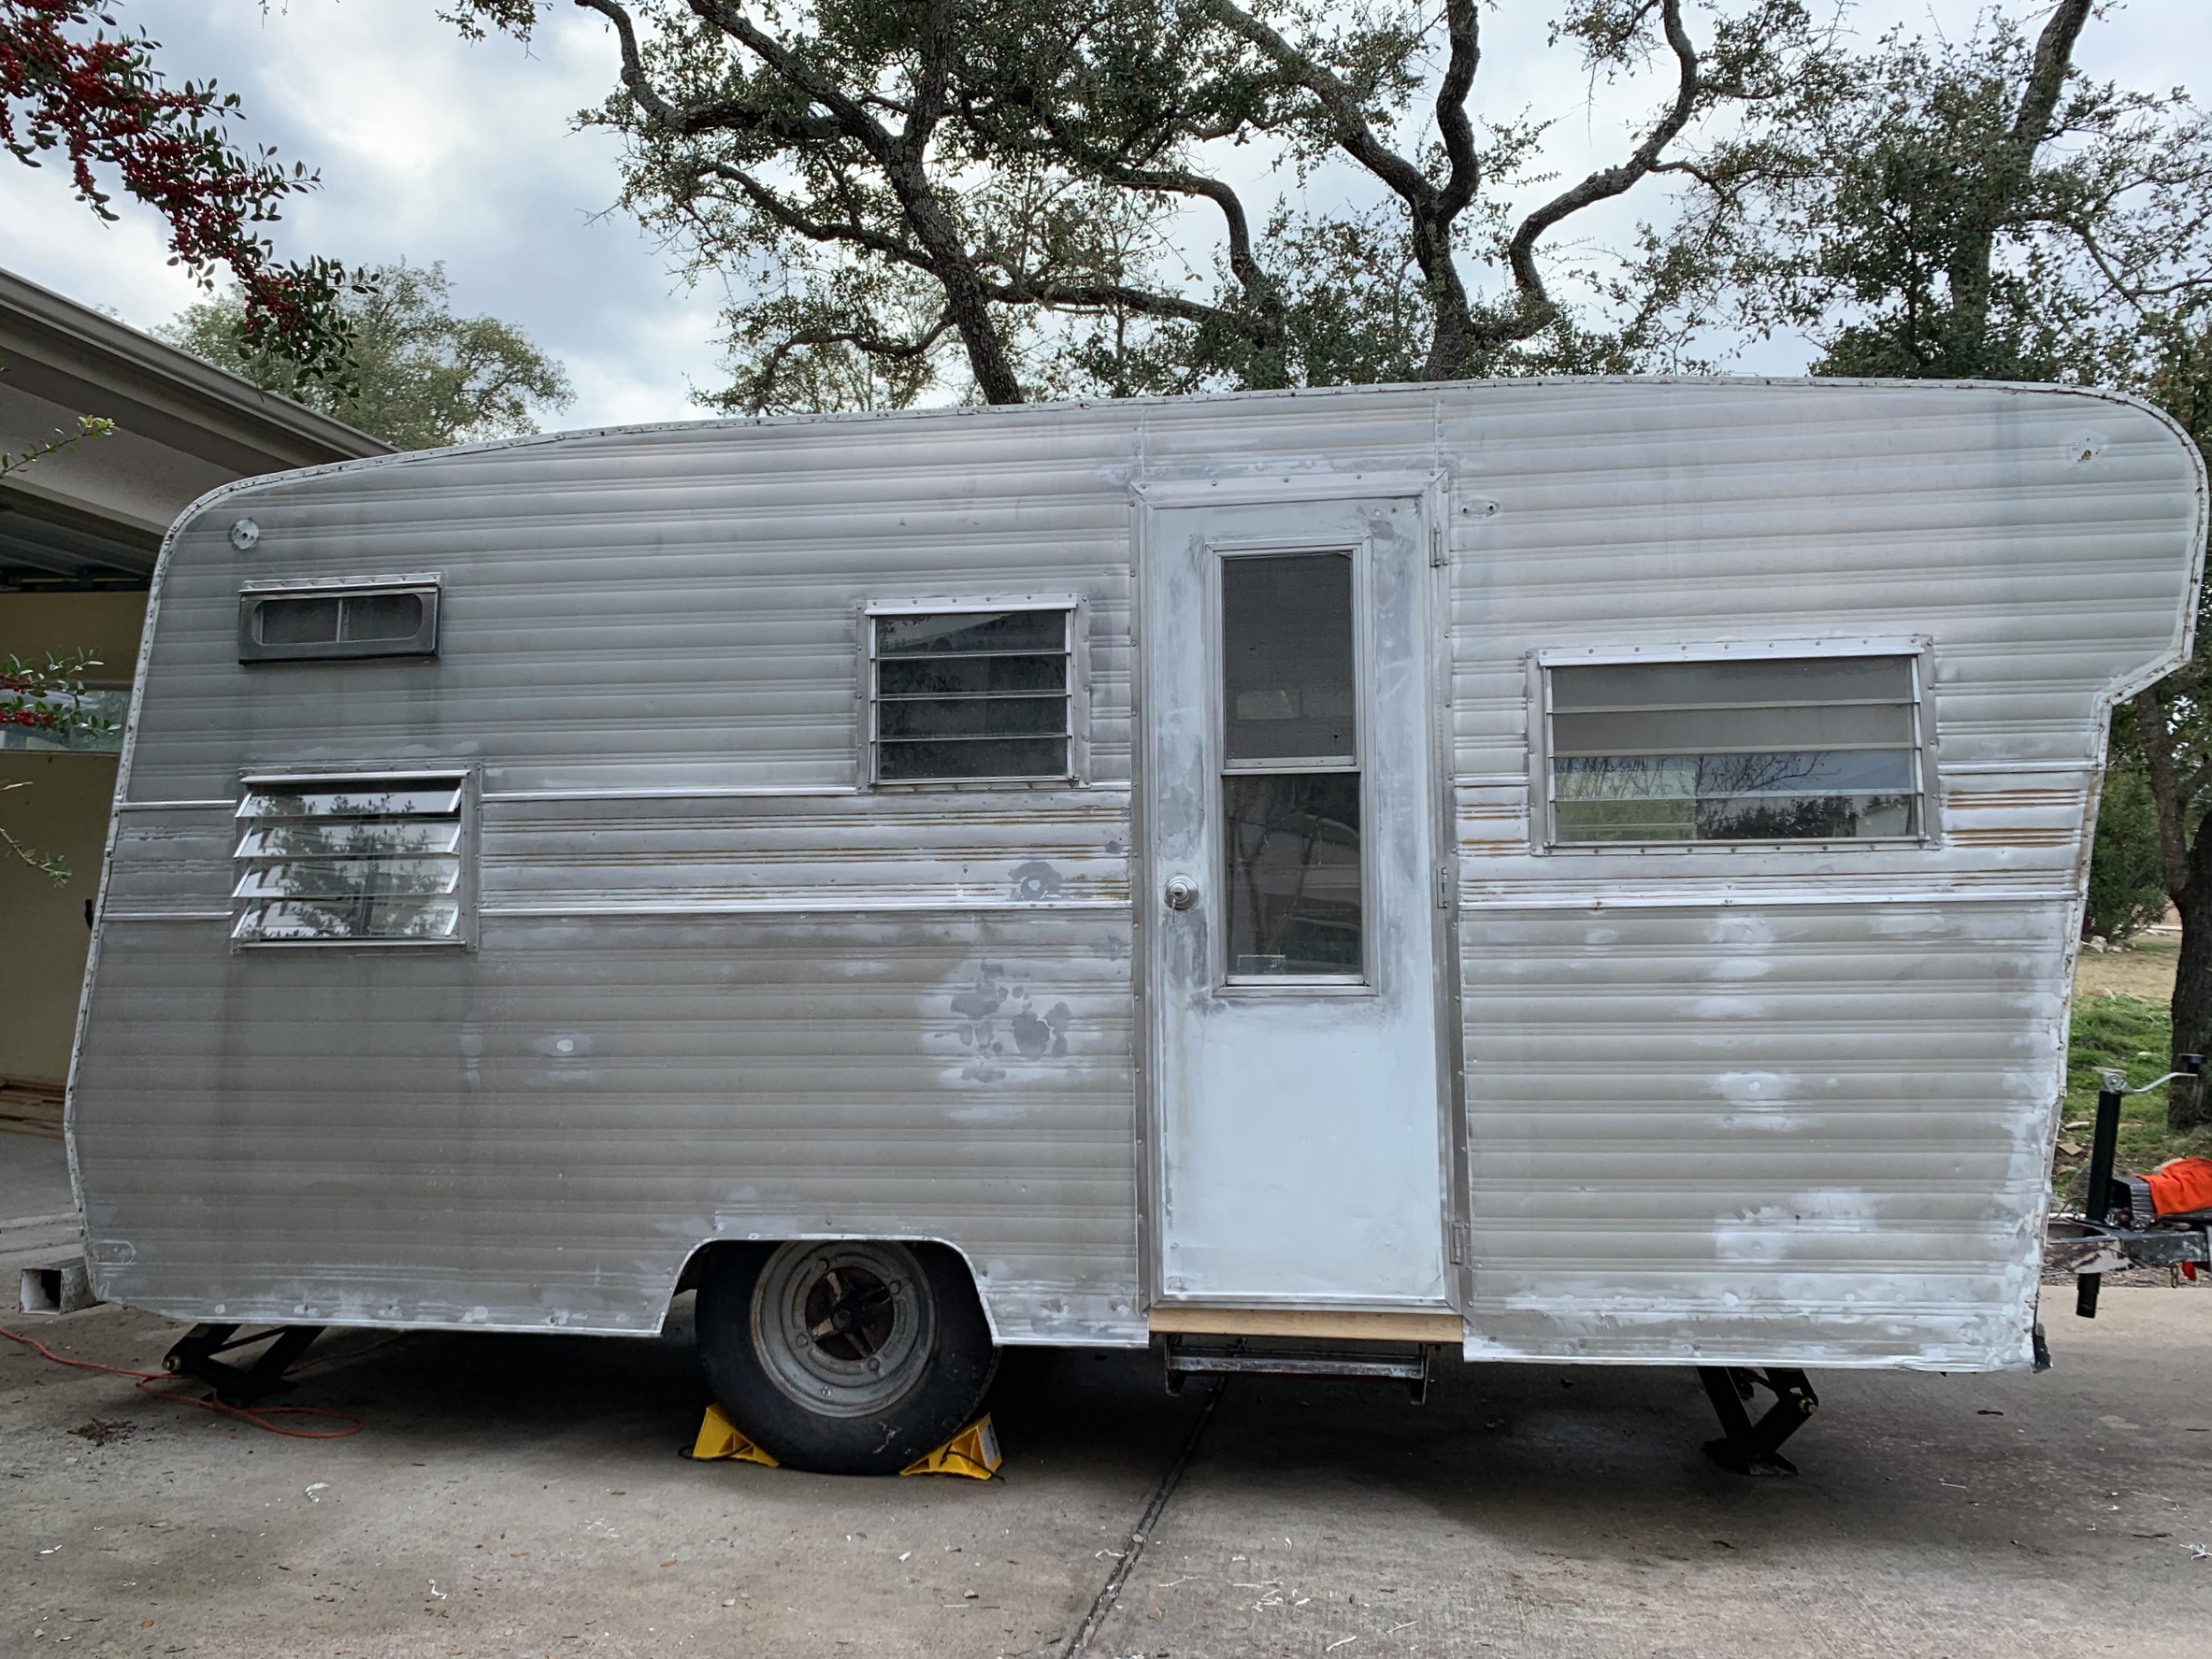
The Cameo gets a bath – cleaning the outside before priming
It’s been a long time coming (8 long months), but we’re FINALLY HERE. And “here” is painting the outside. *Cue fireworks and a montage of the cutest puppies you’ve ever seen.* Since last April when we picked up The Cameo, we’ve wet our toes with demo, beat tetanus on demo day 2, followed the water damage and removed just about everything, almost broke the whole thing when we reframed the walls, welded on stabilizer jacks and replaced the subfloor, removed pounds and pounds of caulk from every nook and cranny, replaced the leaky roof vent, polished the windows and filled in more holes than you can imagine.
If you haven’t been following along with everything it’s taken for us to get to this point and have some time to kill, read from the beginning here.
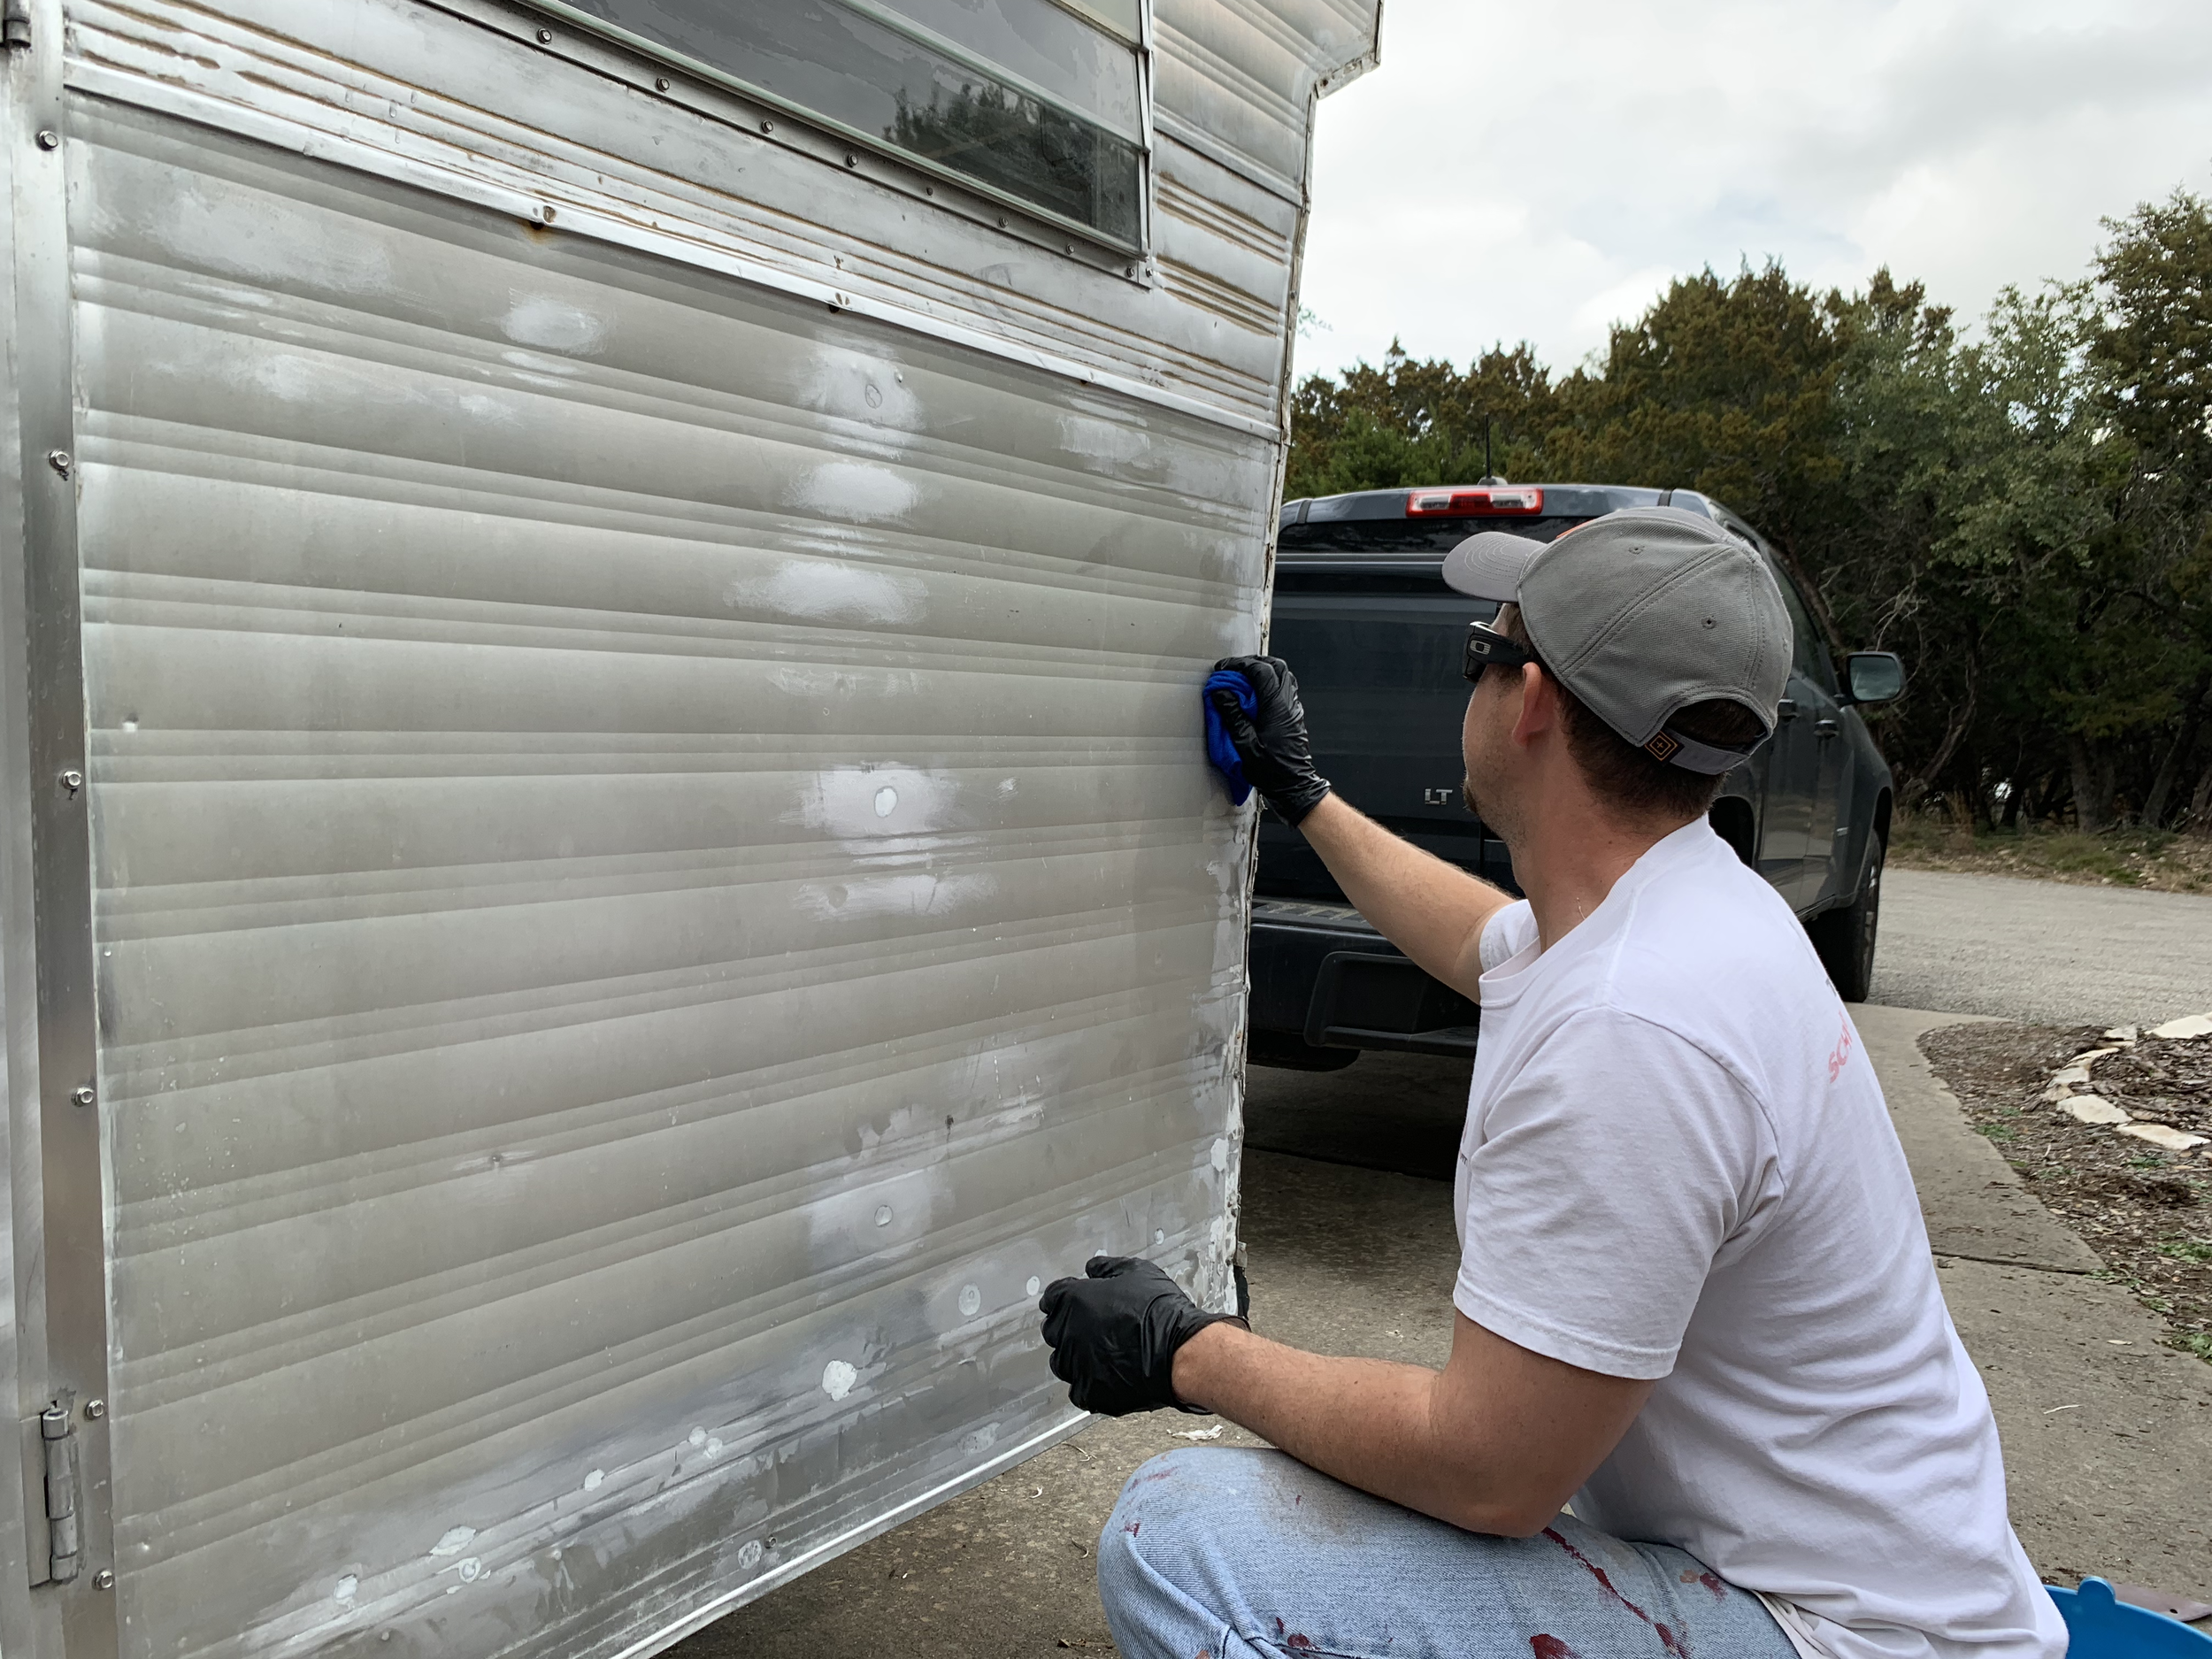
Paint prep supplies
Aside from all of the bodywork we’ve done already (filling holes, caulking seams and gaps), we prepped the exterior for priming using:
Dawn dish soap
A bucket
Water (from a hose with a spray nozzle attachment)
A leaf blower. (Yes, really.)
Rags
Disposable gloves
Ladder (or some other way to reach the roof)
After taping over the holes where the exterior lights will go, we scrubbed off all of the mold and dirt with soapy water and our brushes. Then we rinsed it off with the hose and let it dry. Right before we were ready to prime, Nick “dusted” it off with a leaf blower, then we wiped the walls and roof with TSP, following the directions on the bottle. (8 ounces of TSP per gallon of water, ragged on from the bottom up while wearing gloves to avoid drips and, y’know, so your skin doesn’t burn off.)


Exterior Paint + primer
We chose to paint the exterior ourselves versus taking her to a body shop for a few reasons. First, she ain’t exactly street legal (no electrical means no lights) and in the gutted condition is not safe to be on the road anyway, it’s not watertight, etc. This wasn’t that big of a deal to us since we could always do some extra bracing inside to get it safe enough to drive down the street to a shop. We mostly decided to DIY it because we like the lower price and we’re always up for a challenge and looking to expand our skills.
The primer and paint choices below are what we found in our research to be best for our situation and for our mostly bare aluminum camper. If yours is a different material, or has paint or some other coating on it, we recommend talking to a Sherwin Williams paint professional or calling up an auto body shop to see if that’s a better route for you.
First, because we want the smoothest finish possible, we looked into painting the exterior with a sprayer and automotive paint, but after talking to auto stores around us we learned it wasn’t the best option and they referred us to Sherwin Williams. Second, we looked into Sherwin Williams’ line of automotive paints. Aside from being hella expensive, hard(ish) to find, limited in color options, and needing to be sprayed on (something we were willing to try in the attempt at a flawless finish, but not something we’d ever done before so we were a teensy bit gun-shy about it) we found you also need some kind of license to be able to buy this paint. A license we don’t have. So that option was out. BUT, that’s what led the fine folks at Sherwin Williams to recommend this stuff which is able to be rolled on by a couple-a unlicensed brave DIYers like ourselves. (Score!) So what is this miracle product we drove to two separate stores in our area for?
Primer: DTM Acrylic primer/finish
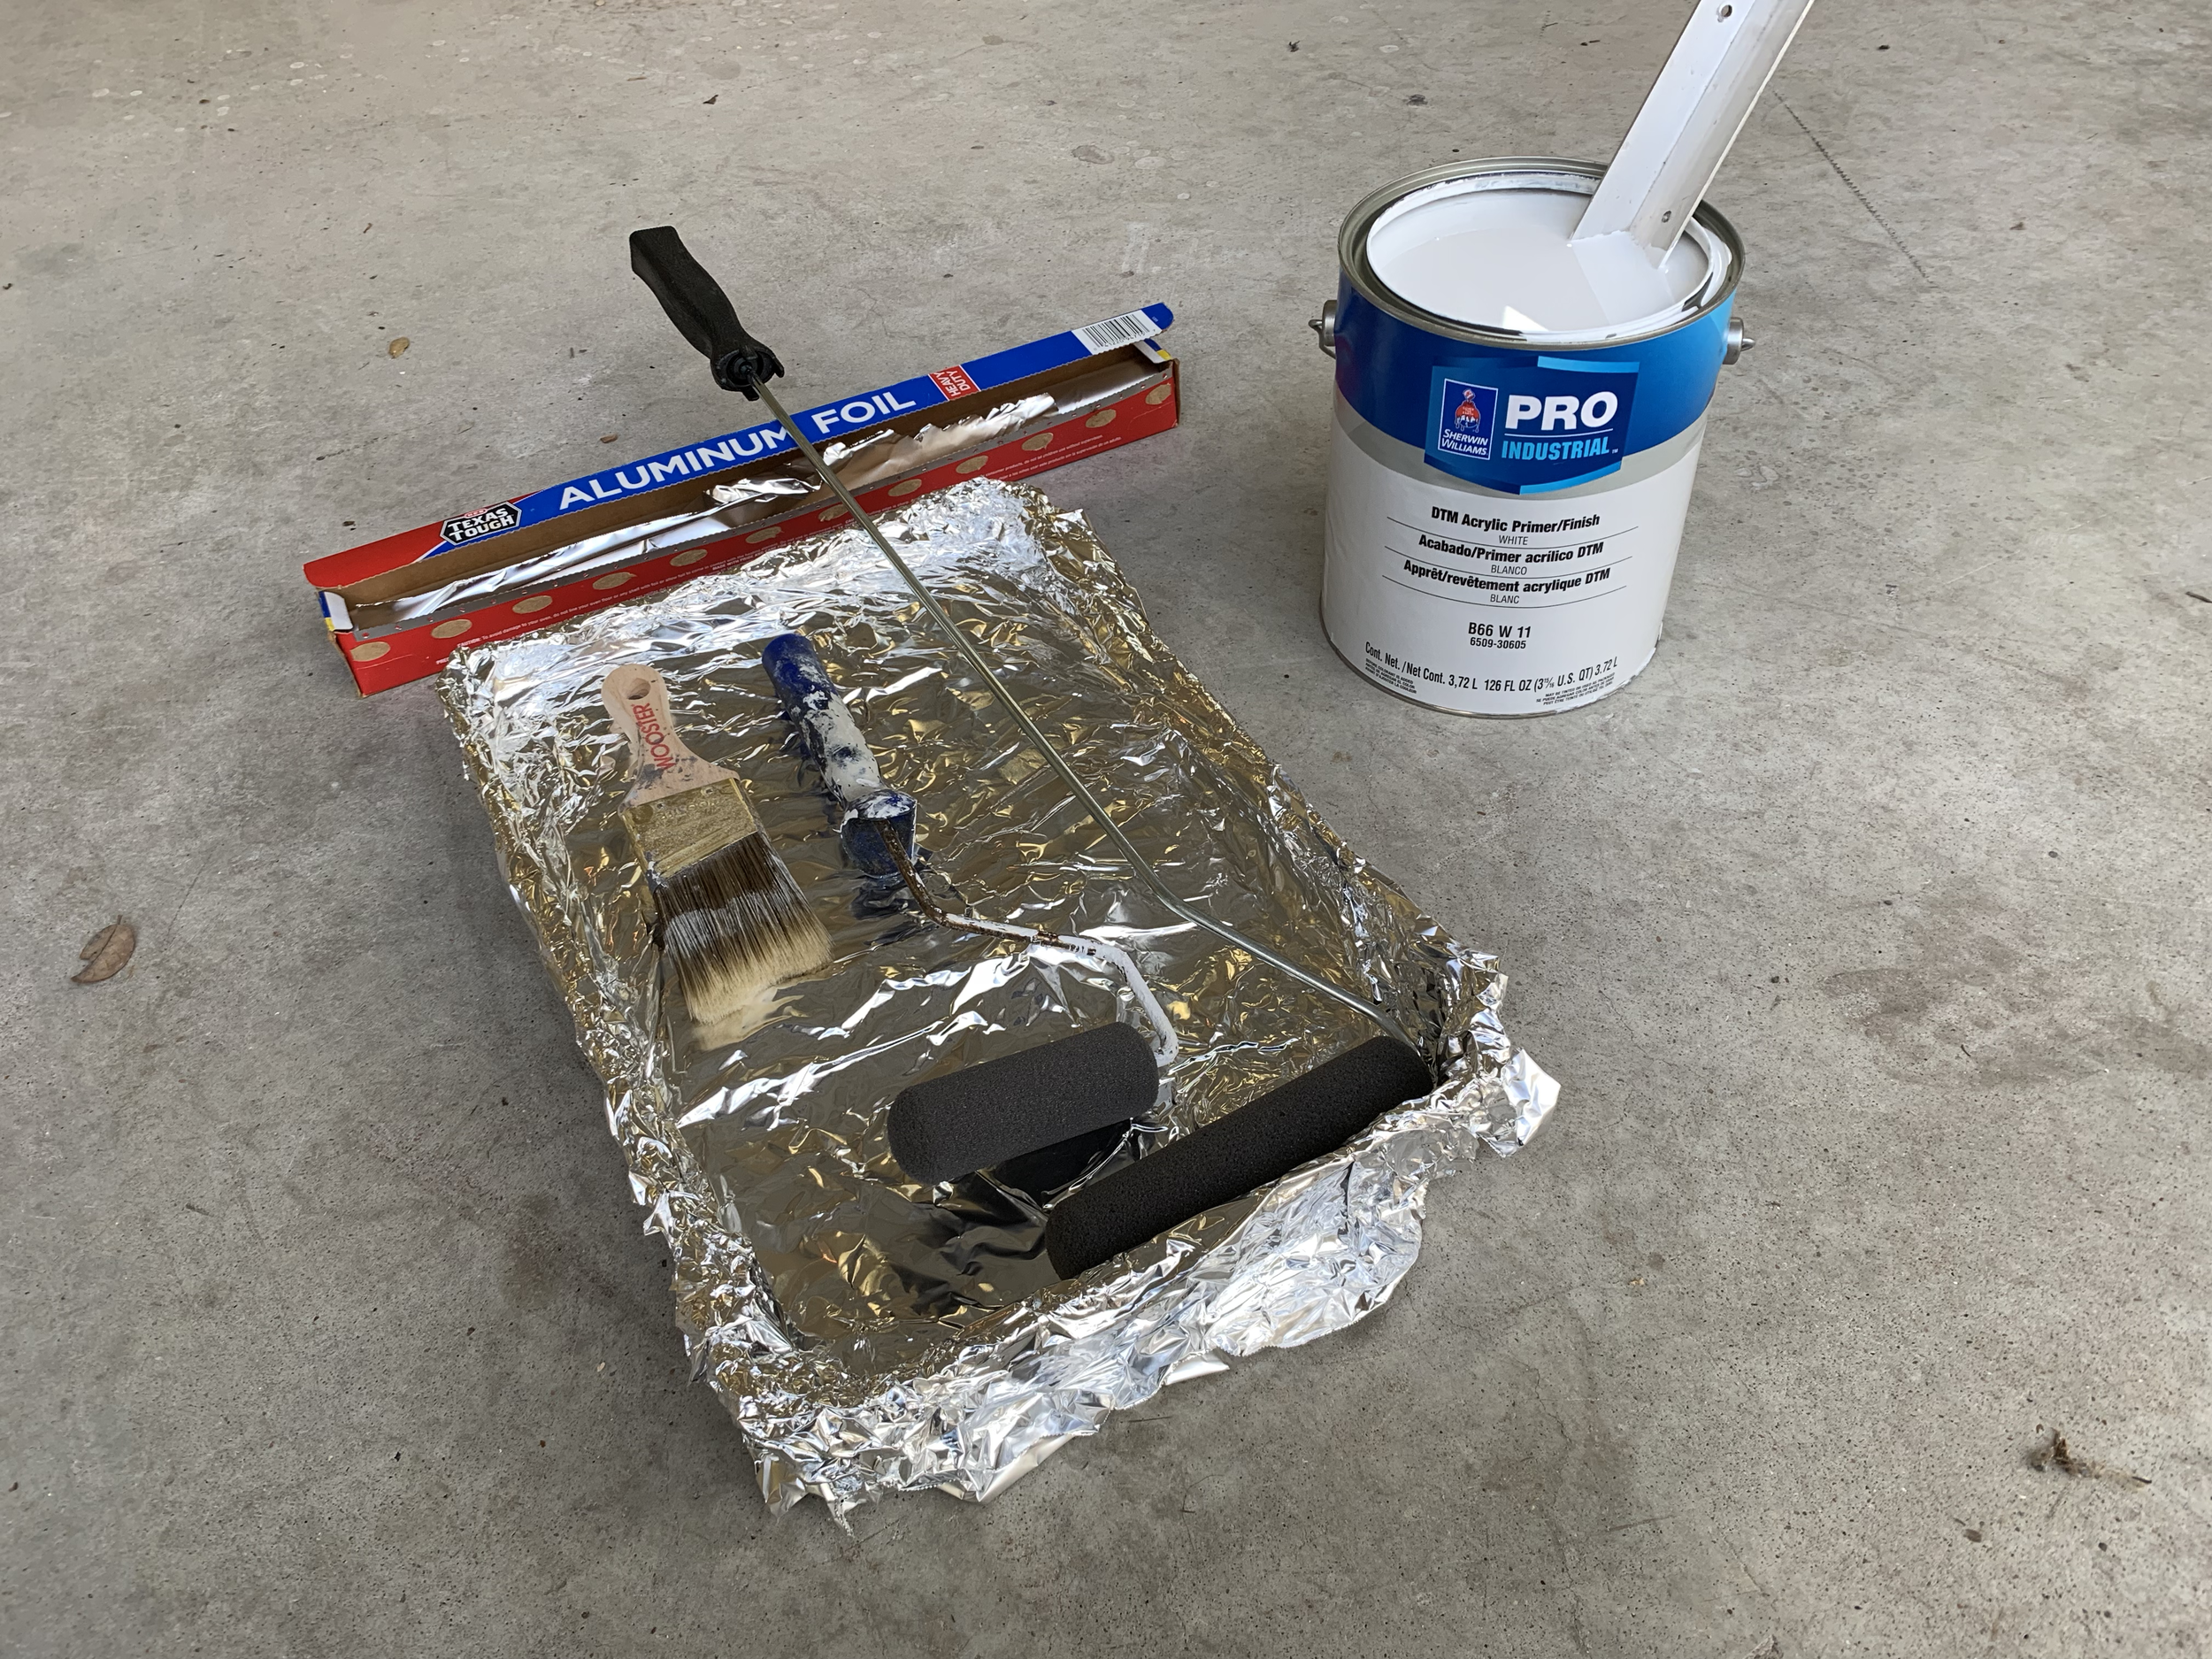
Primer supplies – Sherwin Williams DTM Acrylic Primer/Finish, foam rollers, oil paint brush, rolling tray with aluminum foil
A protective and marine coating, this stuff can be used as both a primer and top coat, if you’re into that sort of thing. The kind we got was bright white in a flat finish, which we chose to keep tint-free since we were using it under a light color. According to the Product Data Sheet, it’s “a 100% acrylic emulsion, waterborne, corrosion resistant coating for both new construction and industrial applications. It can be used as a primer under most water based topcoats or alone as a primer/topcoat system. It can be used directly over multiple substrates. It can be used over prepared aluminum, steel, concrete, galvanizing, masonry and zinc rich primers” and has the following properties:
Chemical Resistant
Fast dry
Flash/Early Rust Resistant
Low odor/low VOC
Early moisture resistant
Outstanding exterior durability
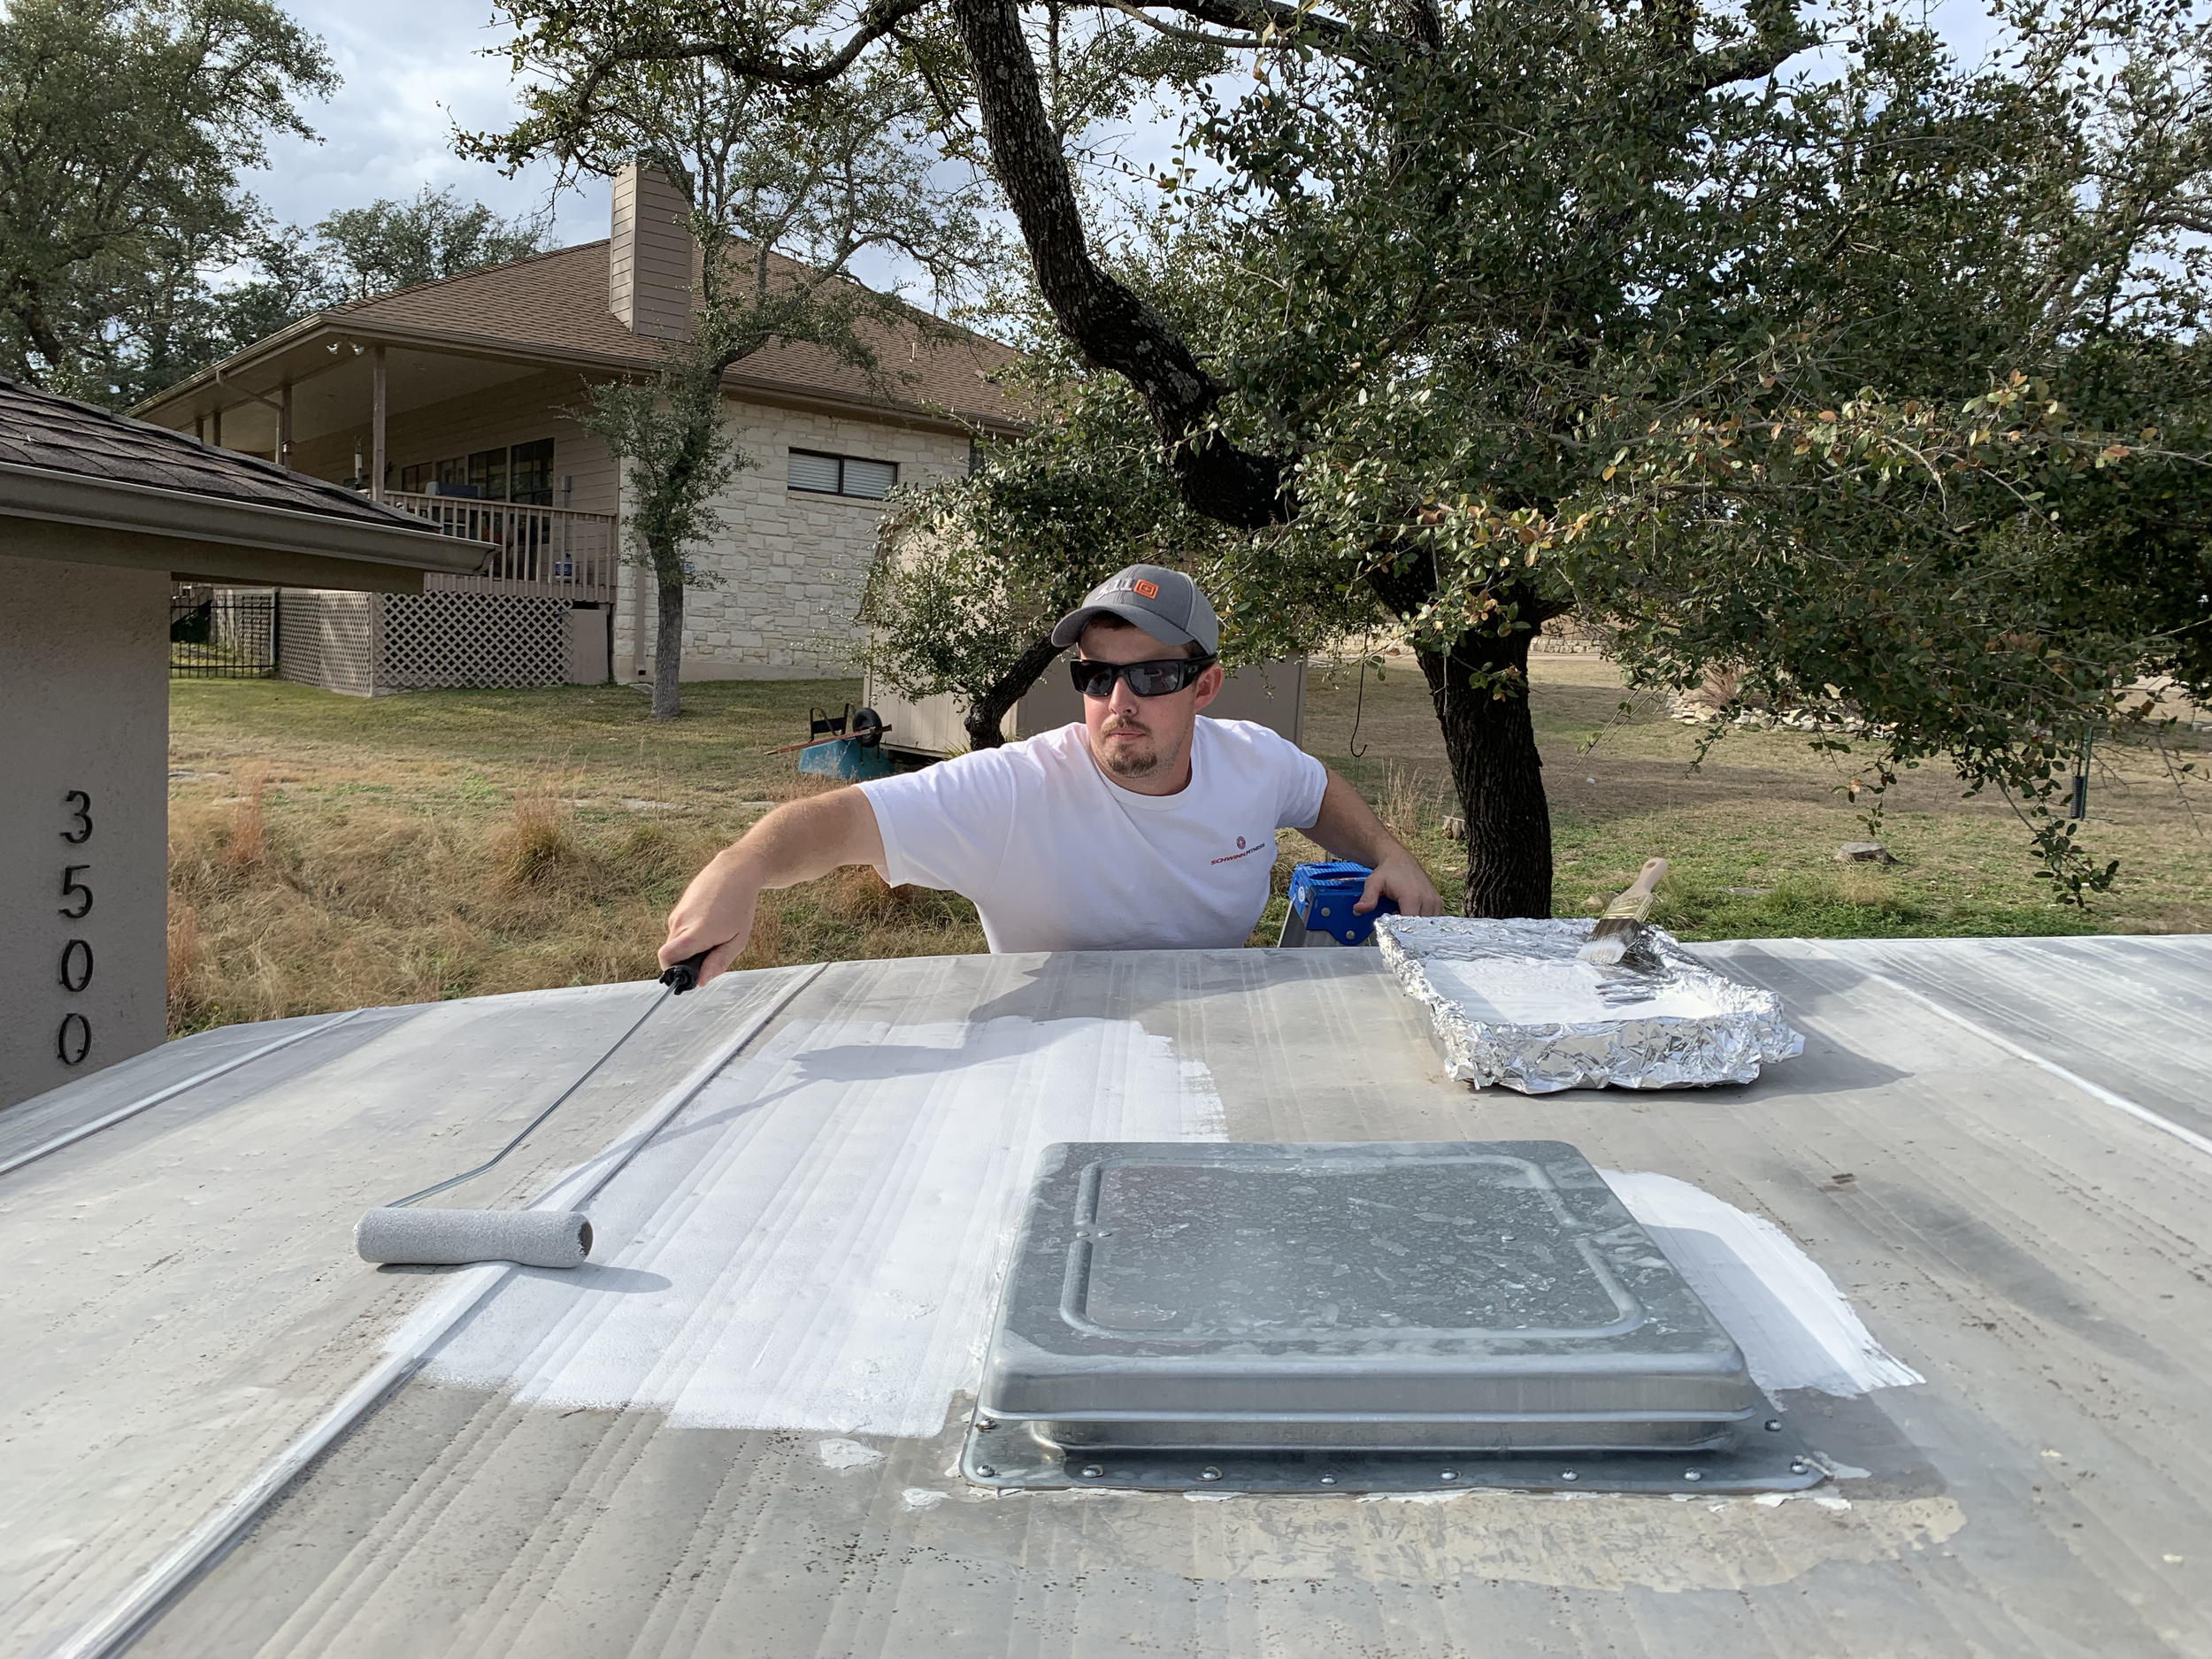
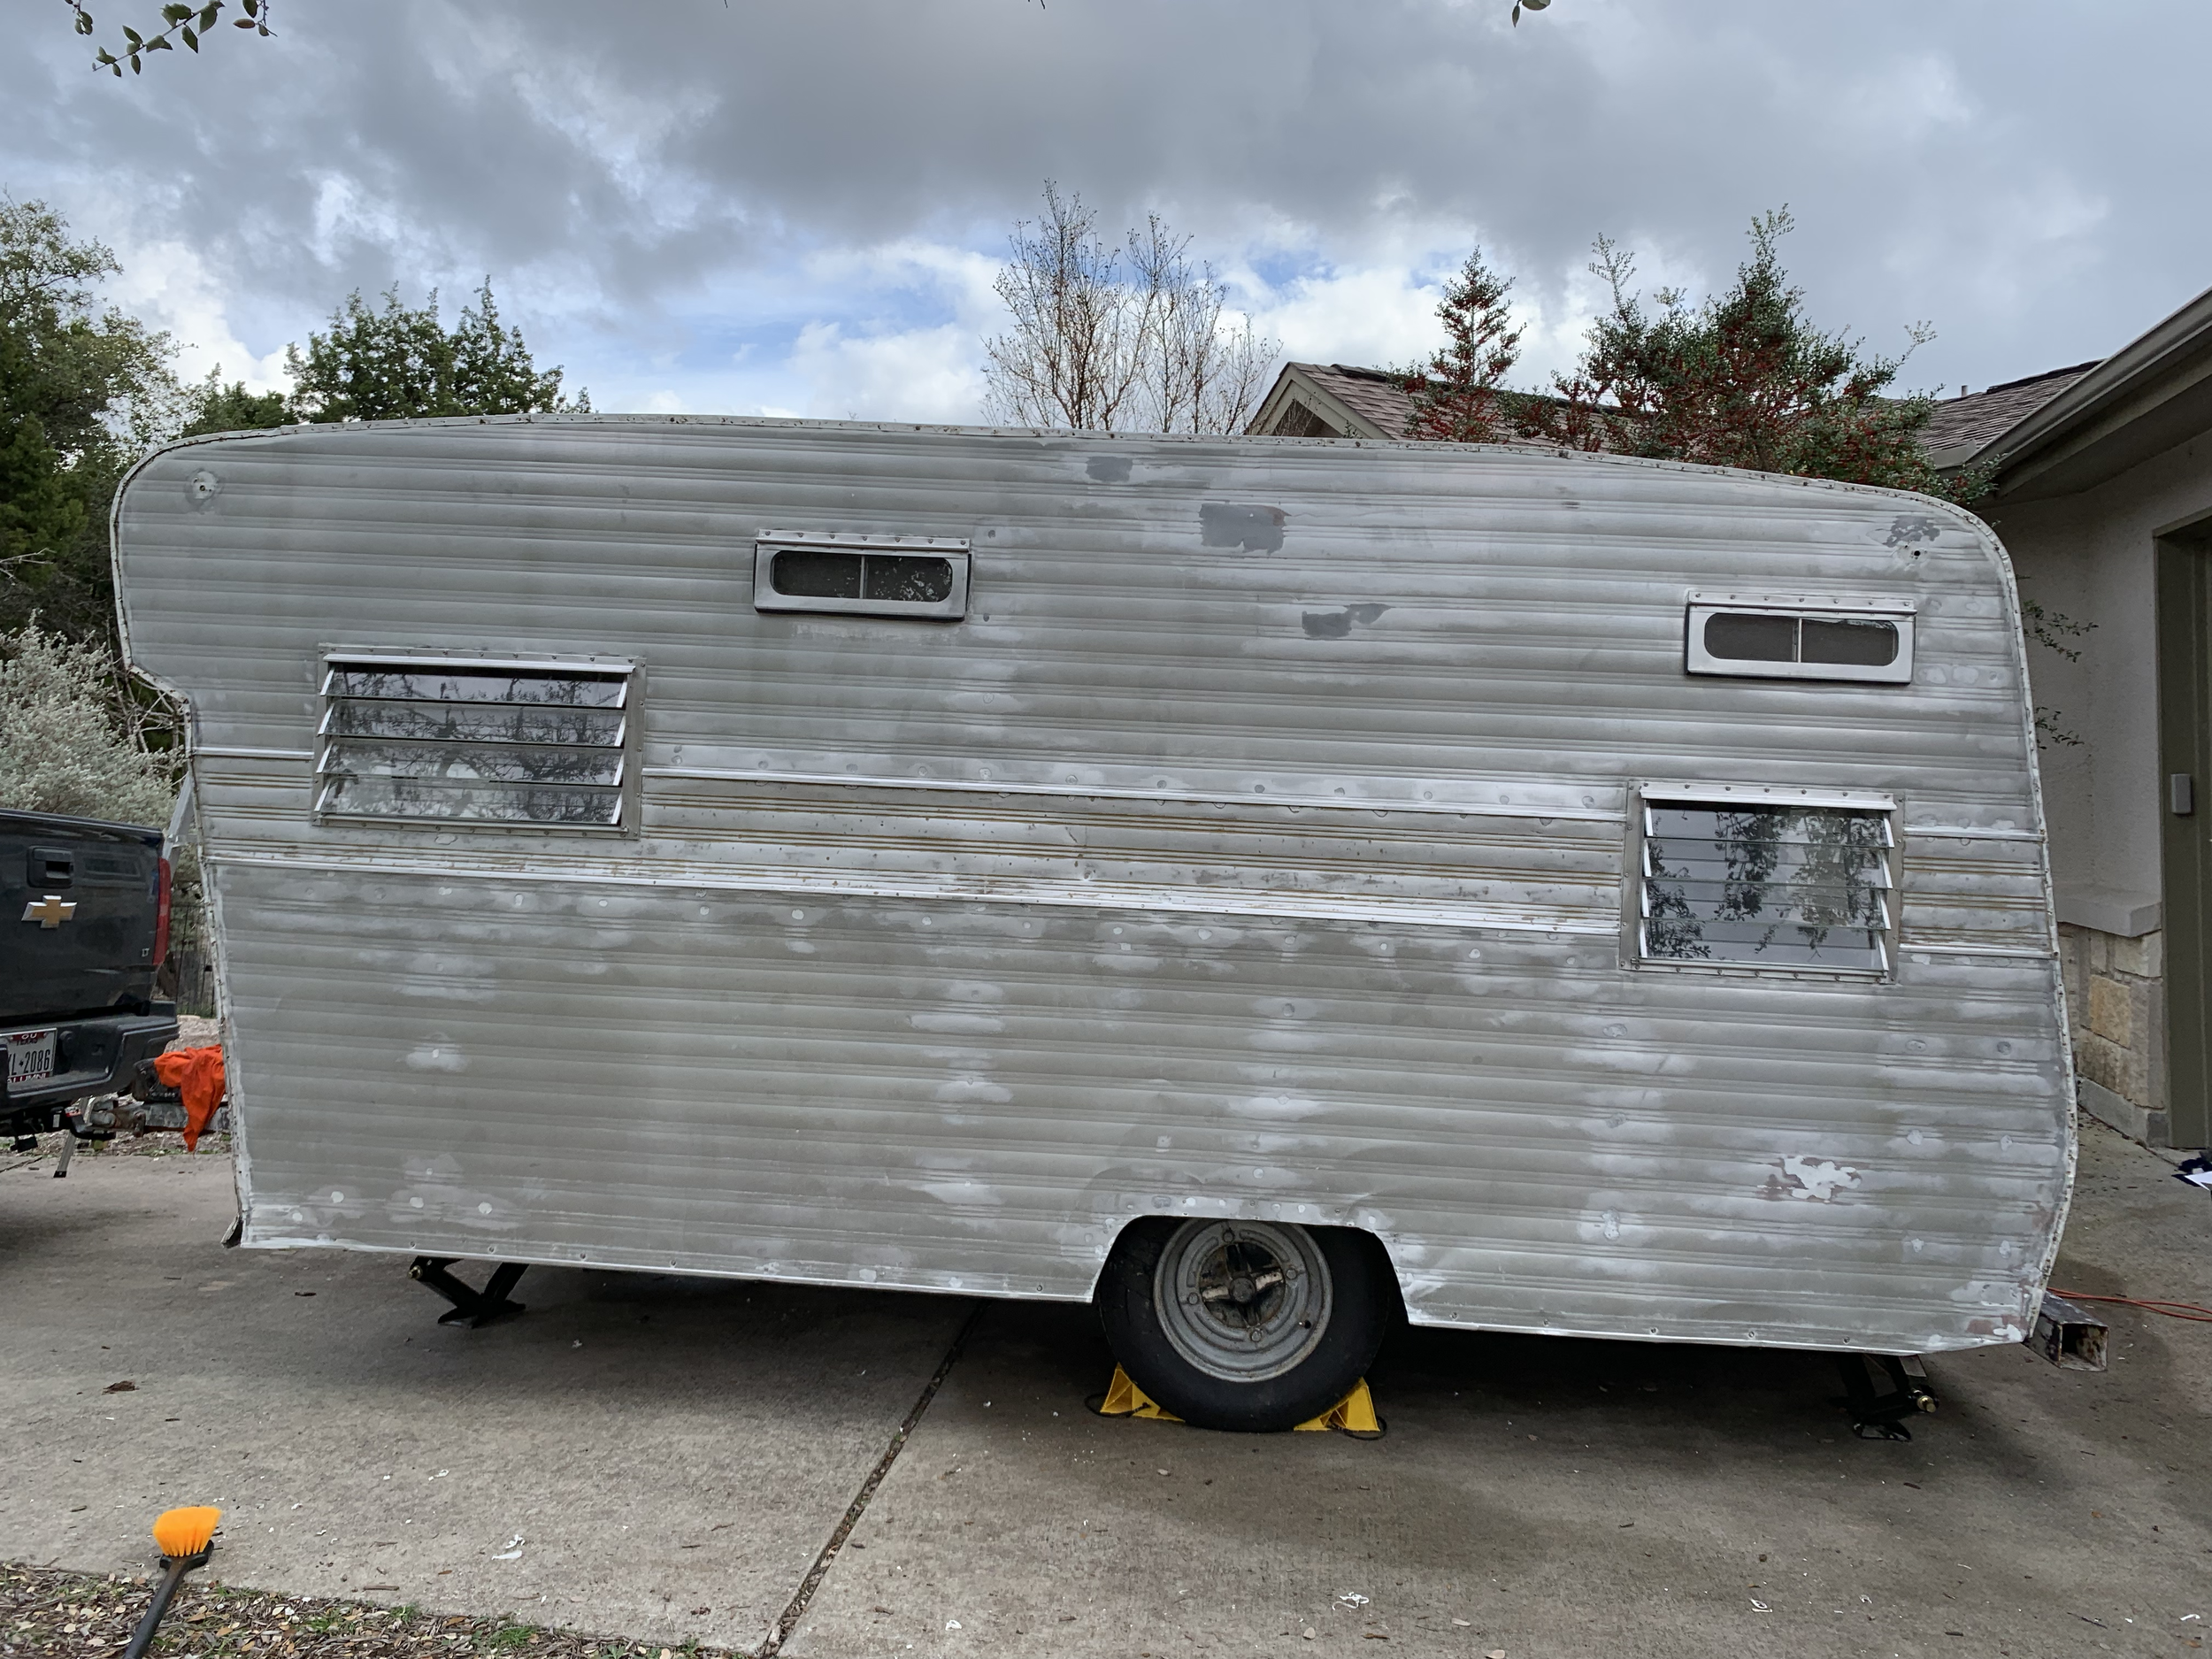
We chose to use this white primer under both of our paint colors, and rolled on two thin coats to make sure we had good coverage before we applied the paint. It went on very easily using this 26-inch-long roller (a total lifesaver with the roof) with these smooth foam rollers for most of it, using an angled brush to cut in around windows and get in the nooks and crannies. (We rolled over the brush lines with the roller while the primer was still wet to smooth.)
Primer/Finish Reference documents from Sherwin Williams:
Product Data Sheet – includes application recommendations for various materials as well as important info including drying and re-coat times.
Safety Data Sheet – includes safety and chemical information.
Environmental Data Sheet – includes Environmental-related information like how to properly dispose of it, etc.
Paint: Sher-cryl HPA High Performance Acrylic in semi-gloss finish
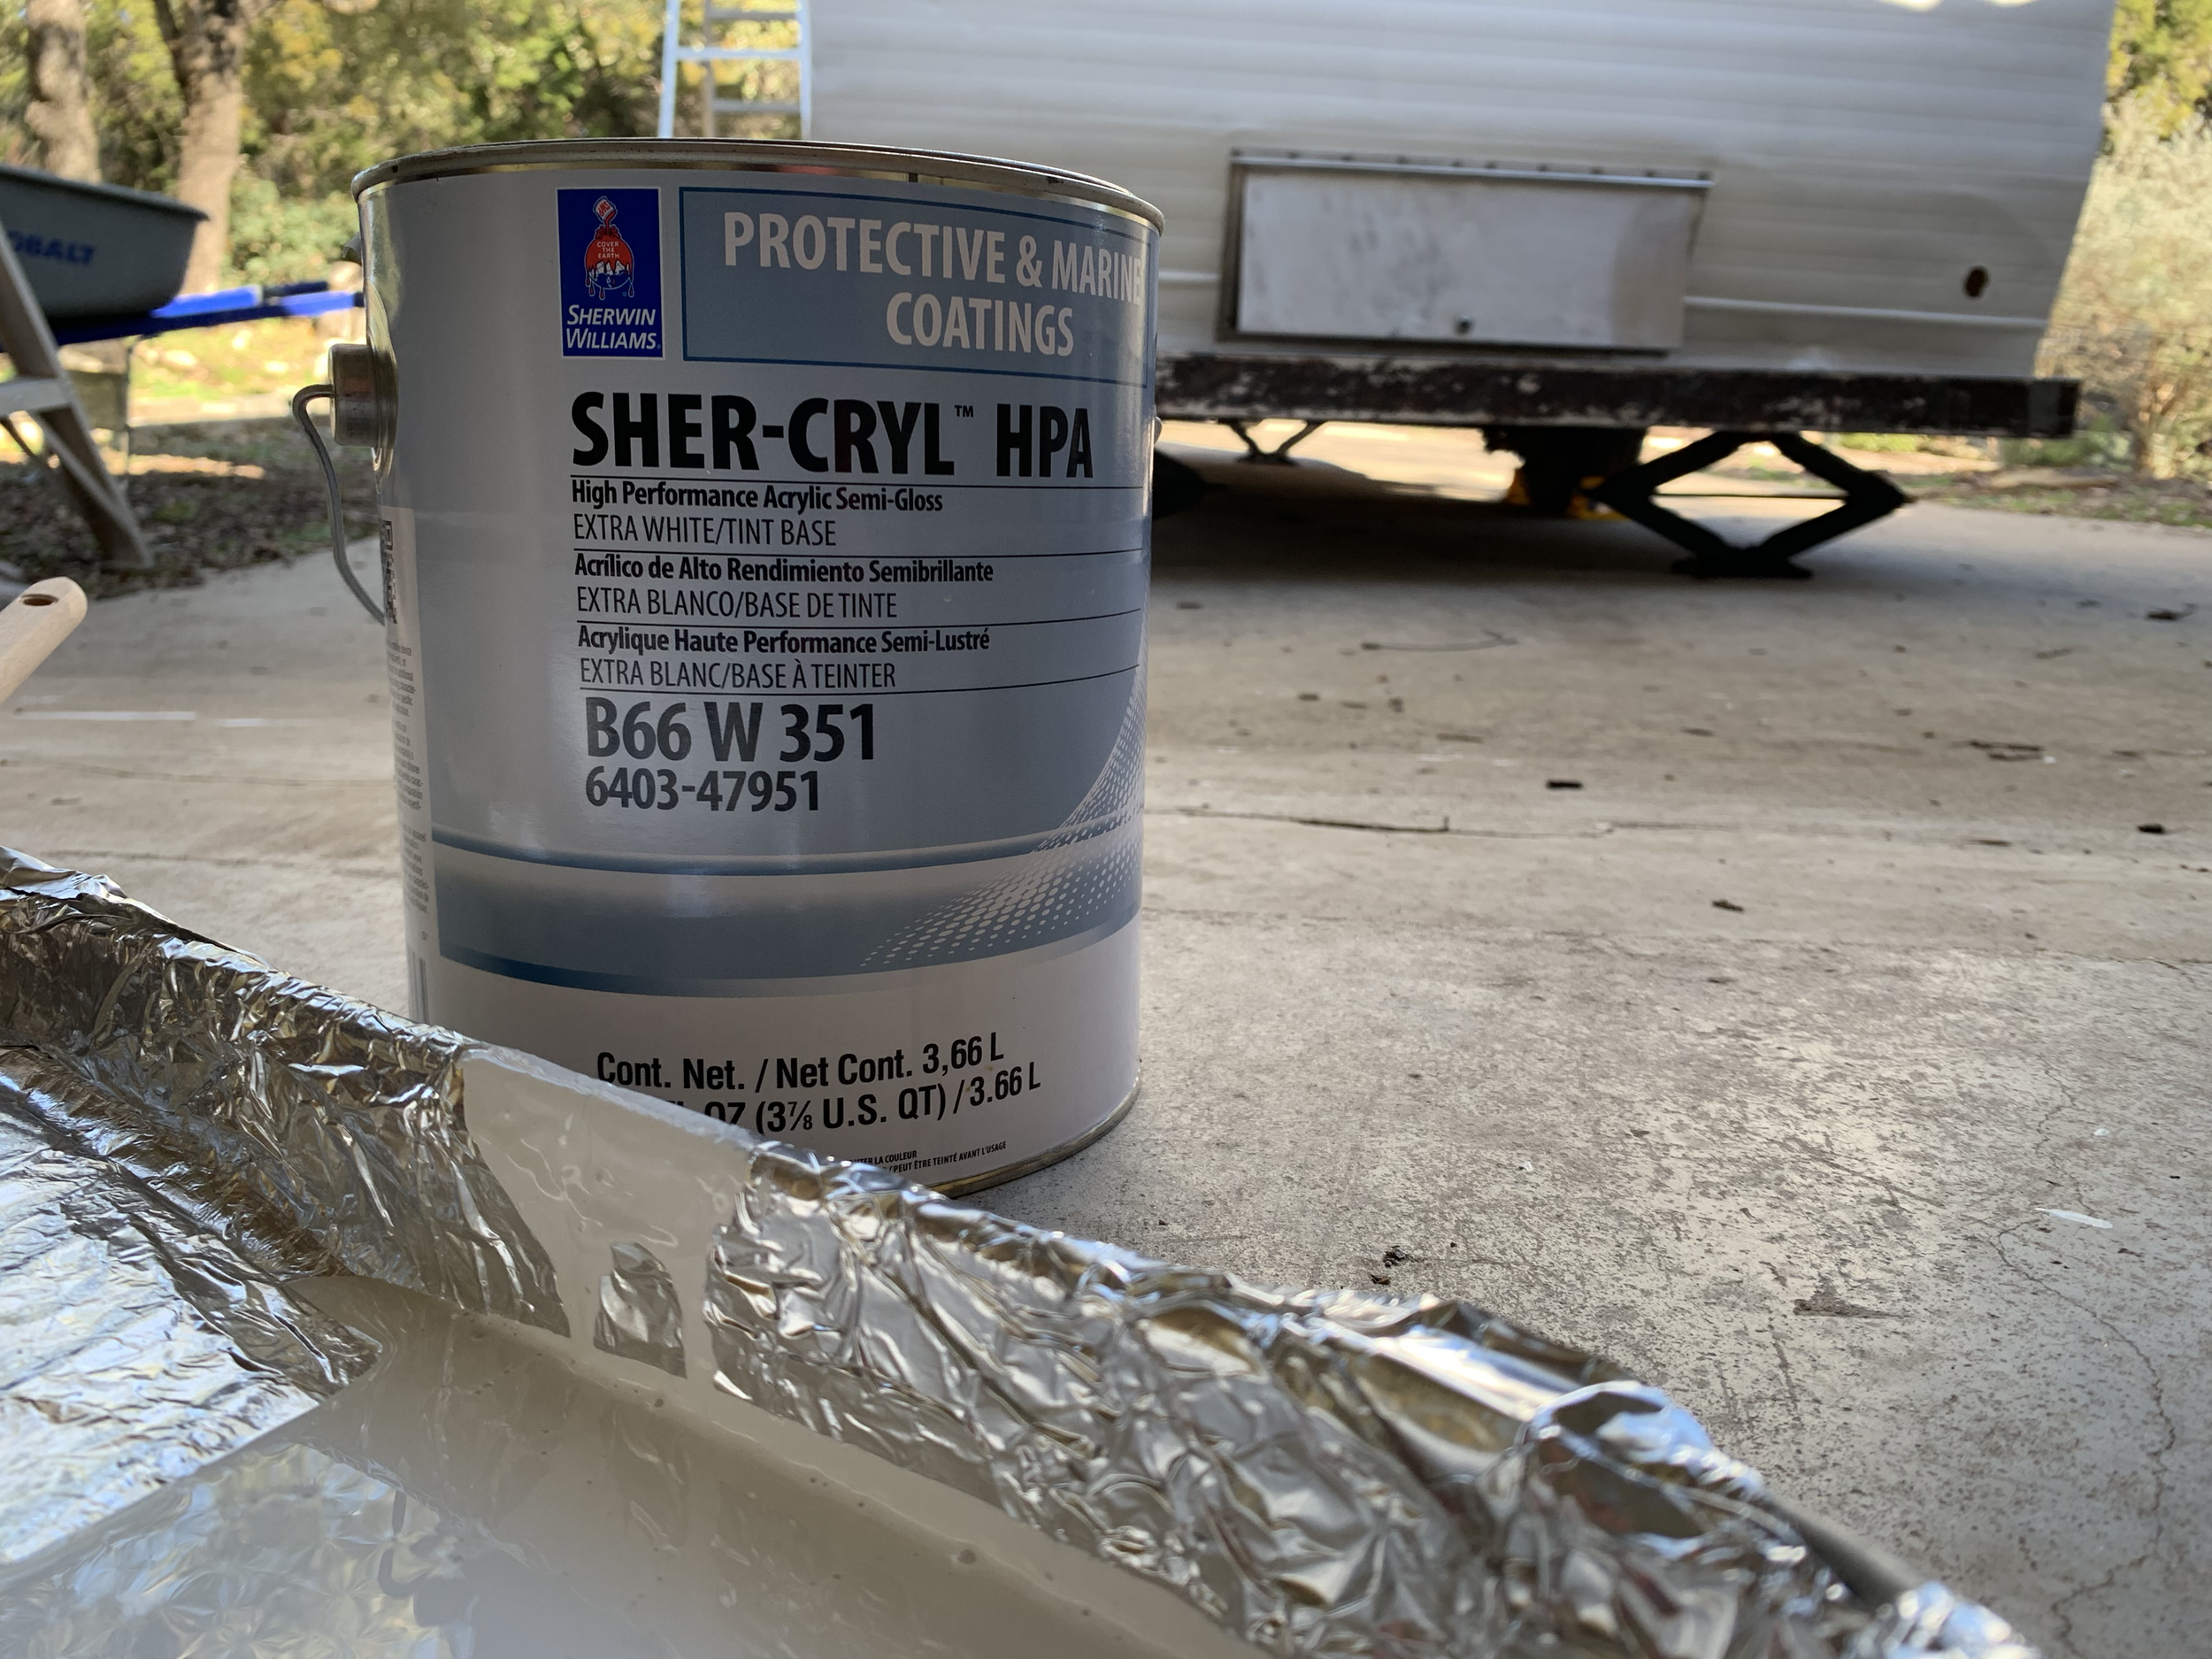
Sherwin Williams Sher-Cryl HPA High Performance Acrylic in semi-gloss finish
According to the Product Data Sheet, this stuff is “a High Performance ambient cured, one component acrylic coating with excellent performance properties,” including:
Chemical resistance
Outstanding humidity resistance
Flash rust/early rust resistance
Corrosion resistance
Fast drying
Outstanding application resistance
It’s recommended for exterior (or interior) use and “for use on properly prepared steel, galvanizing and aluminum, concrete/masonry, wood and previously painted and zinc rich primers.”
AND it can be tinted to any one of Sherwin Williams thousands of colors. It definitely checked all our boxes. We applied it the same way as the primer – cut in with a high-quality brush suited for oil-based paints, and rolled on with a high-quality smooth foam roller.
HPA High Performance Acrylic Reference documents from Sherwin Williams:
Product Data Sheet – includes application recommendations for various materials as well as important info including drying and re-coat times.
Safety Data Sheet – includes safety and chemical information.
Environmental Data Sheet – includes Environmental-related information like how to properly dispose of it, etc.
How we painted our camper exterior
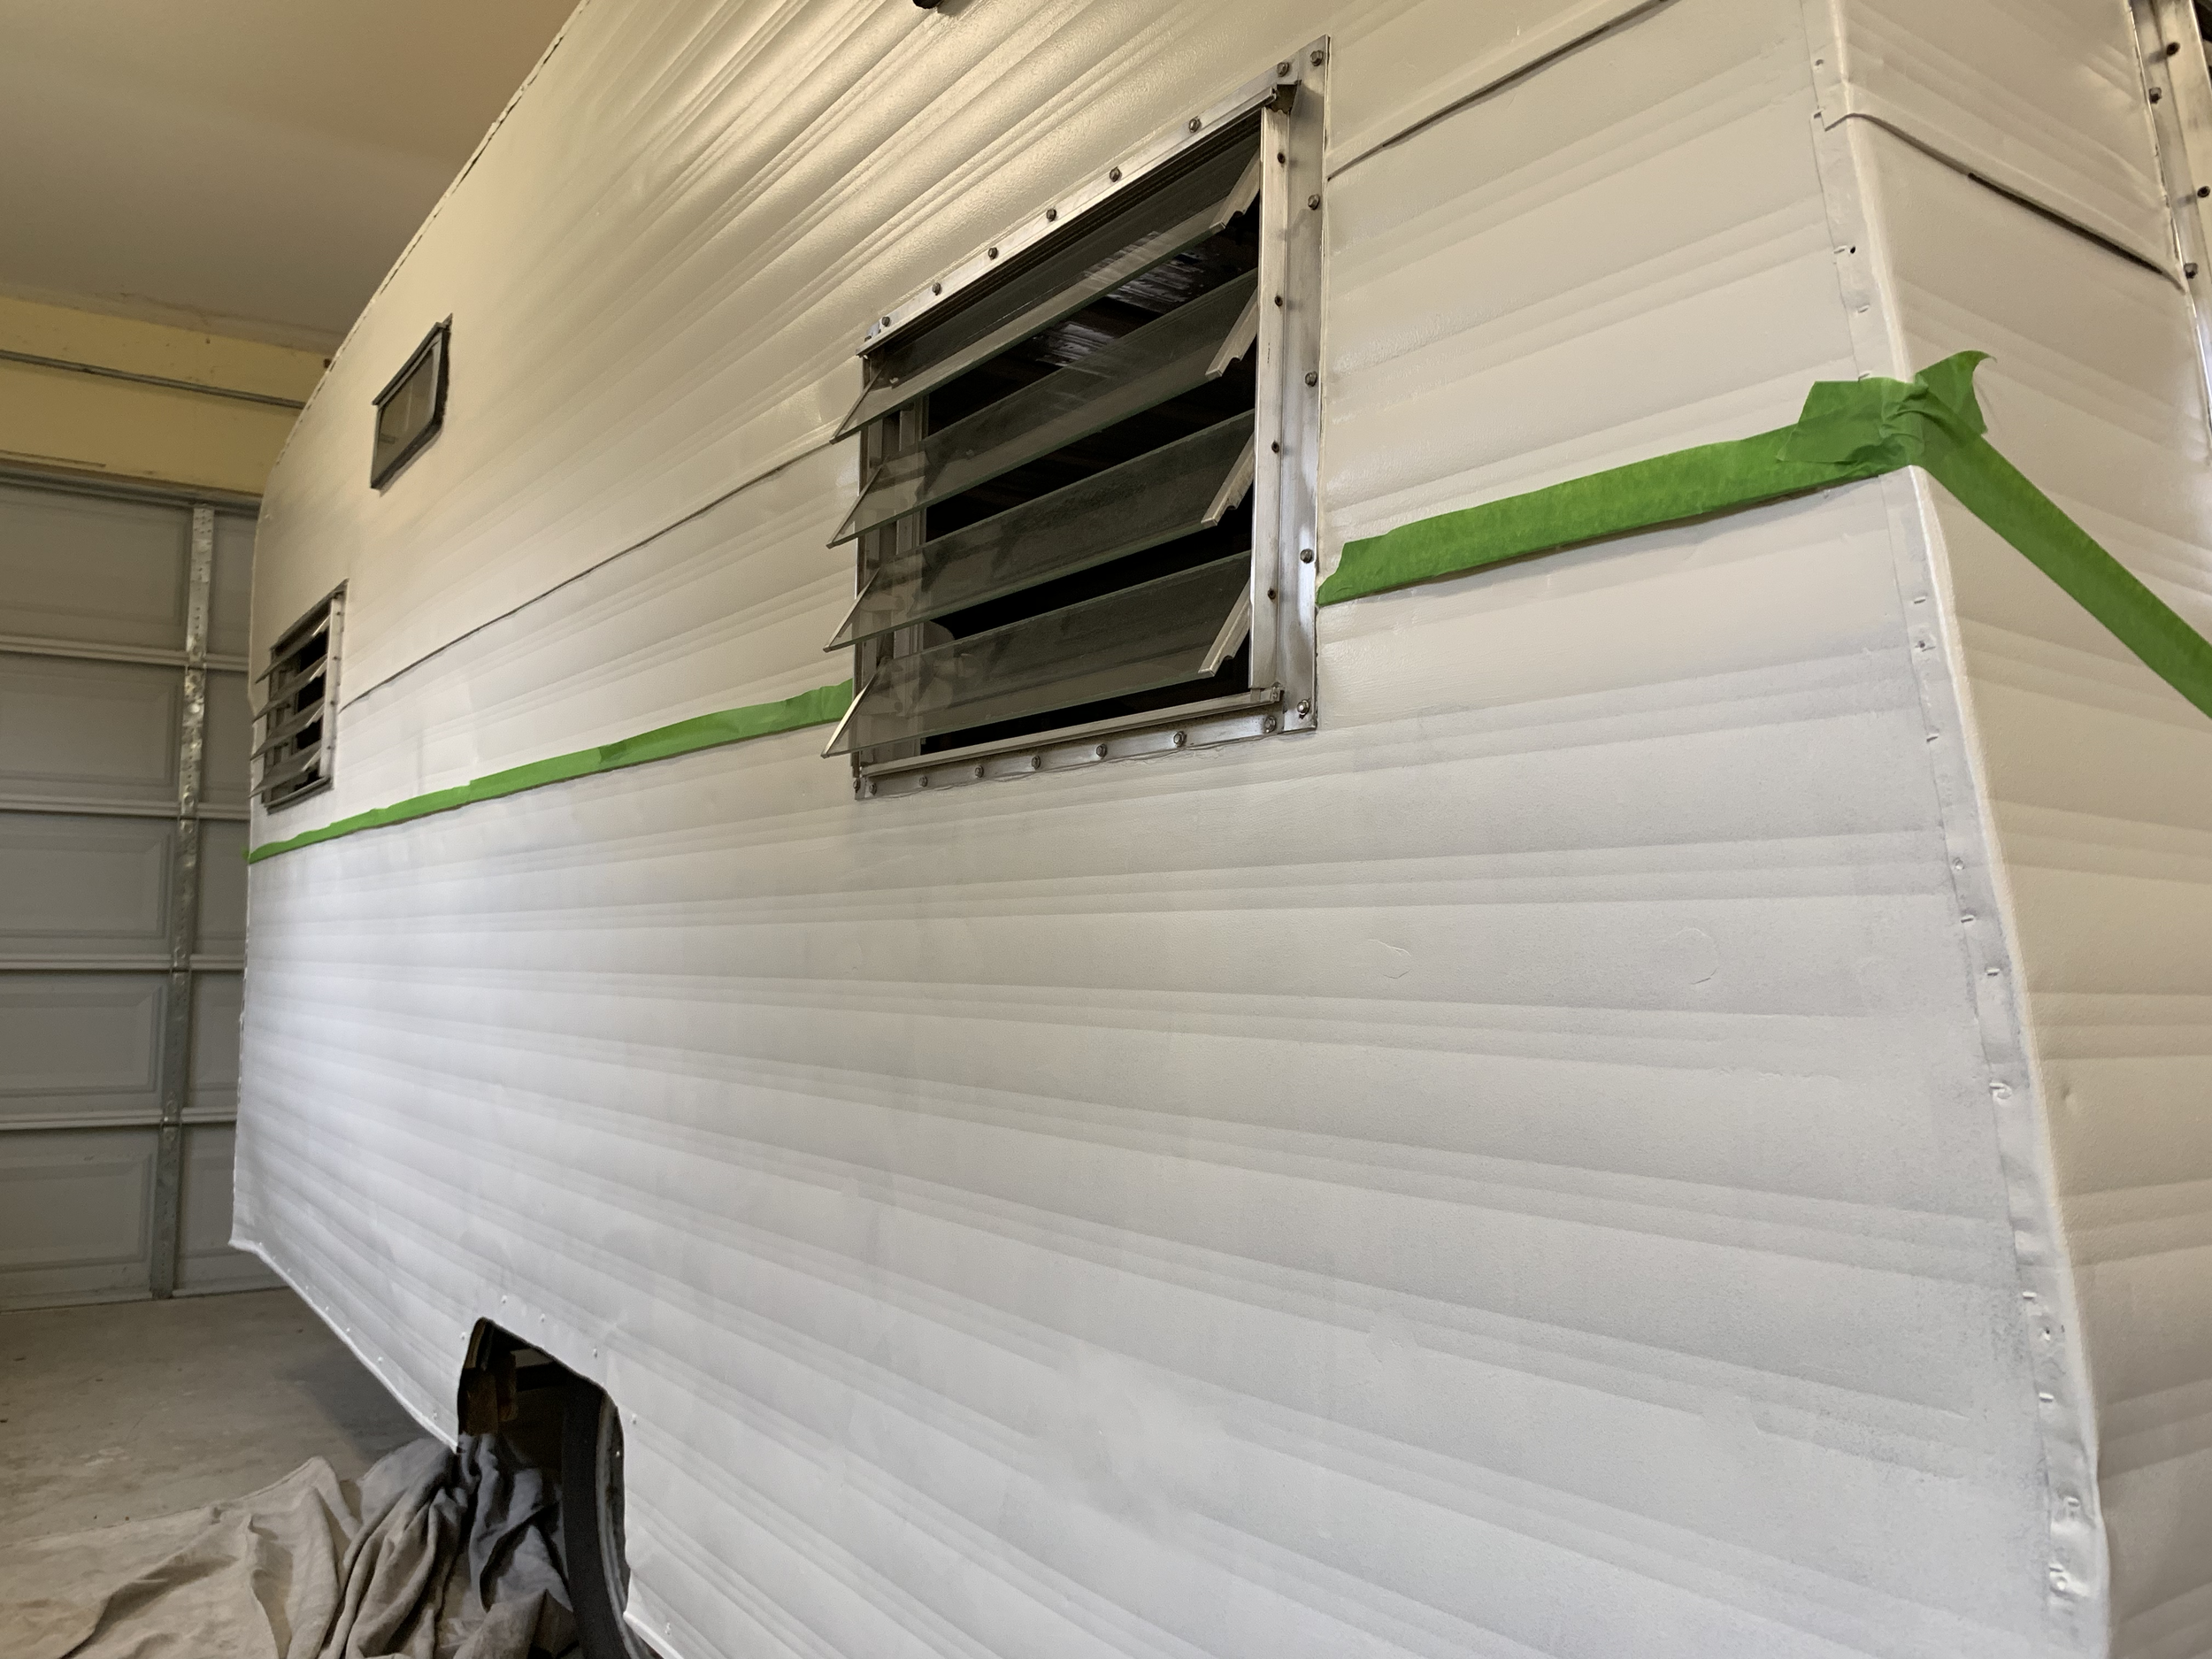
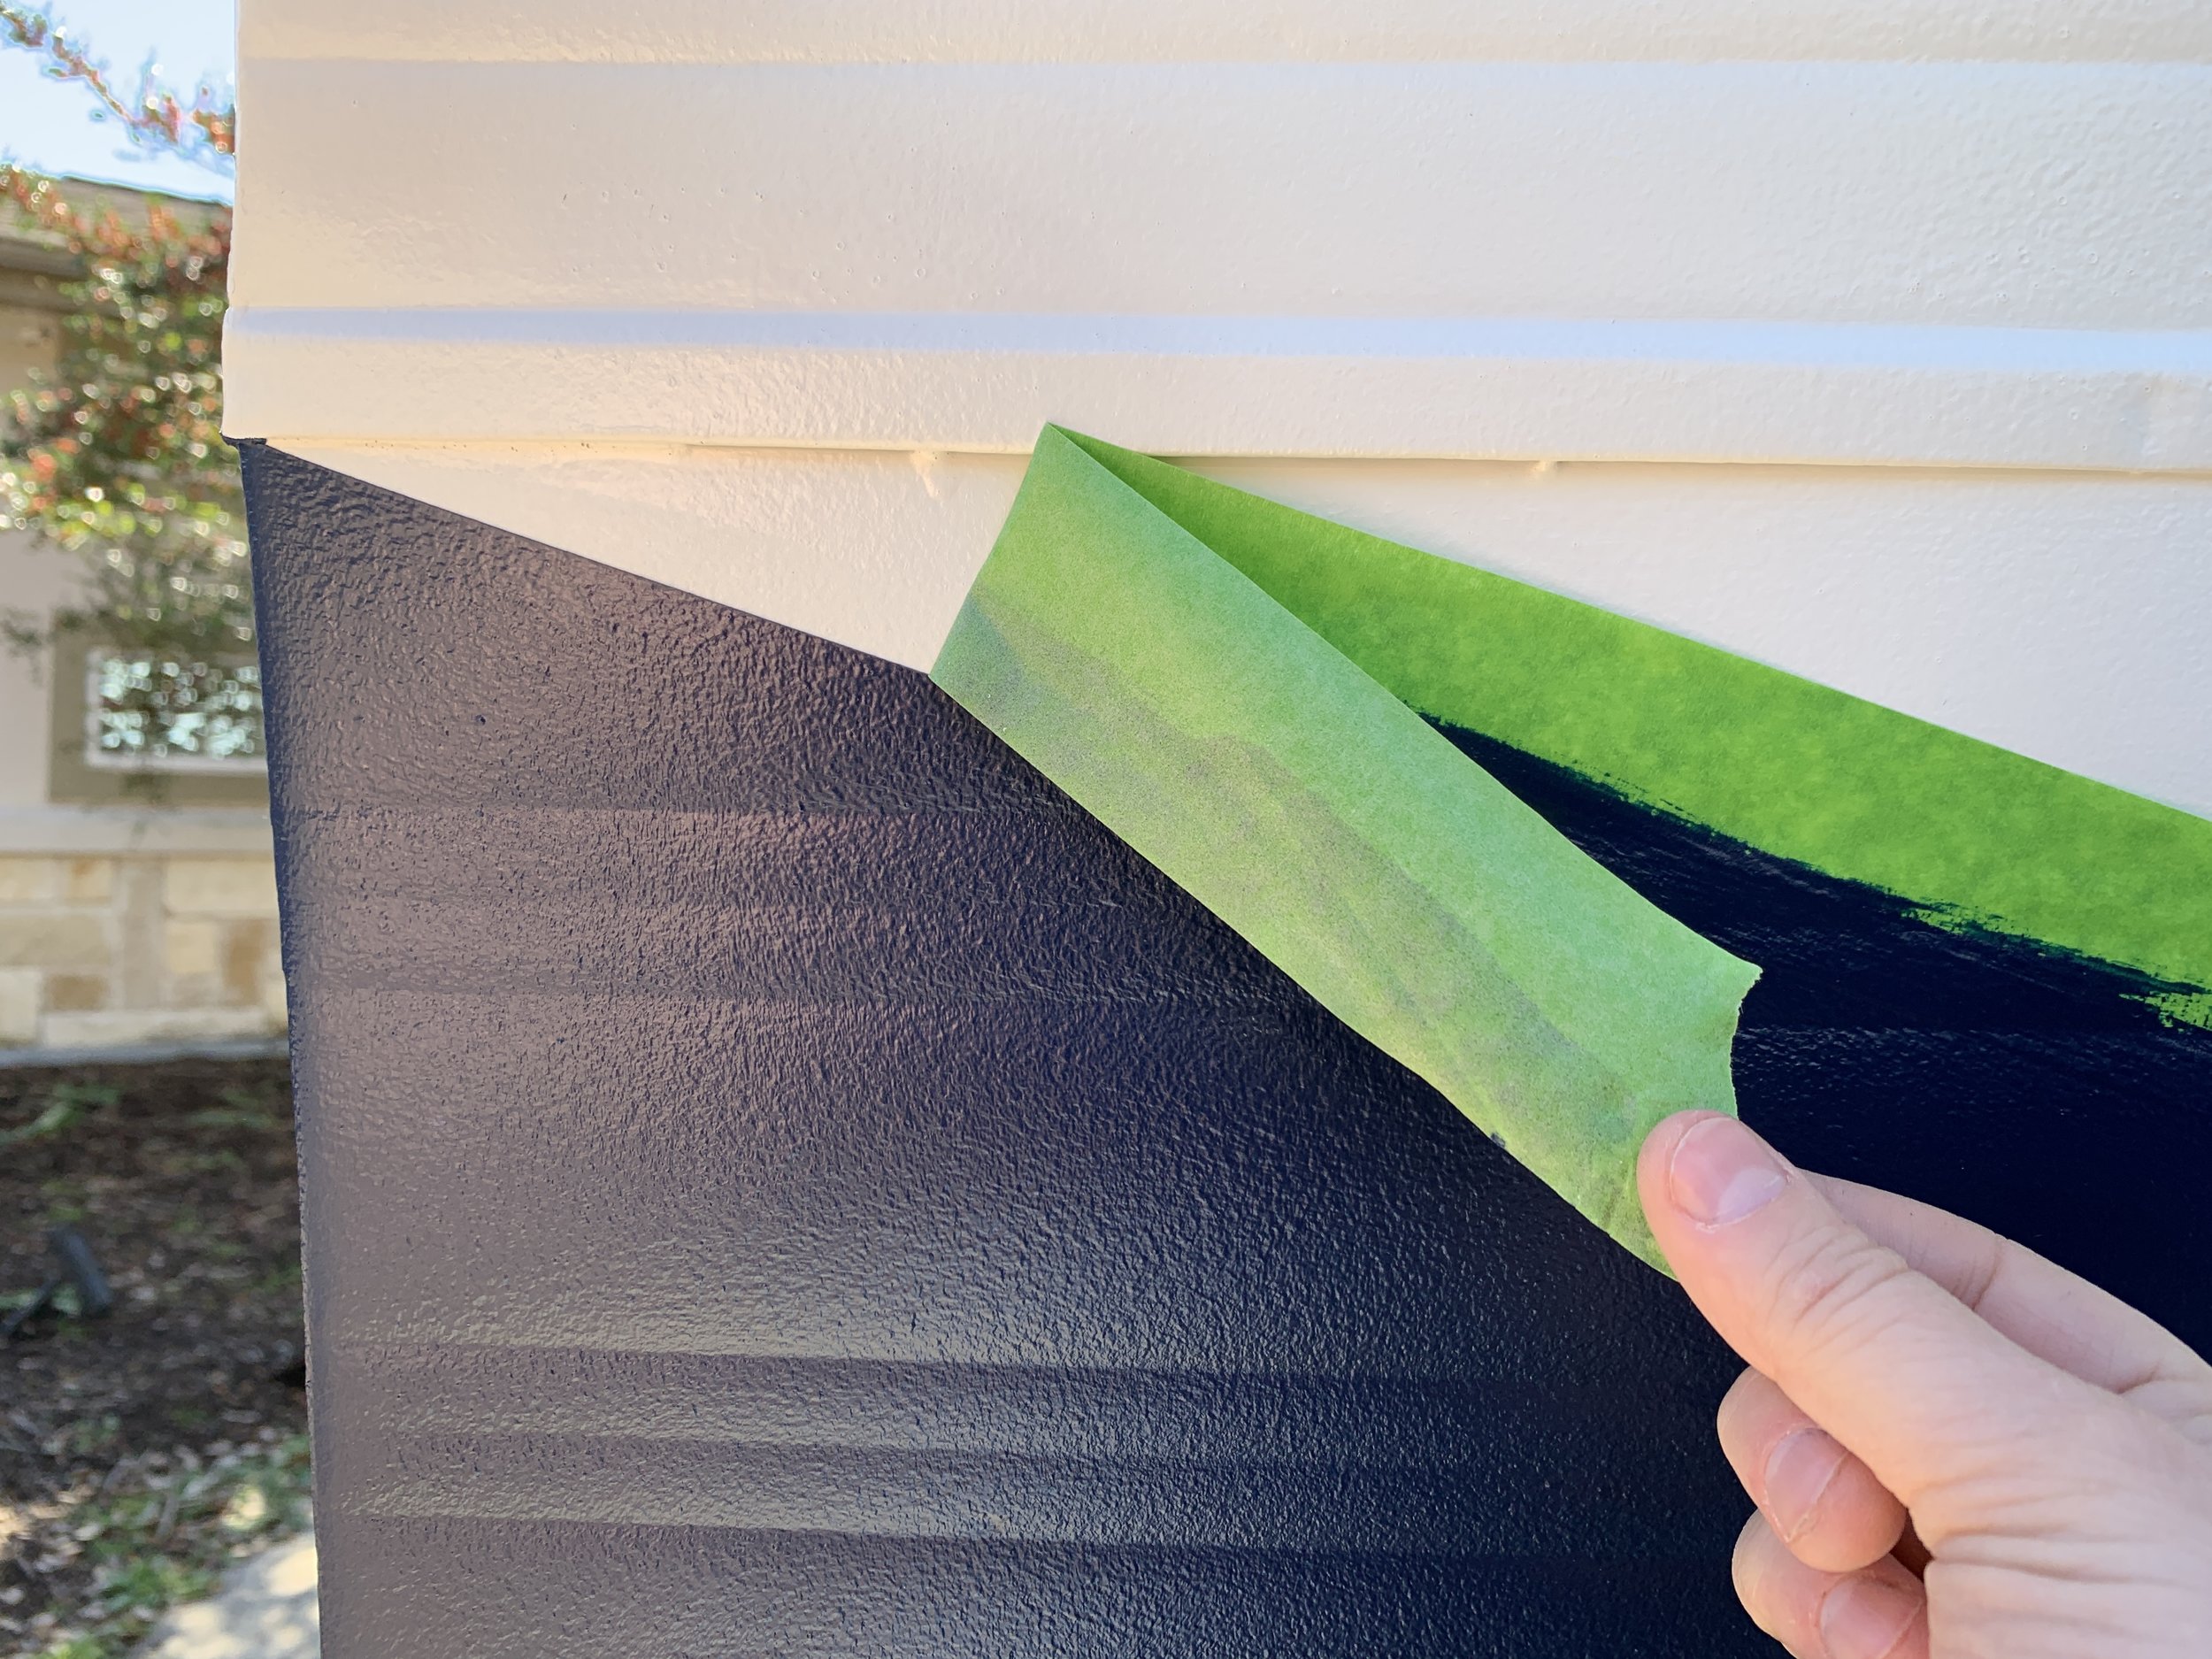
After we rolled on two thin coats of primer on the whole thing, we painted the top half with our off-white – starting with the roof – feathering the edge and extending it well passed where we’d want to start our second color. After two coats of off-white, we taped off our design using the green Frog painter’s tape. On the sides we used the bottom seam of the metal stripe and wrapped the tape under the lip of the overhang. (I used the blunt side of a flat razor to run along the bottom and underside of the metal stripe overhang to help make a good seal with the tape.)
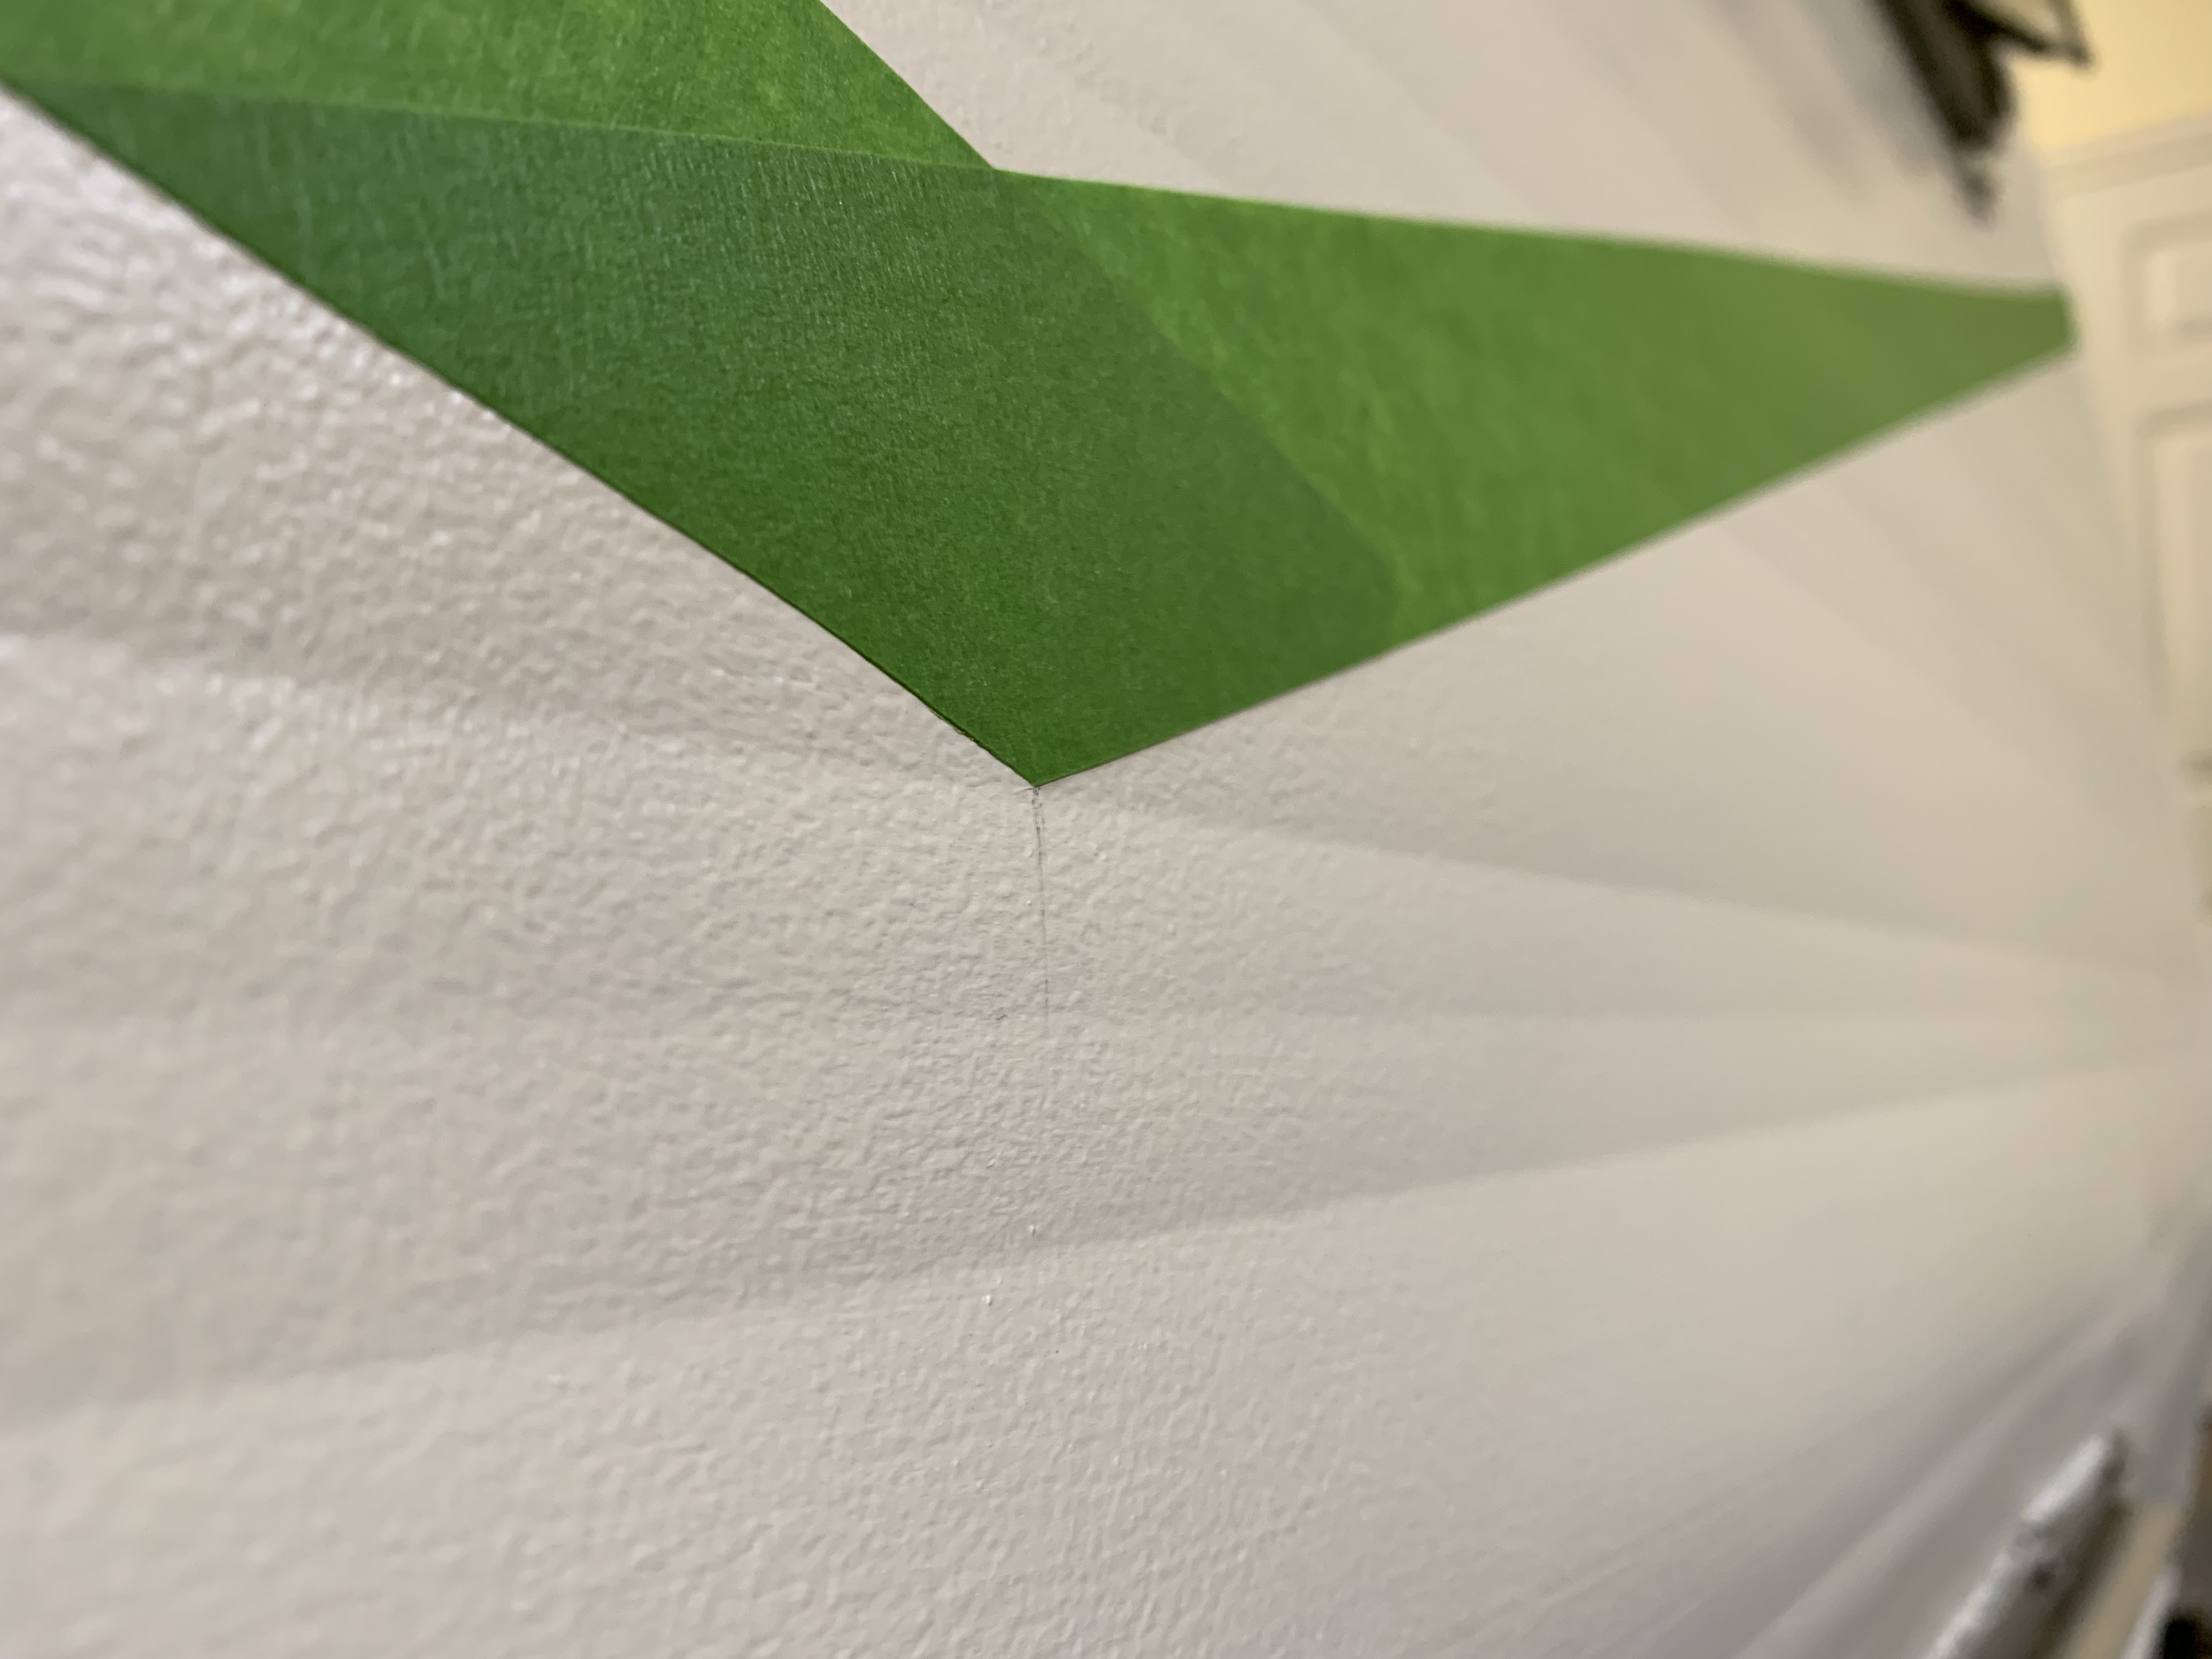
When it came to the front and back we first determined what angle we wanted by playing with the height of our center points. Then we lightly penciled out the center and played connect the dots between where the stripe on the sides ended and our new center mark. After sticking the tape down (carefully and lightly at first so we didn’t skew the tape line into some kind of funky wave) we cut the tape overlap into a clean point with a flat razor, burnishing the tape edge down with our fingers to create a nice tight stick. Then, we painted the dramatic fun part!

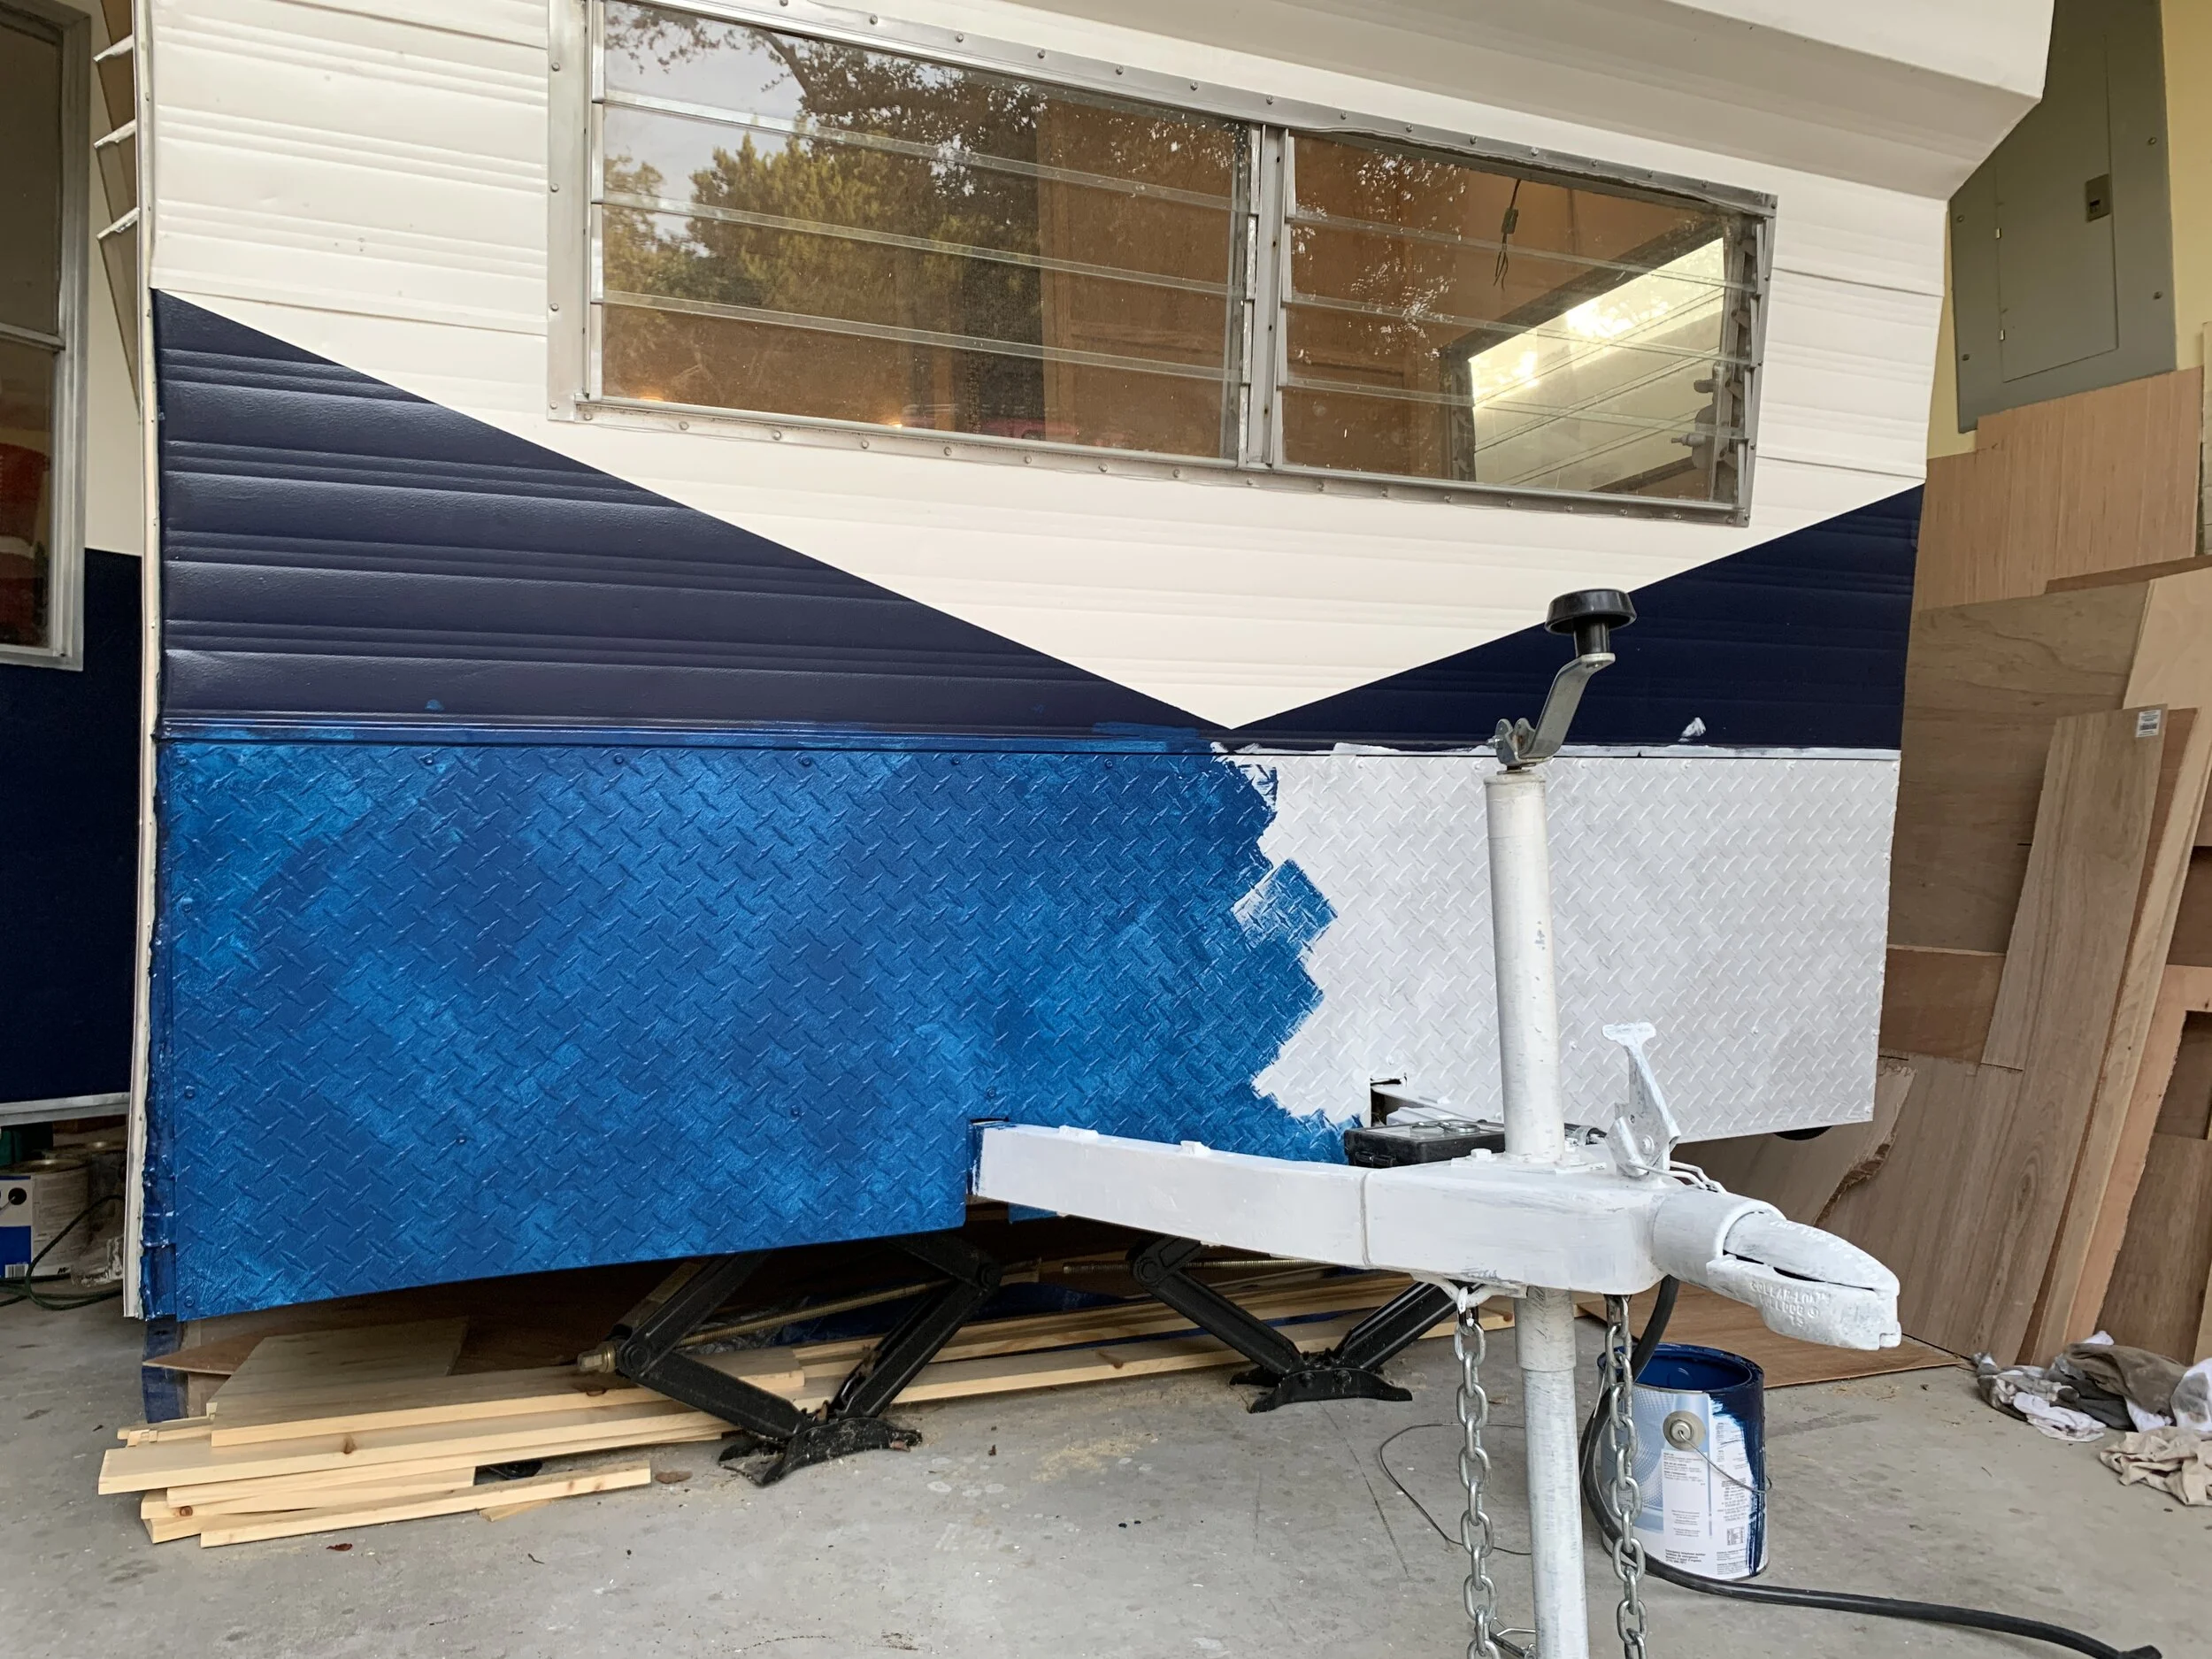
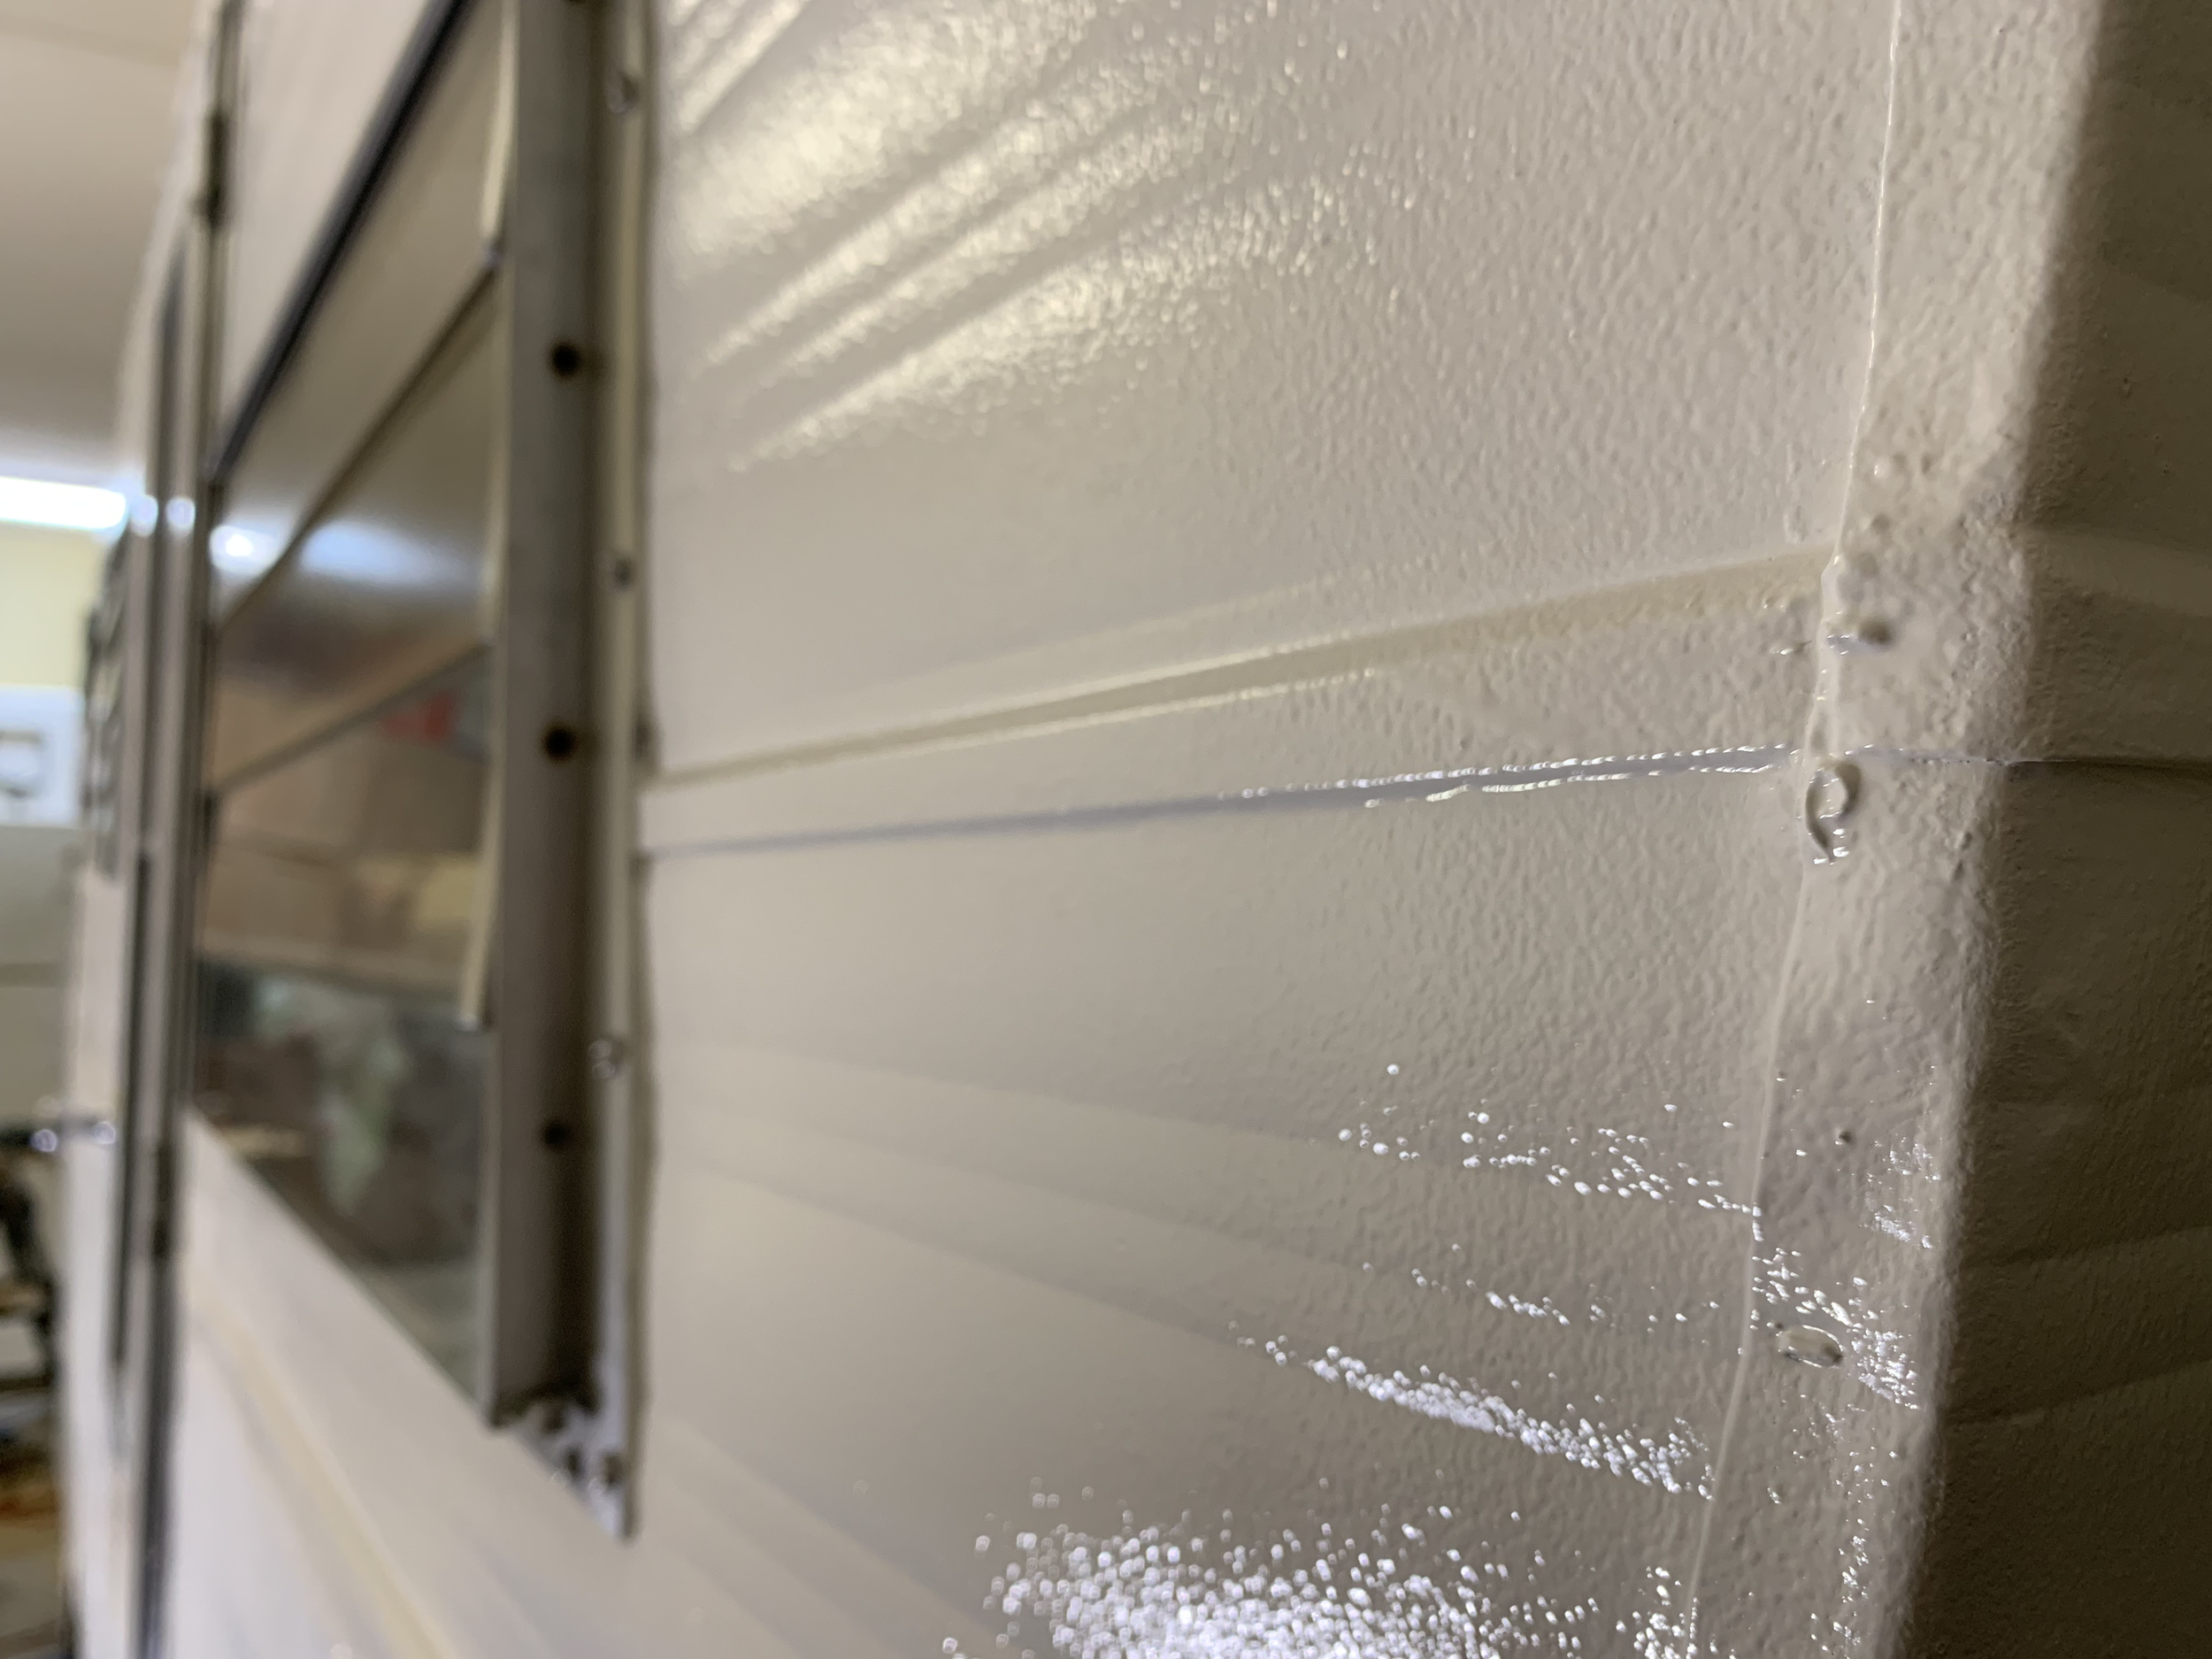
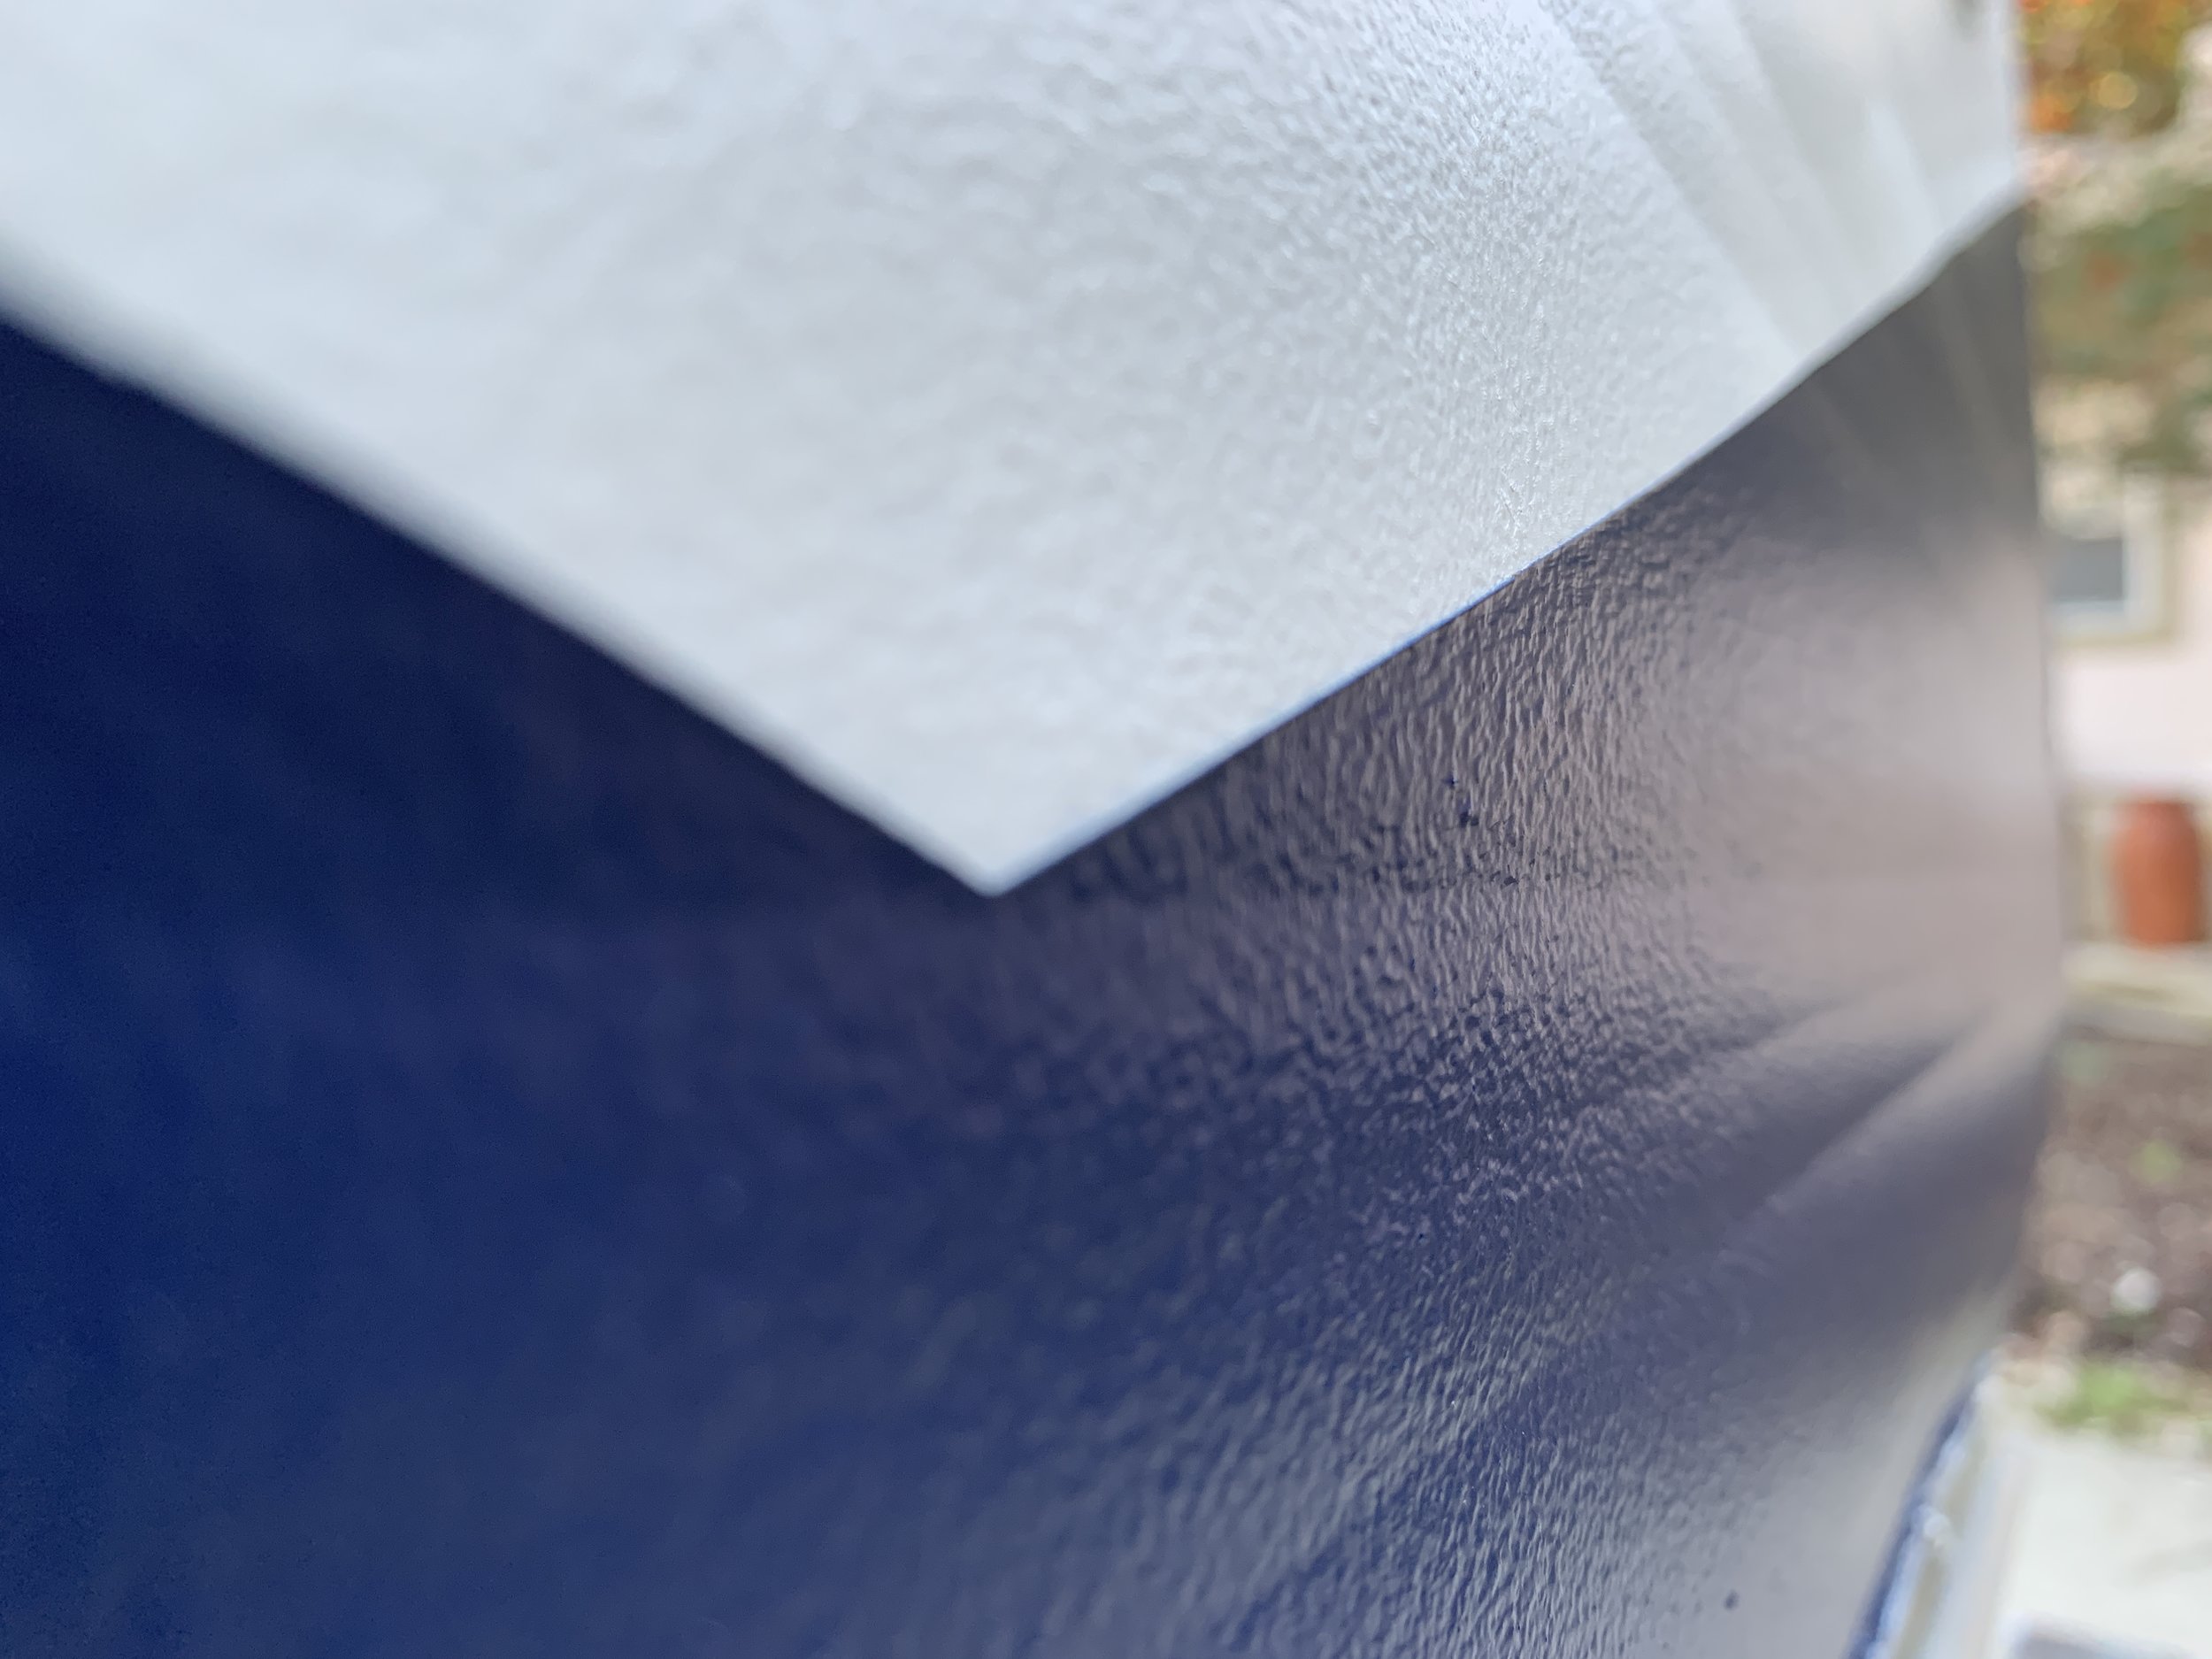
Four coats of navy. This was a test of my patience for a few reasons: 1) we’ve been prepping and painting for what feels like an eternity, 2) I’ve been chomping at the bit to tear that tape off and reveal a (hopefully) crisp clean edge, and 3) because the navy paints on like this when wet:
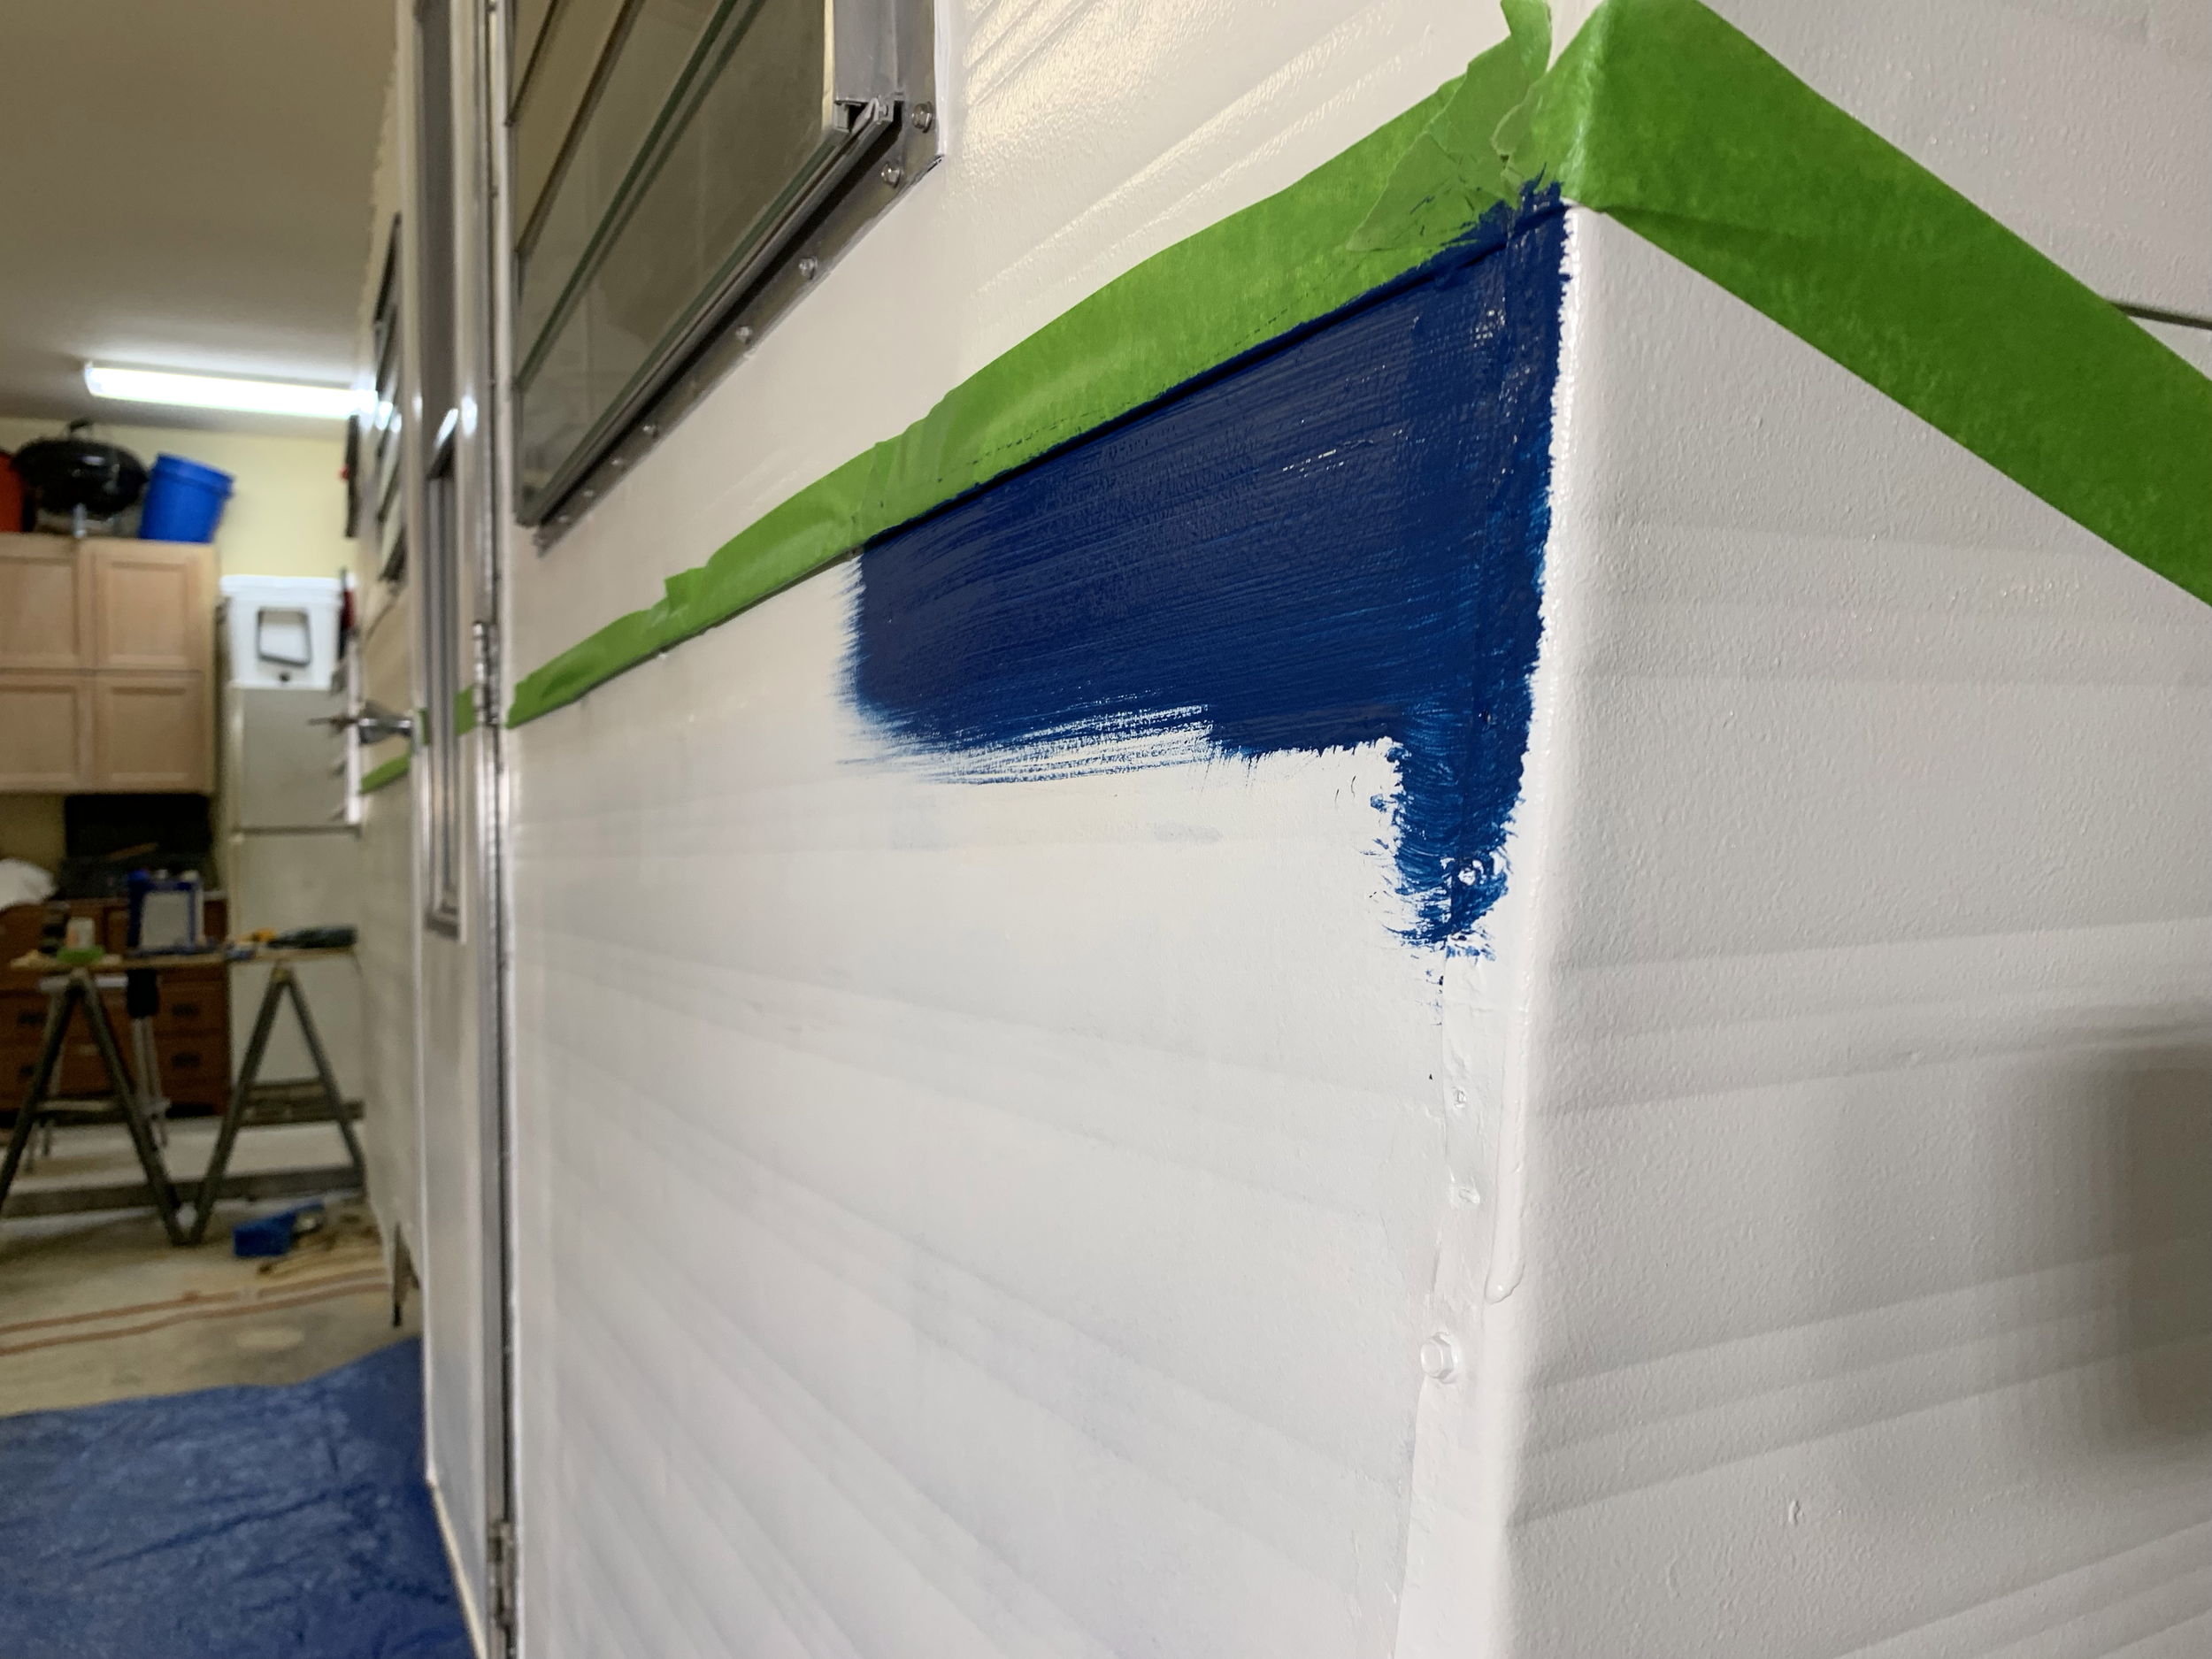
First swipe of blue!
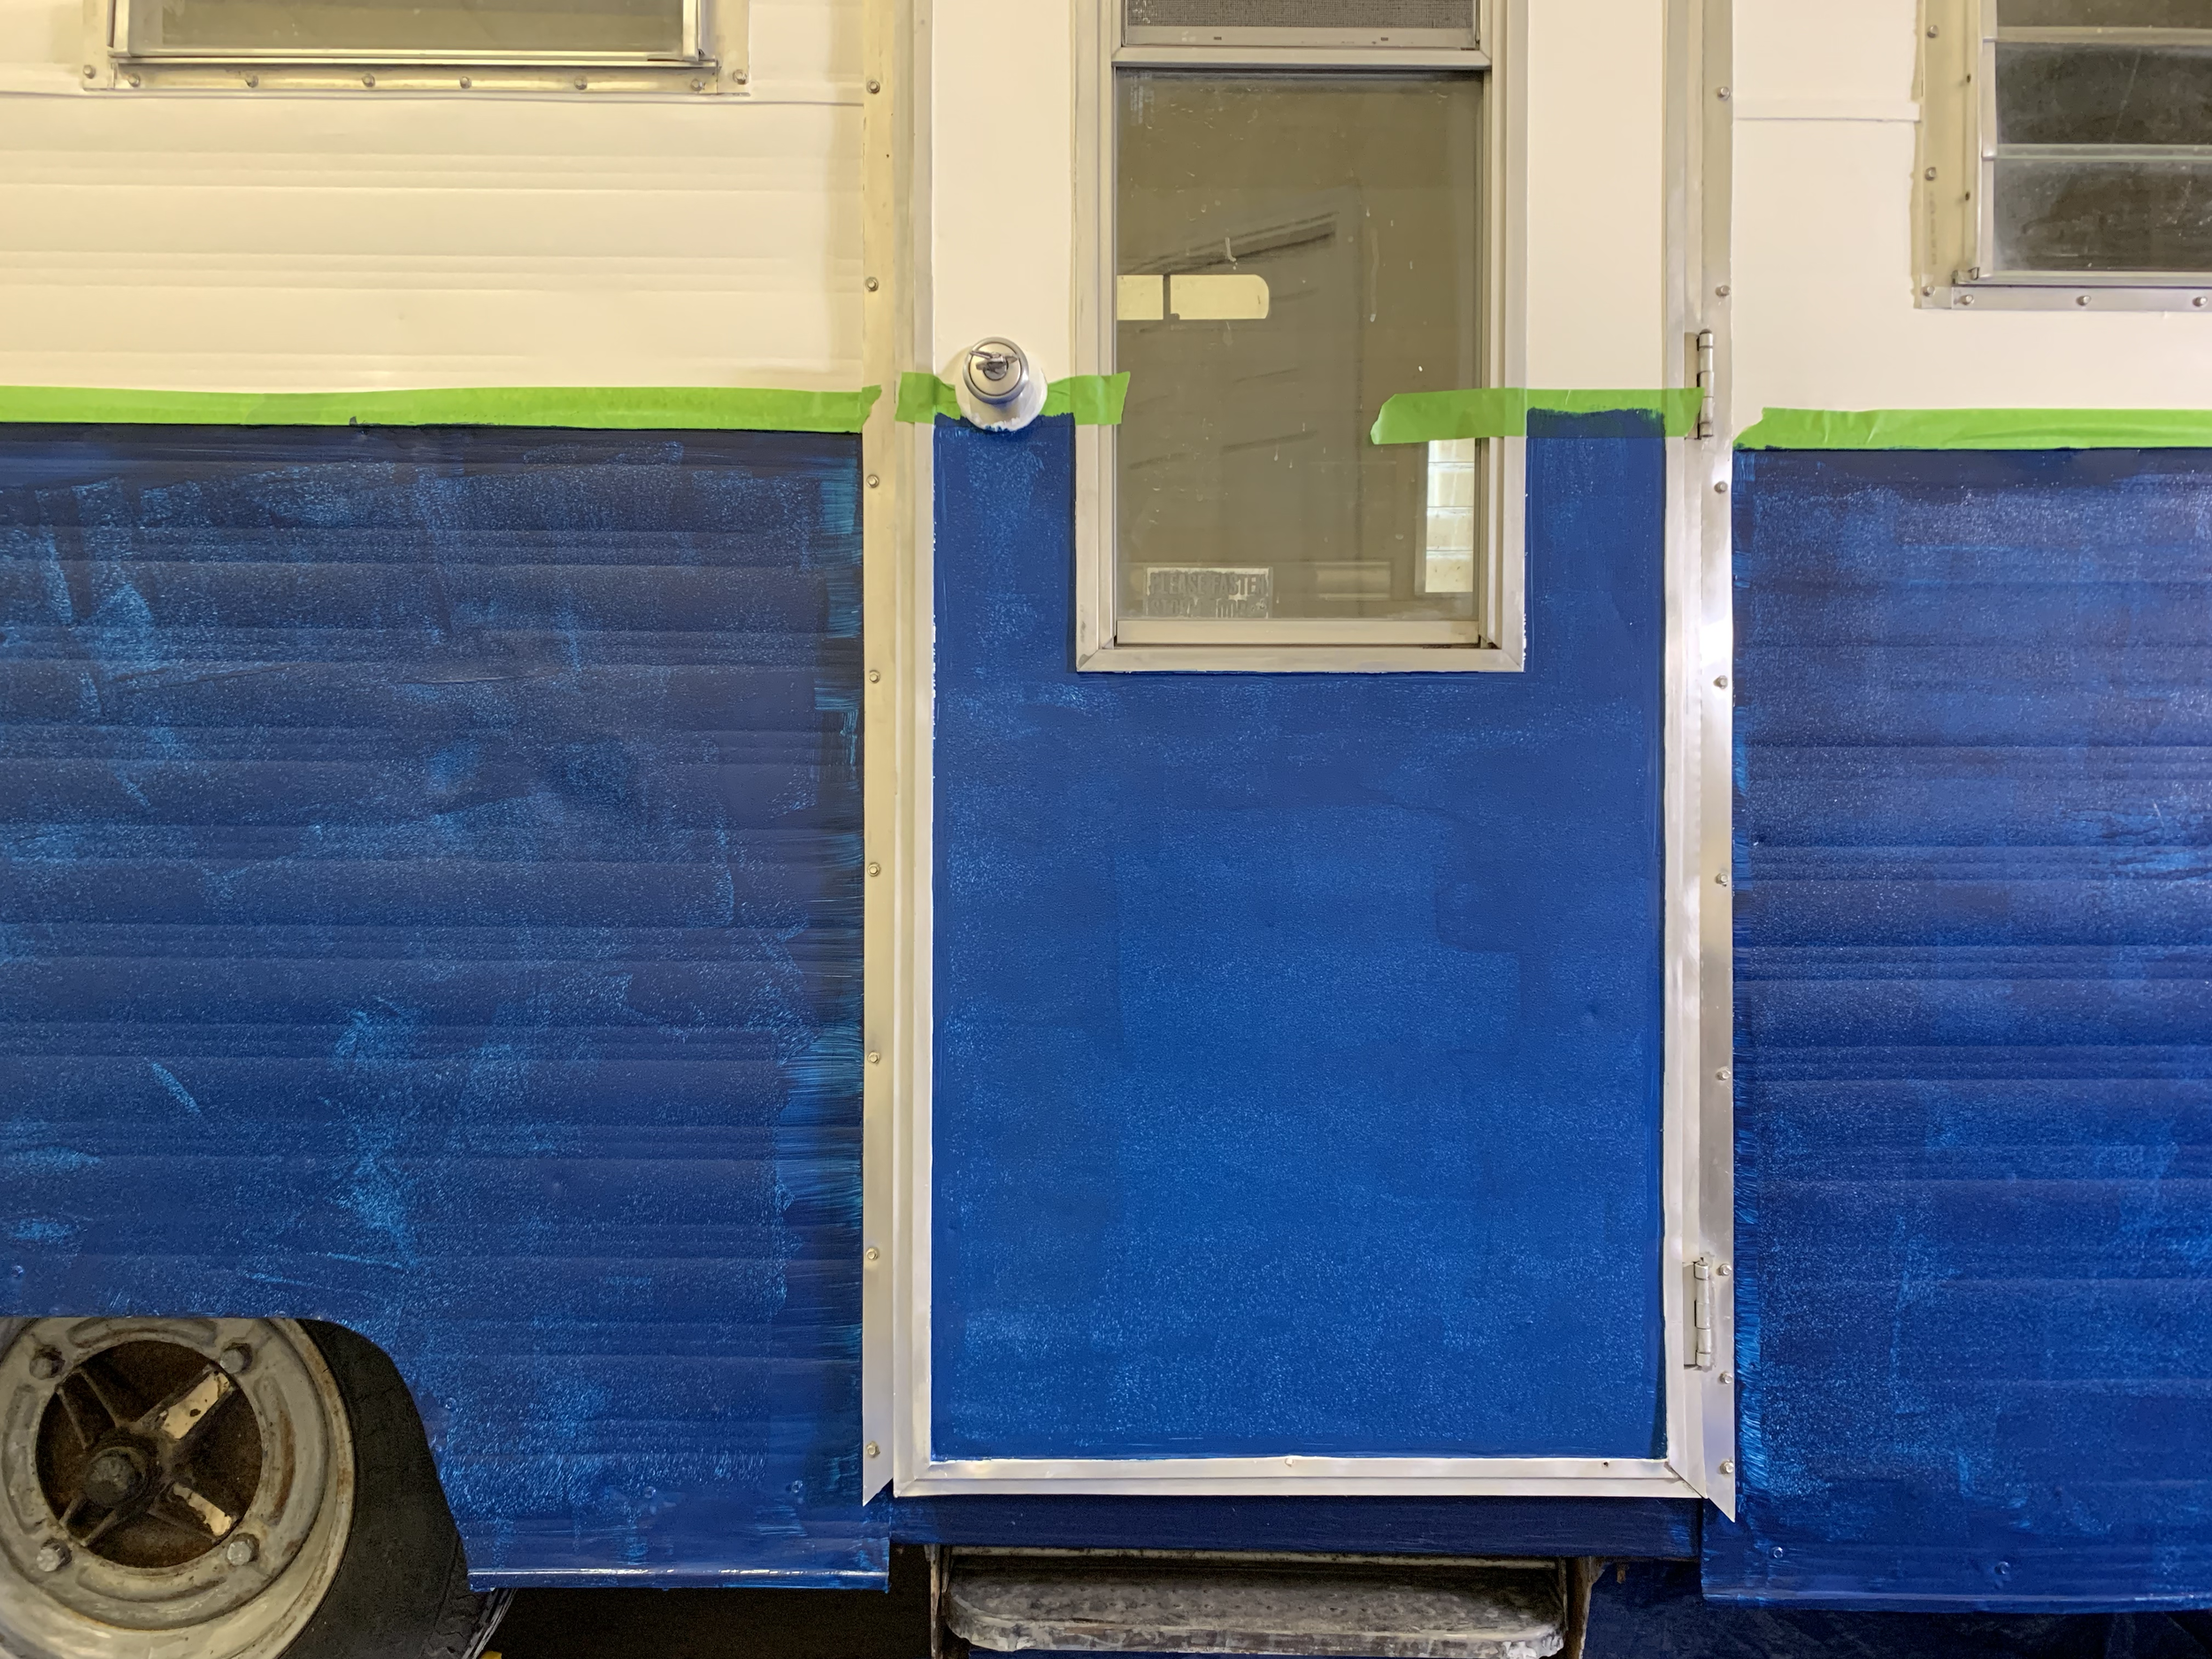
Agh! Egads that’s lookin’ a little Smurfy. (We continued, praying to the paint gods it was mixed correctly and would be the right color when all the coats were done and dry.) It actually doesn’t look super bright in the photo above, but look how differently it went on wet (the bright blue) compared to when dry (the dark blue):

Wet color on top of two coats of dry paint
With each coat the coverage (and color) got better and better…
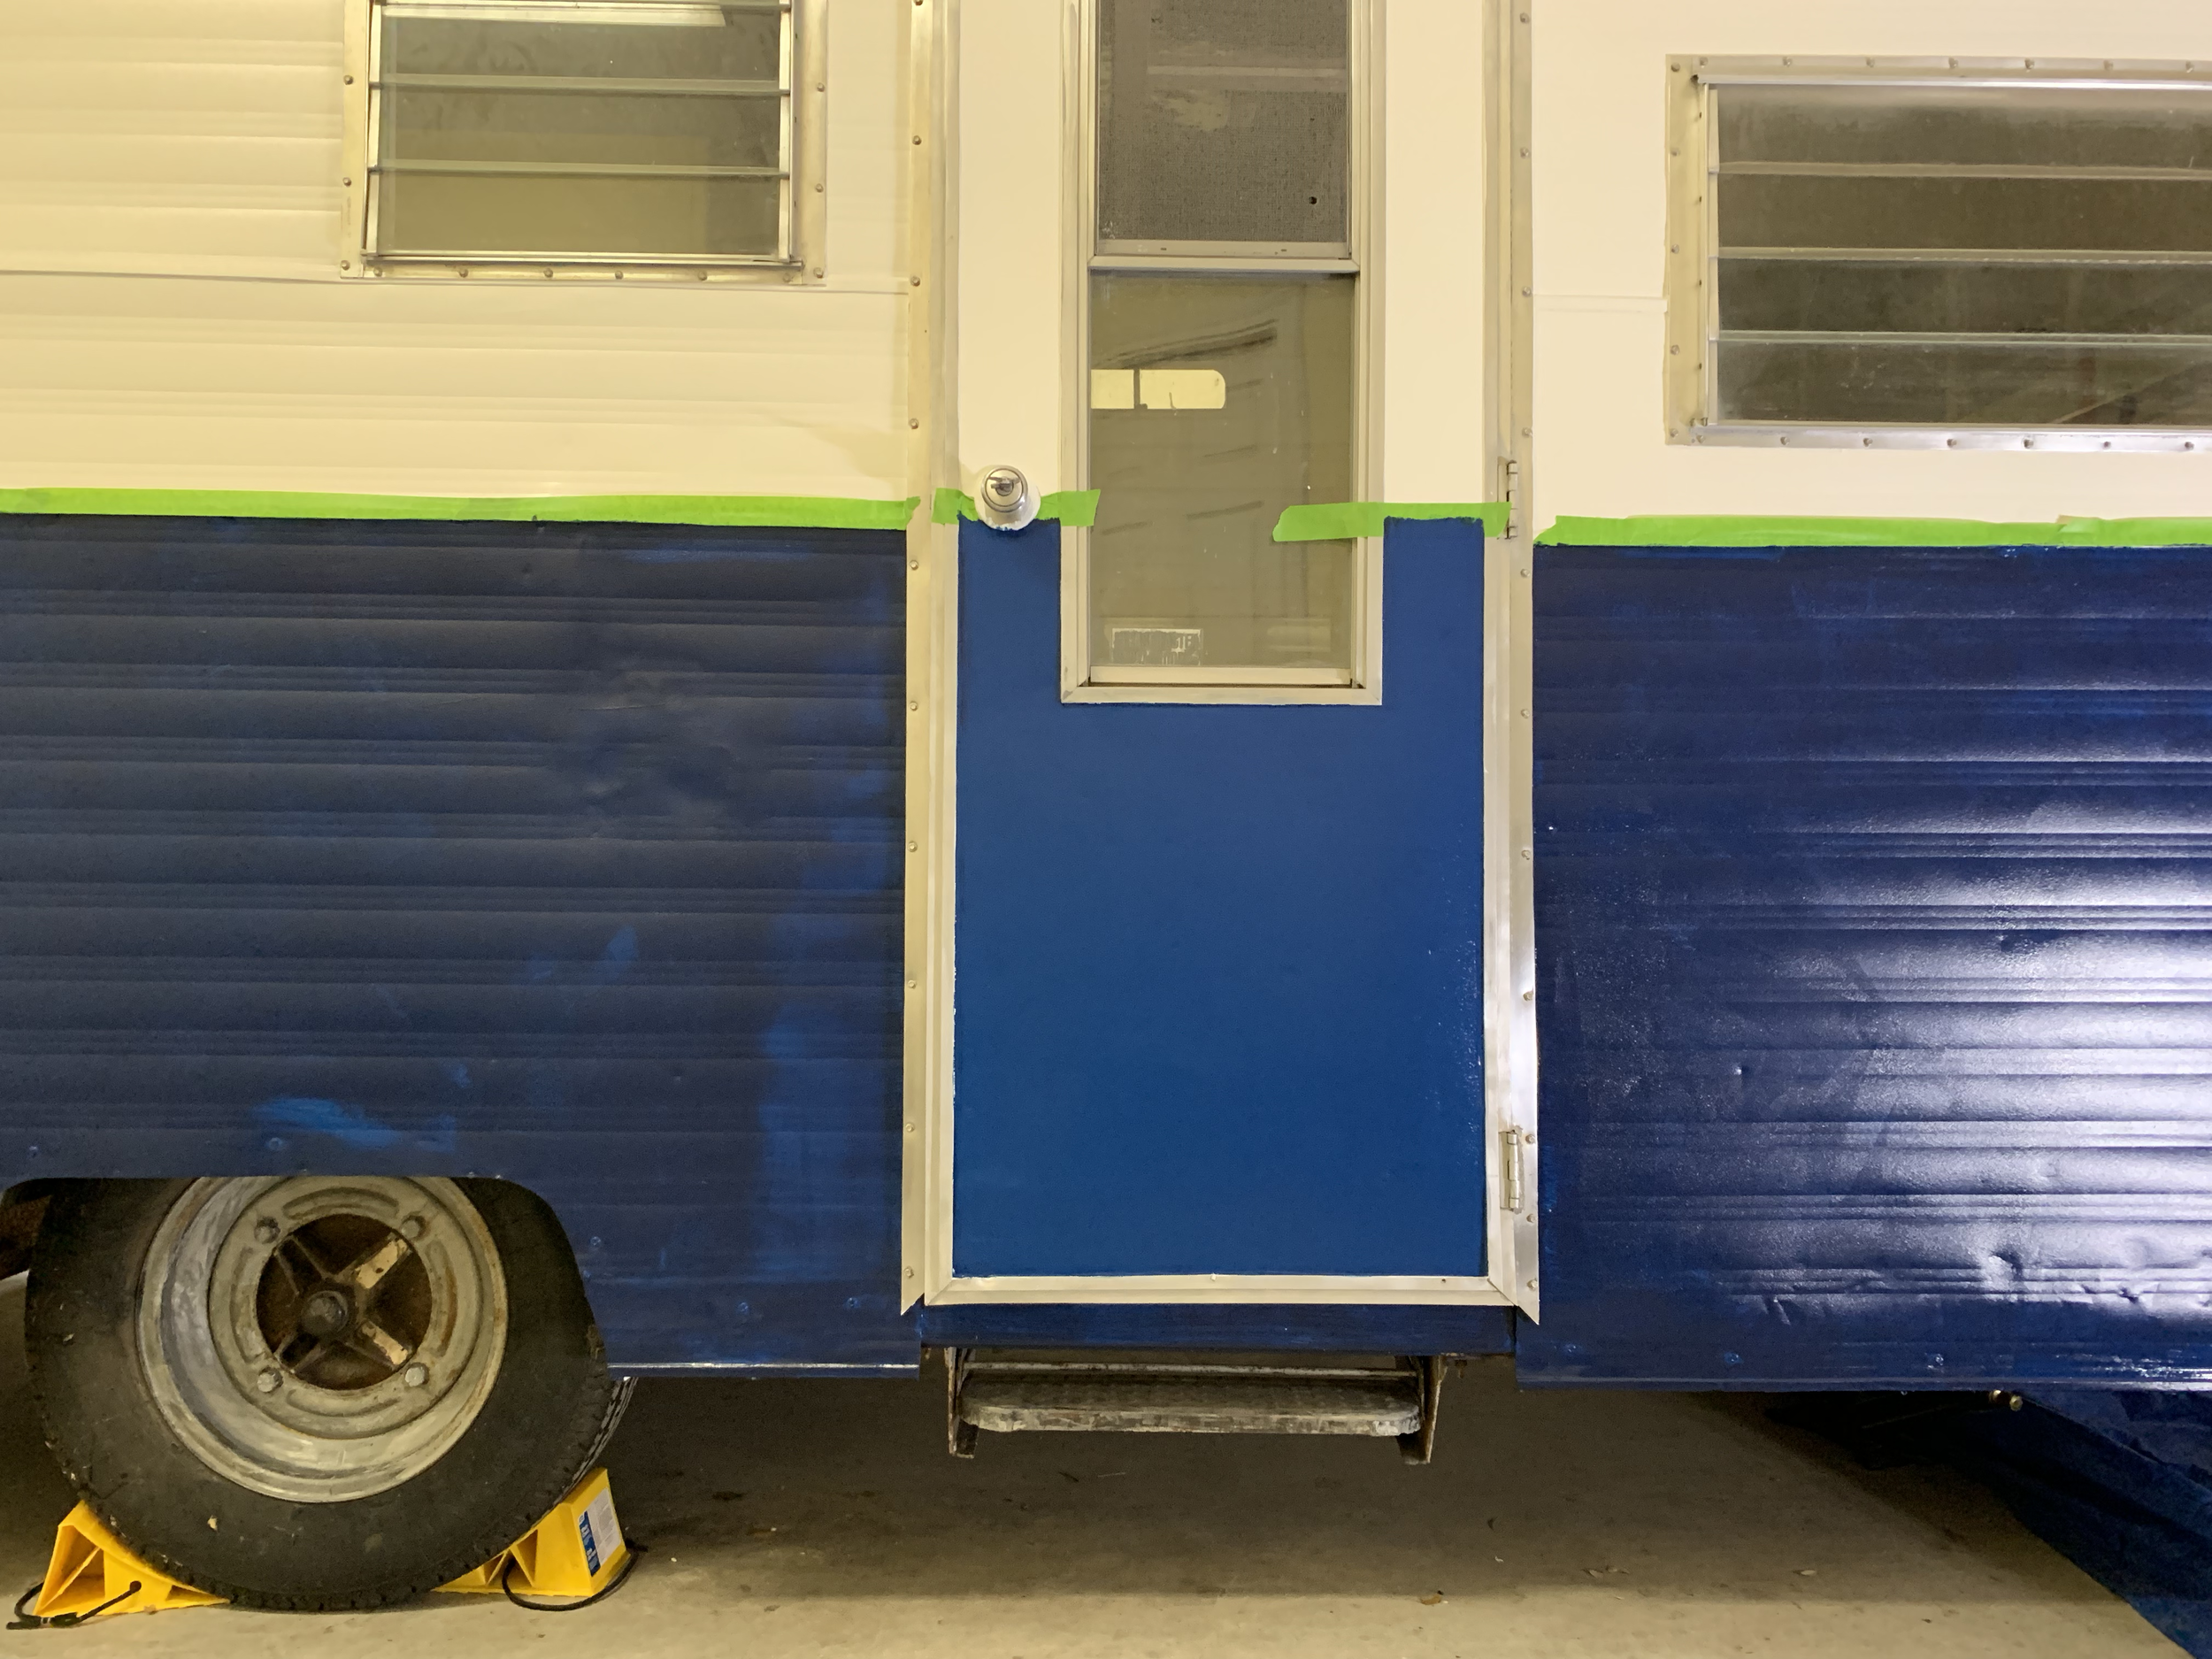
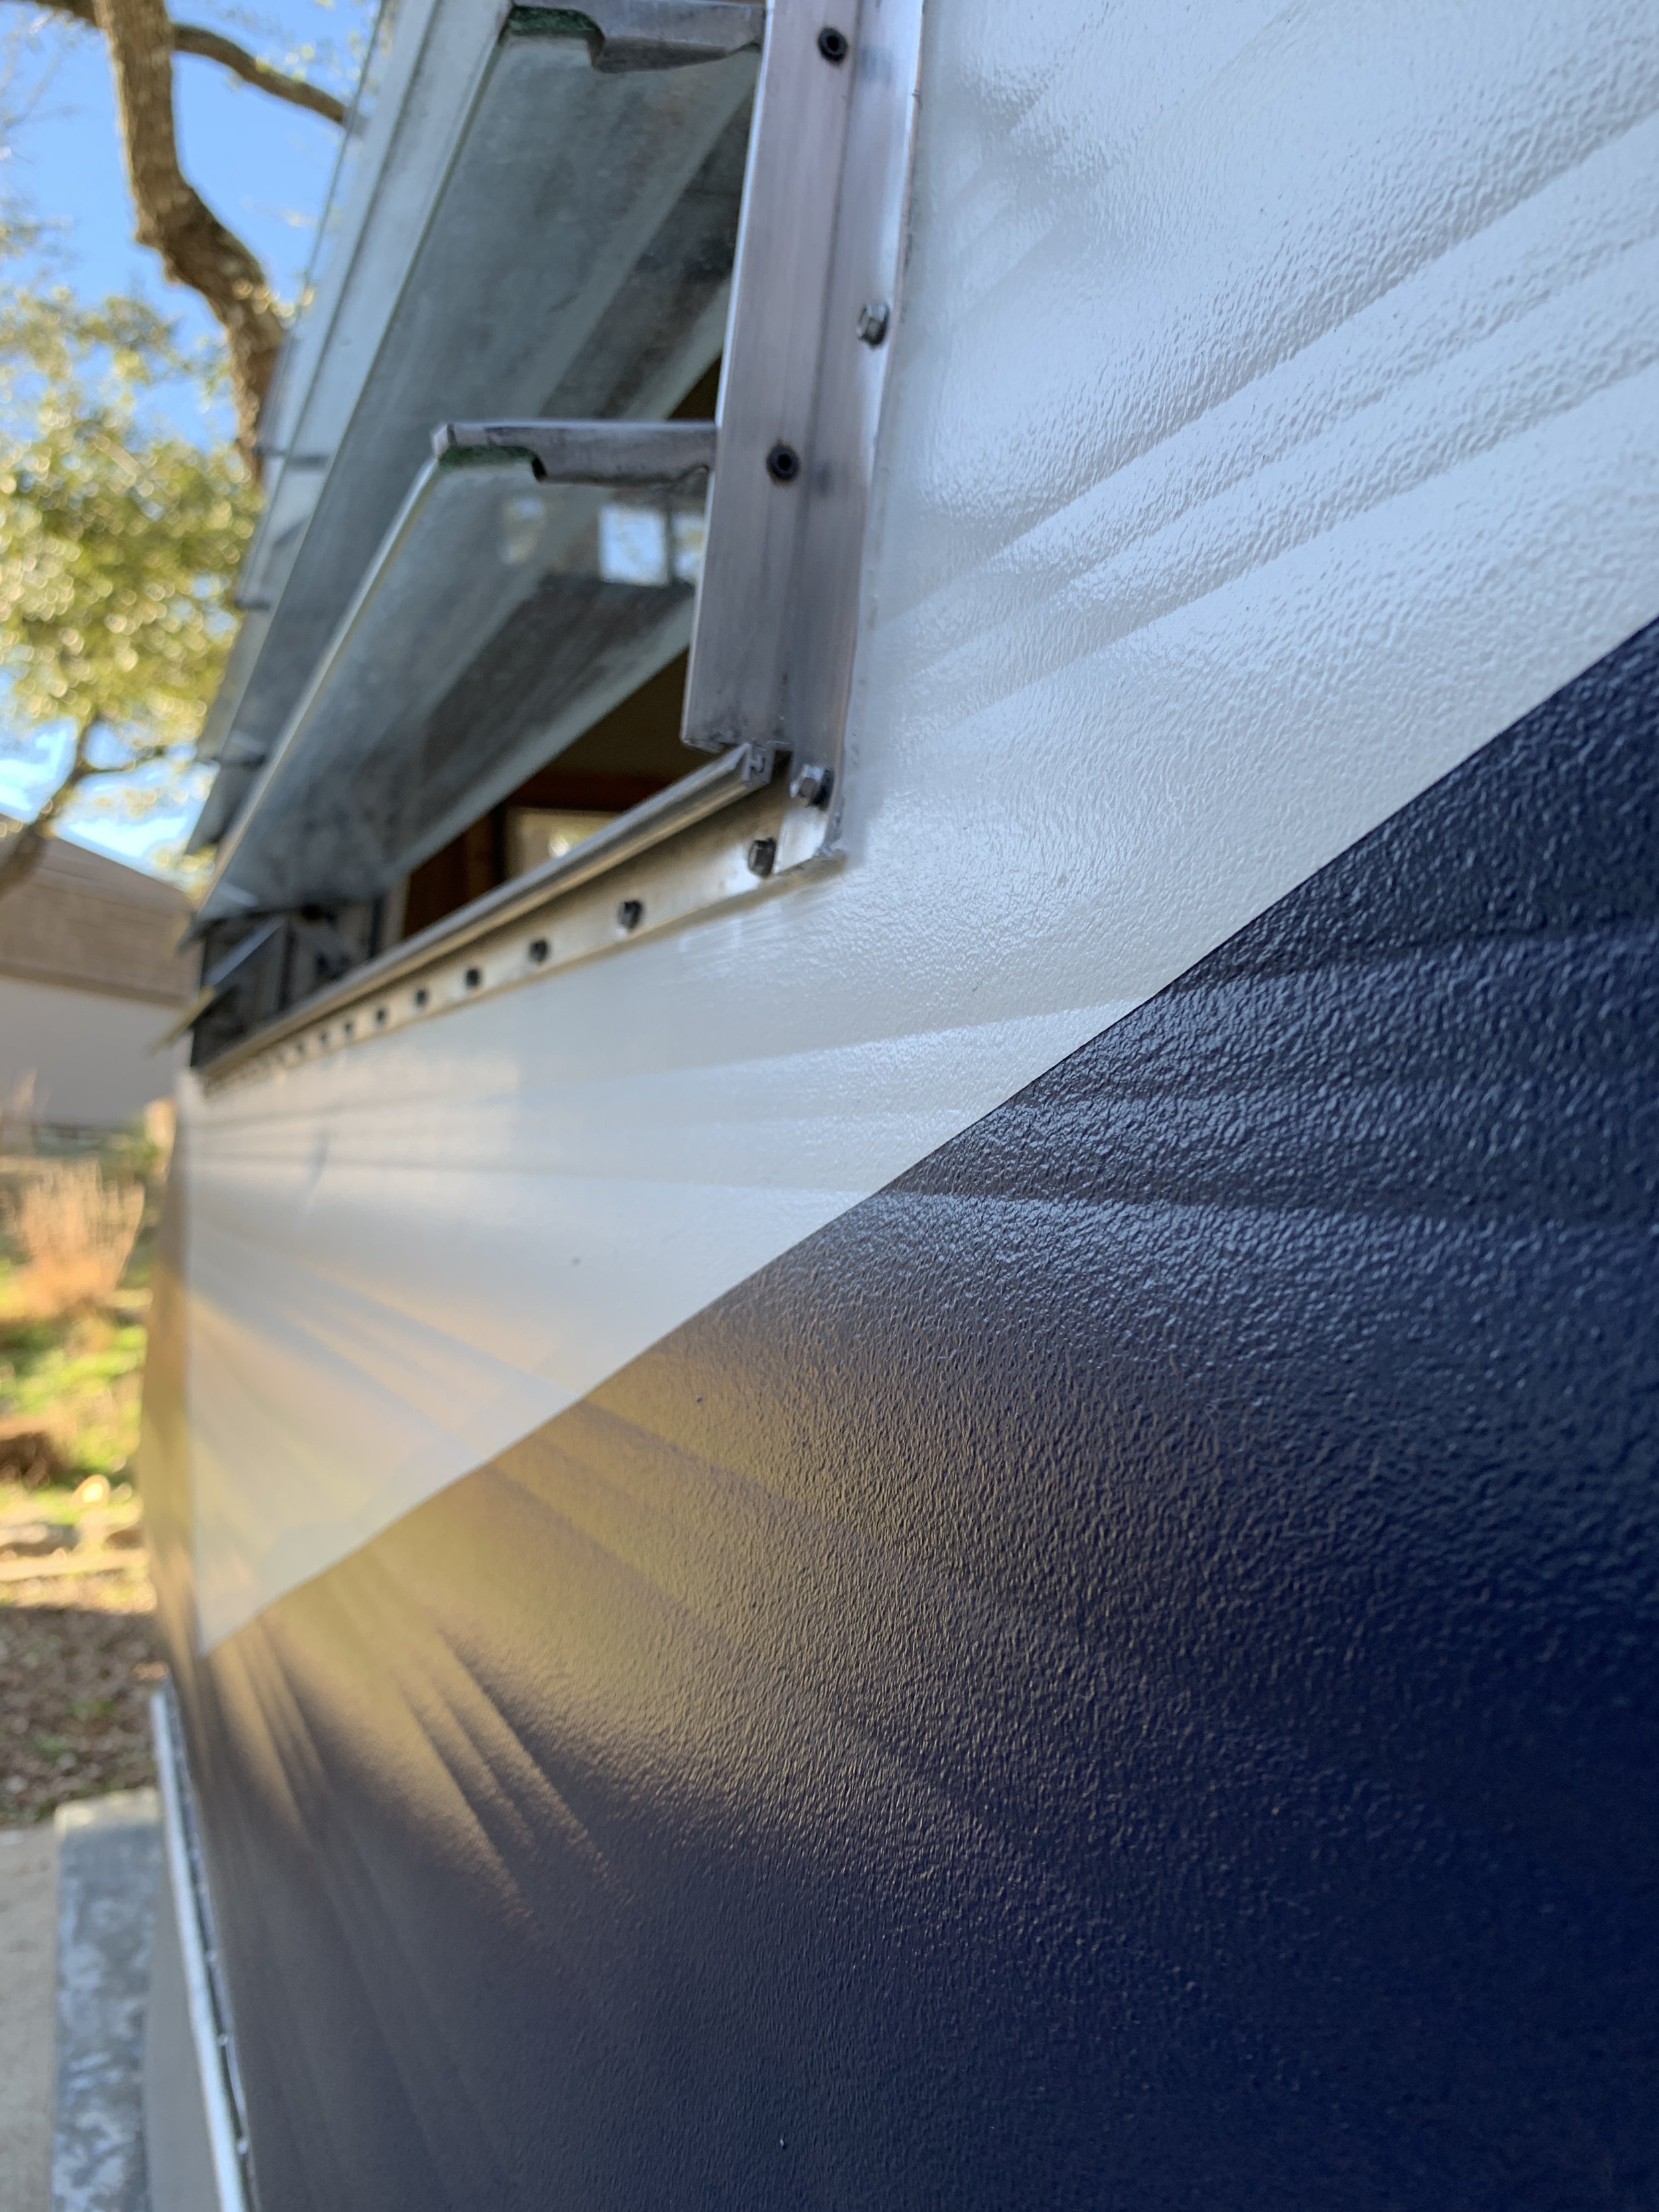
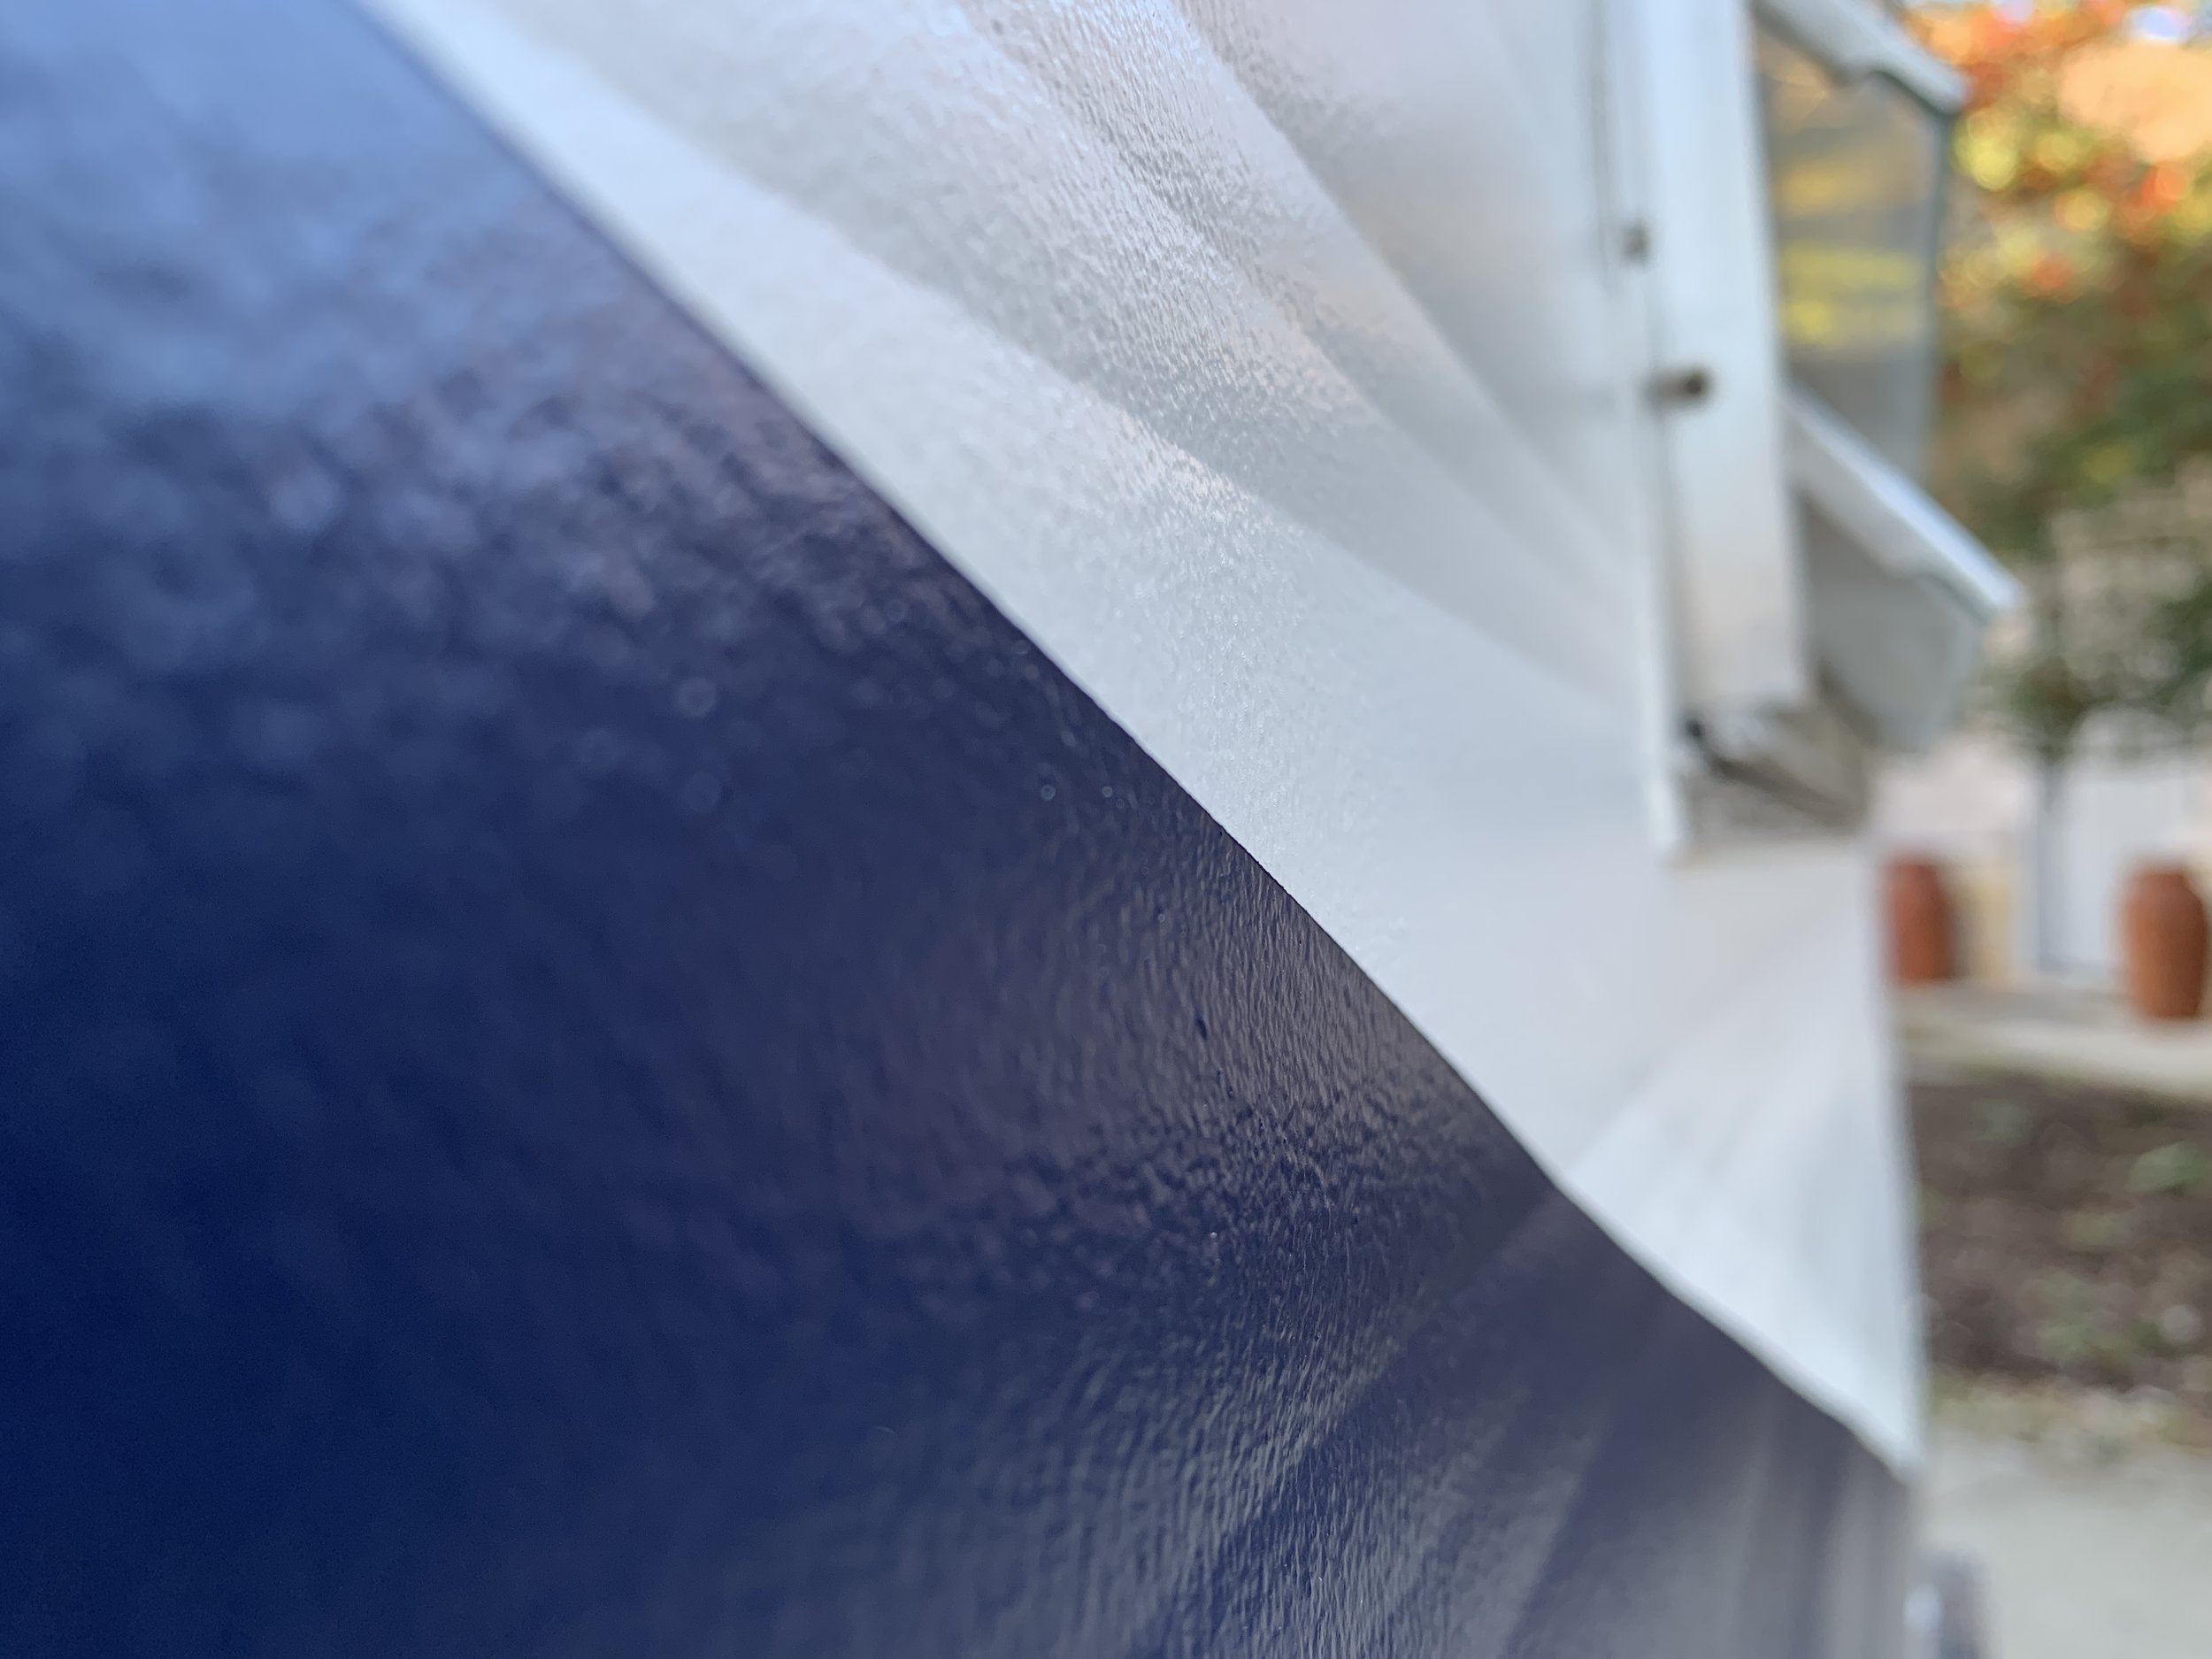
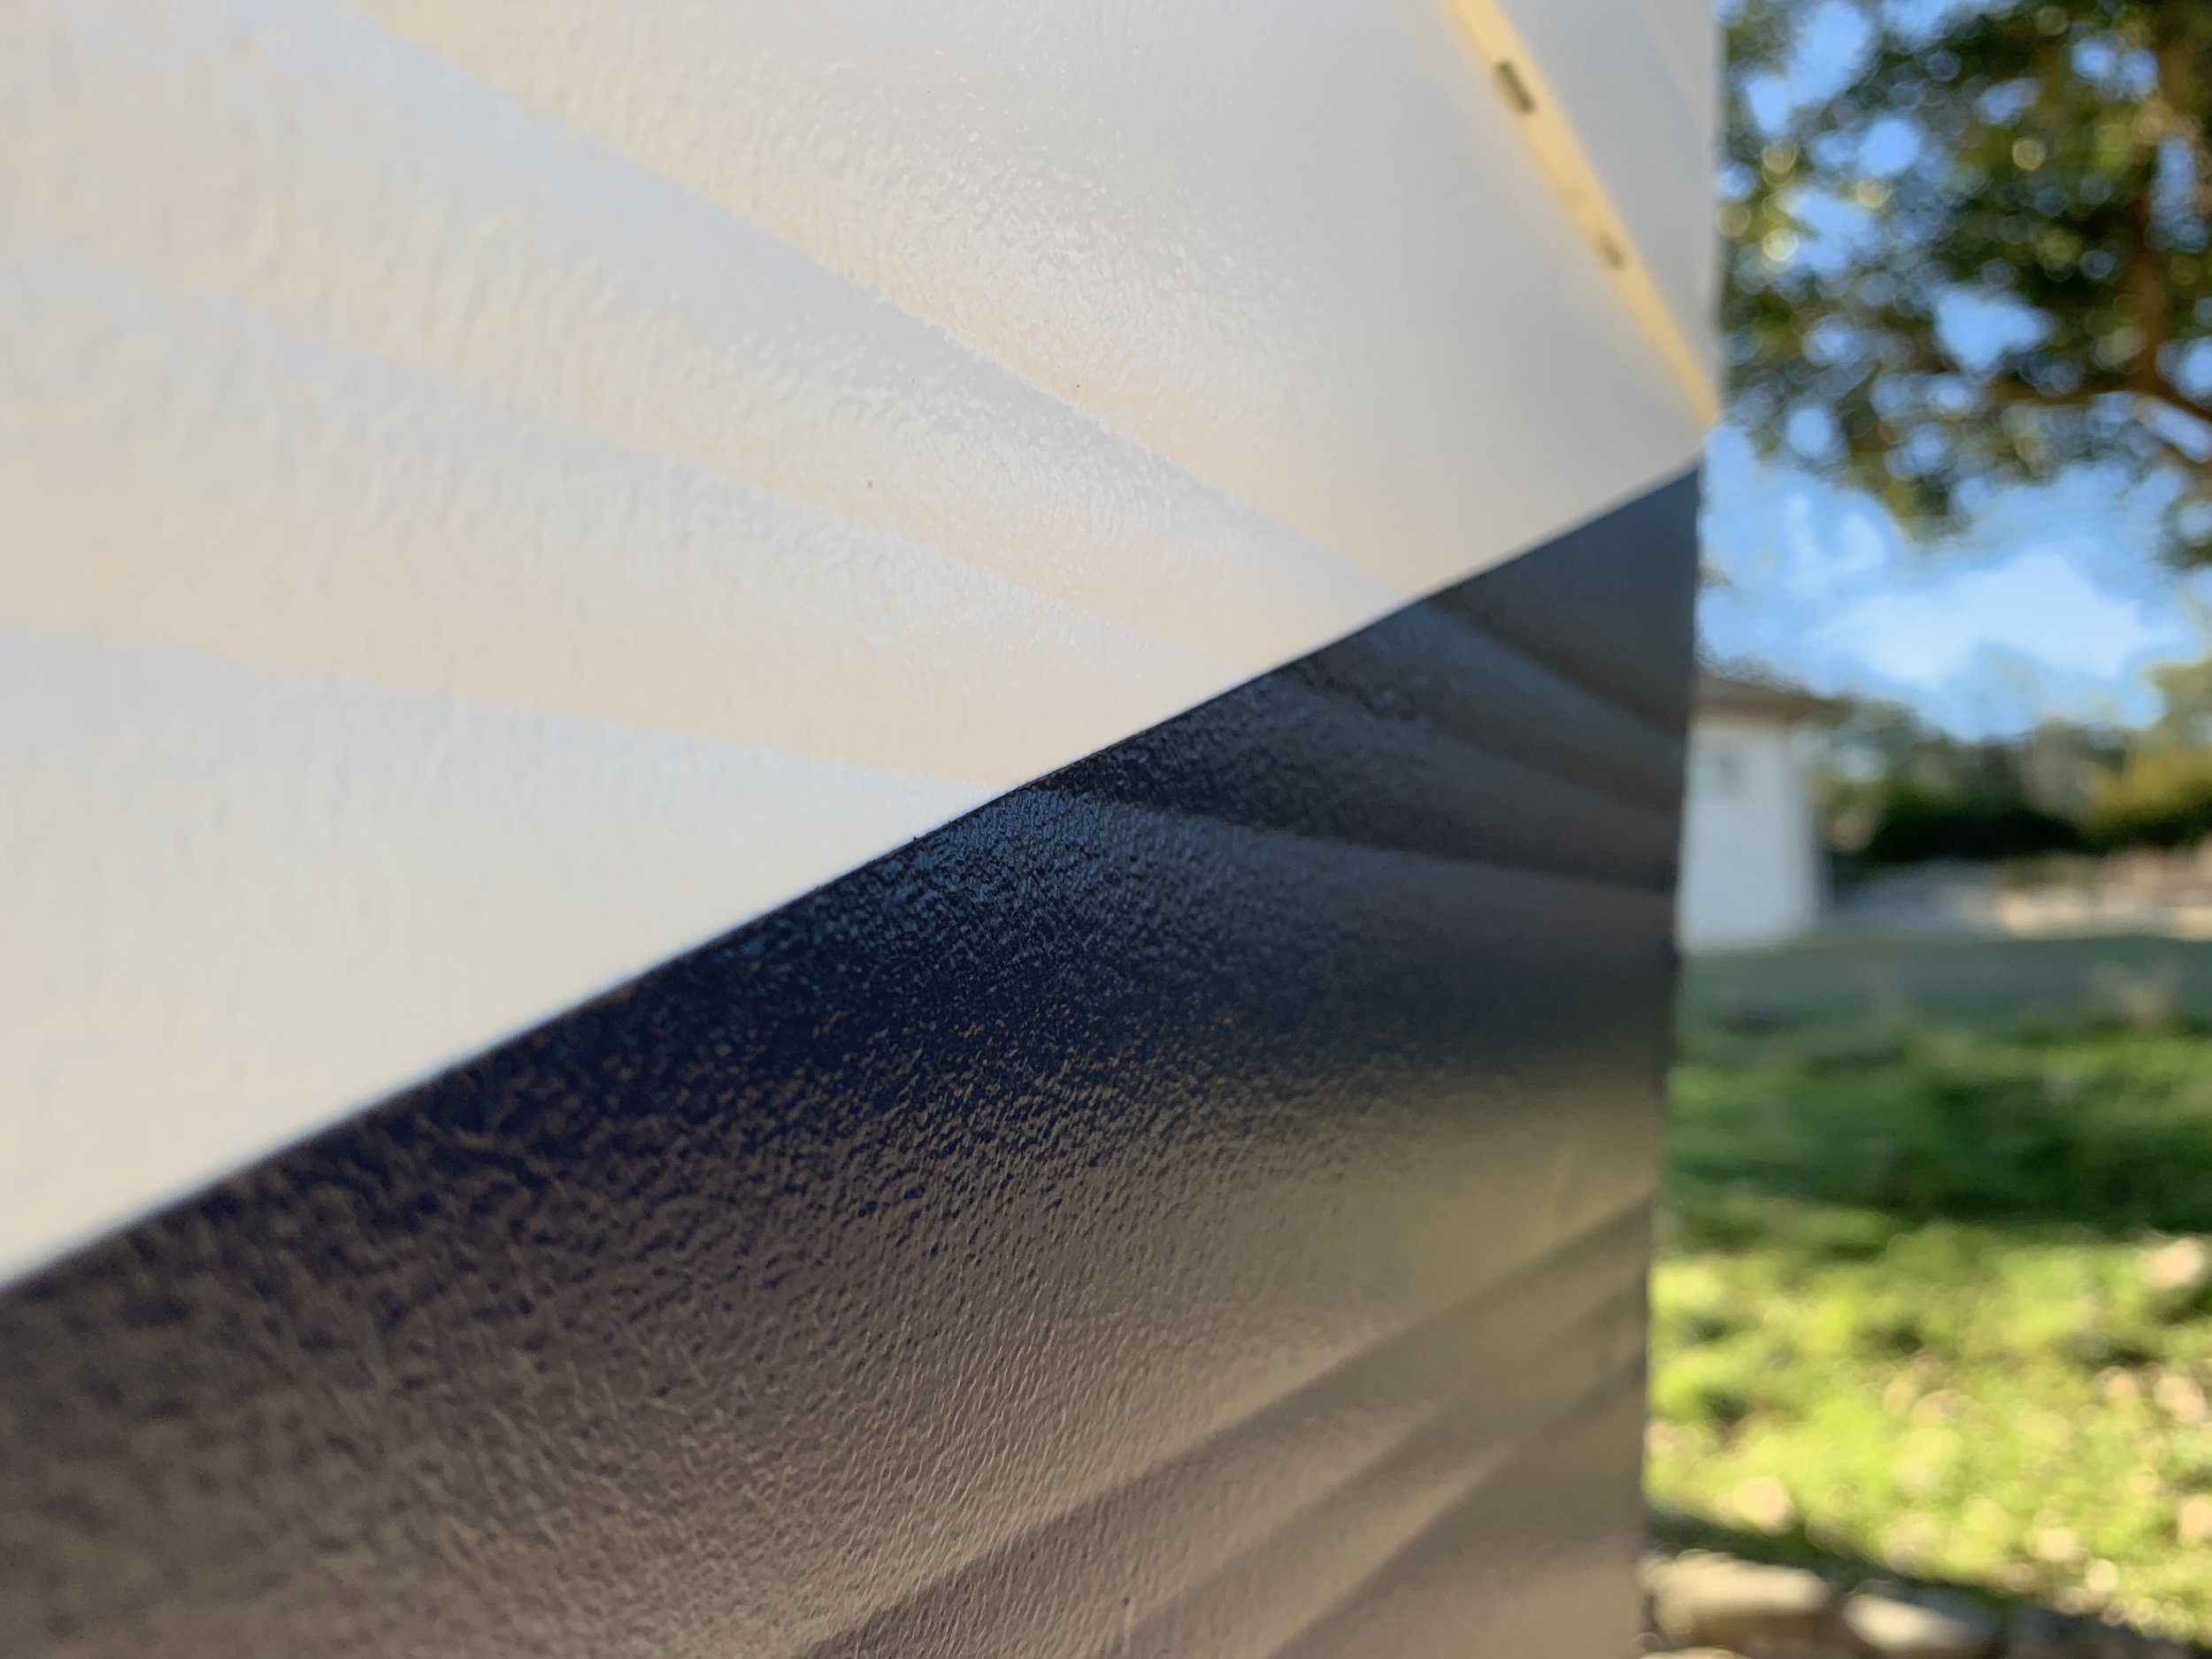
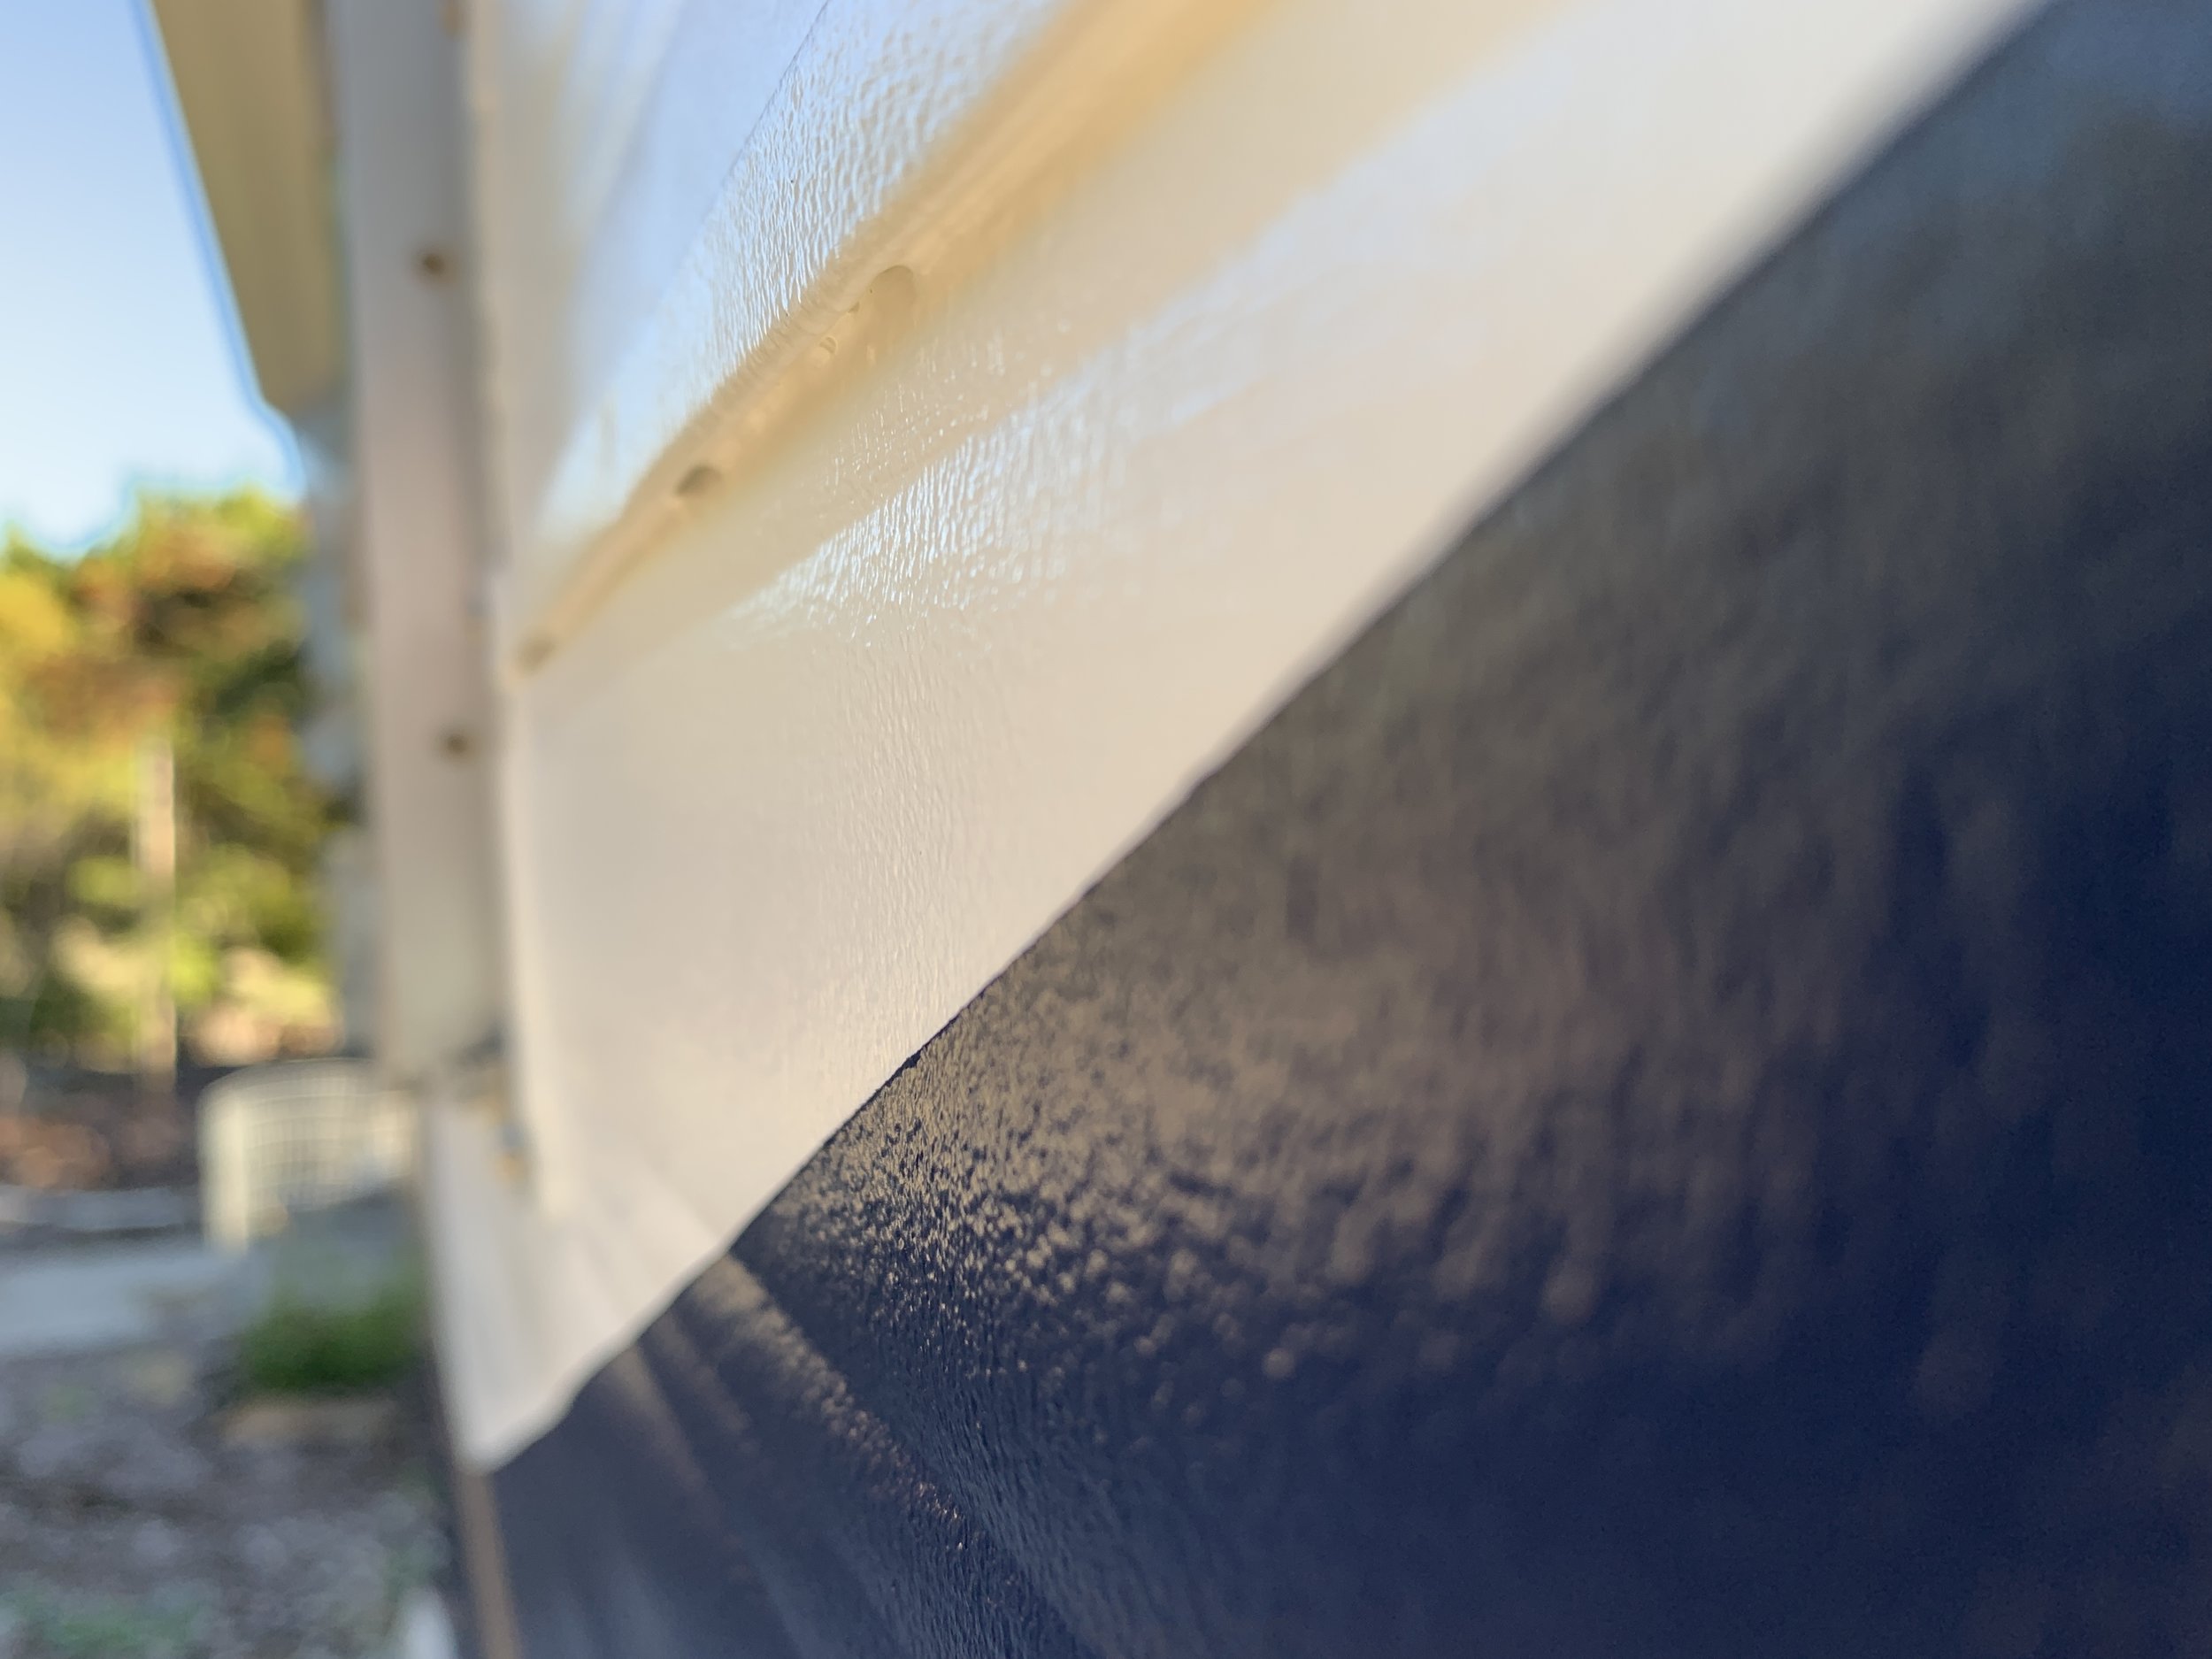
Can we just take a moment to drool over how stinkin’ crisp these tape lines are? I’d say I’m usually a pretty humble person, but good gracious I’m pretty impressed about how clean our tape job is. (Pats self on the back.) For anyone looking for how this paint rolled on (versus the look of a spray, e.g.), you can also tell in these close ups how the texture of the paint is. It has a slightly bumpy texture when you’re up close (like 3 feet away or less), but farther than that it’s pretty smooth looking. We’re pretty happy with it.
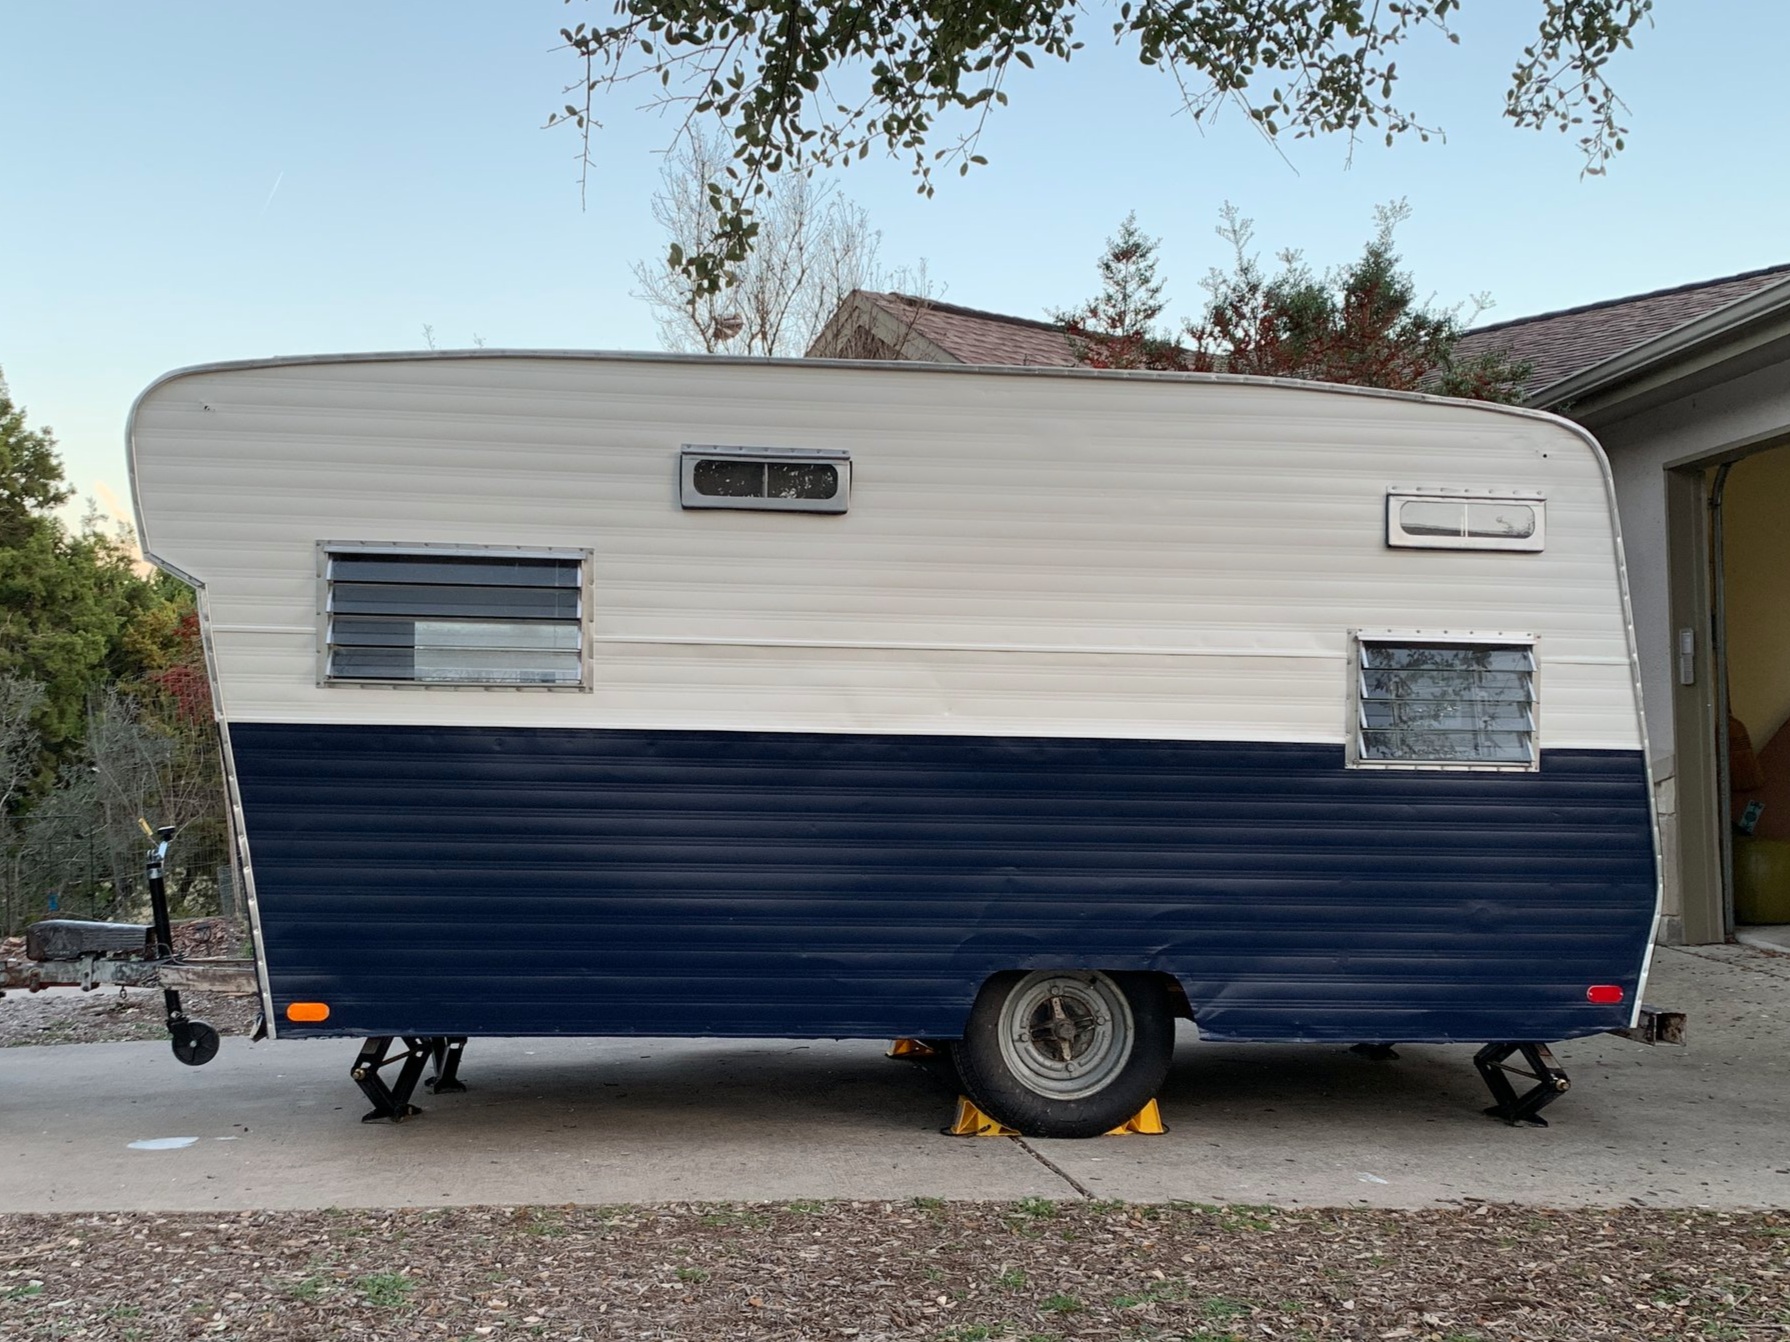
Out with the gold & in with the blue
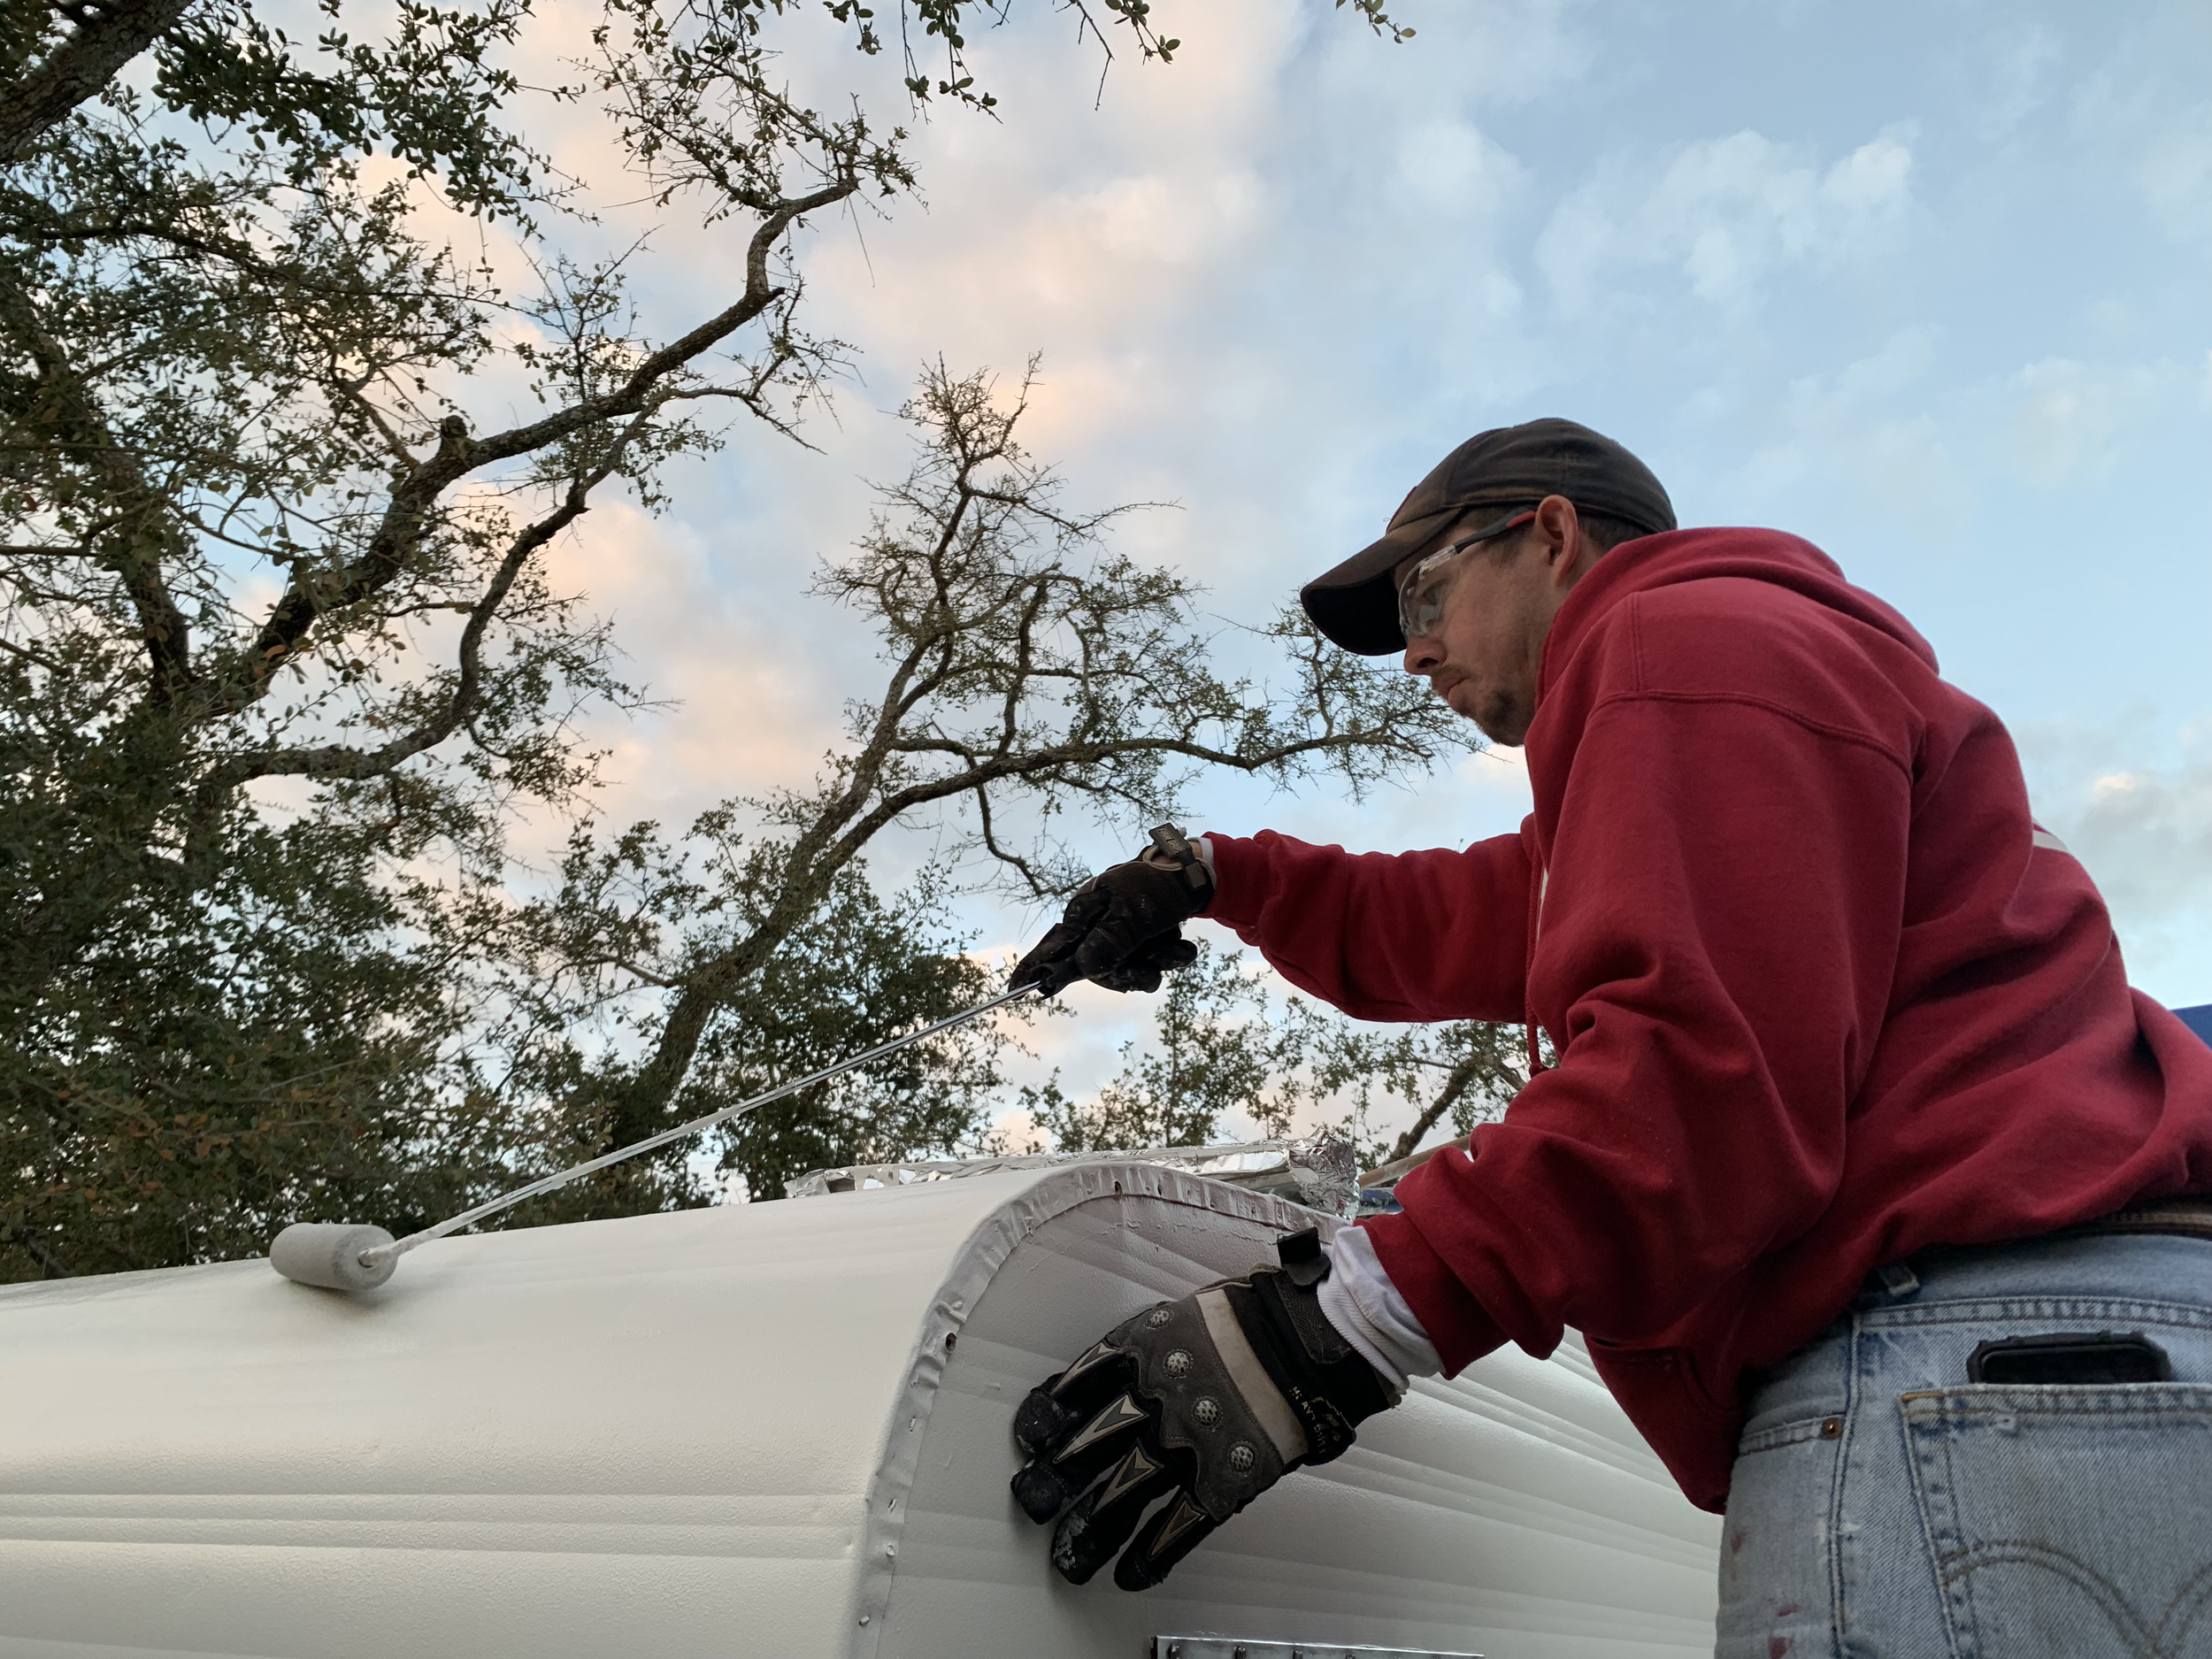
We started out the week with perfect weather, priming outside wearing t-shirts, and by the end moved inside to work in a closed garage with a heater and rocking long underwear (so please forgive the dramatic change in photo quality). Over the course of Christmas week – five days of actual priming and painting (thanks, Texas winter for officially showing up mid-project) and then another surprise day a week later for a fourth coat of navy – we finished all eight of our coats! Yes, EIGHT. (Two coats of primer, two coats of off-white, and four coats of navy.) Not that I was counting or anything…

When we were picking out our exterior paint colors. Love this color combo of navy, off-white, silver and just a touch of gold!
Love love love this color combo of navy, creamy (but fresh) off-white, silver and just a touch of gold. The paint colors we used are In the Navy (SW 9178) and Greek Villa (SW 7551) from Sherwin Williams. AND, after looking through a bajillion swatches, checking each one in the light from all distances and angles, we just so happen to pick “complementary colors” according to SW recommendations on the back of their swatch cards. (A complete and total coincidence… and not really necessary to get a good look, but nice to see our color combo instincts are backed by the pros!)
Tips for your next paint job(s):
These are tips I follow for every paint job, not just for the exterior of our camper.
Be nice (to everyone). But especially your Sherwin Williams peeps. I can’t figure out another reason why so I’m chalking it up to our general pleasantness, but the amazing folks at both Sherwin Williams locations hooked us up big time with some paint and primer discounts. This stuff is not cheap, but as they say, you get what you pay for. And we certainly would rather pay cash now than pay again later in more money and time when we had to repaint down the road. We had no coupons, made no mention of a shoutout on our piddly blog or anything, and didn’t ask for a discount. They were really truly amazing. From their helpfulness every time I’d call with questions, and then come into the store with more questions, to when they’d call around to the other stores so we didn’t have to drive across town unnecessarily, to hooking us up with a discount. Really can’t say enough great things about them.
Invest in high quality brushes and rollers. Don’t skimp here – it can make all the difference in your paint job. Not that I don’t love a good craft store sponge brush, but we reserve those for sampling paint colors.
Don’t waste your money on drip trays and rolling pan liners – just use aluminum foil. It’s super cheap, can be molded to any size/shape of container/pan, makes cleanup a breeze and you probably already have it on hand. Just make sure you push it down in all the corners really good so you don’t tear a hole in it while you’re working. Heavy duty is a little easier because you can usually just get by with one sheet since it’s wider, but you can use regular too (just overlap two sheets).
Taking a break between paint coats (or because your pizza just got delivered)? Wrap some aluminum foil around your wet brush and rollers. This keeps it fresh so you don’t have to rinse it out or trash it and get a new one. Frugality (and delivery pizza) FTW!
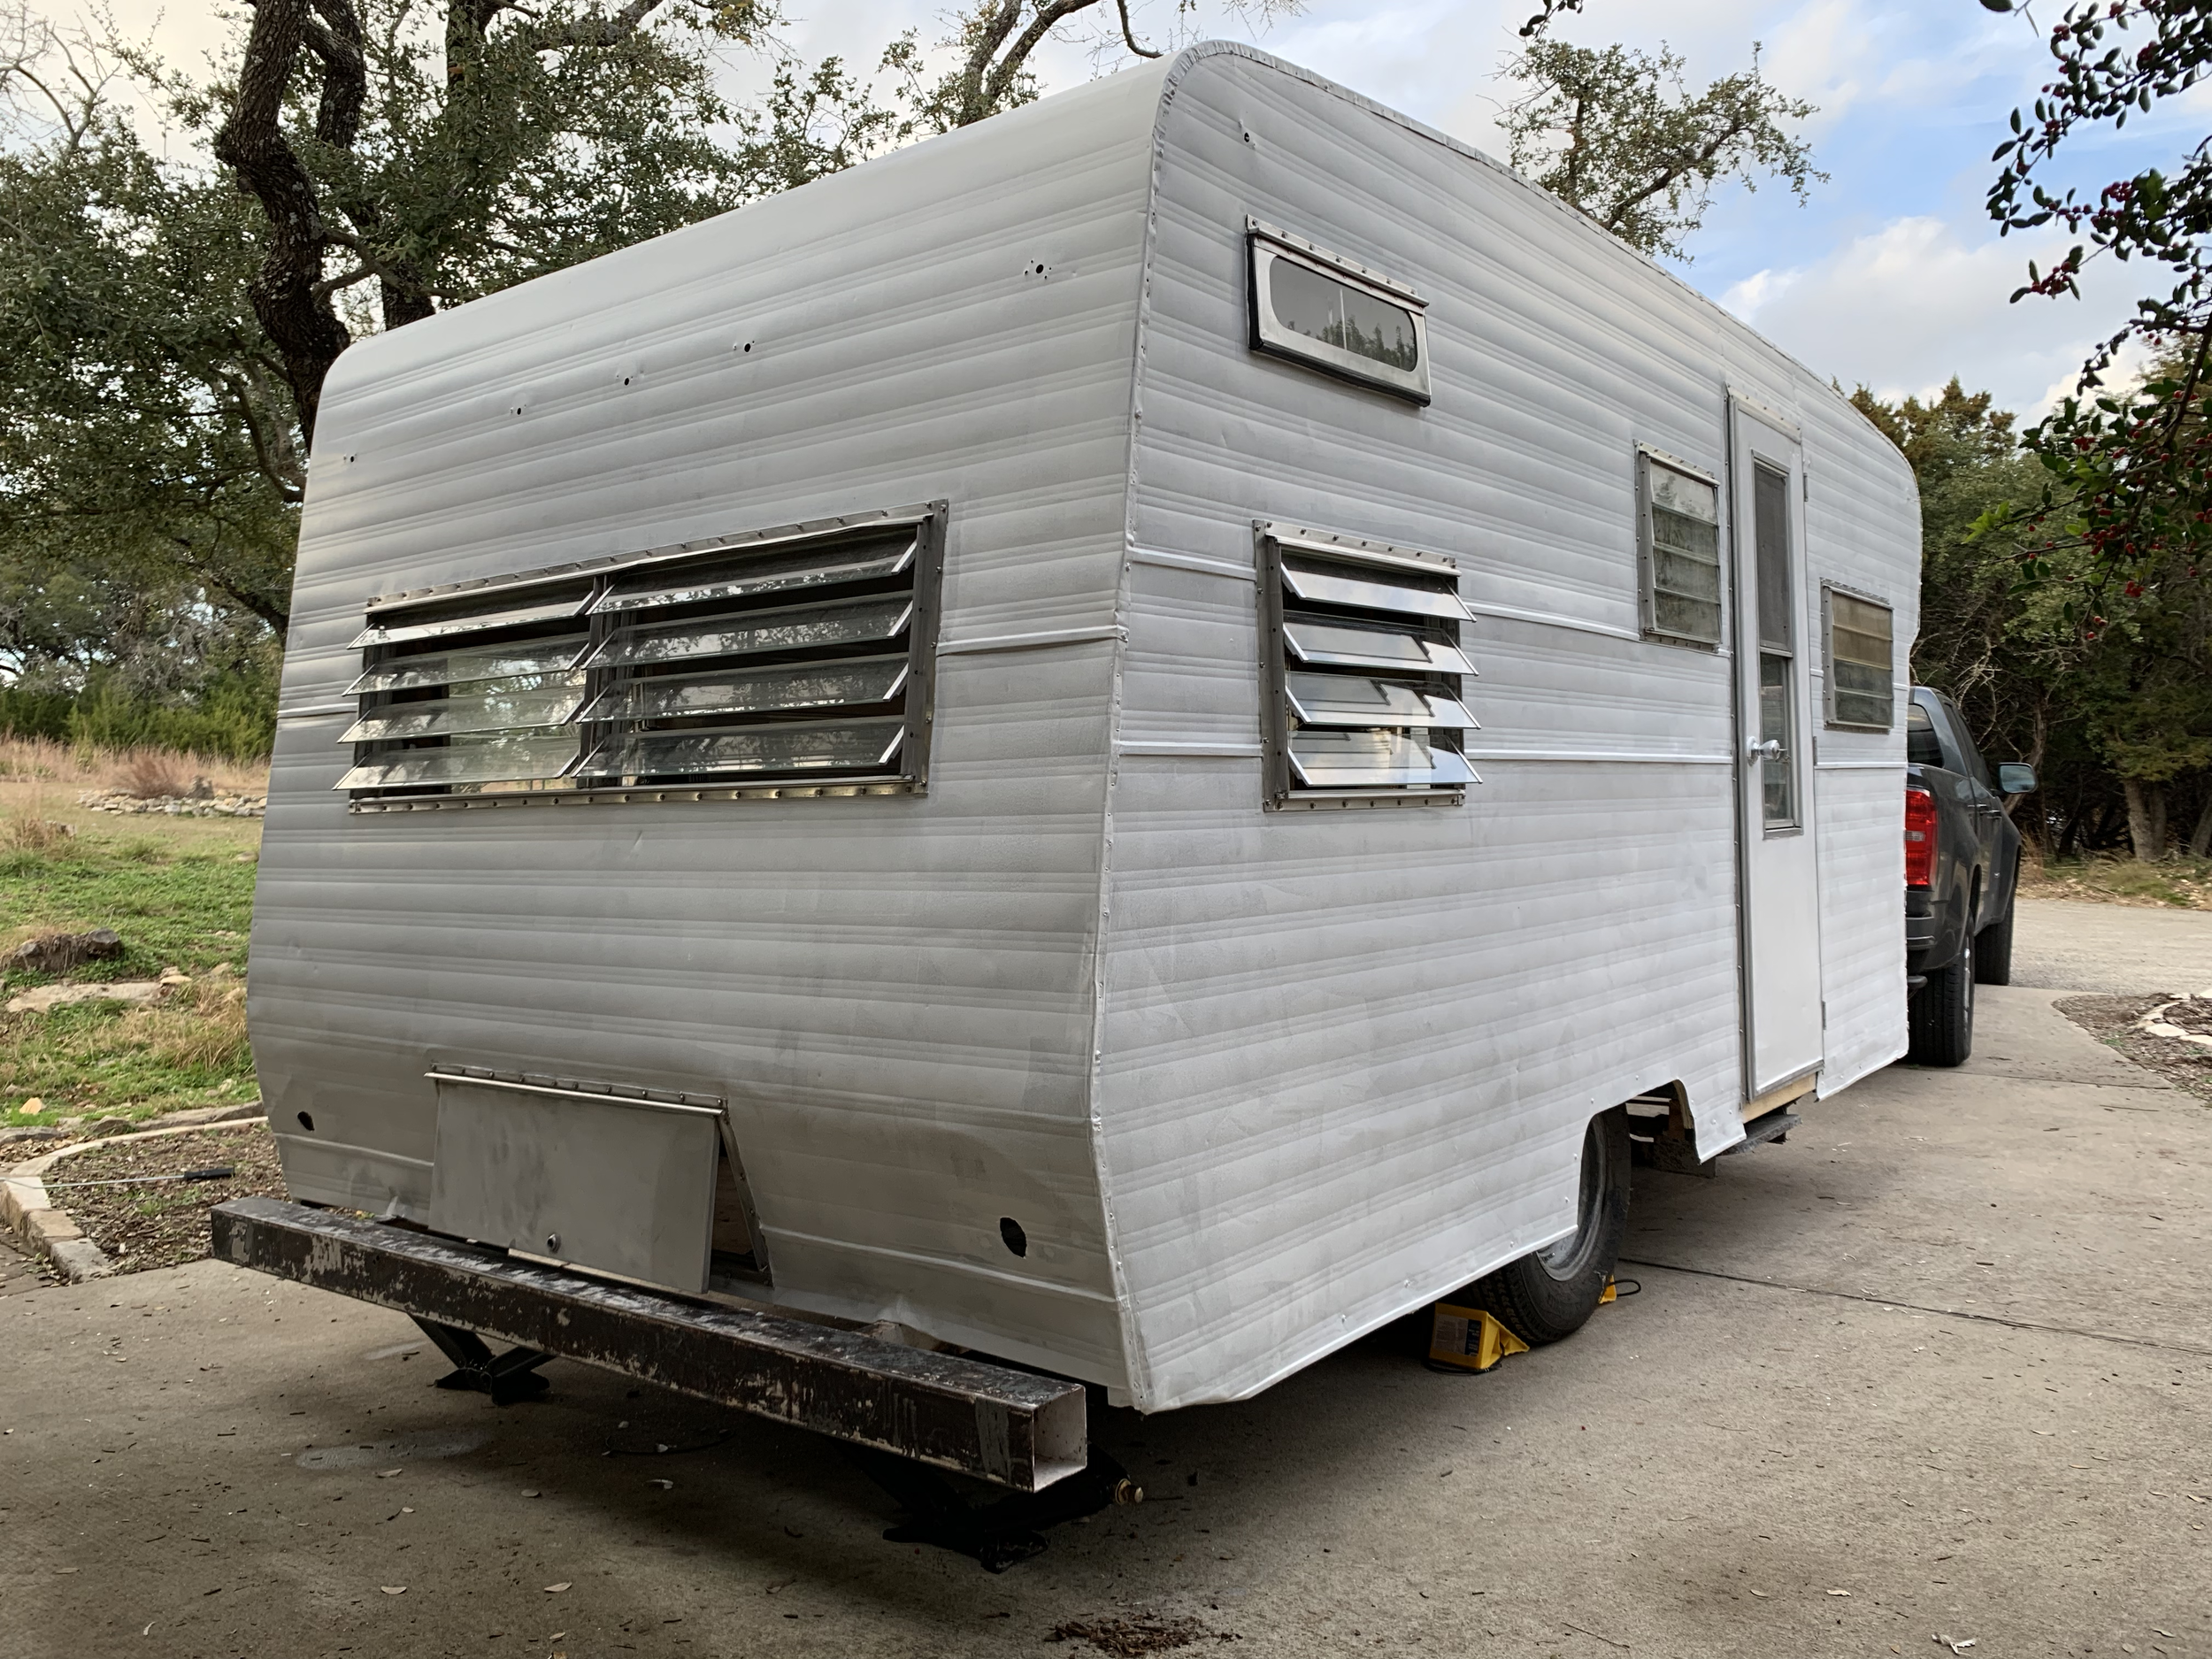
Exterior paint before & after
Alright, I’ll shut up already and show you what you came here for. Drumroll please…
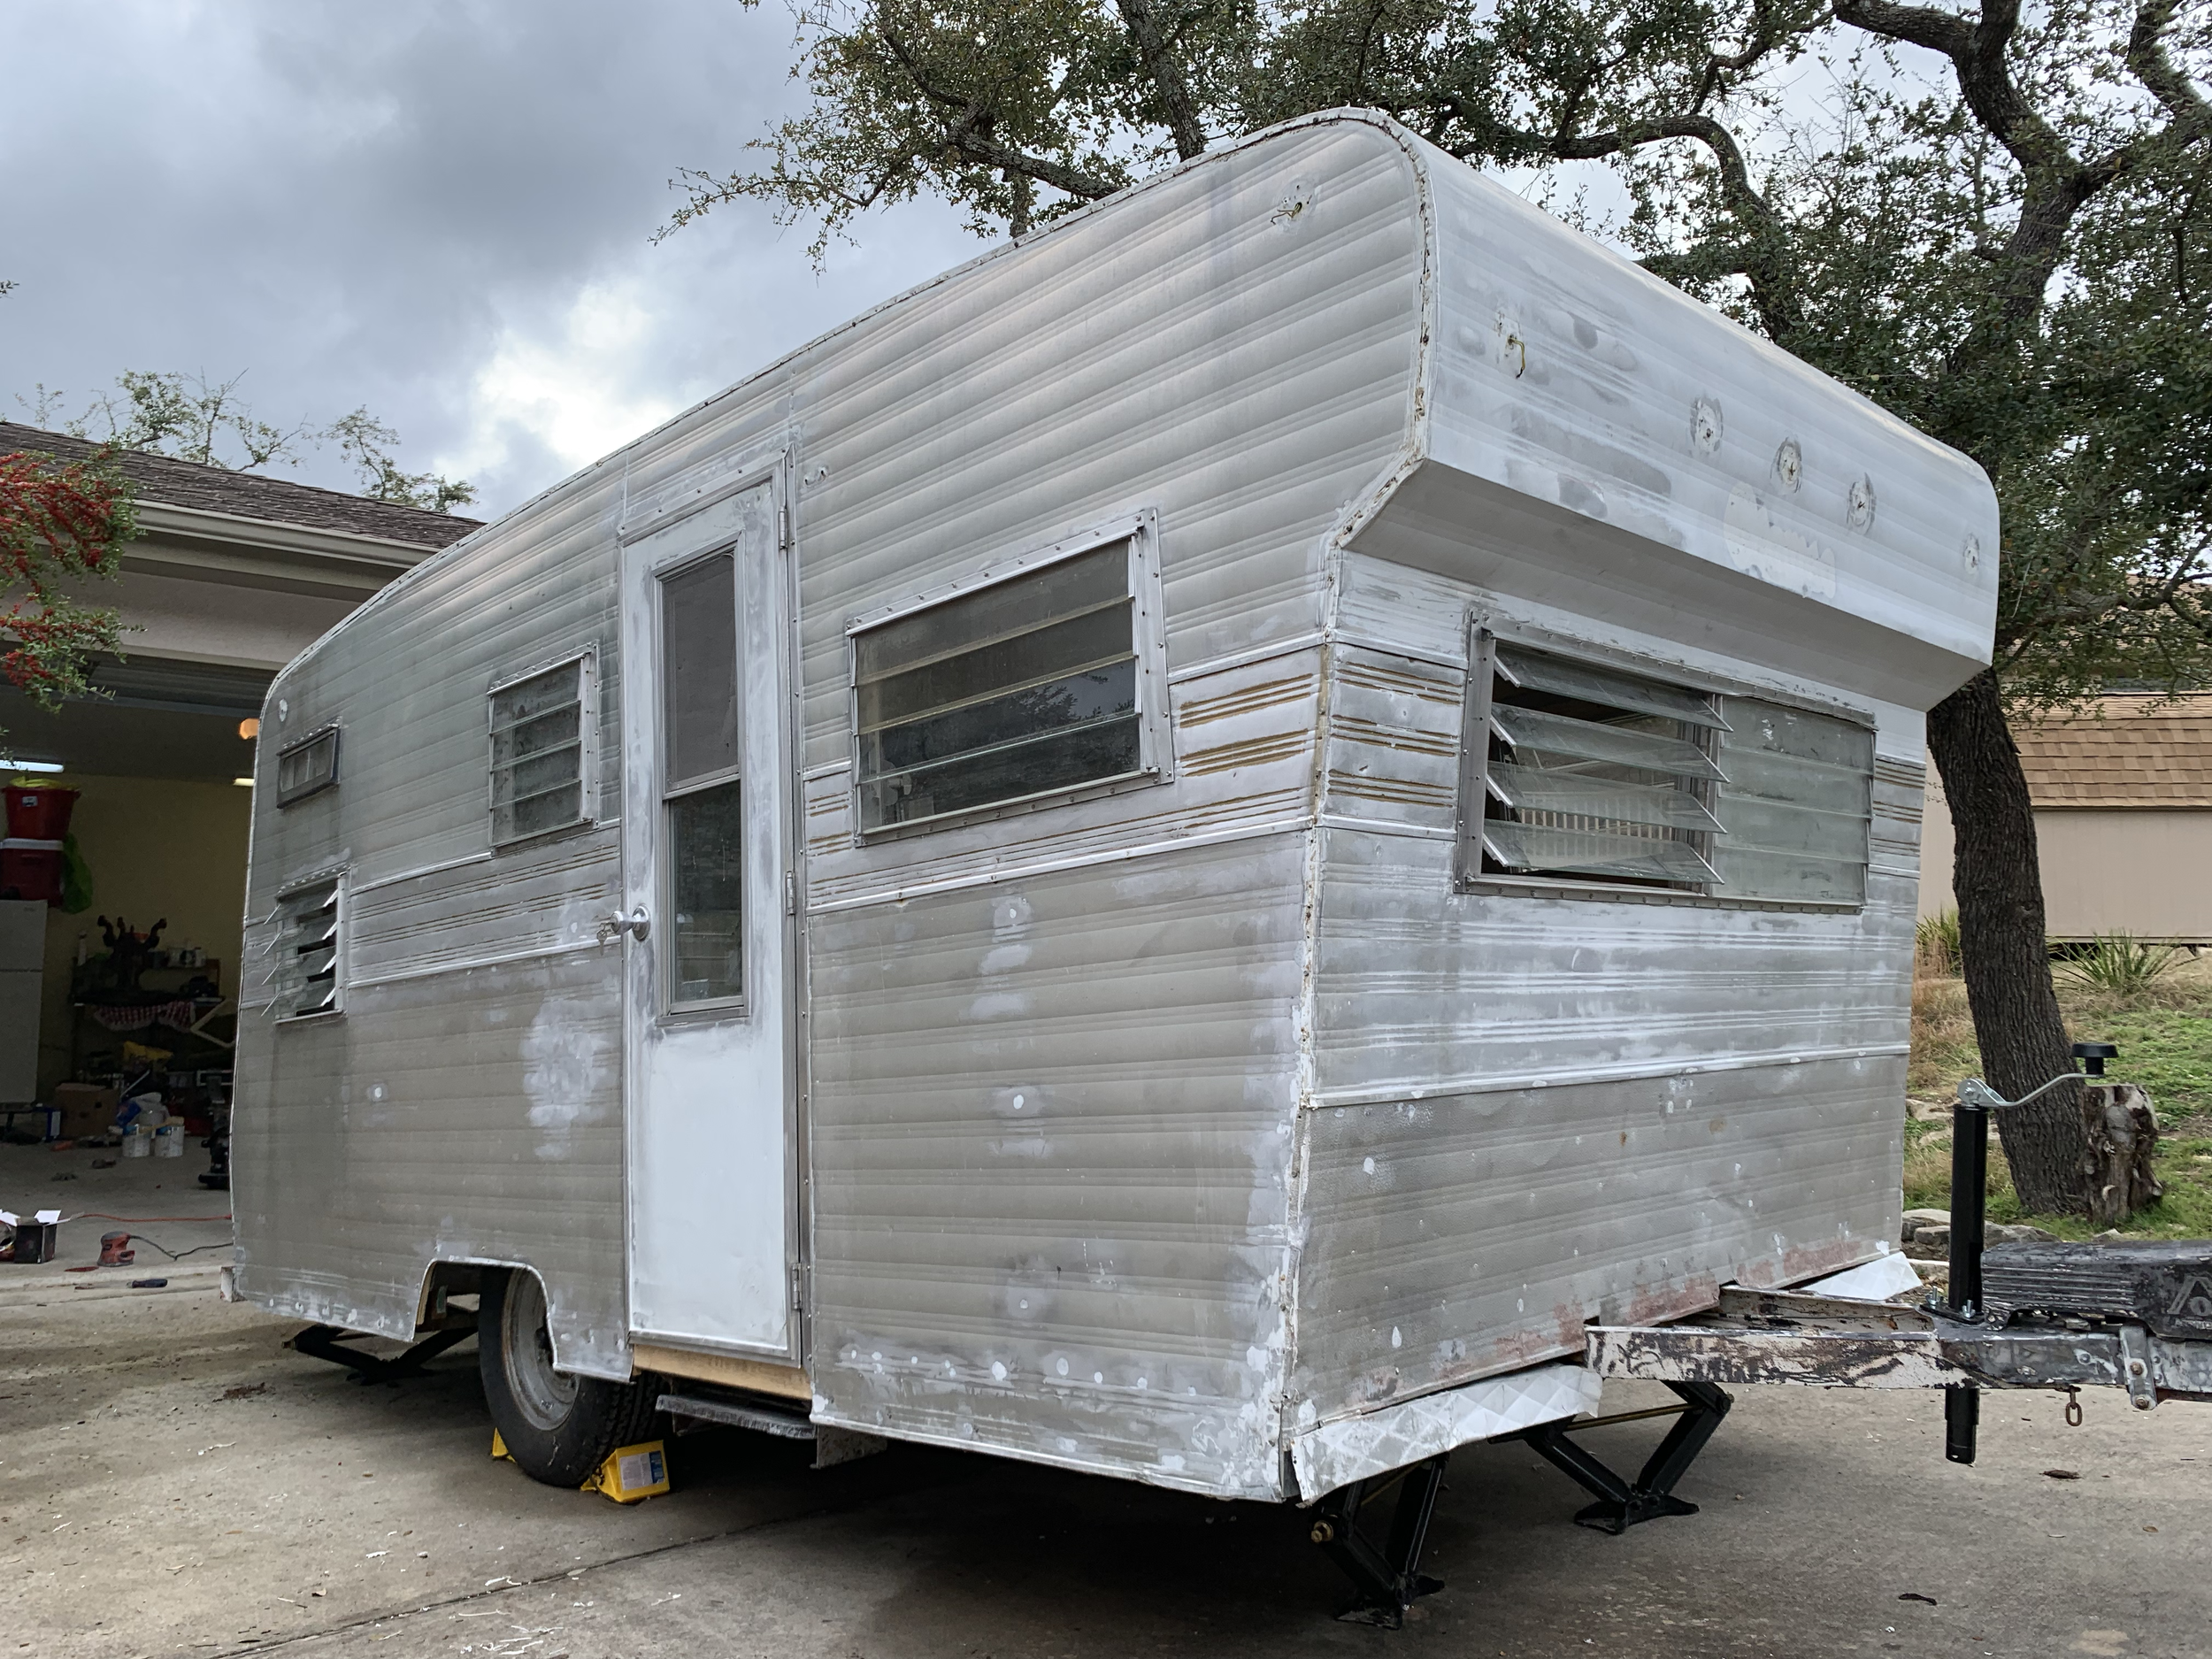
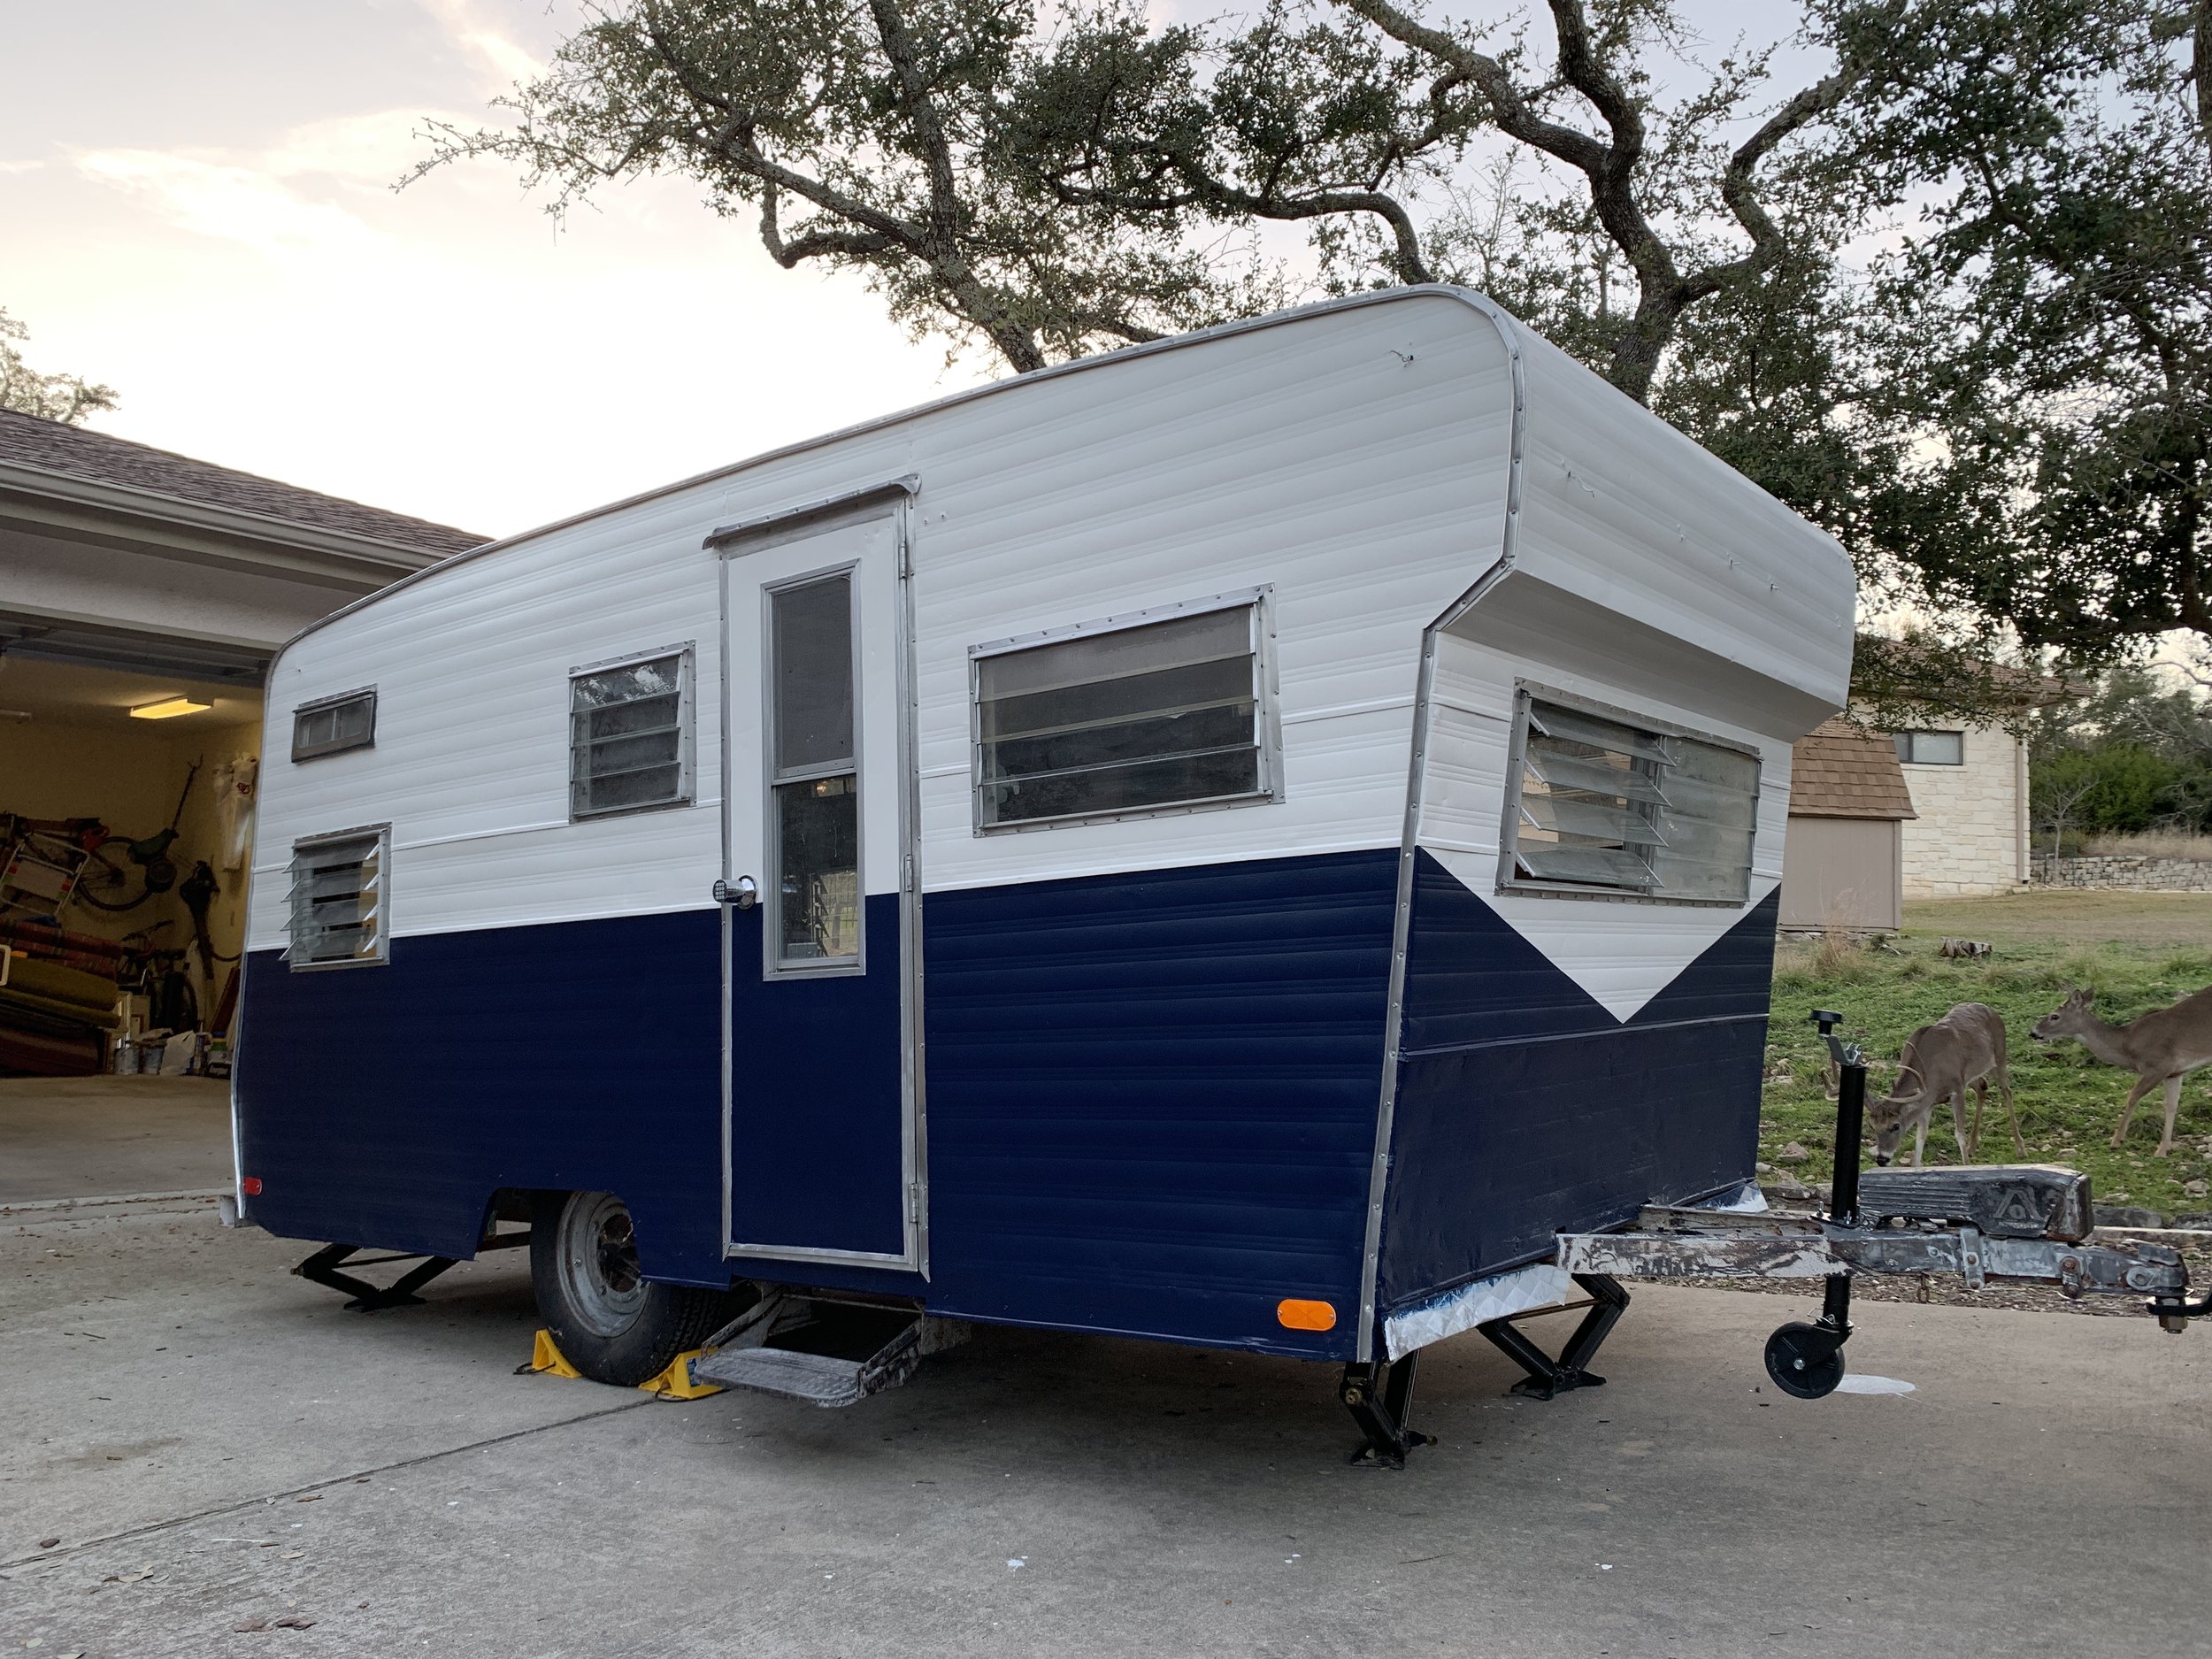
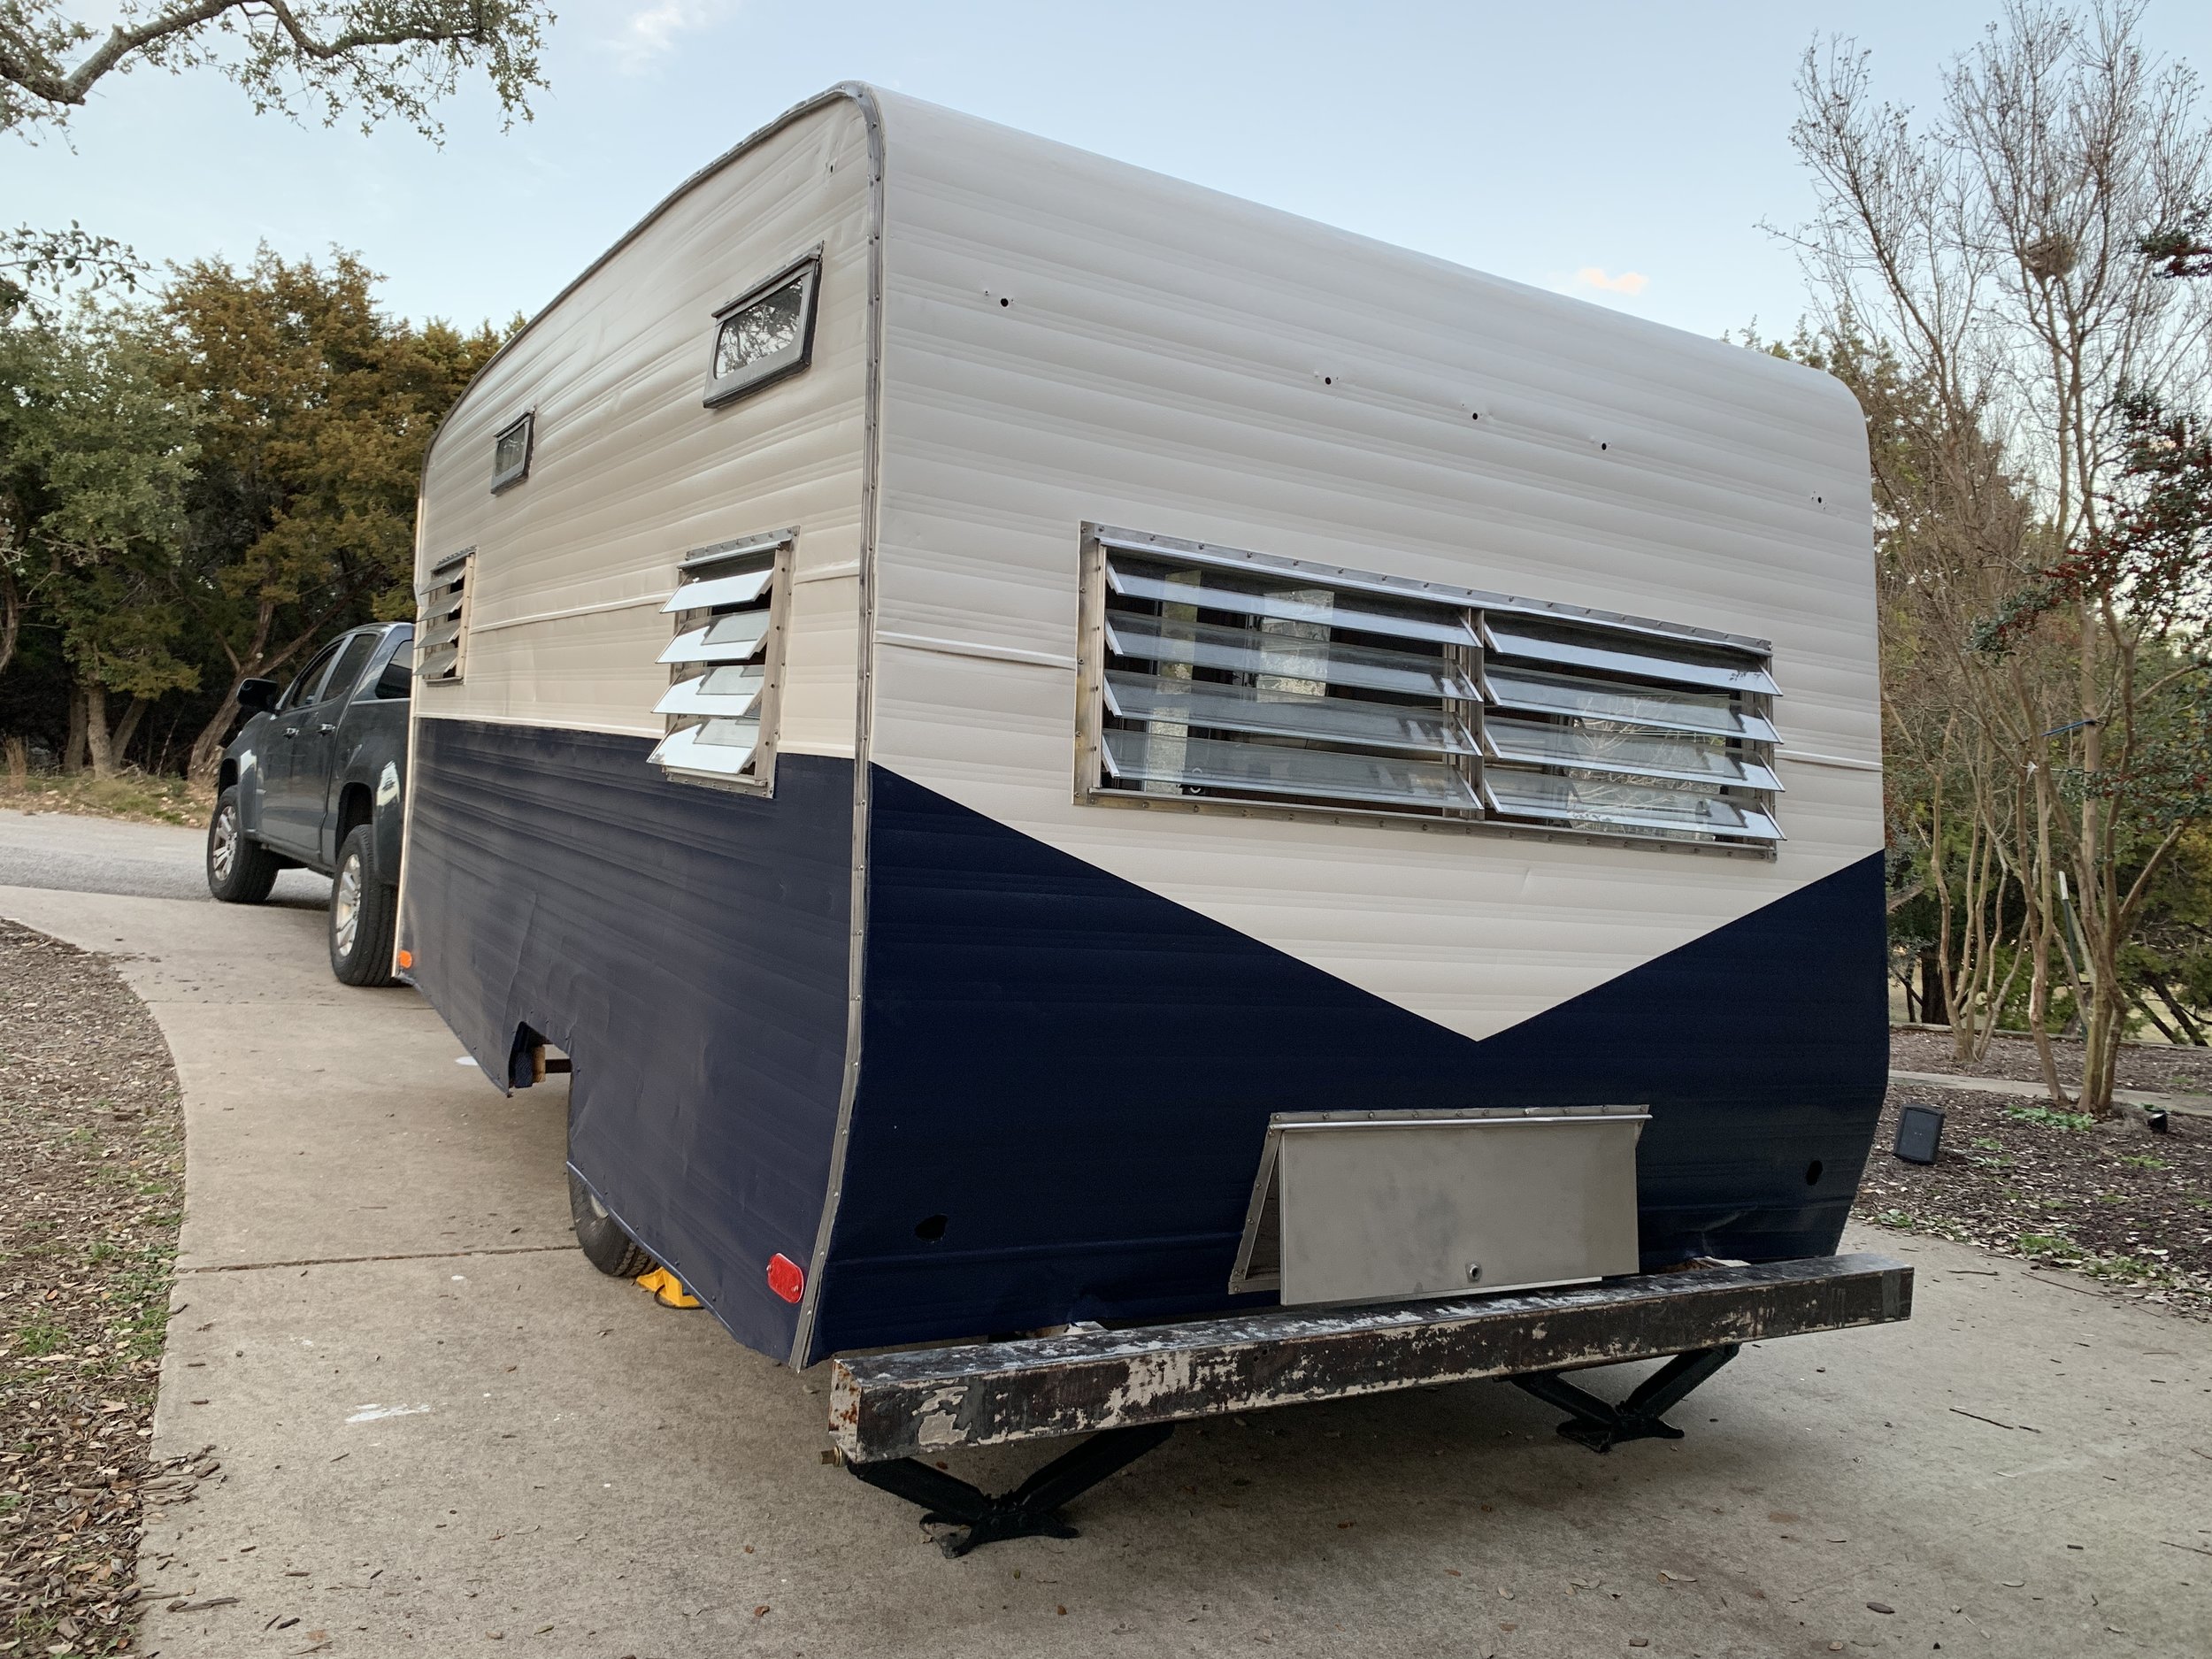
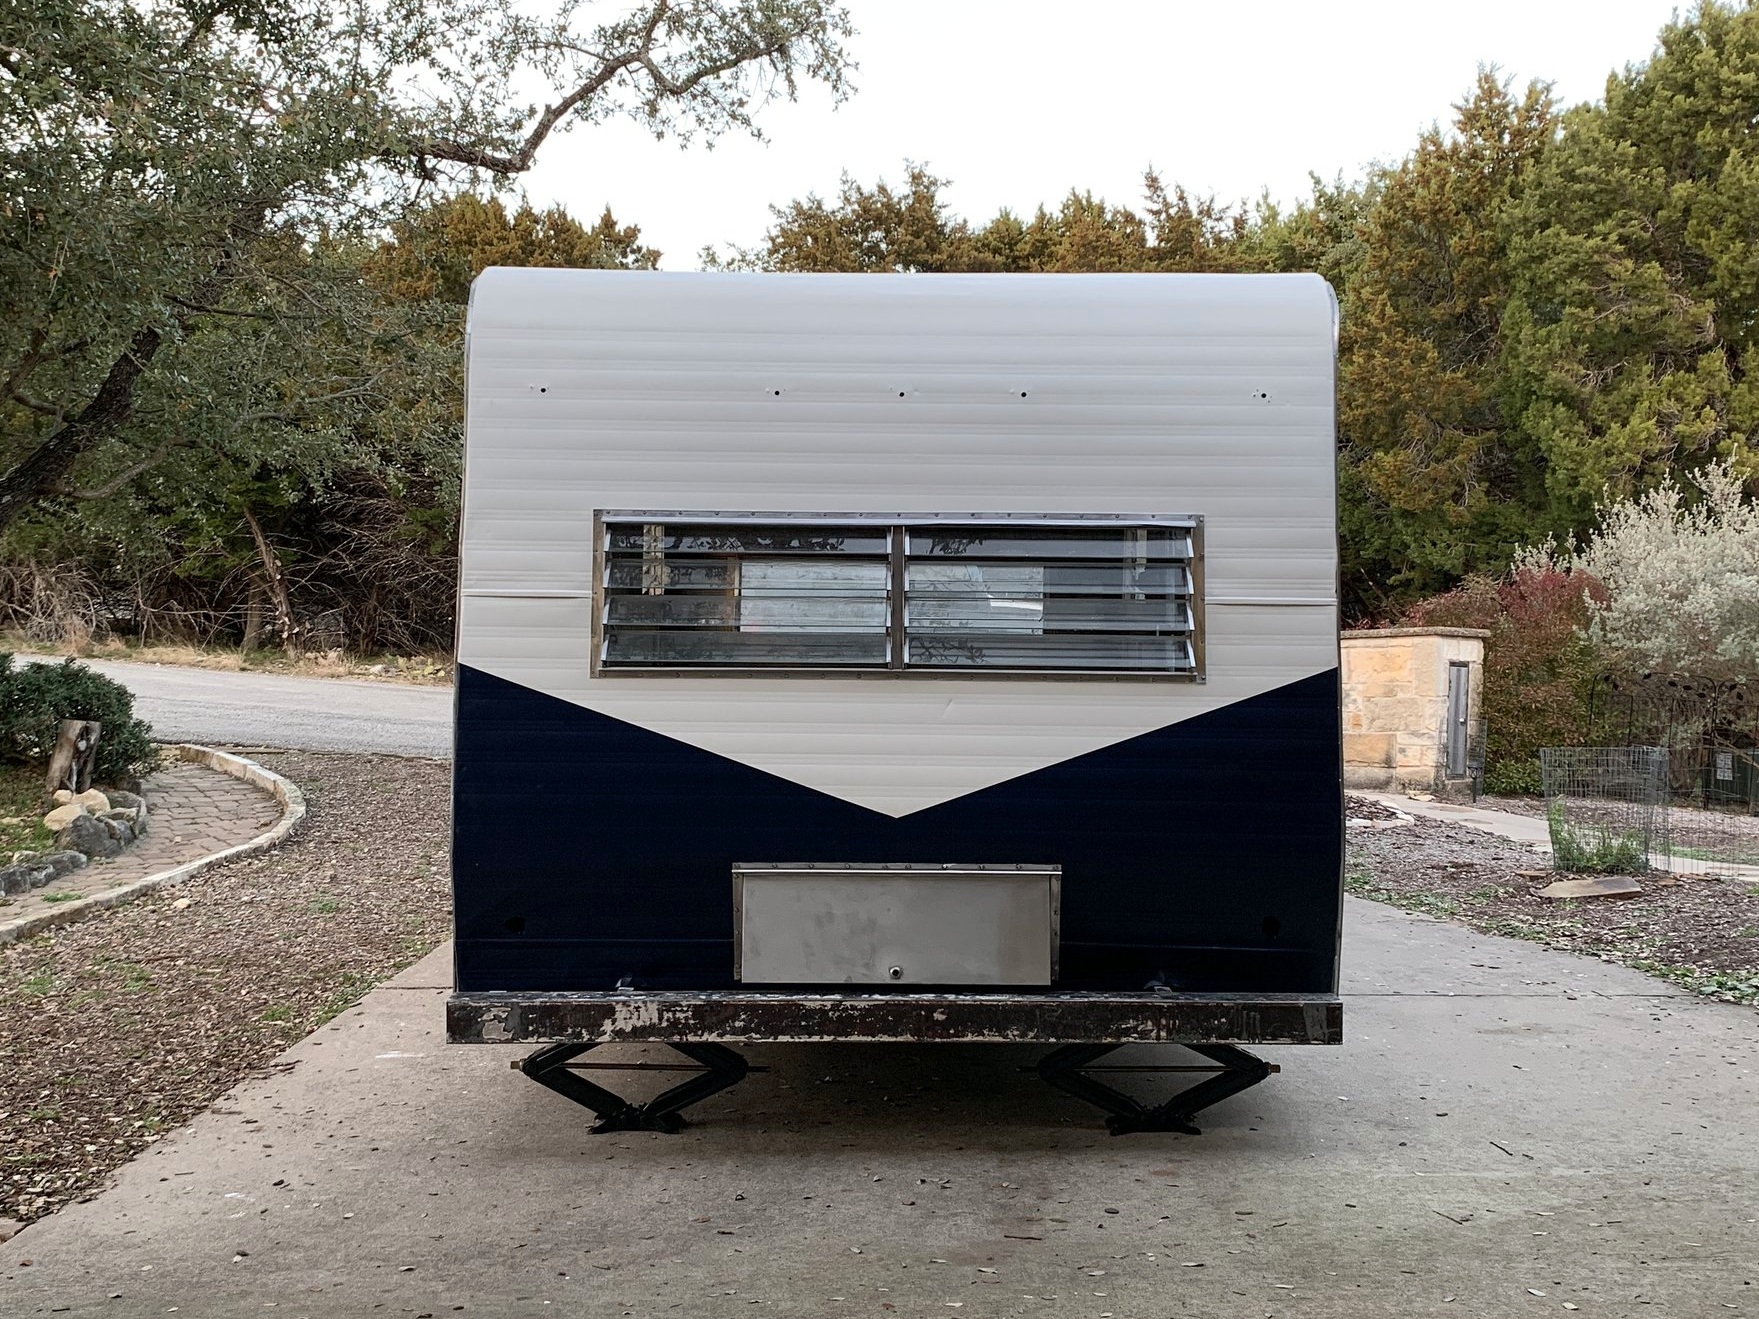
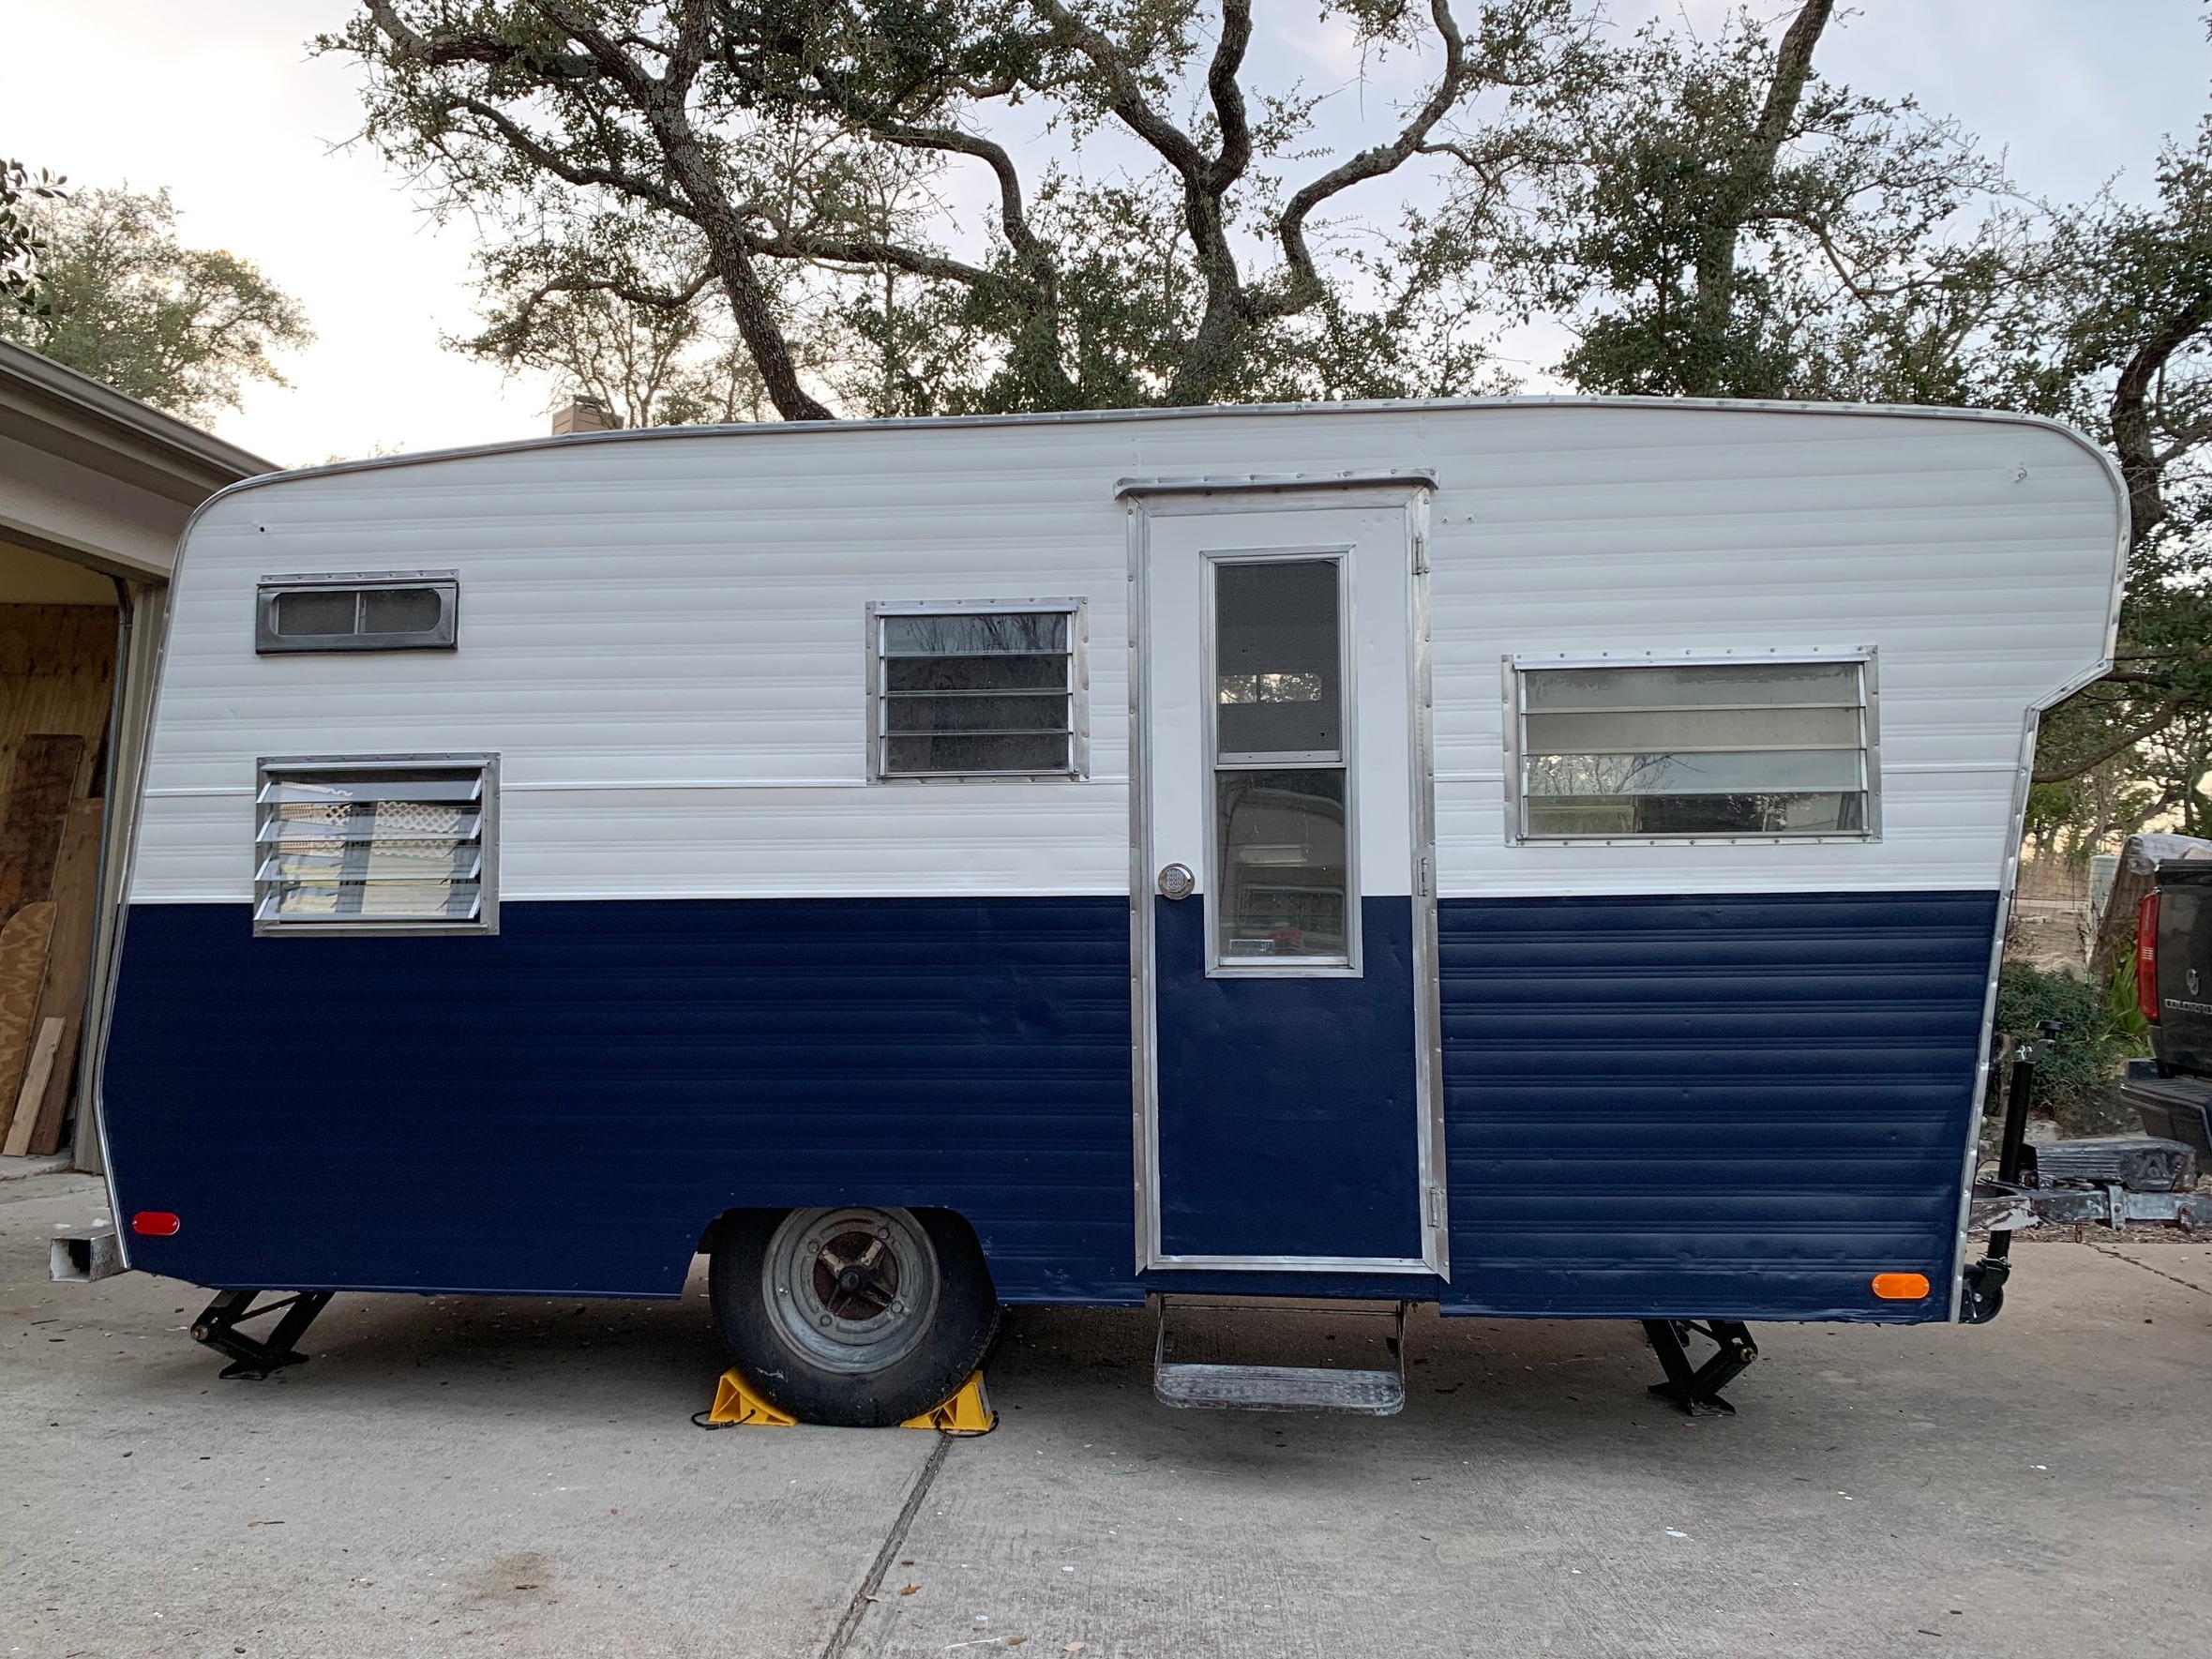
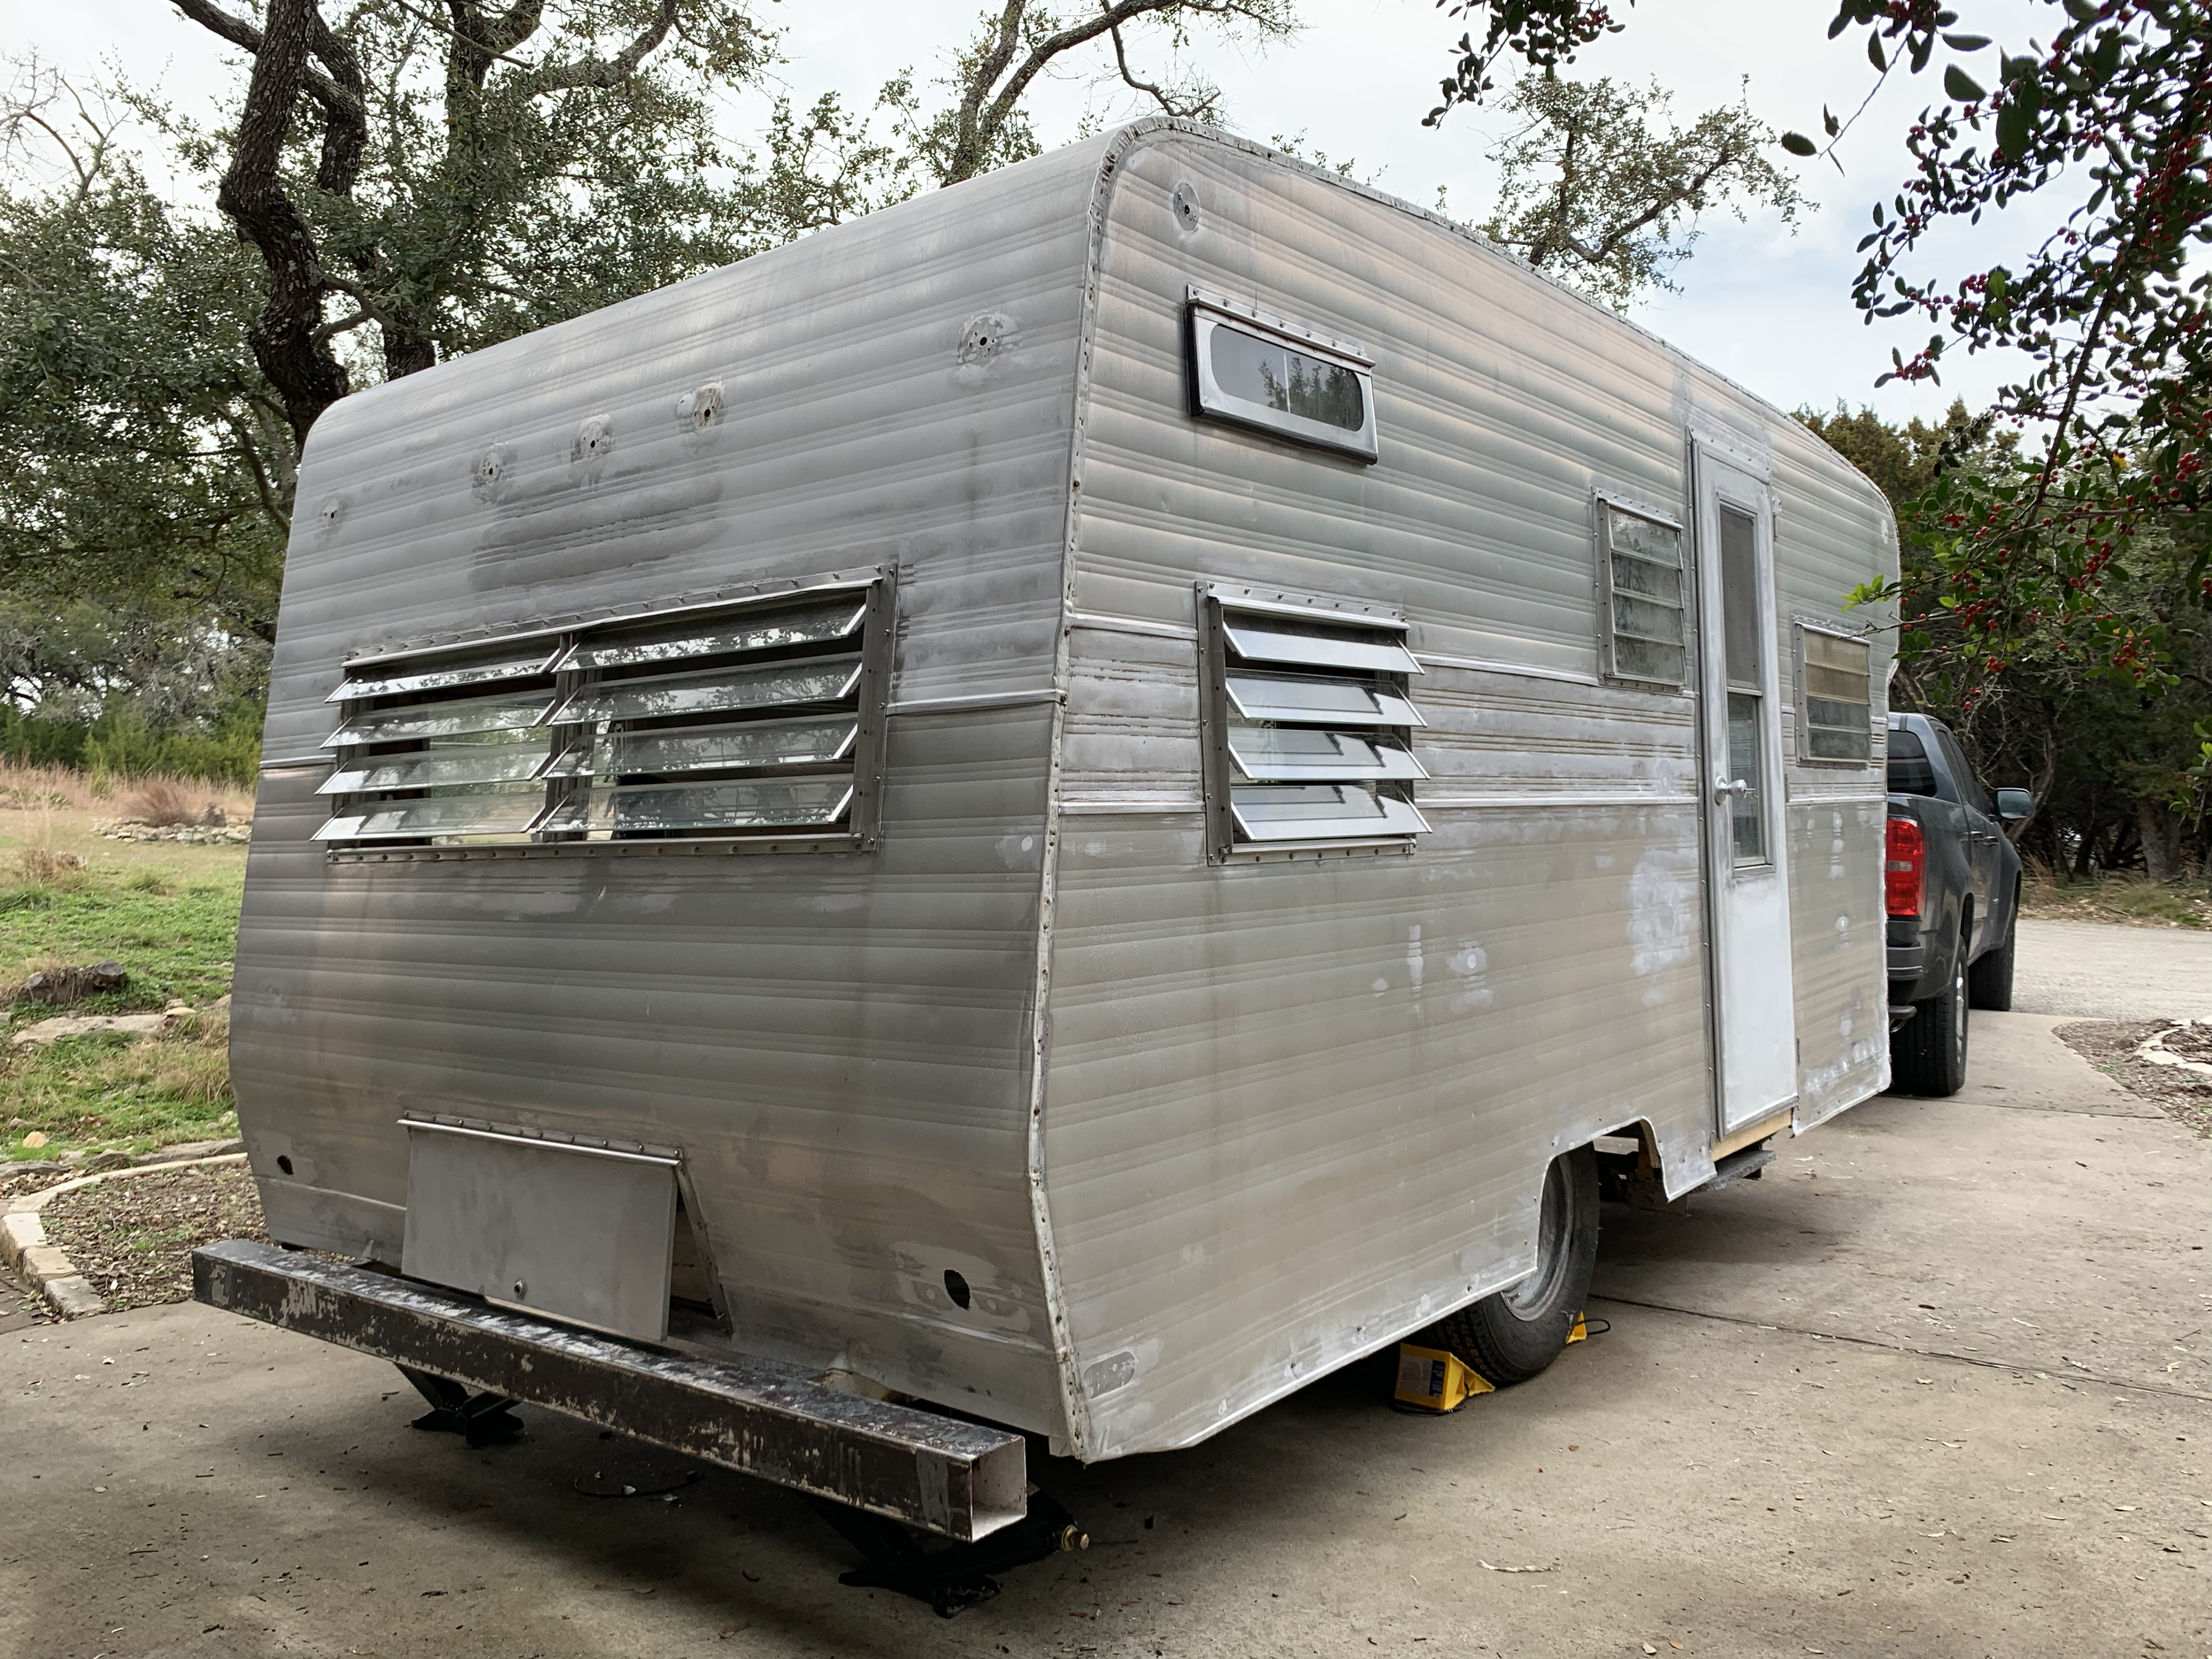
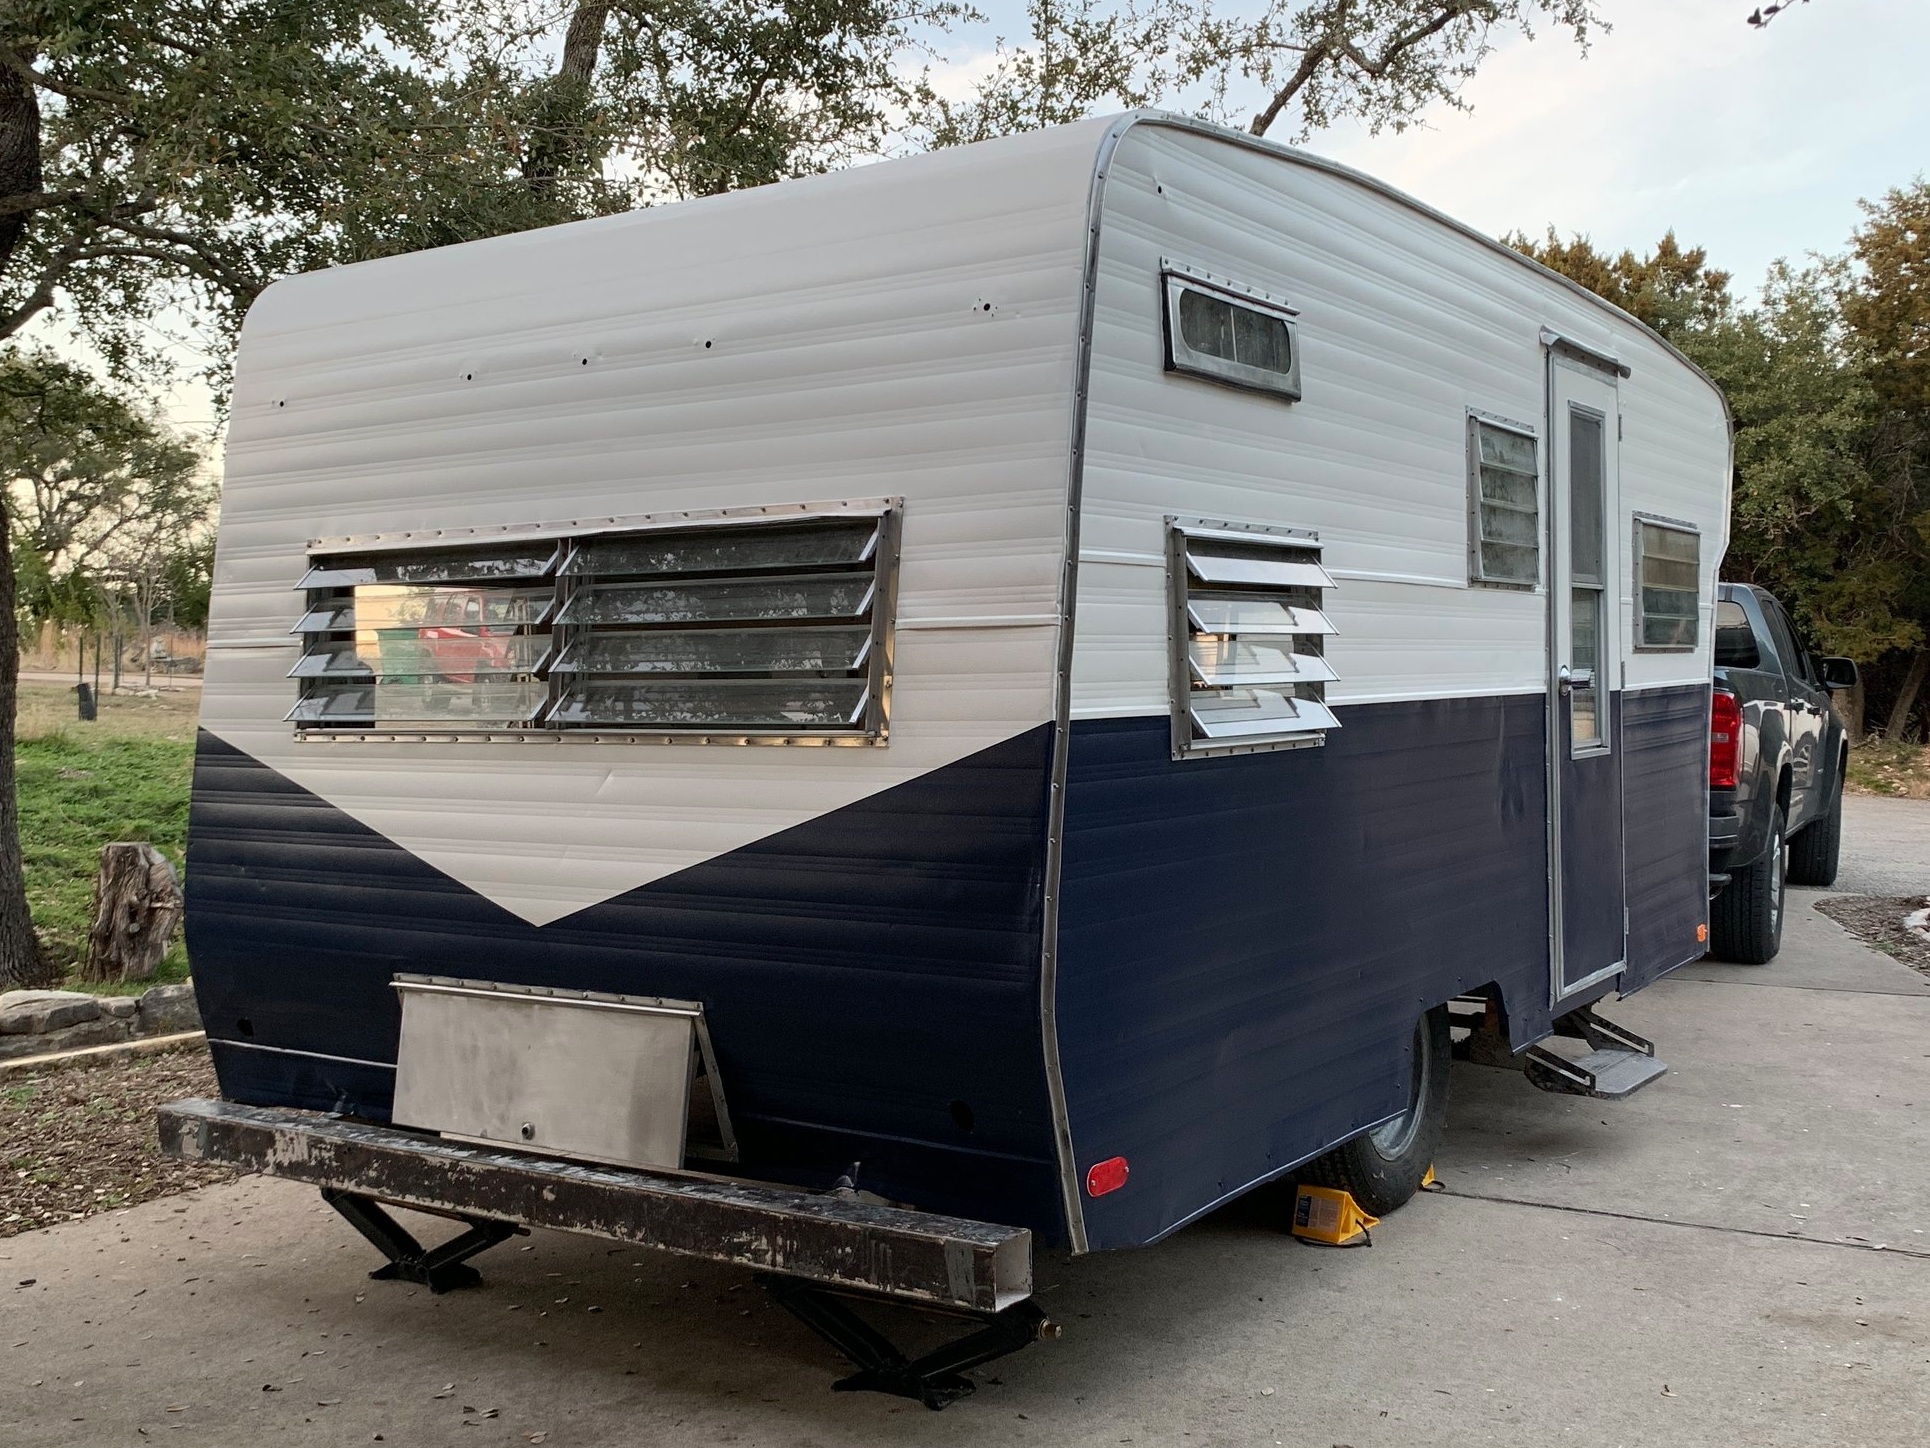
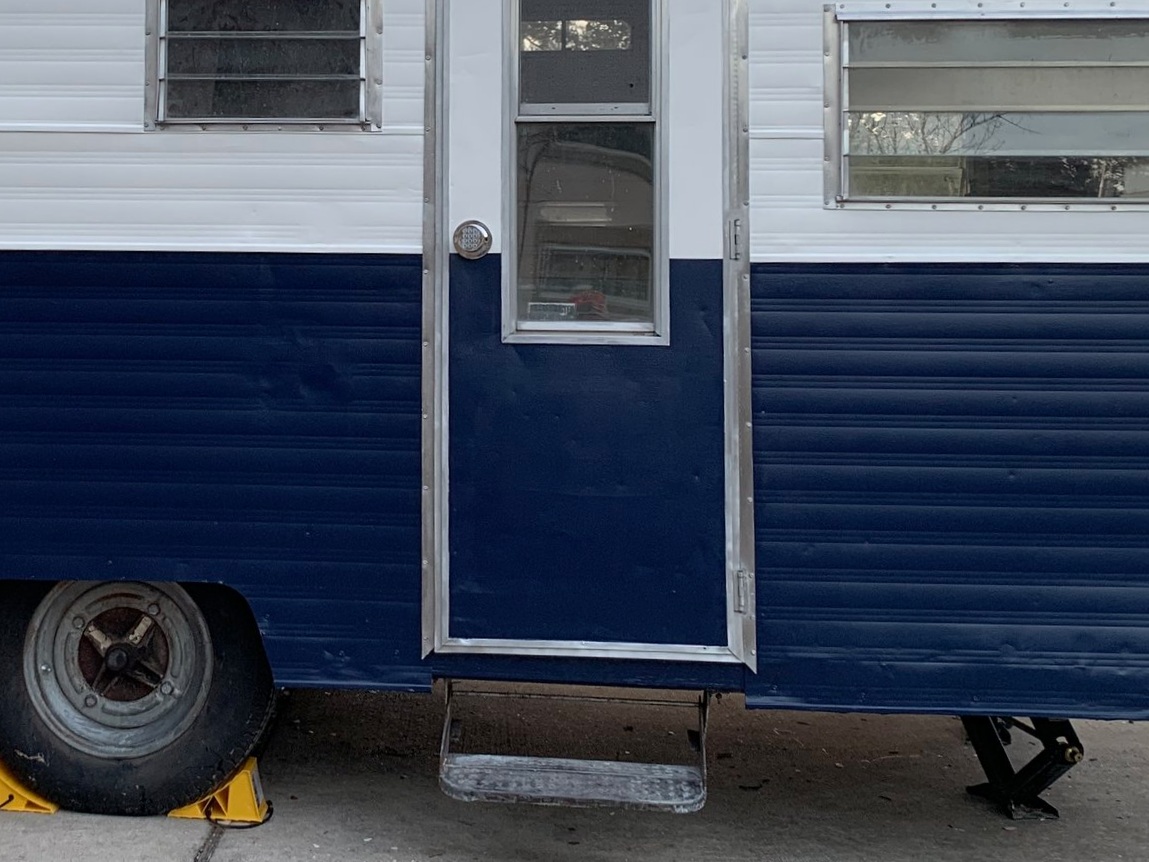
What do you think? Slight improvement?
You’ve probably noticed that even though it’s painted and doesn’t look like it’s straight out of Breaking Bad, the outside isn’t completely done. We still need to paint the trailer (tongue and bumper), repair and paint the rock guard for the front window, and find and paint diamond plating for the bottom front, fix up the wheels, and get lights and the license plate installed, to name a few things. (Not to mention the entire interior!) So just a few more things before she’s “trip ready”, ha!
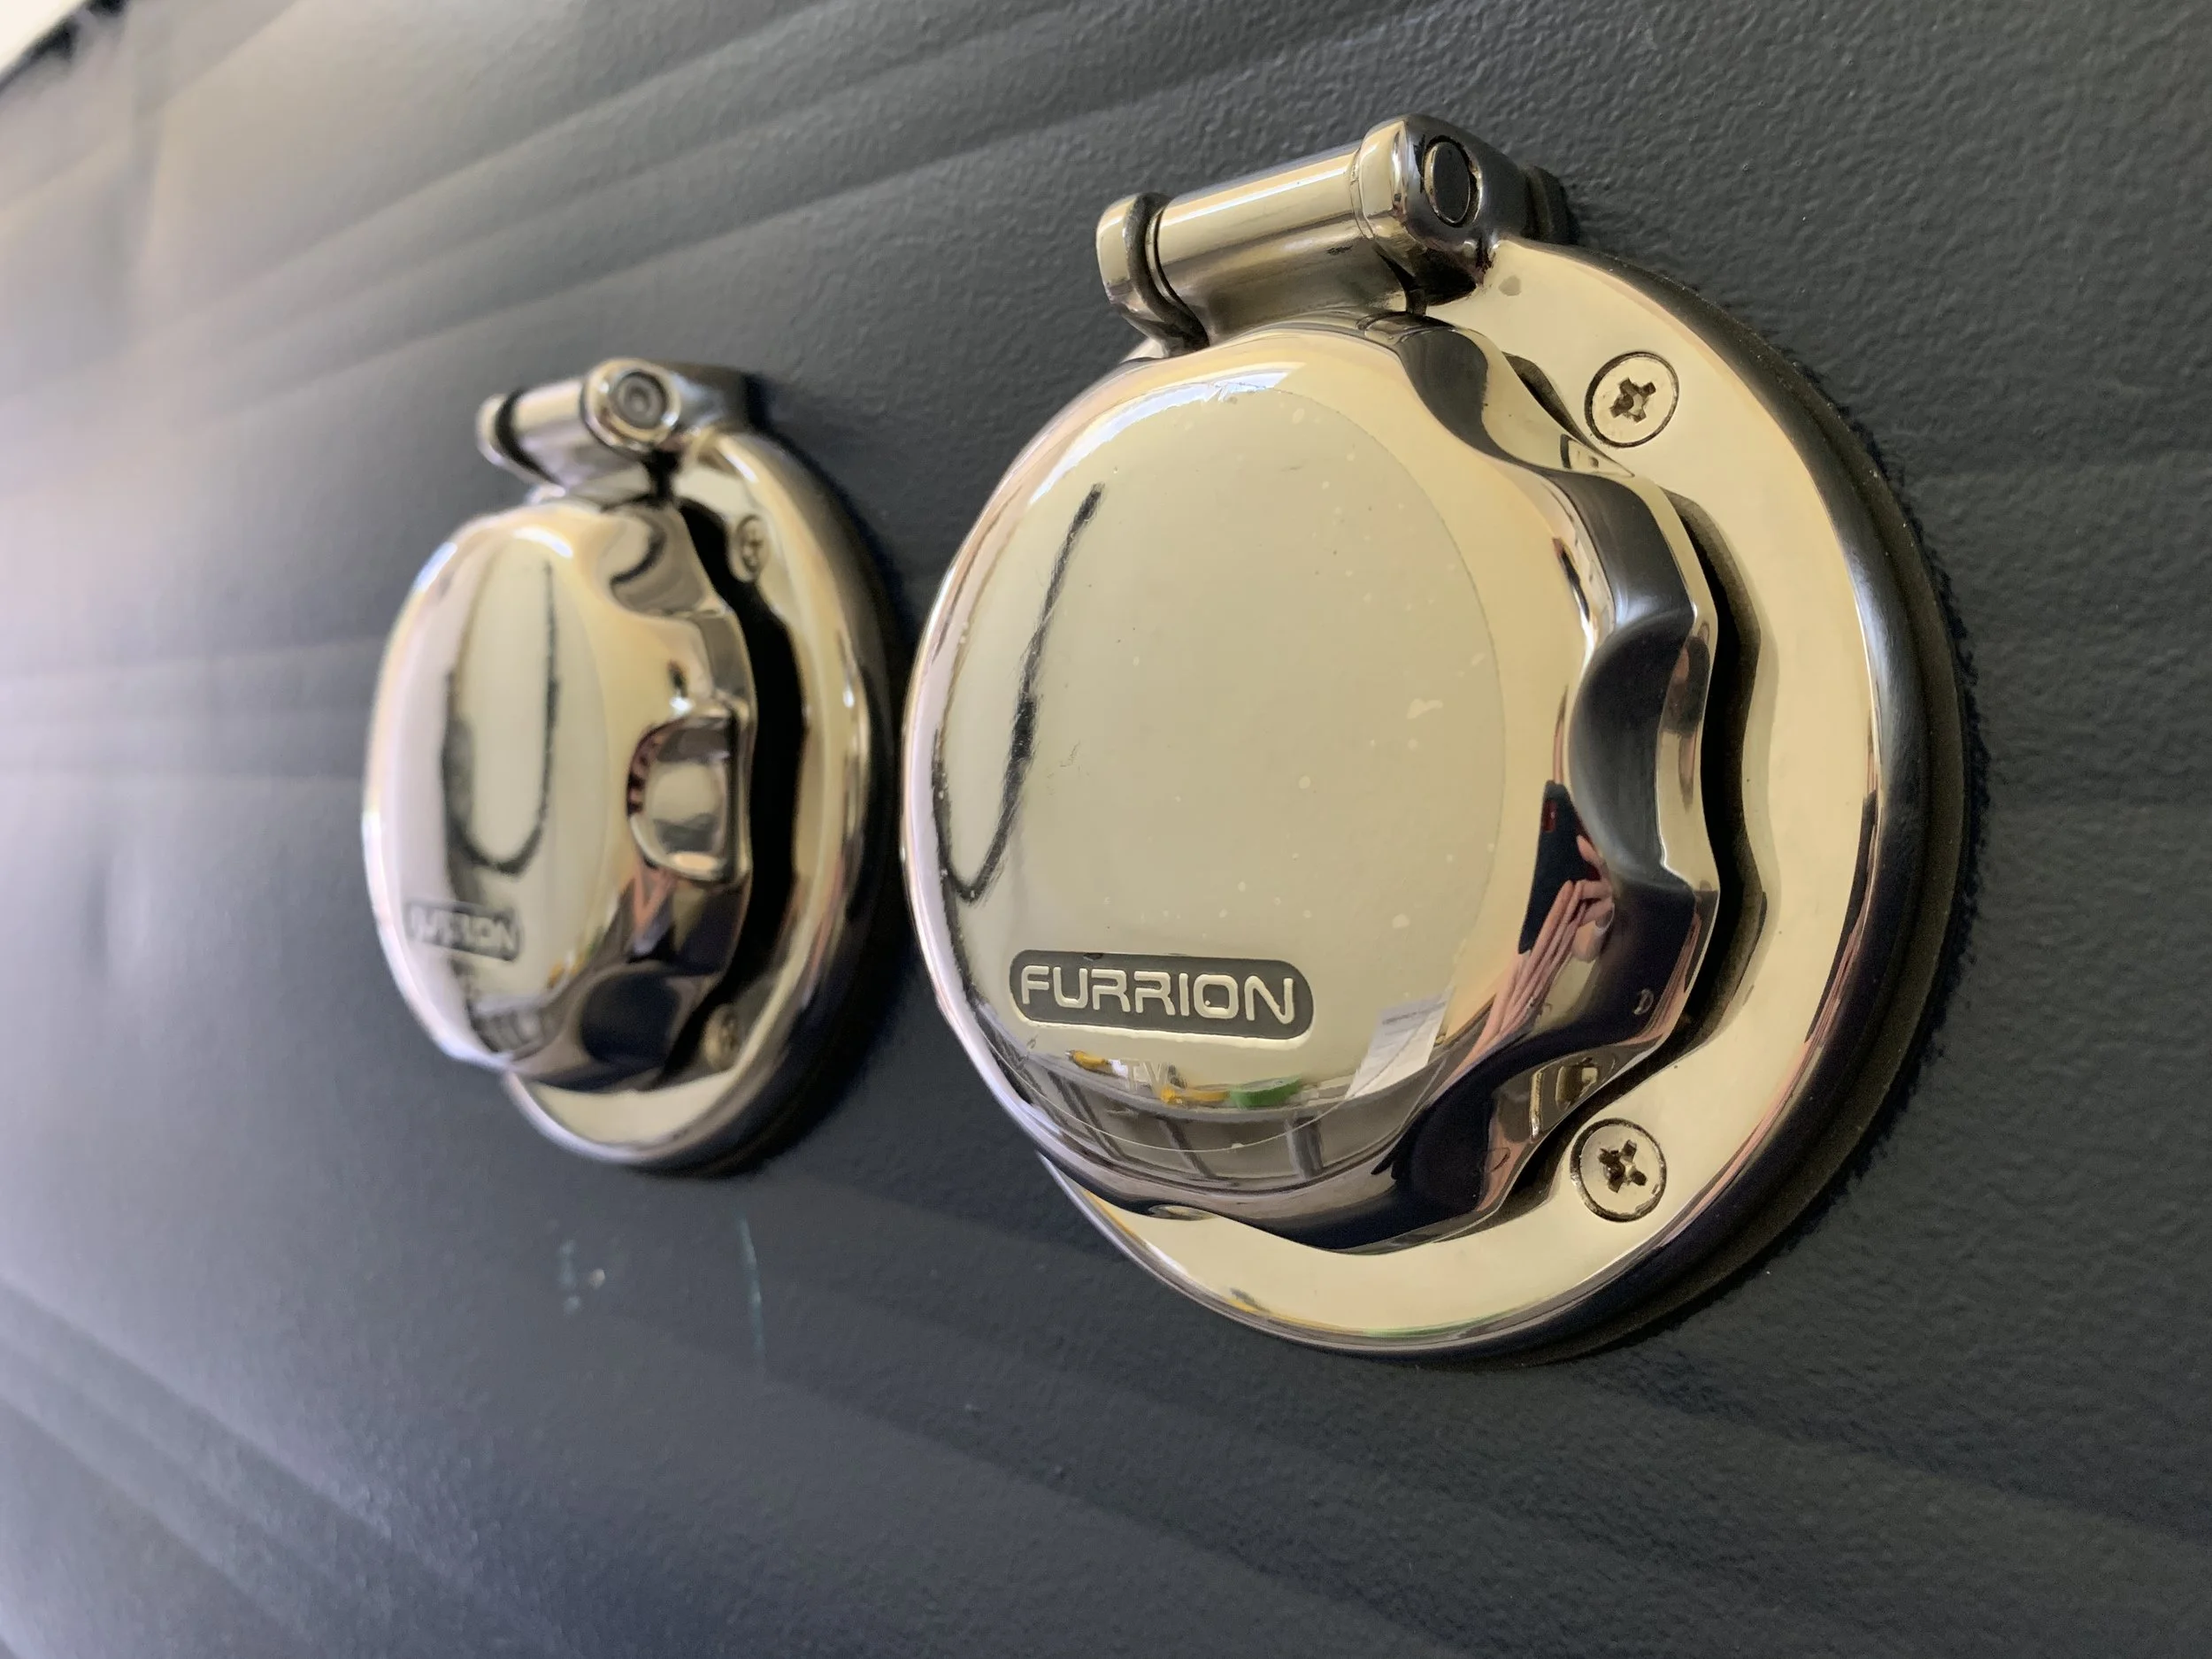
You can see it in the after photos above, but we literally JUST FINISHED installing the J-trim (the shiny silver stuff around the edges that keeps the walls attached to the camper, waterproofs the exterior and acts like a gutter system of sorts), and we’ll post a detailed how-to on that soon, as well as how we installed our keyless digital door lock also seen in the after photos. (Spoiler alert: because it’s one of our projects, we couldn’t just install the knob like normal people… we had to modify the door a bit.)
help!
I’ve been trying to come up with a name for The Cameo but haven’t had any luck yet. Nothing sounds right. When I ask Nick, he says something to the effect of “it’s an inanimate object, does it really need a name?” Is he right? Is that why I can’t come up with anything that sticks? Do you agree with him or should we name it?