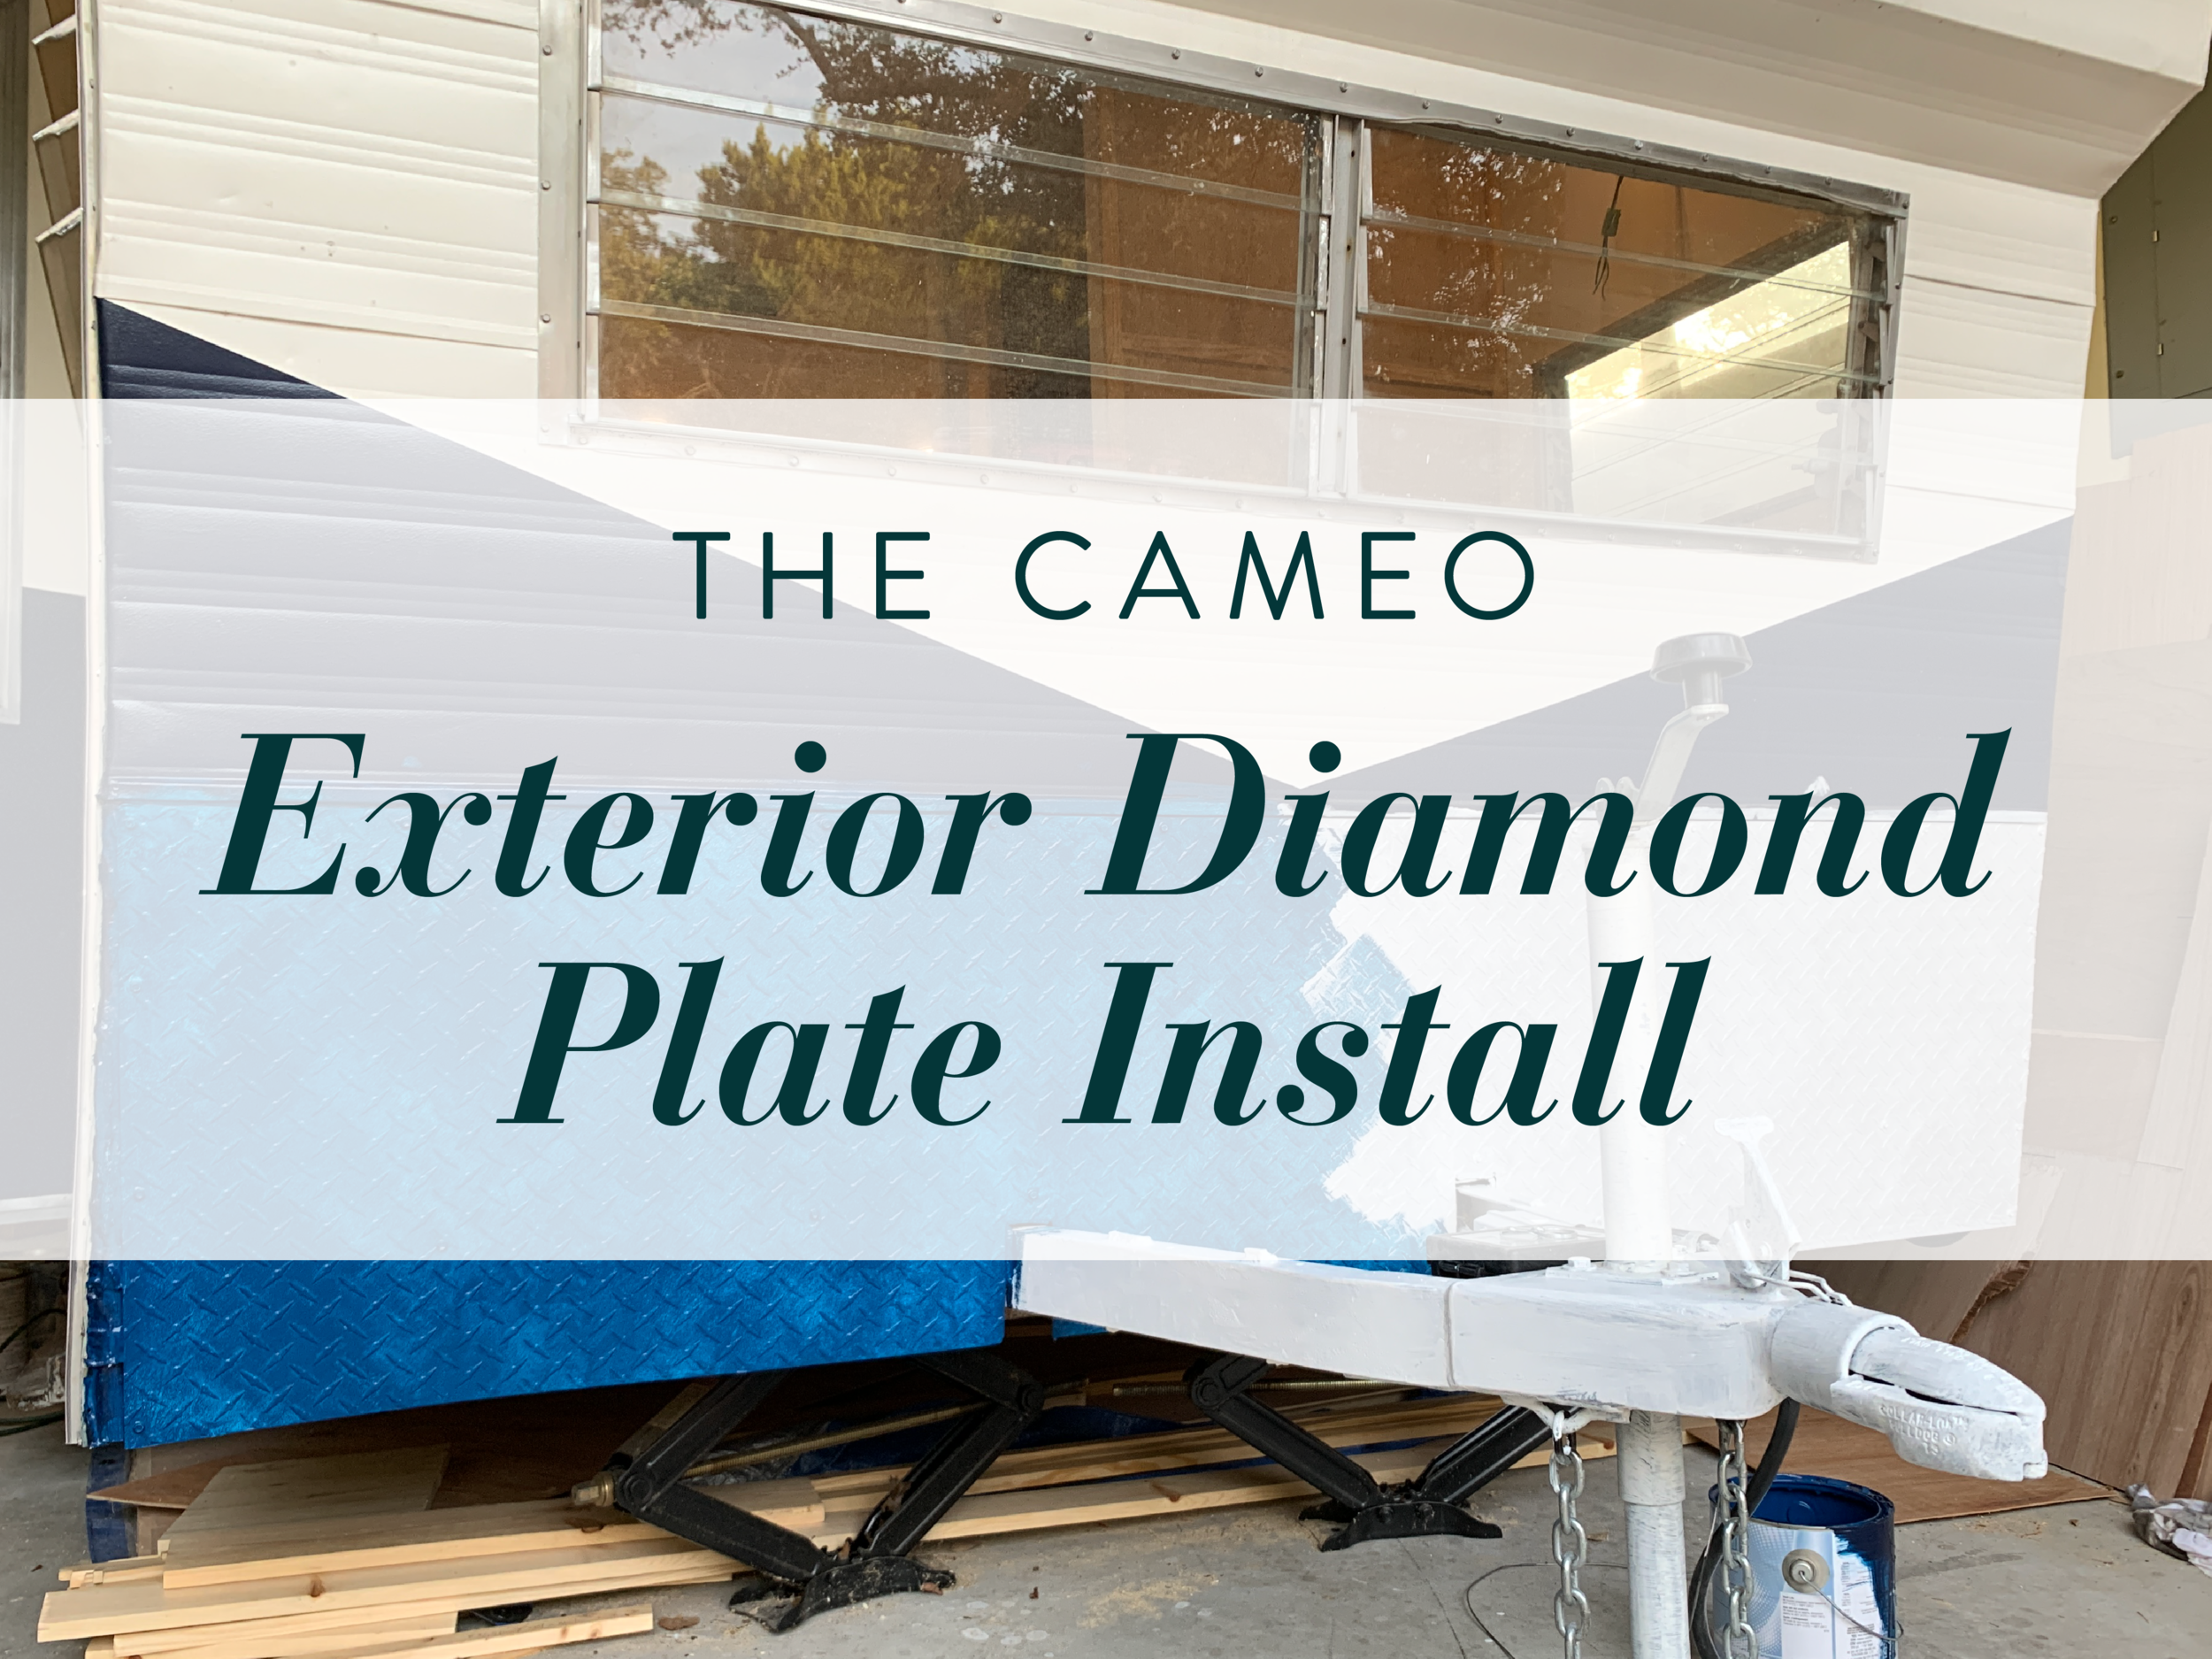
The Cameo Camper Renovation: Exterior Diamond Plate Install
Hey y’all – if you’re new here, welcome! We’re so happy you’ve found us. And if you’ve been following along, welcome back!
Here lately we’ve been sharing a lot of interior updates and since we just wrapped up our dining area build we thought now would be a good time to pop outside real quick and share how we beefed up the front exterior wall for some added protection.
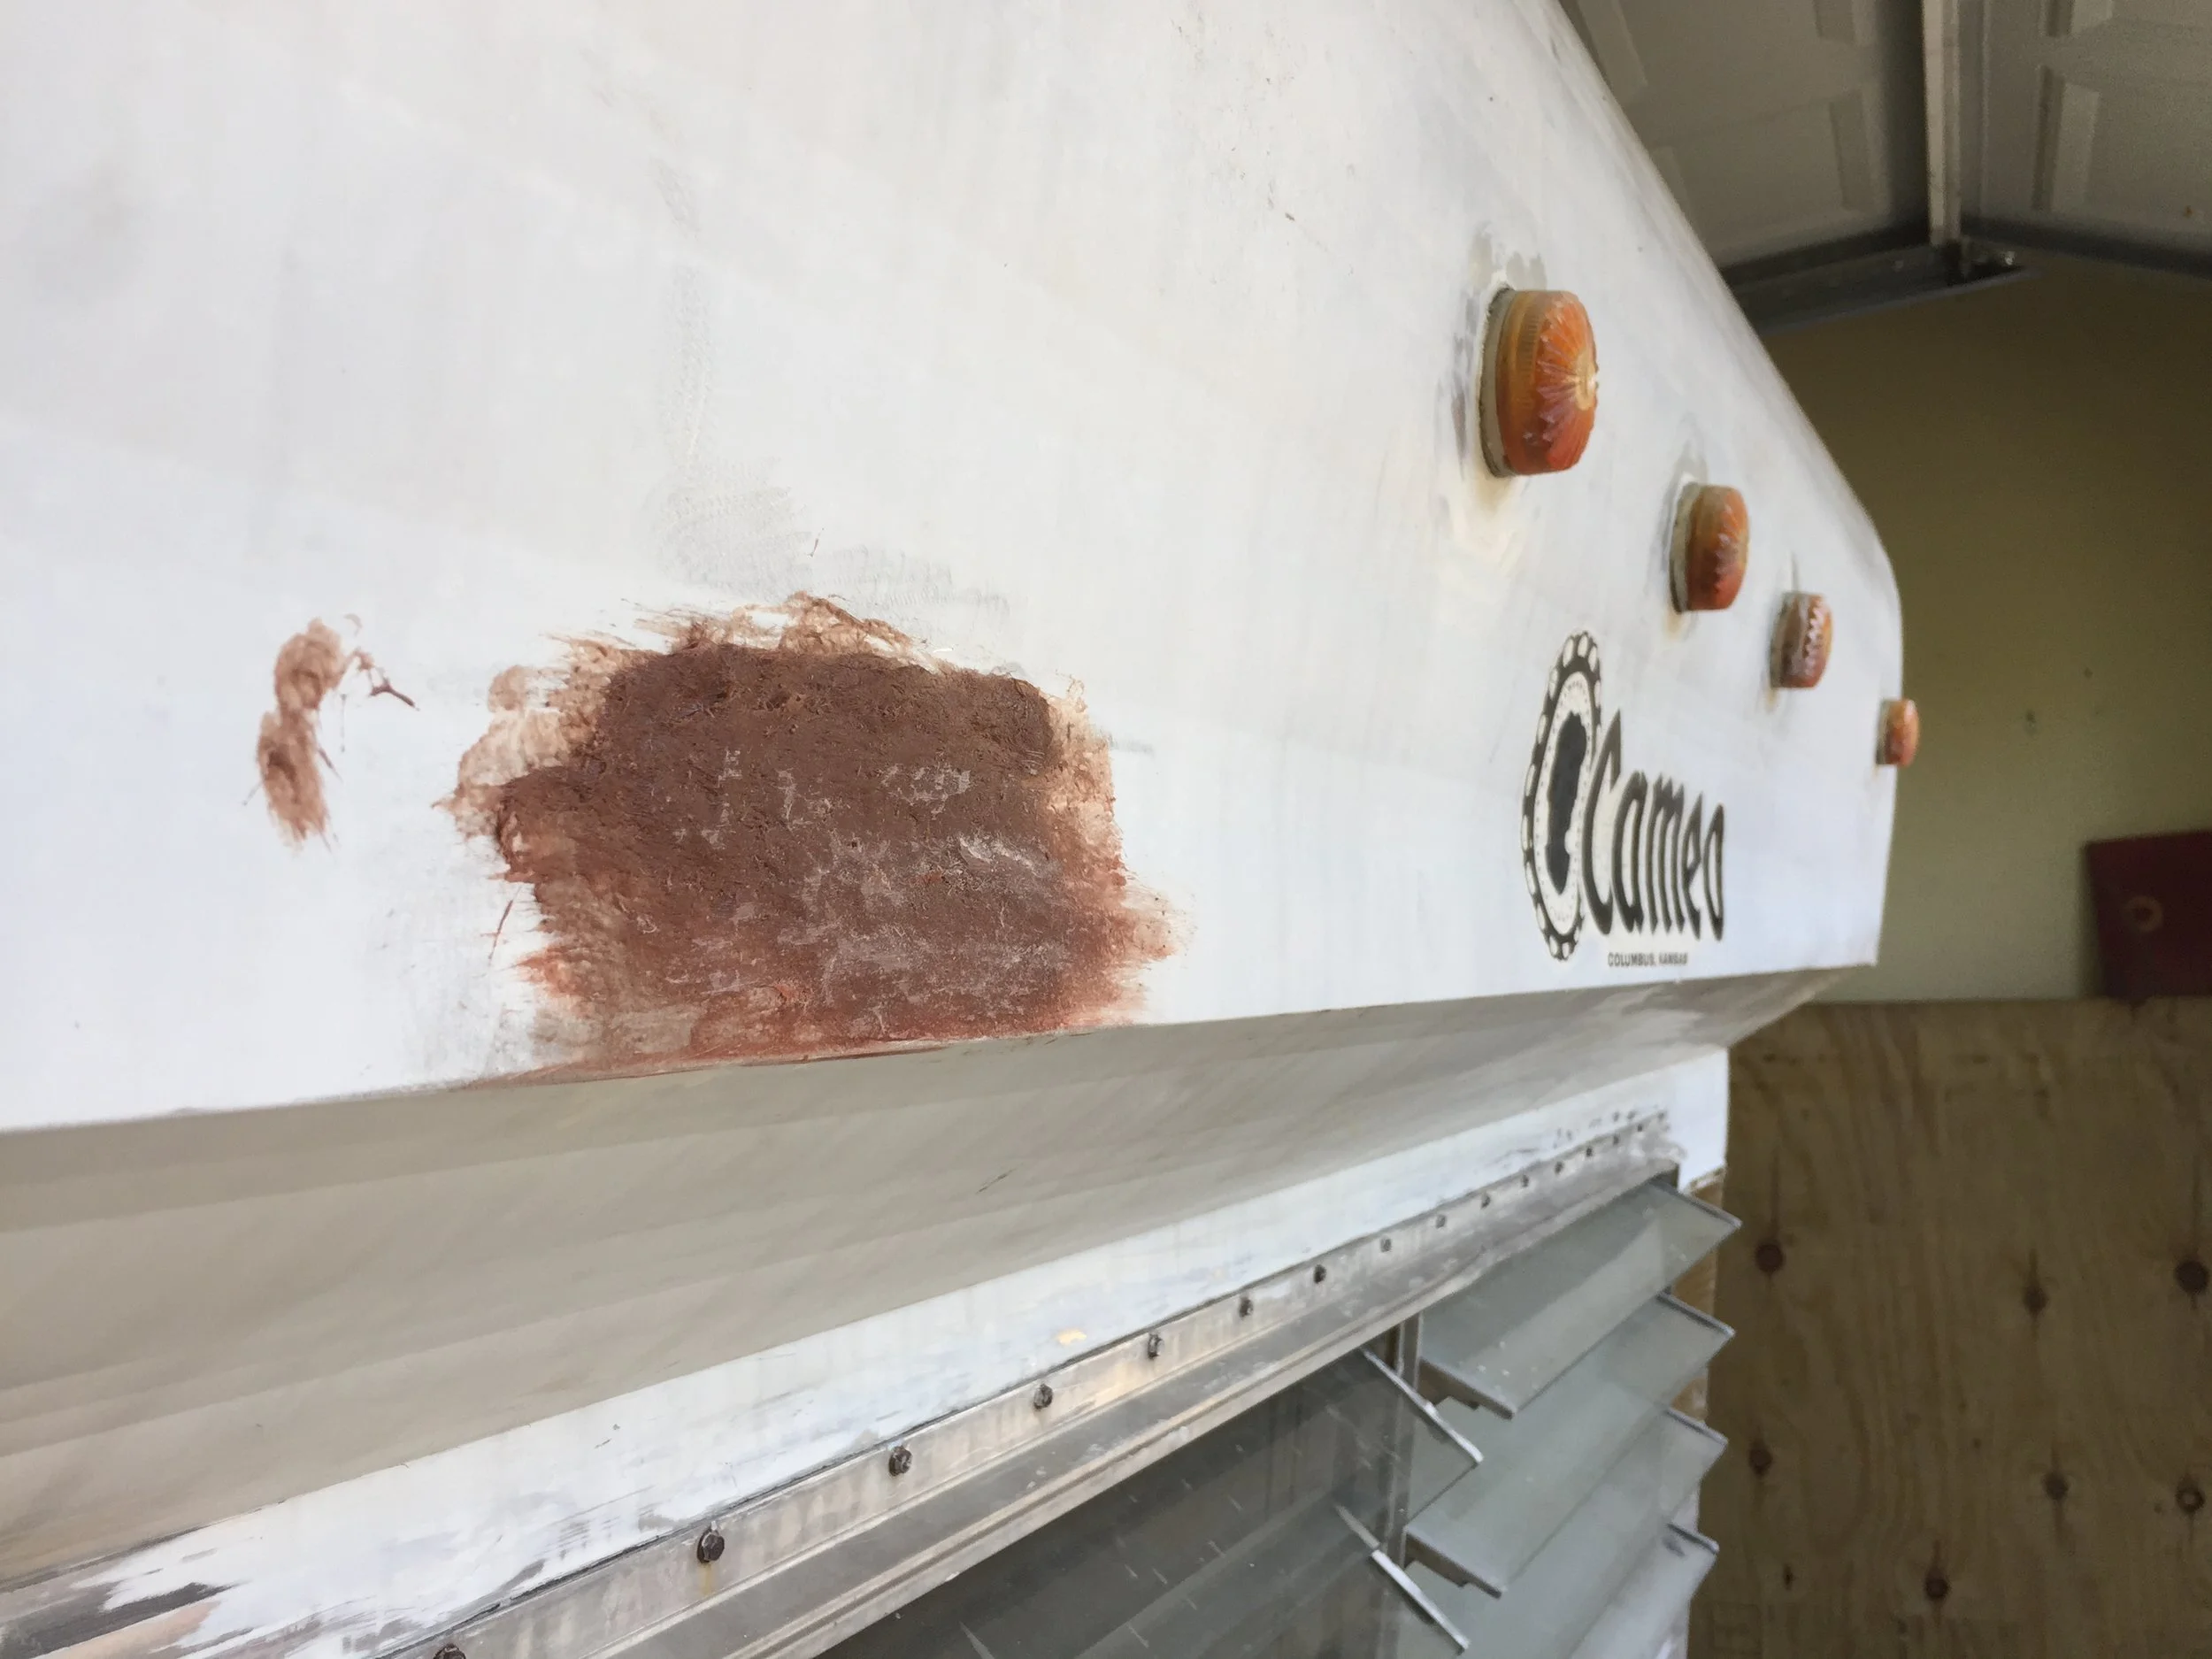
If you remember from way back (or if you missed it entirely) we shared how we patched the very damaged bottom front piece of exterior metal instead of replacing it as a good money saver. (We also knew we’d be adding something extra to it and didn’t want to have to get a custom-made piece with all of the bends and what not that would just be covered up. This two-layer option looked to be more cost-effective than one ultra-custom piece of replacement aluminum.)

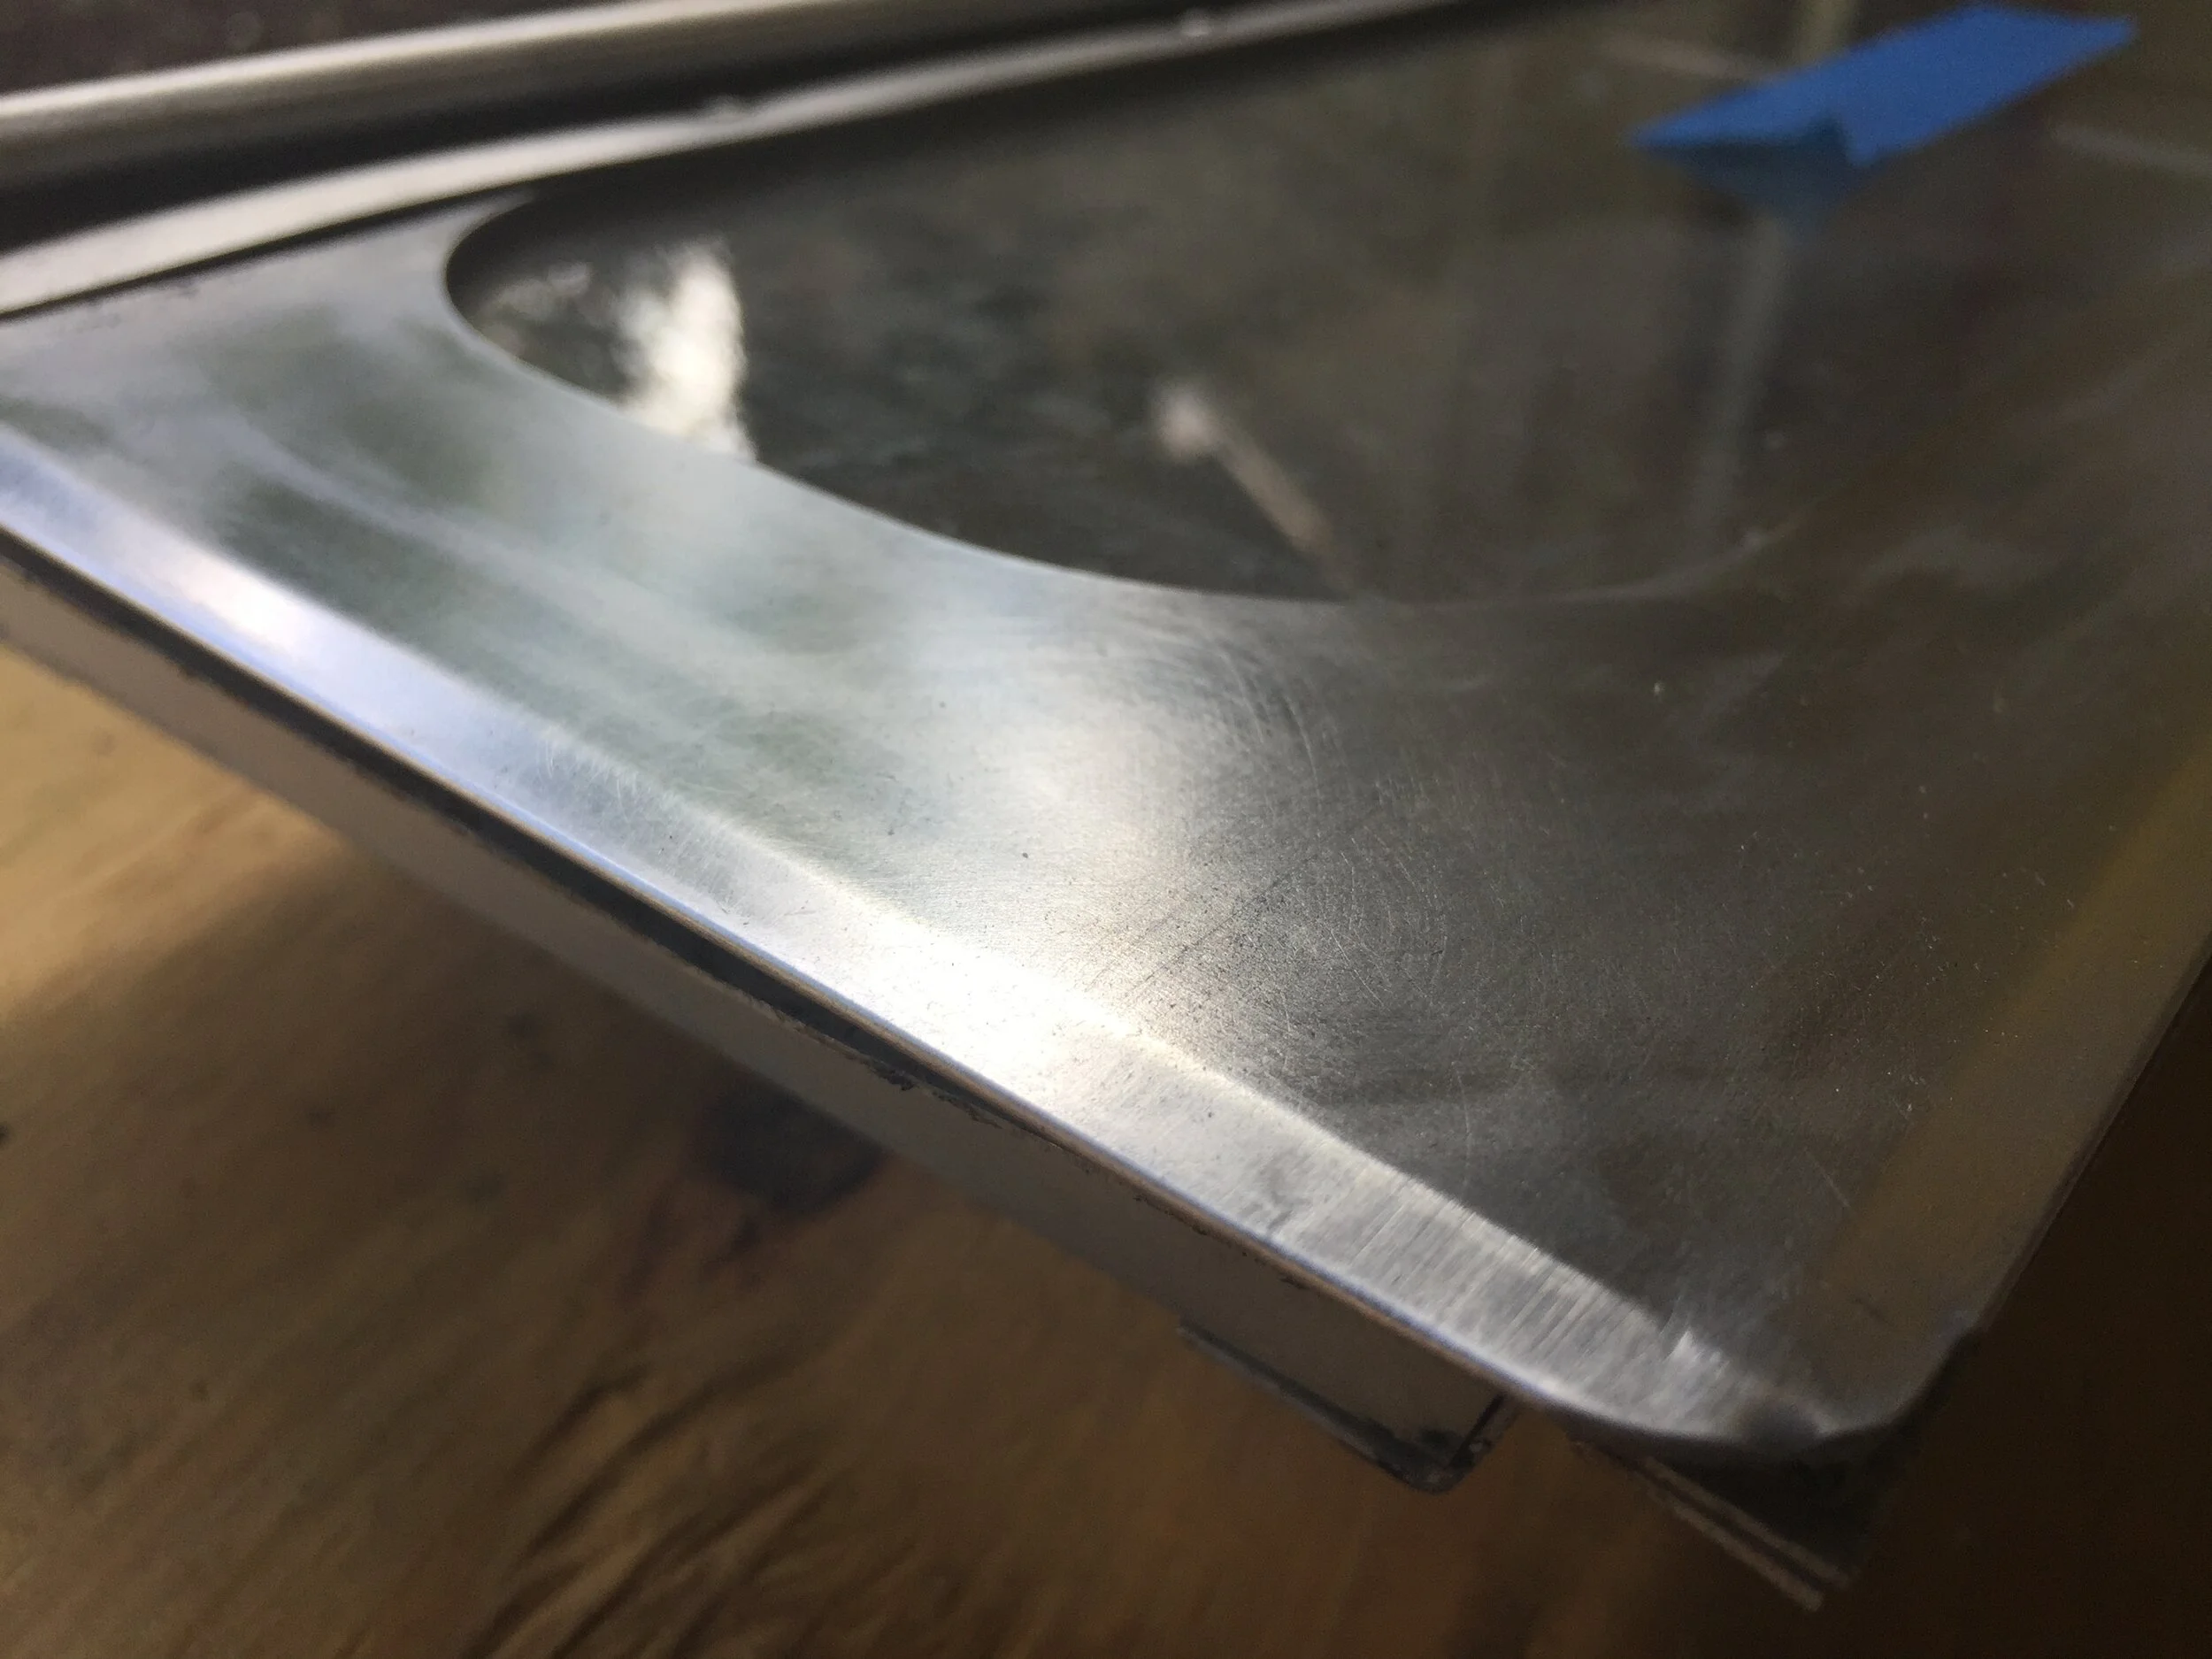
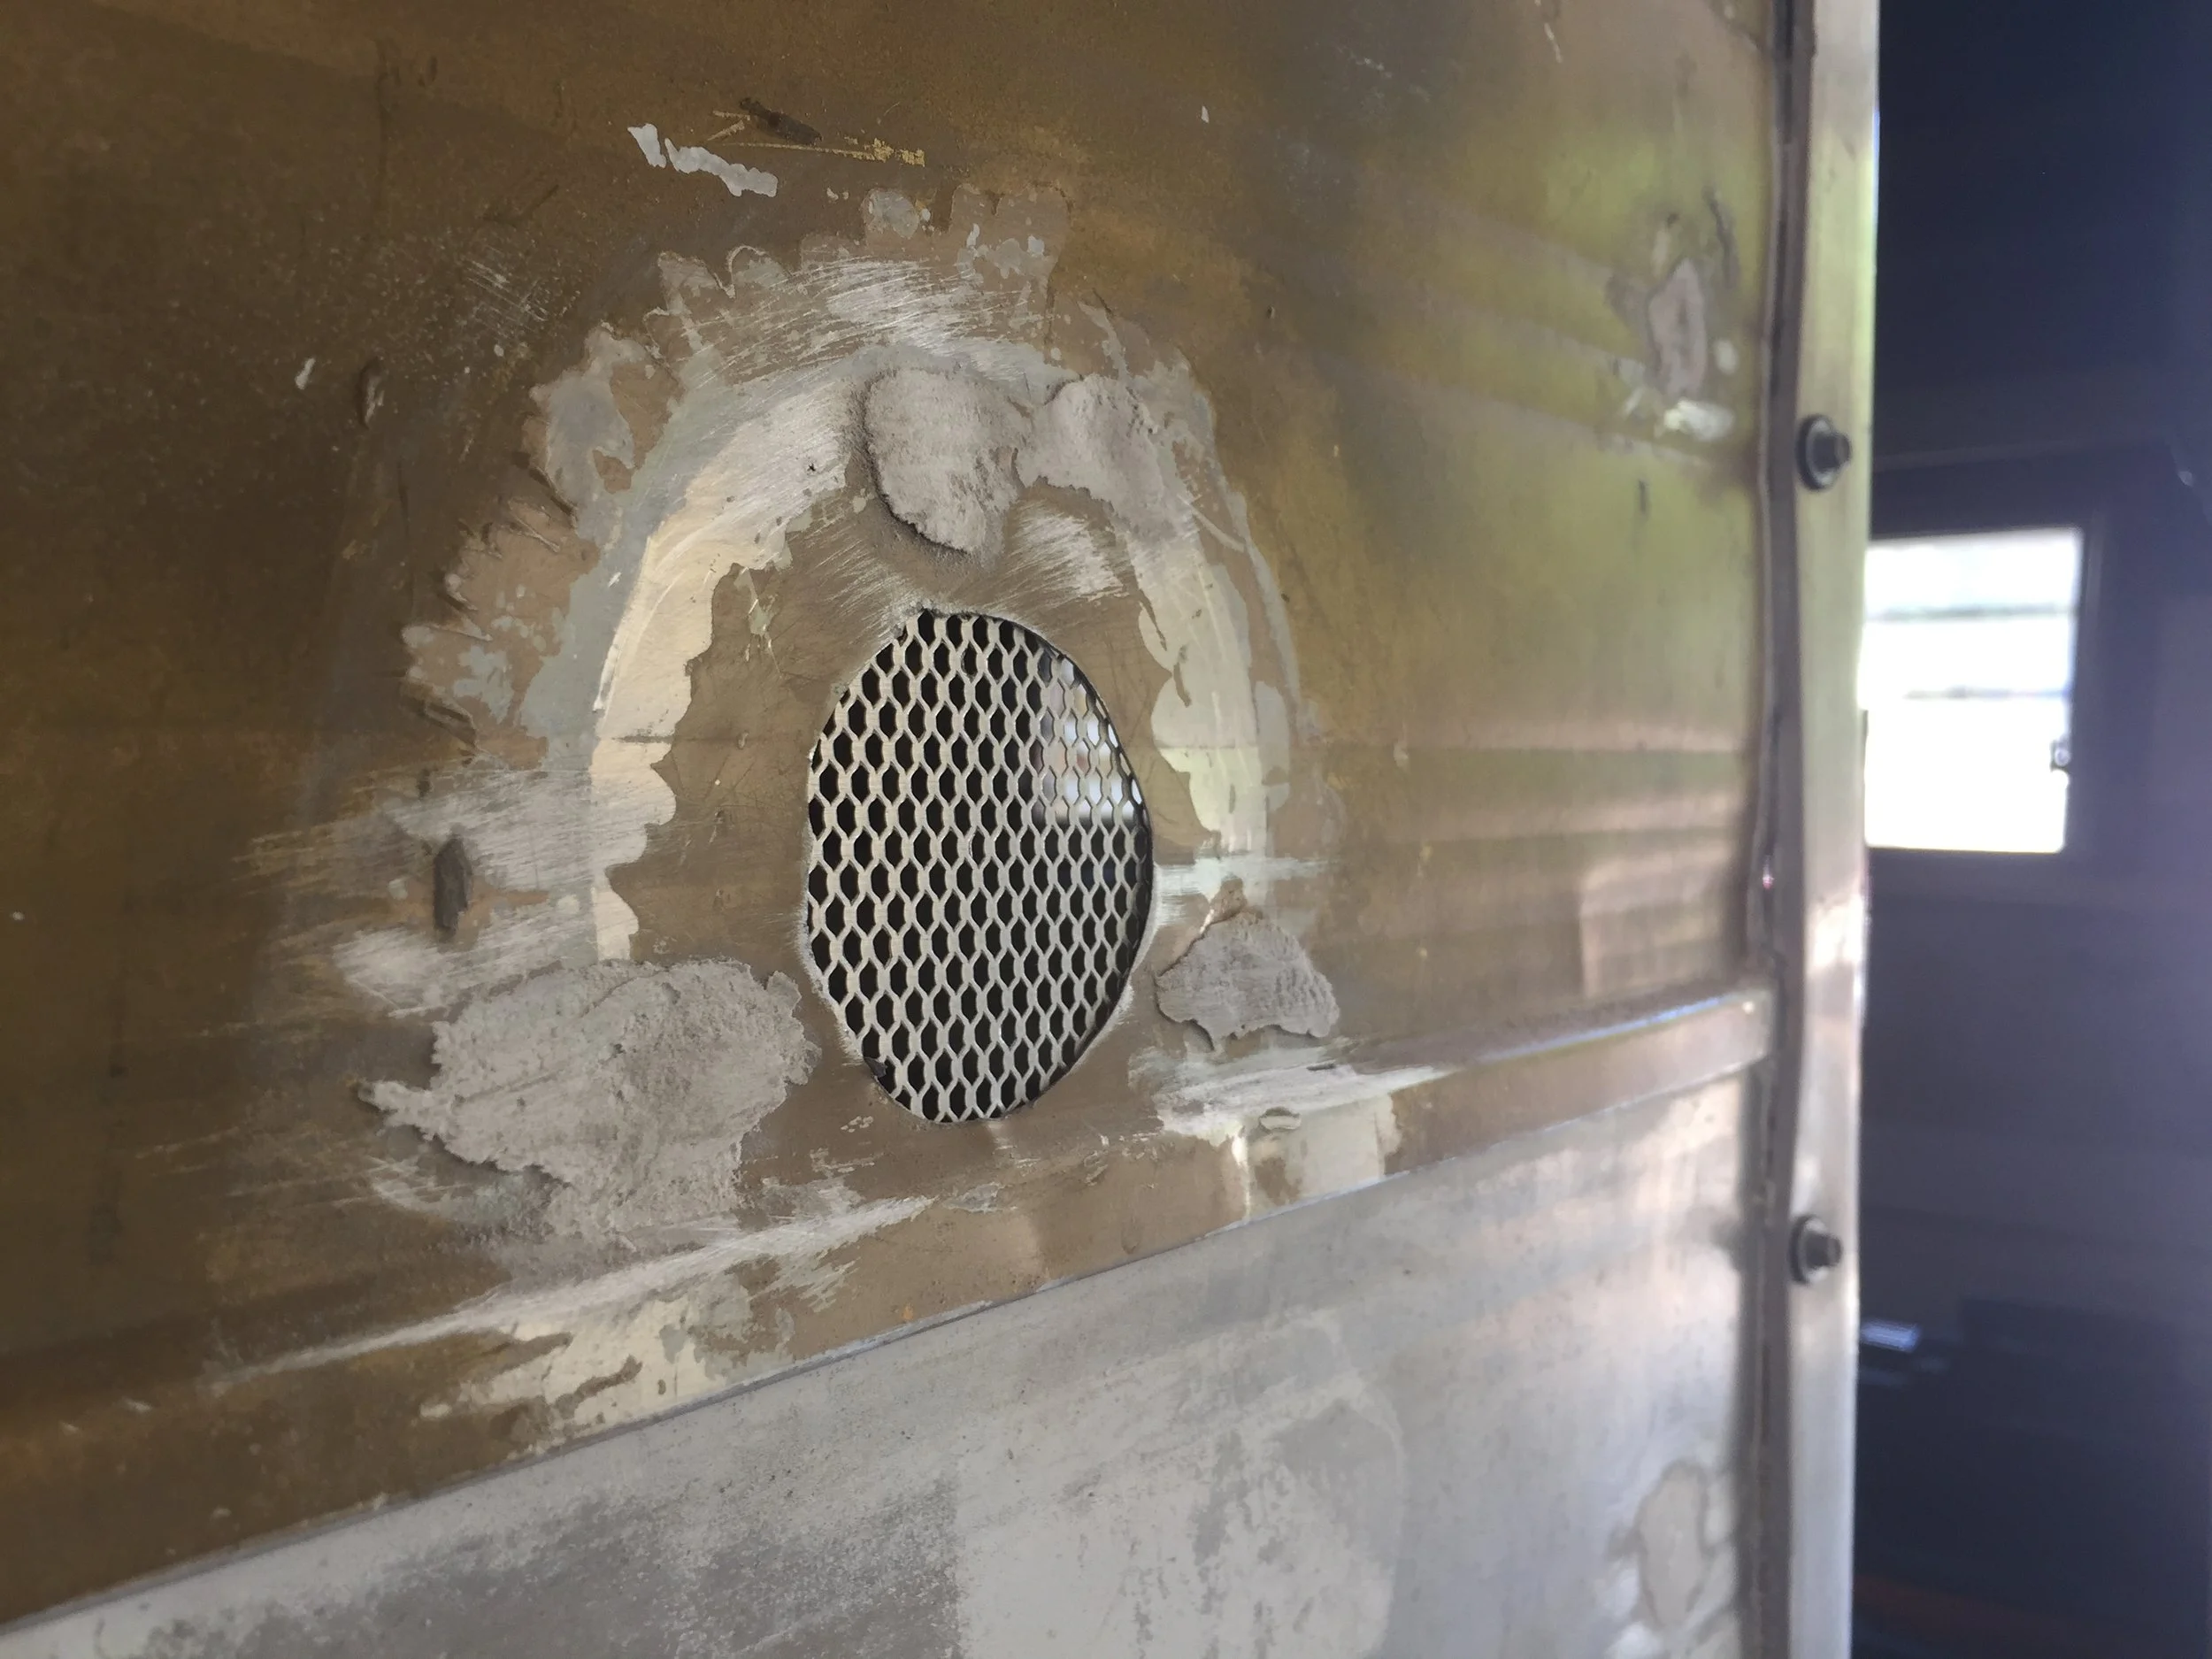
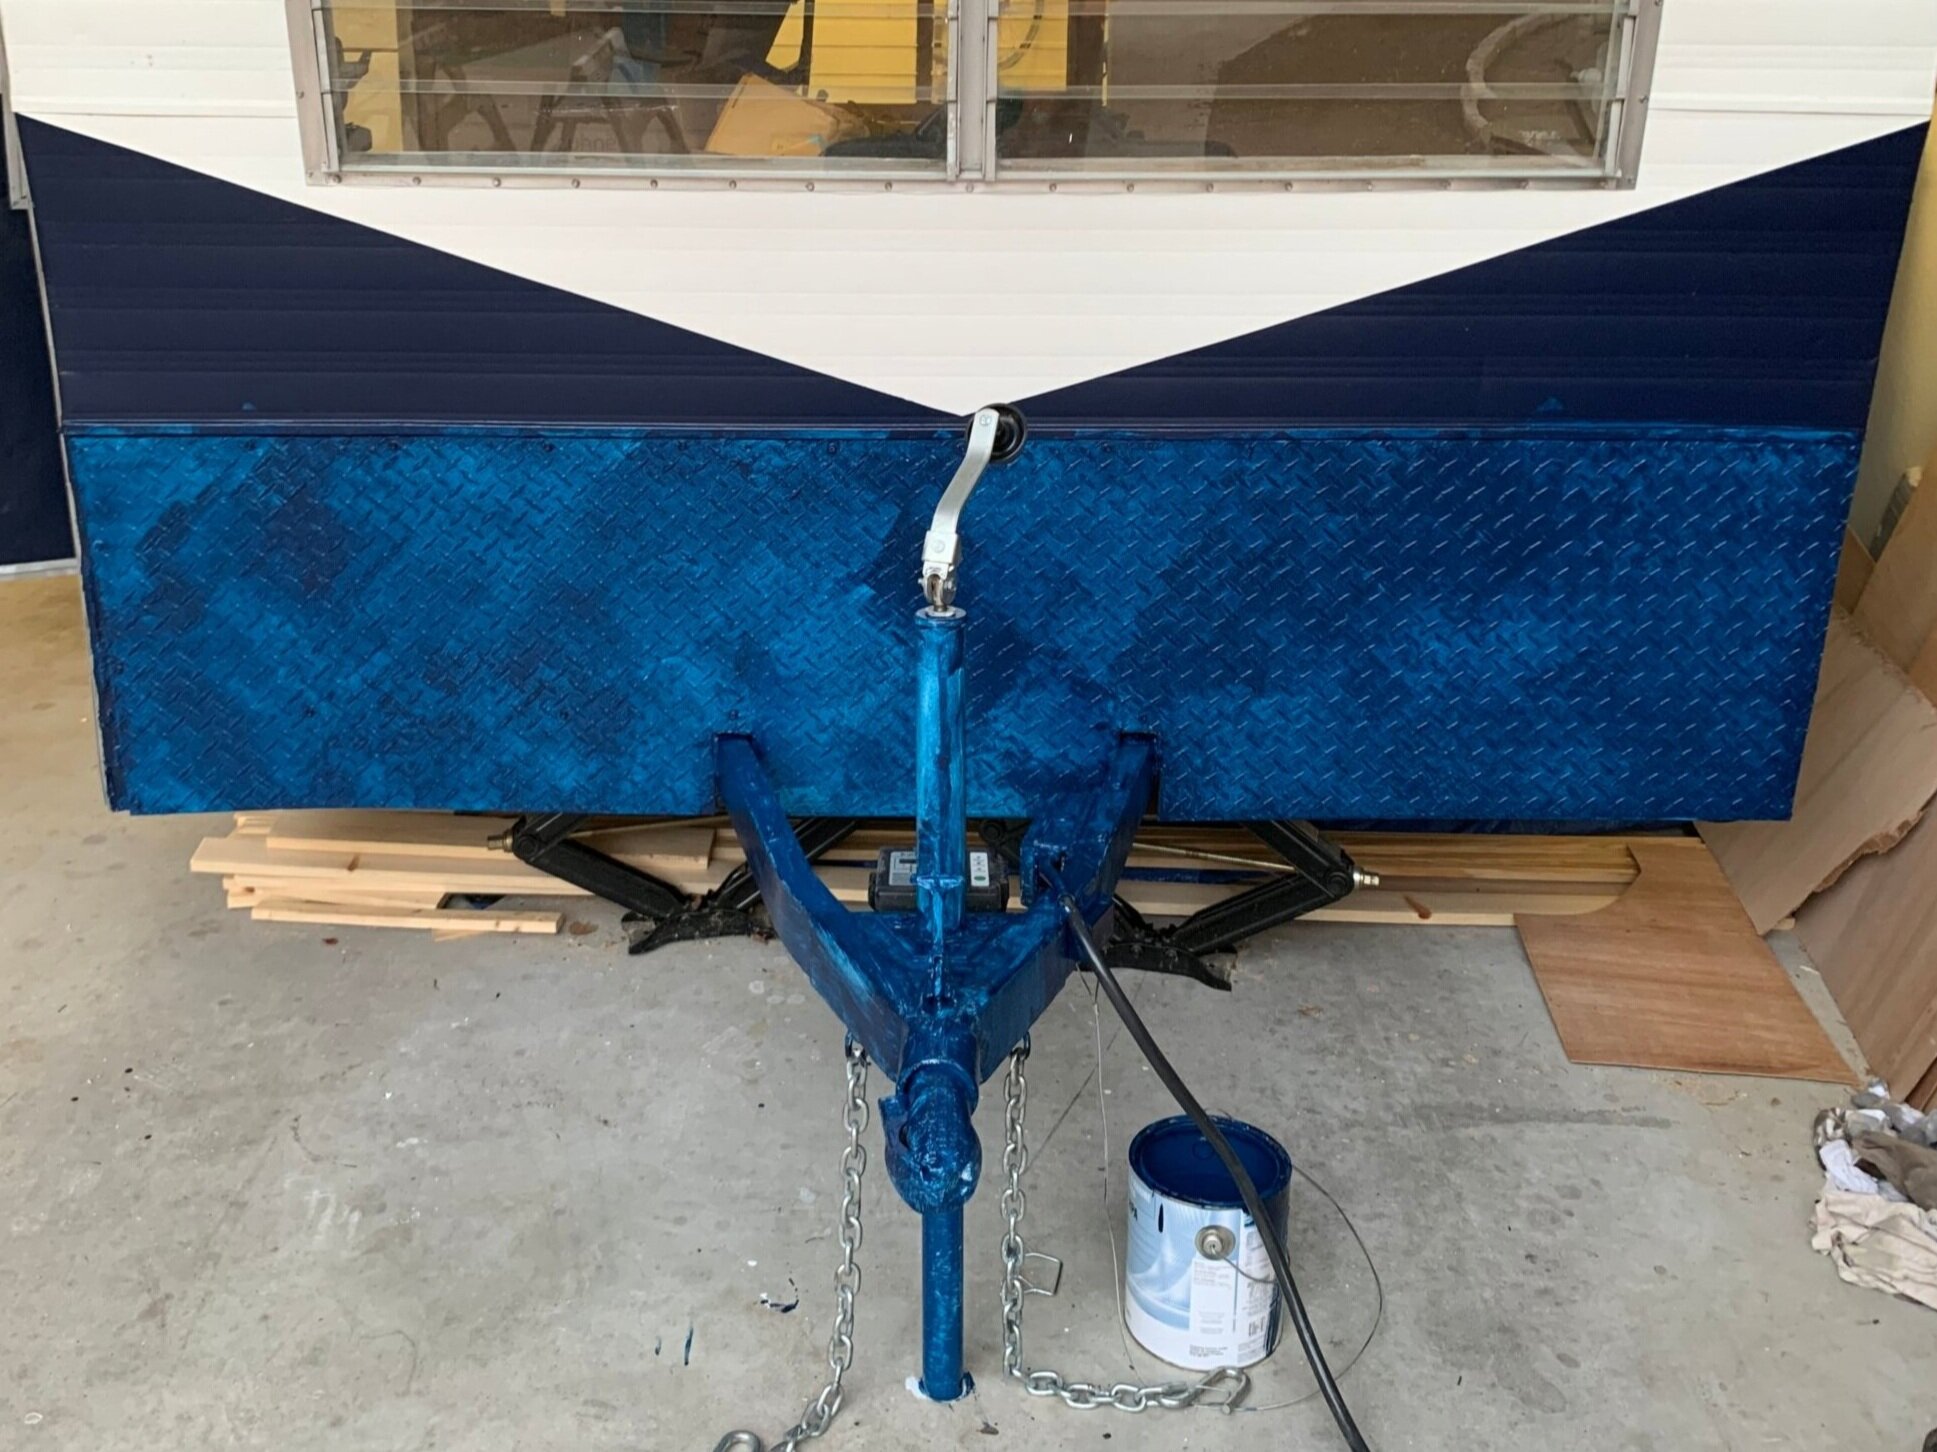
While this thin piece of textured aluminum, pictured above, was the original (and only) form of protection on the bottom front of the camper, we thought it could use a little more something to help protect the obviously dinged up and majorly hole-ridden piece of metal from rocks kicked up while driving. Because stuff happens. To protect the area, we decided on diamond plating sheet metal.
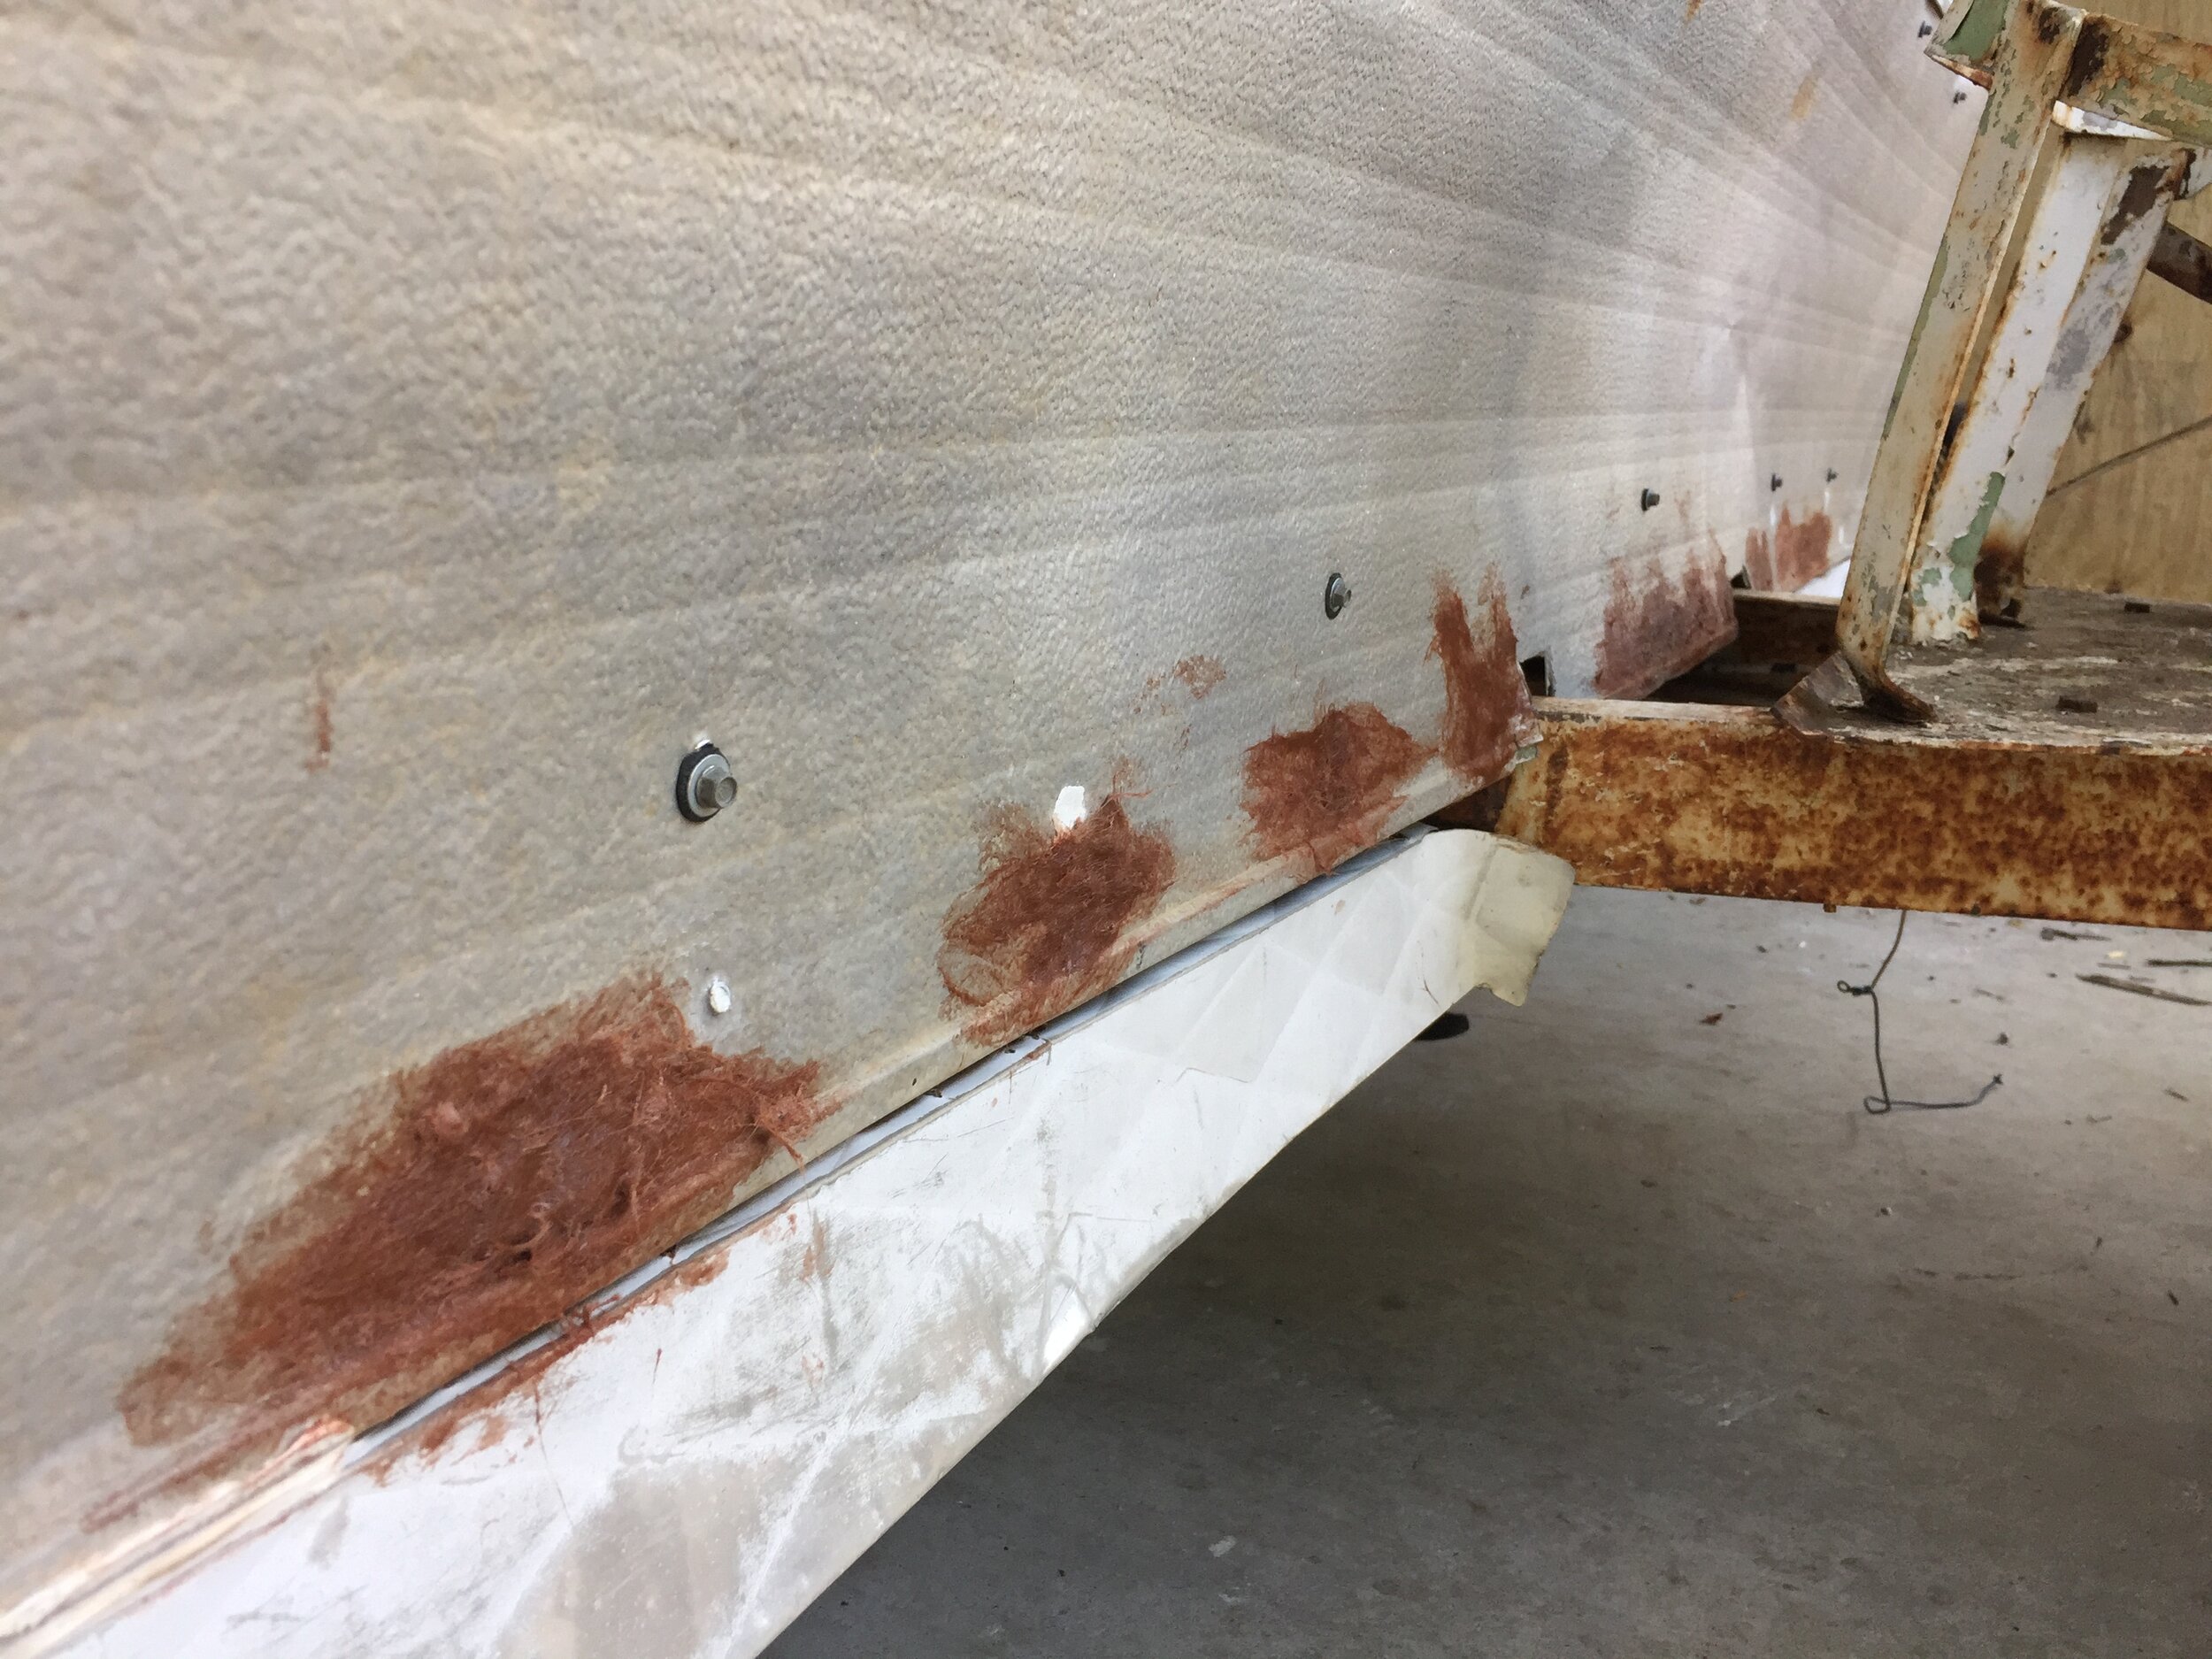
(FYI the brown splotchy poo-poo-like photo above was taken before we removed and repaired the holes caused by the screws and after we applied Bondo, but before we sanded it down to a nice smooth finish.)
Planning + finding custom sheet metal
After a lot of measuring (and re-measuring) and searching online, we found a local company here in Austin that offers a variety of metals that can be custom-cut. With my crude, serial killer-esque drawing in hand, we visited the shop and after seeing the samples in person quickly decided on 1/16” thick stainless steel diamond plating – it was more than thick enough to offer protection without adding a ton of unnecessary weight.

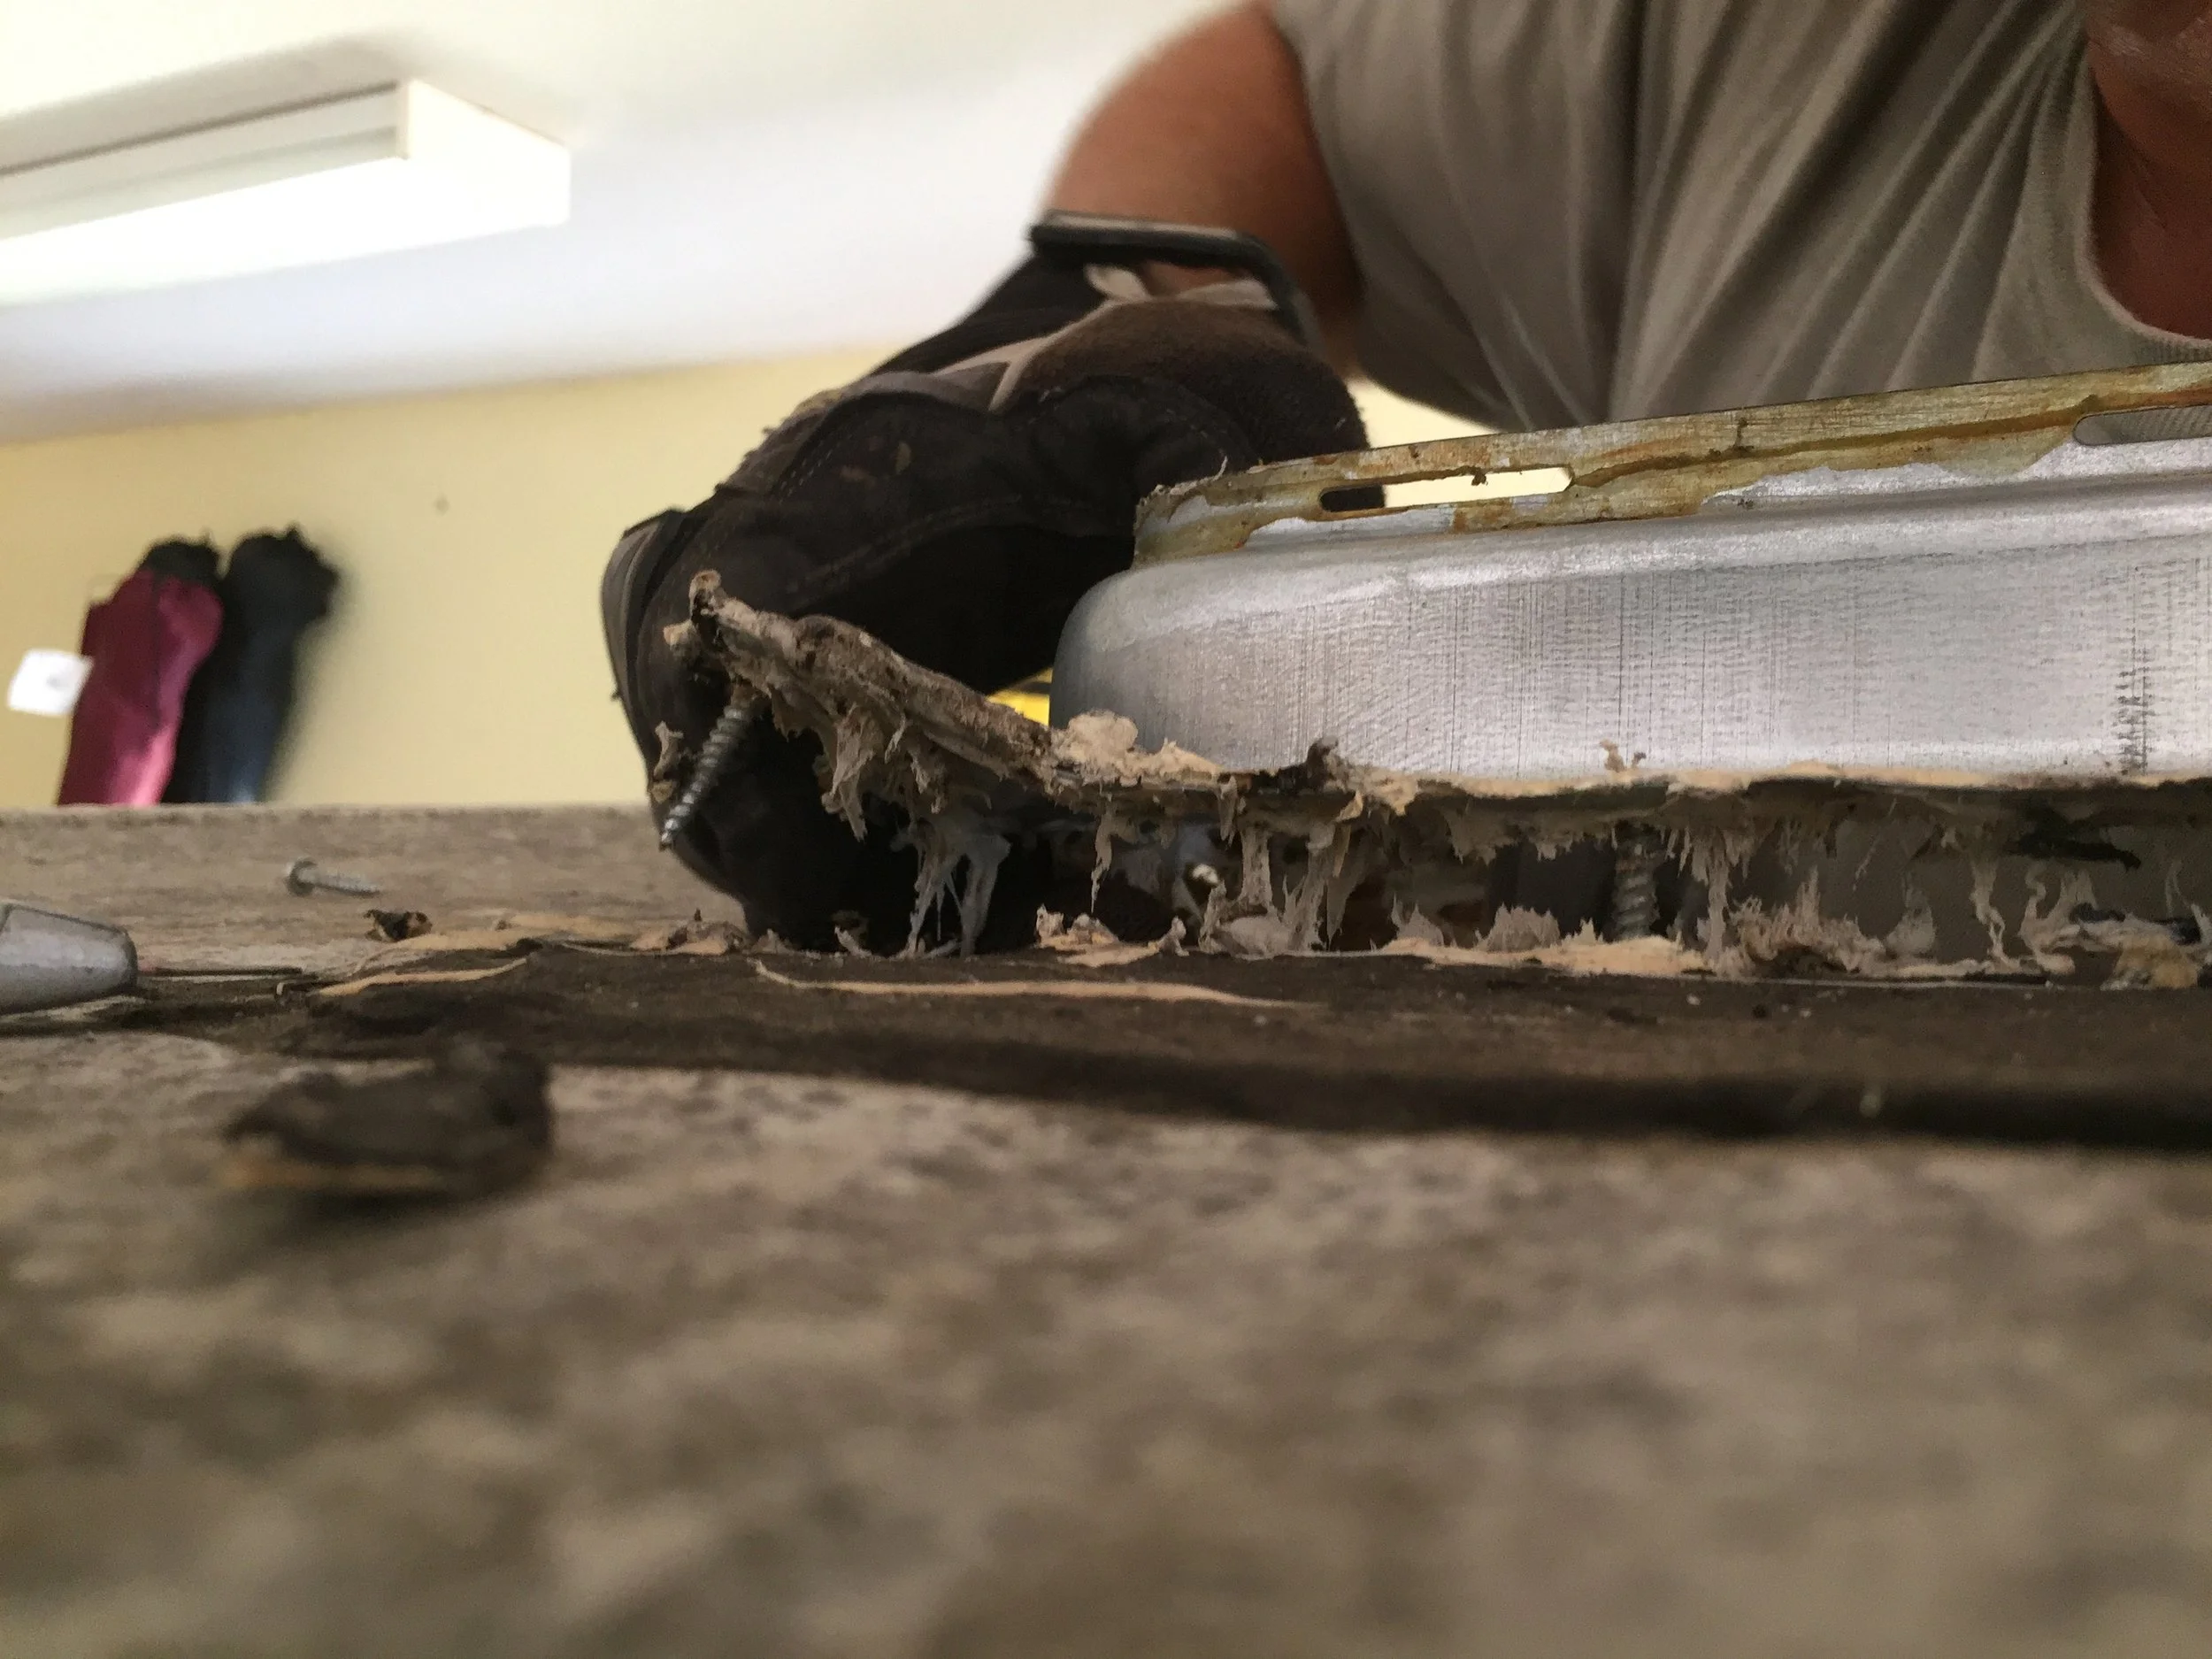
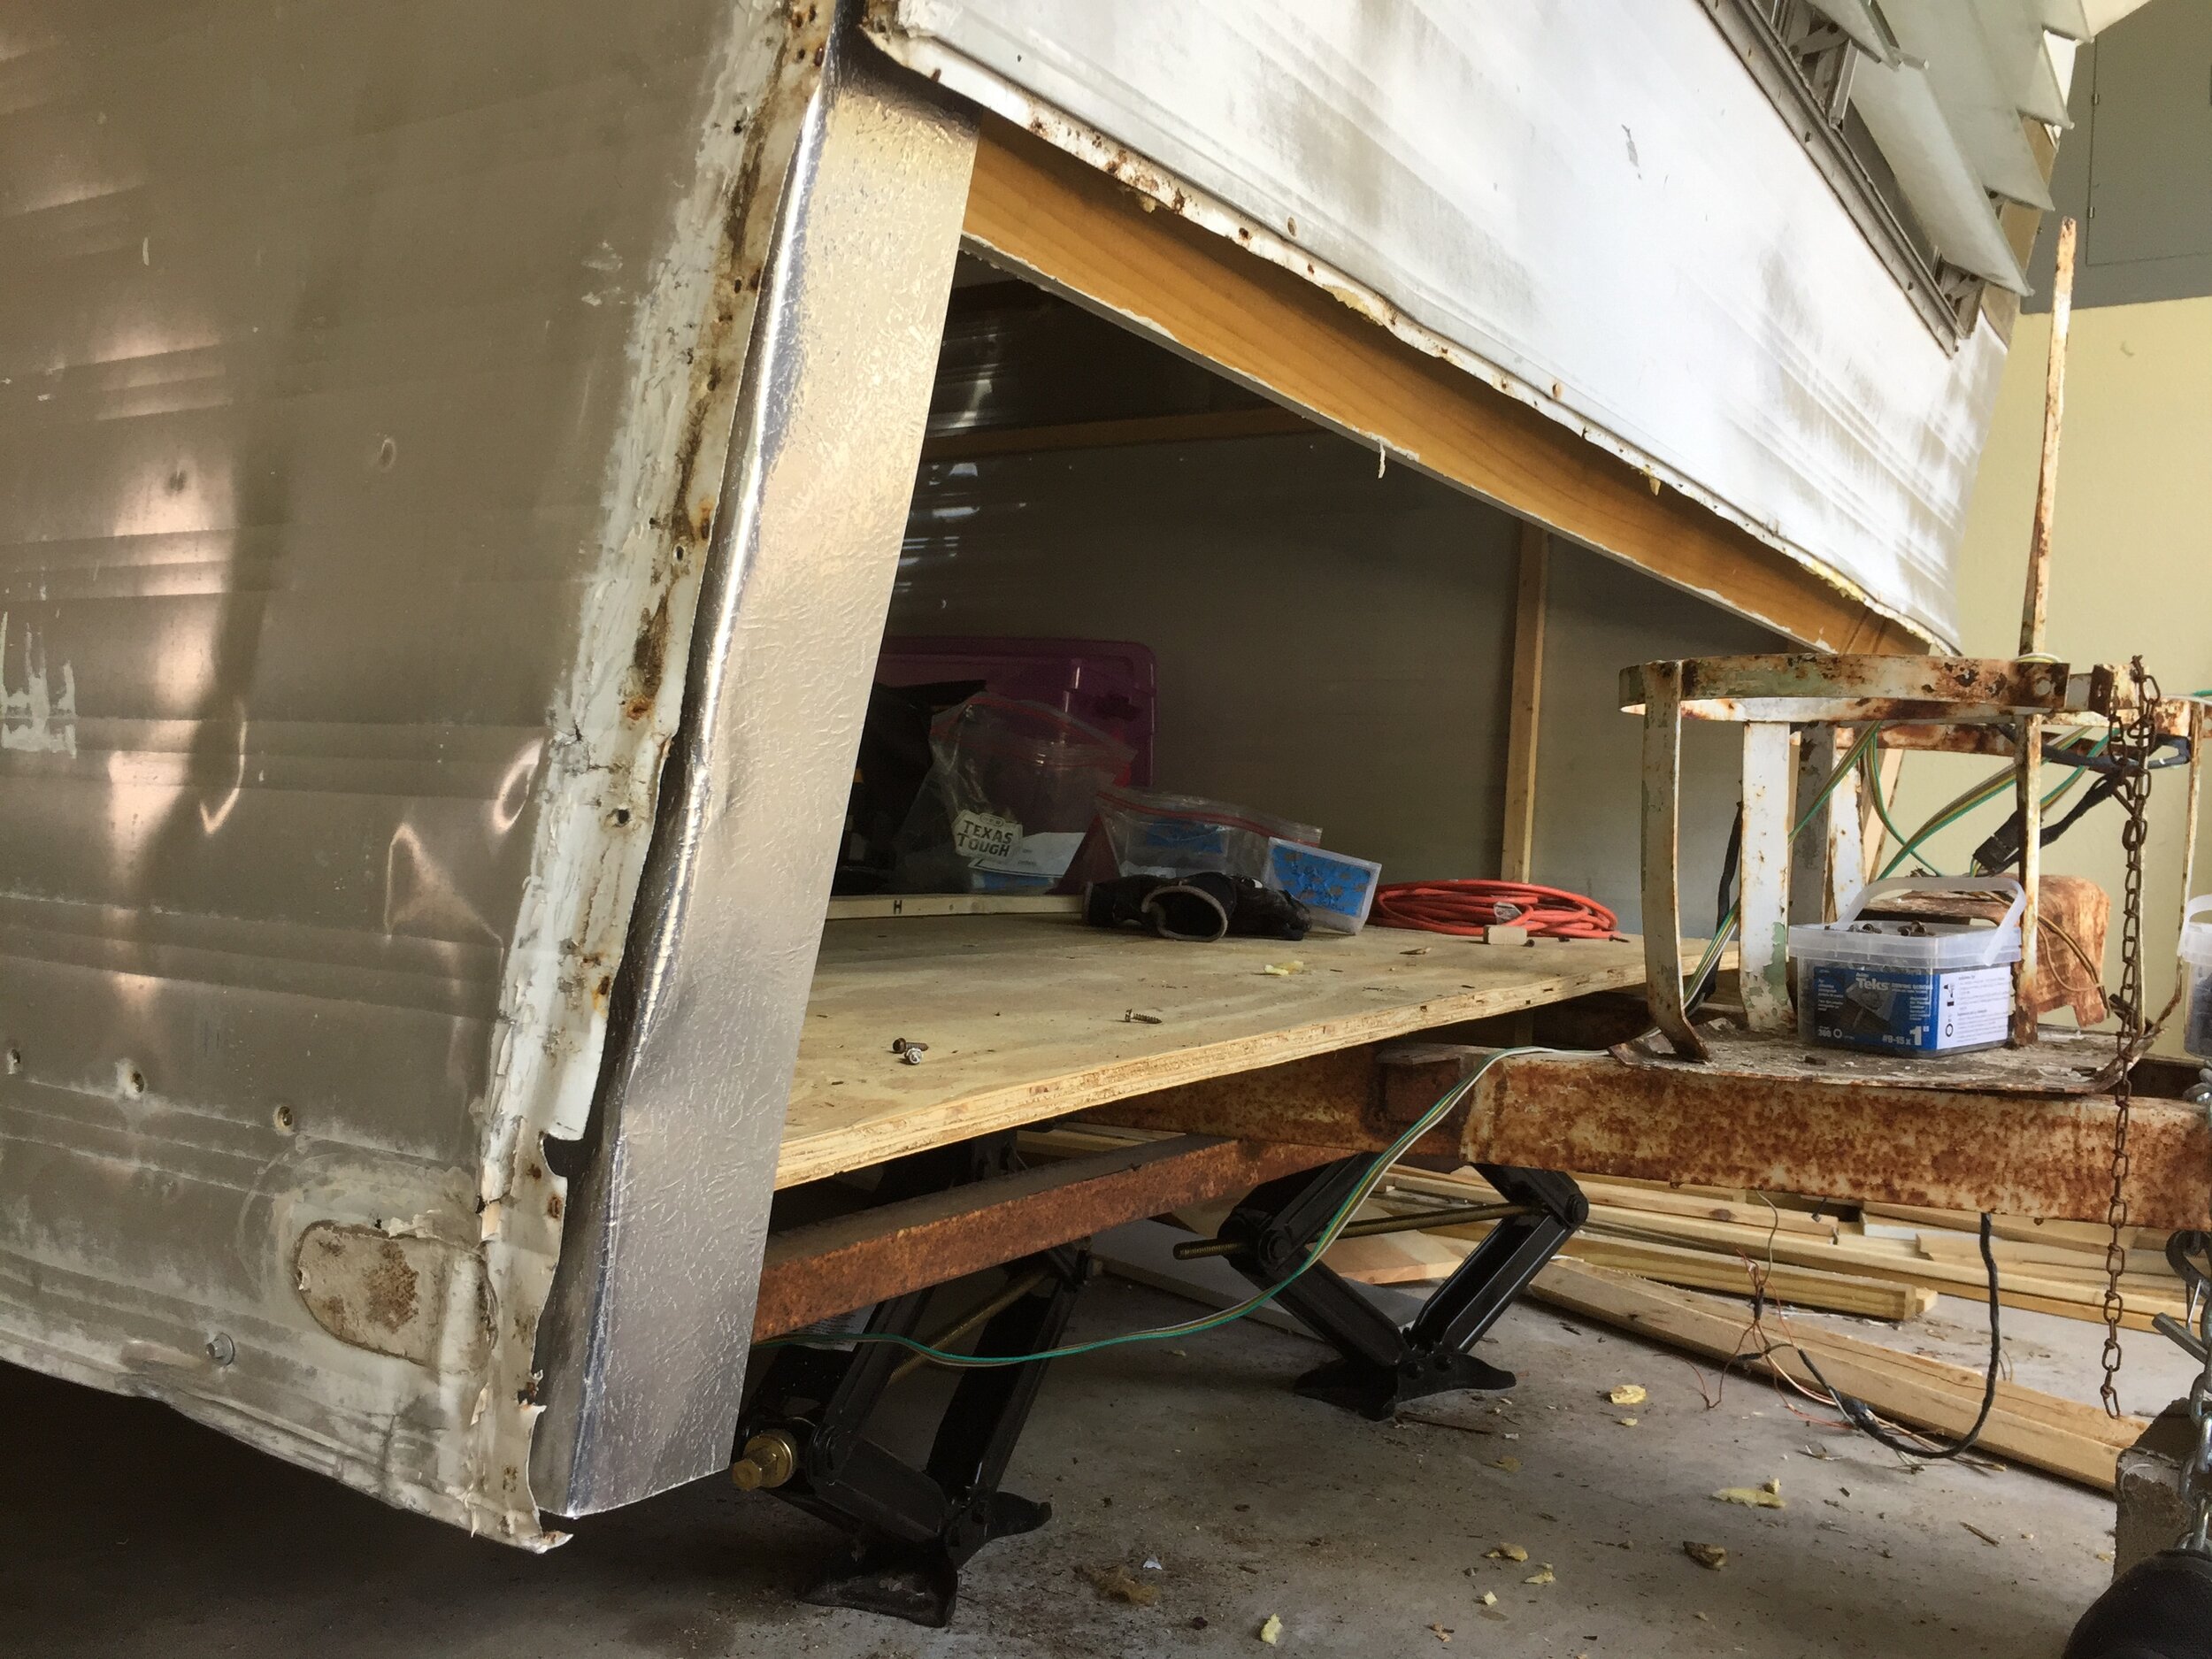
You can see in the photo below (please forgive the quality) how the side floor joists of the camper sit lower than the middle metal tongue/front of the camper floor. Because of this, we needed to set the metal sheet lower than the trailer tongue to be able to hide the front of the side floor joists.

The solution we came up with was to notch the diamond plate sheet to fit tightly around the trailer tongue. We chose to have the metal shop cut our piece into a rectangle (84 x 20.25”), smoothing the cut edges for safety, and we’d handle cutting the notches ourselves – another reason we picked the thinner 1/16” diamond plating.
Notching the diamond plating
After we picked up our custom-cut sheet metal, we held it in place by hand and marked out where we needed to notch for it for the trailer (because sometimes measurements lie and we thought it’d be safer to mark the real deal in place than to go by an old sketch). We followed our Sharpie lines to cut the notches on-site using our grinder so that they tightly hugged the trailer tongue where it met the exterior wall.
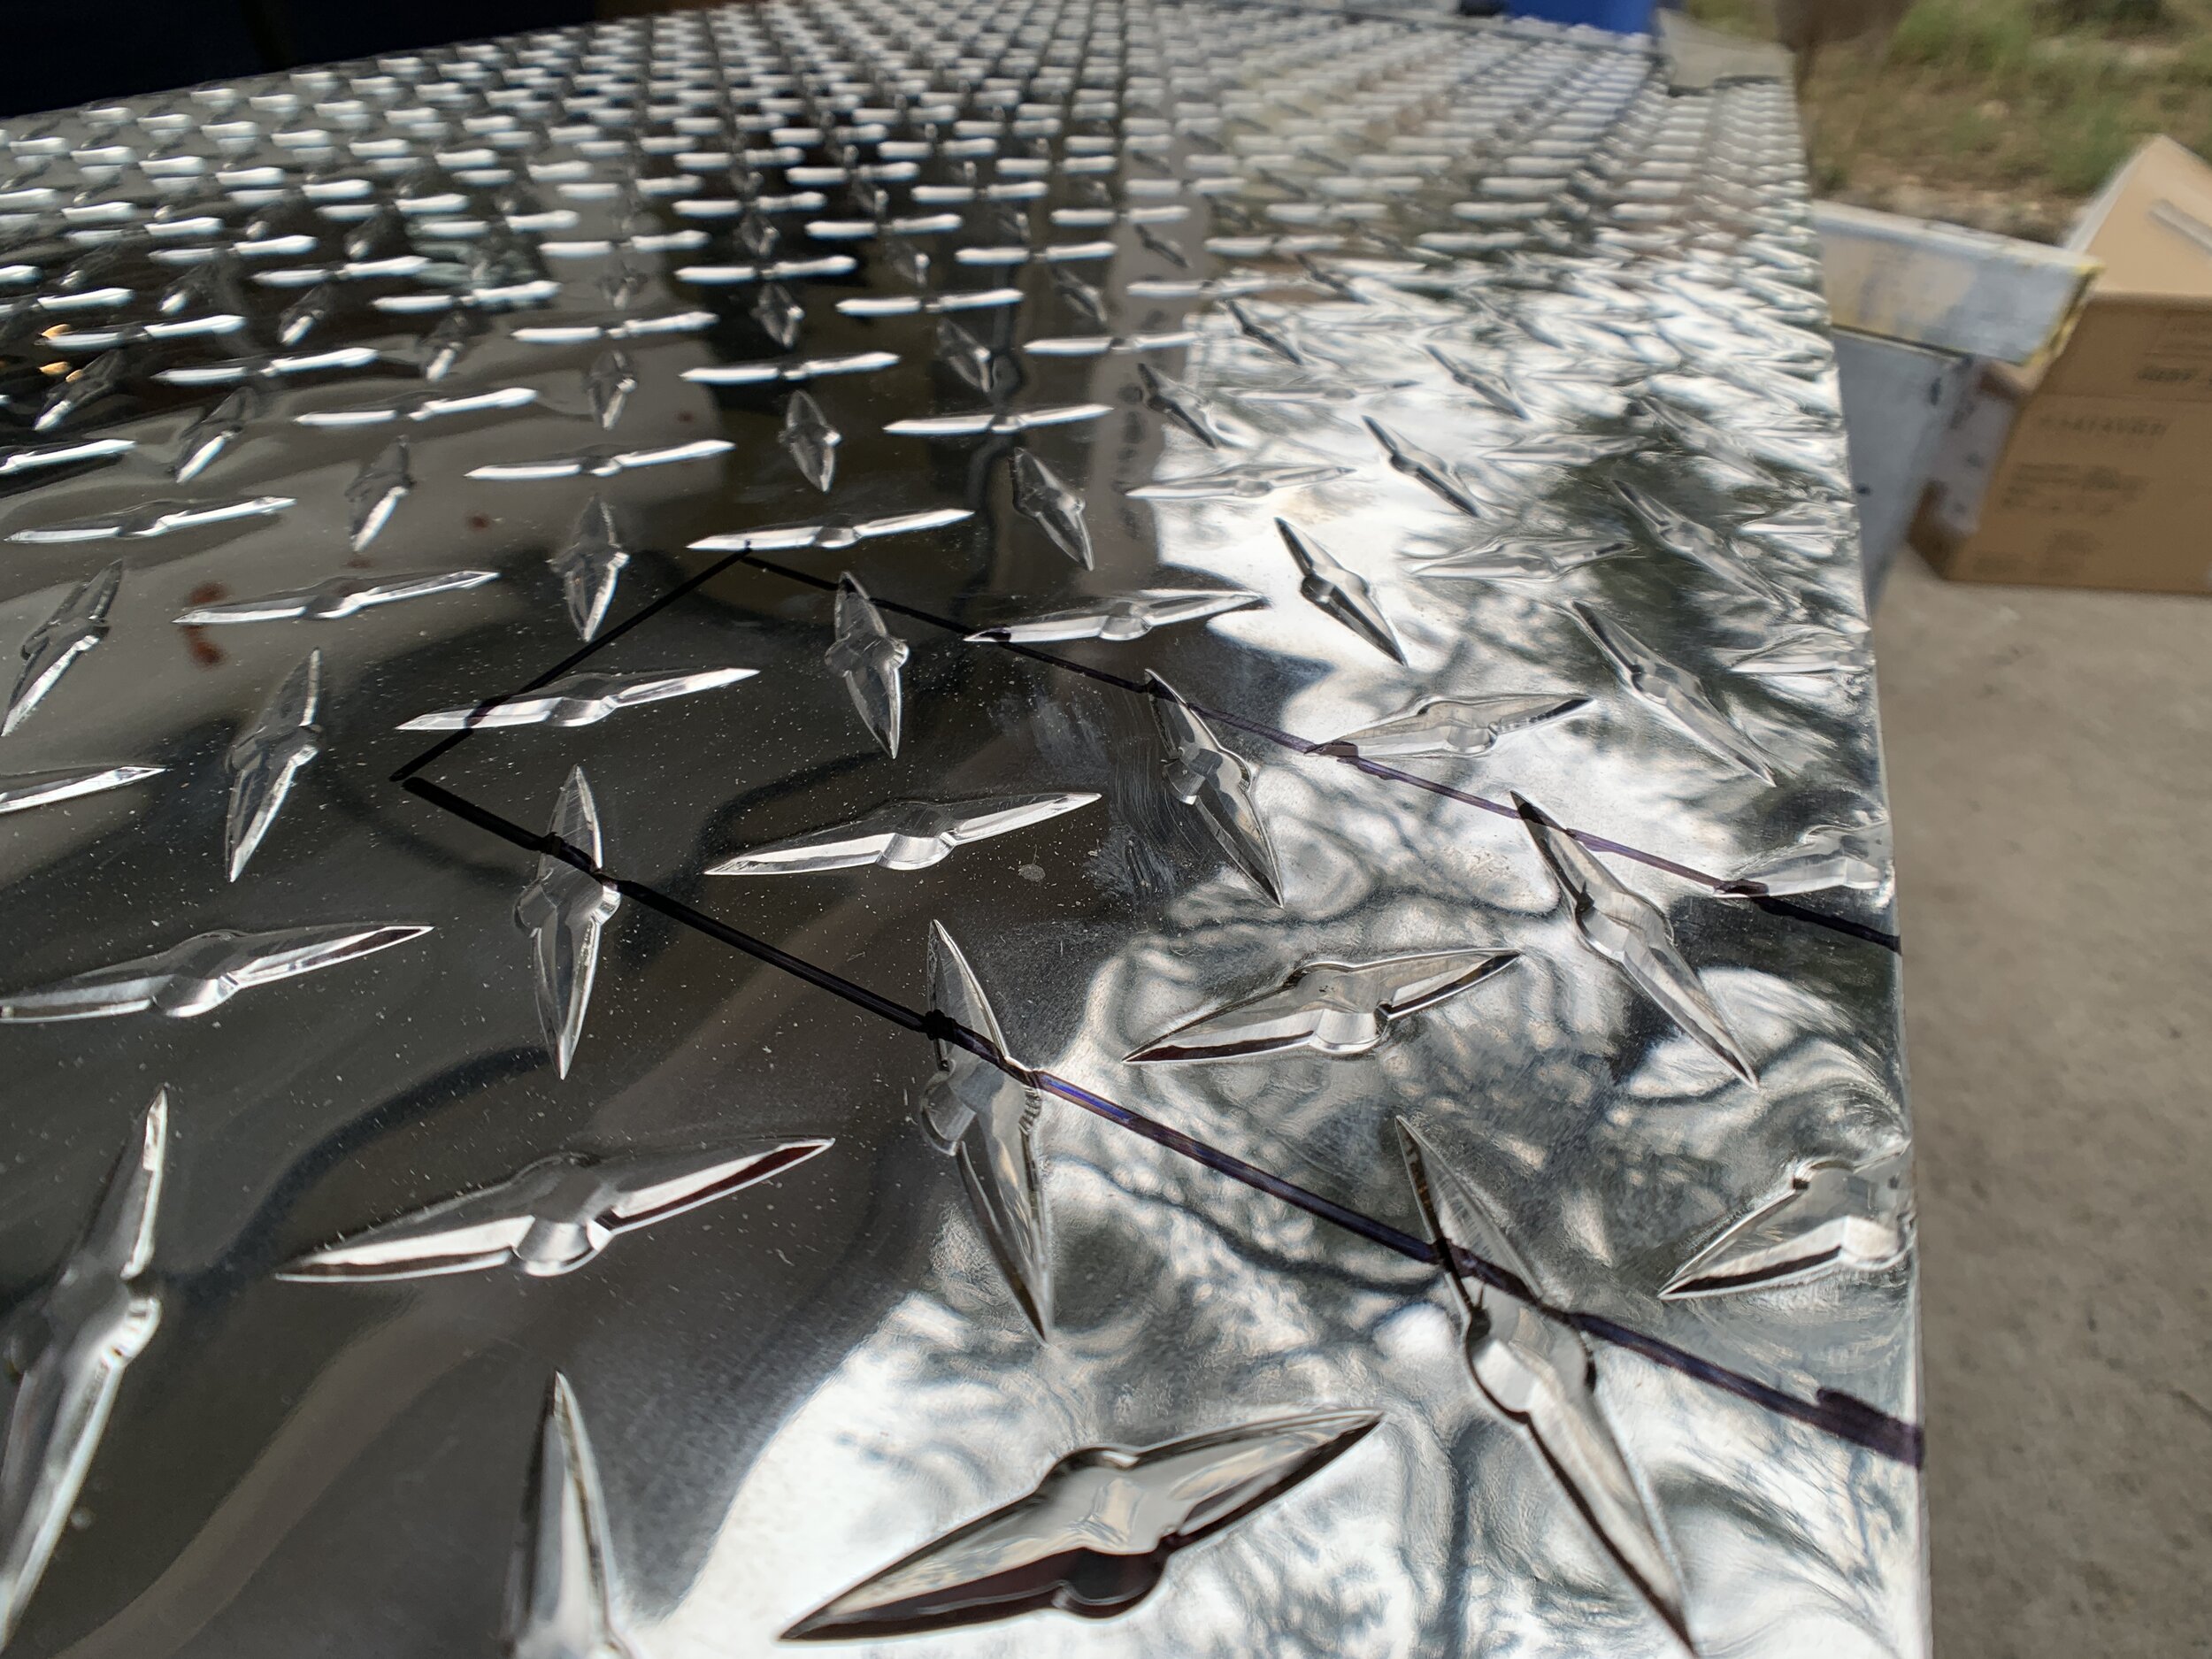


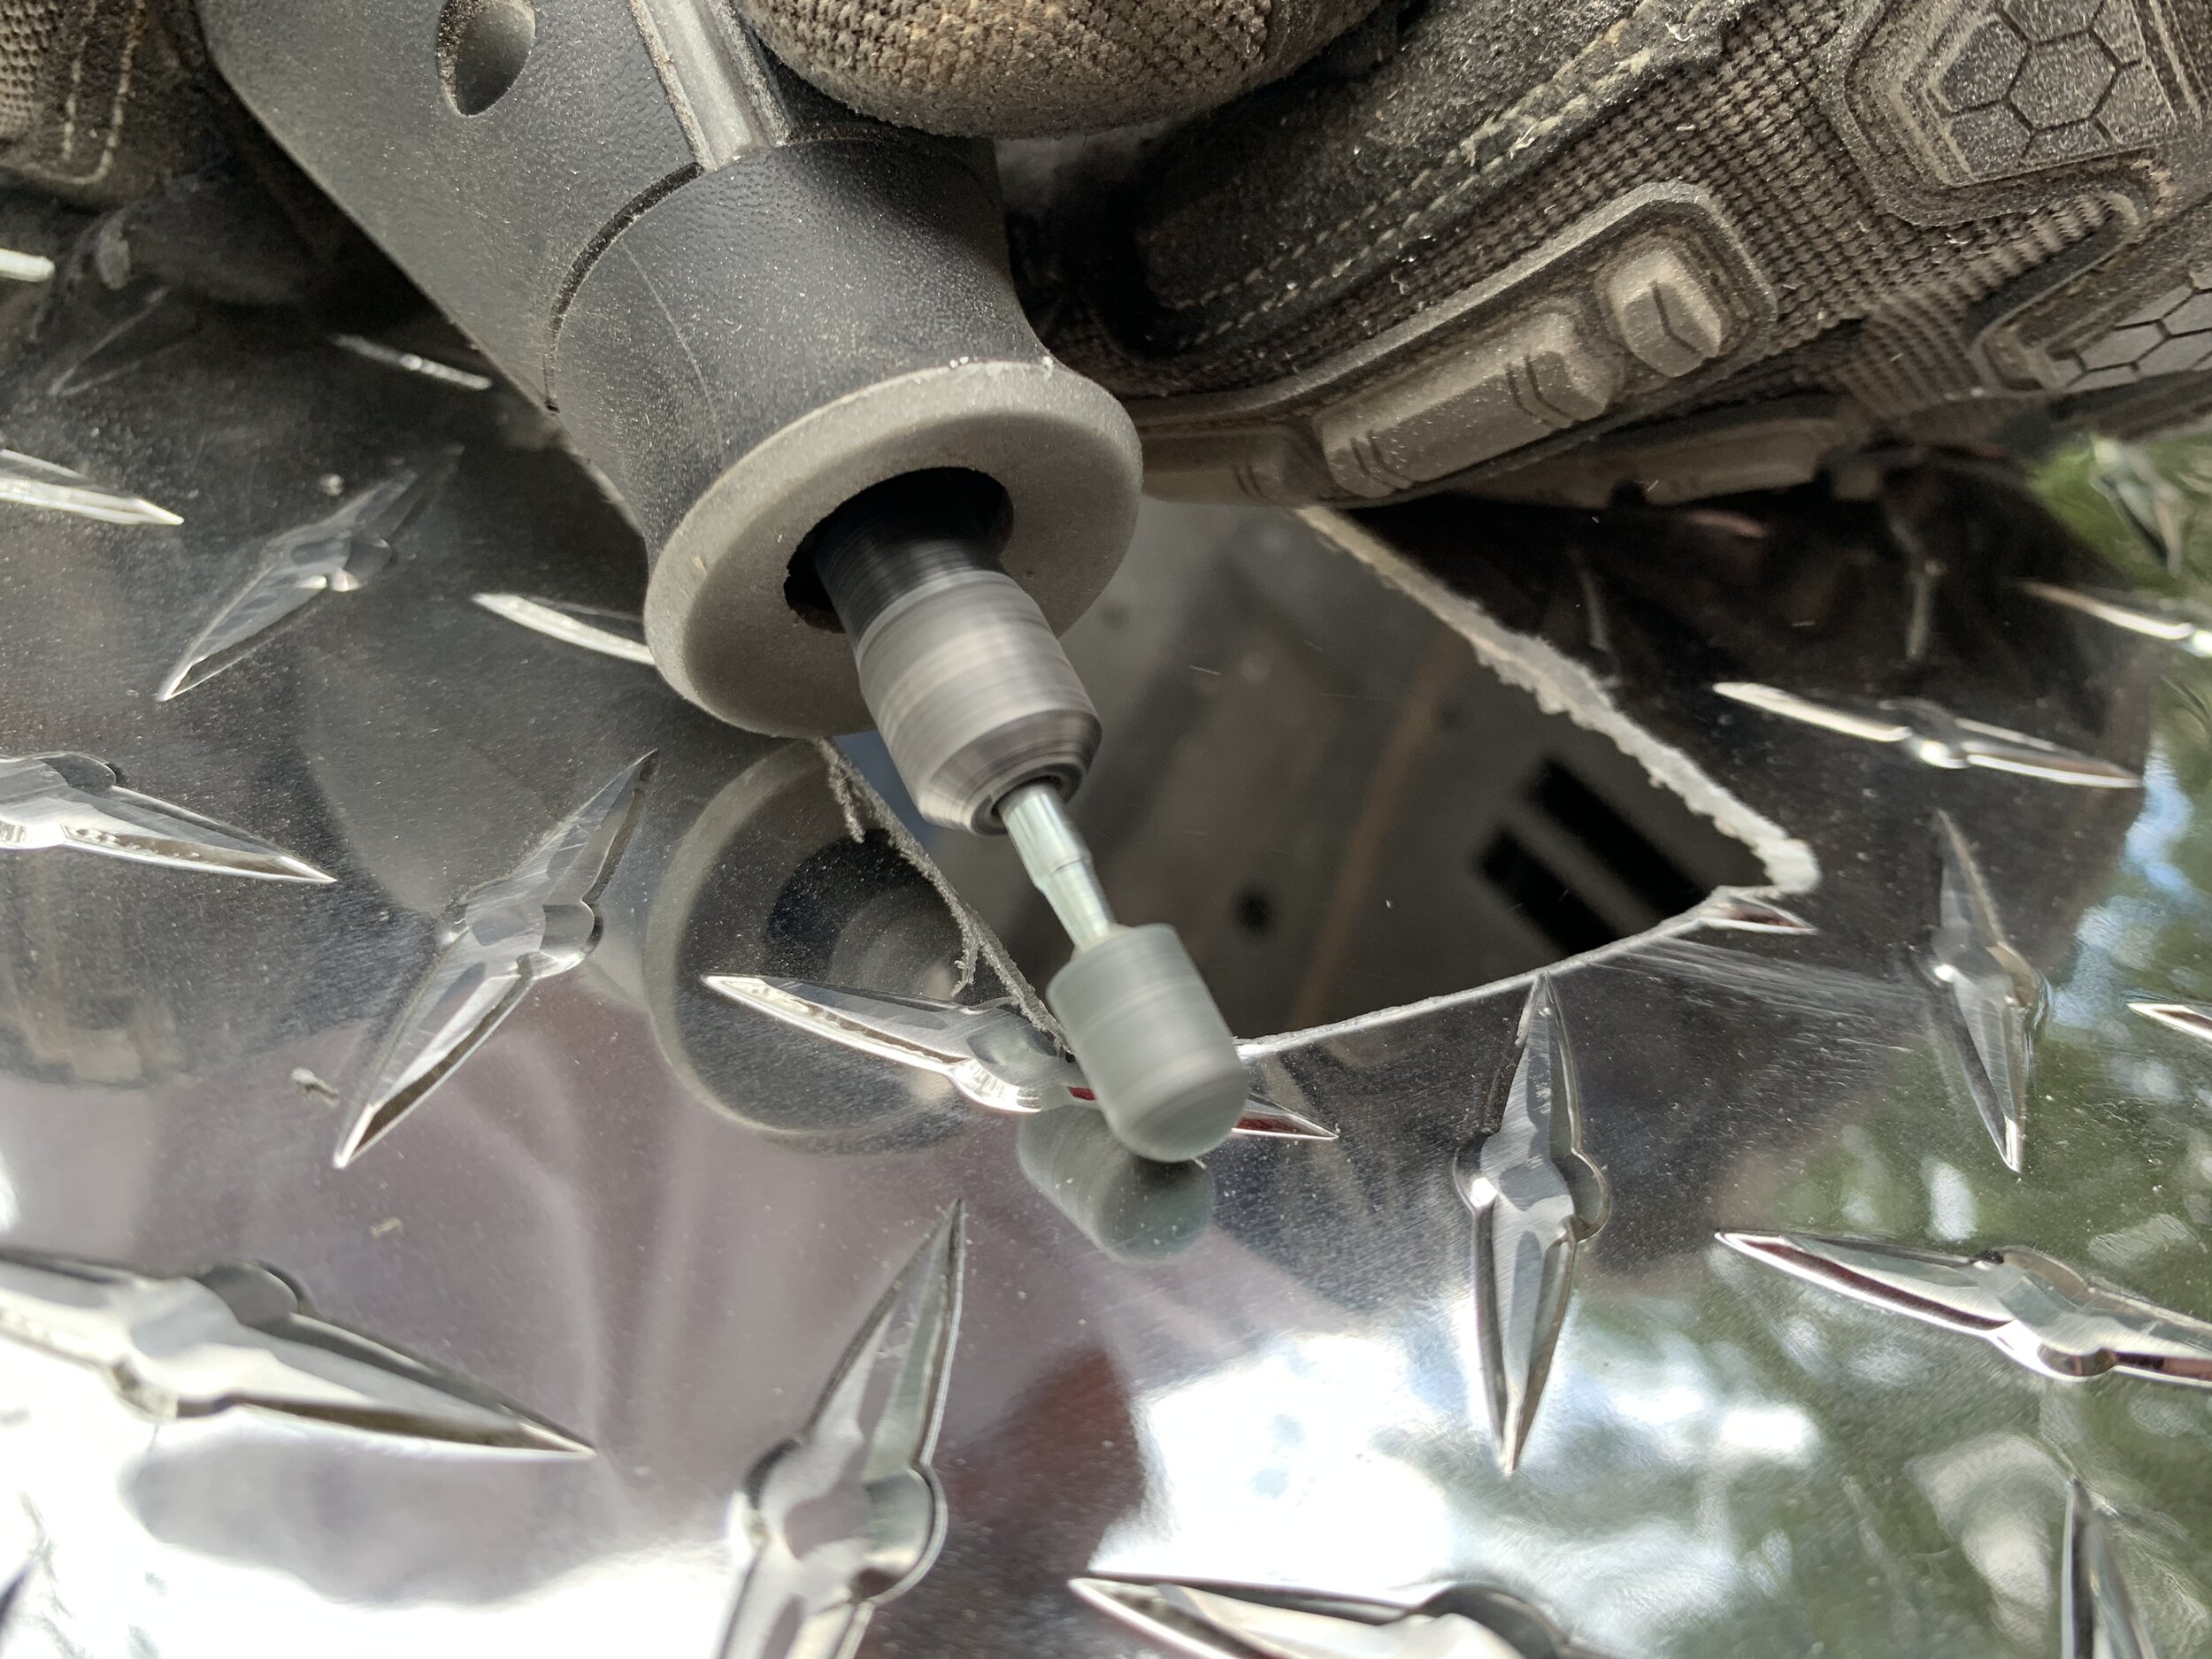
While Nick cut the vertical parts of the notches all the way through, we didn’t cut all the way through on the top/horizontal part of the notches since the grinder wheel is wider than our cut. After the verticals were cut, we flipped the sheet metal over to keep from damaging the front of the panel. We were able to score most of the way through the last cut with the grinder wheel and then after the metal cooled, we carefully bent it back and forth to snap the notch pieces off. Nick smoothed the edges using a combination of our grinder tool with a different wheel as well as a smaller, fine bit on our Dremel.
Installing the sheet metal rock guard
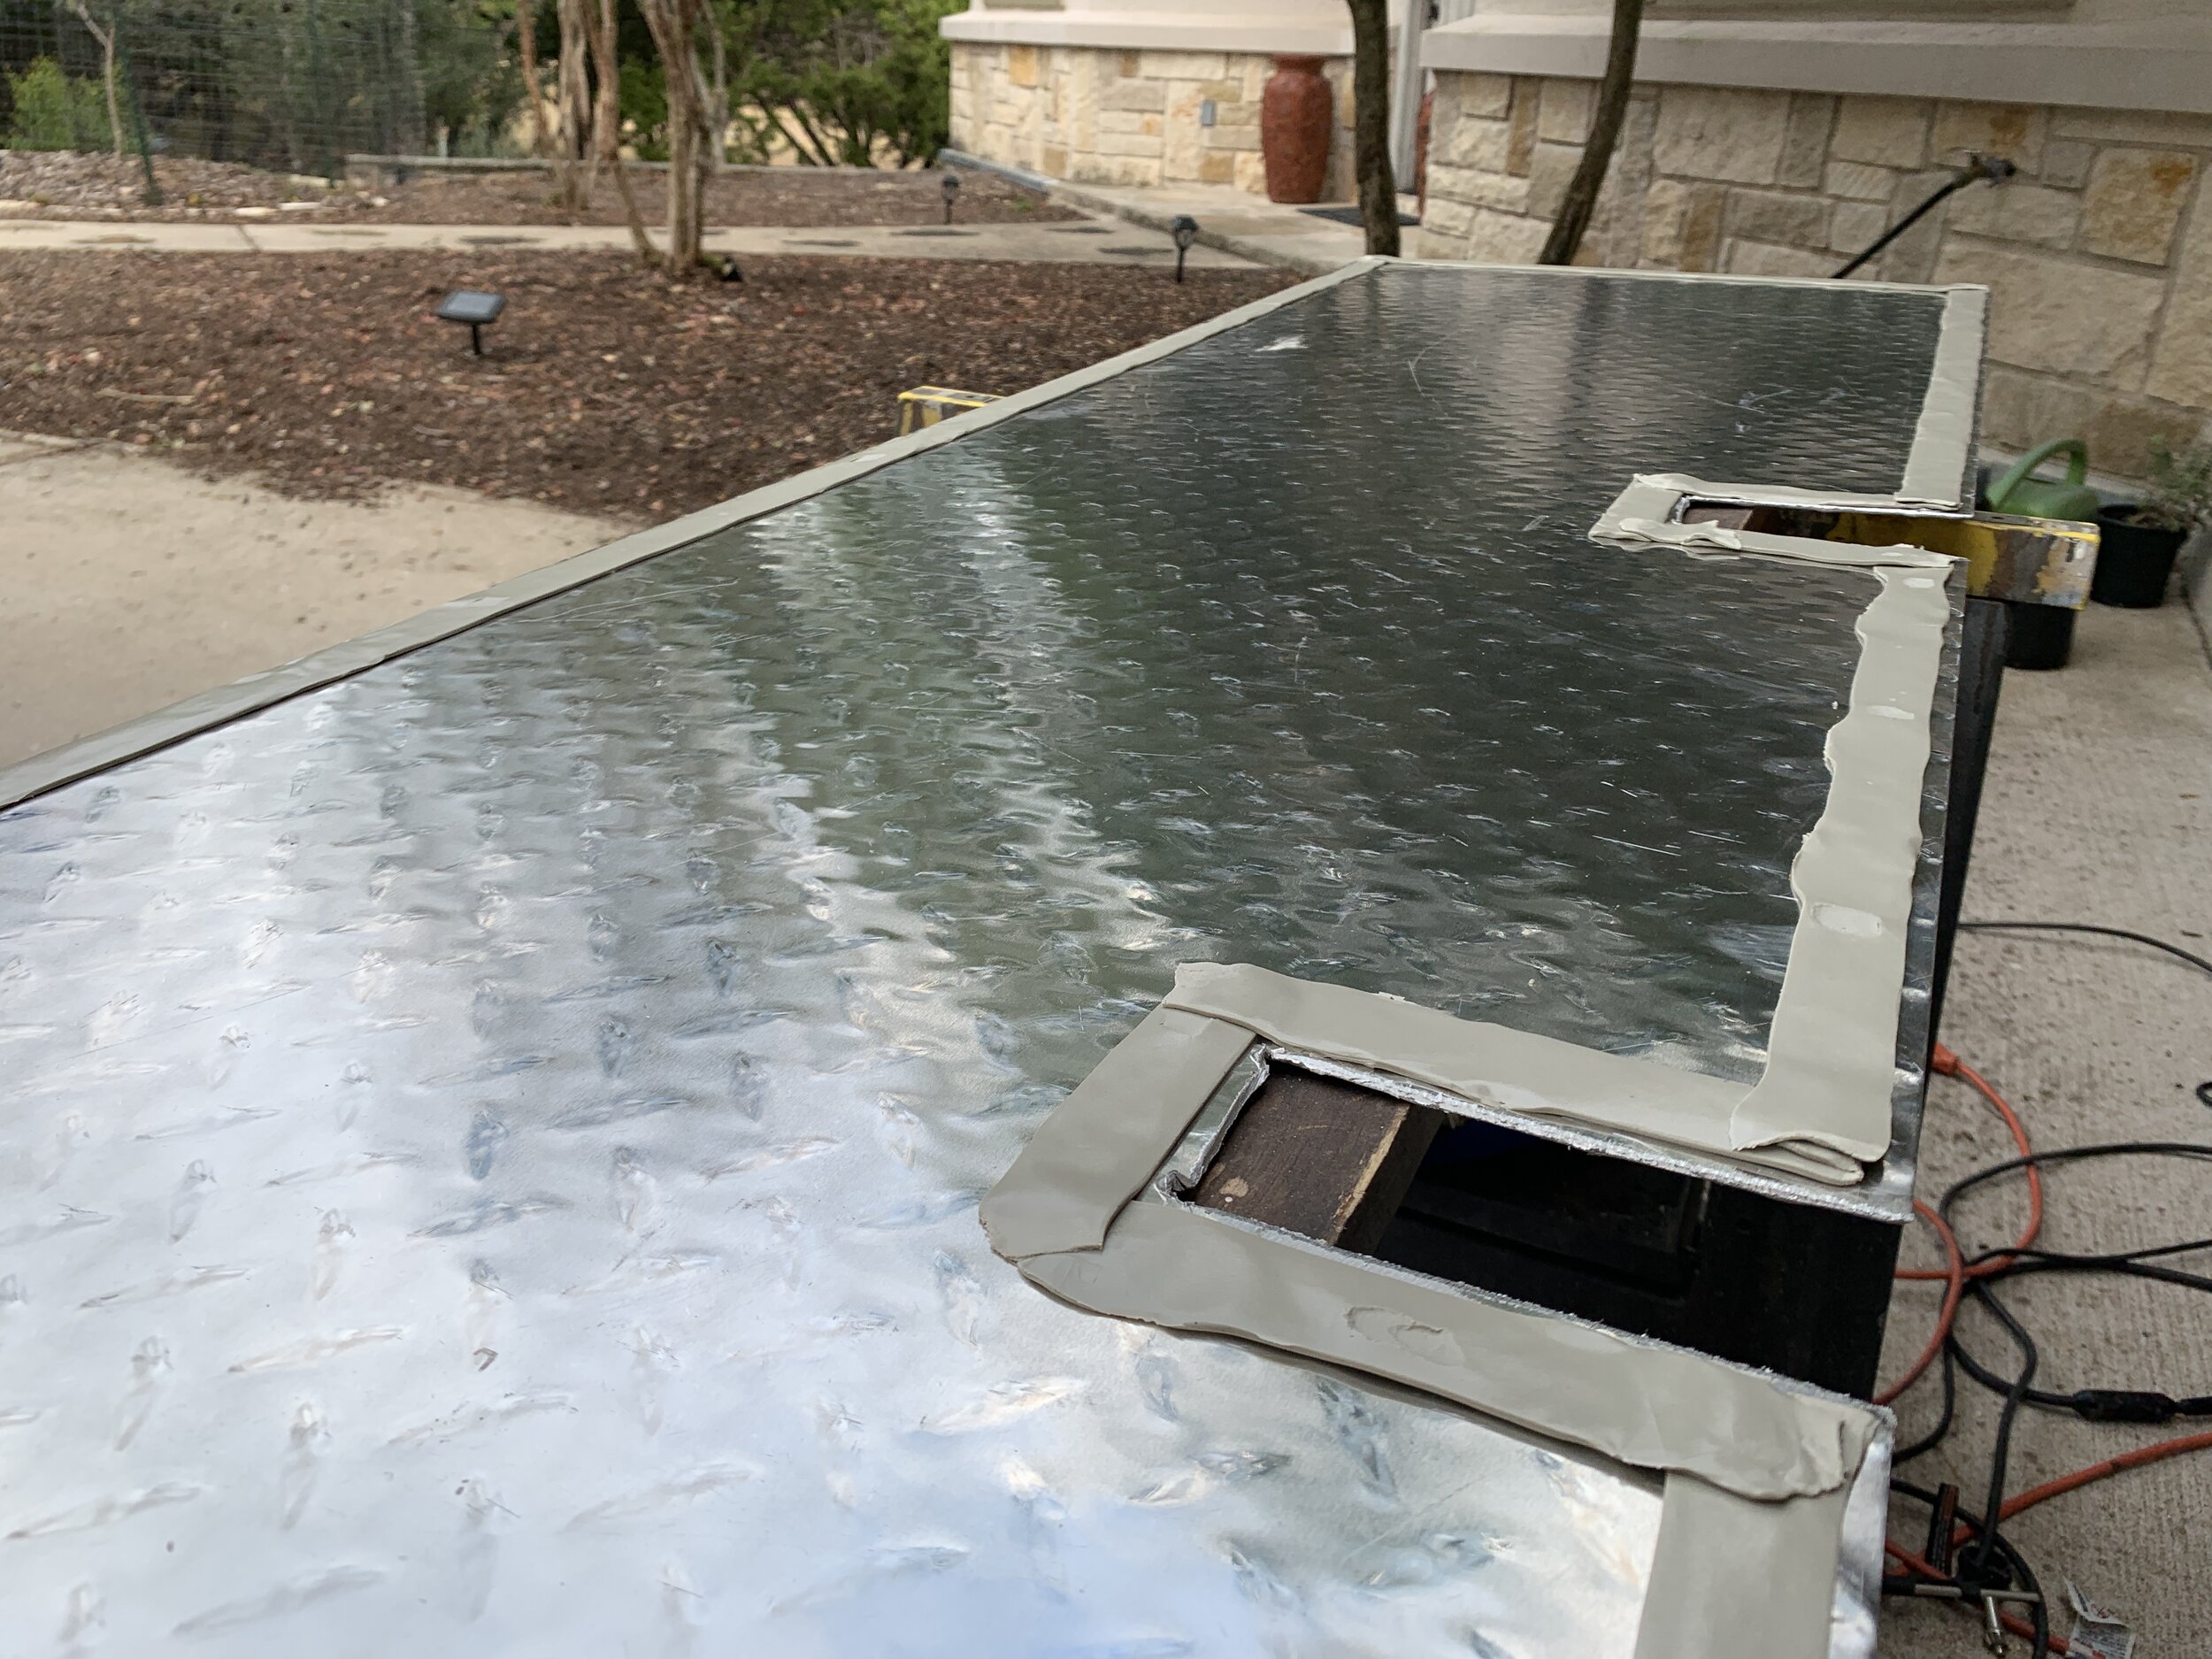
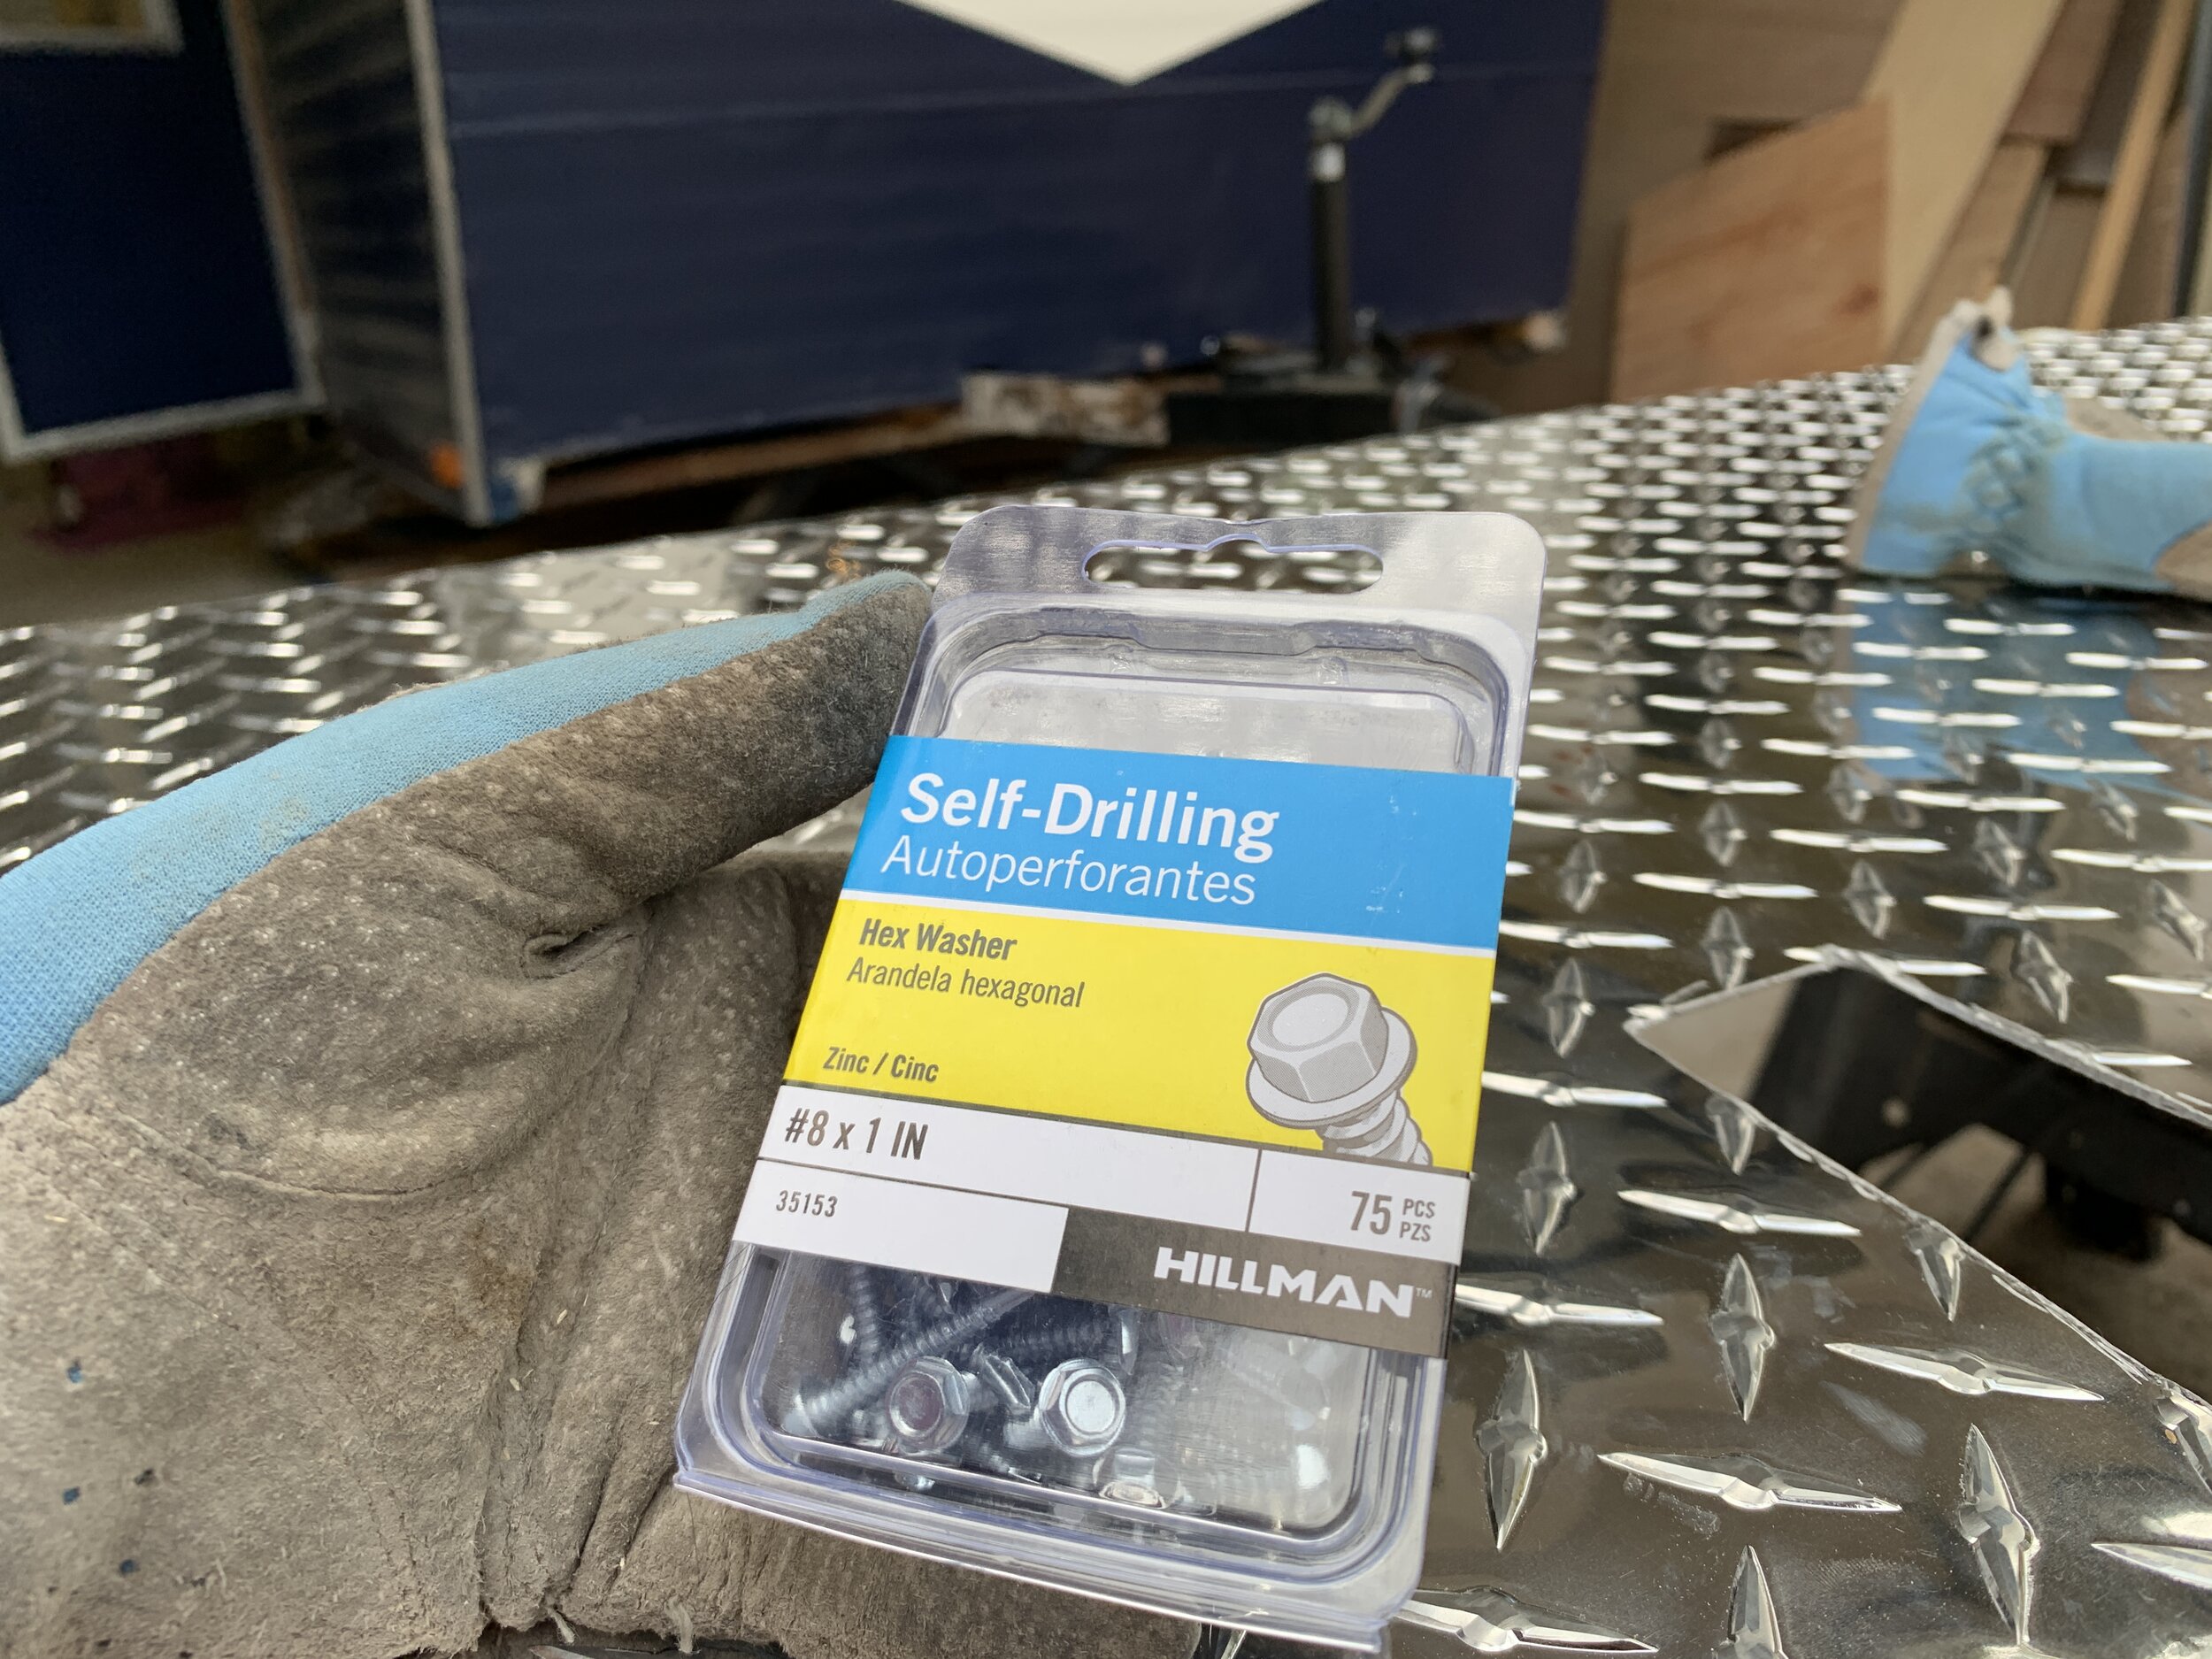
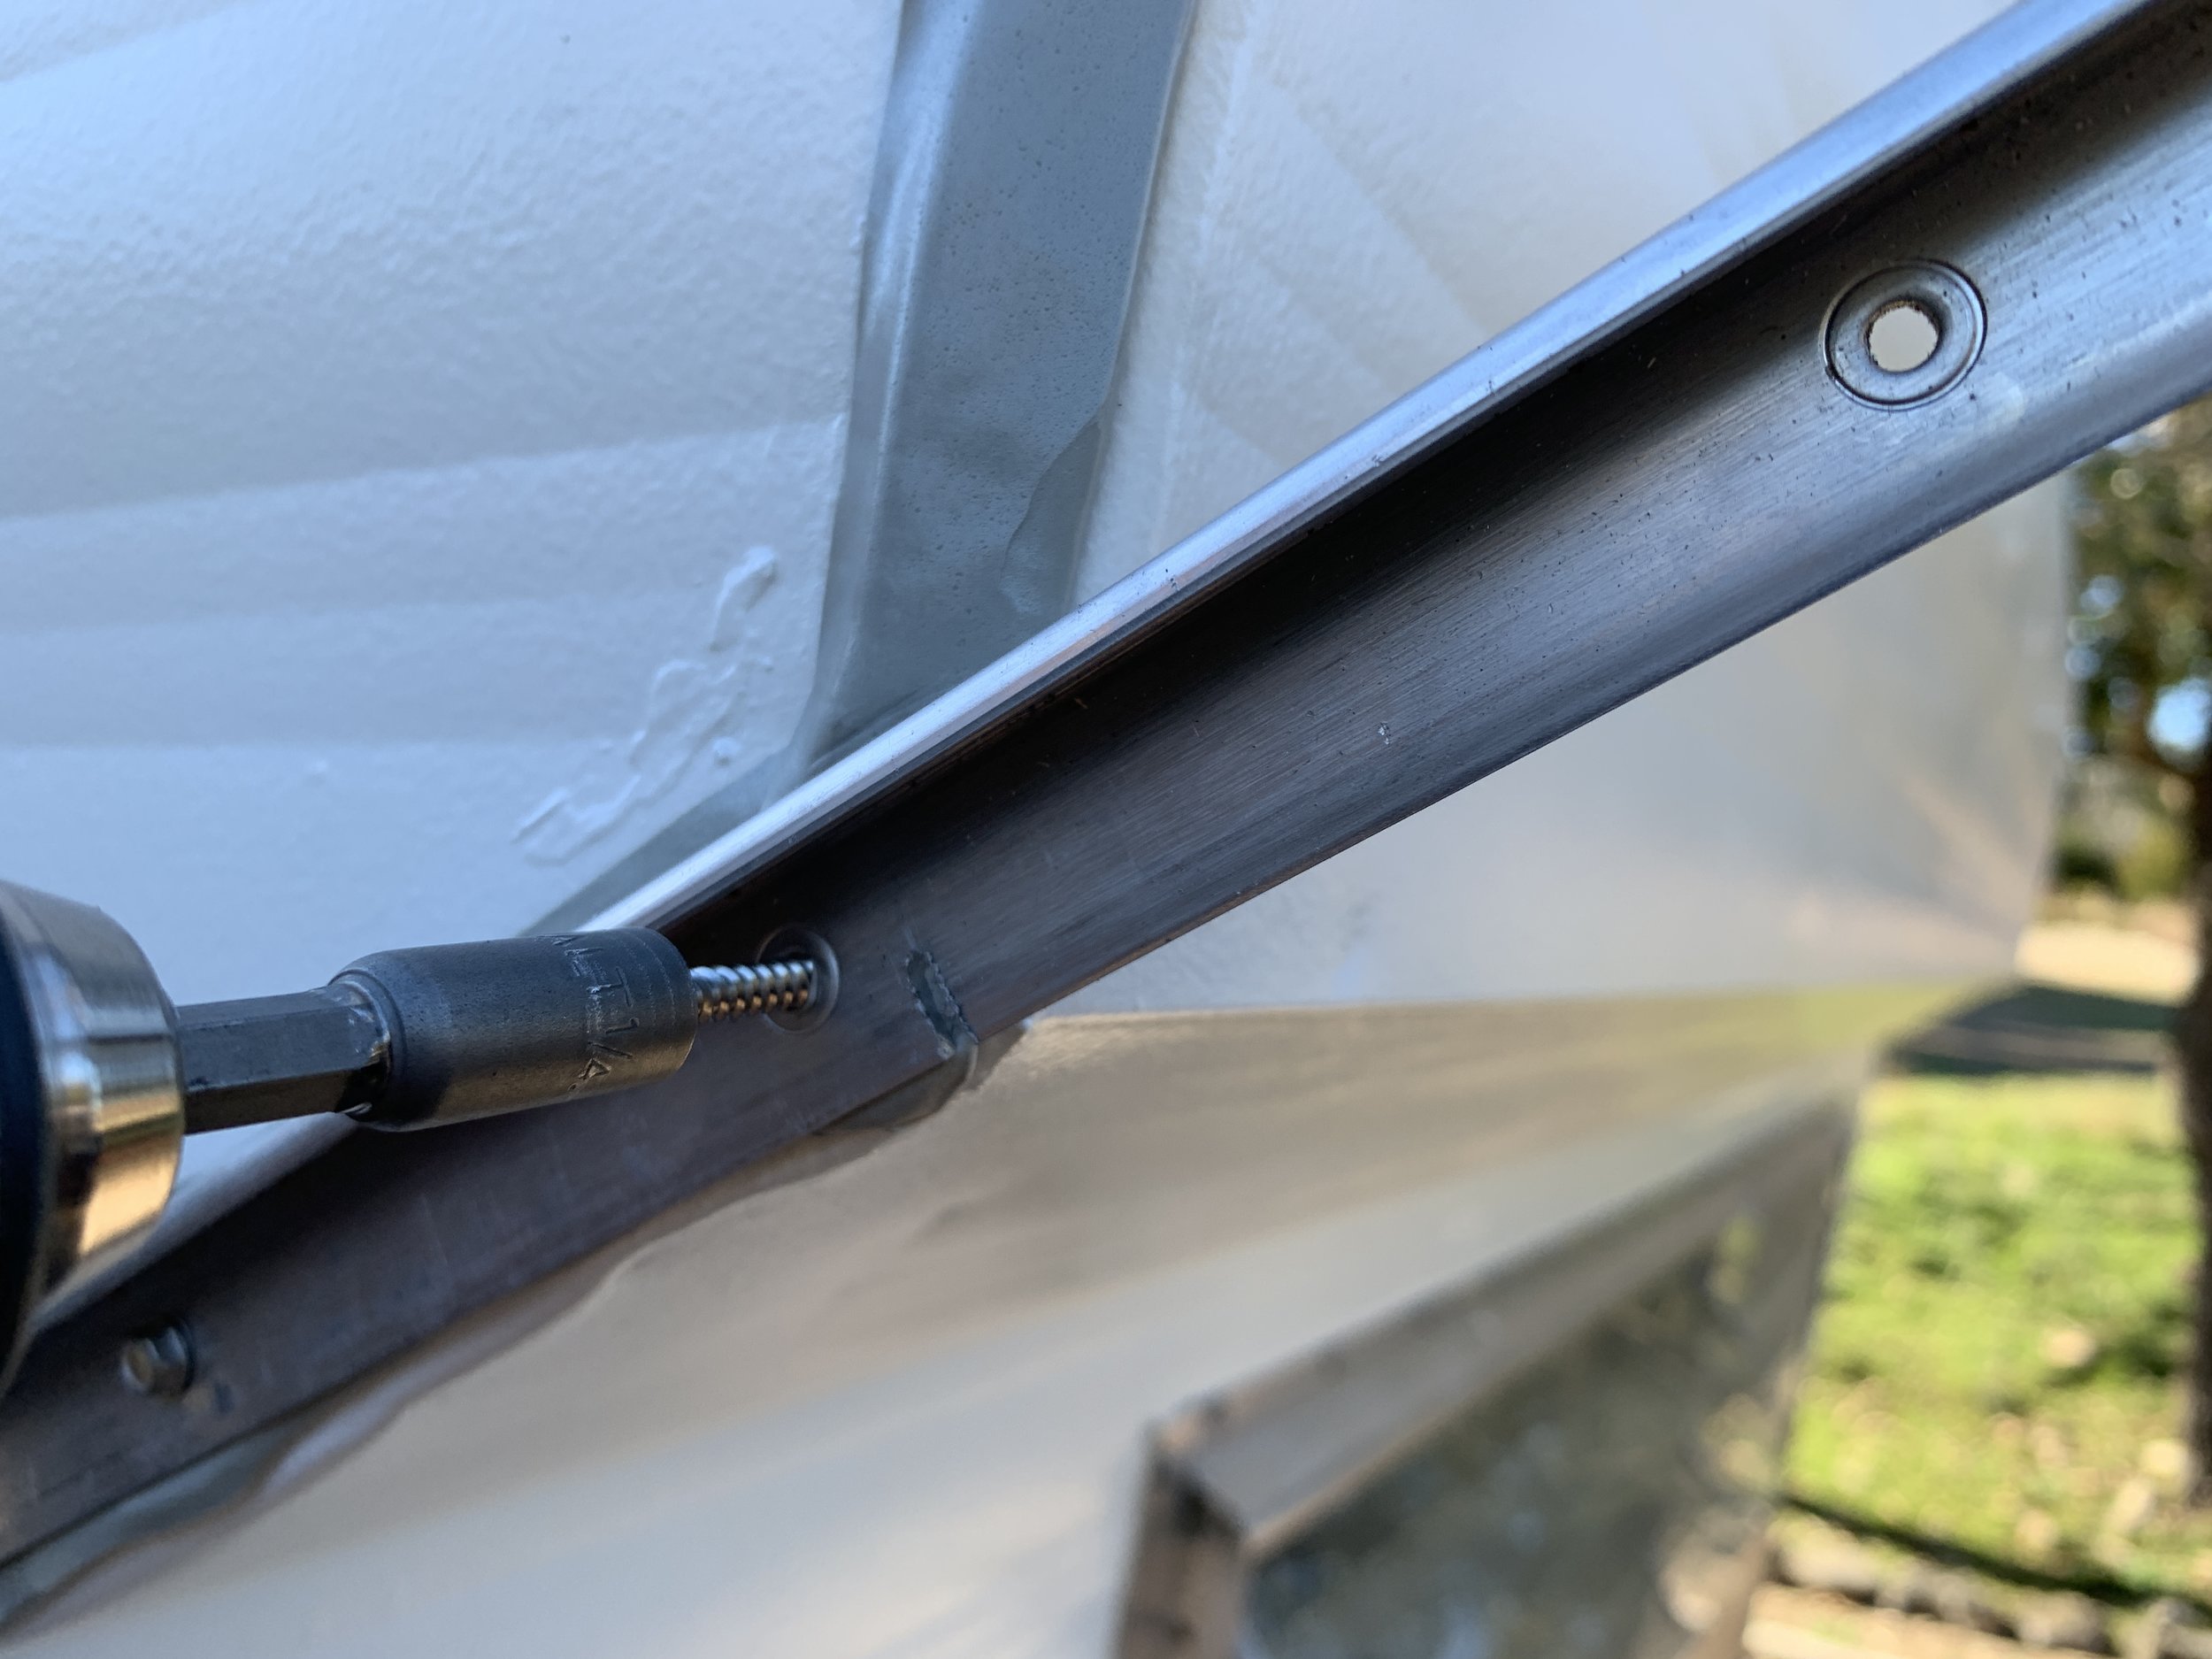
Once we had our metal panel notched out, we applied our trusty butyl putty tape to the back of the metal around the entire perimeter and cleaned the camper exterior wall so it was free of dust and dirt. We carefully aligned the sheet metal notches over the trailer tongue and underlapped the top of the panel under the camper’s metal wall seam to help water/leaves/debris not get trapped under/behind the diamond plate. After we had it in position, we firmly pushed it onto the camper’s exterior to tack it in place with the putty tape while we secured it in place with self-tapping 1” sheet metal screws. The entire bottom front of camper is plywood (vs. the sides, which are metal) so for the bottom row we used similar-looking stainless steel hex-head wood screws.
We didn't measure out our exact screw placement and instead eyeballed it – they're about 6" apart from one another. (We have four screws on each vertical side where the length of the diamond plate is 20.25" and 13 screws on the top horizontal edge where the length of the diamond plate is 84".)
We initially screwed a screw into each corner, then one in the top center (where our paint “V’s”) and then worked in additional screws in between. The most important thing here is for it to hold properly you want to make sure you're always drilling into wood and not just into the diamond plate and metal camper skin, which is too thin and flimsy to support the weight of the diamond plate.

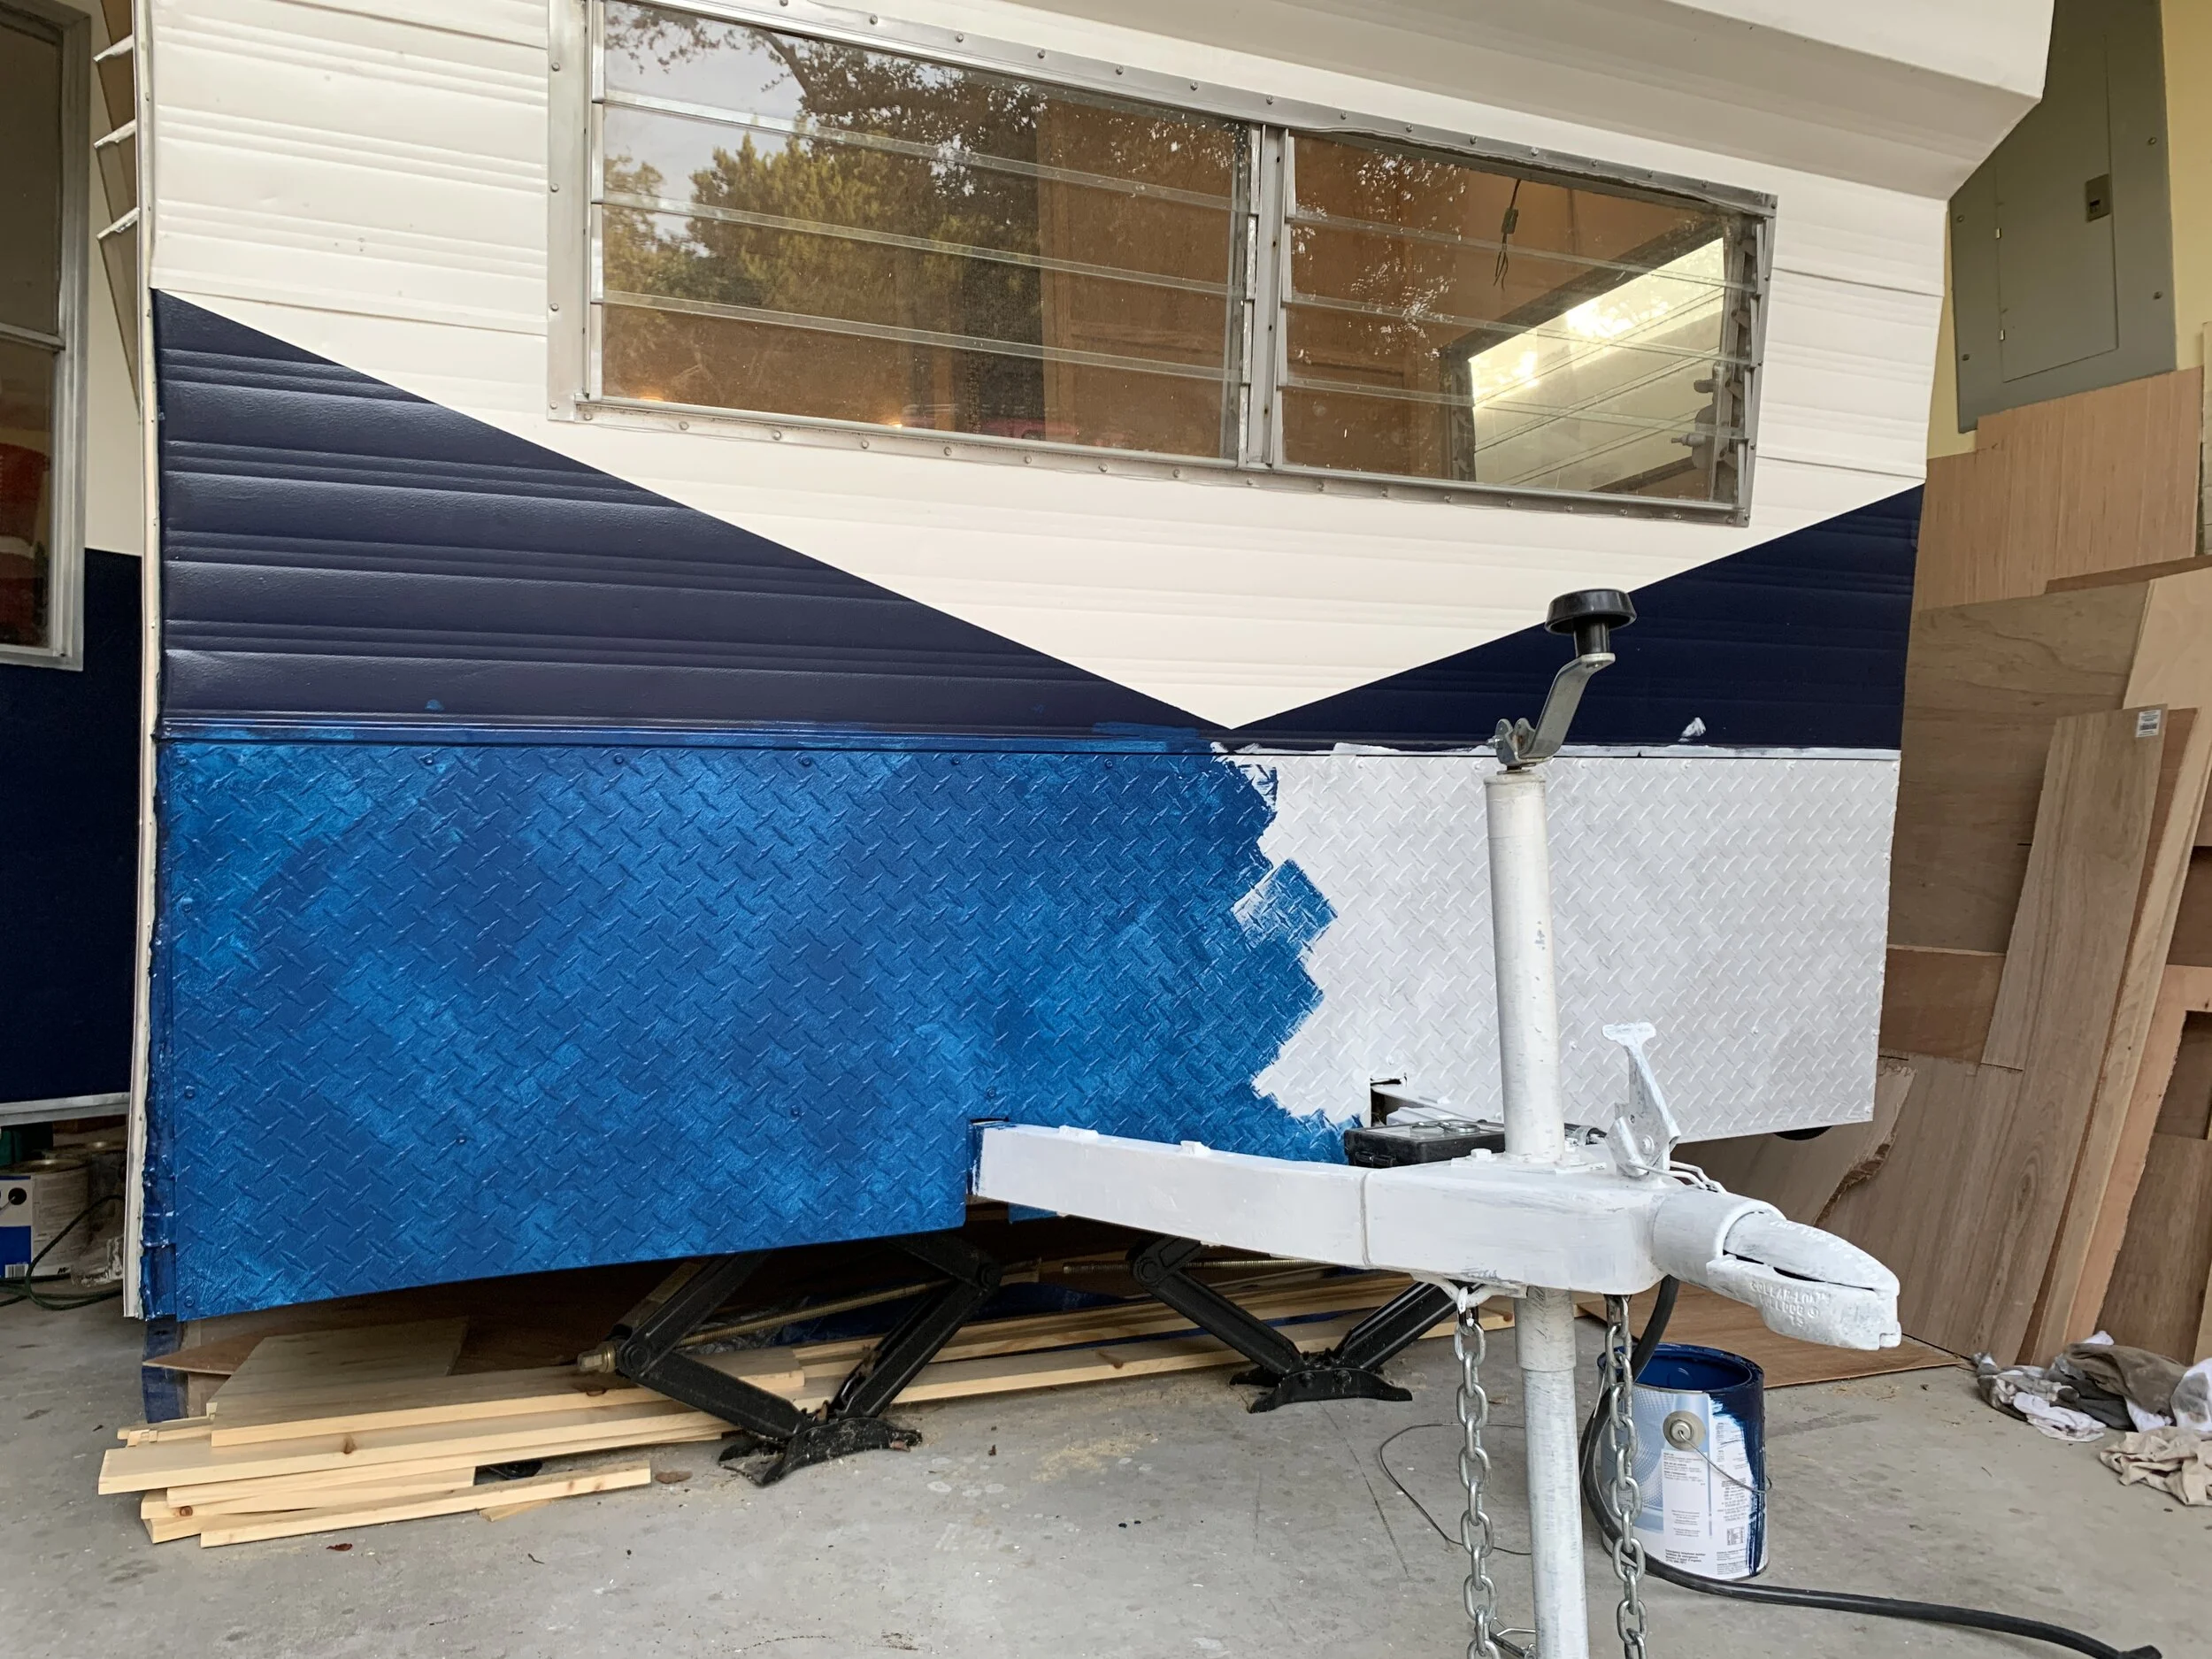
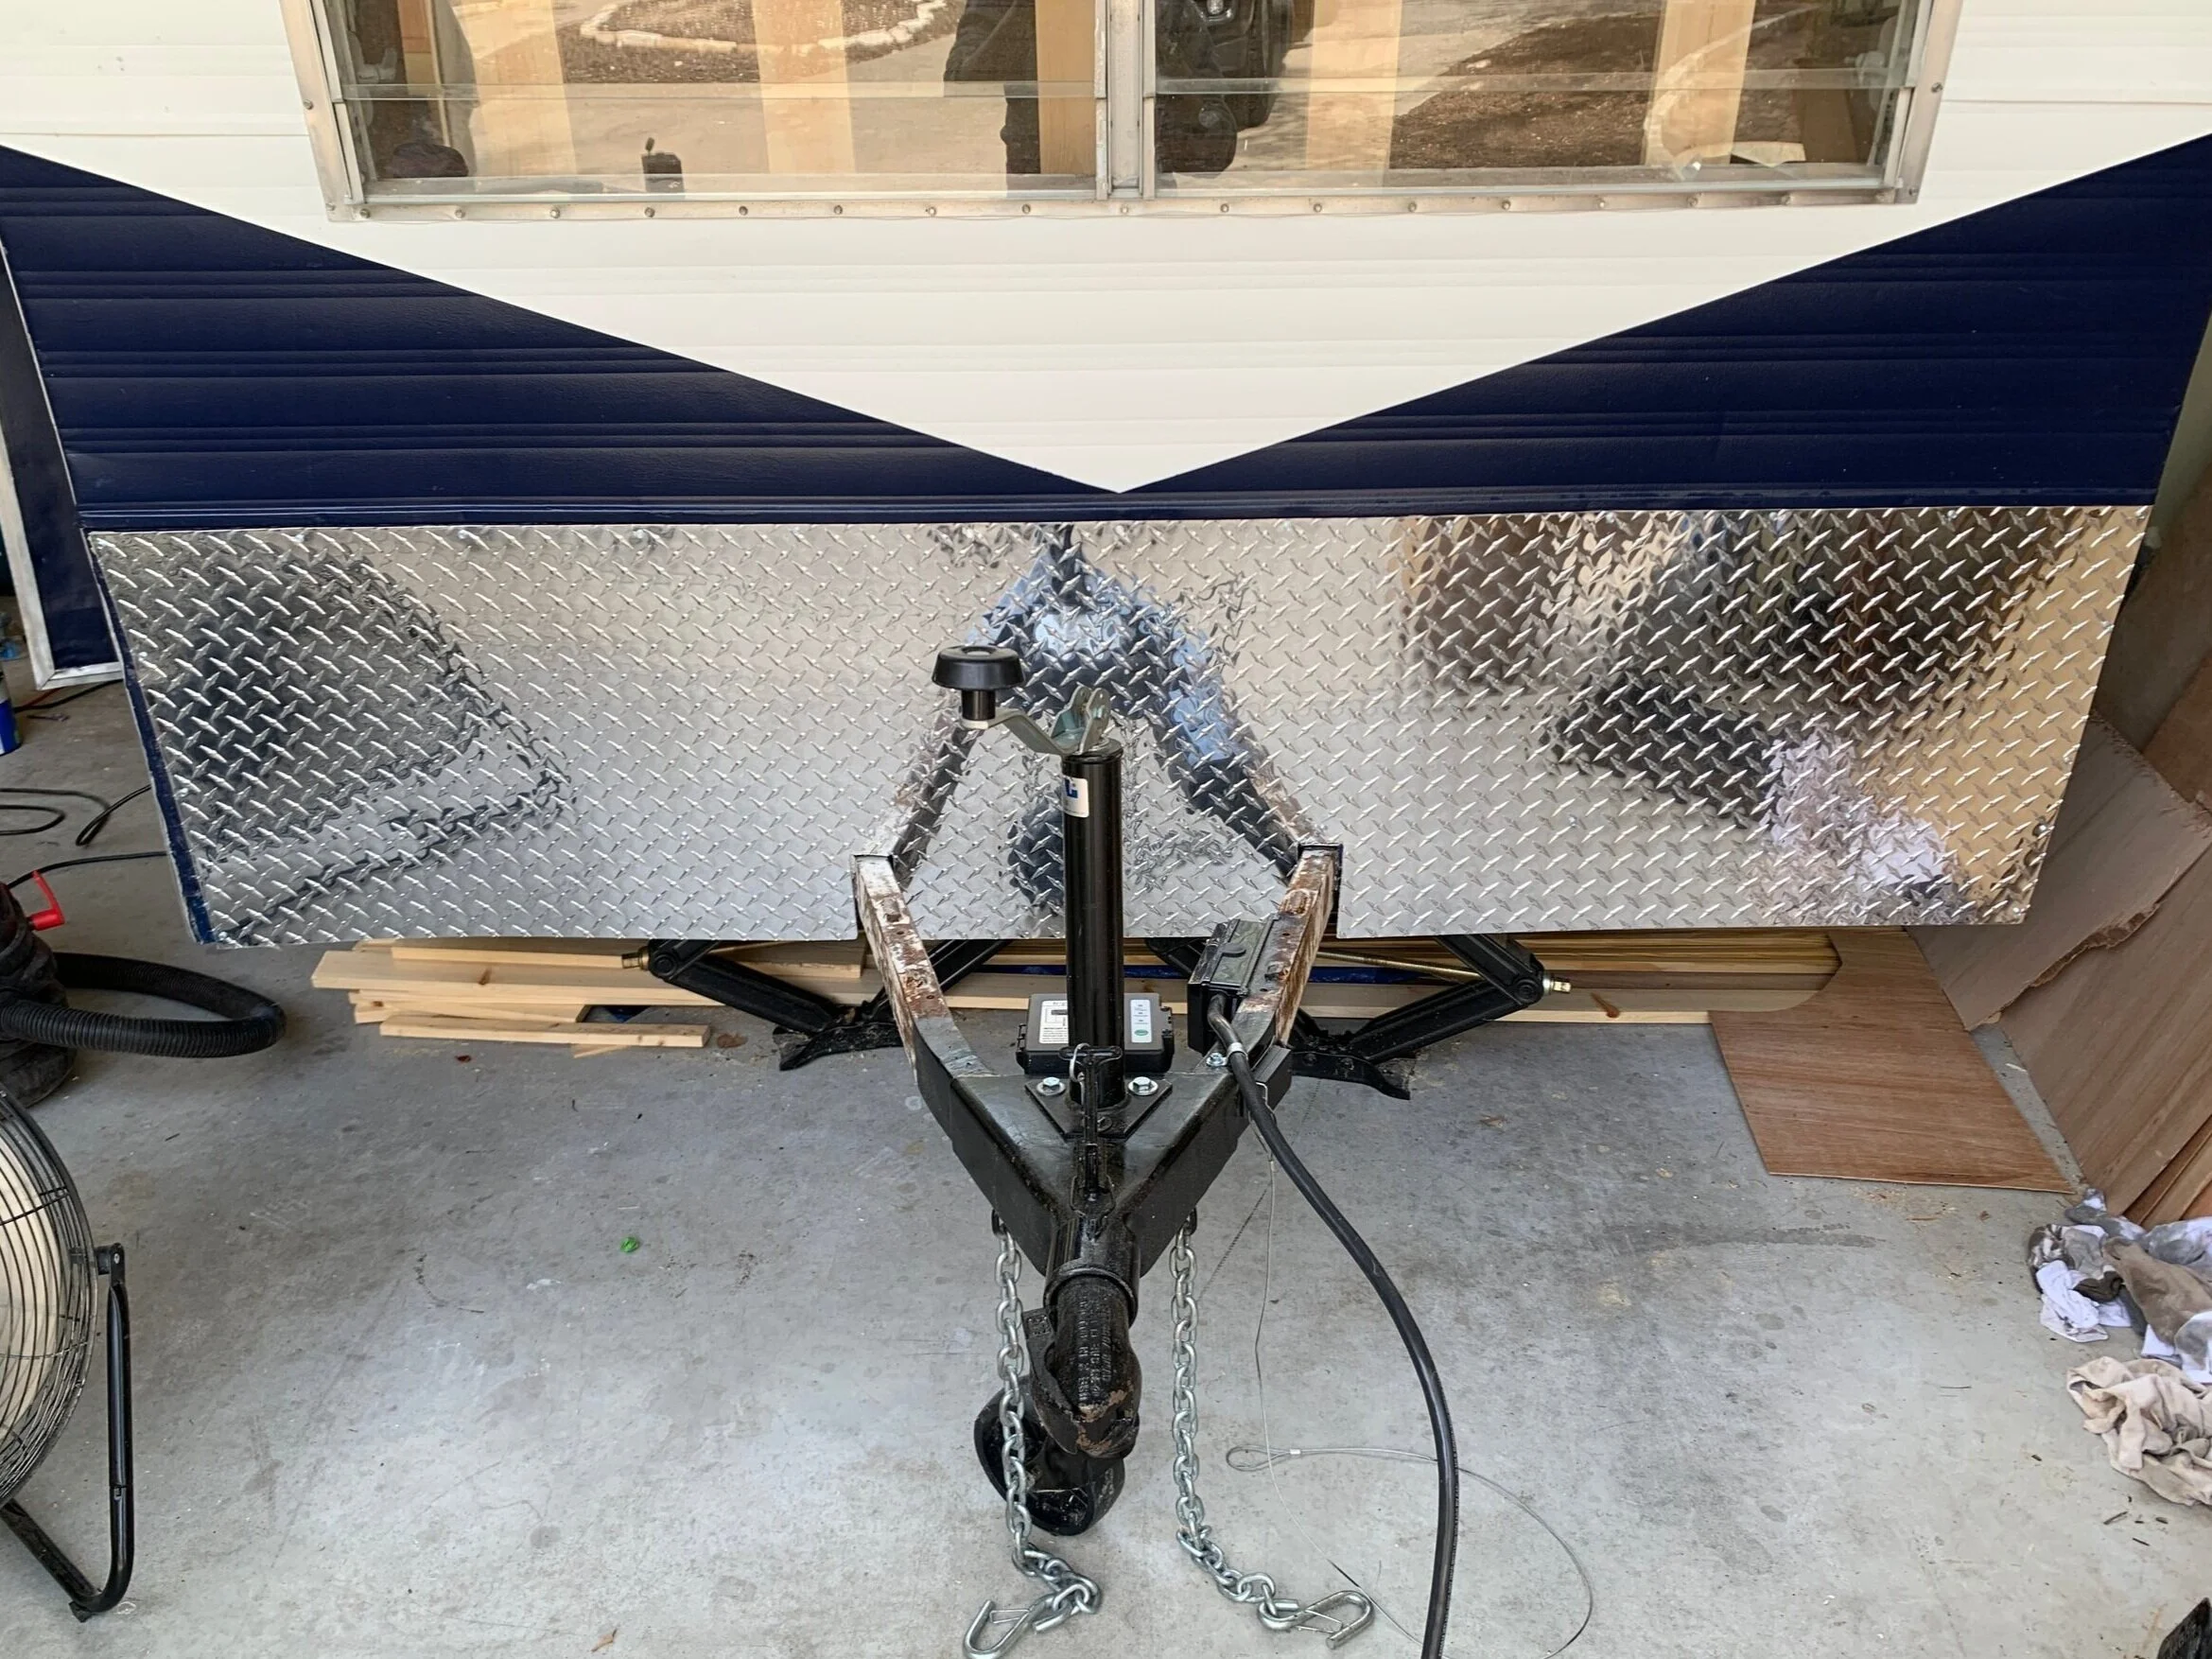
New diamond plating sheet metal install.
Finishing the metal to match
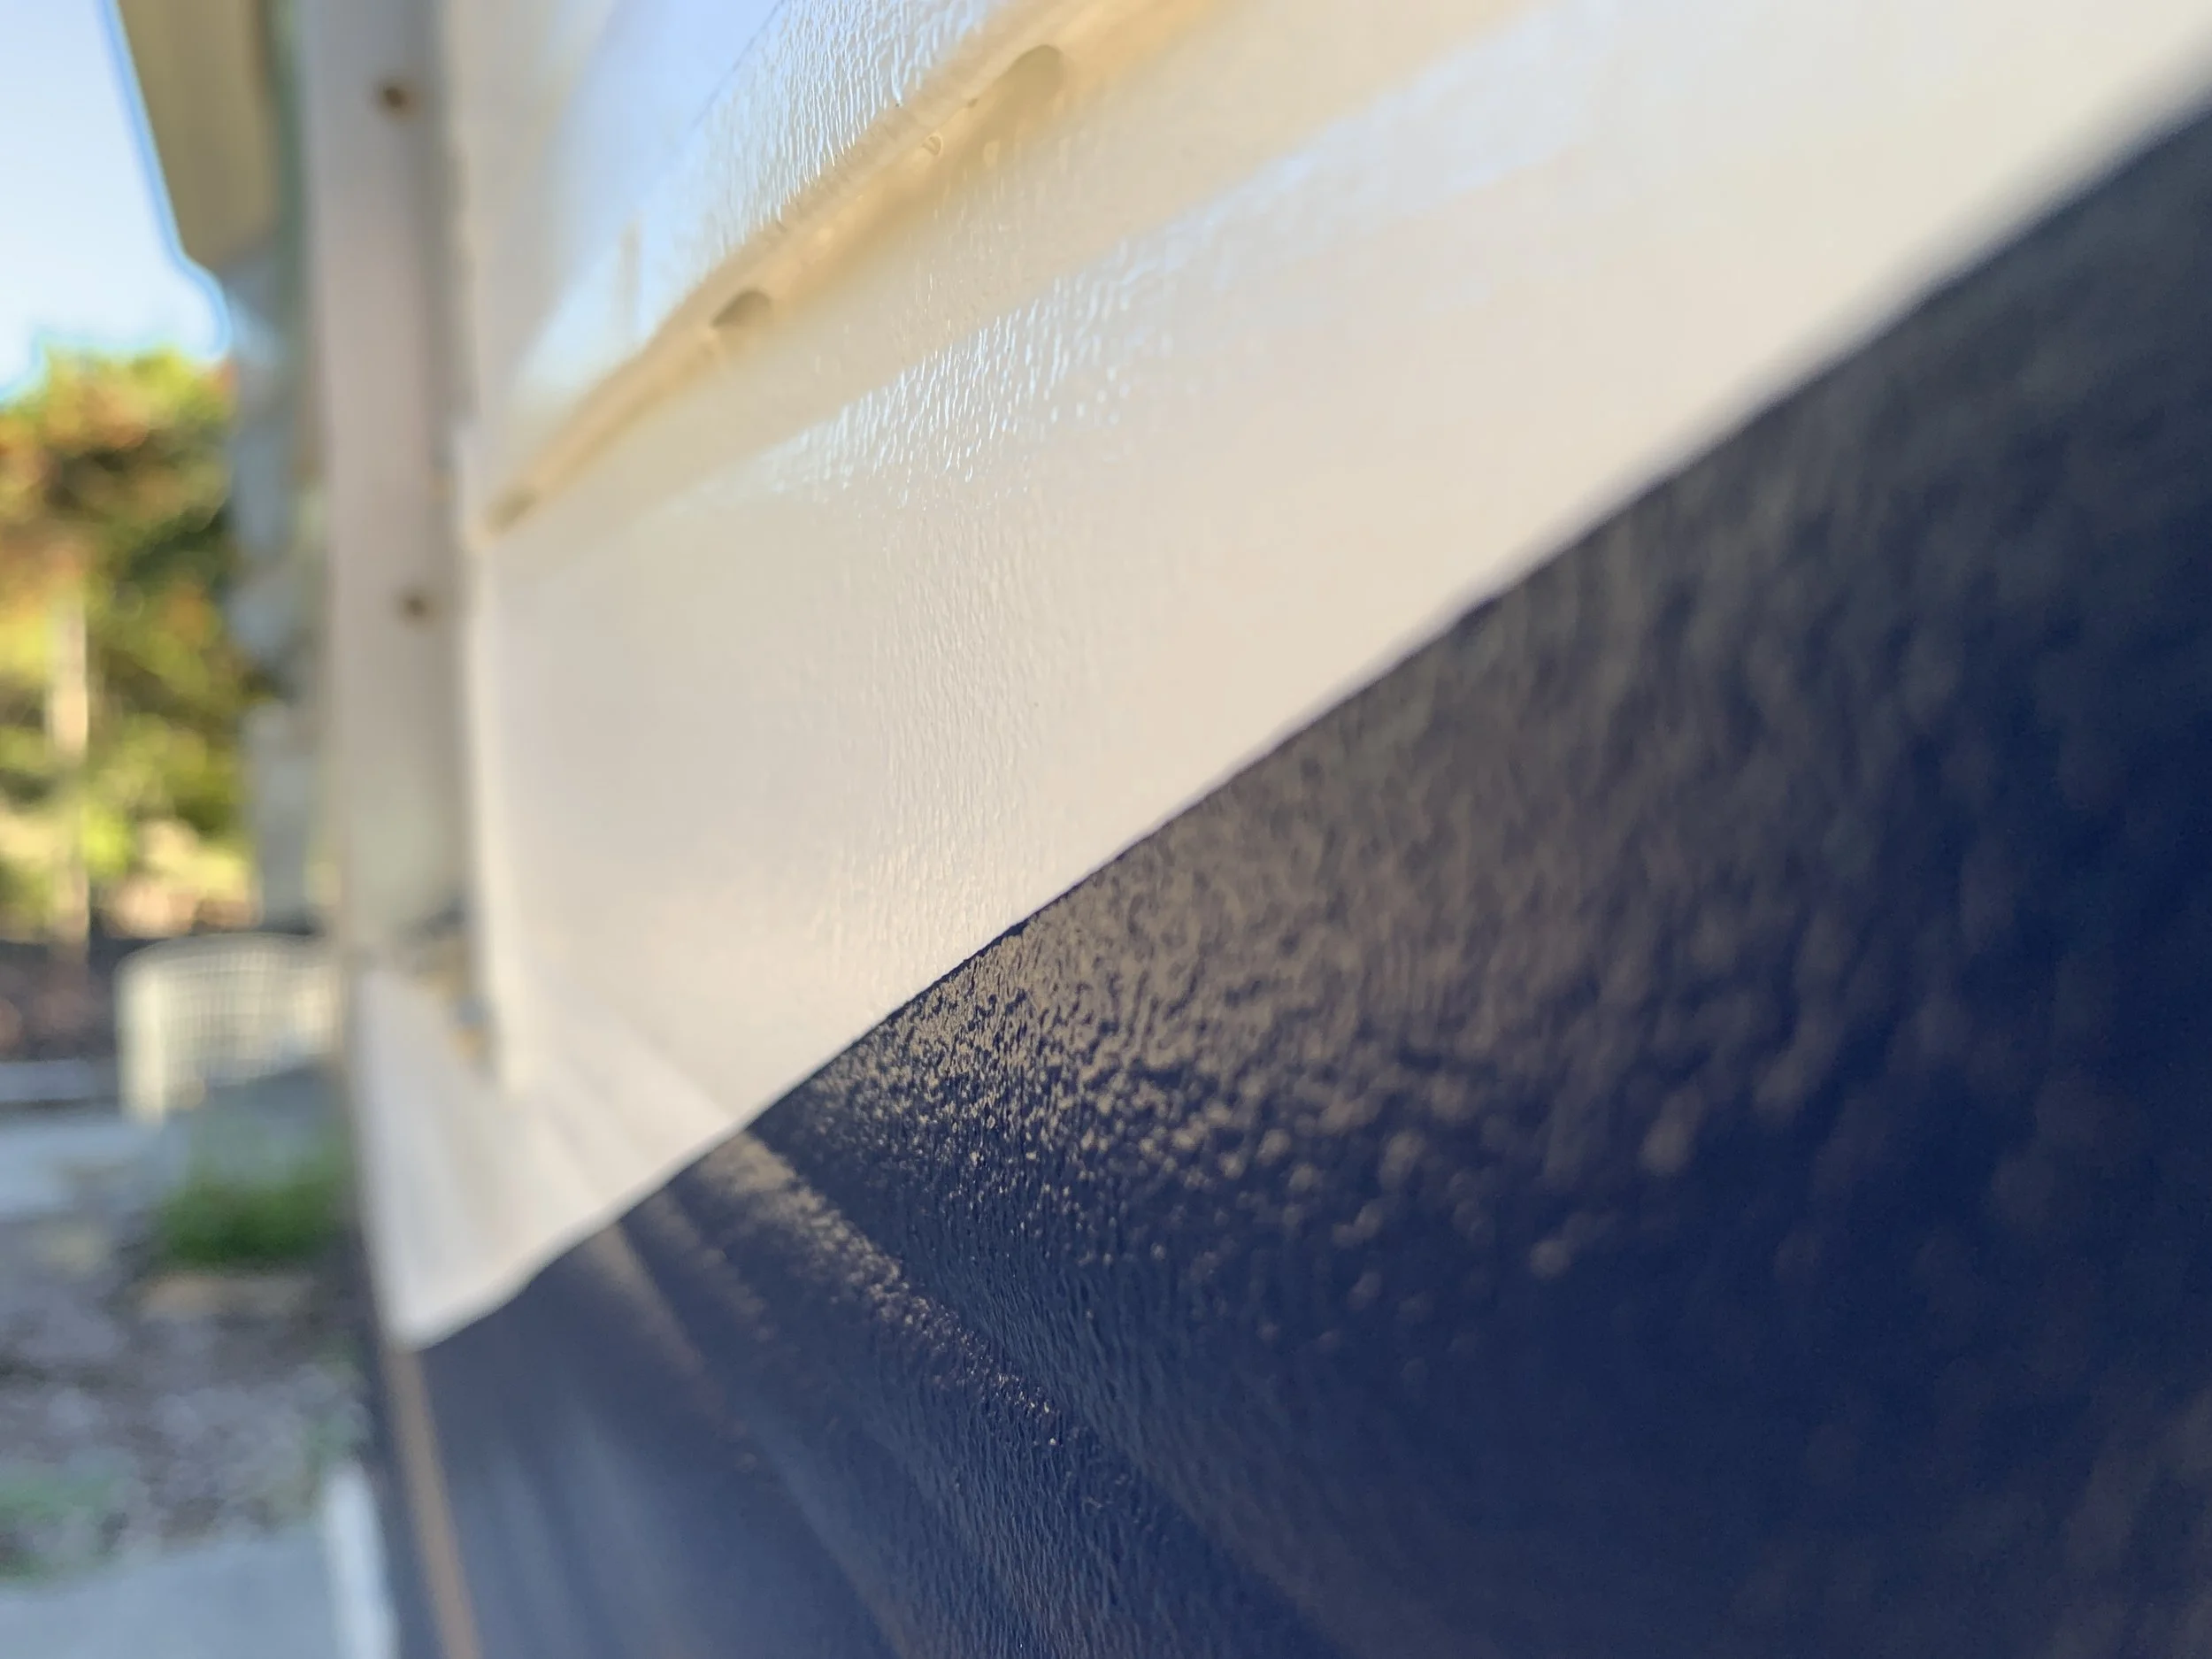
After the sheet metal panel was secure, we primed and painted it (with a few coats) using the same DTM acrylic primer and navy Sher-Cryl paint we used on the rest of the exterior to blend the modern material into the vintage exterior.

We haven’t had a problem or anything, but are thinking we might use Lexel Clear Paintable Silicone Caulk (like we used on our exterior seams) to seal the edges even more from debris that might get in between it and the camper exterior. Little leaves sticking out of the top and sides of this diamond plating panel would not be a good look.

We love it anytime we can combine form and function. What do you think?