The Cameo Camper Renovation: Transitioning from Dining Table to Bed
Hello again and welcome to this photo-heavy post! If you’ve been following along, you know we recently shared exactly how we built our dinette bench and dining table from scratch and how we blinged out and installed our dining table leg. Today we’re sharing exactly how we turn the rear of the camper over from an eating space to a bedroom within a few minutes in a handful of super easy steps.
If you’ve missed the posts most-related to this one, you can find them here:
Dining table build (part 1)
Table leg + install (part 2)

Before we get started, a couple notes before you take a peek and get all distracted.
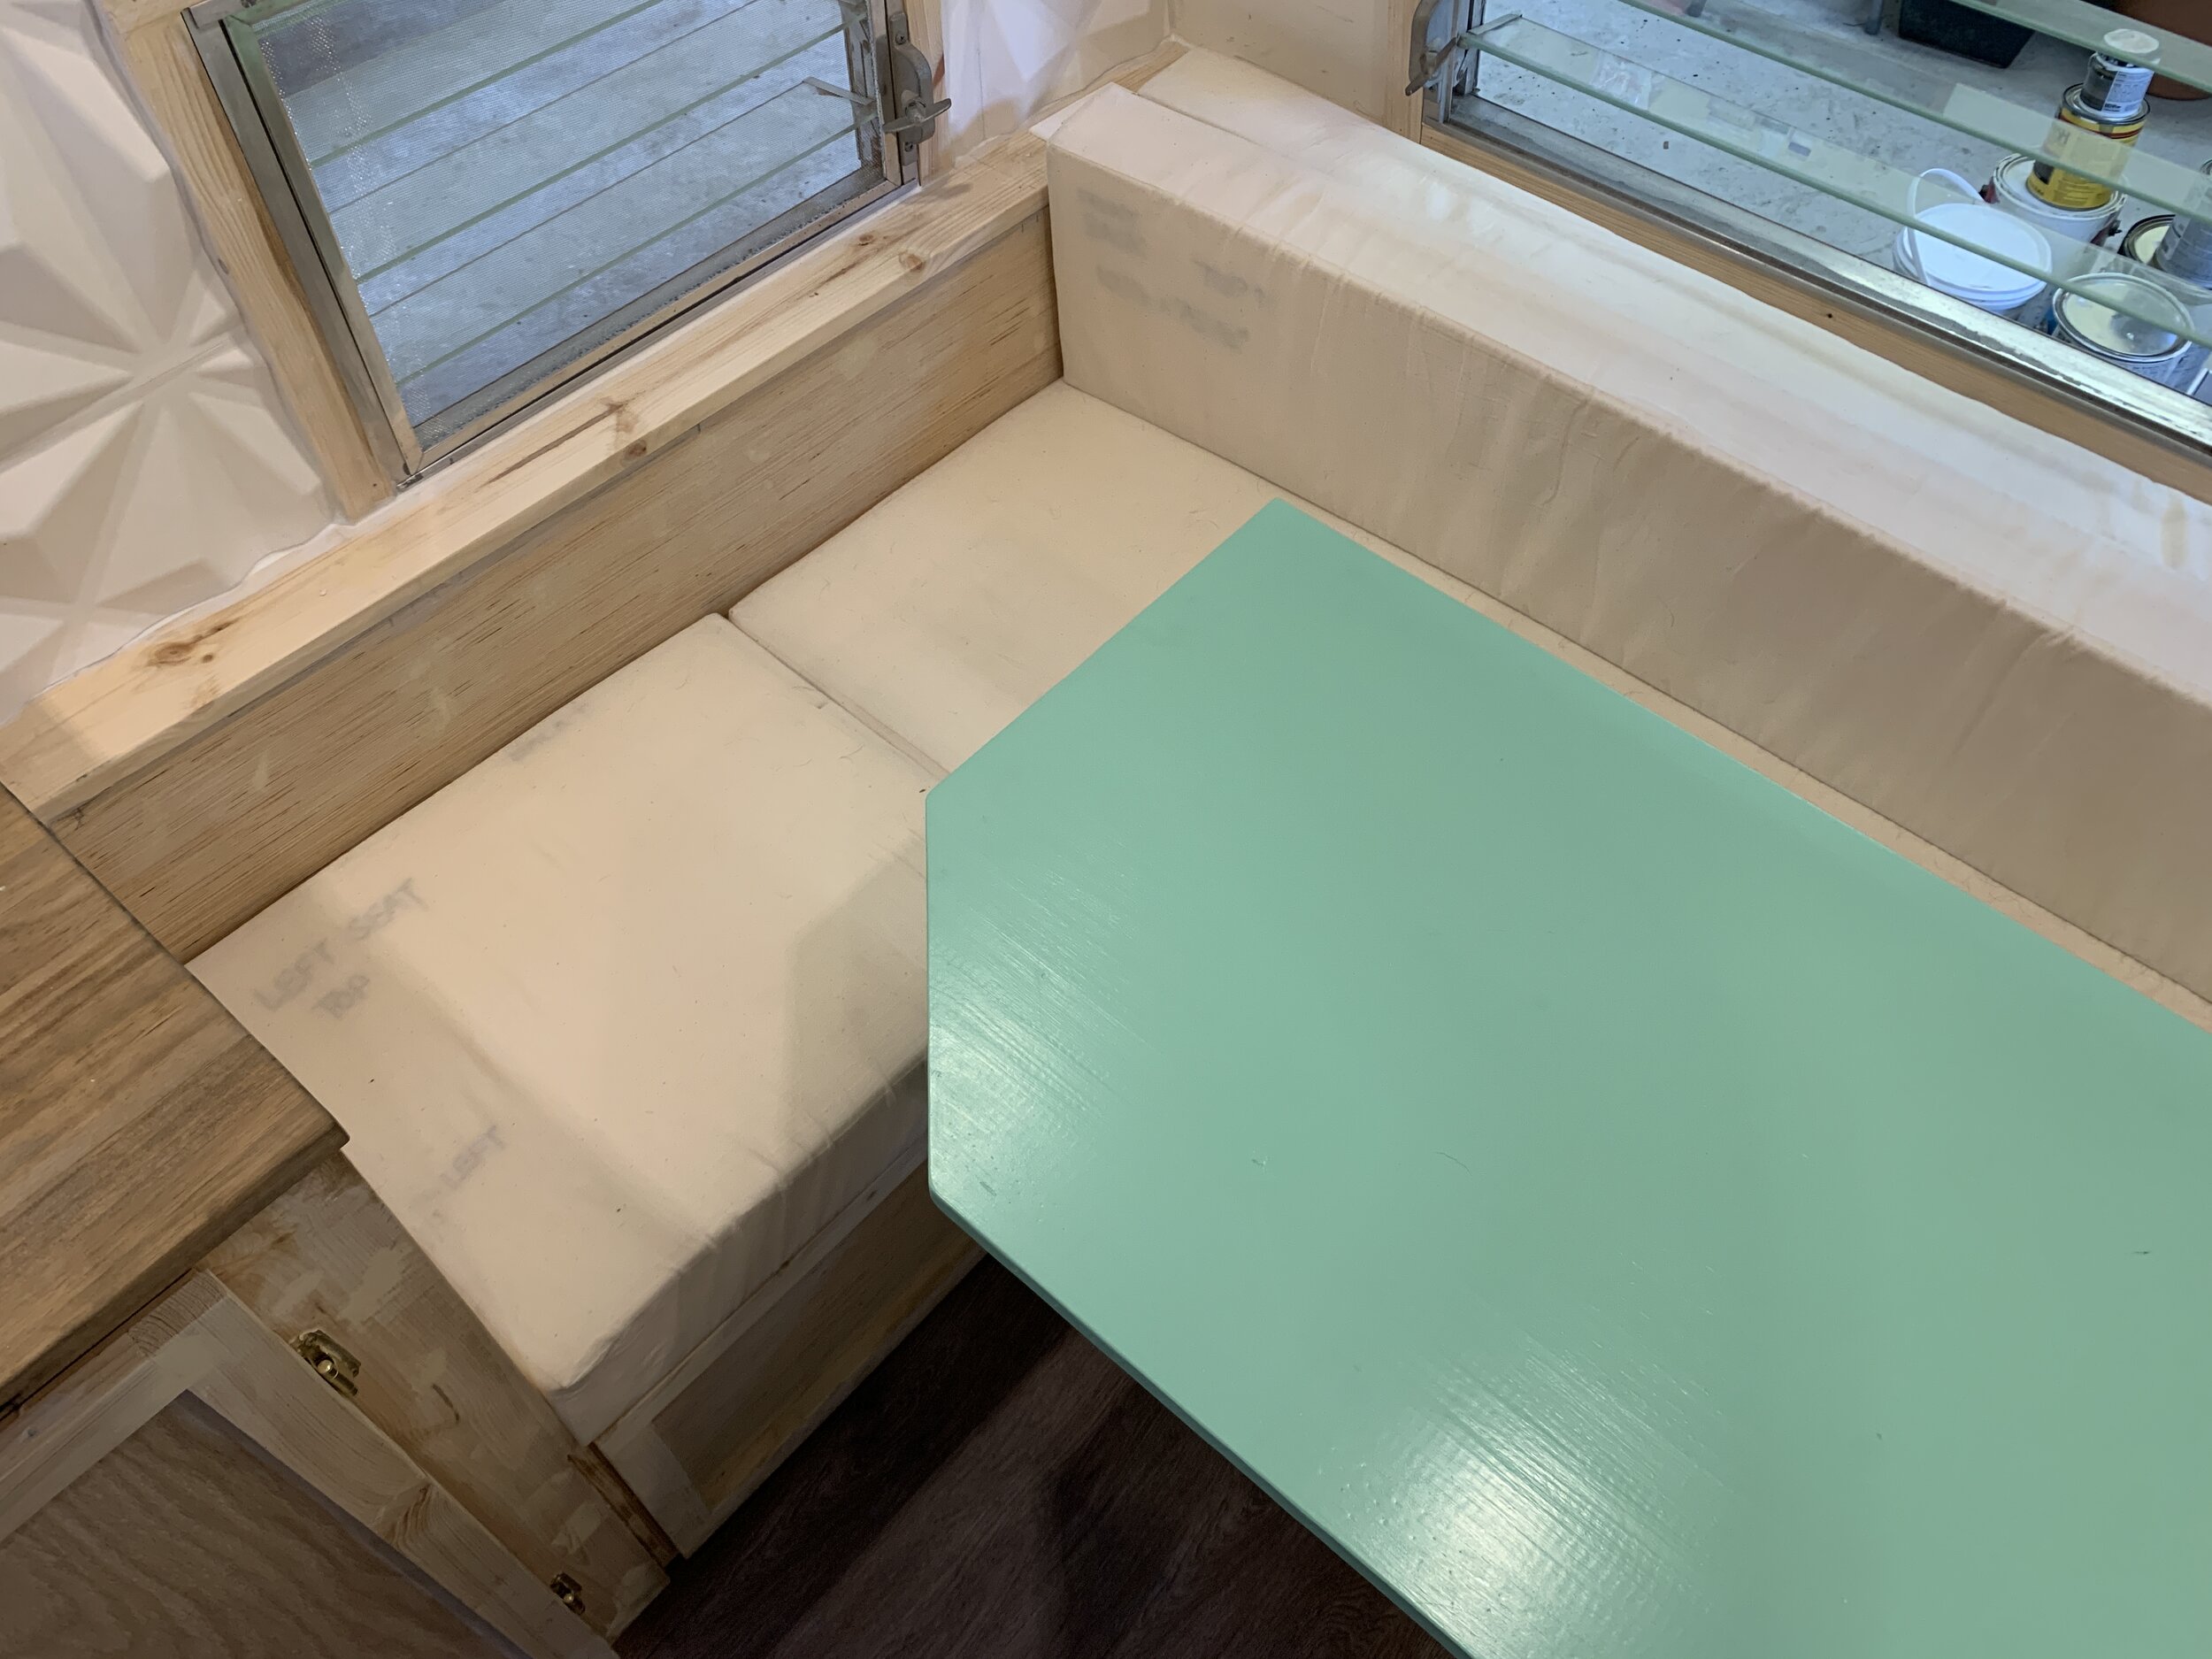
You may notice the plywood backrest on the right side of the bench is missing. We still need to work on our plumbing and plan to hide the water inlets and plumbing inside the backrest. Once we have it installed, we’ll put the bench backrest back on. (And we’ll be covering it all in detail when we get there!)
We’ll also be sharing our cushions in detail in a separate post once the upholstery is completed – as of now they’re covered in a muslin fabric which will be the inner encasement for the cushions.
Step 1: Start with the Dining area
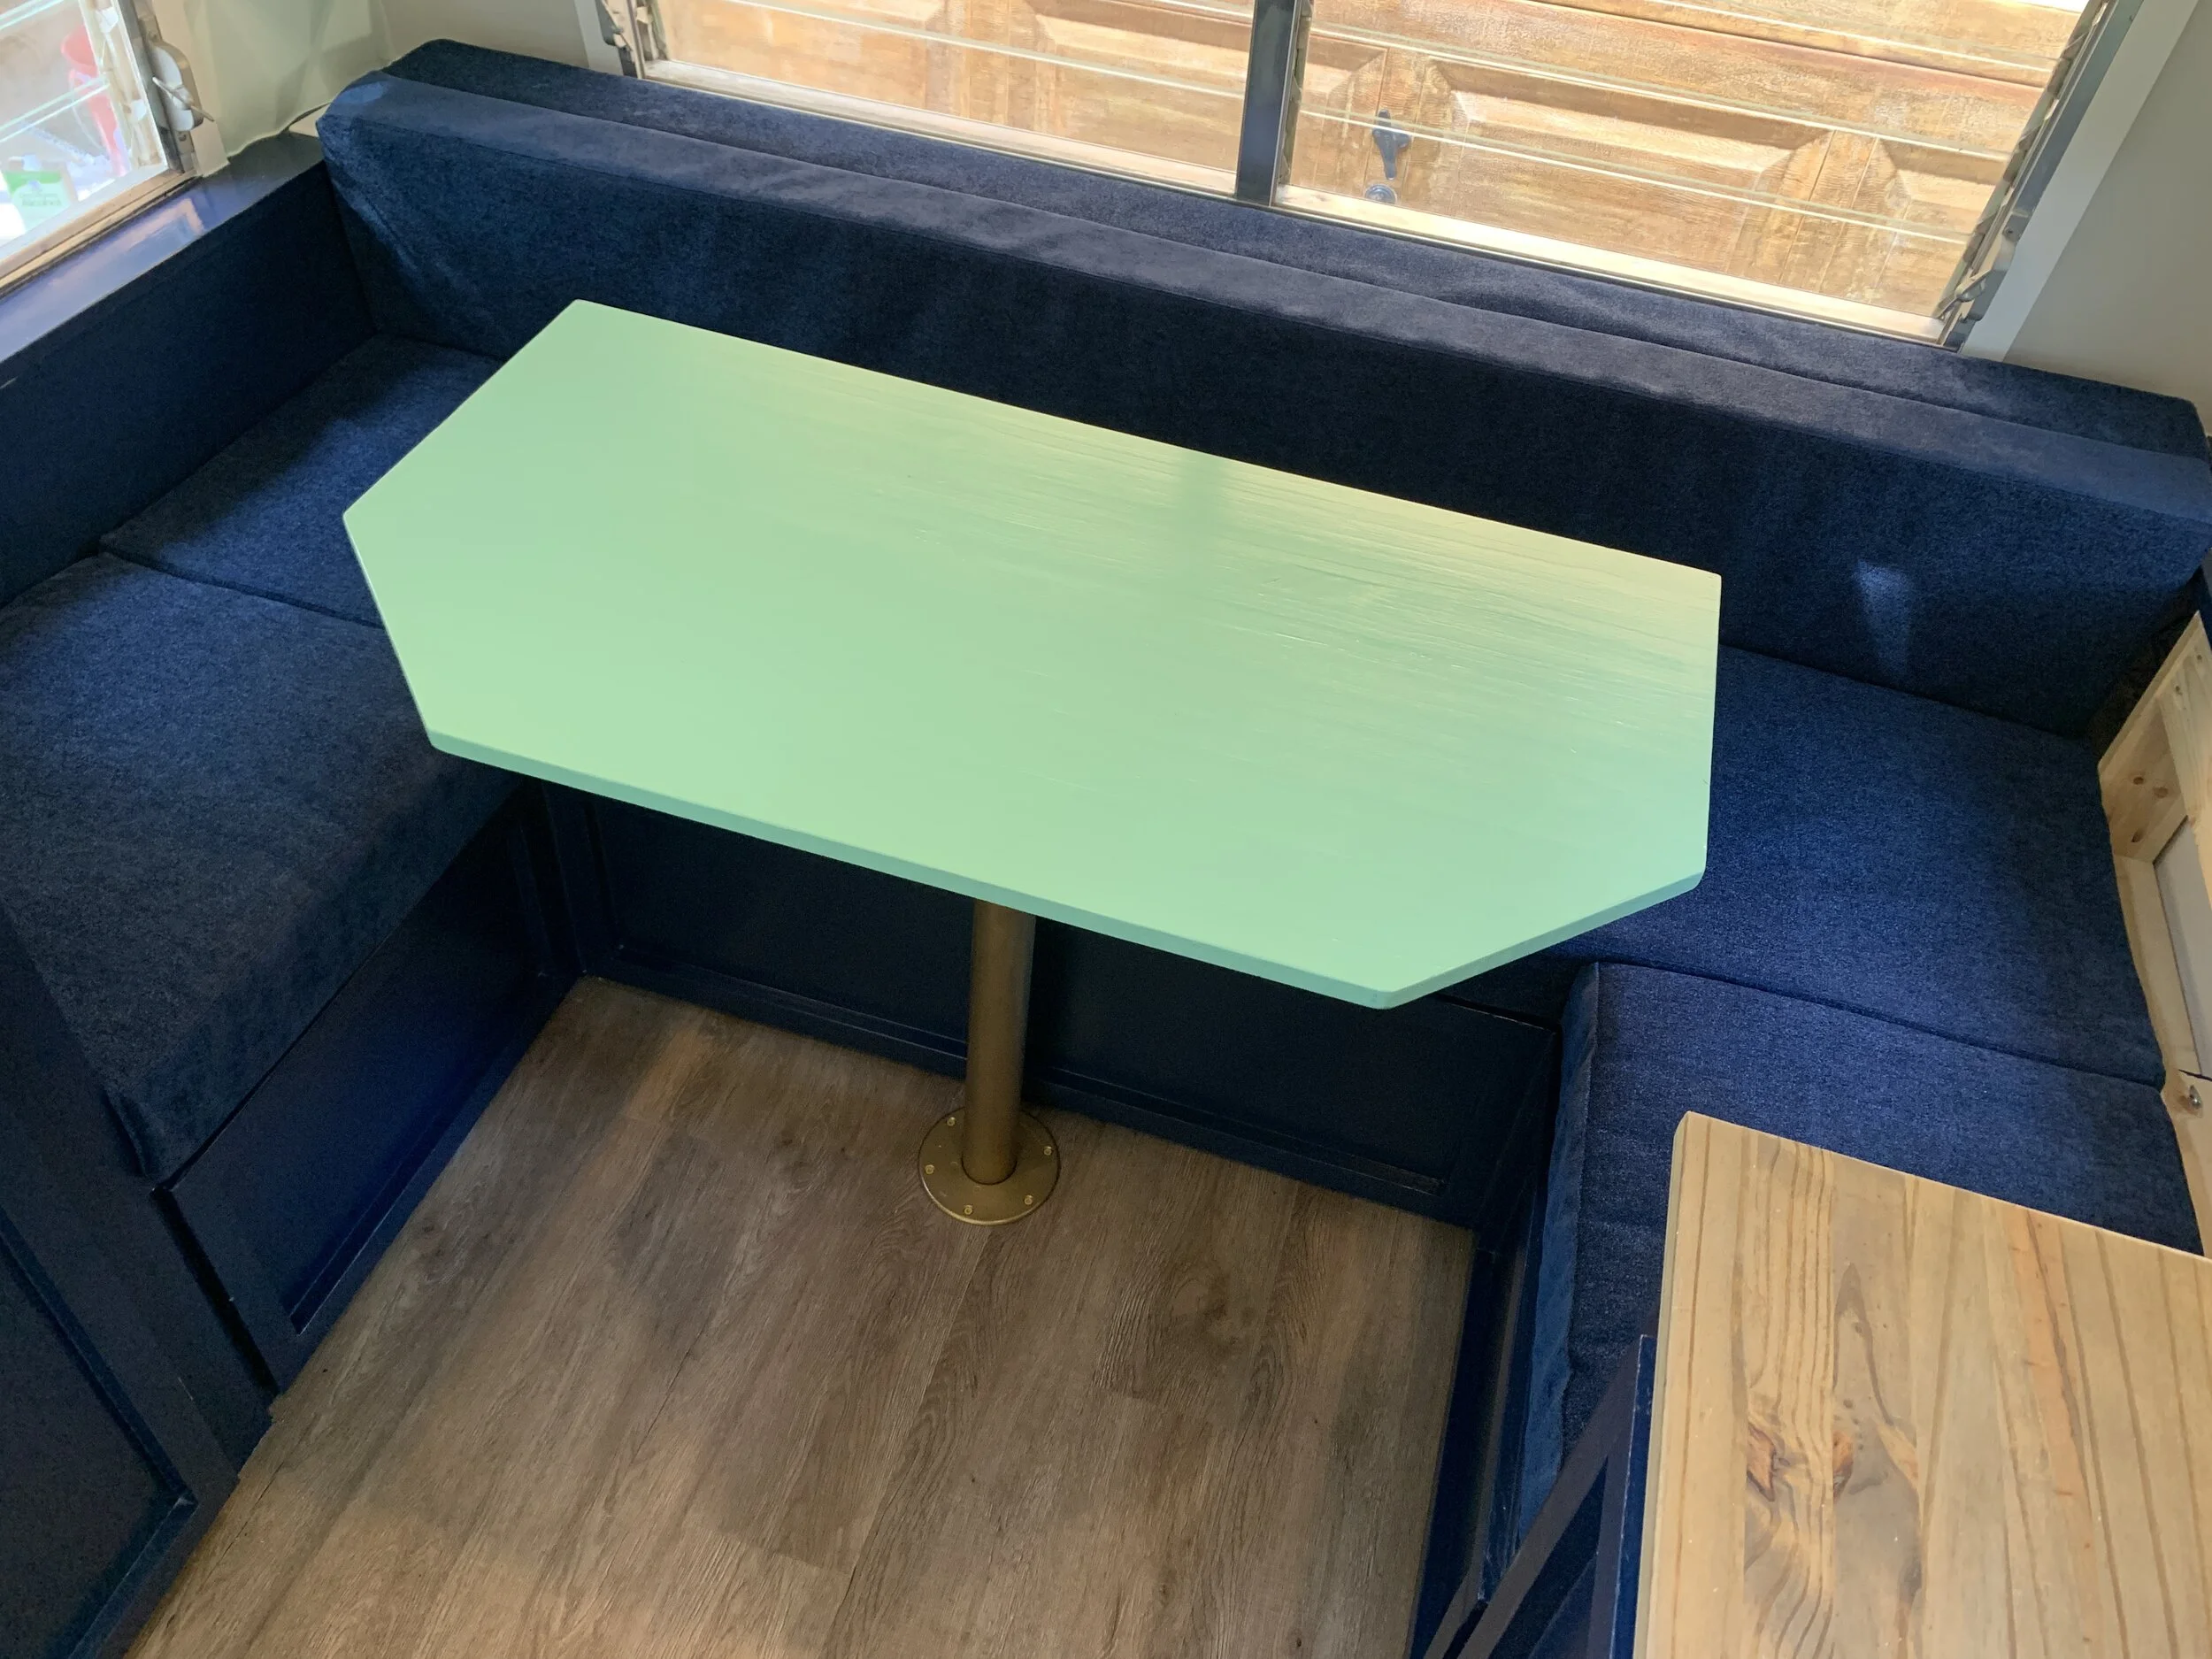
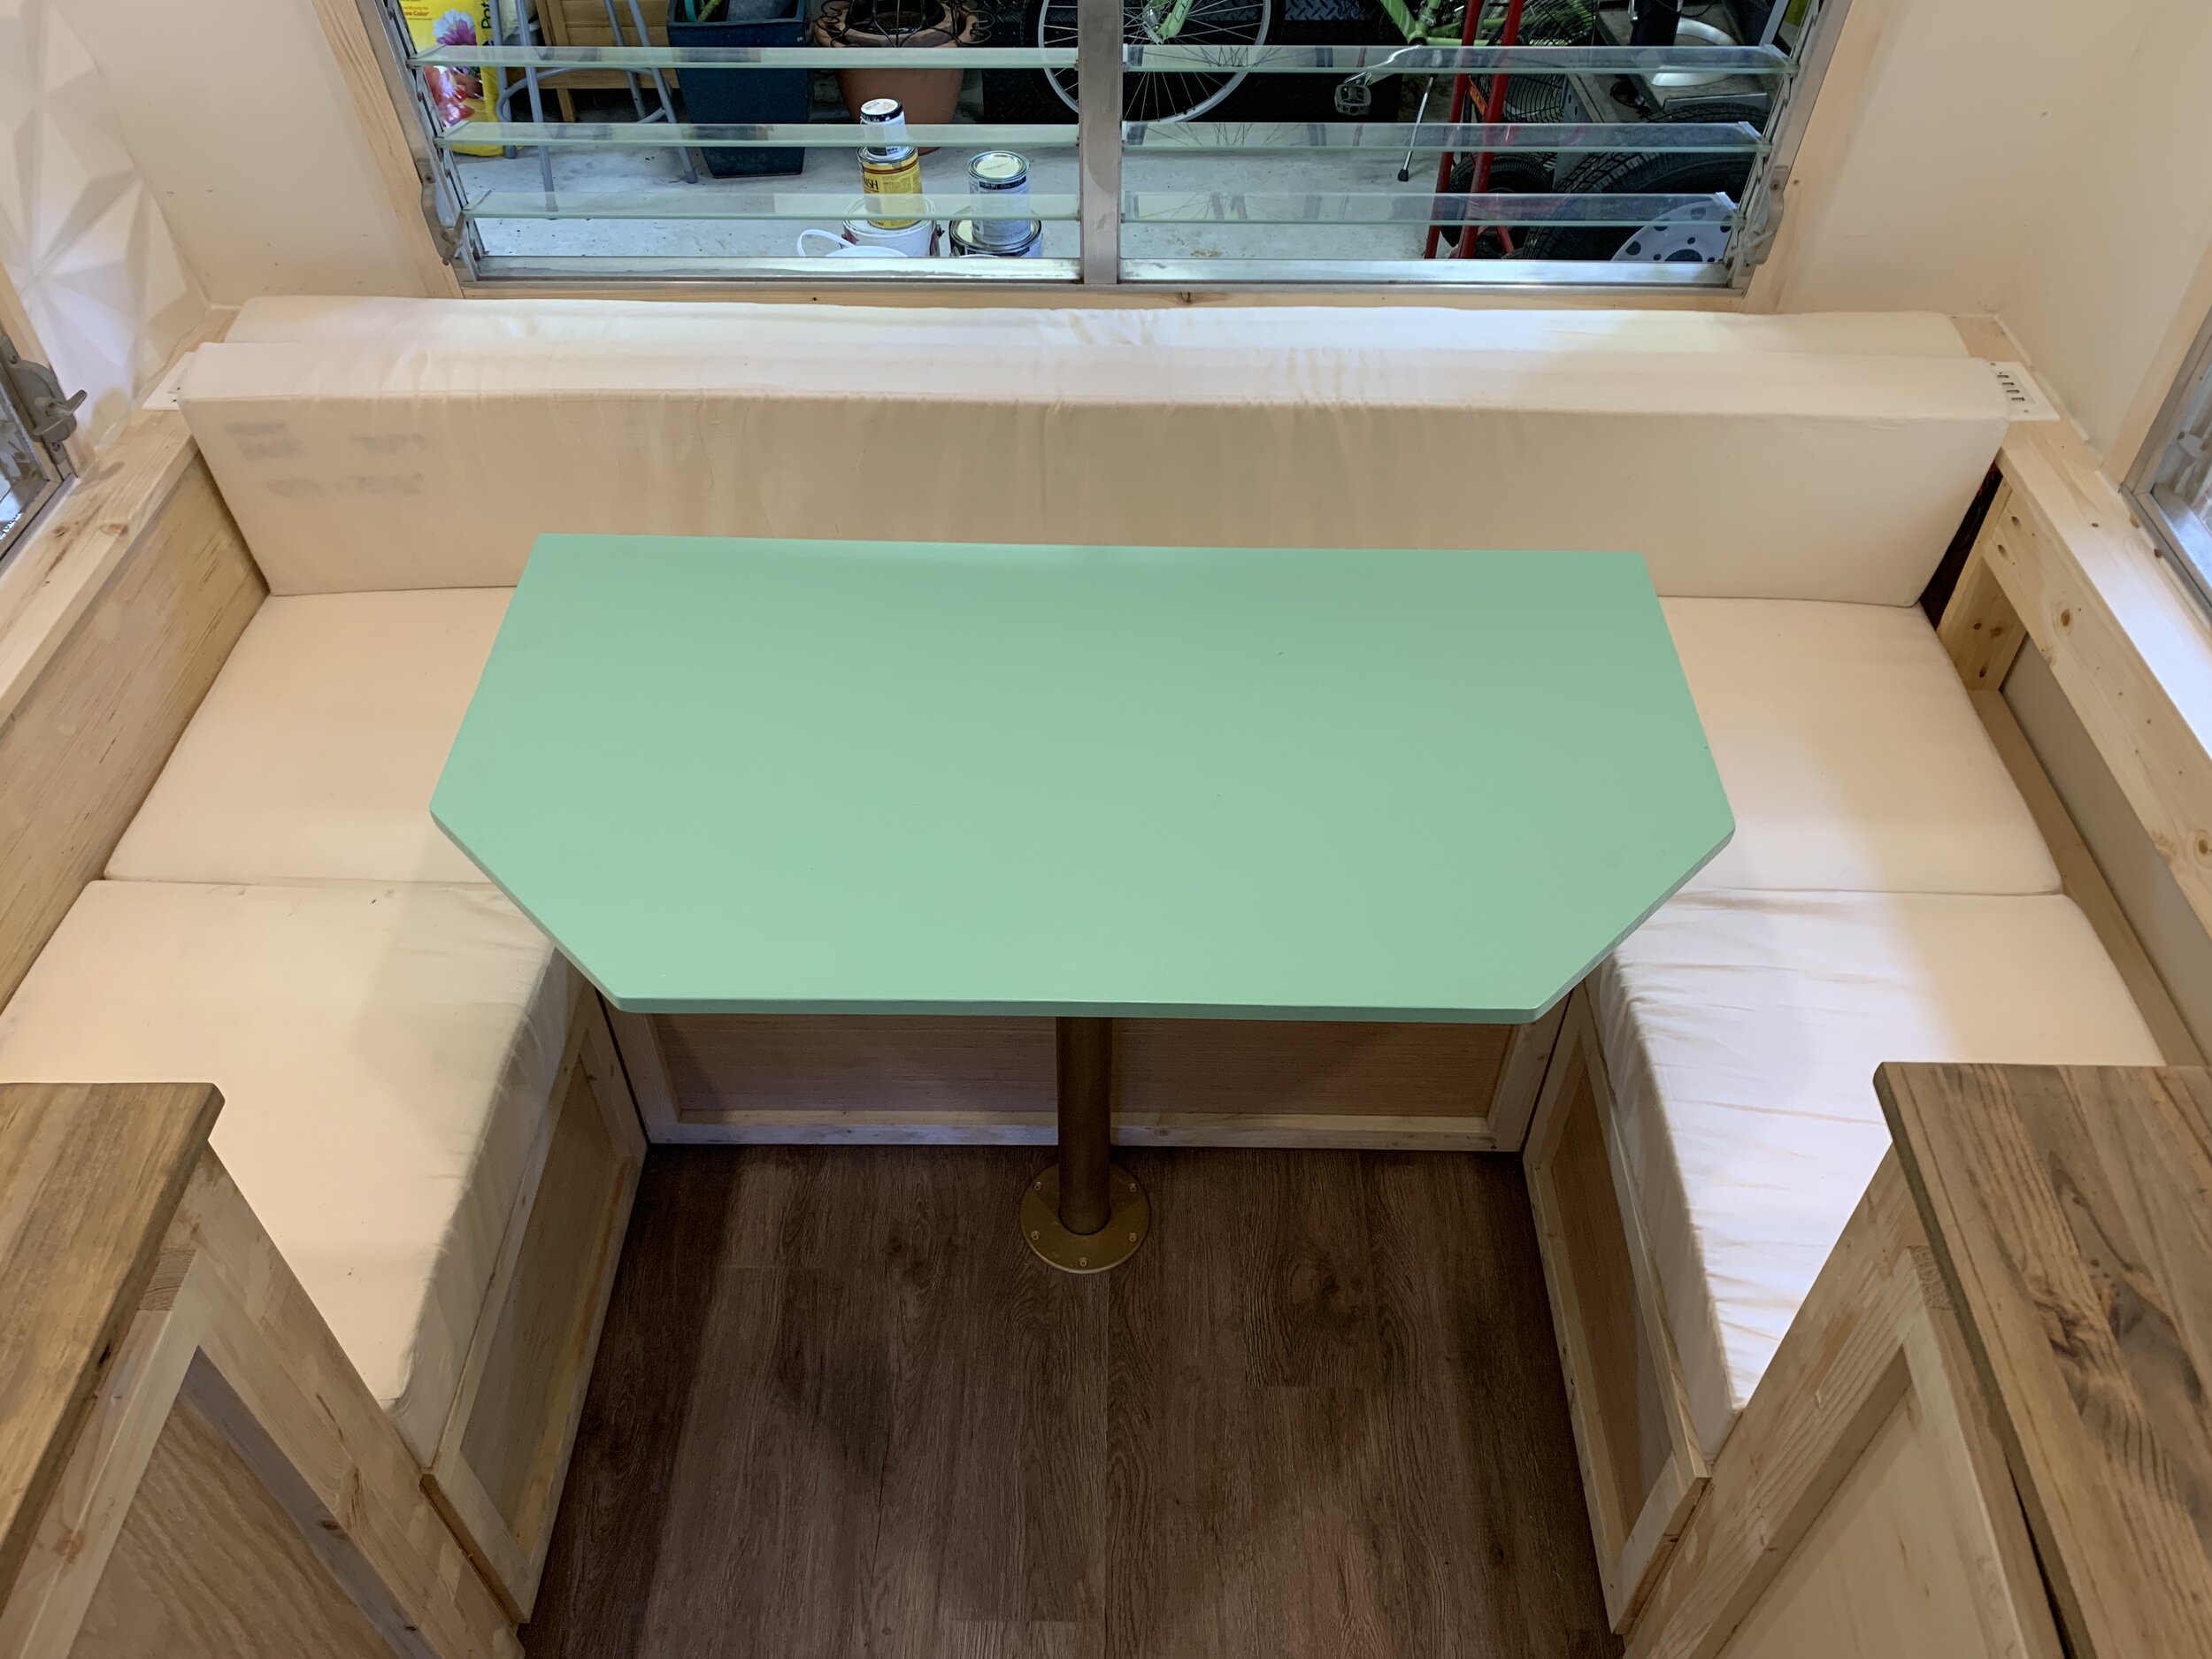
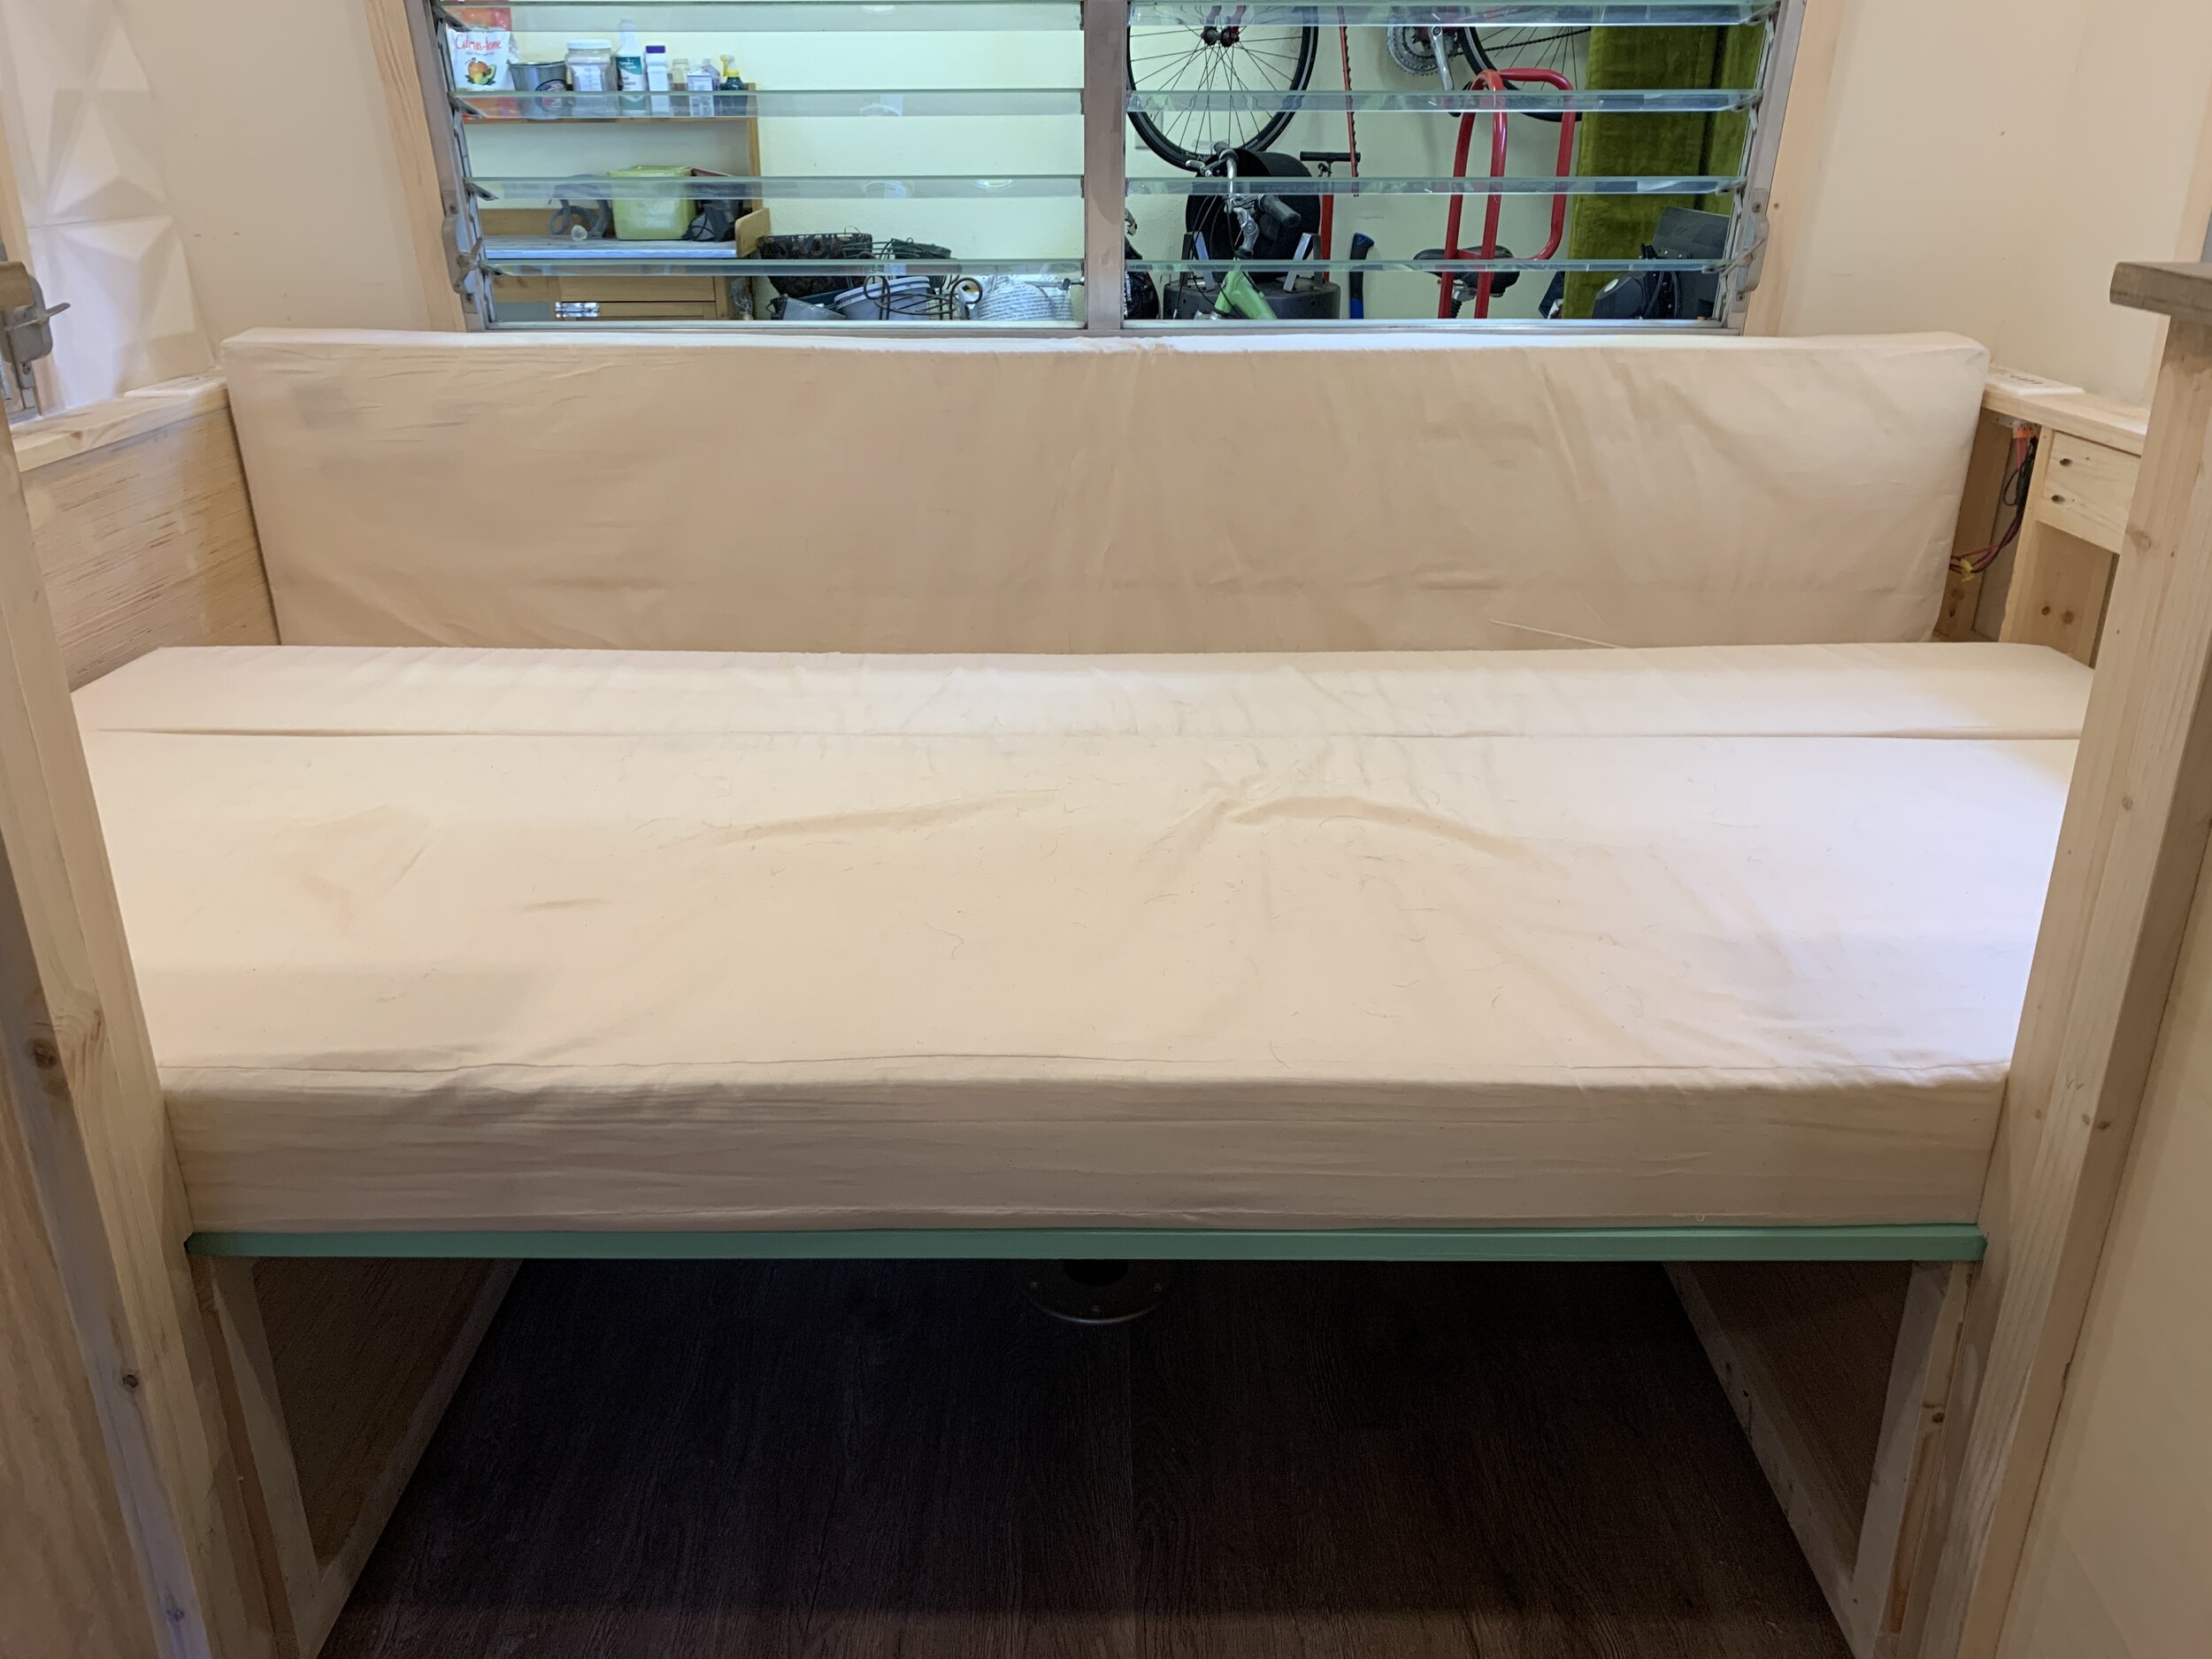
First we have a dining area that looks like this:

Dinette area with table and cushions.

Step 2: Remove the tabletop
This one’s super easy. We just pull the tabletop off of the leg and gently set it aside so we don’t scuff up the paint.
Dinette area with tabletop removed.
Here you can see what the inside of the flange (the gold part that fits over the top of the table leg) looks like. (We do not remove the tabletop and place it in the garage during the transition like the photo would suggest, but we just wanted you to be able to see where the flange is on the table and how it looks/functions.)

Underside of tabletop with mounted flange.
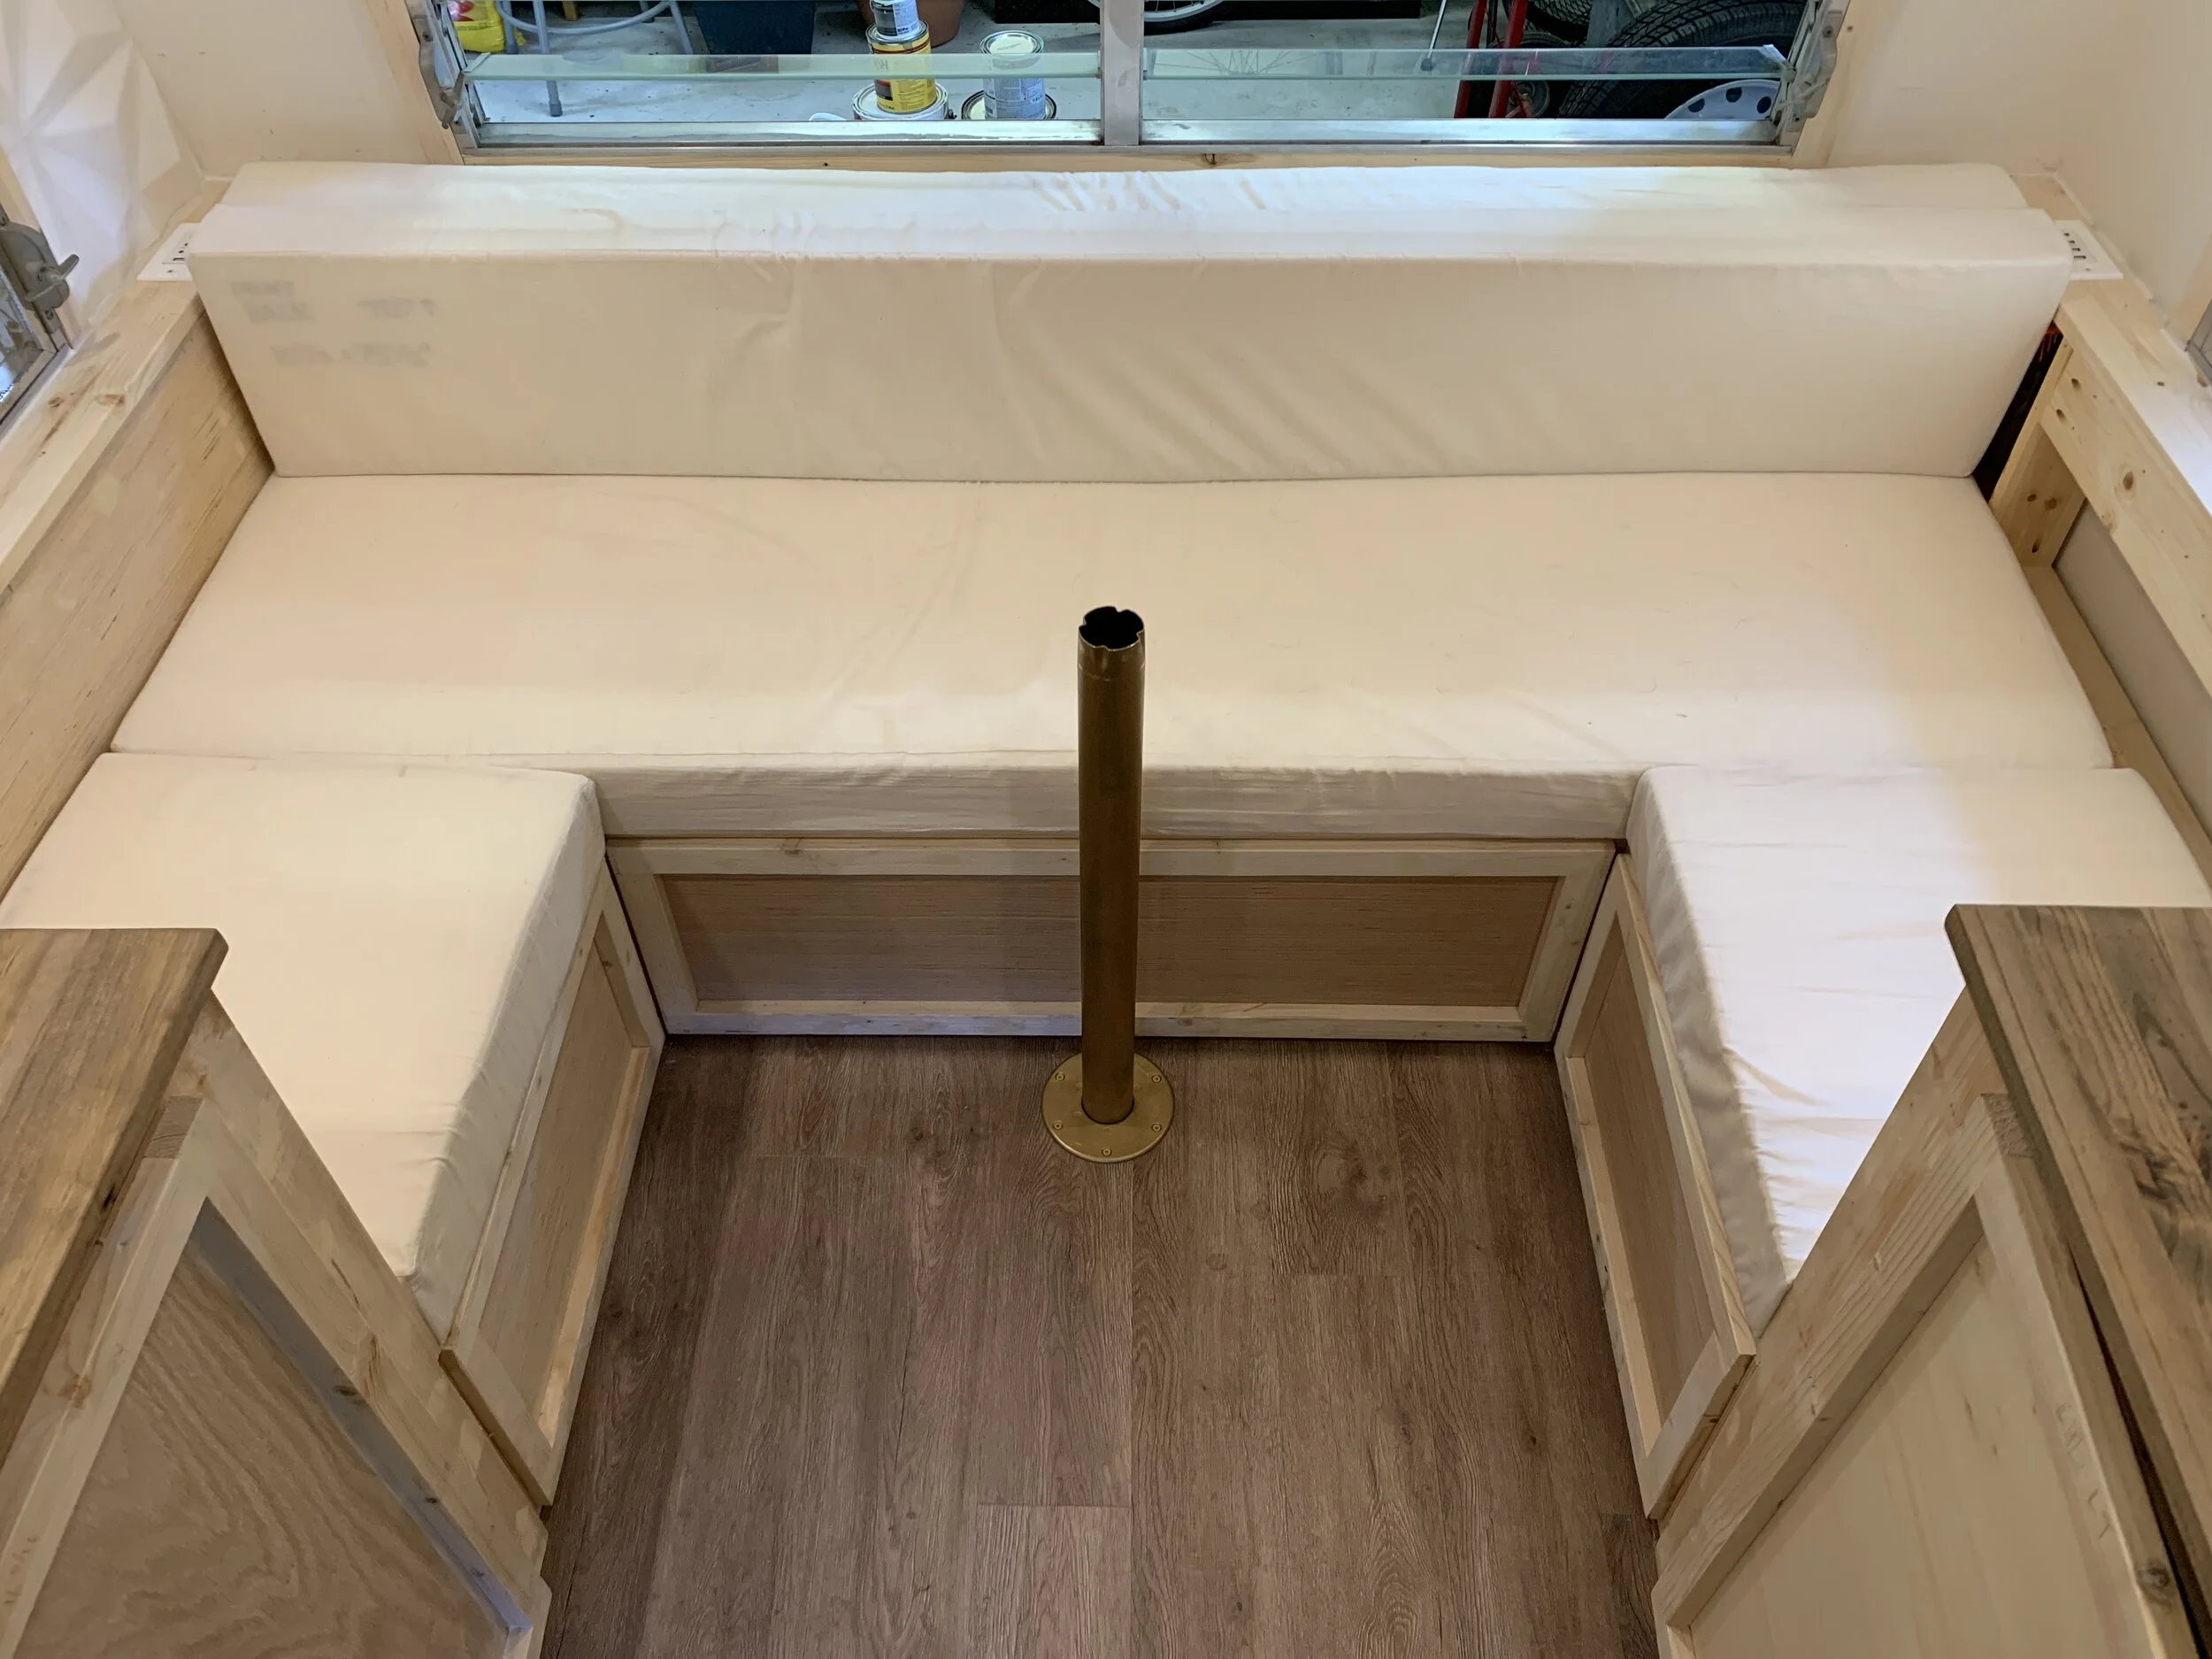
Step 3: Remove the leg
Next we remove the table leg with a gentle little twist and pull up. We store ours in the sink/stove cabinet in the skinny space between the wheel well cover and front of the cabinet.

Dinette bench with the table leg removed.

When we transition to a bed, we store the table leg in the skinny cabinet space under the sink/stove on the left.
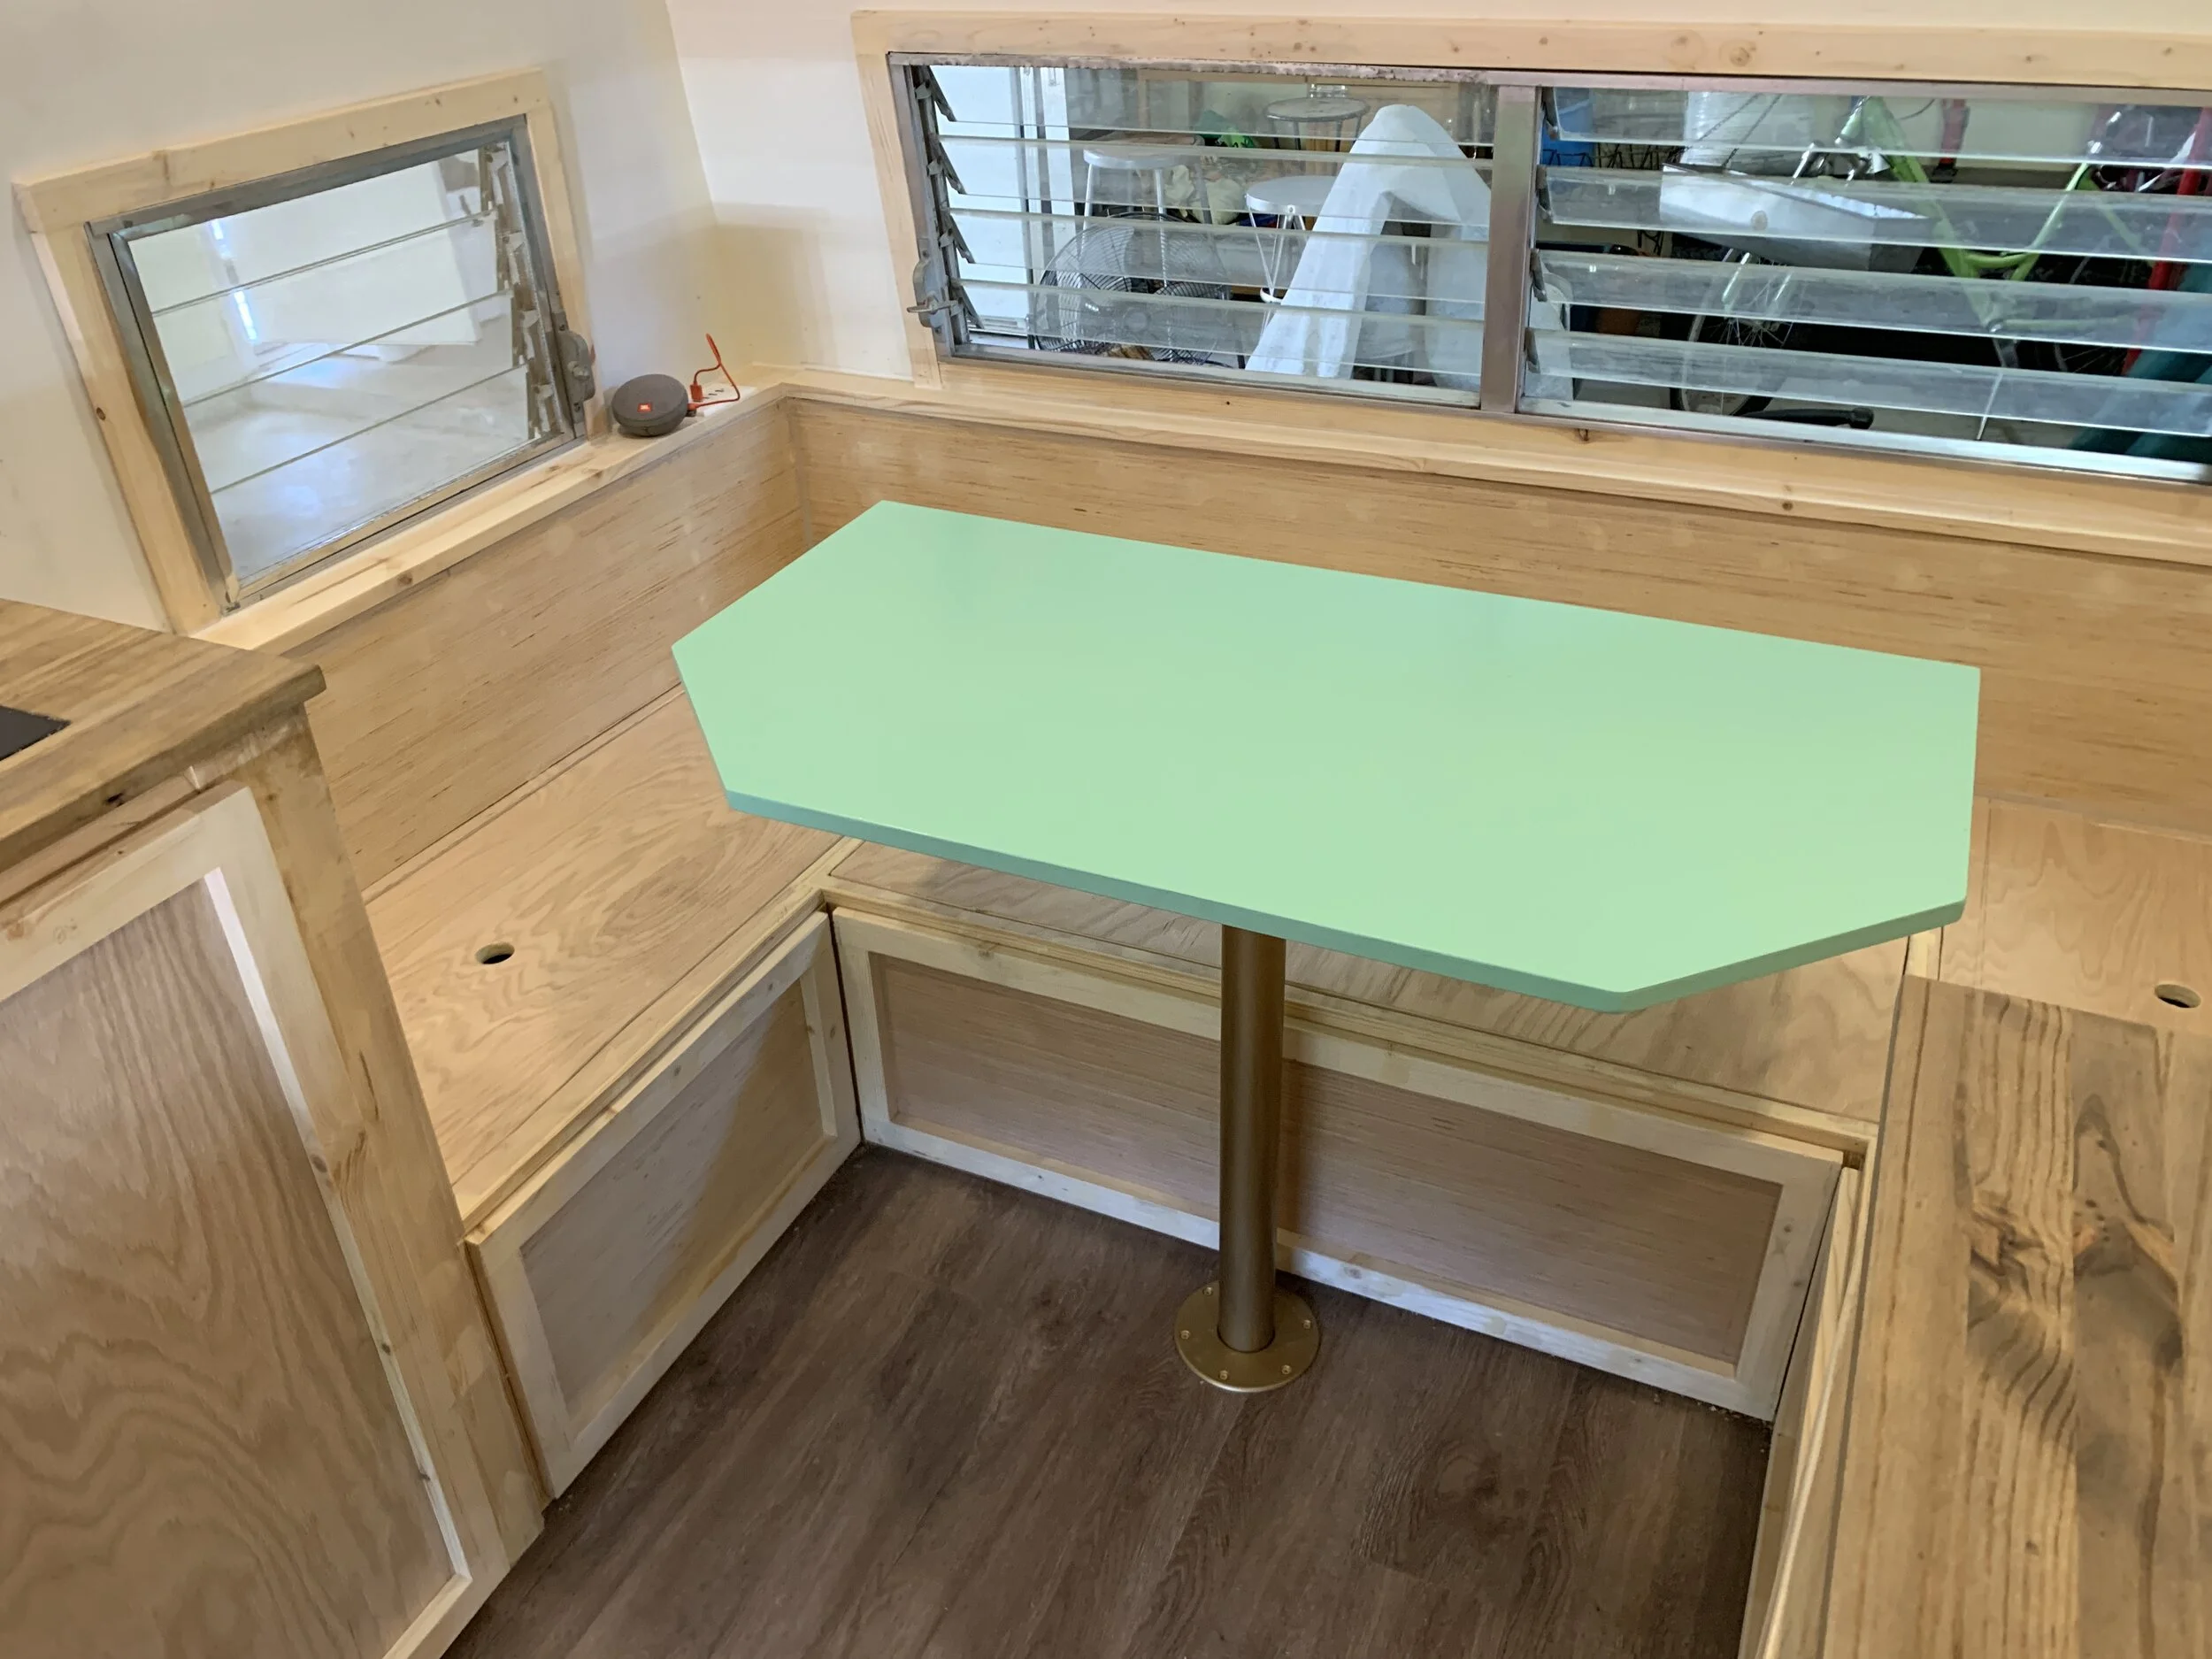
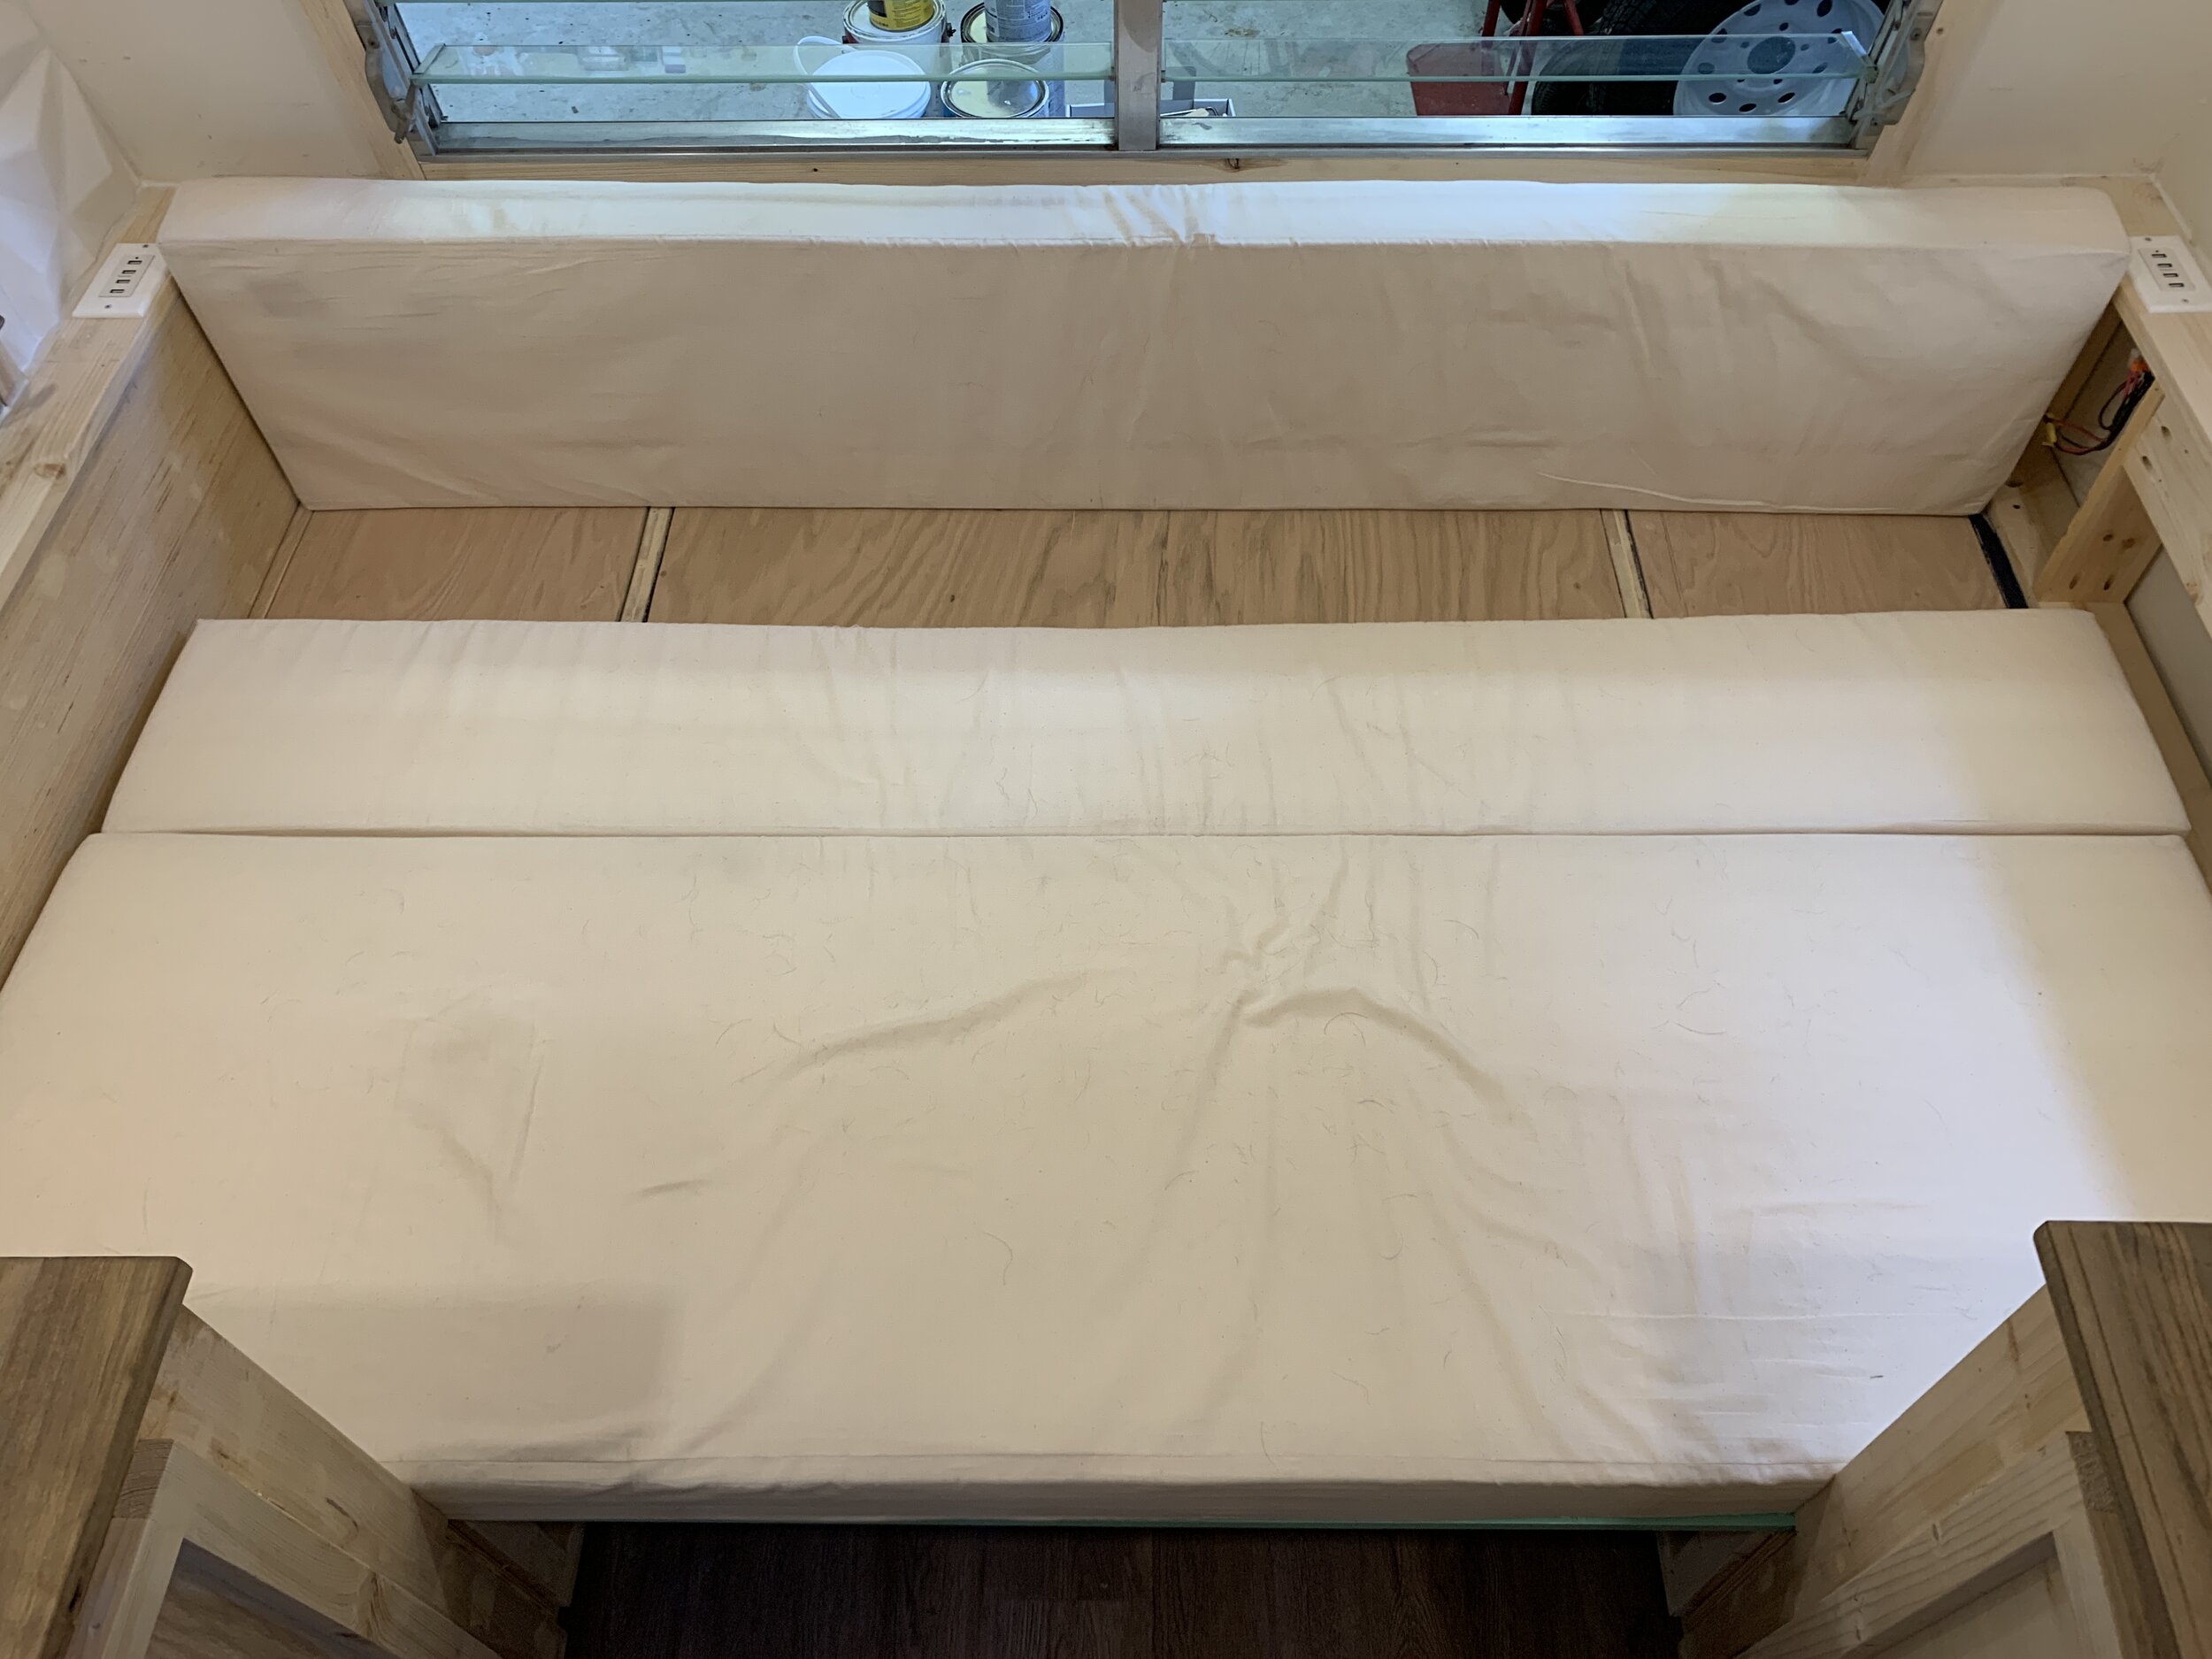
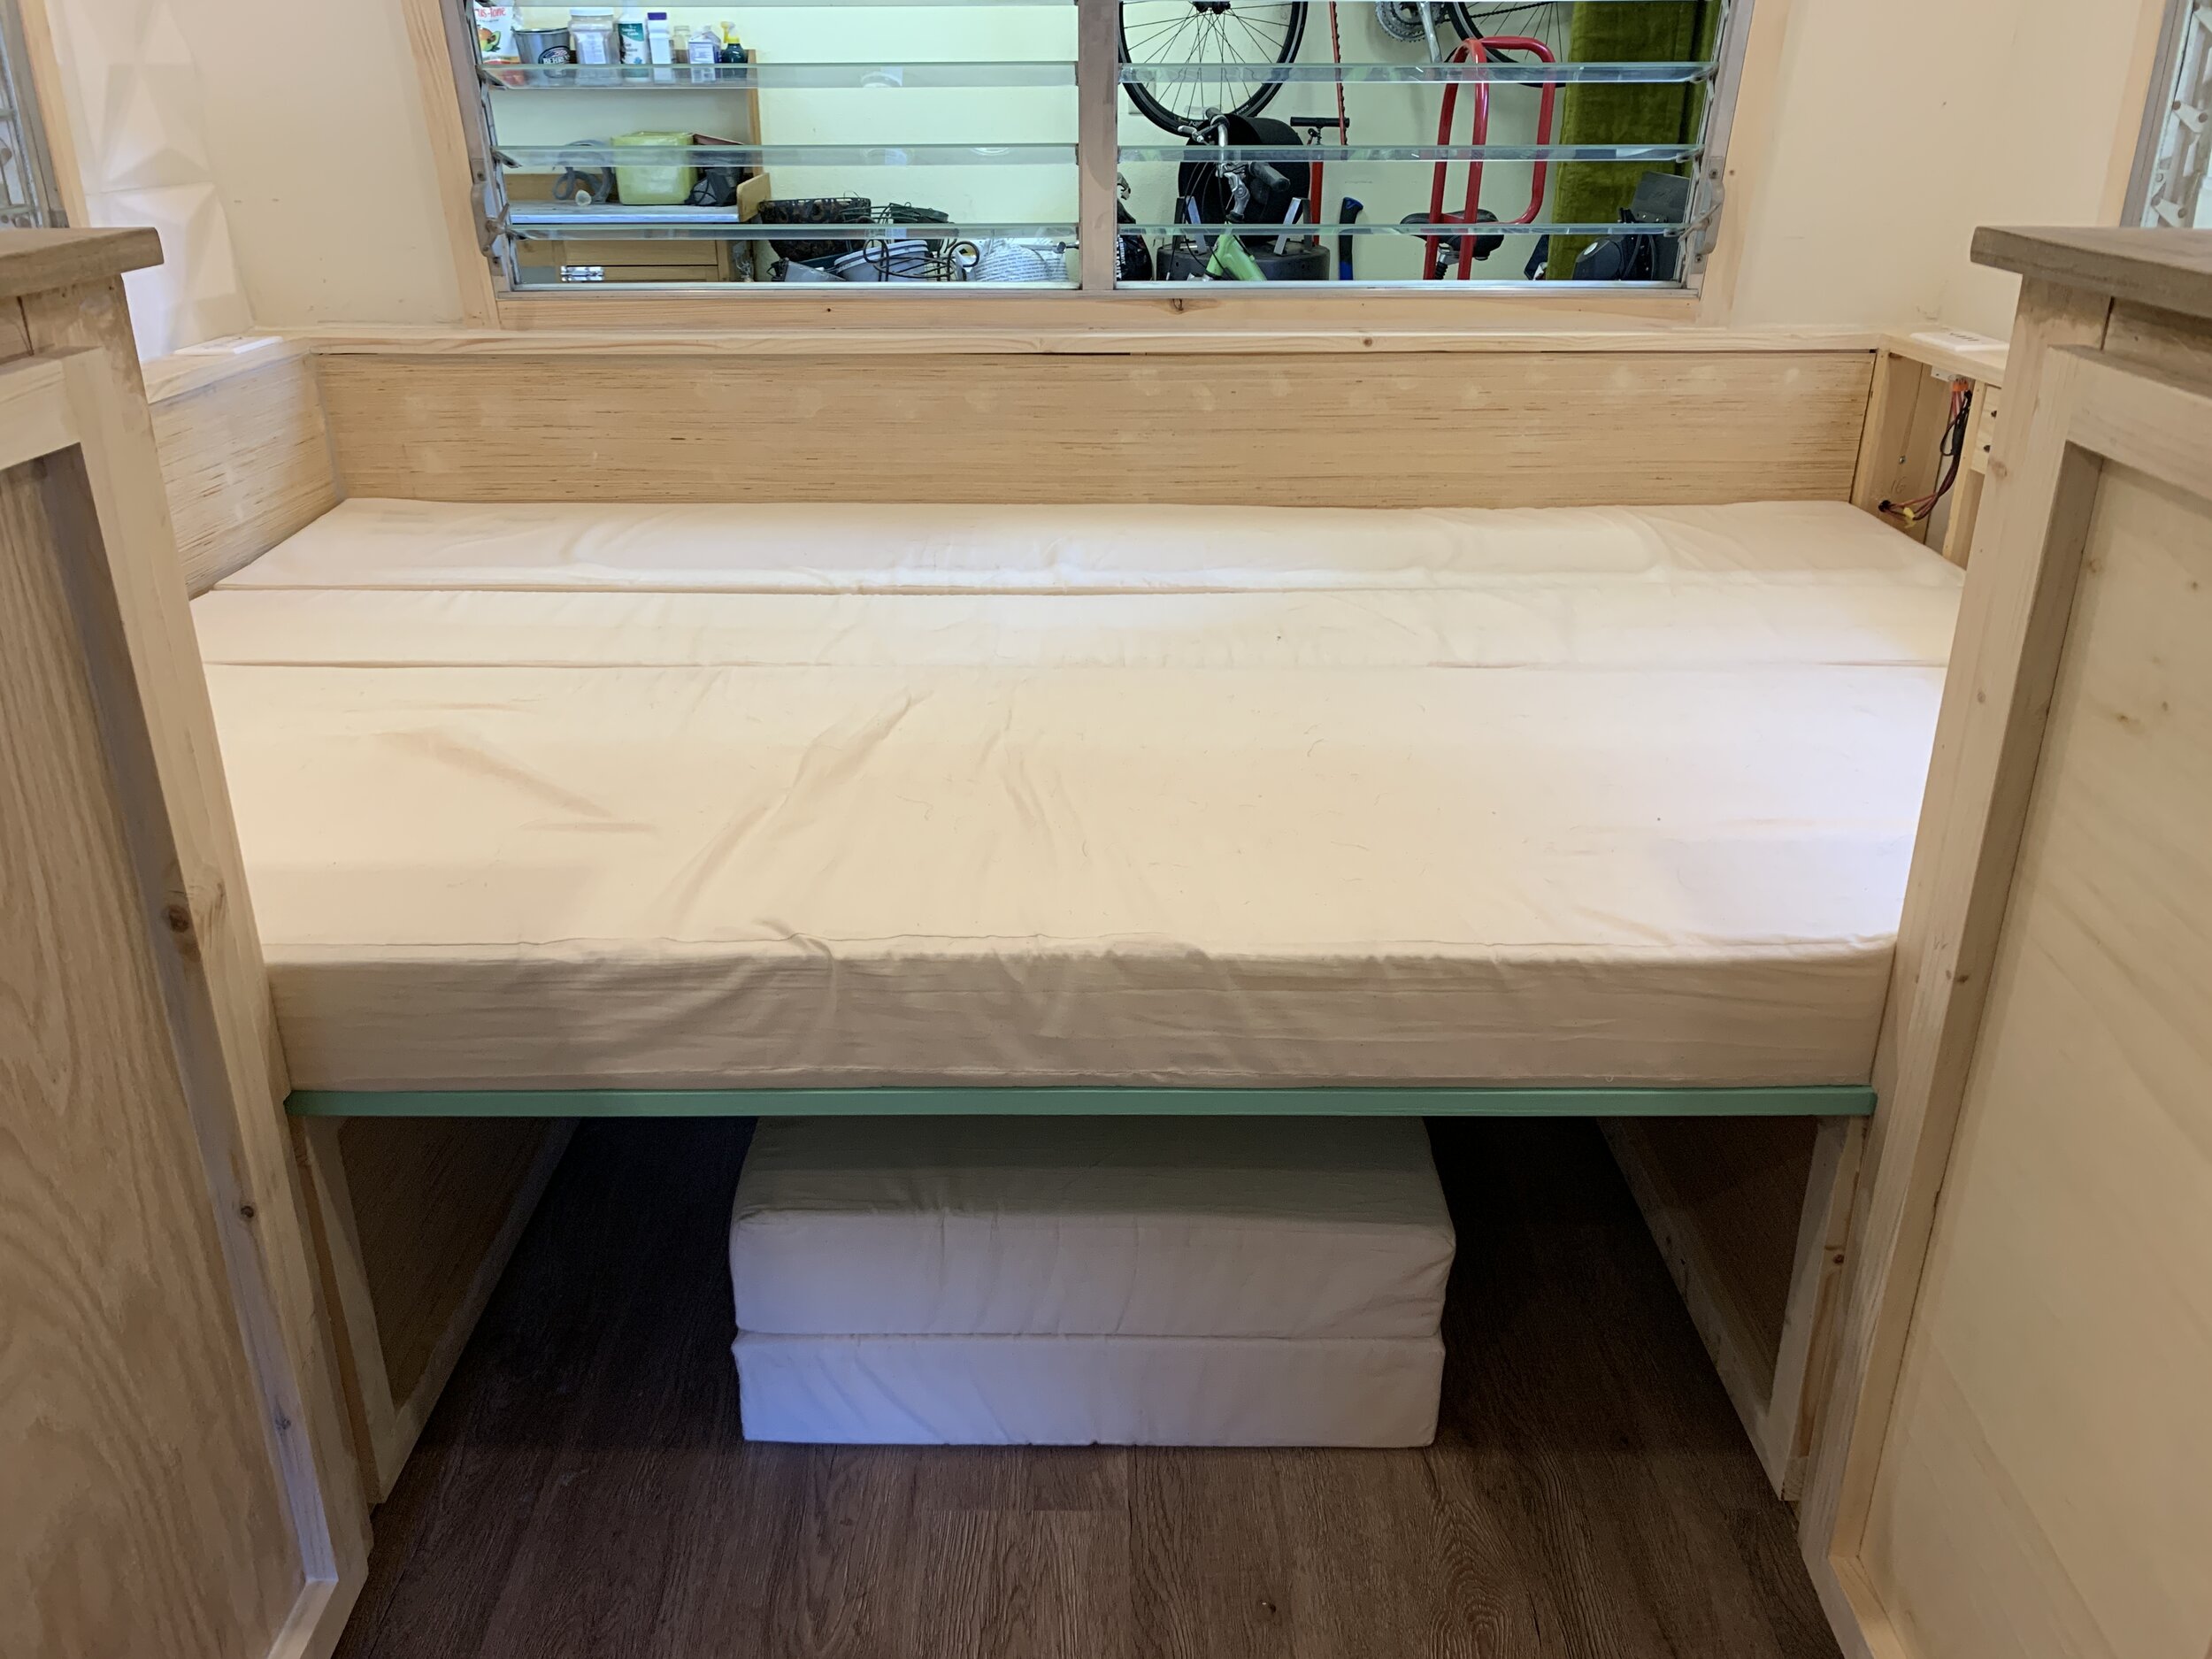
Step 4: Place the tabletop
Attempt 1
First we put the tabletop down on the ledge just as it is when in table form. After we cut the corners off (so we could get by the table to actually get into the bench for eating) we noticed when we sat on the very edge of the bed and pushed up to stand, the table edge goes down (causing it to flip up in the middle of the bed which we didn’t like). So we tried a simple fix…

Dinette area in bed form with table installed backwards. This placement was unstable with the dog-ear-edges facing out.
Attempt 2
To keep things stable, we decided to turn the tabletop around so that the dog-eared-corners are in the inside of the bed instead of on the edge by the cabinets. Rotating the table 180-degrees solves the flipping problem, and the small holes in the middle of the bed aren’t big enough to be noticeable when laying down.

Dinette area in bed form with tabletop installed correctly, so that it stays in place.
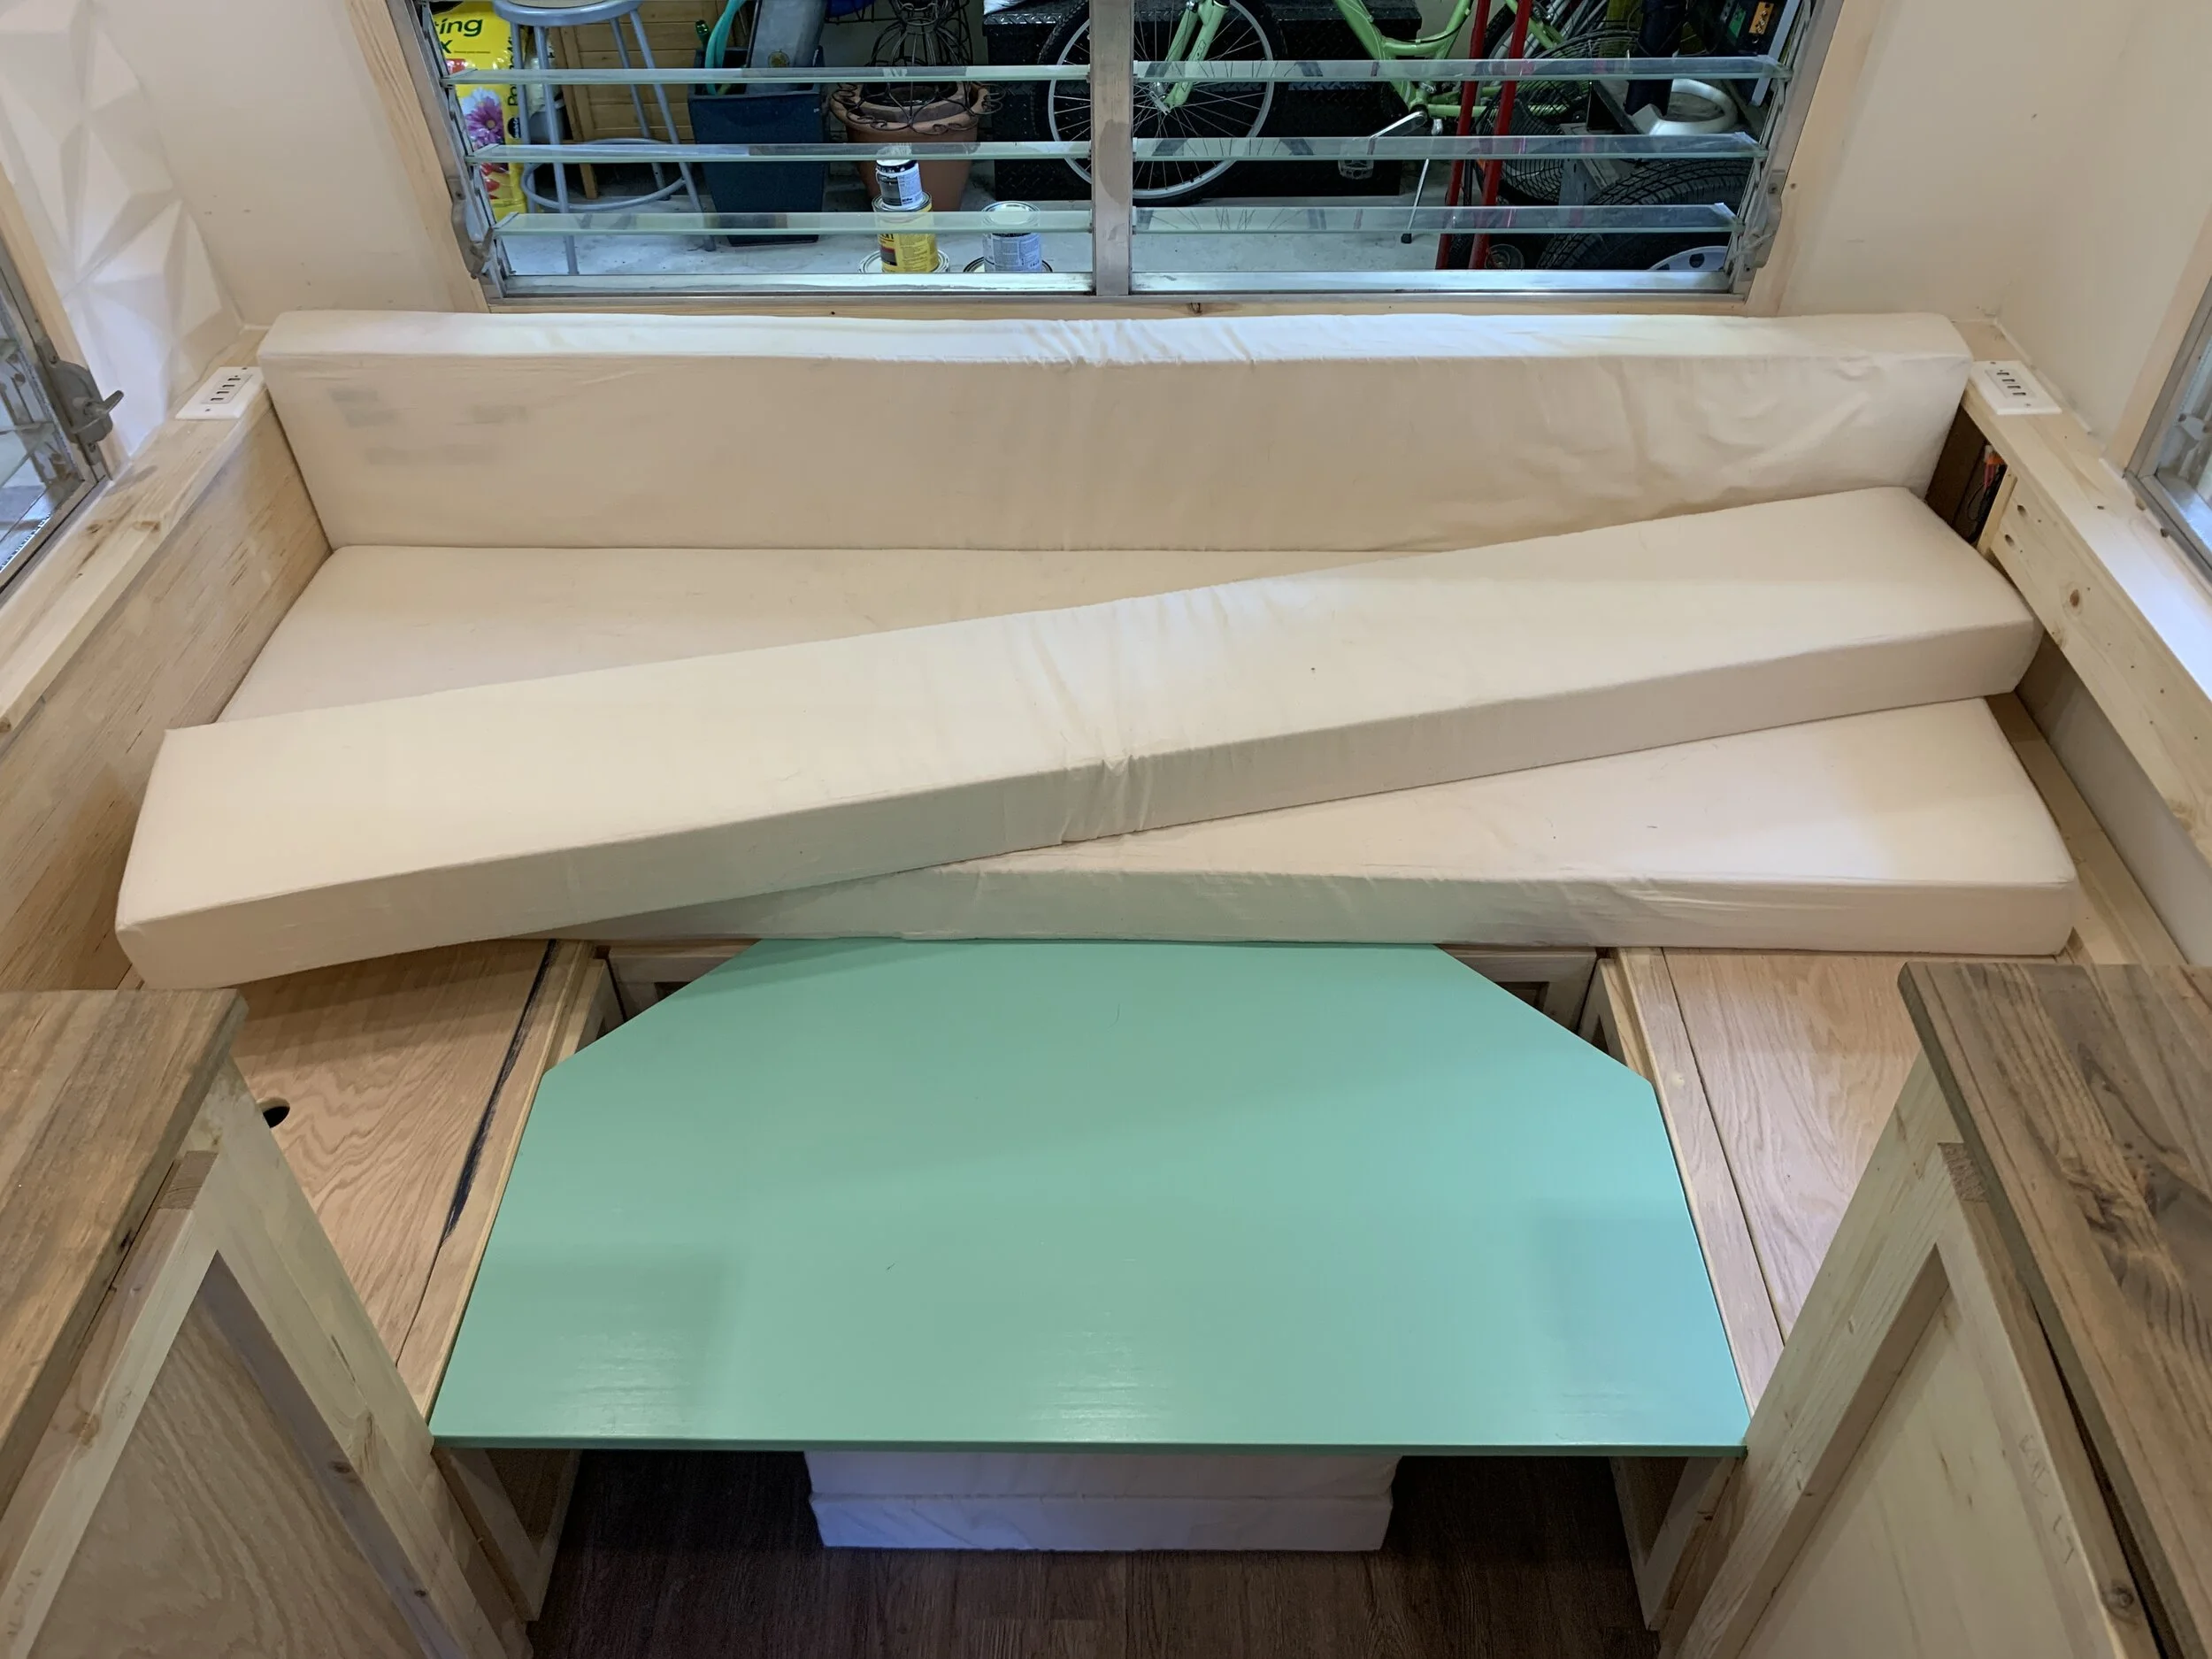
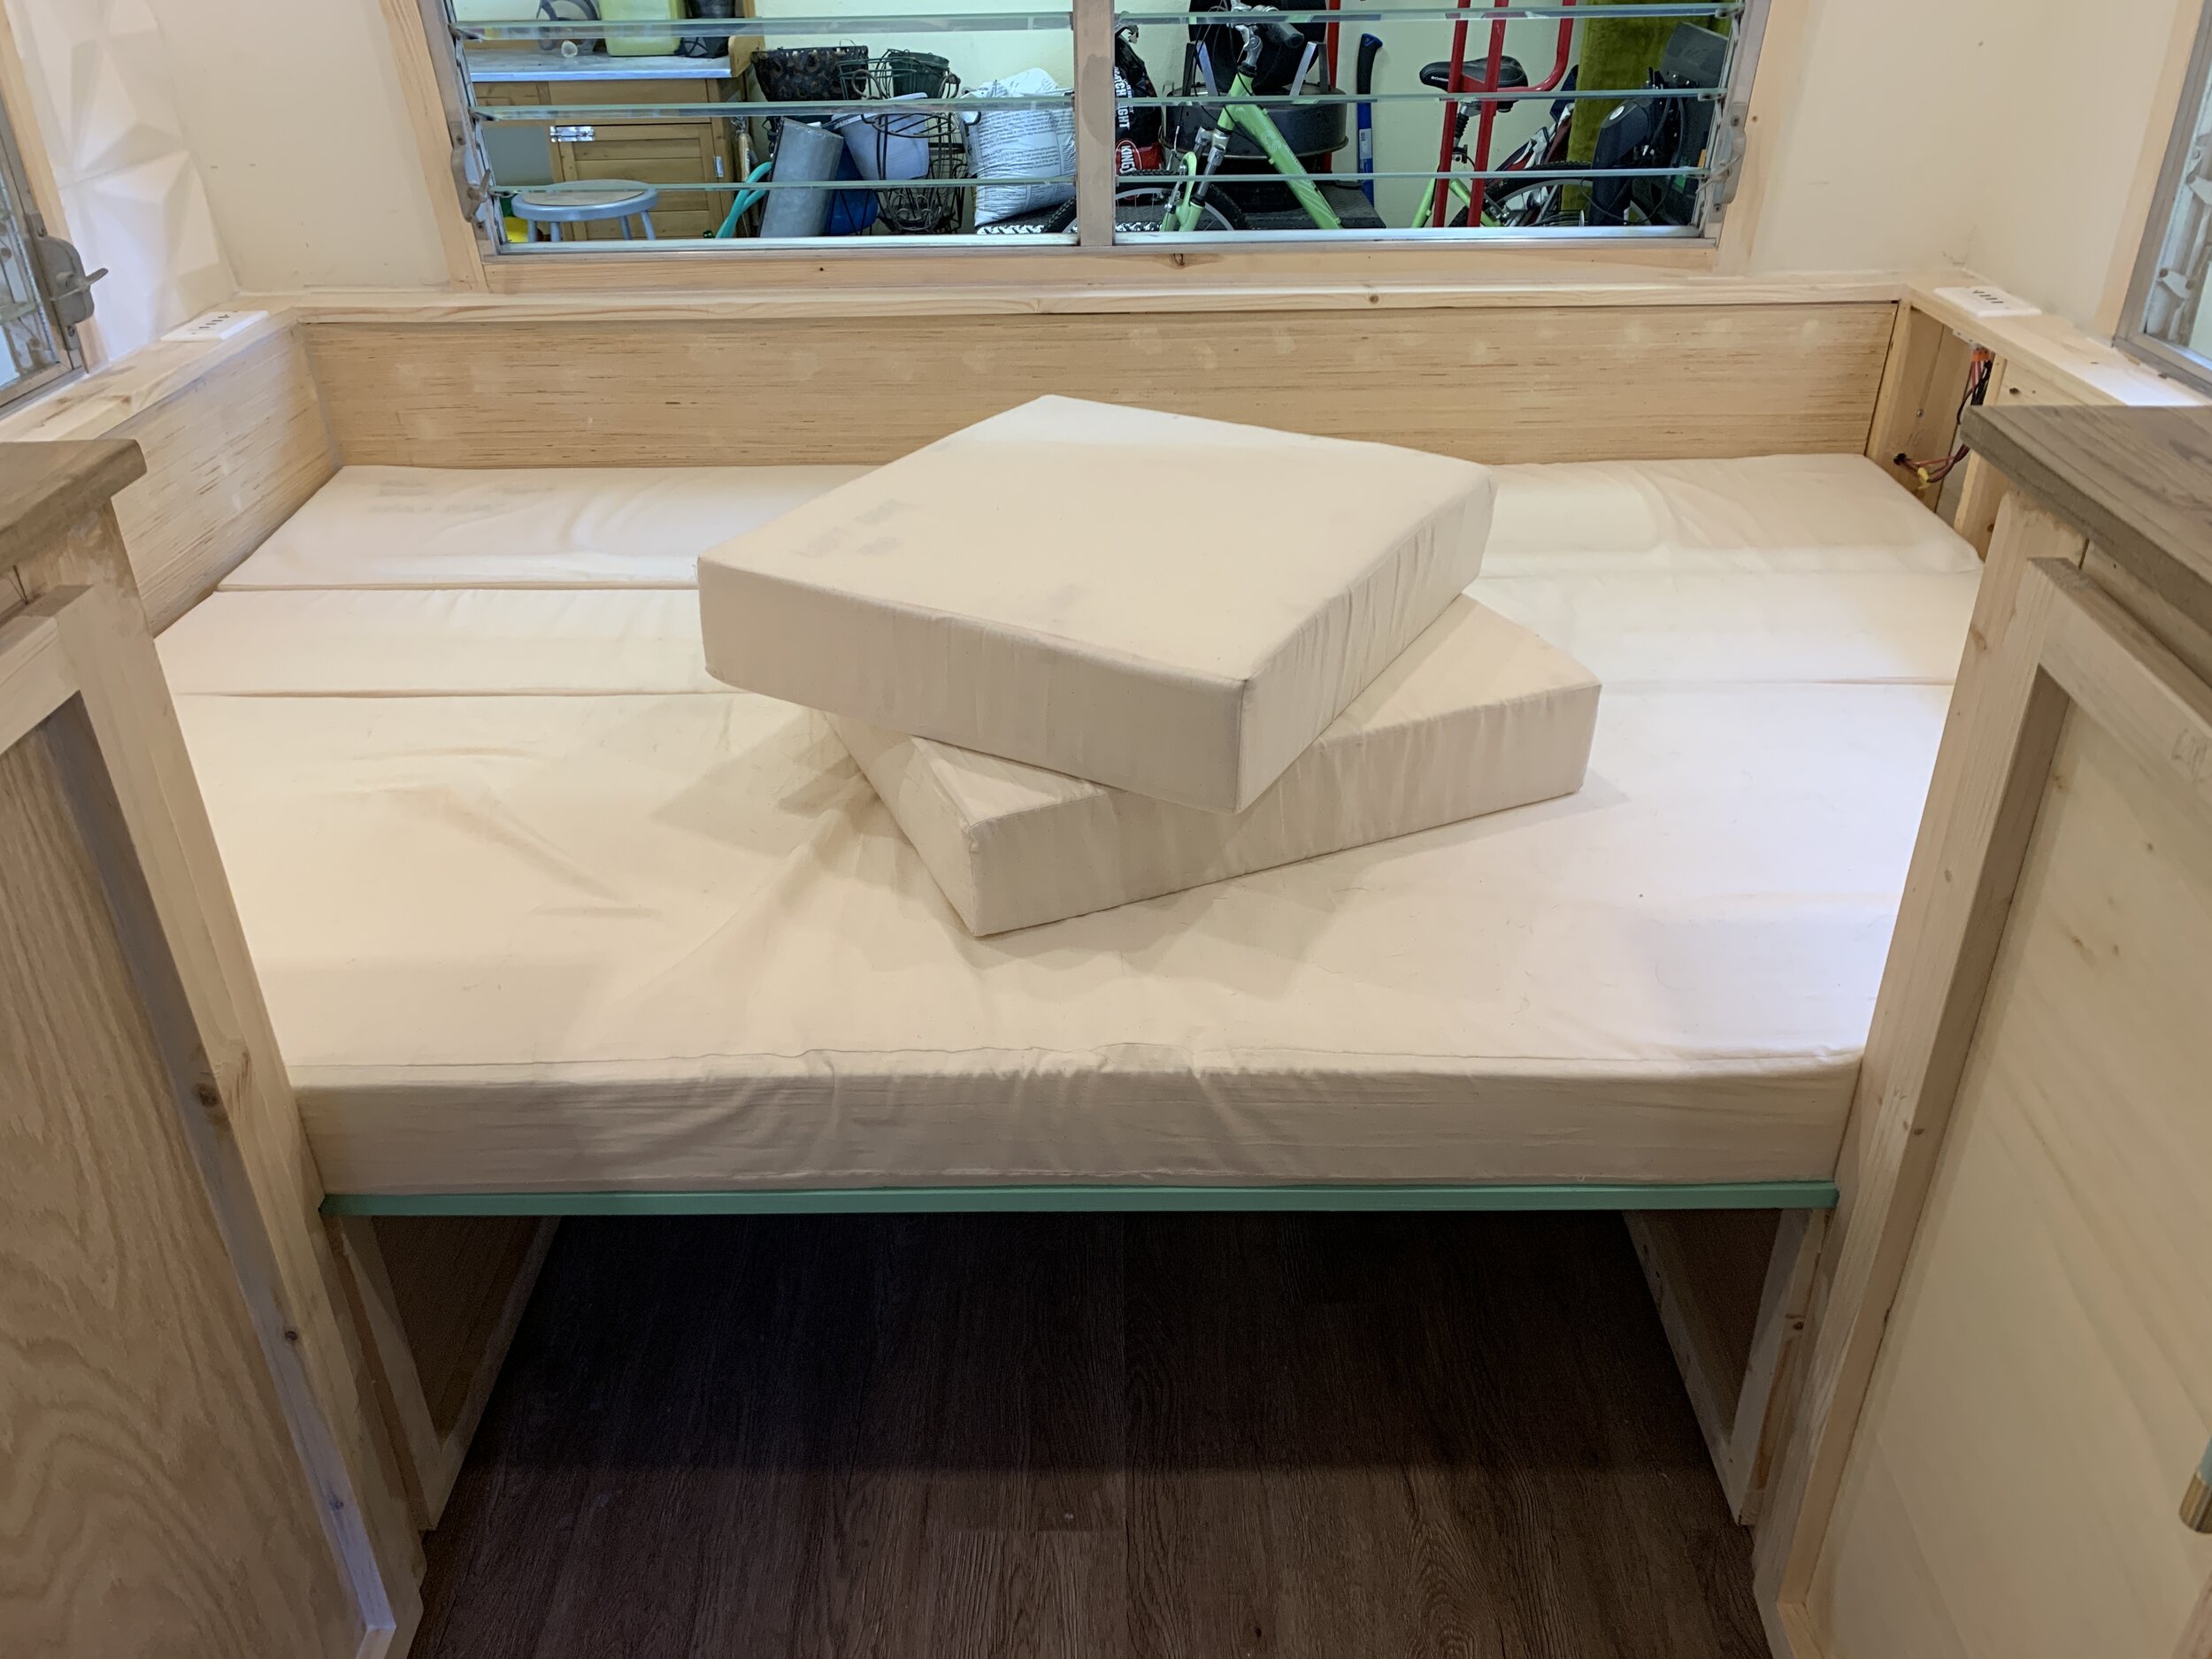
Step 5: Store the extra cushions
You can see in the photos above and below we remove the two square-ish “wing” seat cushions and store them on the floor since they’re not needed to make the mattress. You could put them in a cabinet (and we might in the future) but as of now we just tuck them under the bed since no one is walking under there when it’s bedtime.

Dinette area in bed form with side cushions stored below.
Step 6: Adjust the cushions
Cushion 1
First, we pull the long seat cushion all the way forward to the edge of the bed so that it touches the side of the cabinets. (Really, these cushions all add up to the same width so the order doesn’t technically matter, but this is the easiest way to assemble them with the way they stack when they’re arranged as dining cushions.)

Dinette area in bed form with cushion two (the front backrest cushion) on top of cushion one (the seat cushion).
If you hadn’t already noticed from the photos, there are two back rest cushions stacked one in front of the other when in dinette bench form. The front backrest cushion is shorter than the other one (the one that’s against the wall and rests on top of the seat cushion, while the wall-side back cushion is tucked behind the seat cushion, resting on the wooden bench seat itself).

Dinette area in bed form with seat cushion in place.
Cushion 2
Then we scoot the second cushion forward so that it’s touching the first cushion.
Cushion 3
Lastly, we pop the taller, wall-side backrest cushion into place to complete the mattress.
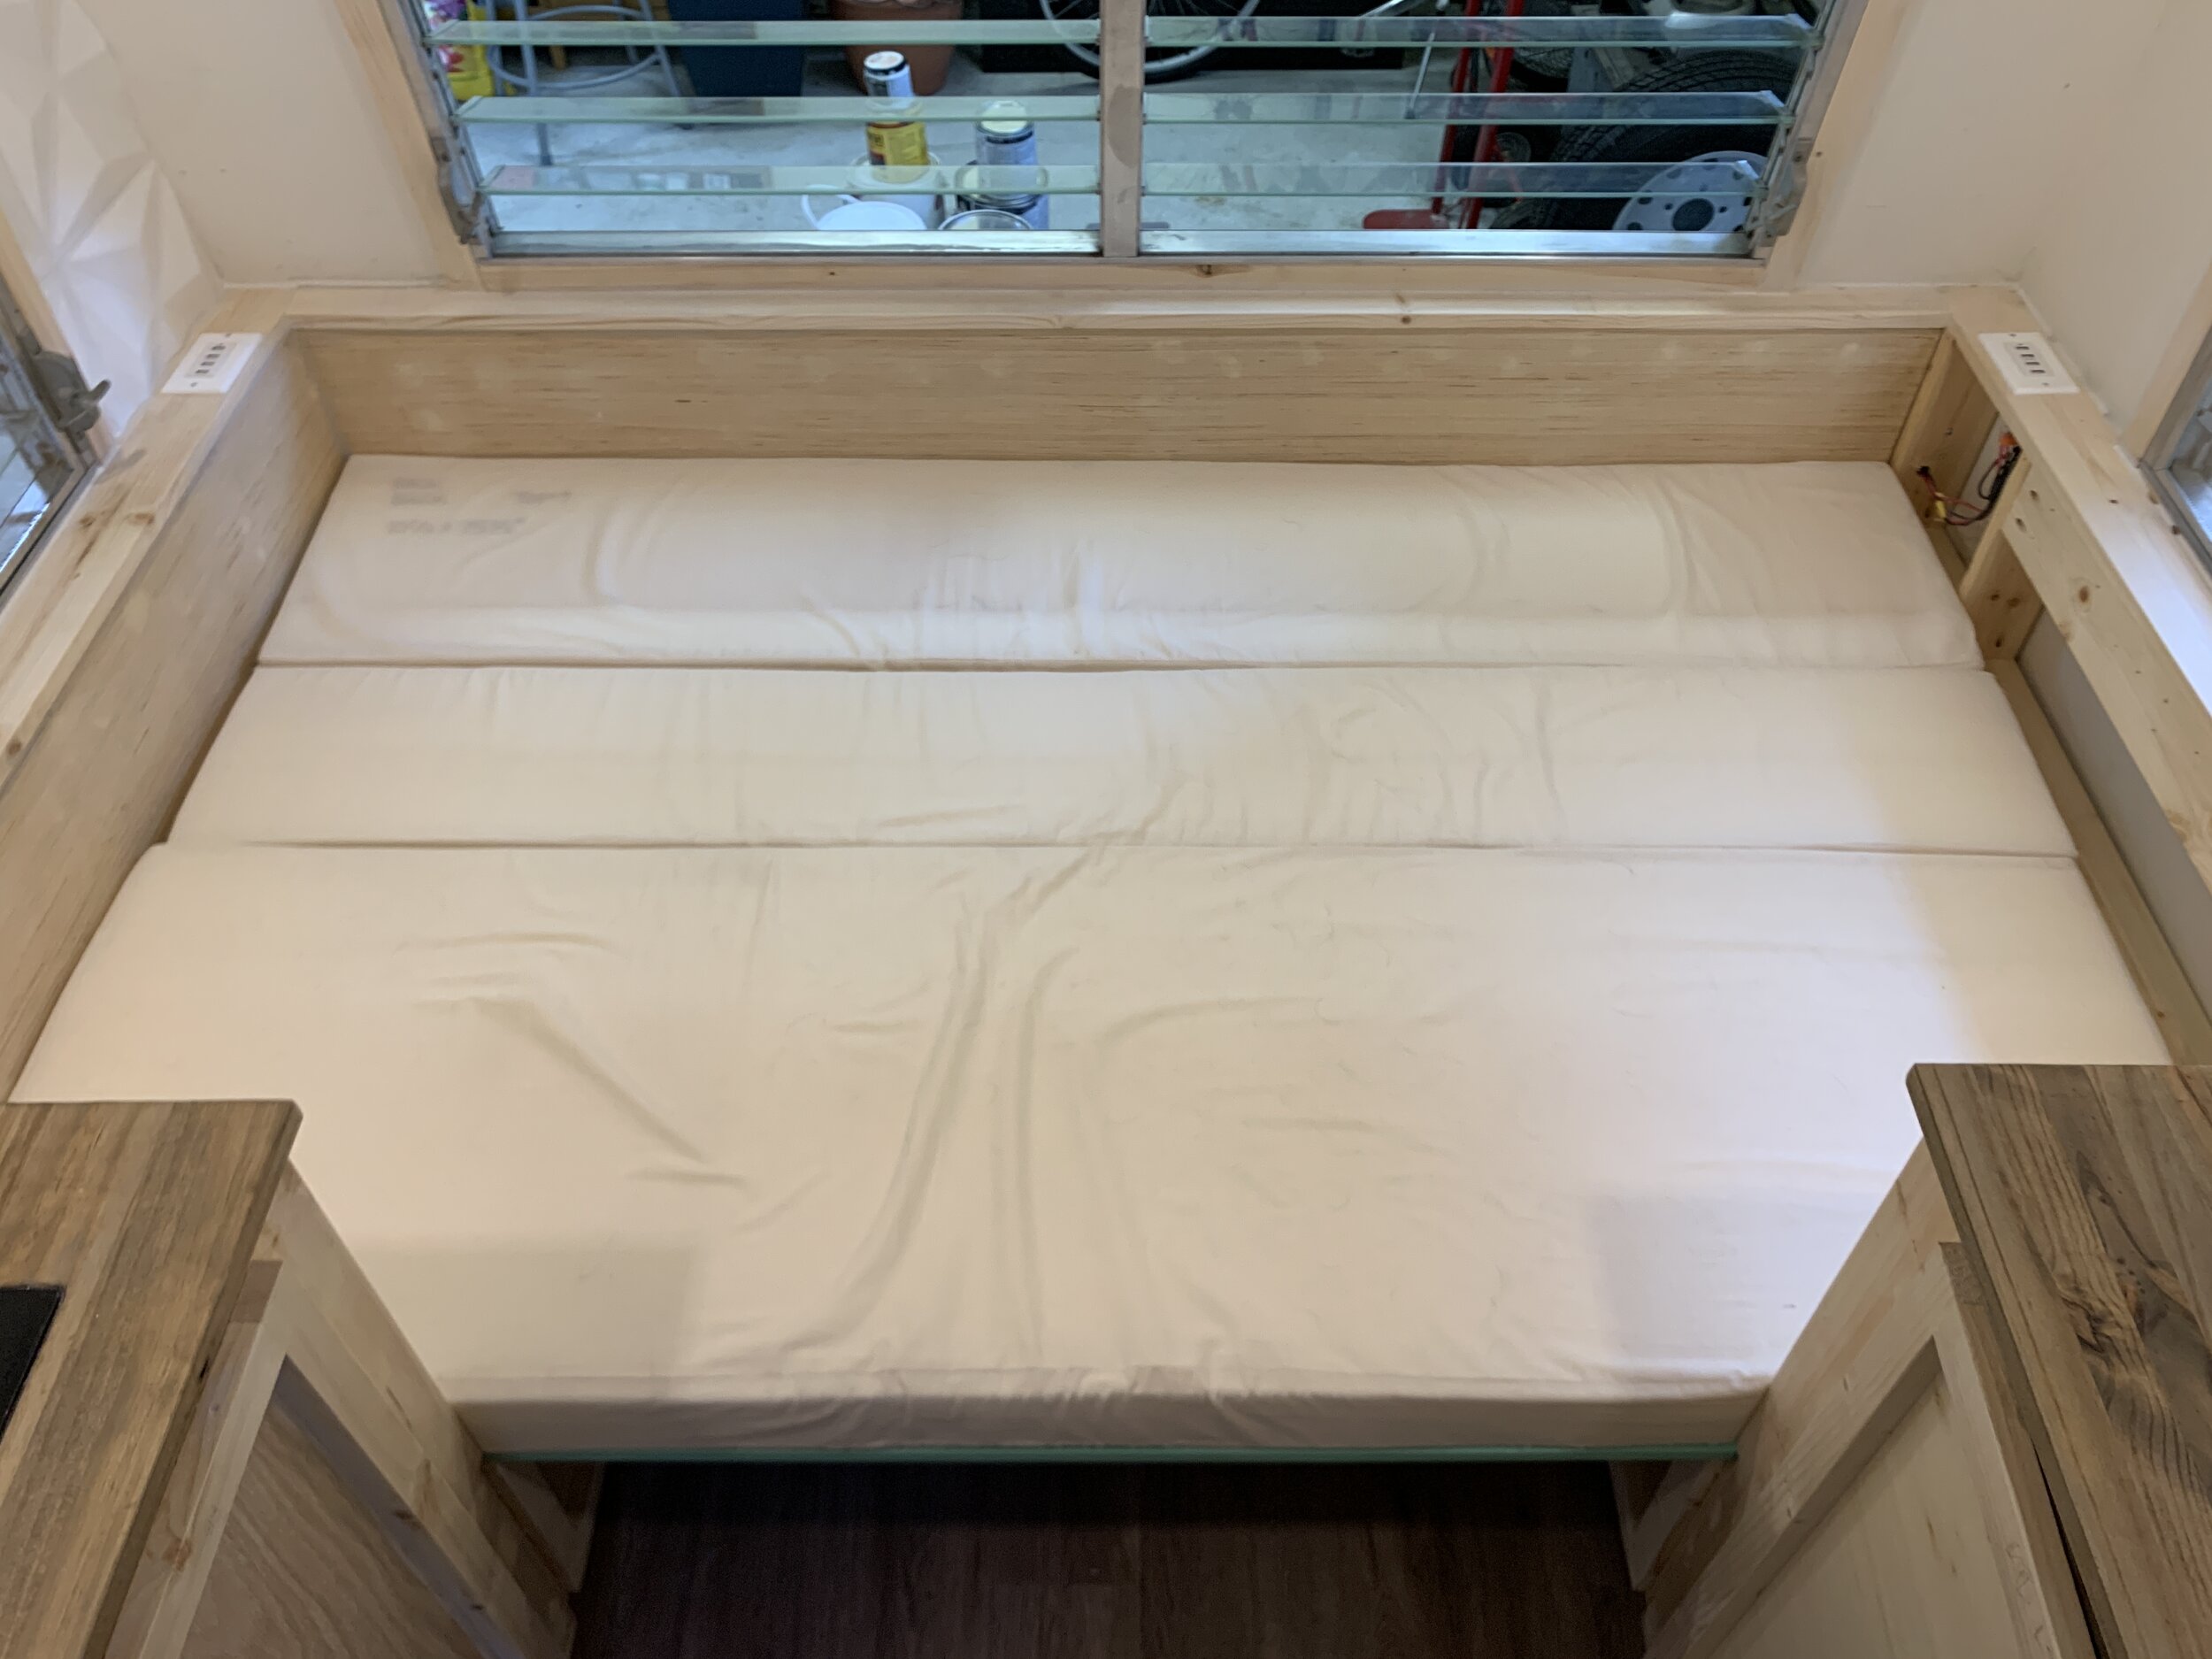
Completed dinette area in bed form with all three cushions in place to make the mattress.
Still on deck (when we finish the project) is our upholstered cushions (including where we got all of the materials for them), our feature wall install (that you might’ve gotten a little peeksie of above or on Instagram), the bookshelf build out, our finished cabinets (we’re currently in the middle of painting them and might I say they are lookin’ fab so far), and the exterior diamond plating install.
What do you think? We’d love to hear from you in the comments below!