The Cameo Camper Renovation: Building a Custom RV Shower Pan Part 1
This is part one of a series. Don’t forget to check out part two, too!

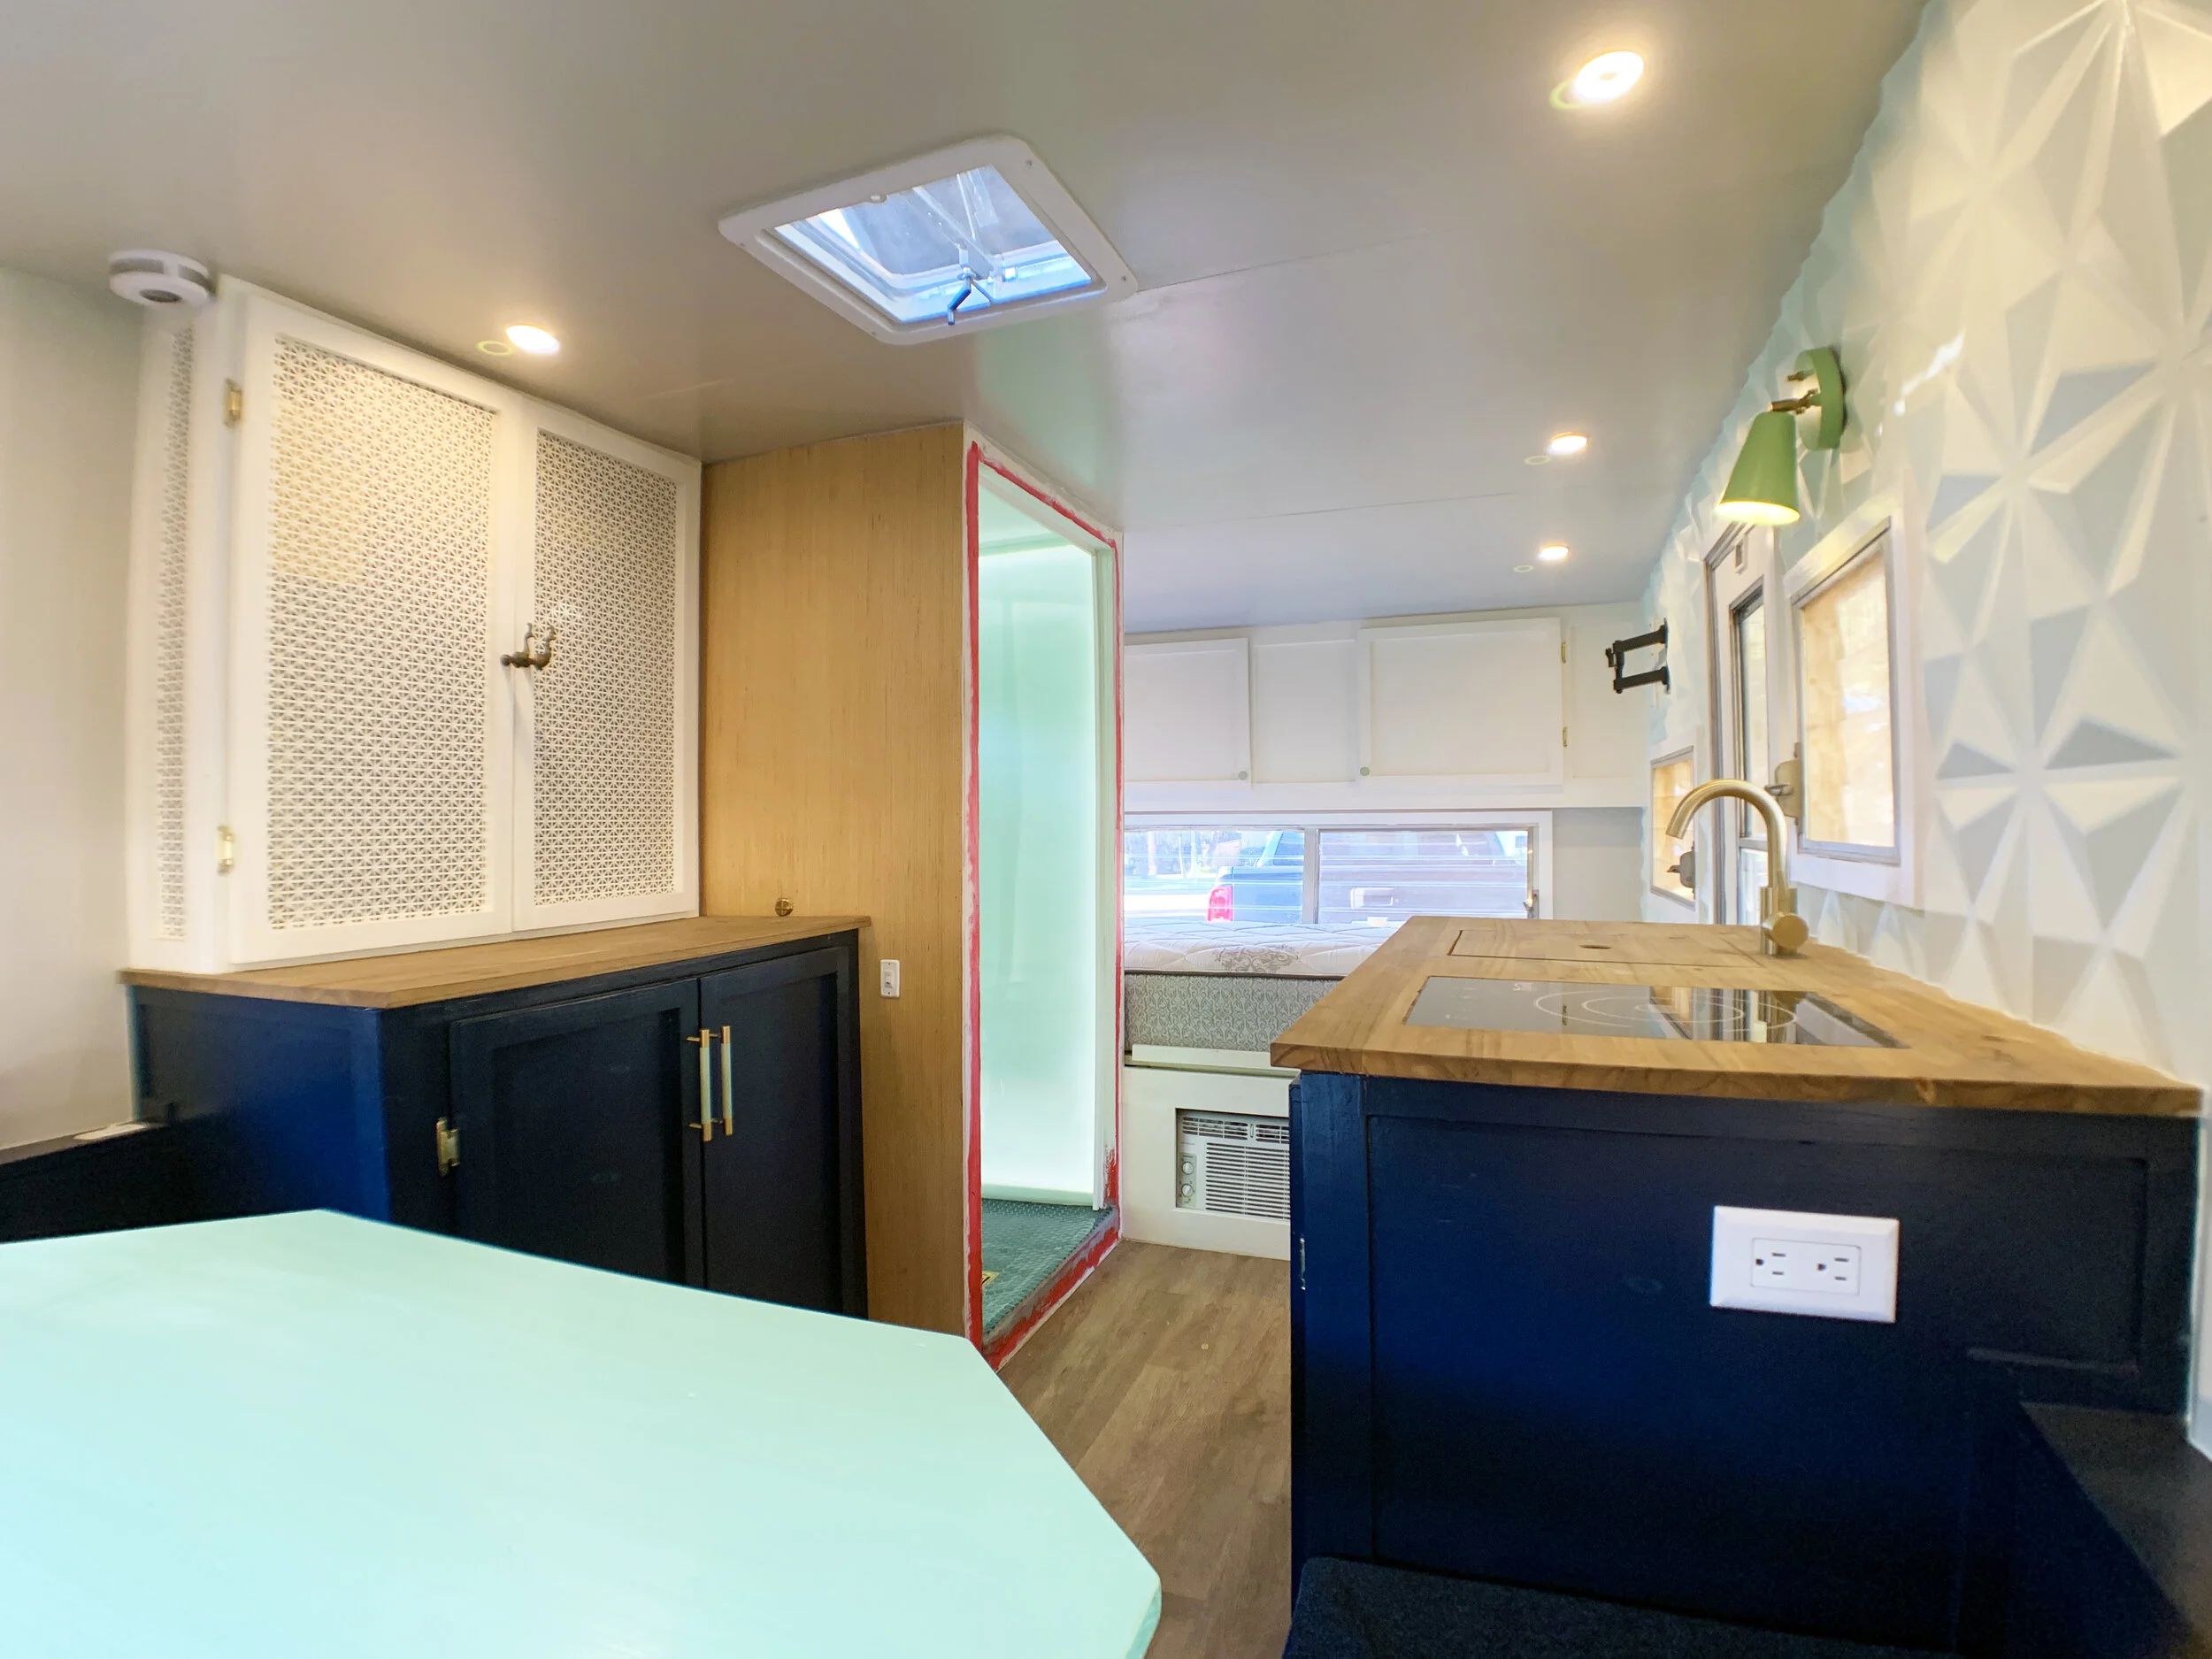
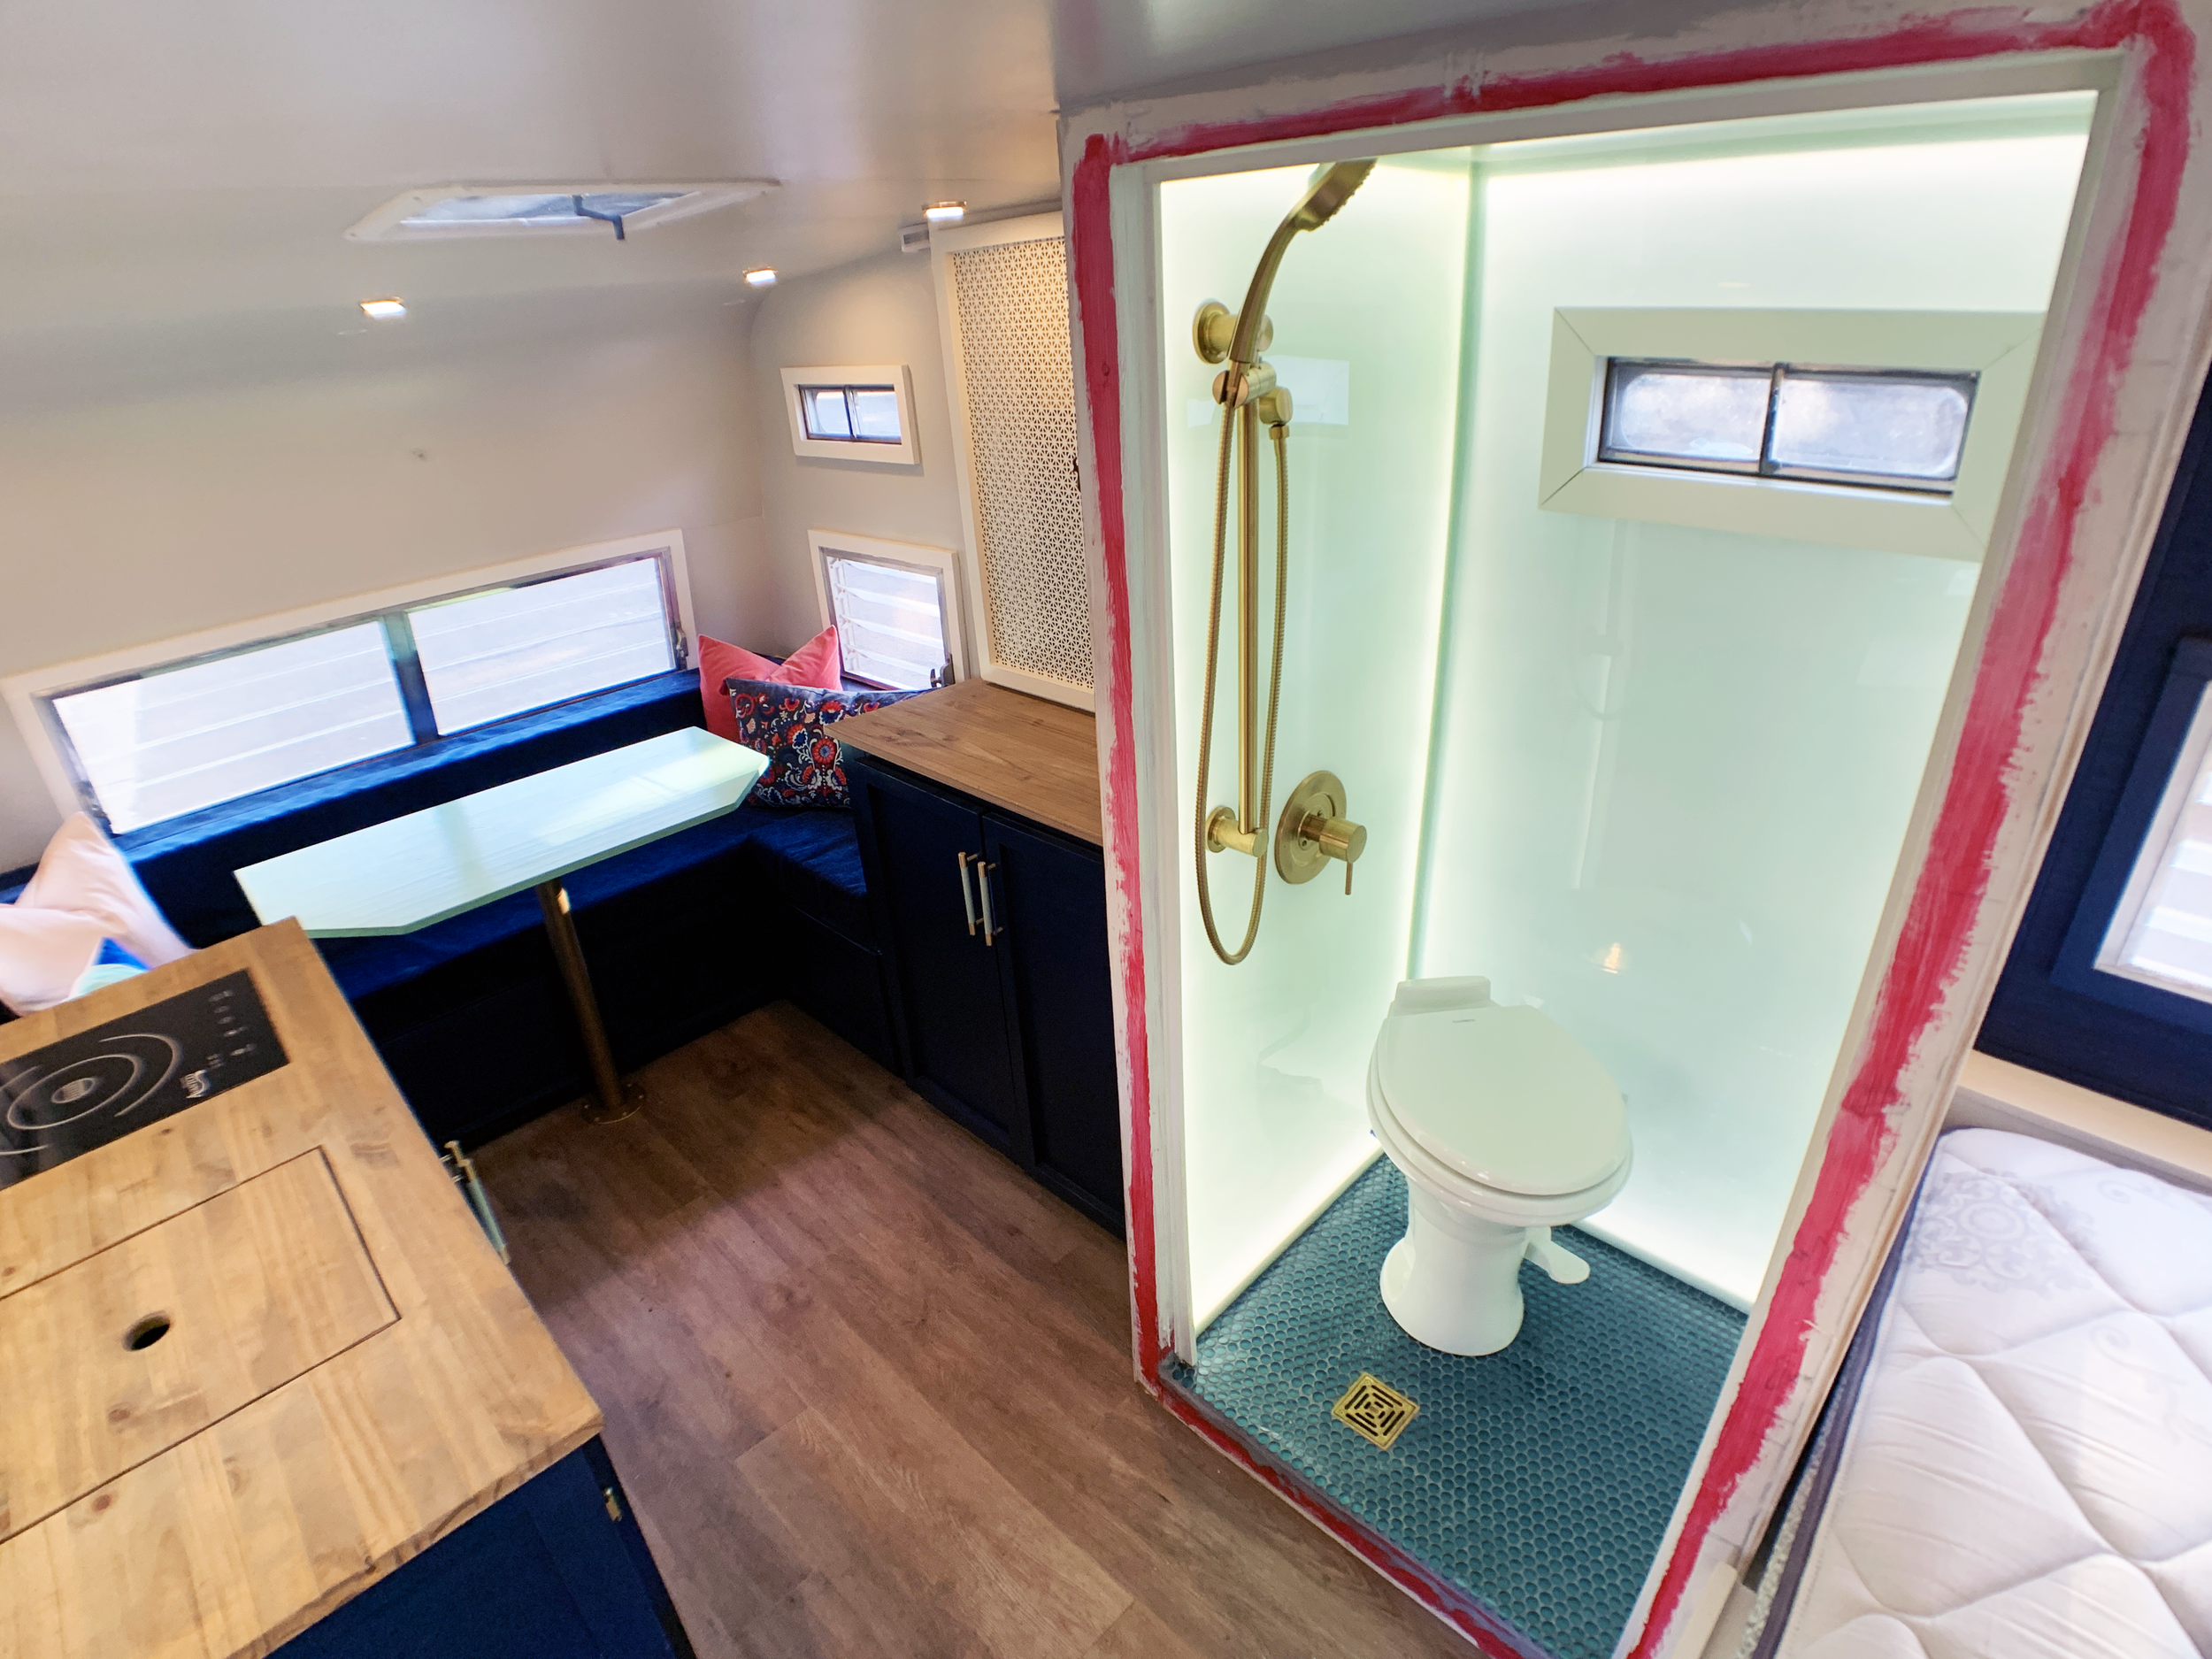
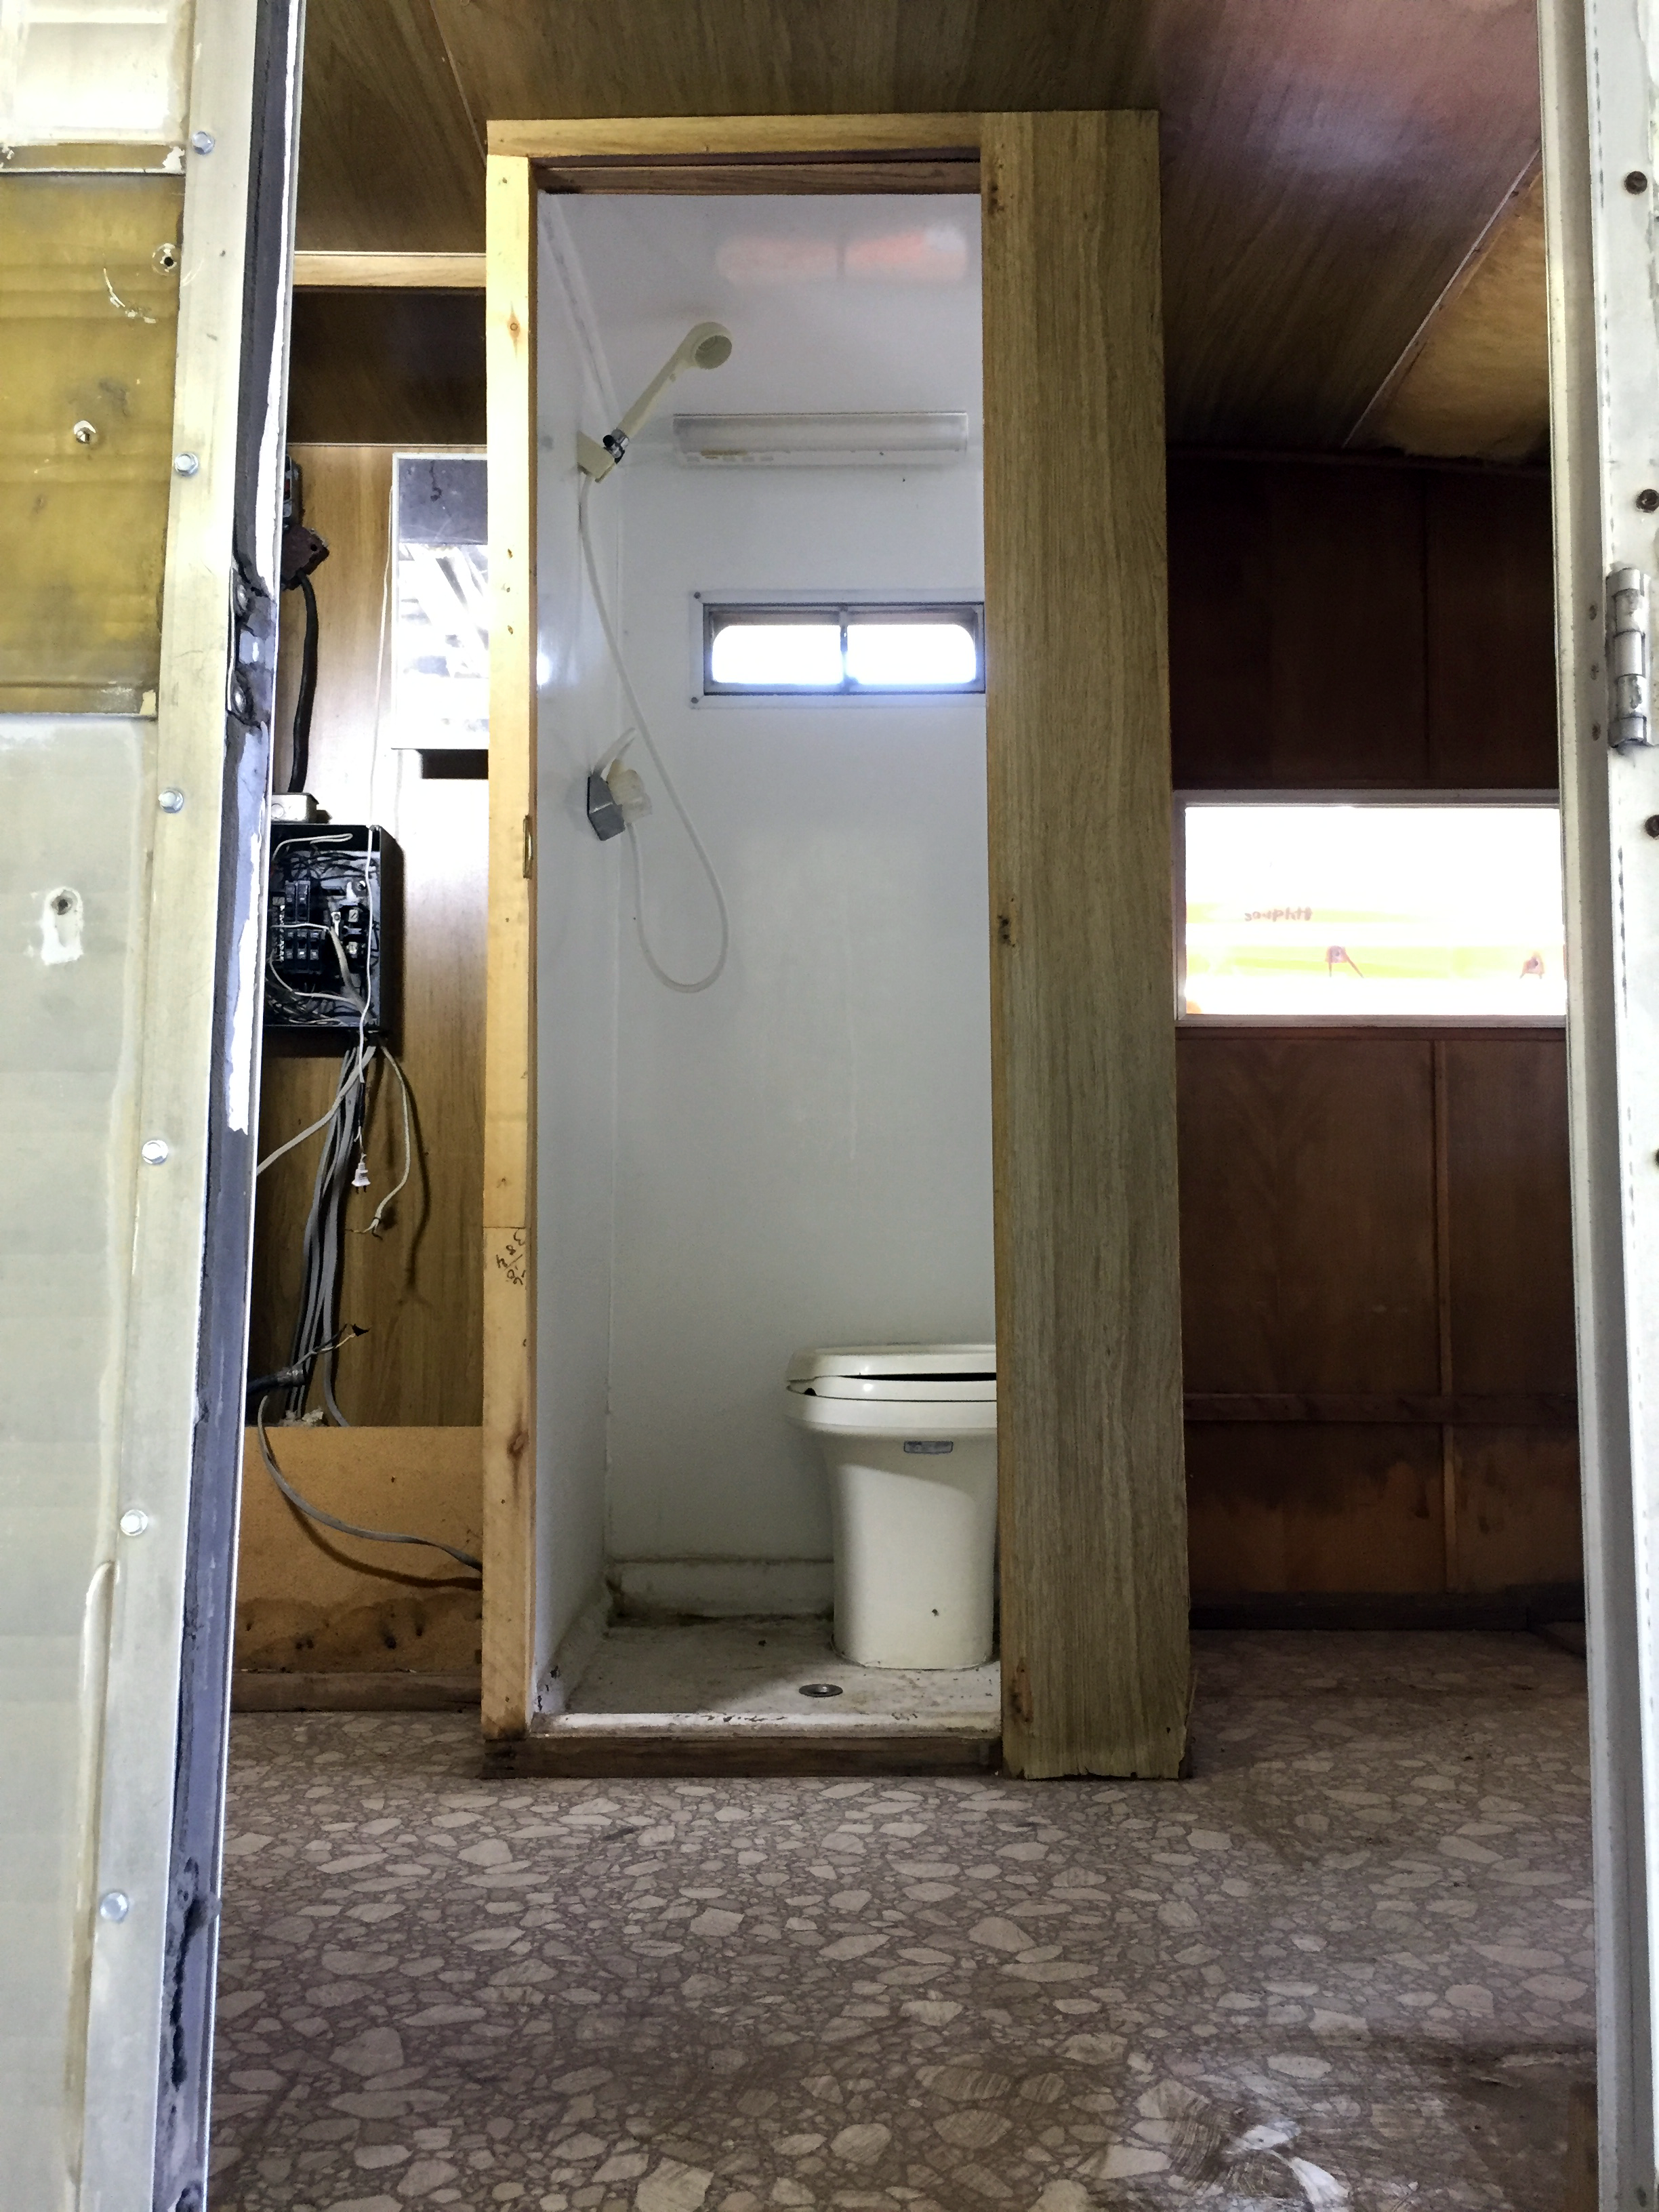
Over 2 years ago when we first got and demo’d The Cameo, we removed the squishy, stinky shower pan and surround that was made of (we’re pretty sure) dry erase-coated masonite board. Since then, we’ve framed out a (believe it or not) larger wet bath that will have both a shower and a toilet in it – just like was there originally.
There are many tutorials out there on building and waterproofing a shower, and they would be fine if they all didn’t have a solid mortar base (which requires a sturdy, non-moving surface – like in a house – to not crack). Not to mention the added weight a solid mortar shower base would add to the camper.
This left us with a handful of options:
Use the original shower pan/bathroom floor
Find a new pan somewhere that perfectly fits the larger-than-normal space we’ve already framed out
Get a custom pan made out of fiberglass for $1,000+
Learn how to work with fiberglass and fabricate our own pan
Never move the camper
Since we’d already tossed the original one, wanted to go bigger than any pre-fab RV ones we could find, would rather not spend anywhere near $1,000 on just a shower pan, don’t trust ourselves on the first go to correctly make an attractive and functioning fiberglass pan, and wanted to actually be able to use The Cameo to go see all the pretty things, that left us with option 6: Find another way to make a shower pan ourselves.
Disclaimer:
We do not yet know if this whole thing worked since it’s so new and we’ve not driven it around yet. We’ll update as it gets more use and let you know how it’s holding up over time.
Our custom shower pan solution
Oh and to add another layer of “fun” to the mix, we also need to make it so it can have a toilet on top since this is technically an all-in-one compact wet bath and not just a shower.
This requires a solution that is:
Sturdy…
But is flexible enough not to crack in travel/during use
Slopes nicely to the shower drain so we’re not standing in pooling water and encouraging water to sit and cause water damage…
But also has a high, flat spot in one area for the toilet base to sit on
Our shower/wet bath floor shopping list
Most of this you can find at your local hardware store, but some of the things we ordered online (like the brass drain and the waterproofing tape).
1/2” high-quality marine-grade plywood – cut to the size of the bathroom floor. (We used 3 pieces that were approximately 33 x 29”, but read below and plan for just 2)
Shims – we used about 8-10 packs of mostly the standard size but also used the longer ones, which were helpful in some areas
Liquid Nails construction adhesive + caulk gun – (We used about 6 small tubes)
Wood screws in varying lengths – to secure the 1/2” plywood layers together and the base to the camper floor. (We used 1-1/4” for our 3-plywood layer base and 2” to secure the triple-layer base to the camper floor)
Gap and crack filler spray insulating foam – (We used a little less than 2 cans)
Toilet flange – the type you need may vary depending on your floor’s thickness and the toilet you’ve chosen. We were able to use a standard 3” toilet flange from the hardware store.
Silicone – We used Lexel since we already had it on hand from all of our other waterproofing projects
1/4" high-quality marine-grade plywood – cut to the size of the bathroom floor. (Ours was approximately 33 x 29”)
RedGard Waterproofing and Crack Prevention Membrane – 1 gallon should be more than enough for a small camper bathroom. We used about 2/3 of a gallon.
Paint brush/roller(s) + trays – to apply the RedGard Waterproofing Membrane
Notched tile trowel (1/4” square notch) – this depends on what your specific tile size is, but likely with a shower floor it’ll be a 1/4” notch
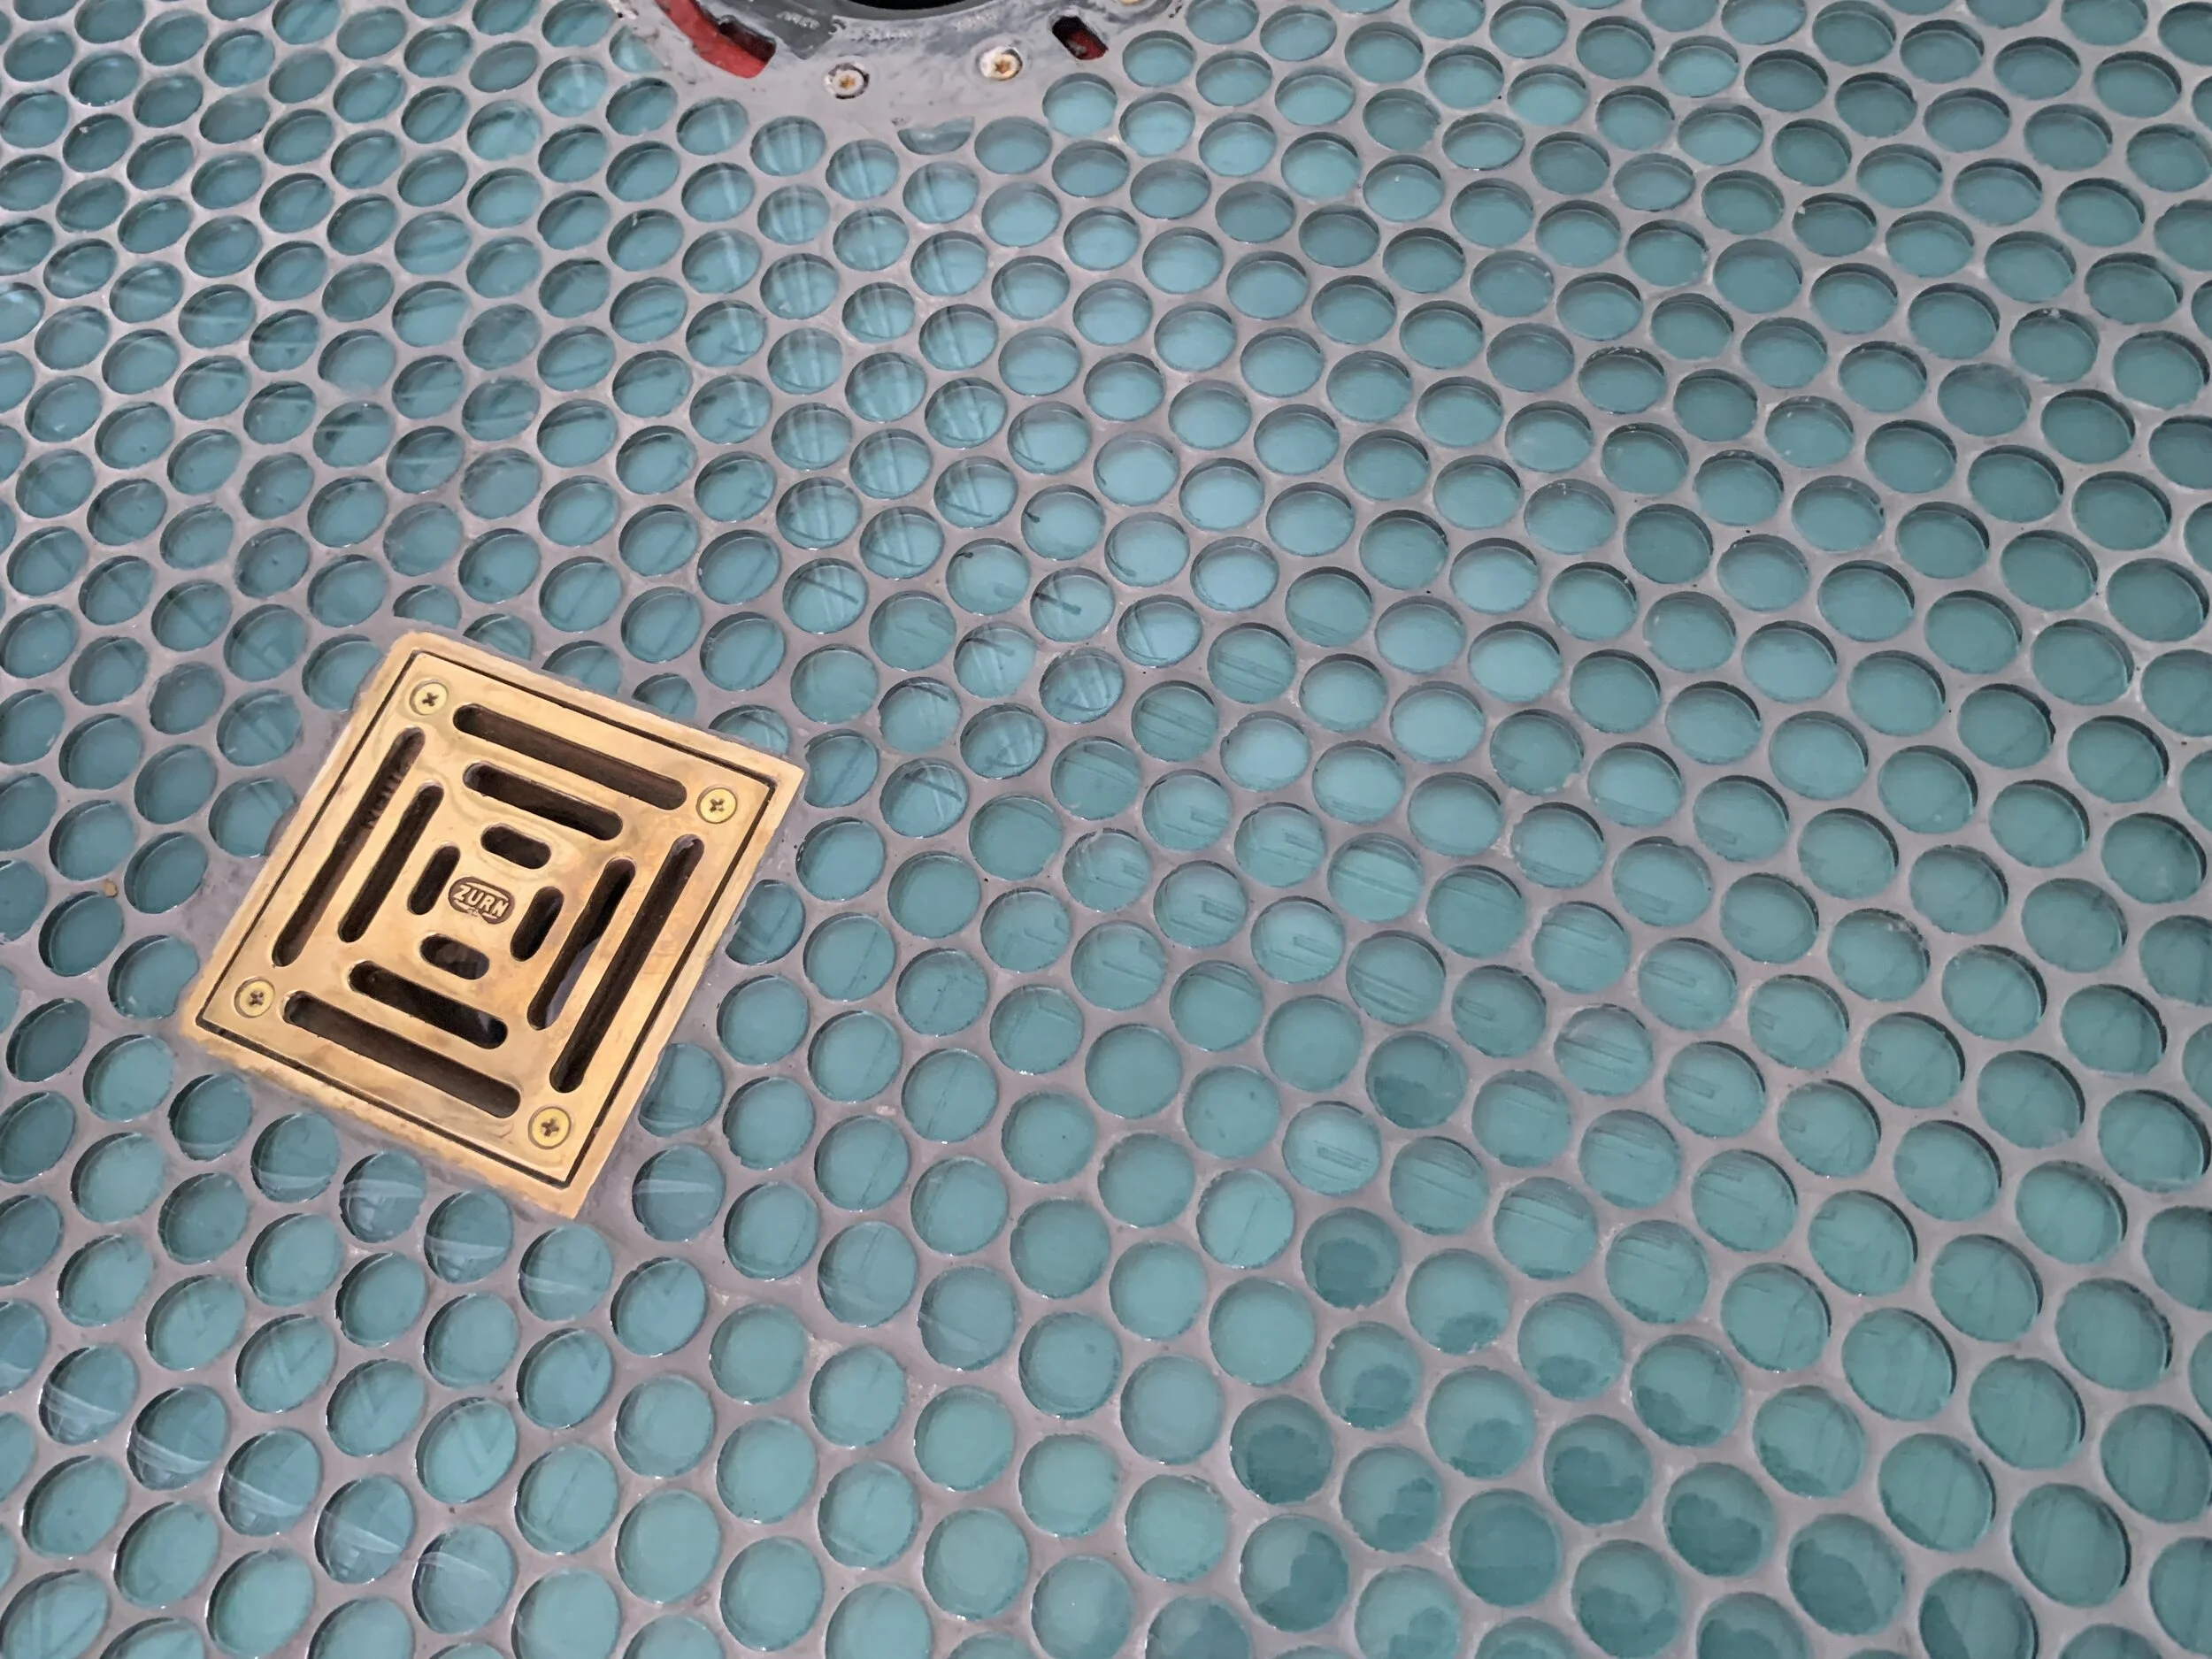
Tile – the smaller the better for a sloped shower floor. We went with penny tile, which has a lot of grout lines and that helps the floor not be super slippery (especially since we went with glass!)
Rubber grout trowel
Grout – we went with an unsanded grout since our tile is glass, which can scratch with sanded grout
Tools needed to complete the job:
Circular saw – for cutting plywood base(s) to size. Could also use a table saw if you have one.
Sliding compound miter saw – to cut shims to length before gluing in place
Drill – for making drain holes + securing layers with screws
Jigsaw – to trim the shims after gluing in place
Knives – for trimming/shaving insulation foam. (We used a combination including our drywall knife, flat blade and box knife)
Orbital sander + sandpaper – for smoothing the insulation foam
Misc. heavy (but small) stuff – for weighing down the floor while it cures
Electric staple gun + staples shorter than the thickness of your framing lumber – for securing the extra pan liner edges on the outside of the shower
Making a custom mortar-free shower floor (that can be used in a camper)
Step 1: Measure + plan the base and drains
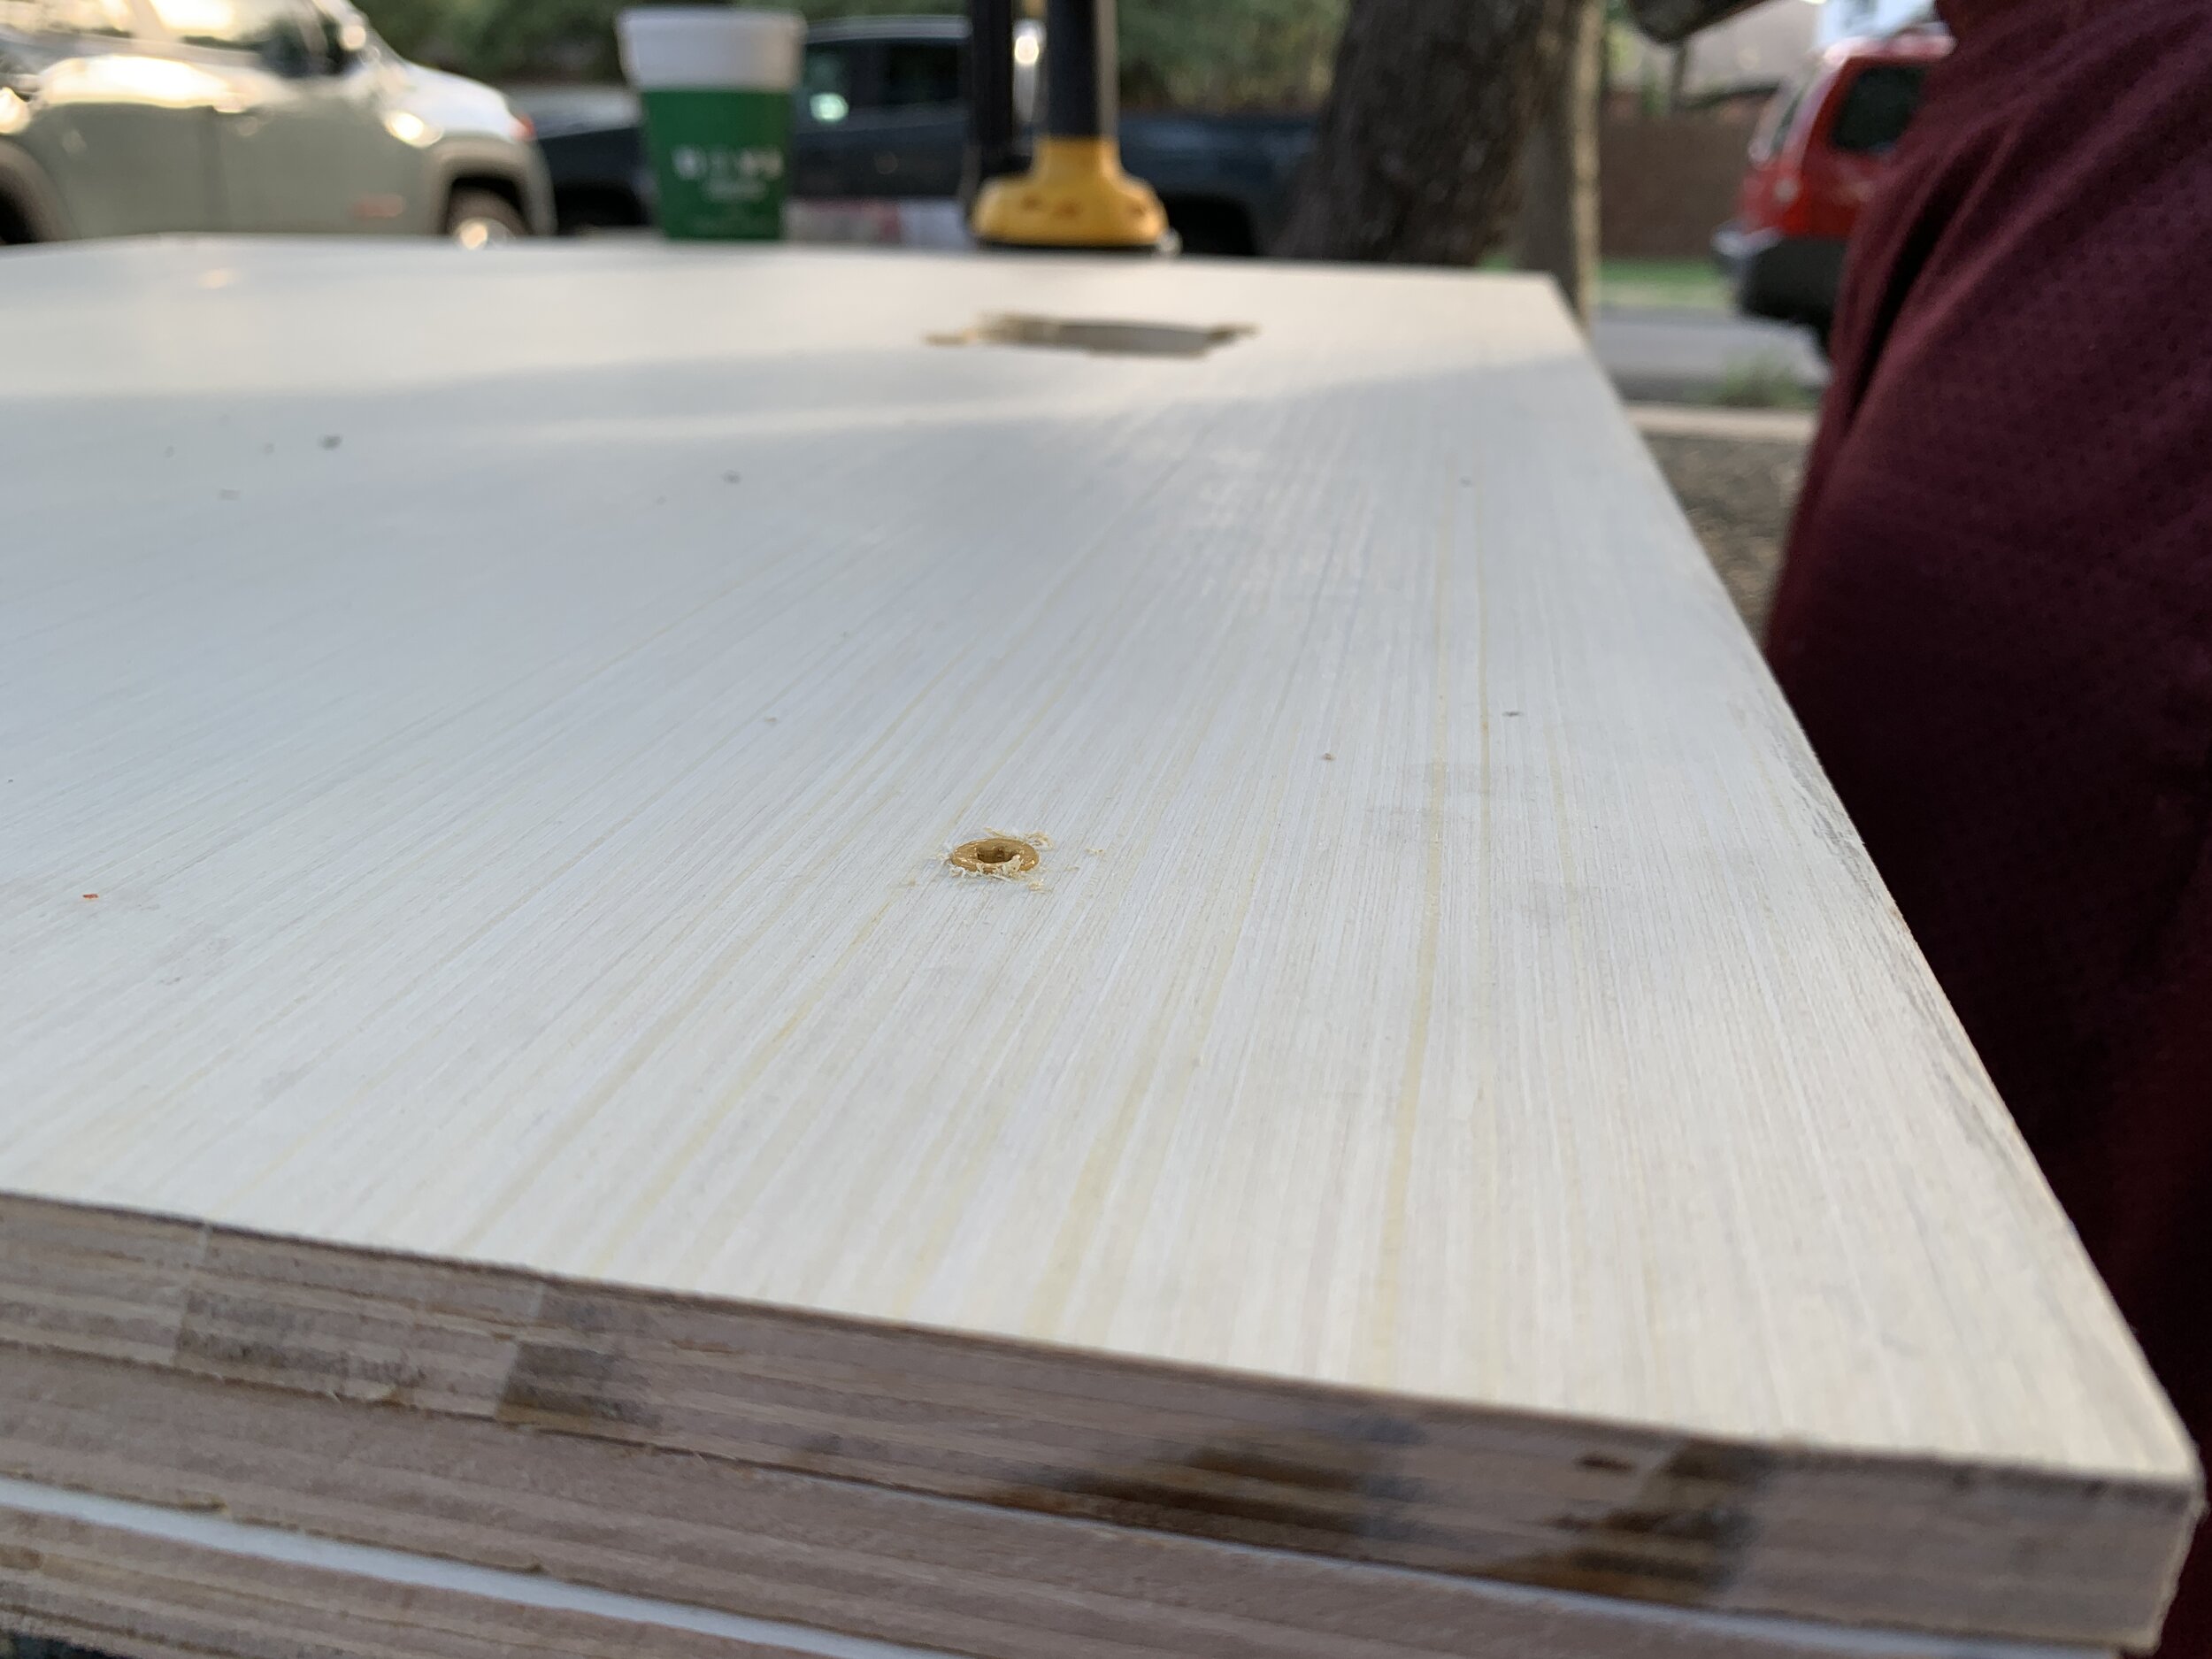
First we figured out exactly where the shower and toilet drains needed to be placed so they would work with the yet-to-be-placed-under-the-camper gray and black tanks (drilling small-ish pilot holes through the vinyl and plywood subfloor to use as reference points inside and under the camper to make sure we were going to miss the intersection of floor joists running underneath the floor) and that the toilet placement fit the minimum distance of 10” from the interior showers walls as listed in the toilet install instructions.
From there we made a plan to keep the toilet drain area high and flat, the shower drain area the lowest and everything else in between sloping down toward the shower drain.

Once we had our two properly placed drain holes drilled through the subfloor, we measured our shower floor dimensions and made a template of the whole shower floor with a roll of butcher paper we had lying around. (If yours is perfectly square you probably won’t need to do this, but our bathroom is askew just enough that we wanted to make sure each of our corner angles were correct so we had the right fit.)
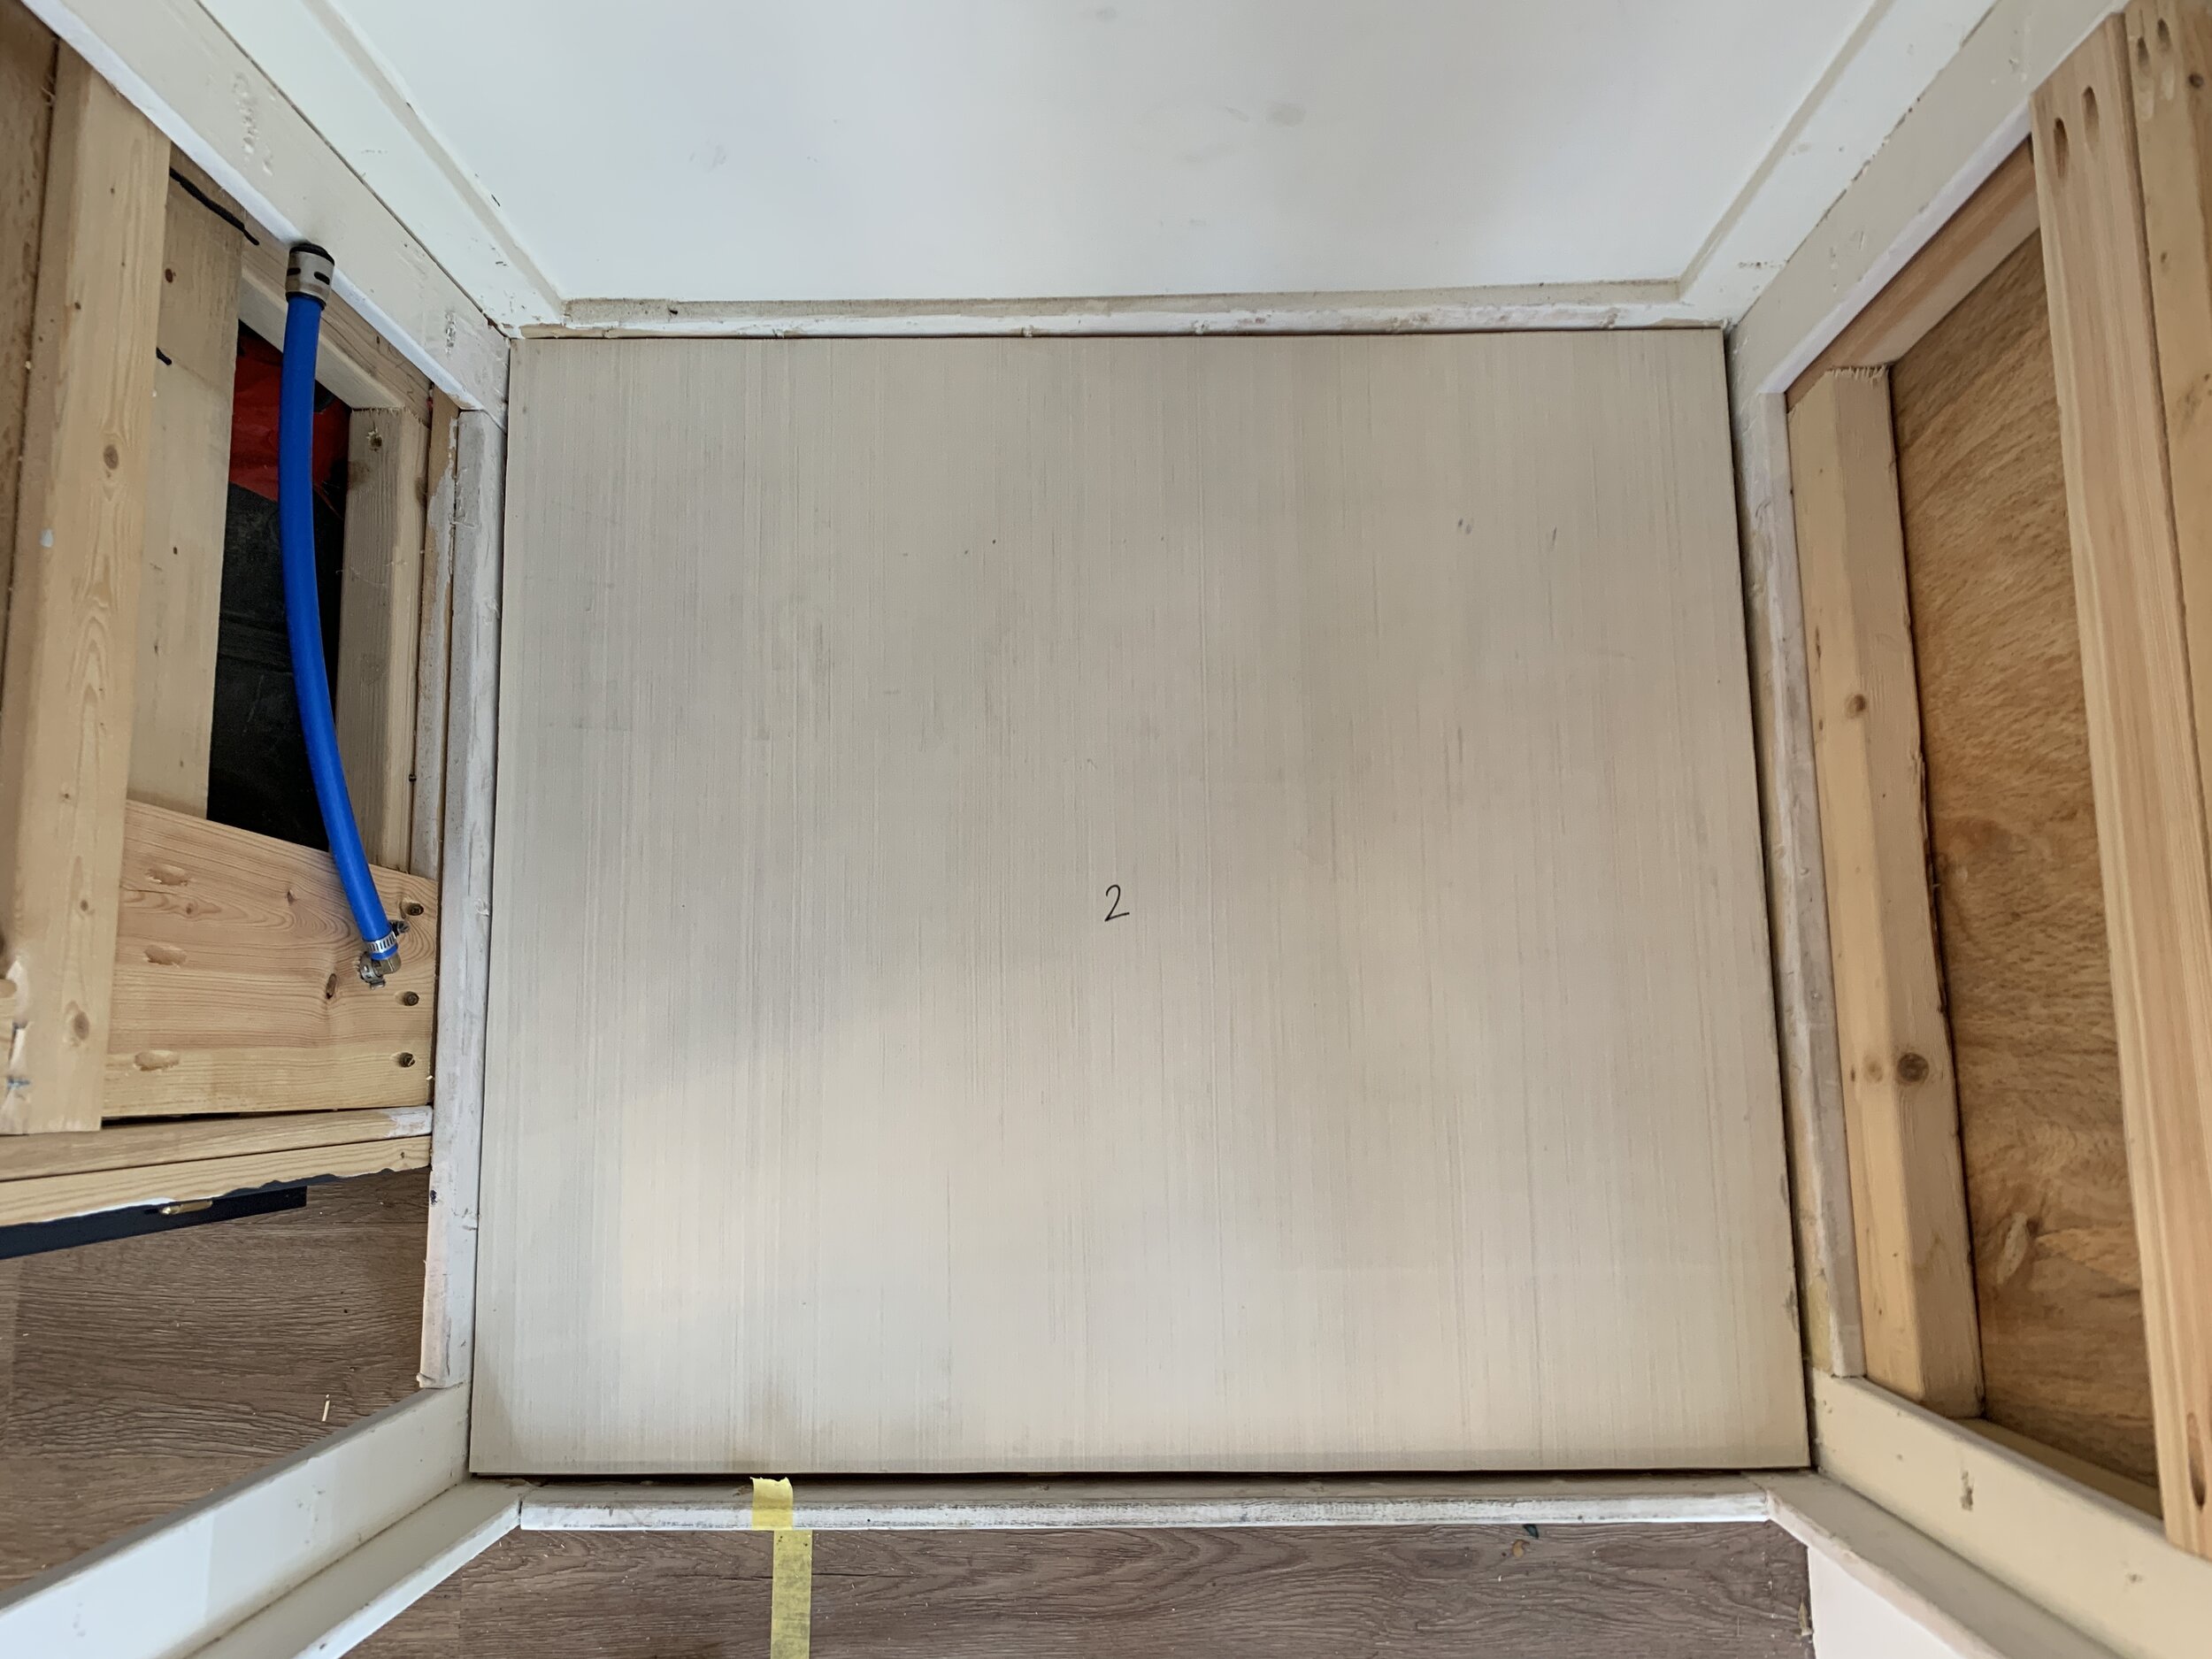
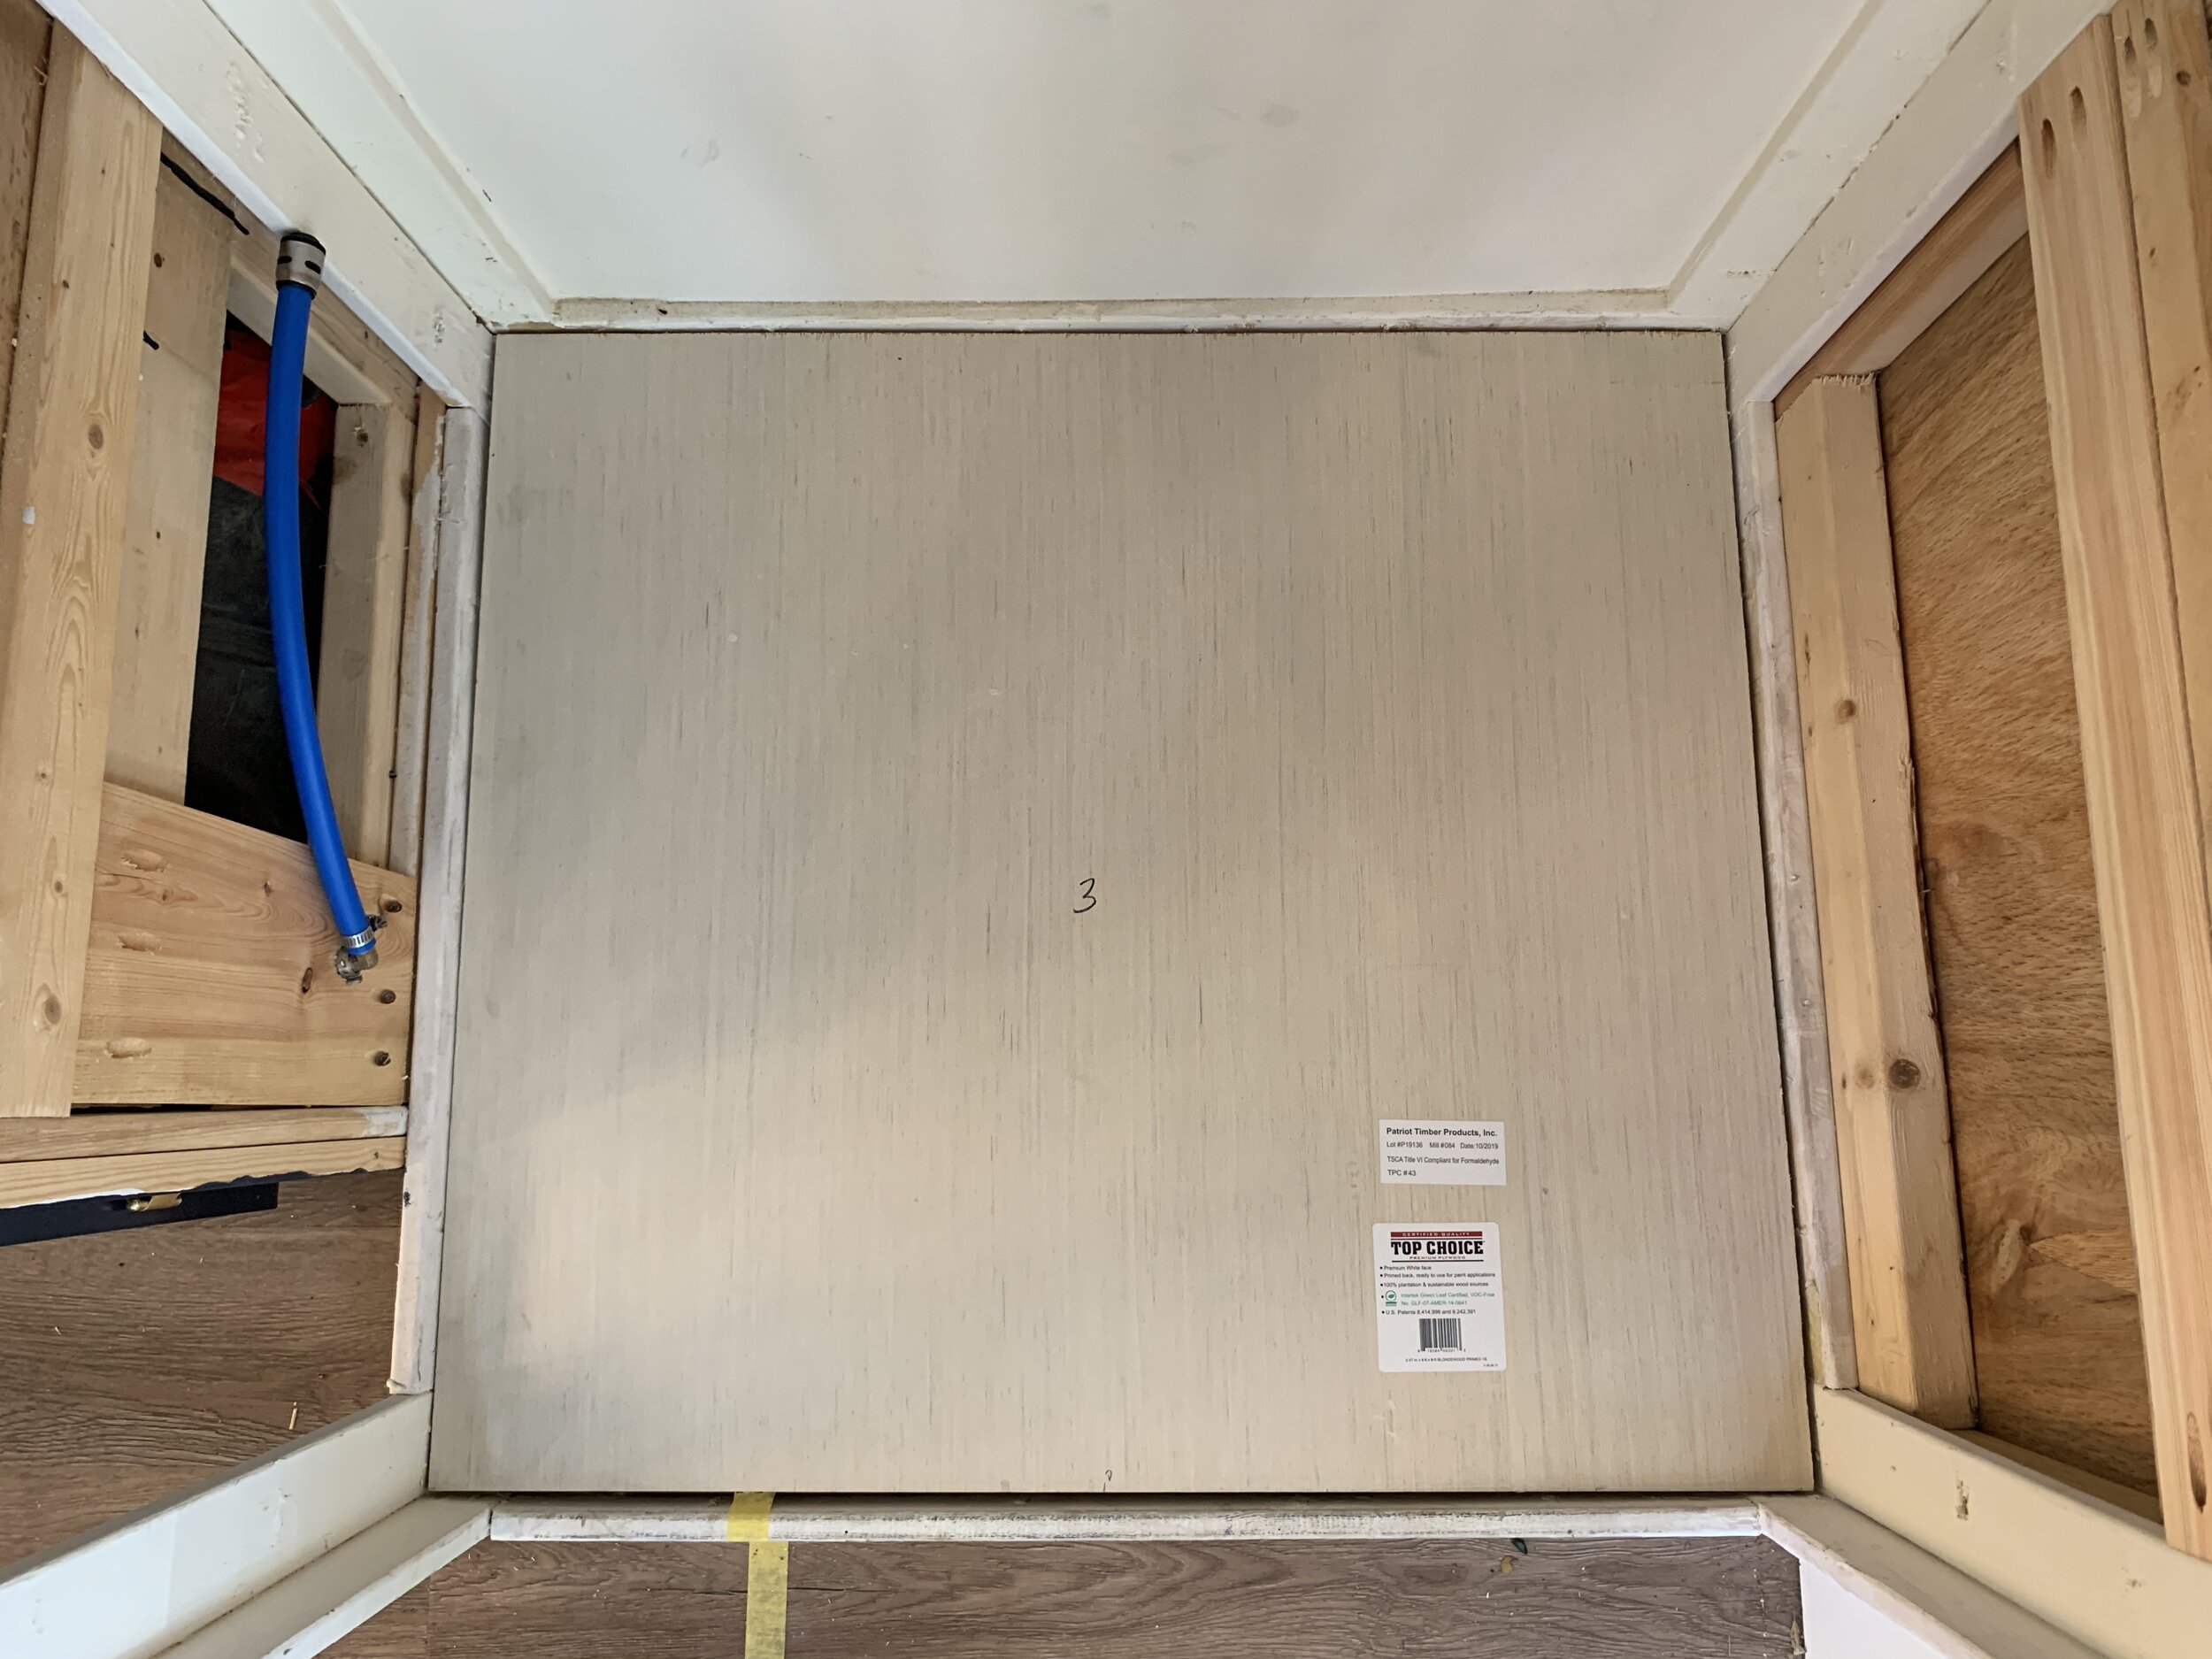
Step 2: Cut the plywood base
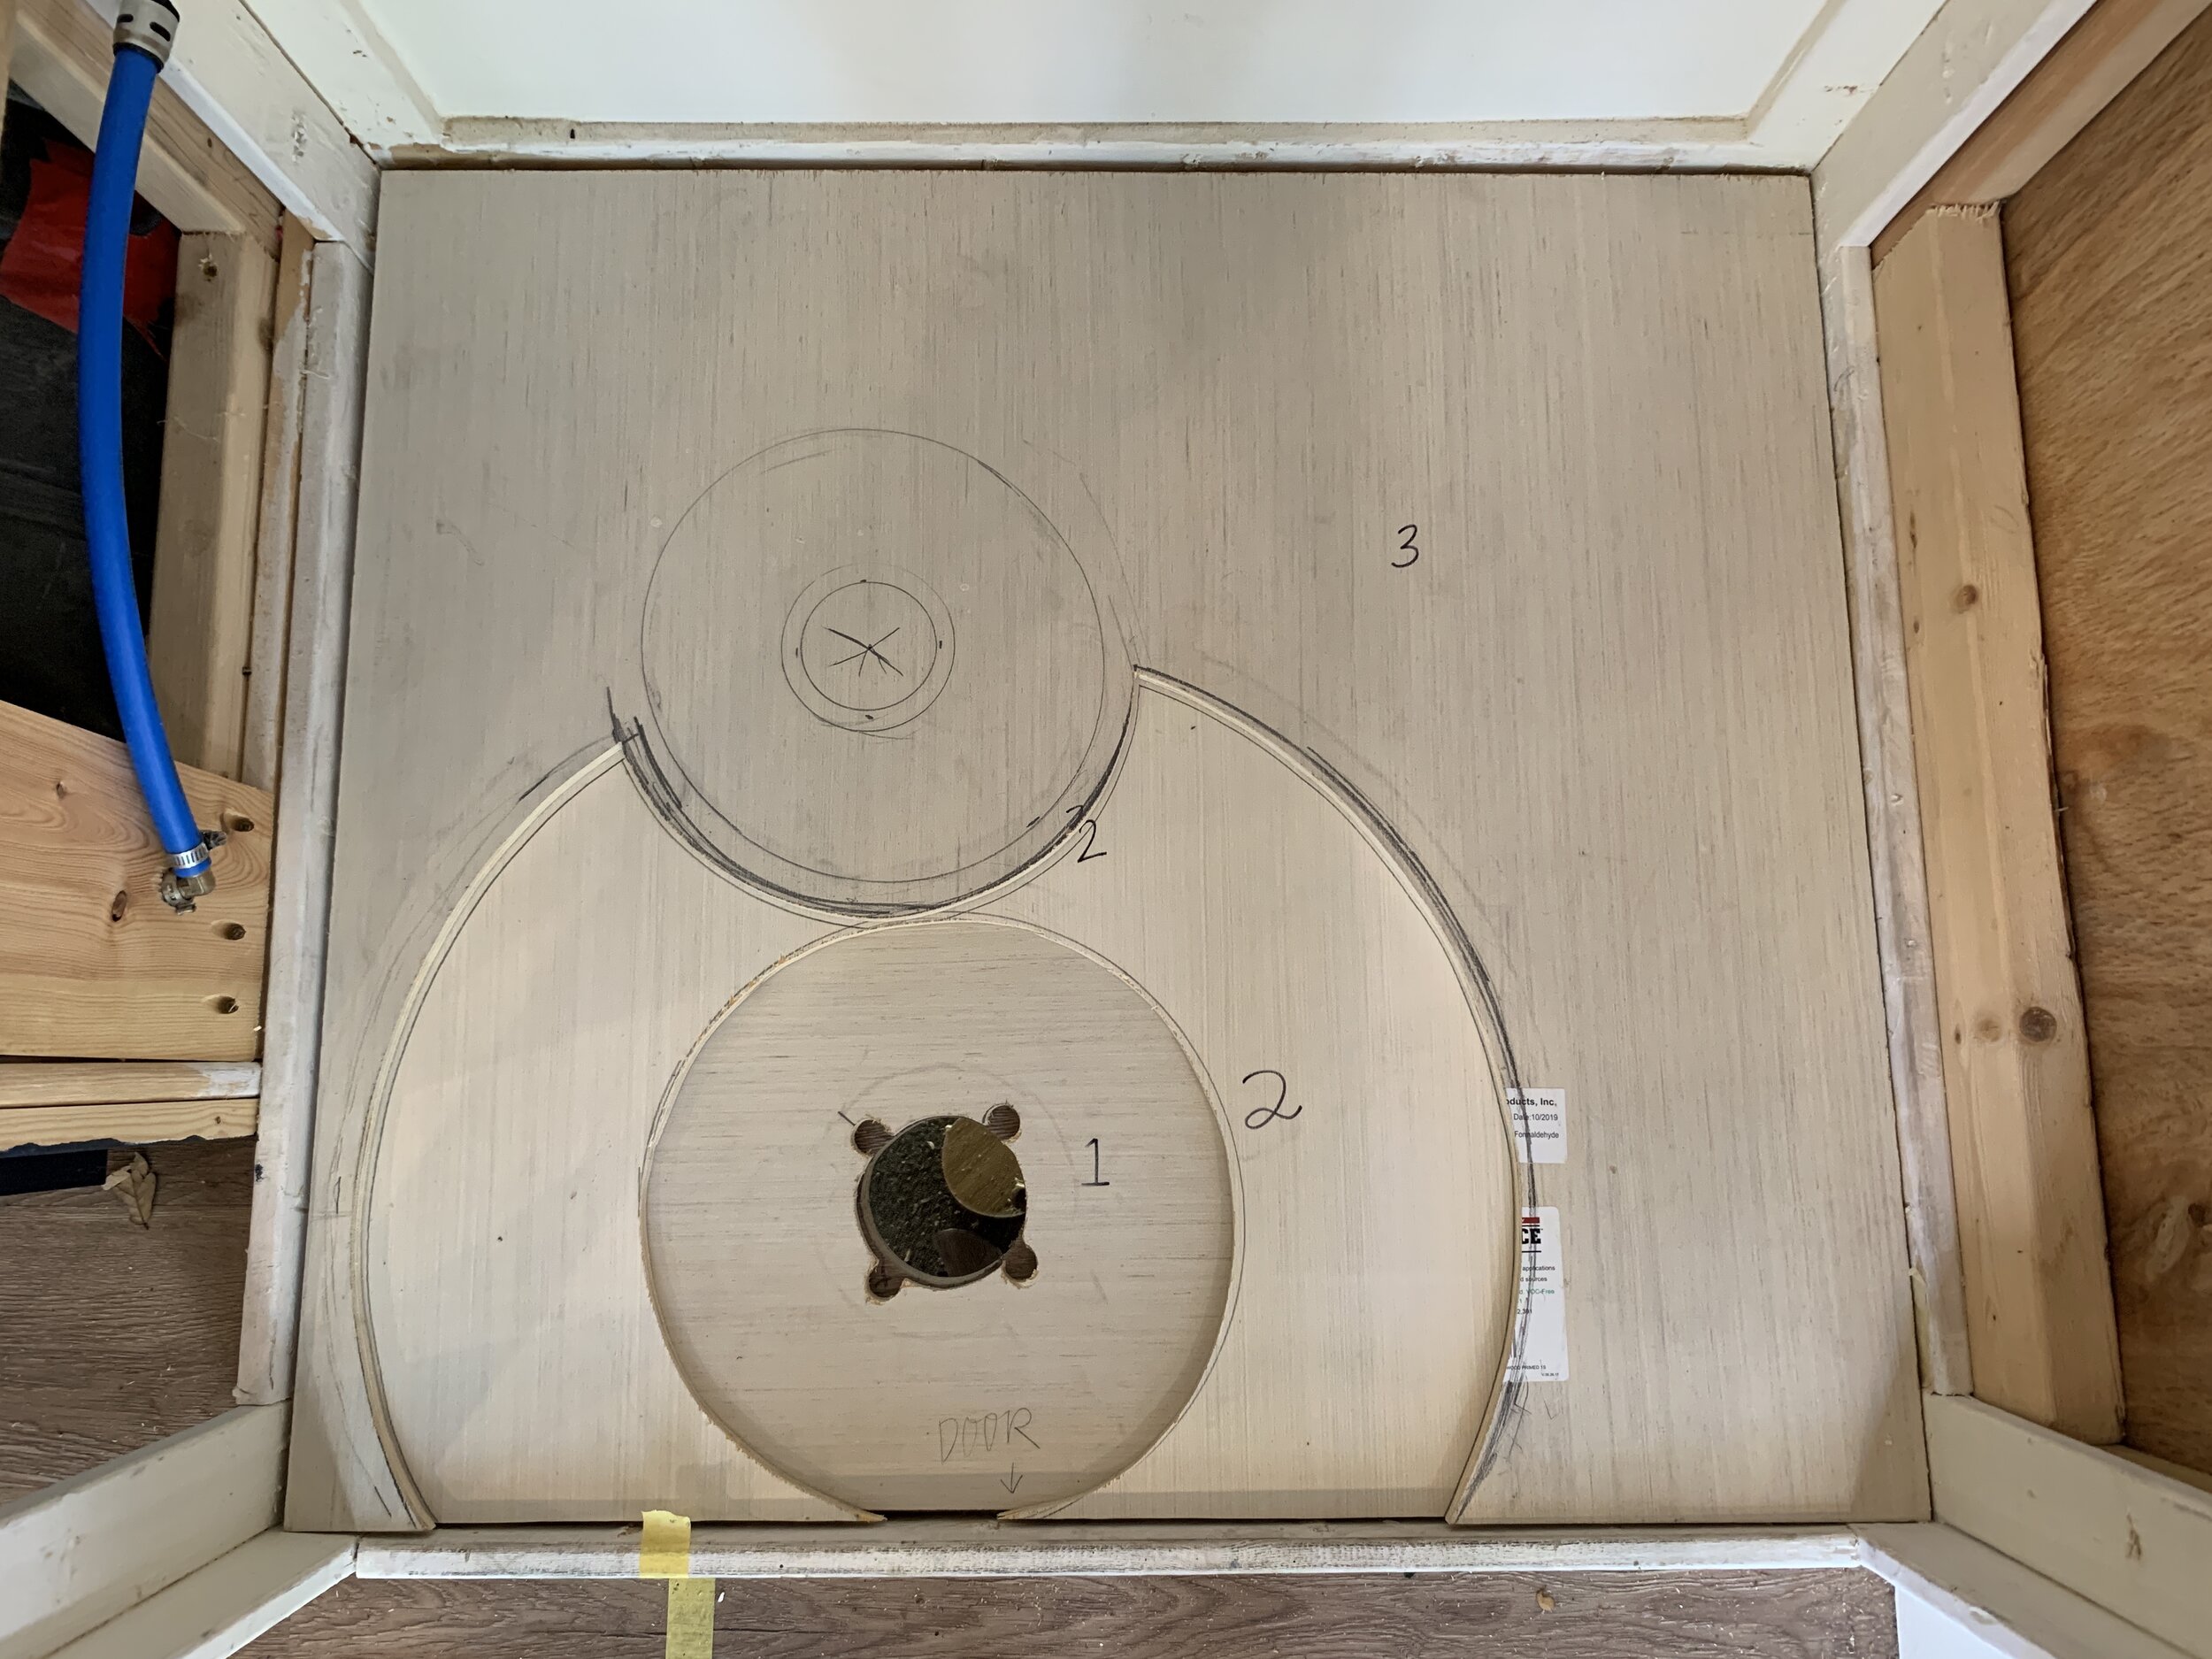
Using the paper template as a guide, we traced out the shower floor onto what would be our first 1/2” piece of shower base and cut it out with a circular saw. With the first base piece cut out, we dry fit it in the shower and after confirming it fit, used it to cut two more same-sized layers of 1/2” plywood, labeling one with a “2” and one with a “3” so we knew which were which for the upcoming steps. We dry stacked all three in place on top of one another with layer 1 on the bottom, 2 in the middle and 3 on top to make sure they all fit in the shower.


This is where we’d recommend keeping it to two layers of 1/2” plywood to keep the slope from being too sloped (which might give you problems down the road like it did us). We managed with three layers and if we were to do it again, we’d try to make it work with just two, since shower pans really only need to slope about 1/4” over a 1-foot distance.
Keep the paper floor template on hand to cut your 1/4” plywood piece in part 2 of our shower install.
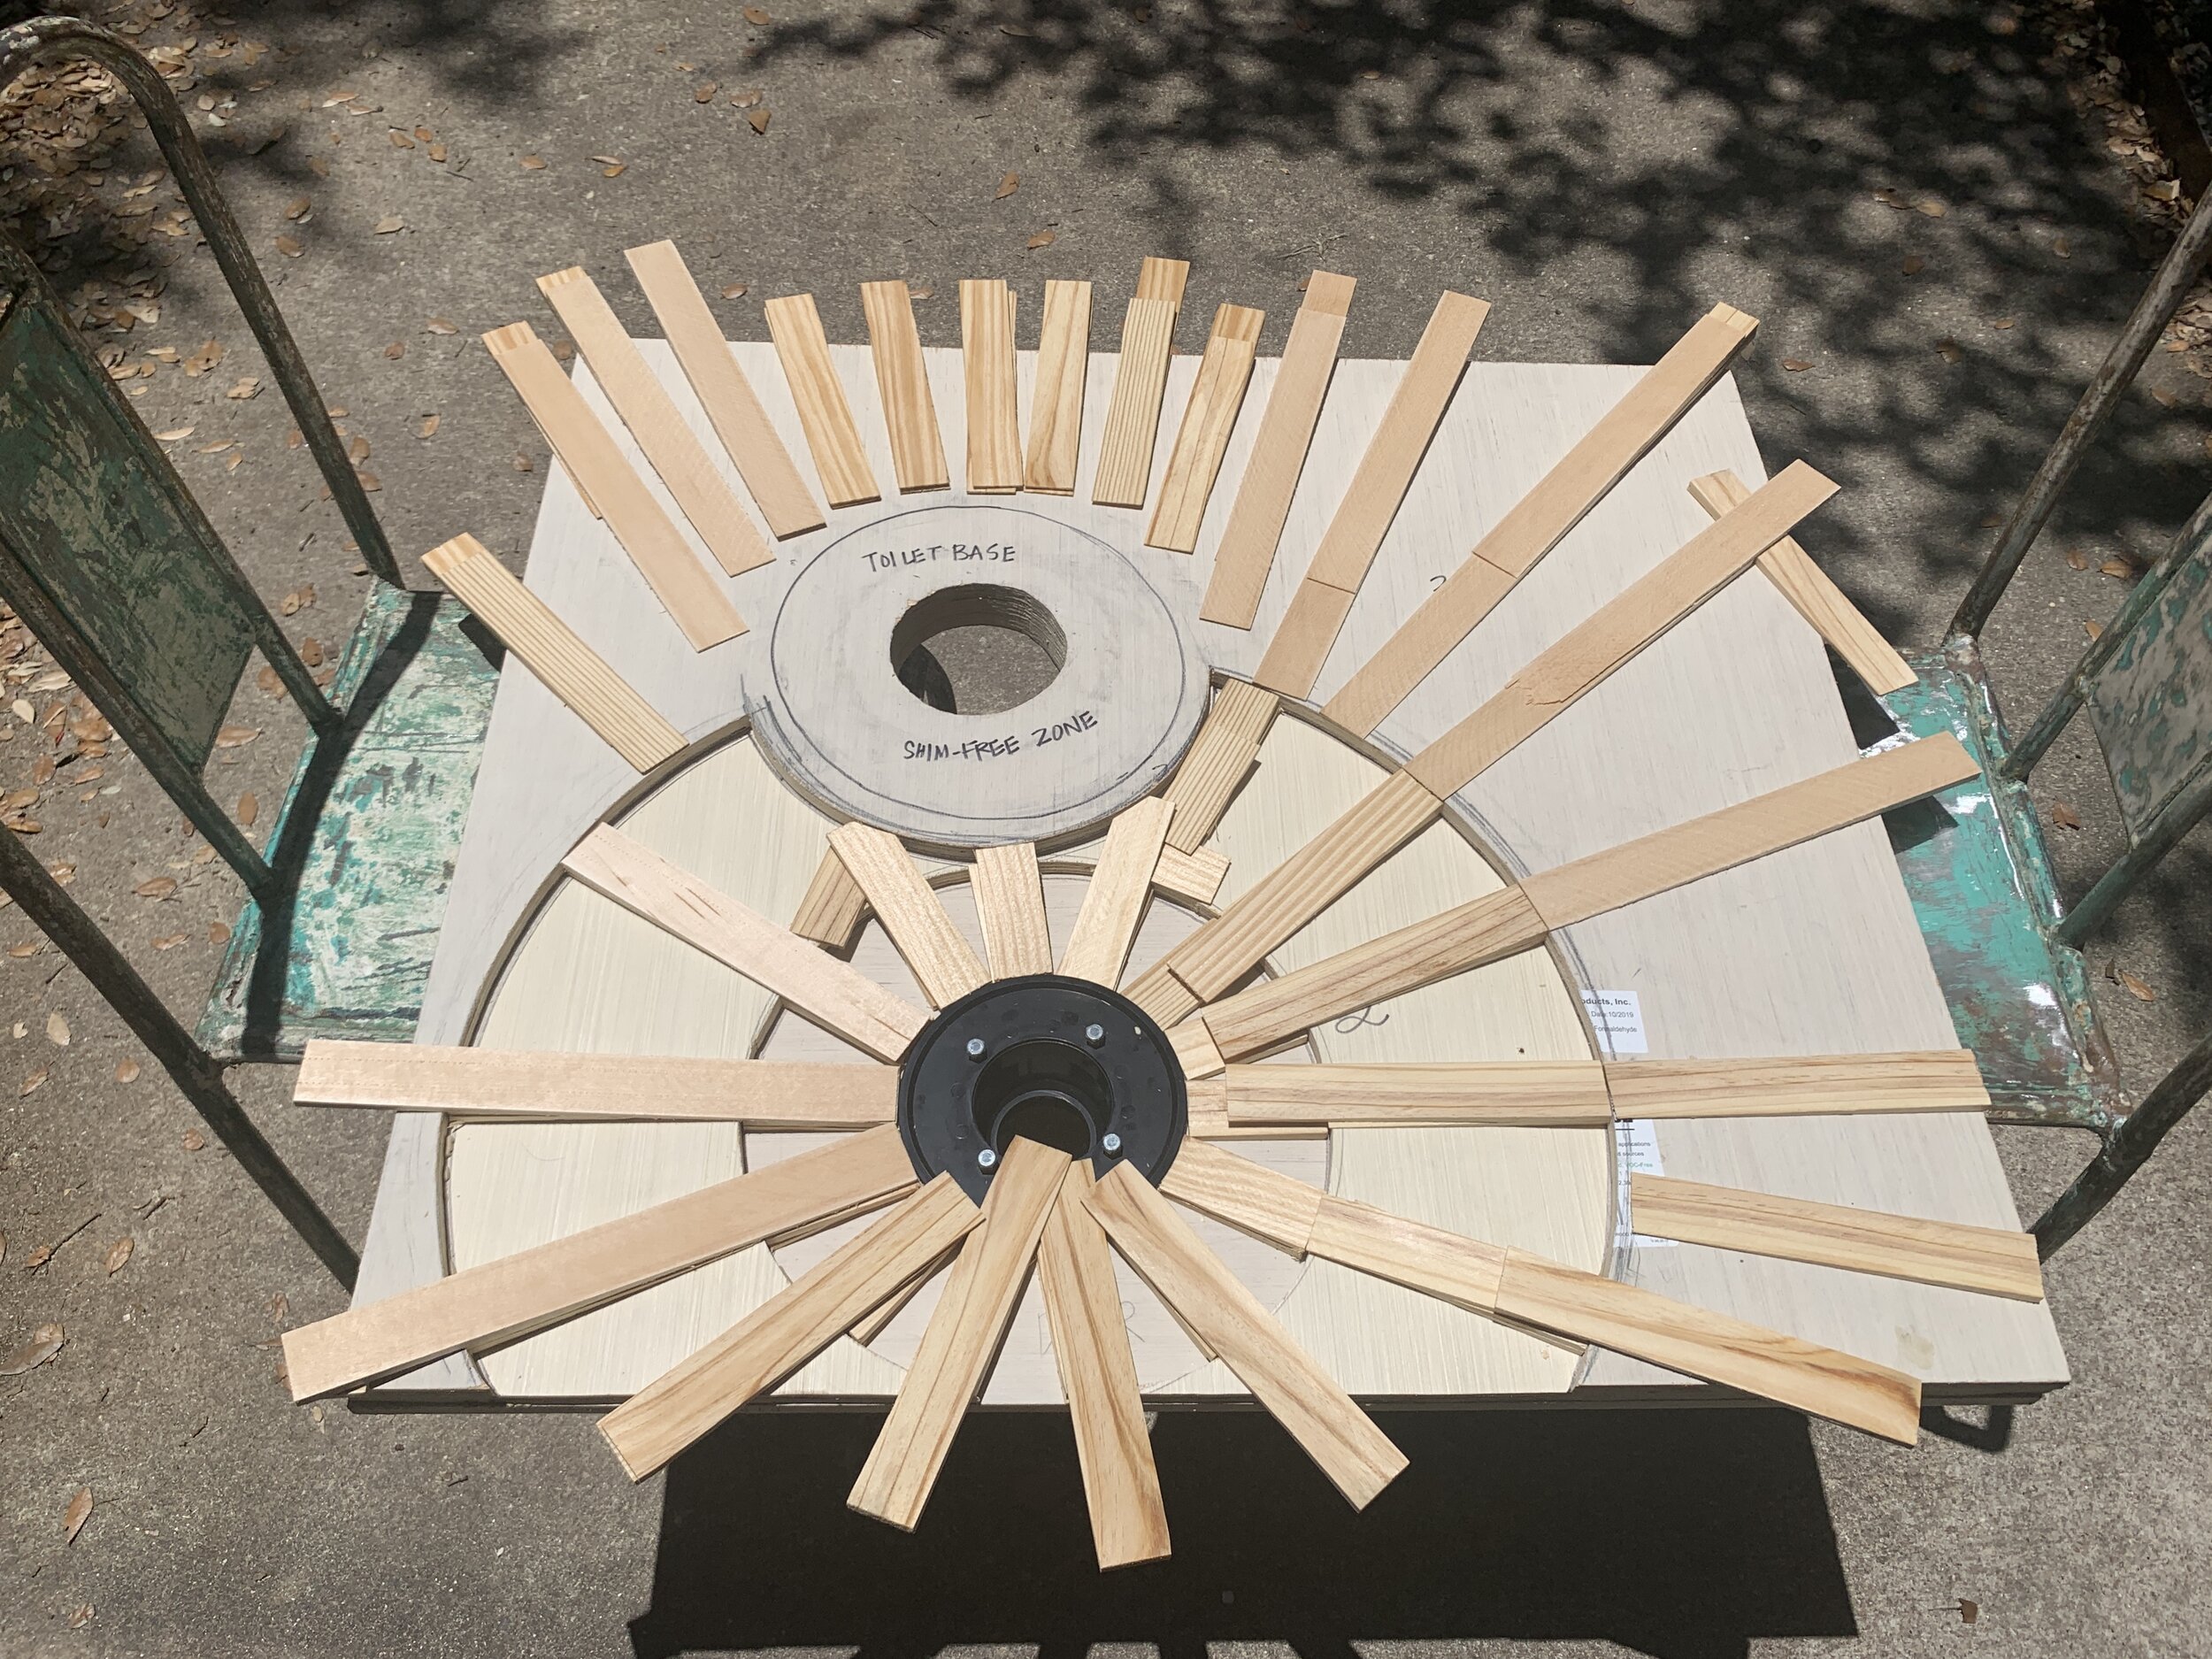
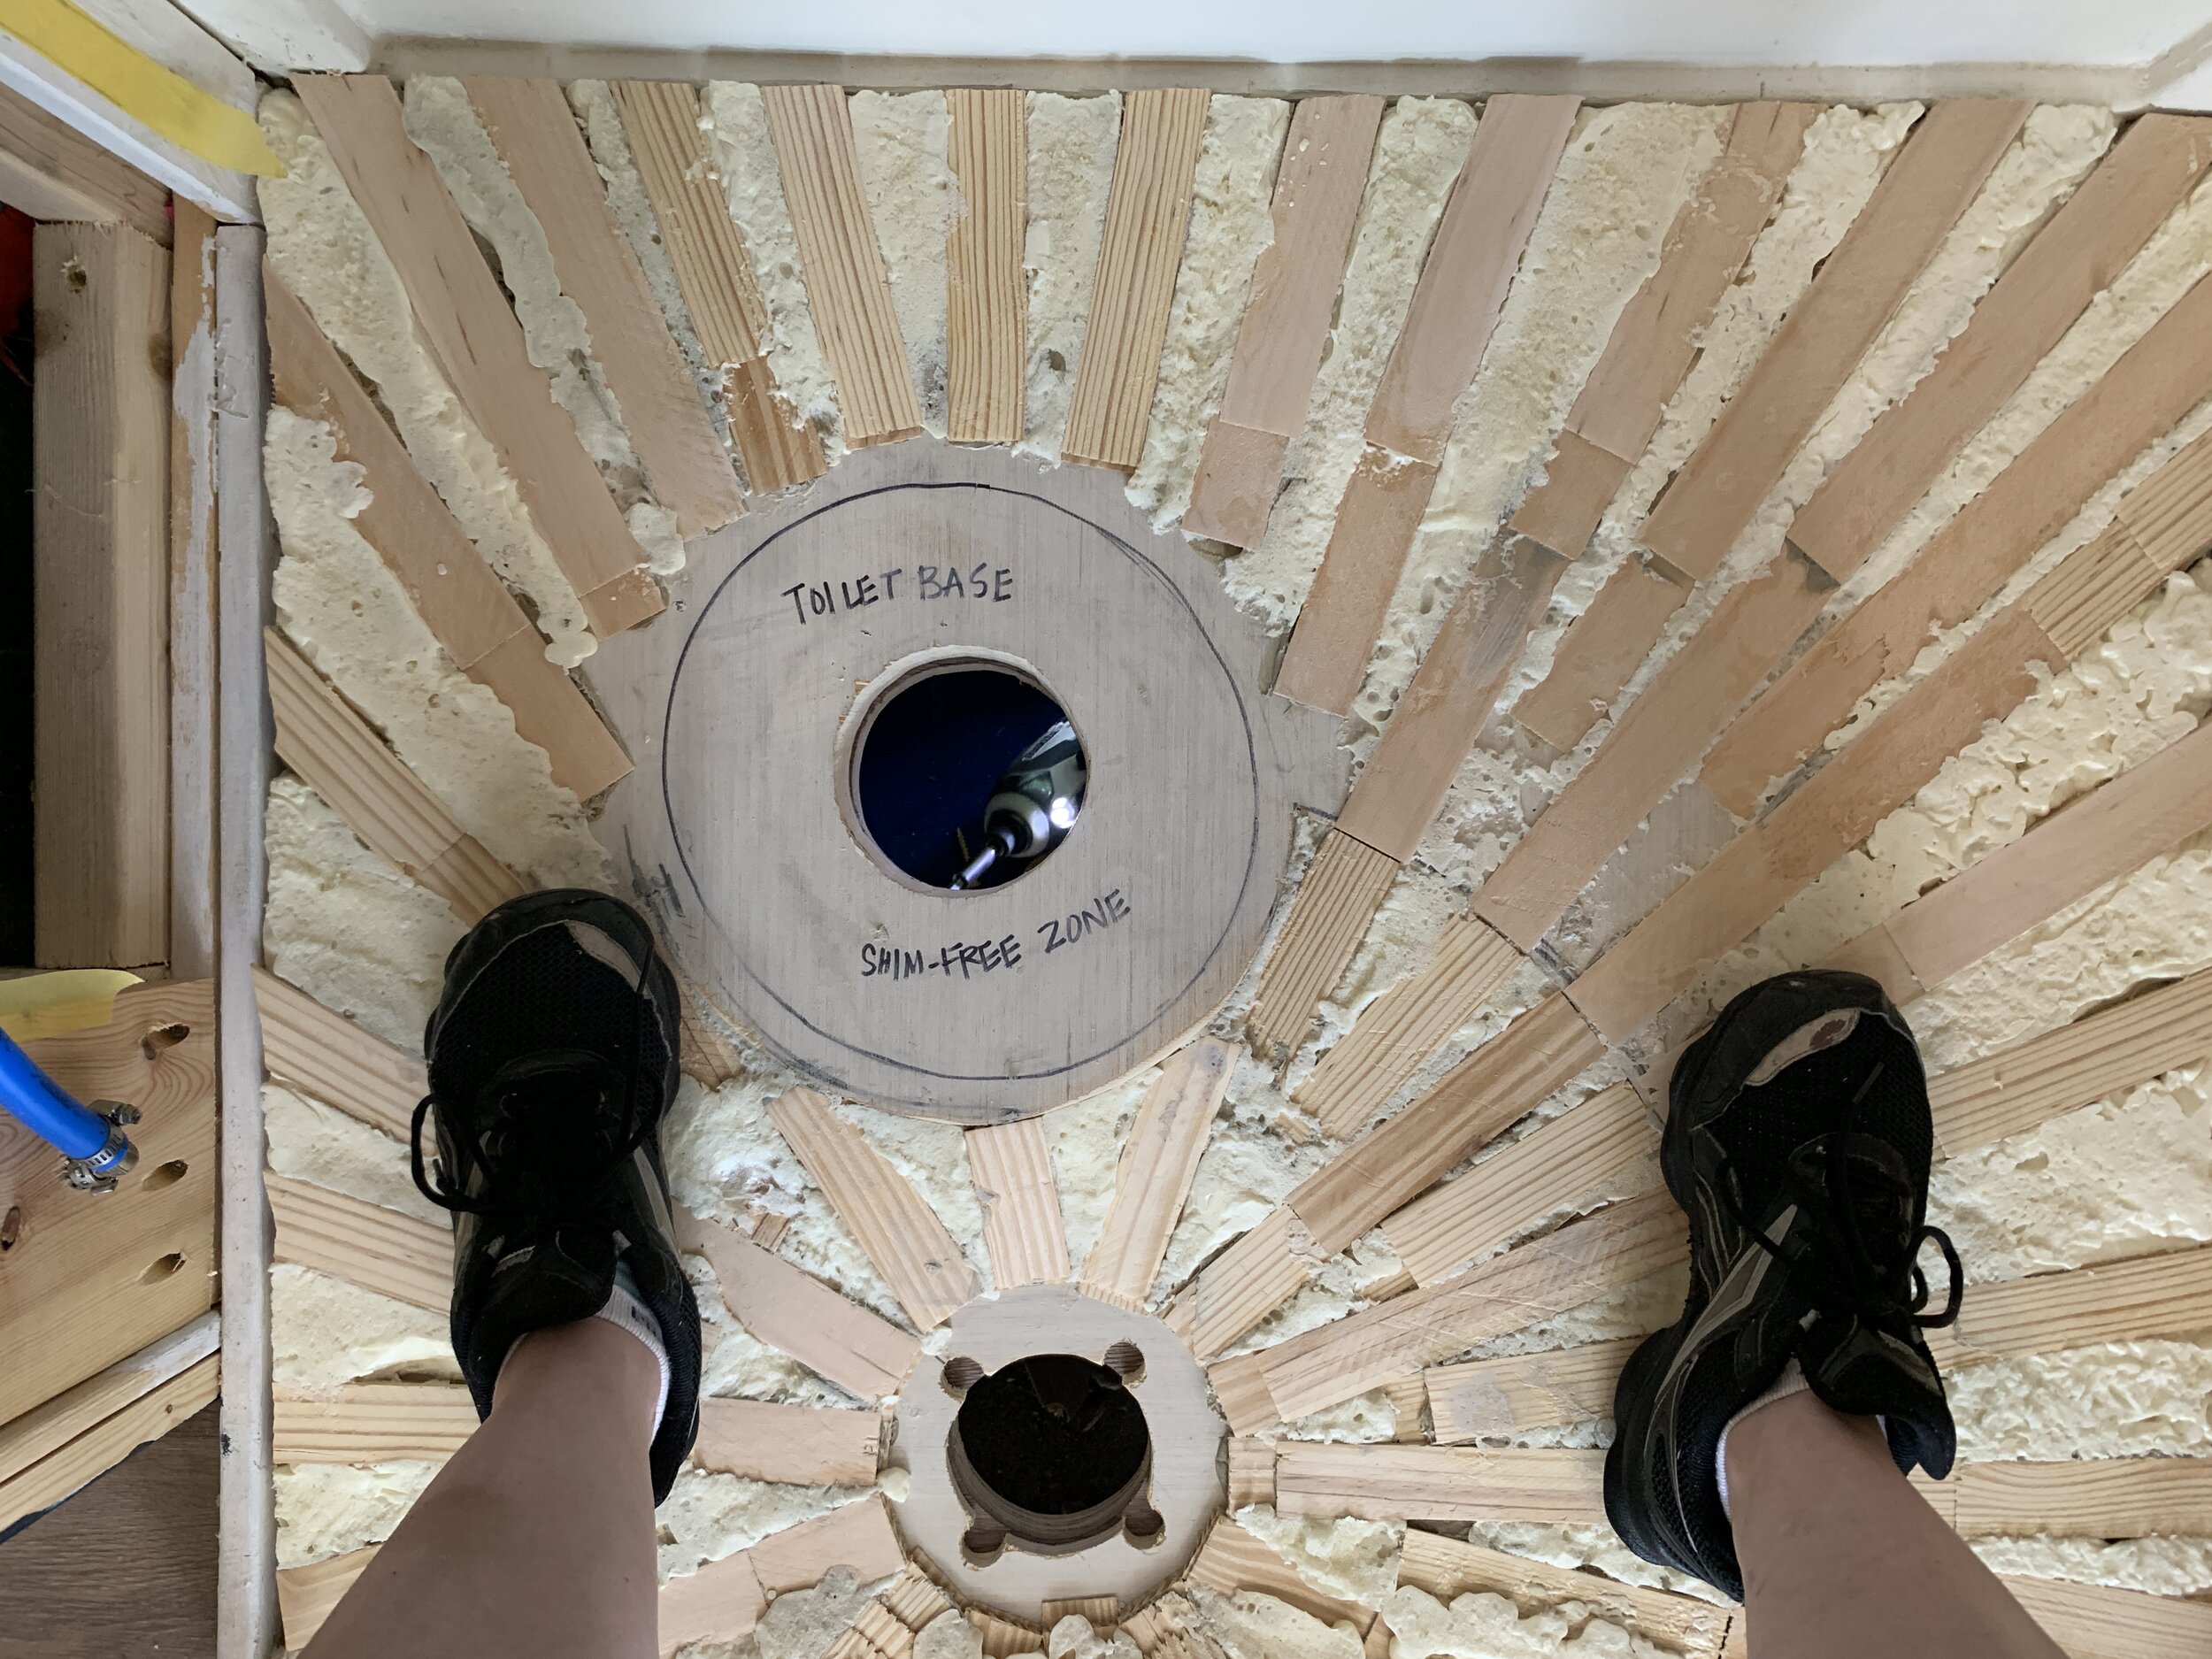
Step 3: Markup the floor layers
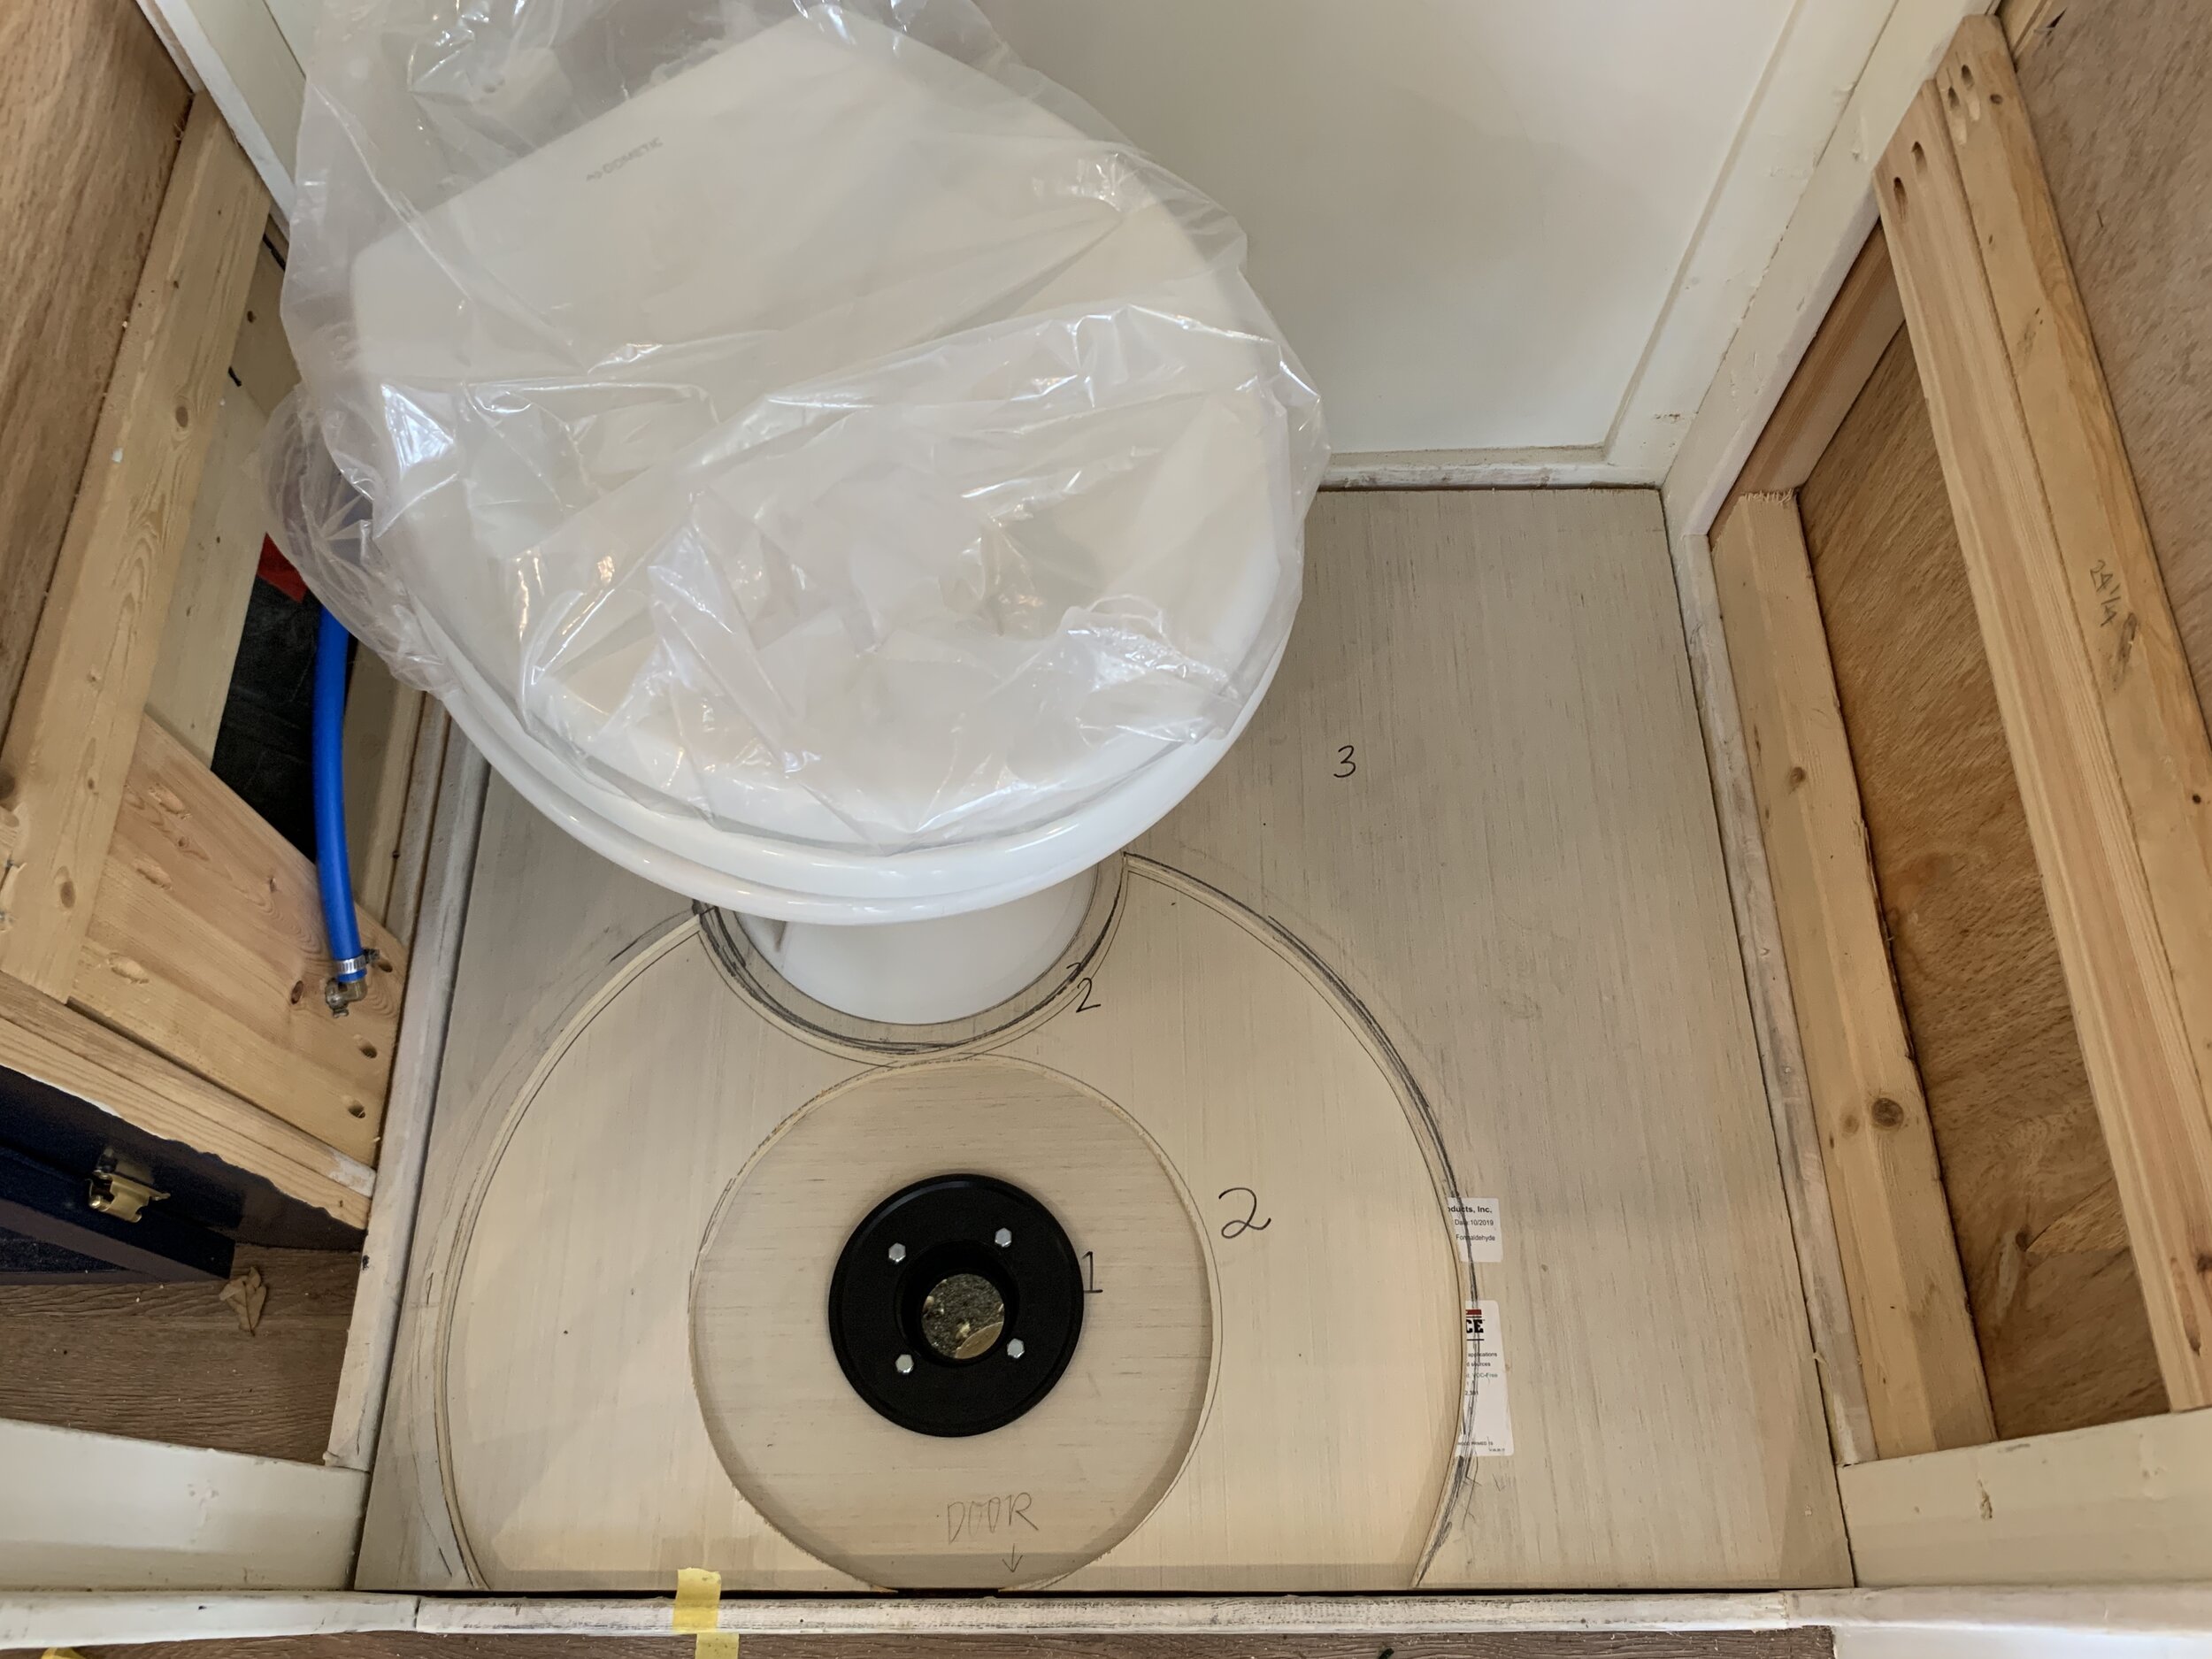
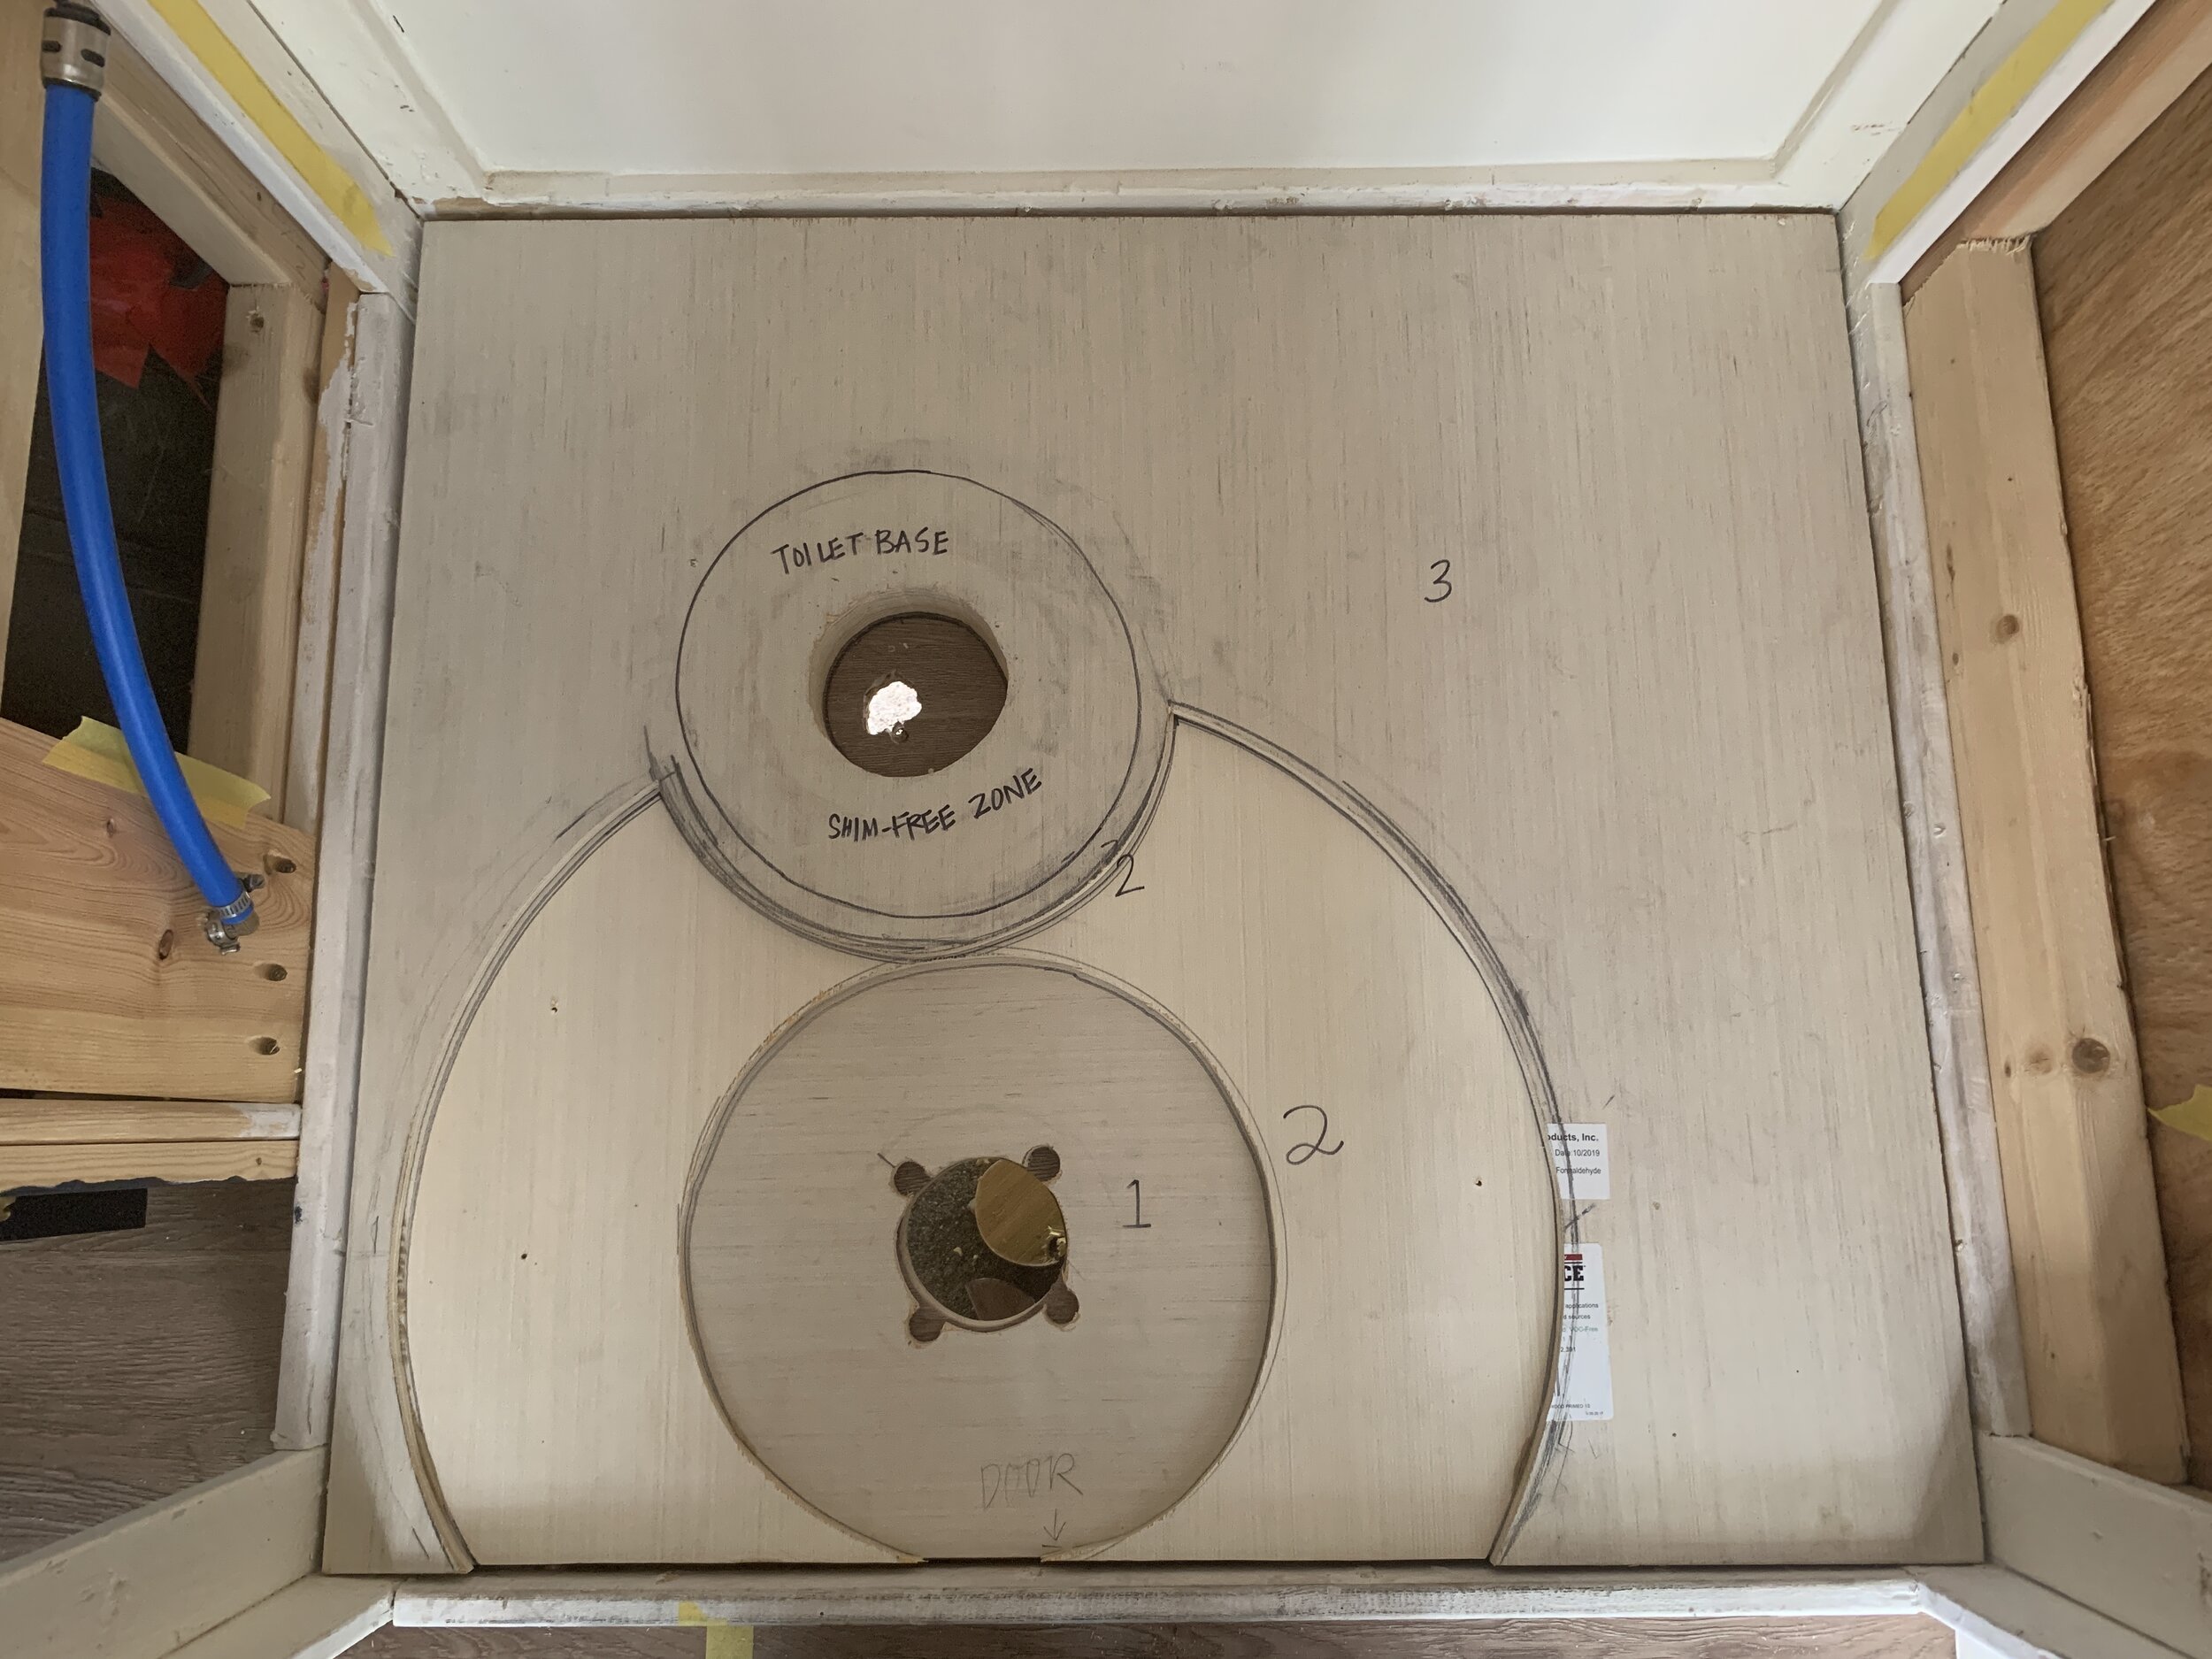
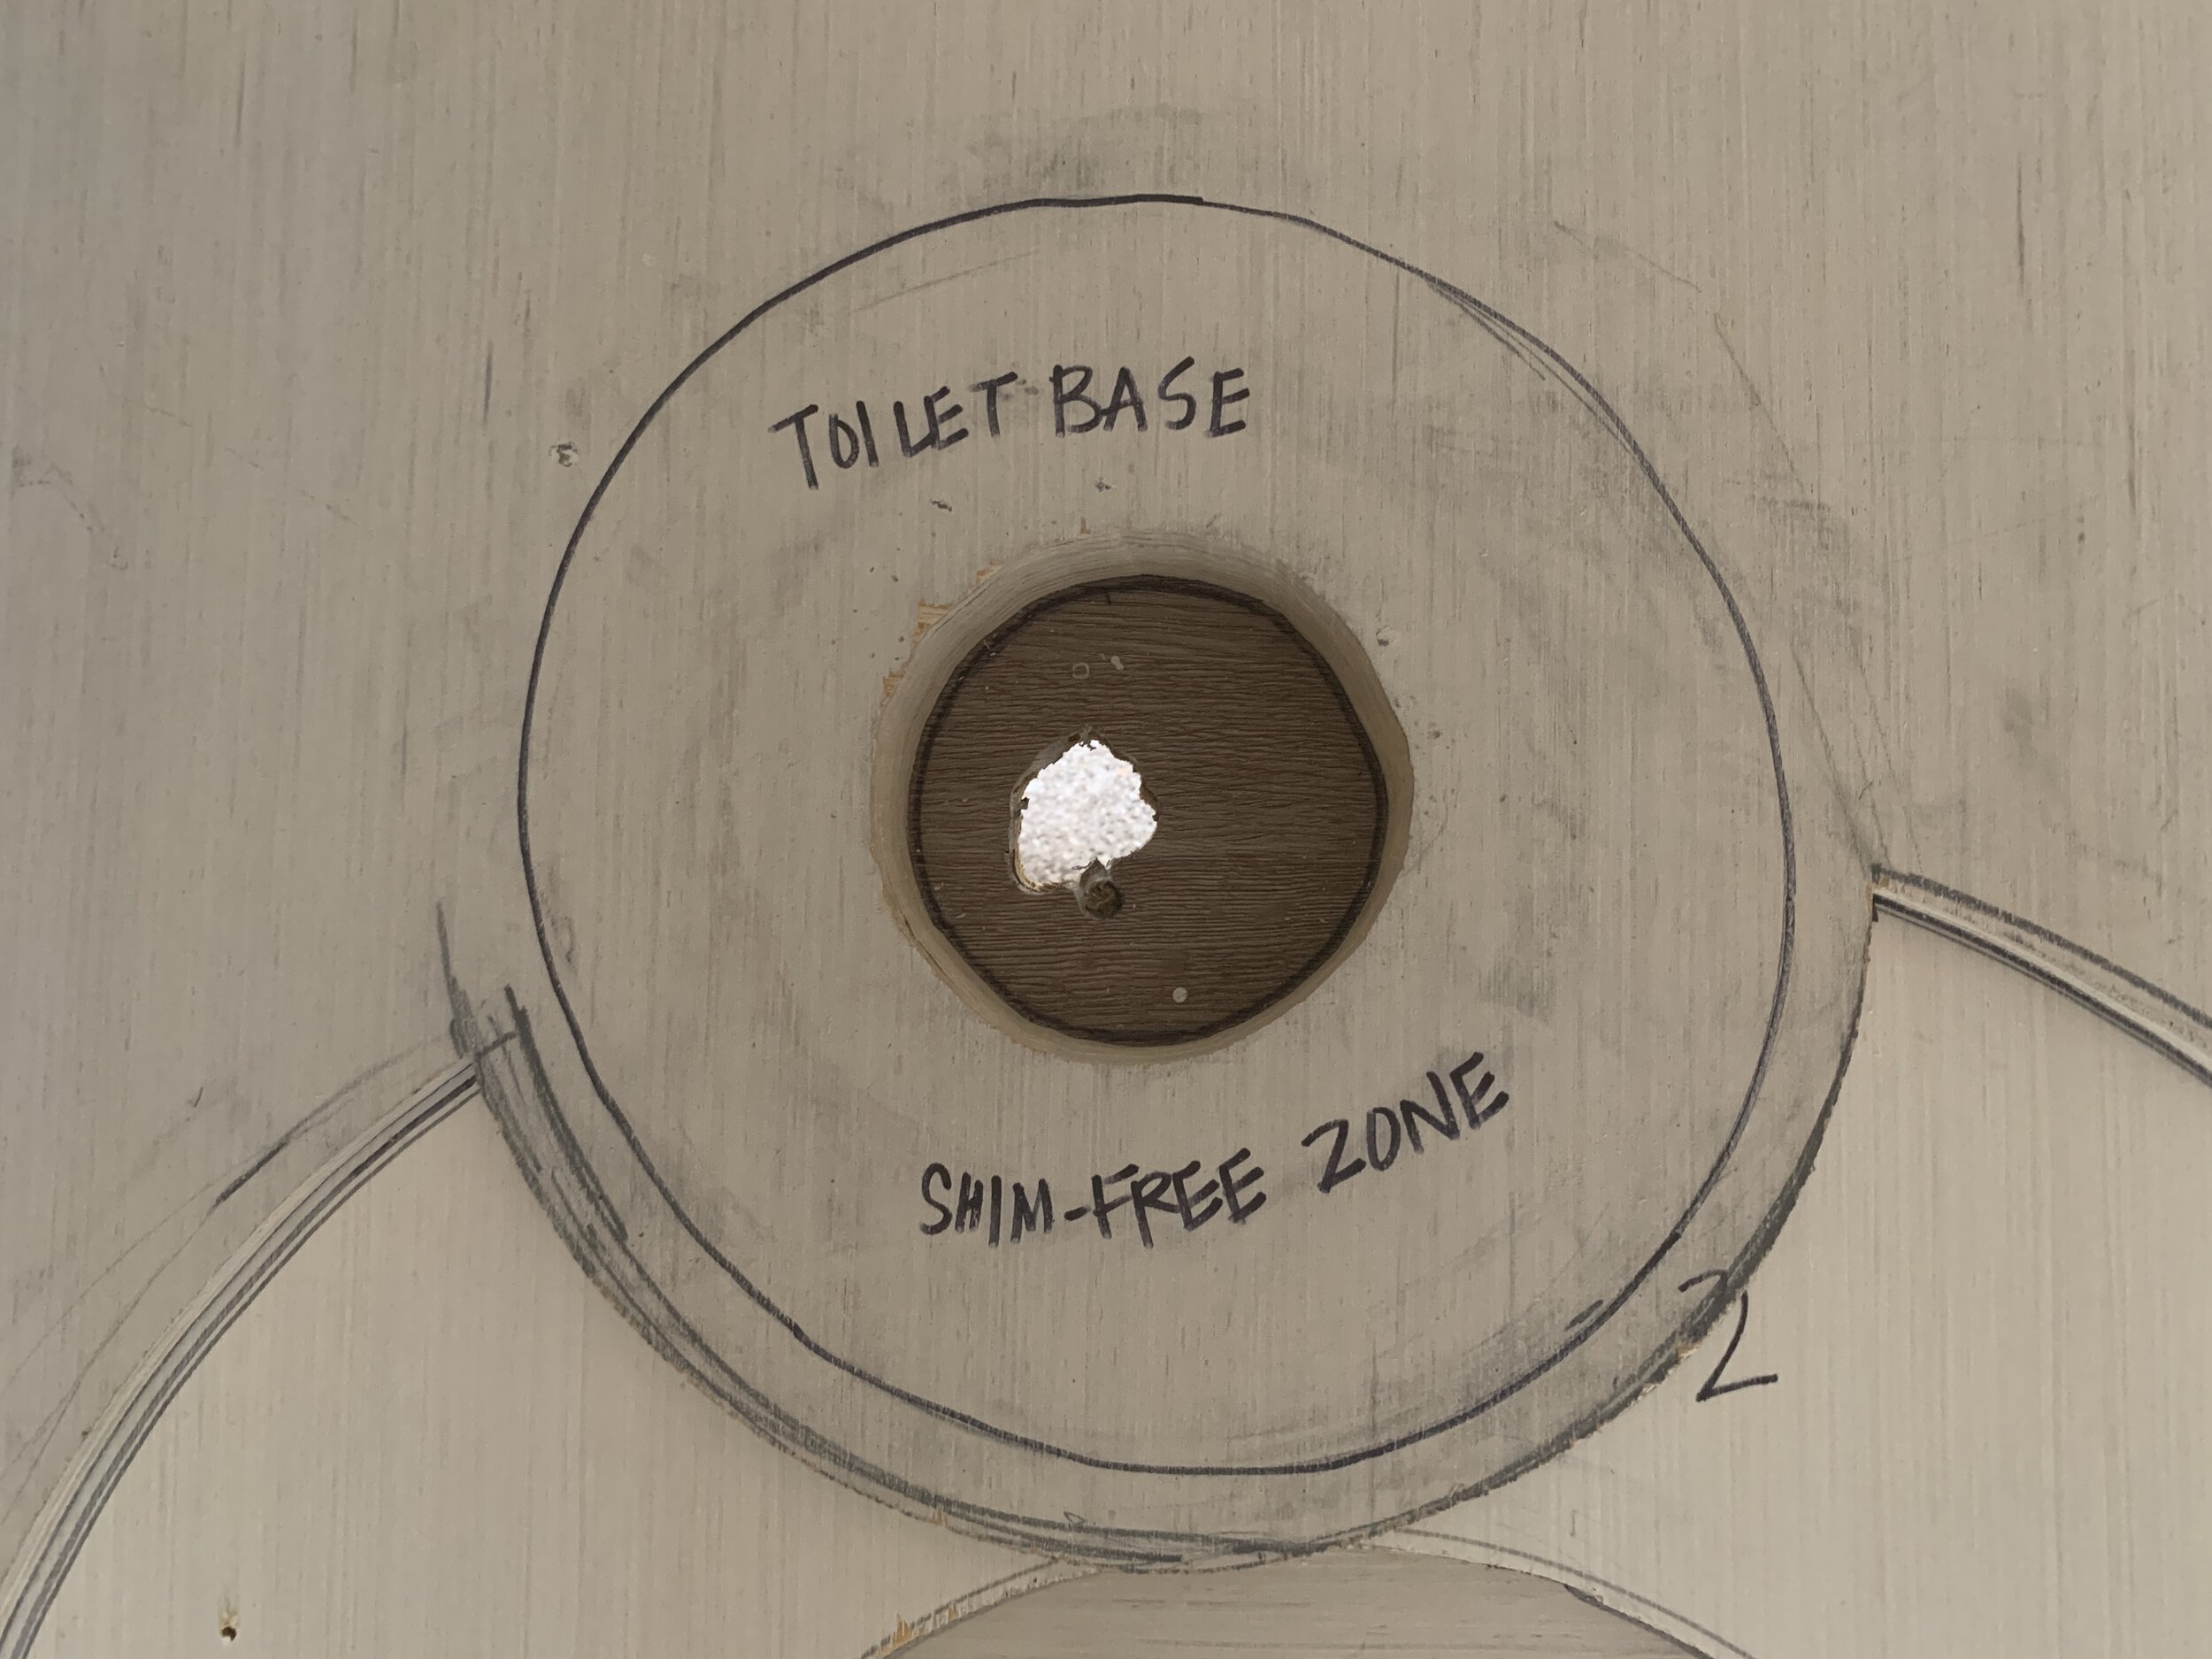
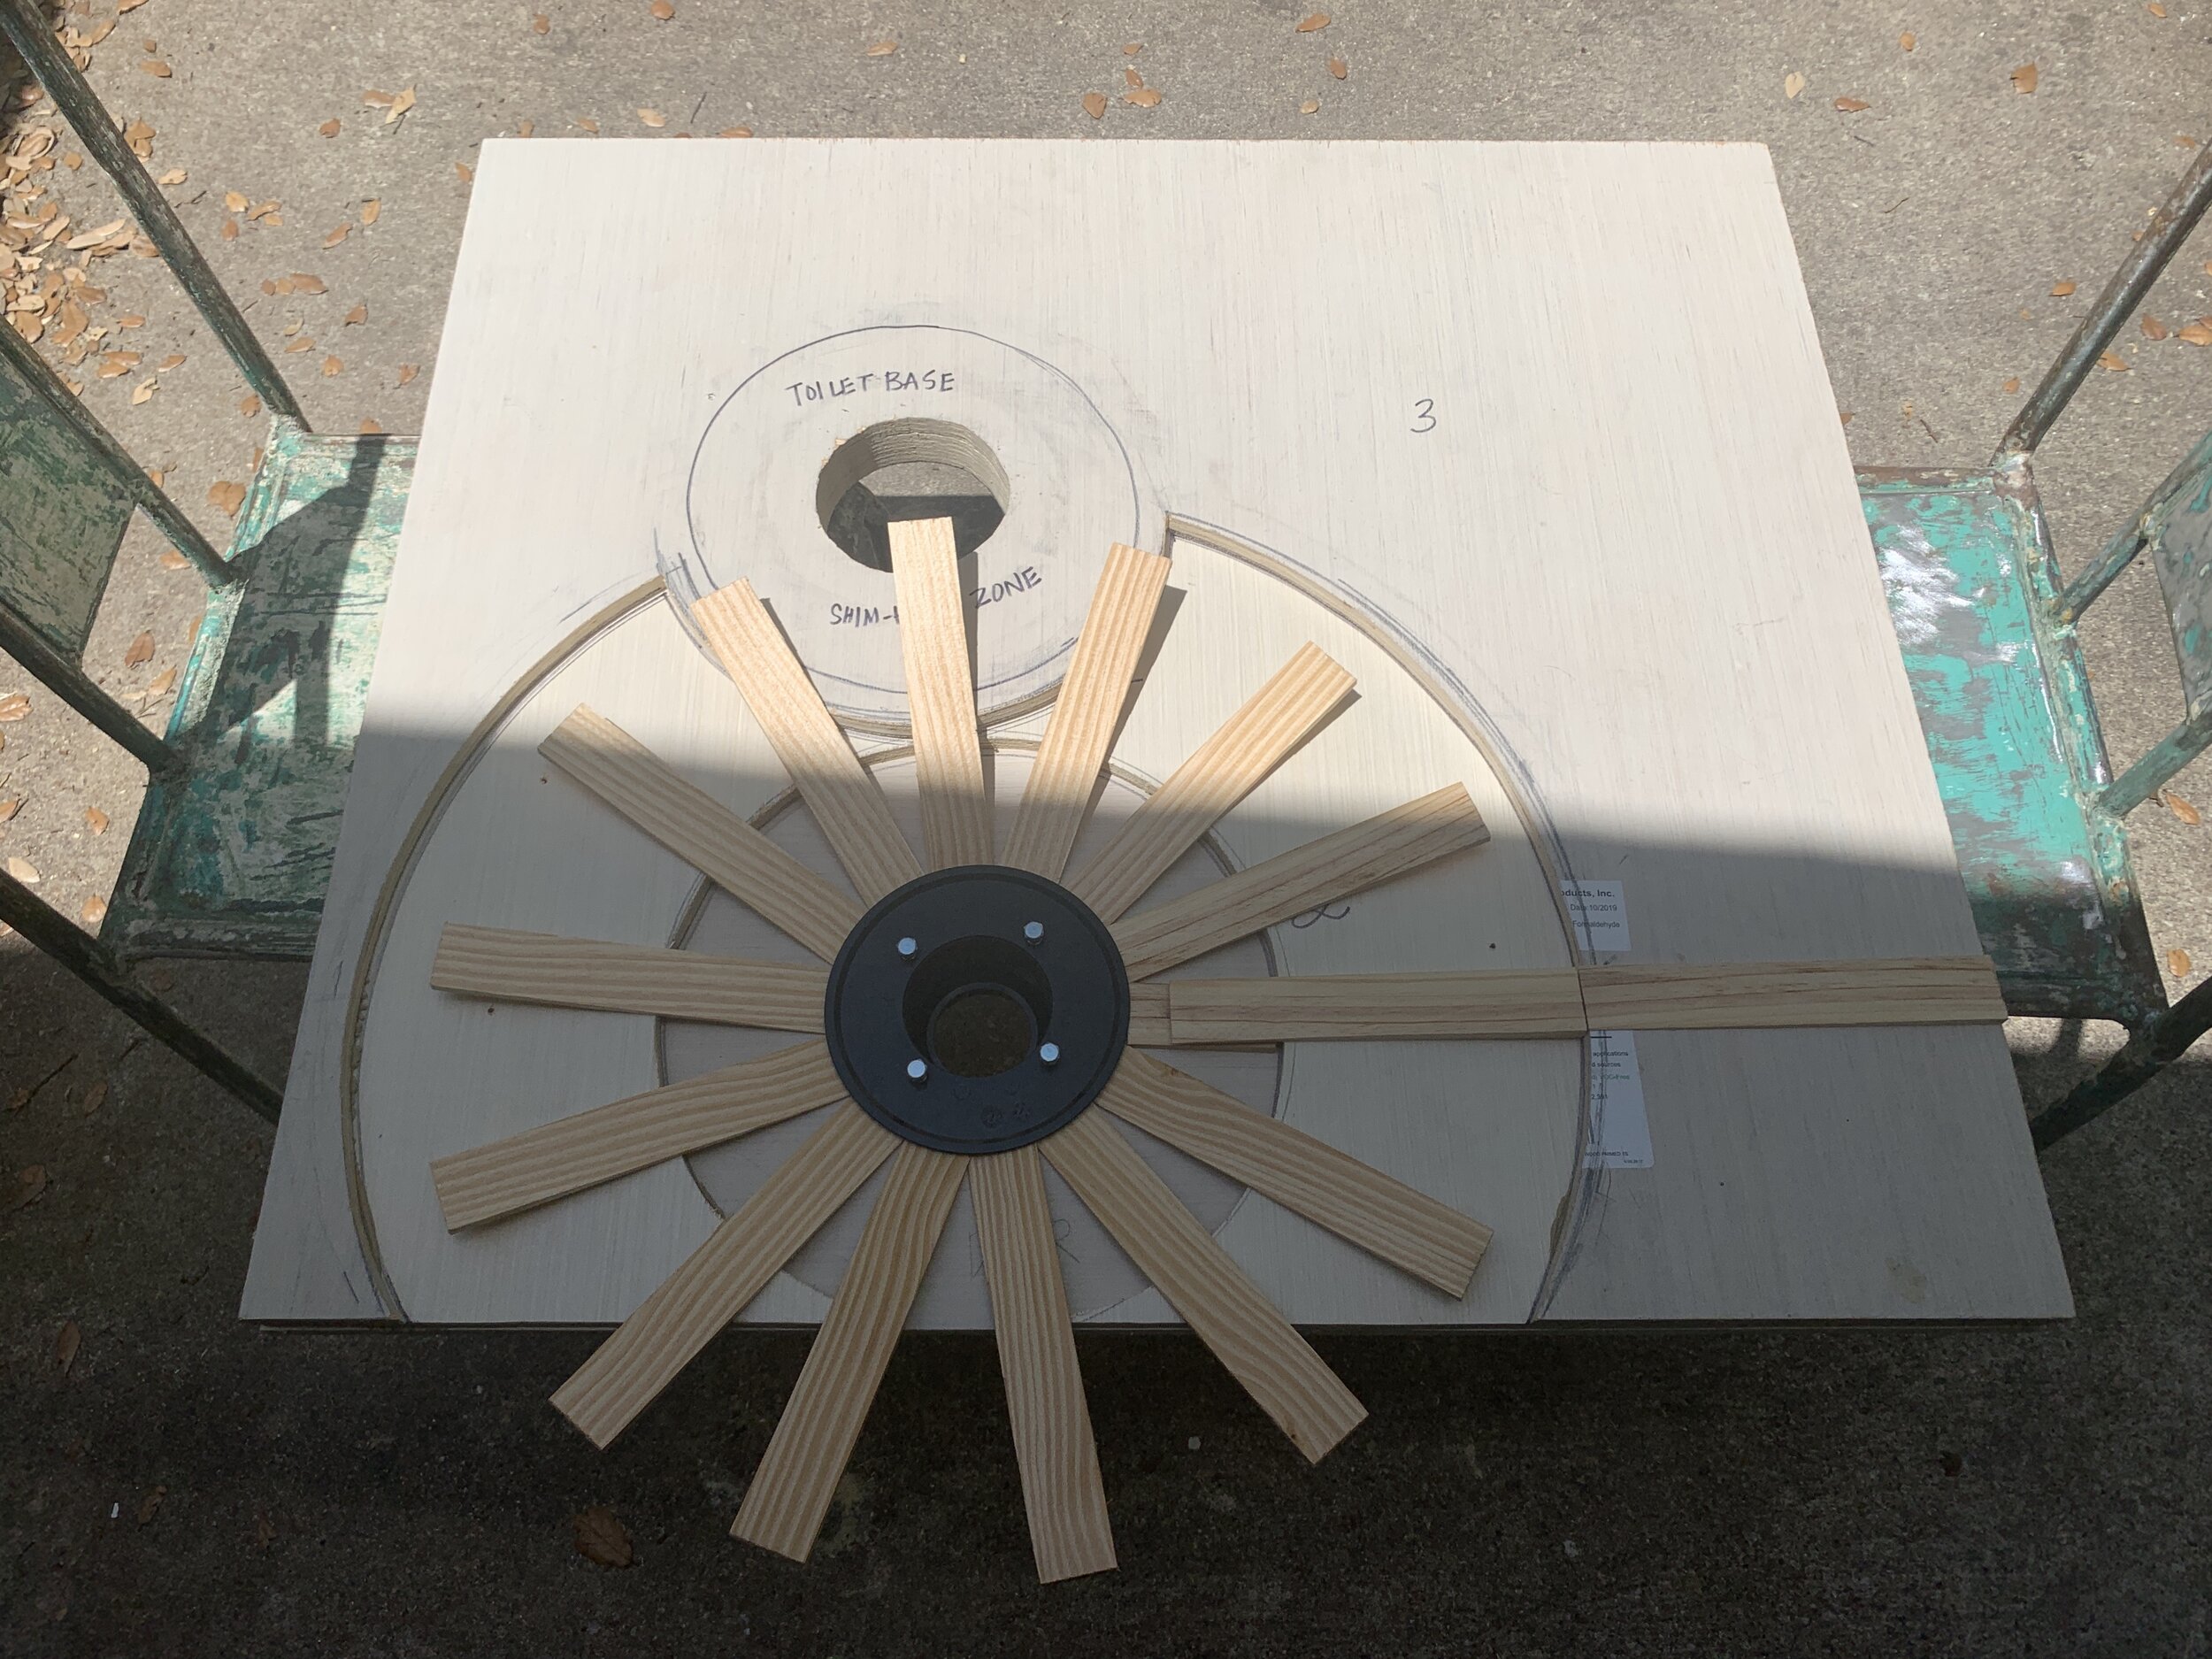
With layer 3 on top, we marked out our toilet drain using the dimensions and distance-from-wall-minimums figured out in step 1 and dry-fit our toilet over the drain, marking out the outermost edge of the toilet base so we knew exactly what area needed to be completely flat, then added about another 3/4” to that just to be safe.
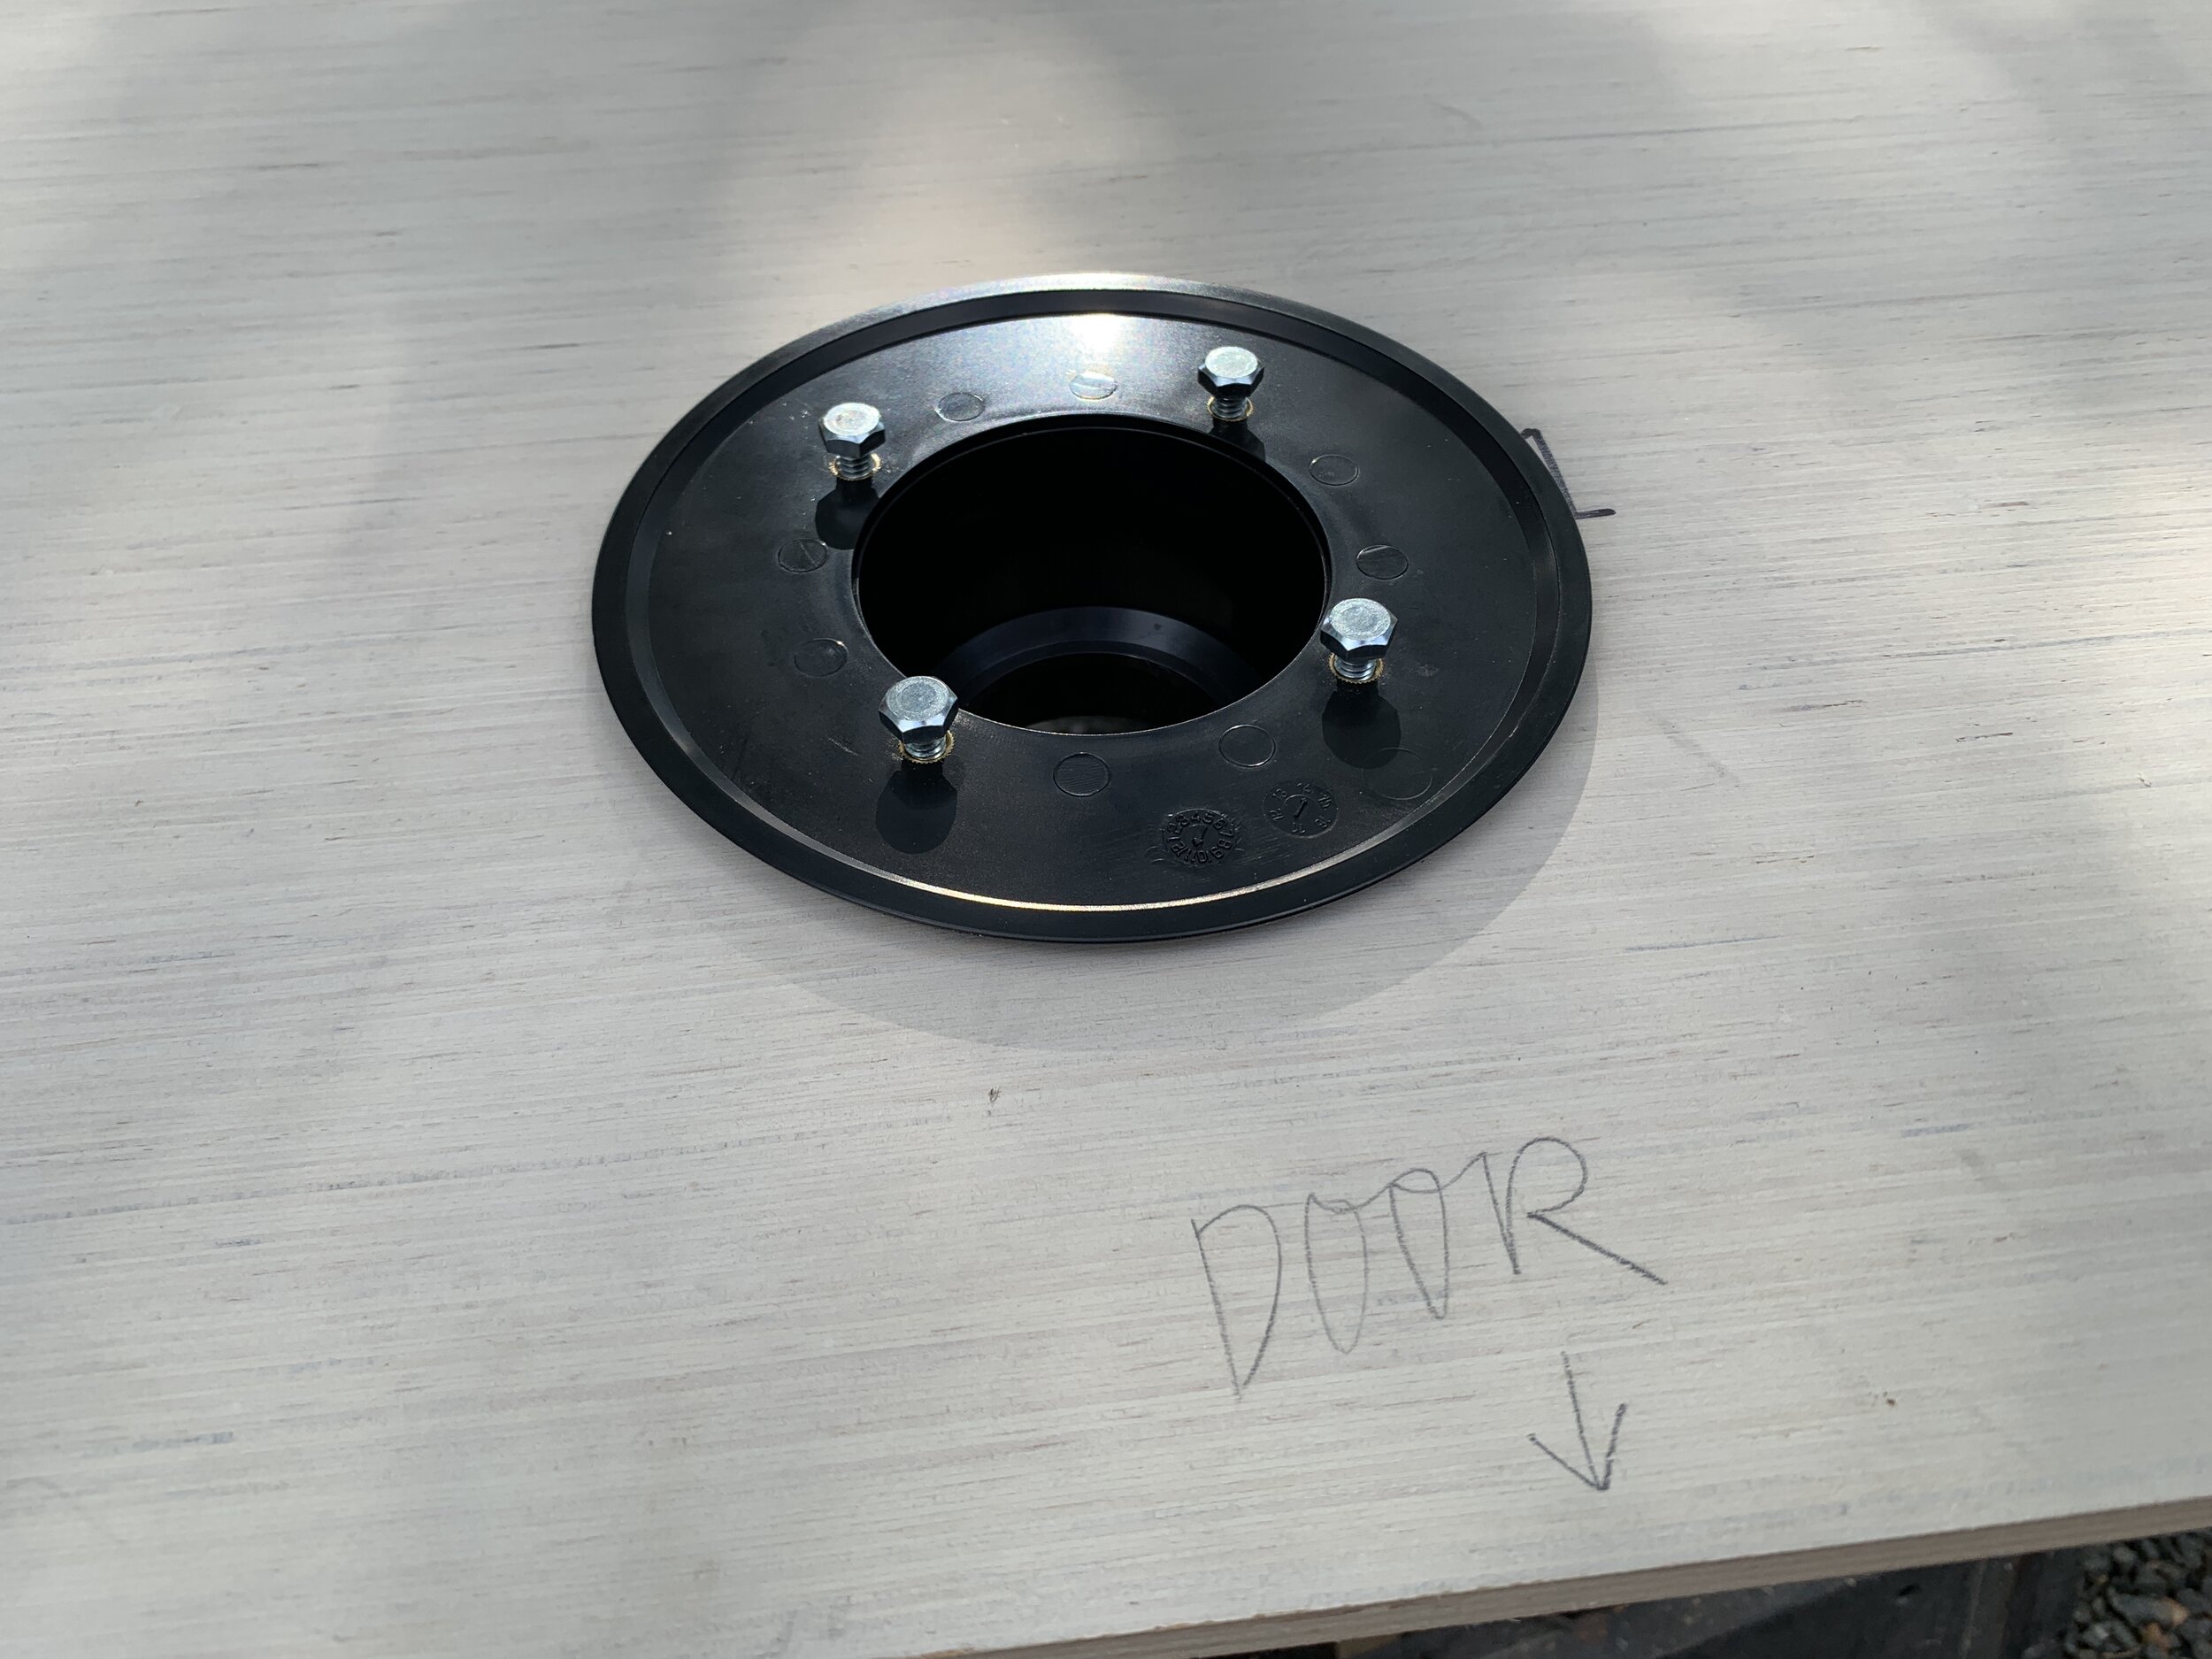
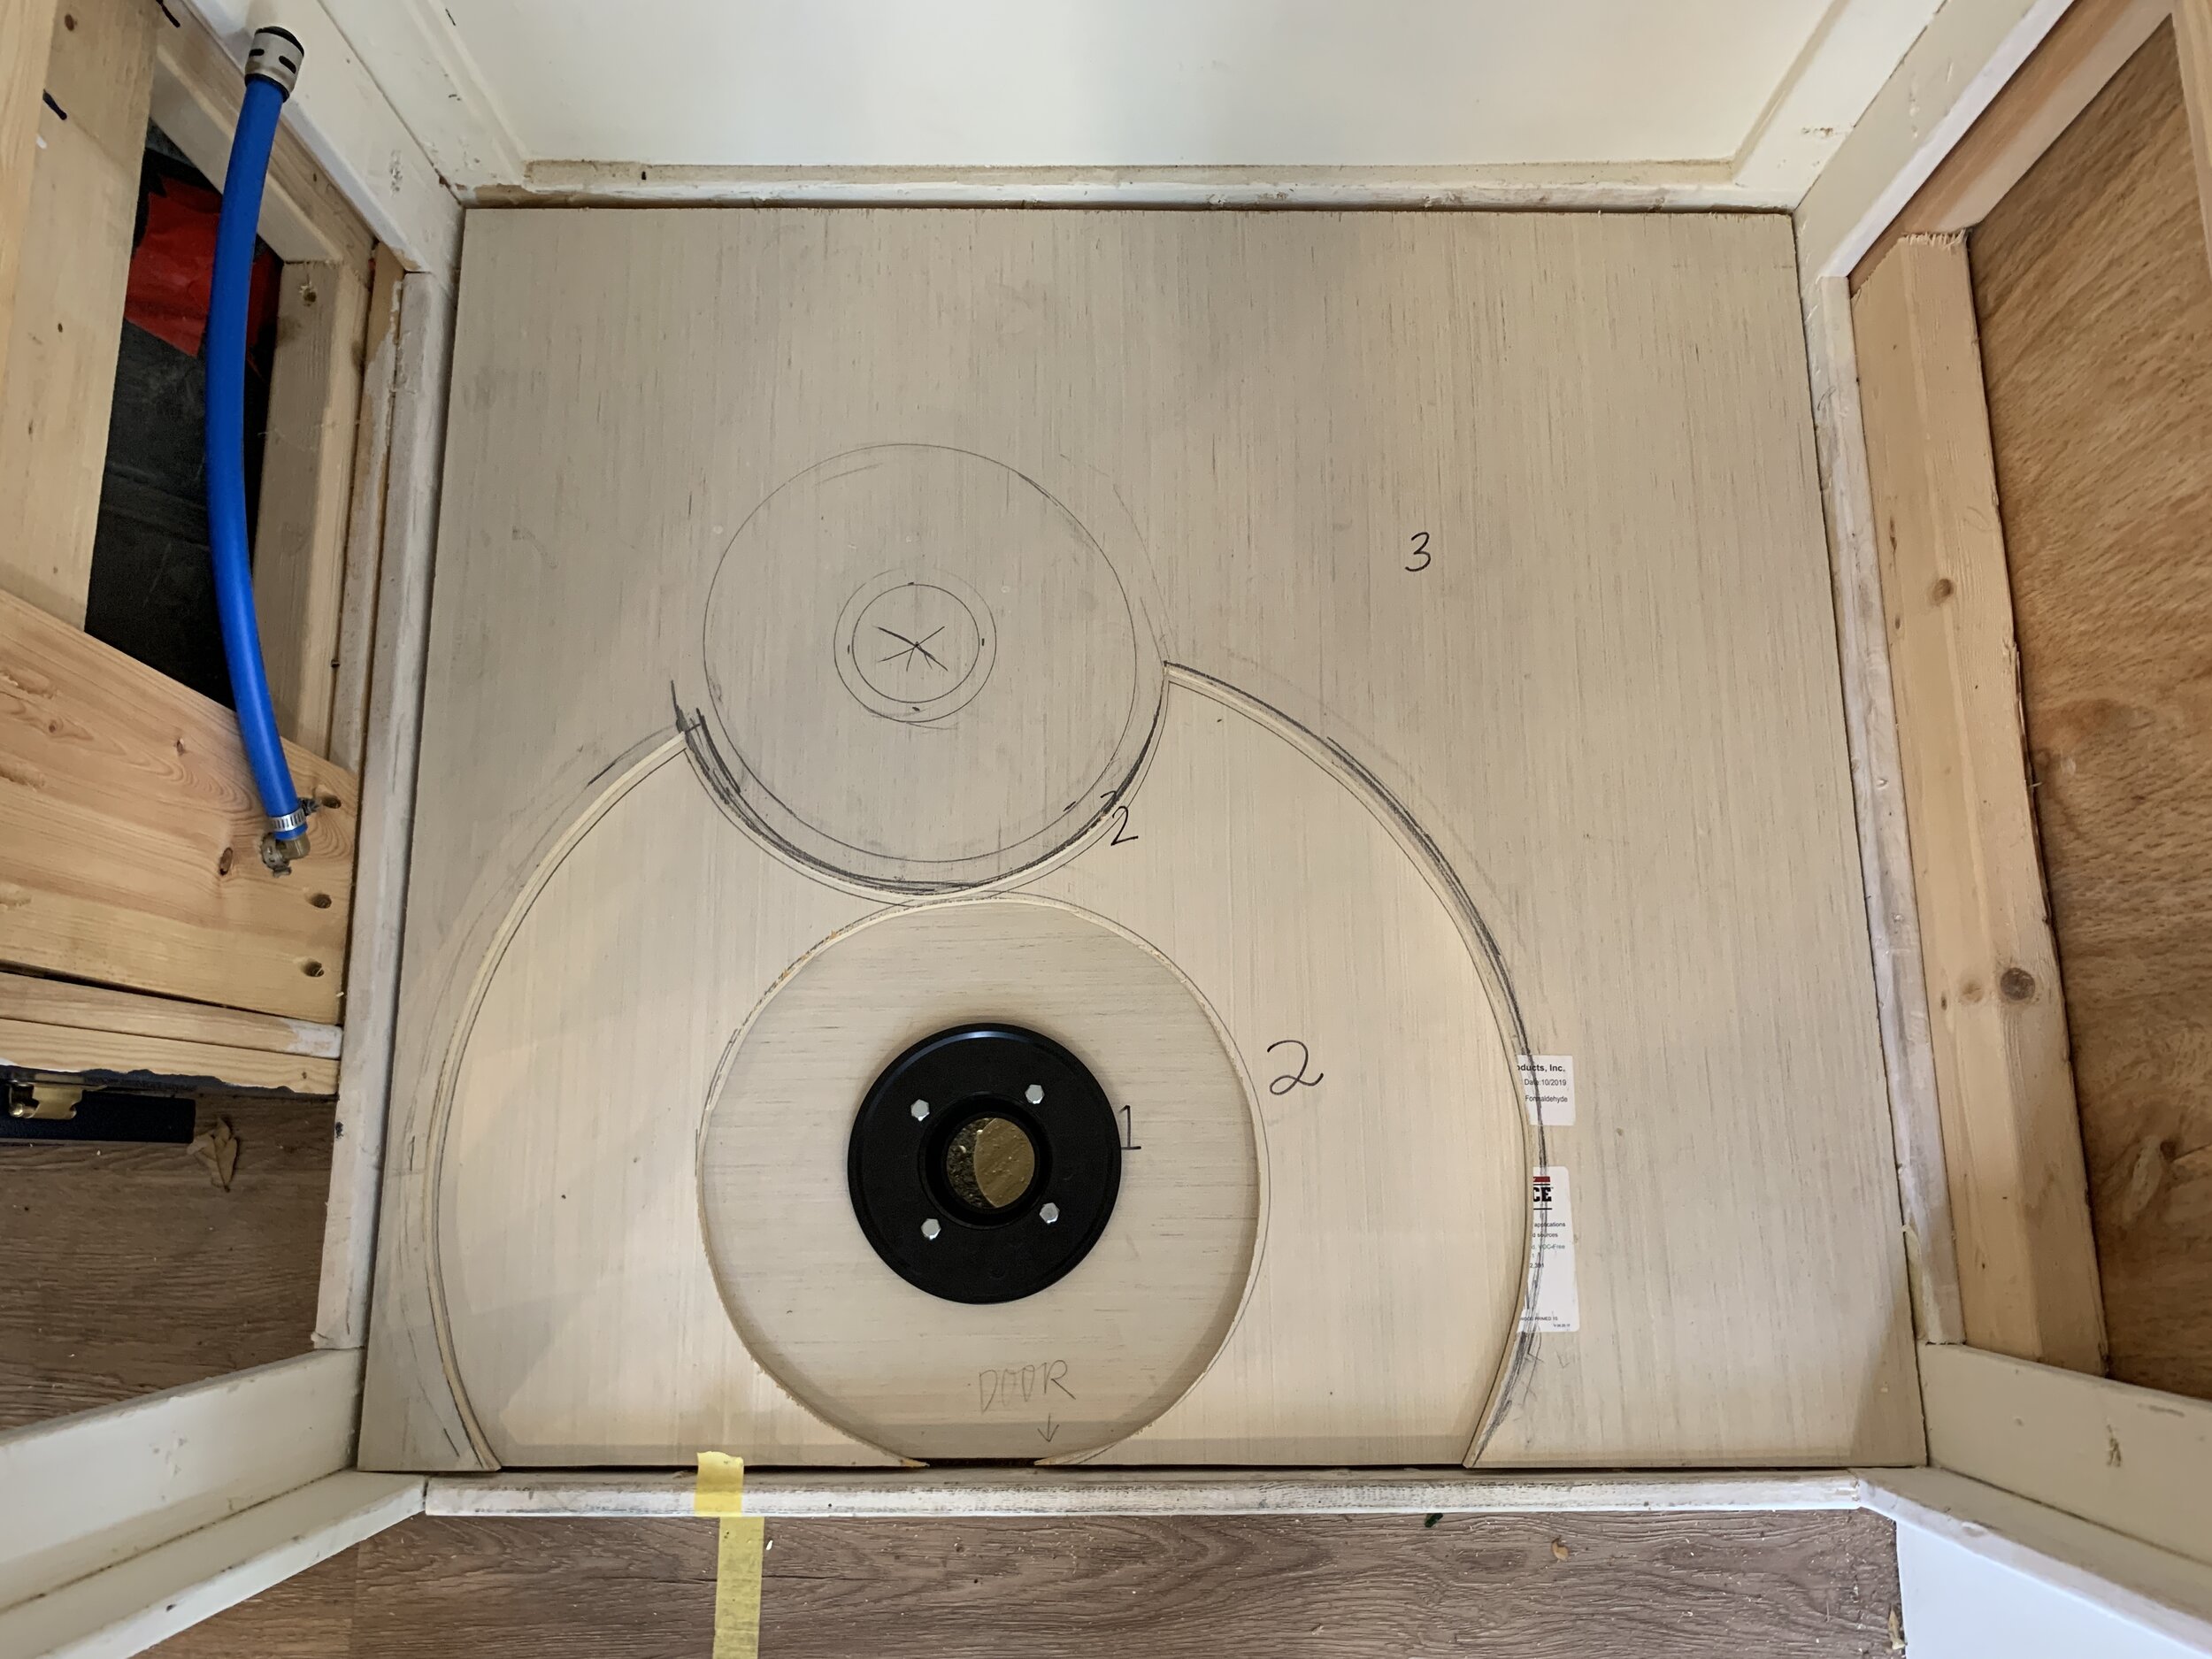
Once we had our “shim-free-zone” marked out for the toilet base, we used the bottom-most part of our 3-piece-shower-drain (the piece with the four circle/bolt areas coming off of the sides that at some point in this install started calling “bubbles”) to mark out the shape of our shower drain hole.
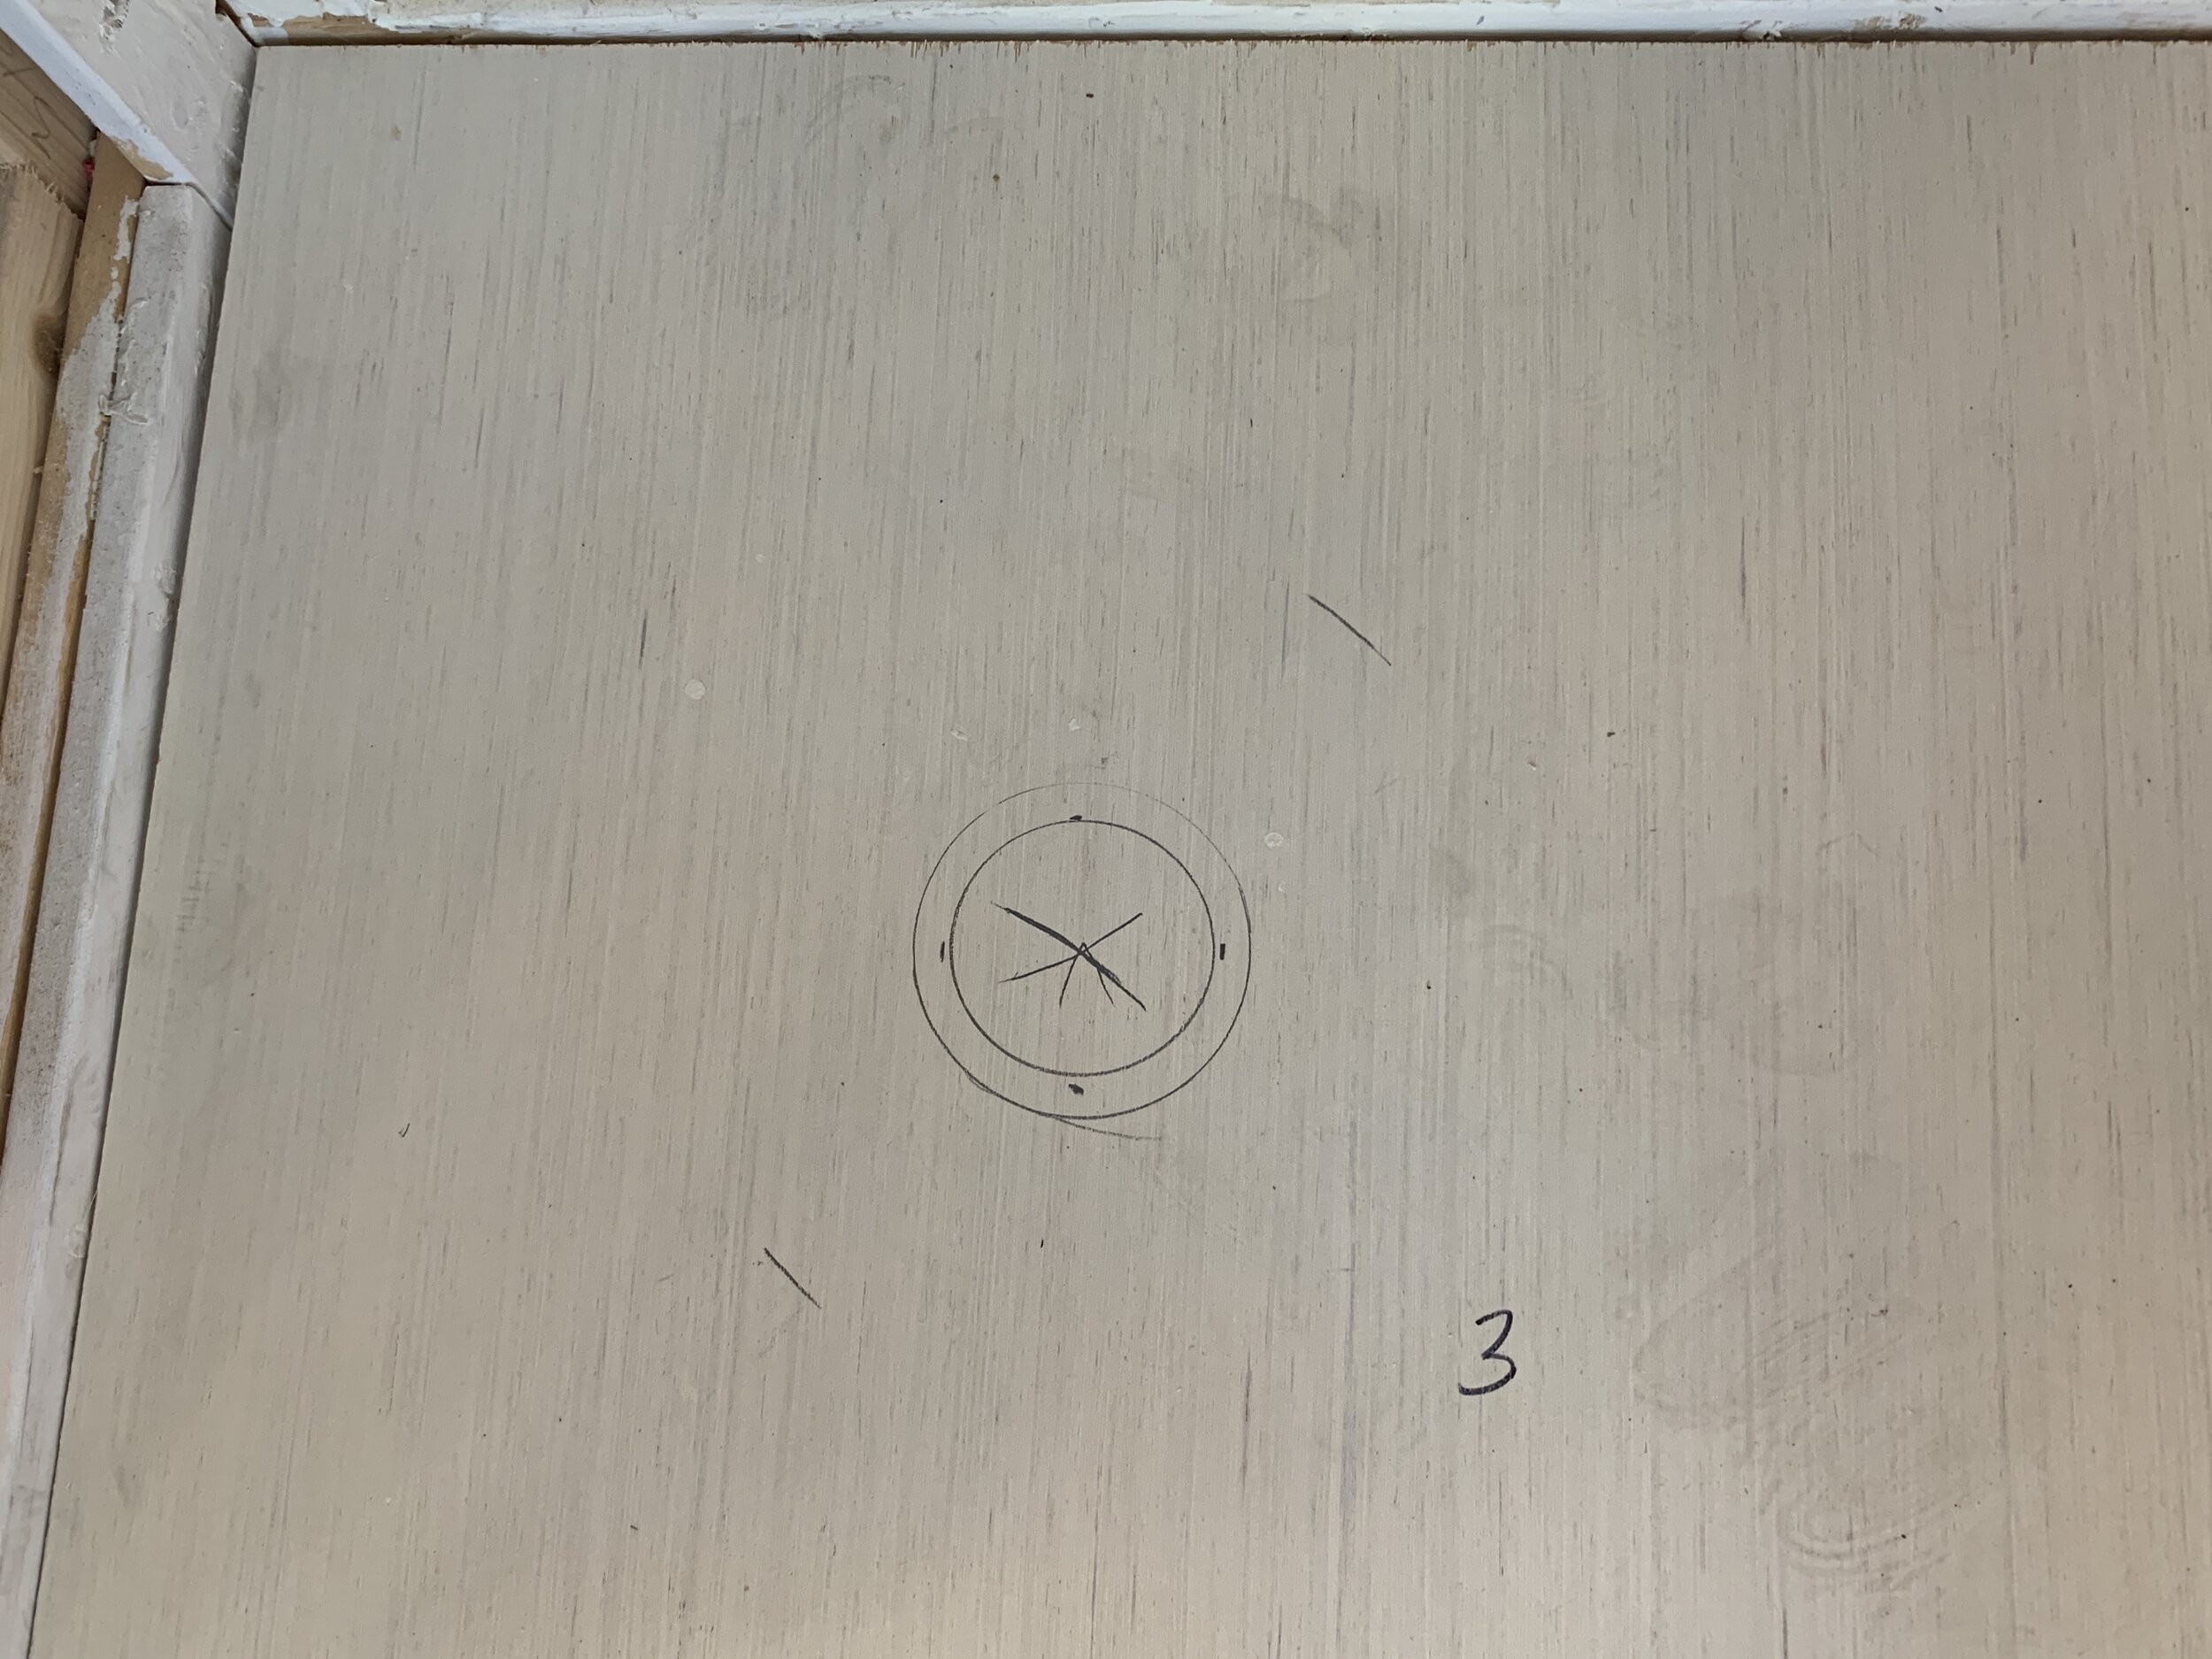


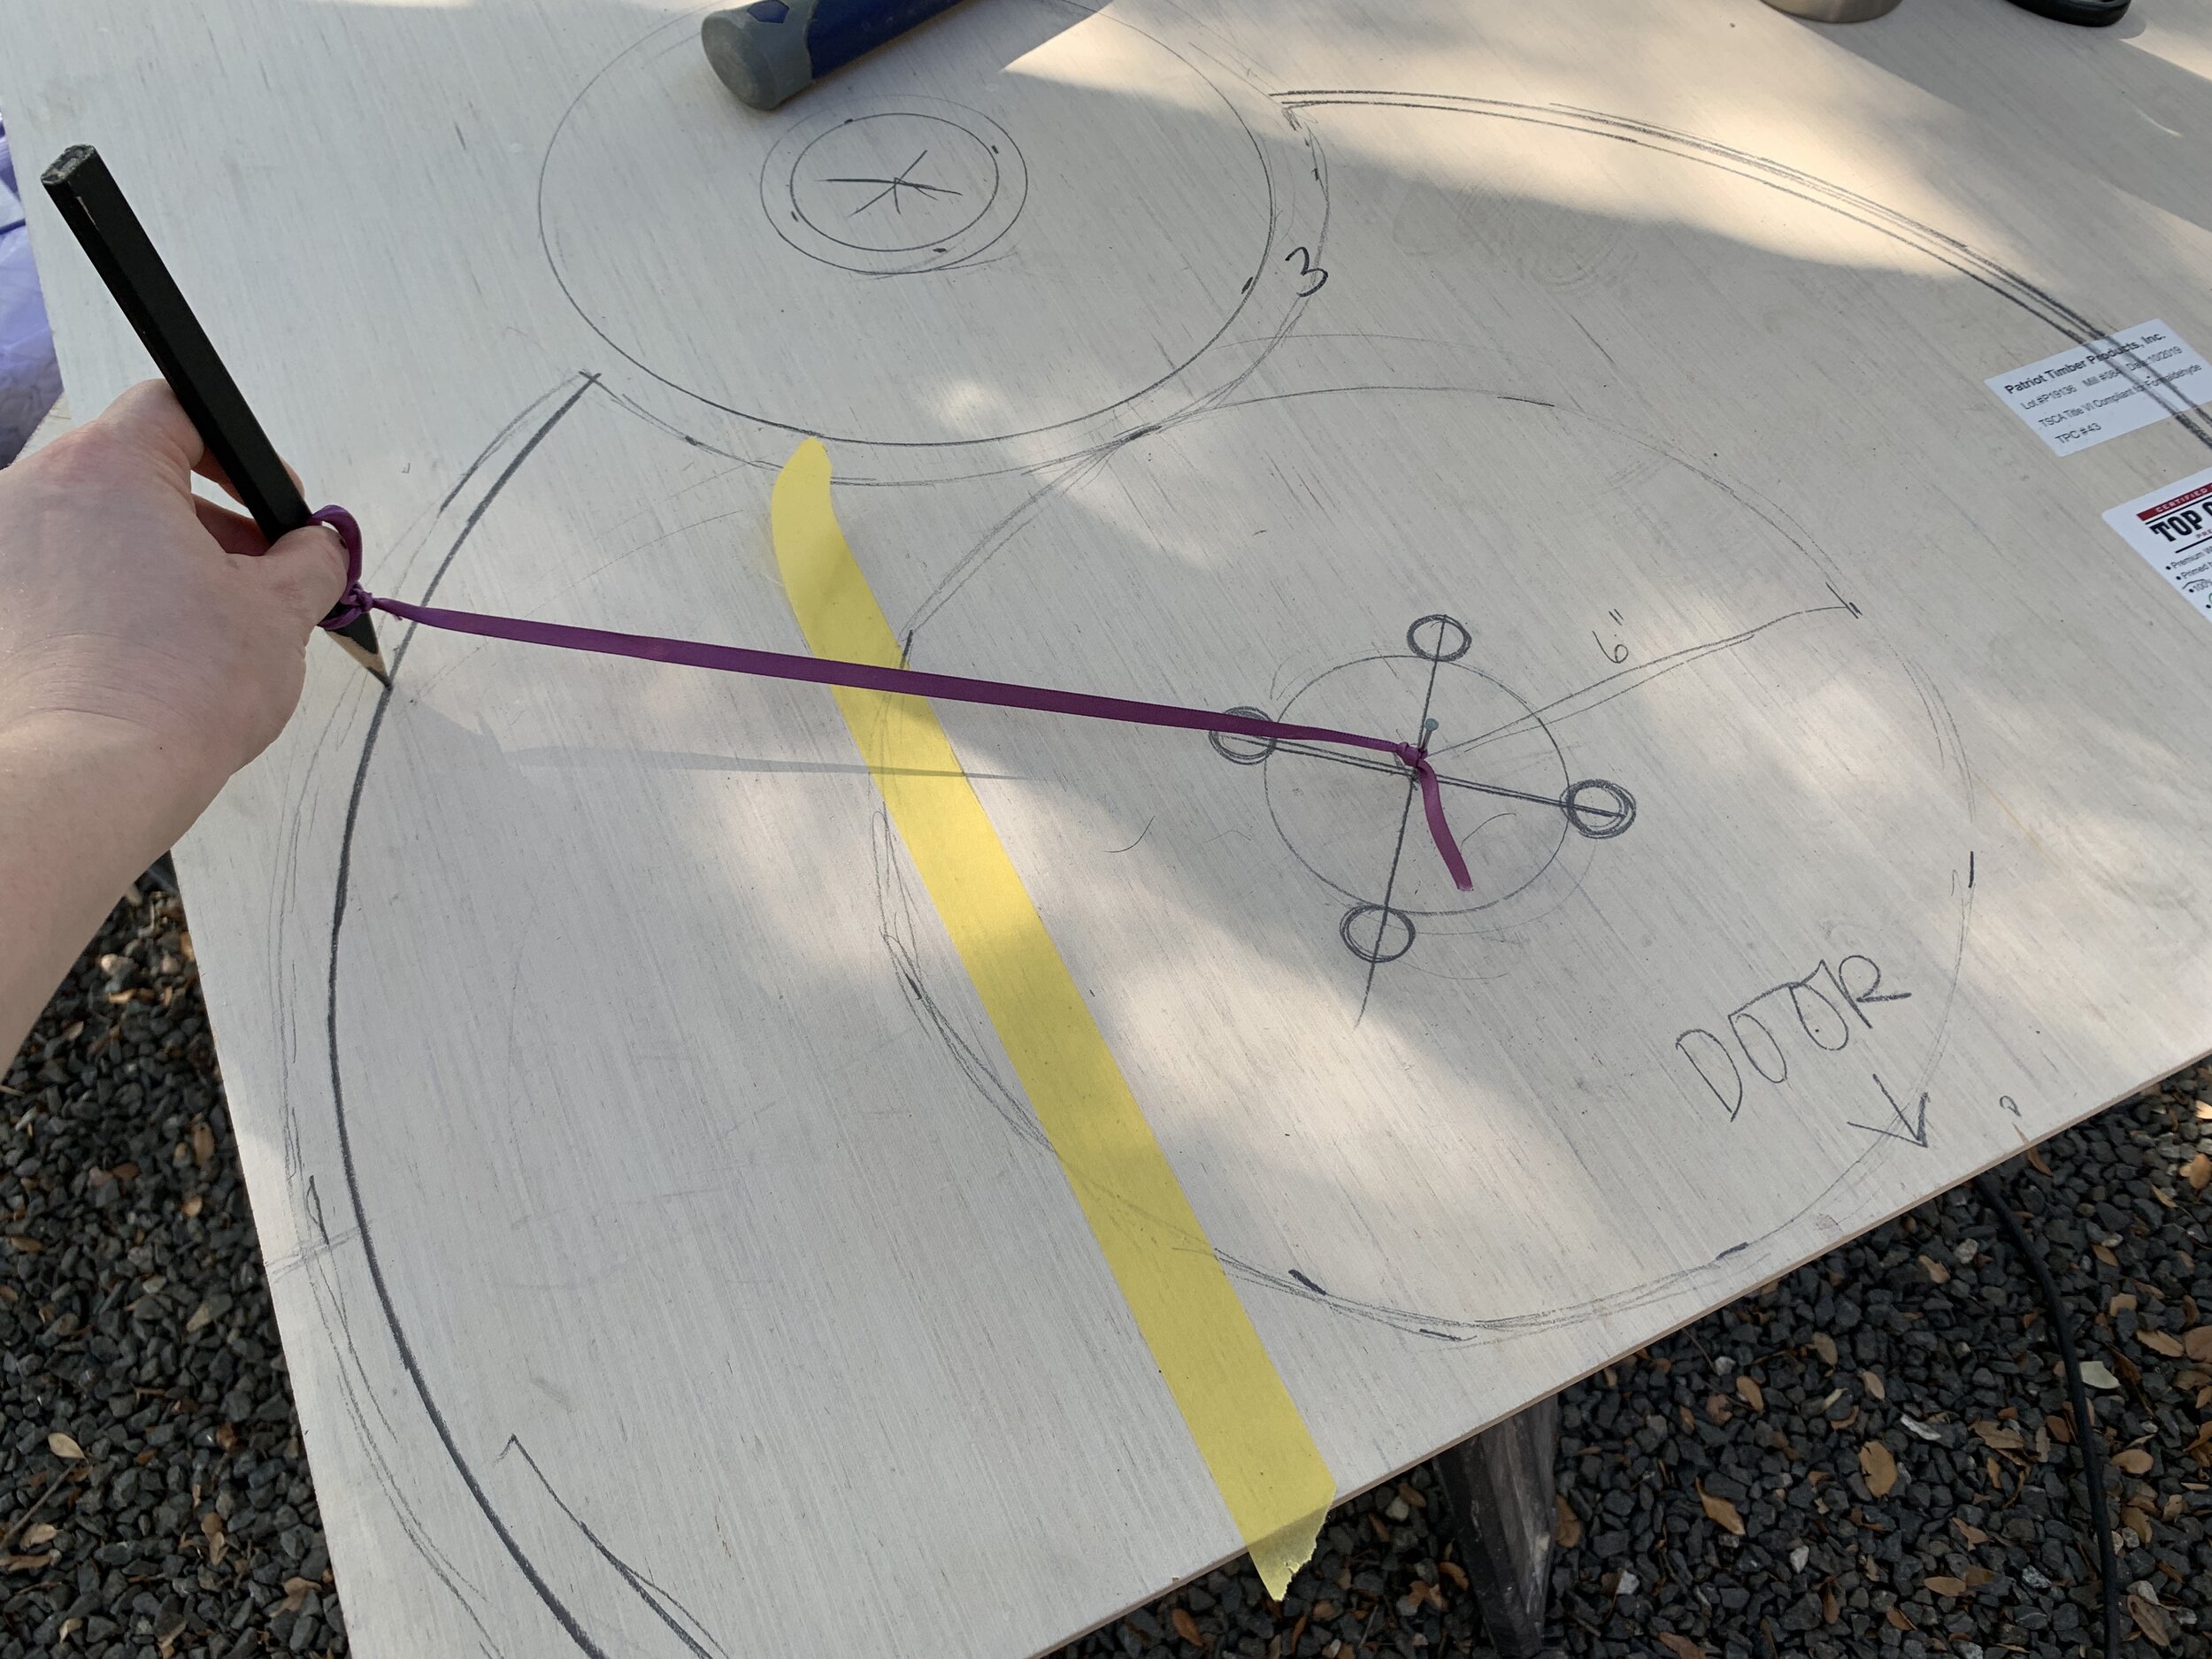
With “bubbles” the shower drain translated onto base level 3, we measured two rings out from the edge of the drain, each 6” apart. We dead-ended our second/12” ring out from the shower drain where it intersected our toilet’s “shim-free-zone”. Removing layer 3 from the shower, we used the good old fashioned nail + pencil on a string trick to get a perfect circle marked out.
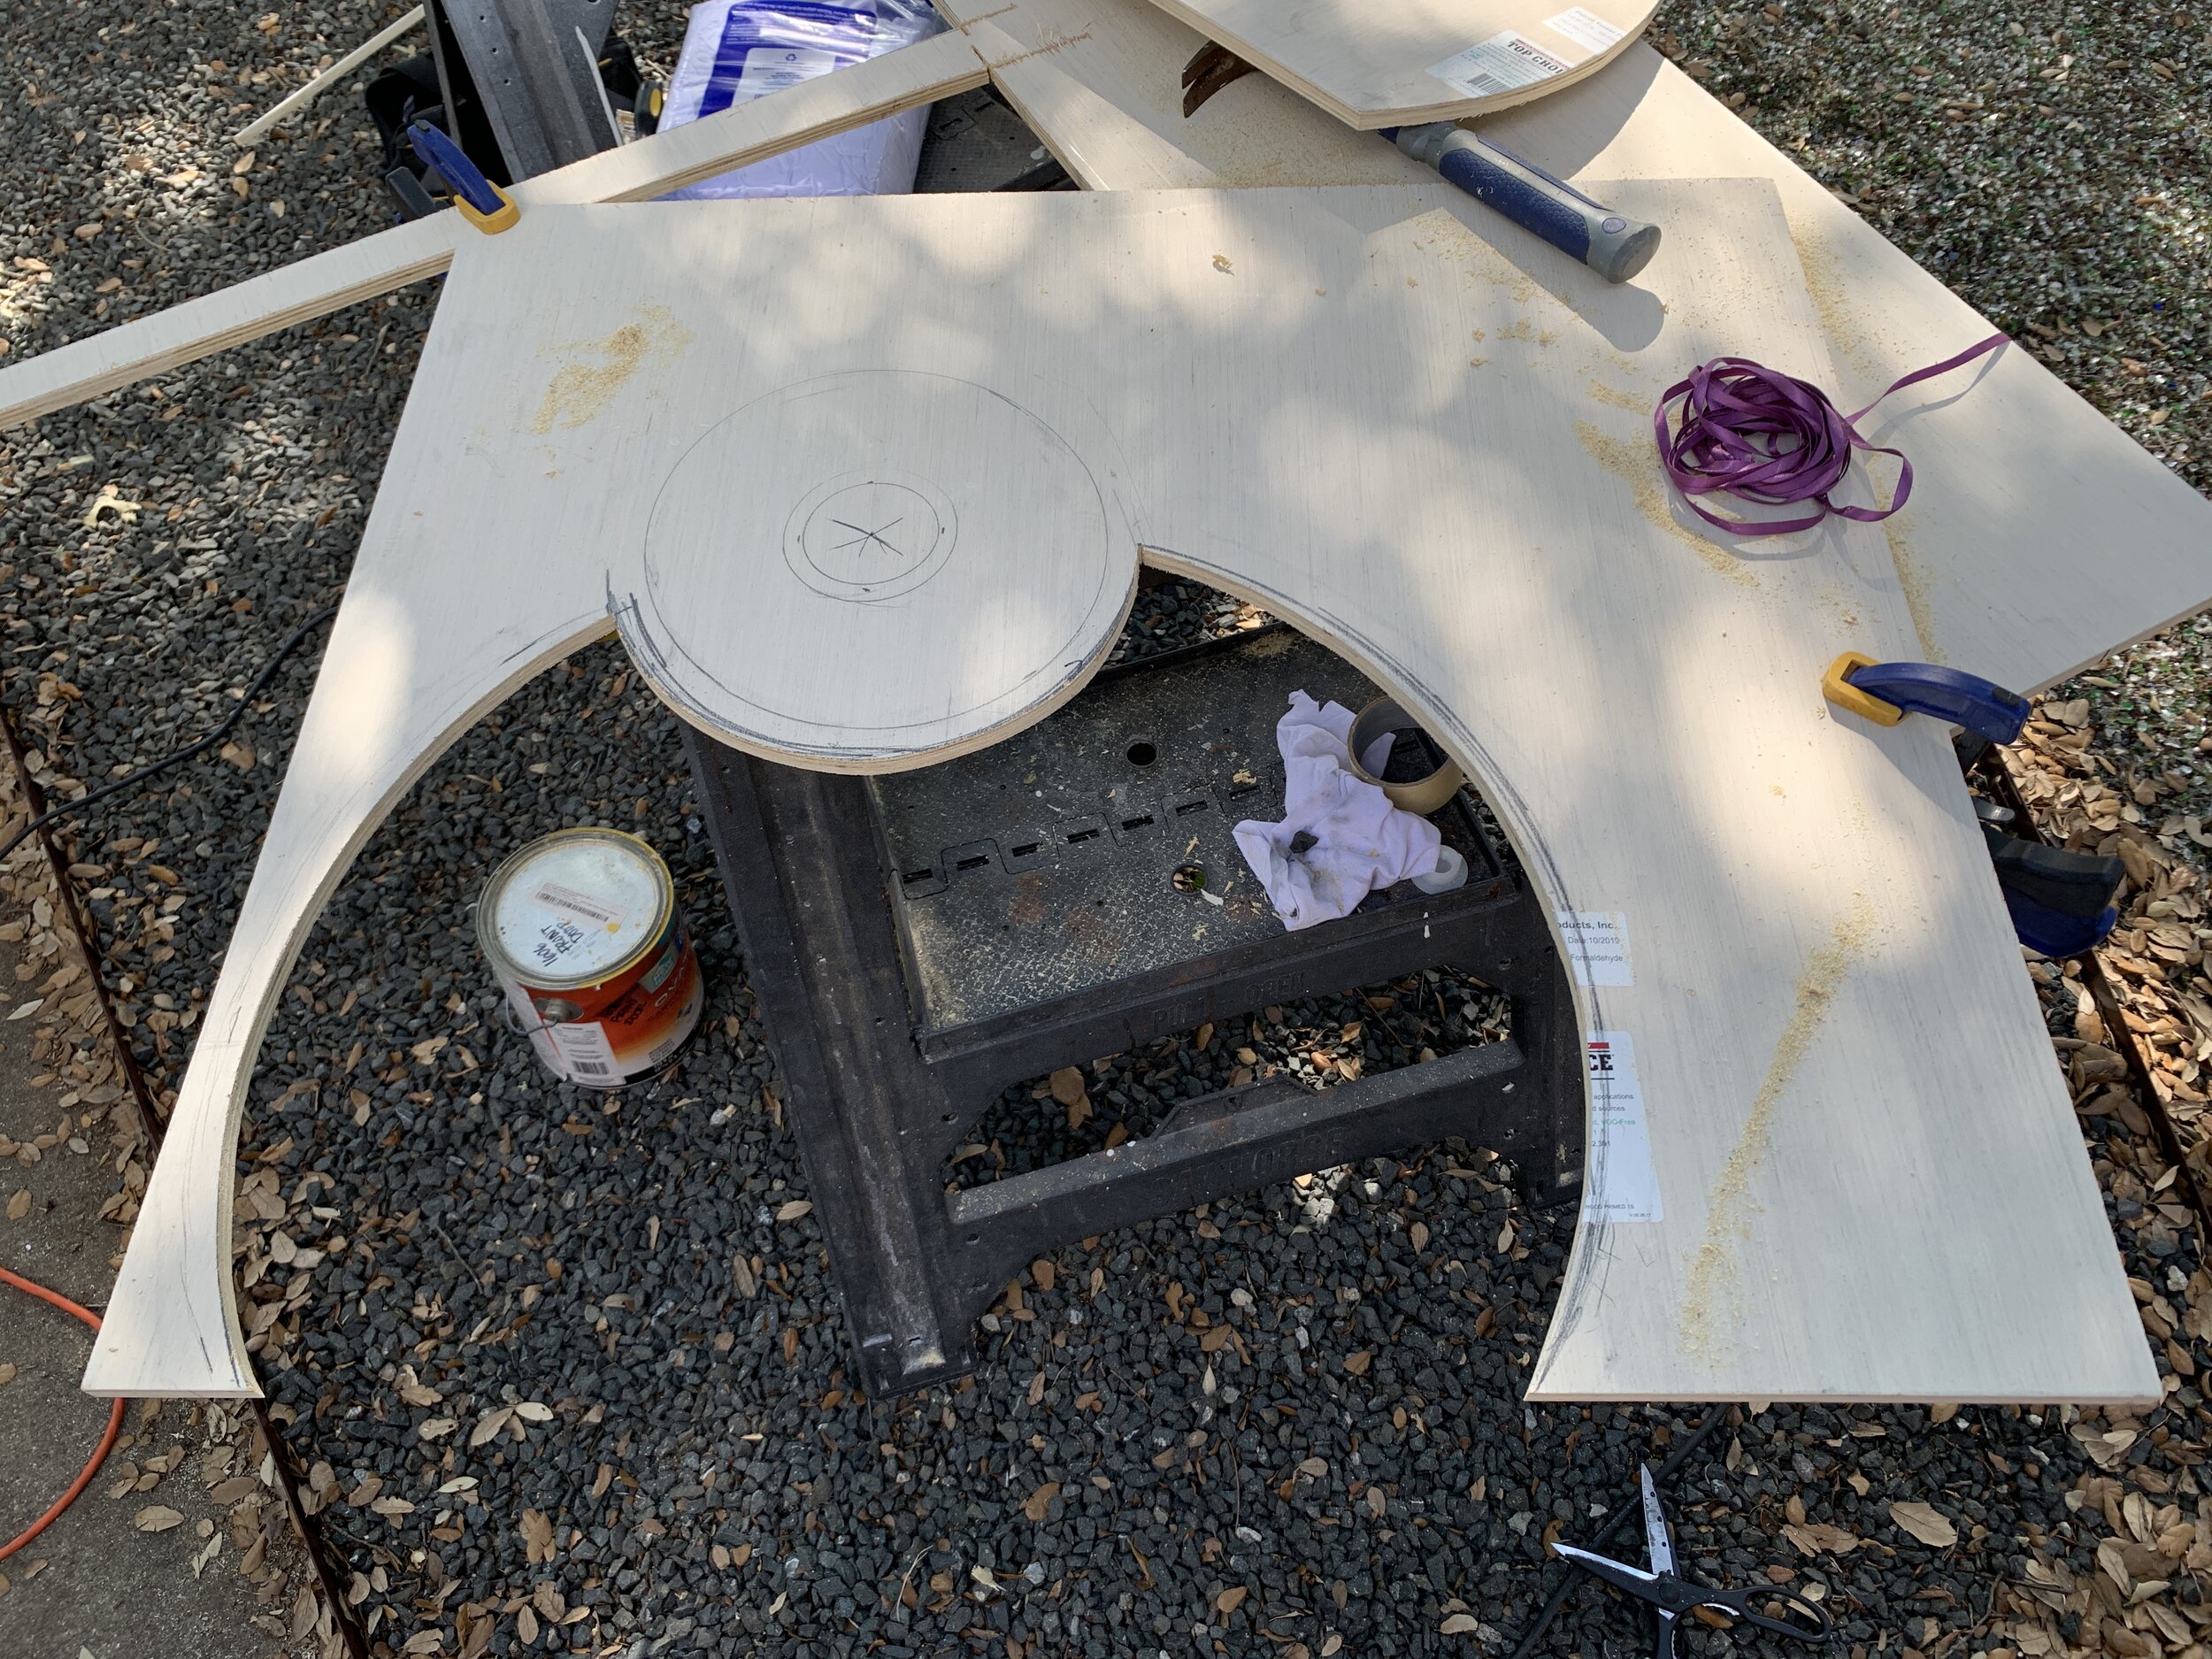
Step 4: Cut the slope rings
Using our jigsaw, we cut the largest 12” ring out of base 3. Then we moved base 3 back onto base 2 to mark out what we’d just cut. Using this ring as a guide, we measured 6” in and re-marked our smaller ring, now on base 2. We cut the 6” ring out of base 2 with a jigsaw. then we moved base 2 and base 3 on top of base 1 and used the shape of base 2 to mark out “bubbles” the shower drain again, this time on base 1.
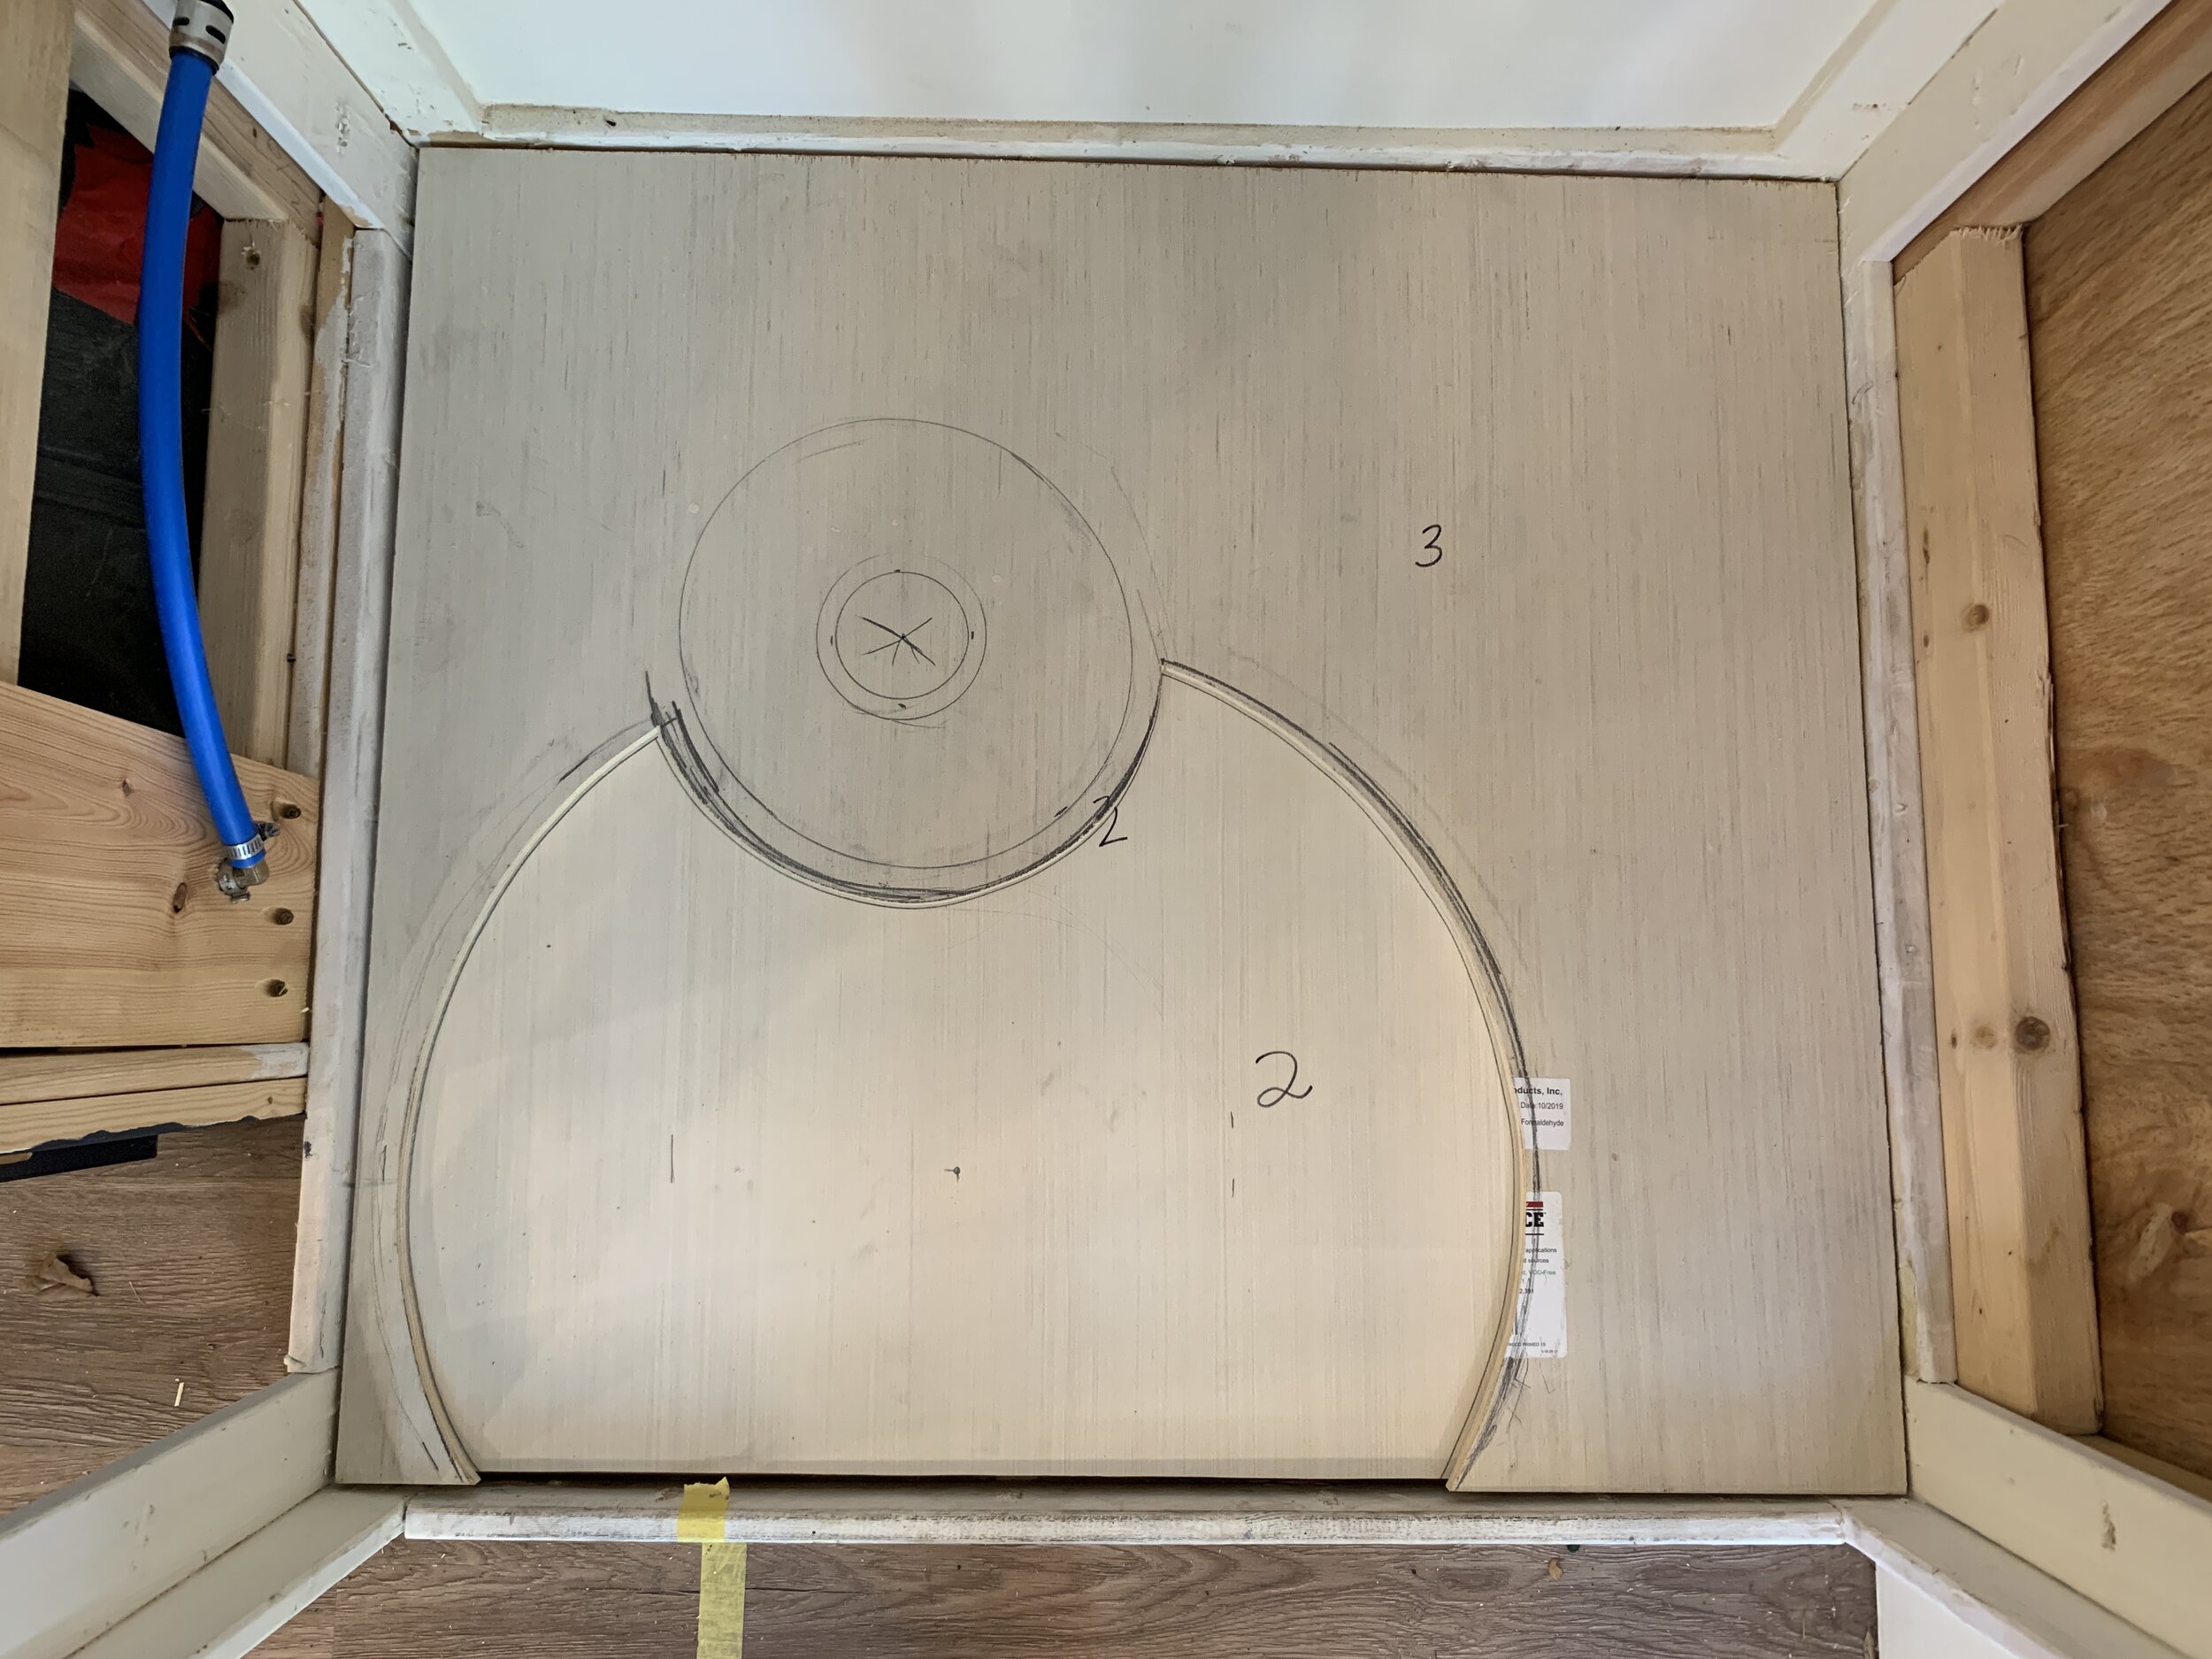

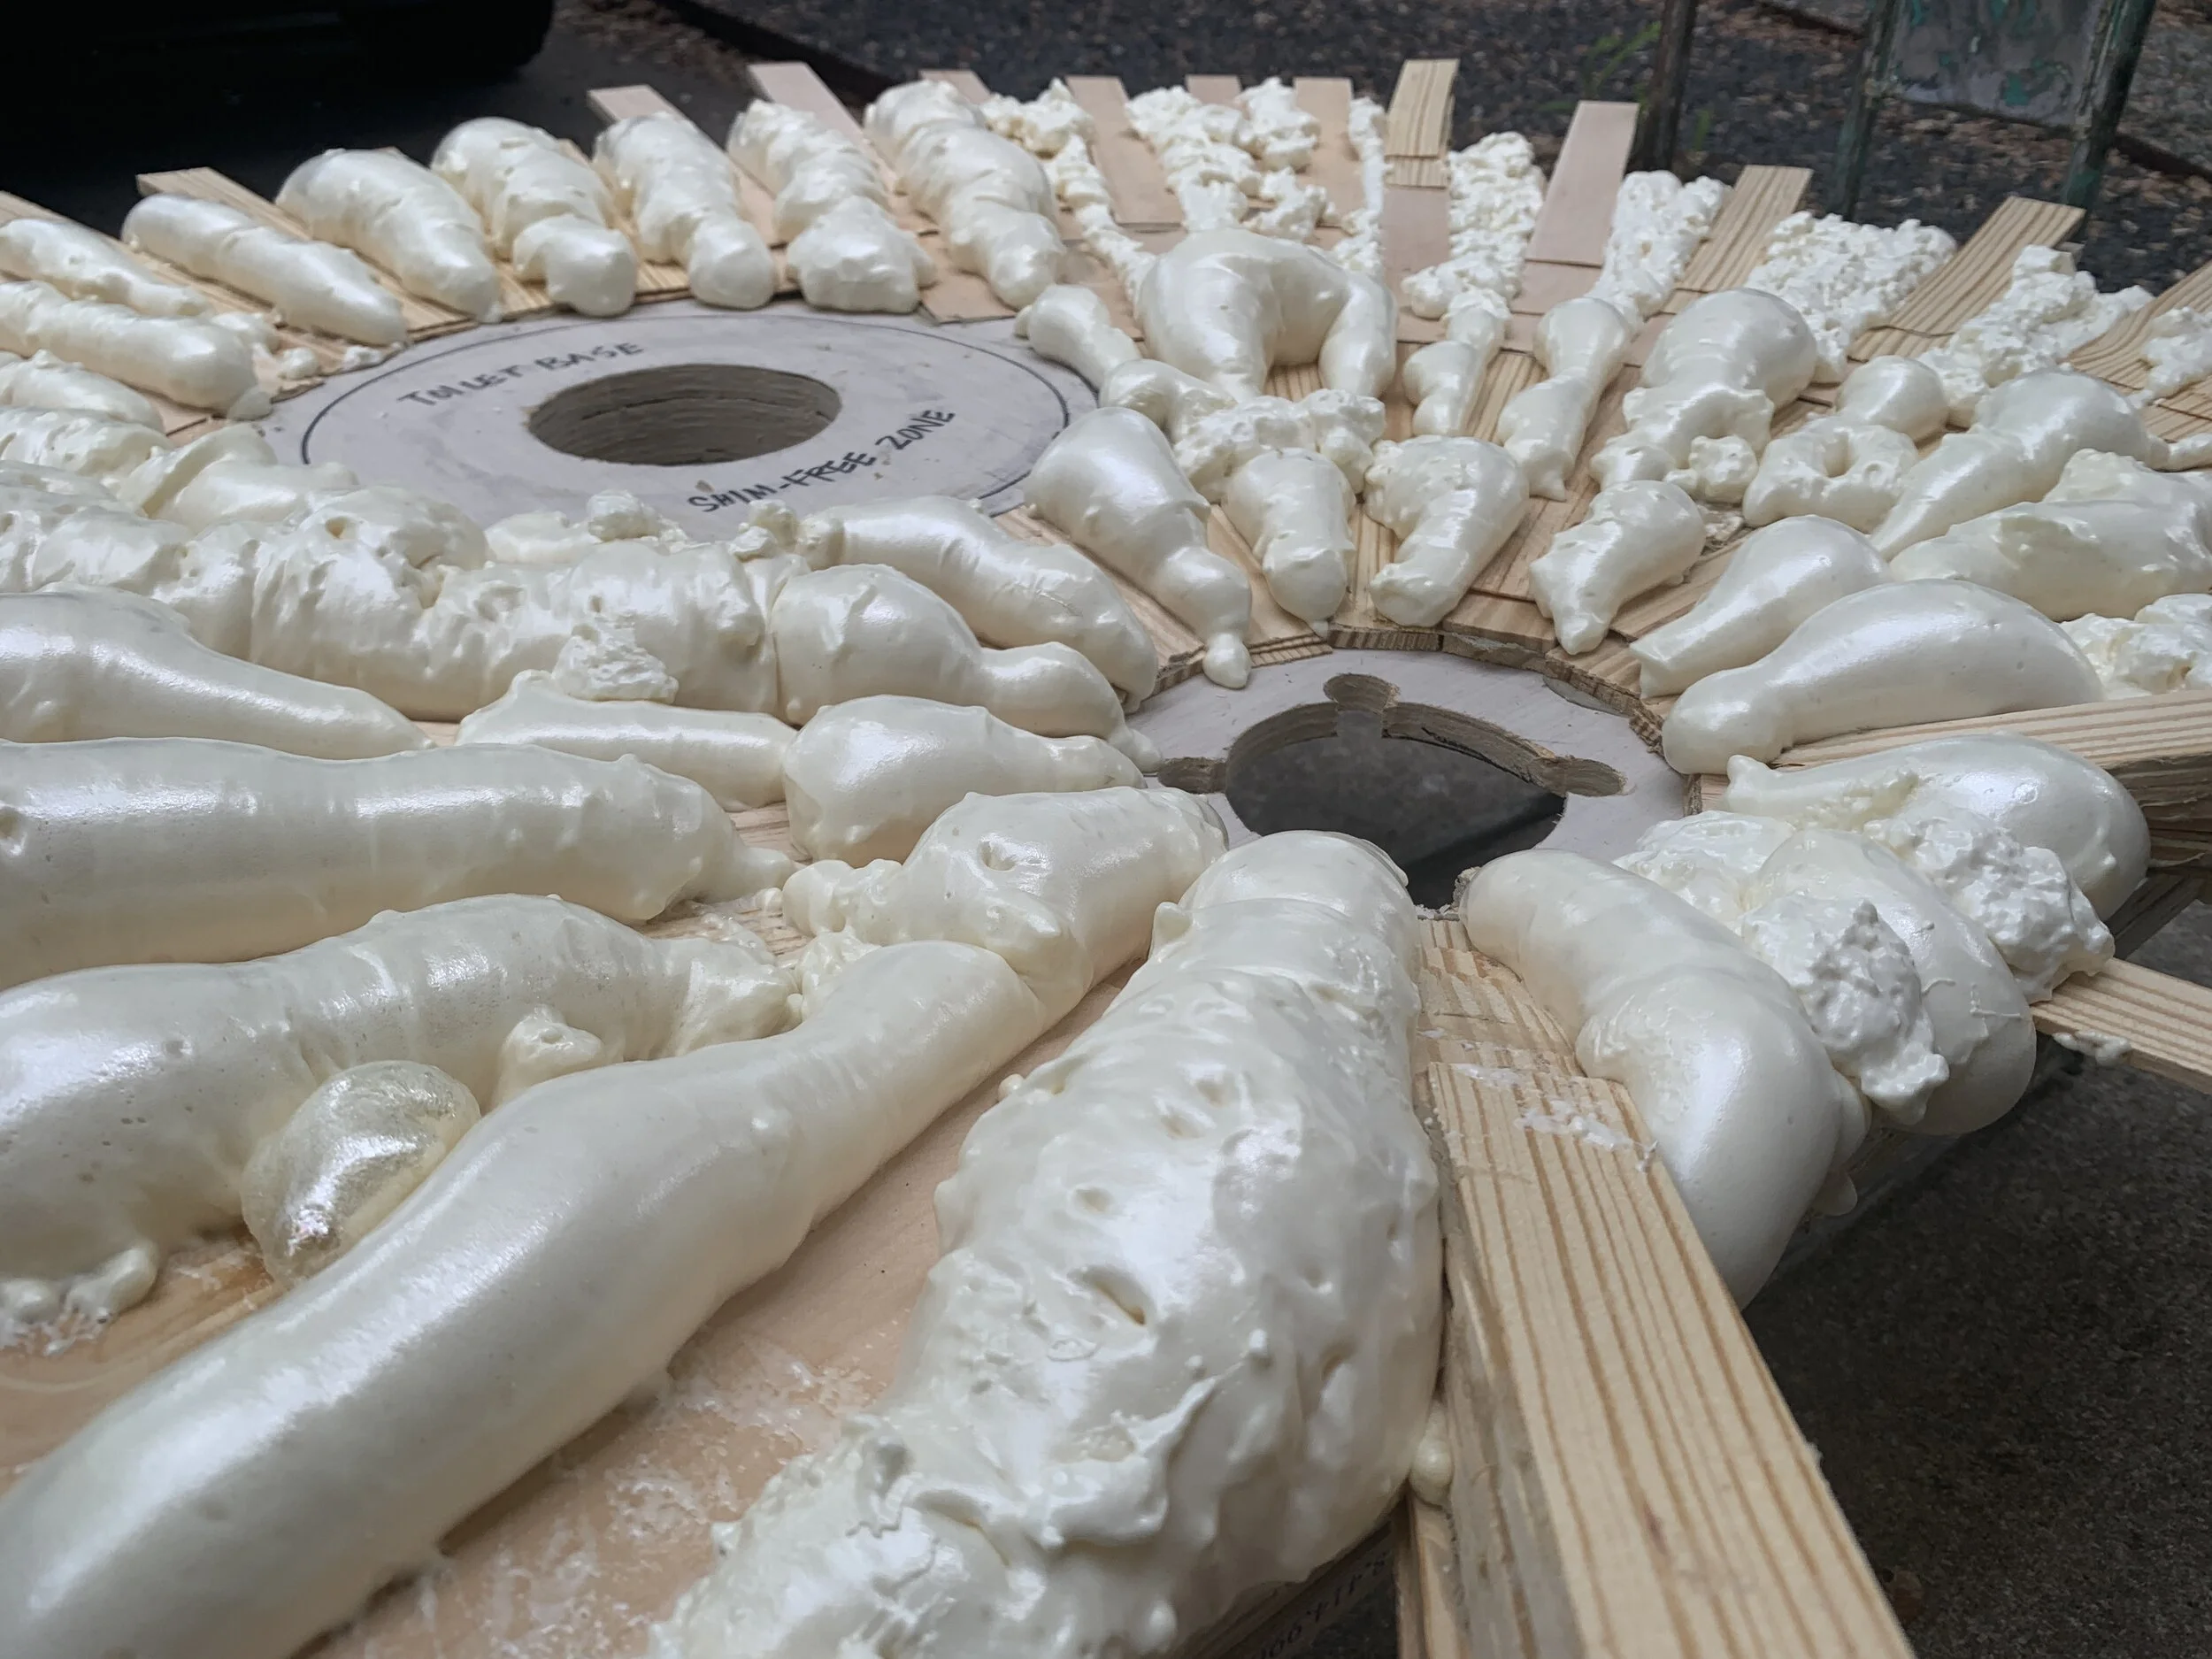
By now the base is starting to look like the makings of a crazy-lady atomic clock or something.
If we were rebuilding this smarter and with only two layers, we could probably just go with the one 12” out from the shower drain marking and skip base 2 altogether. So the shower base would look like base 1 and base 3 with no base 2 layer in between.
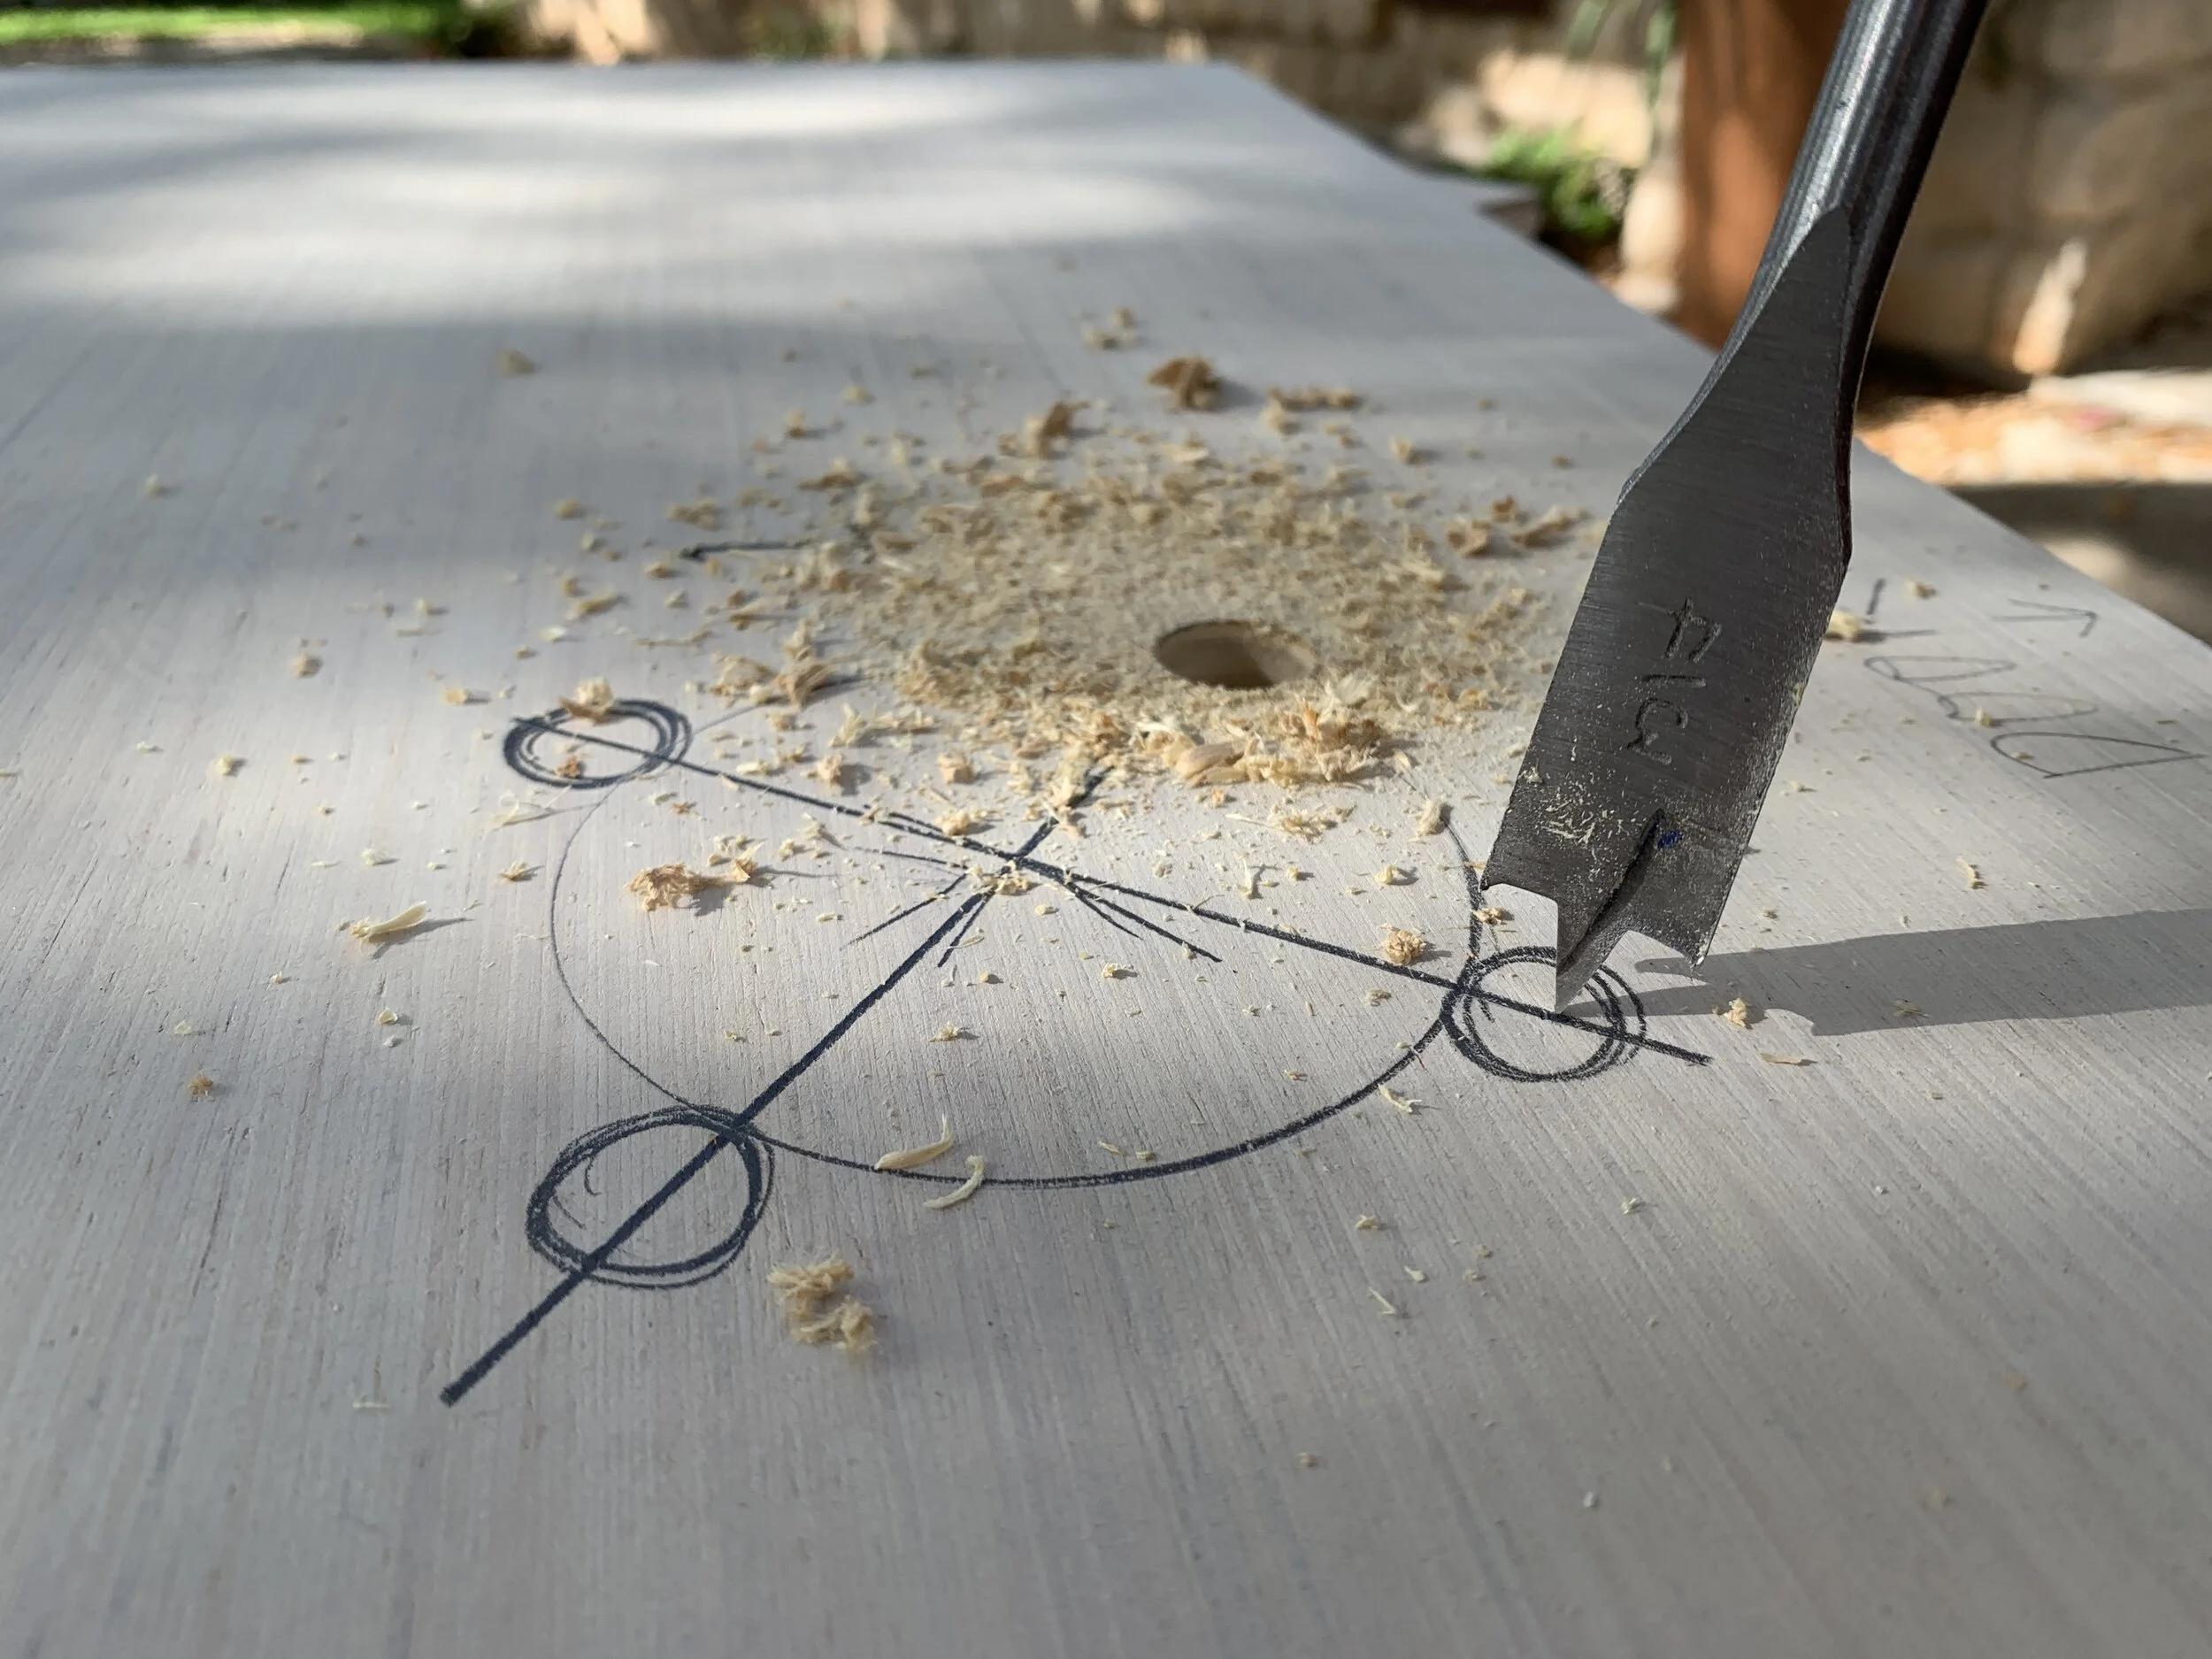
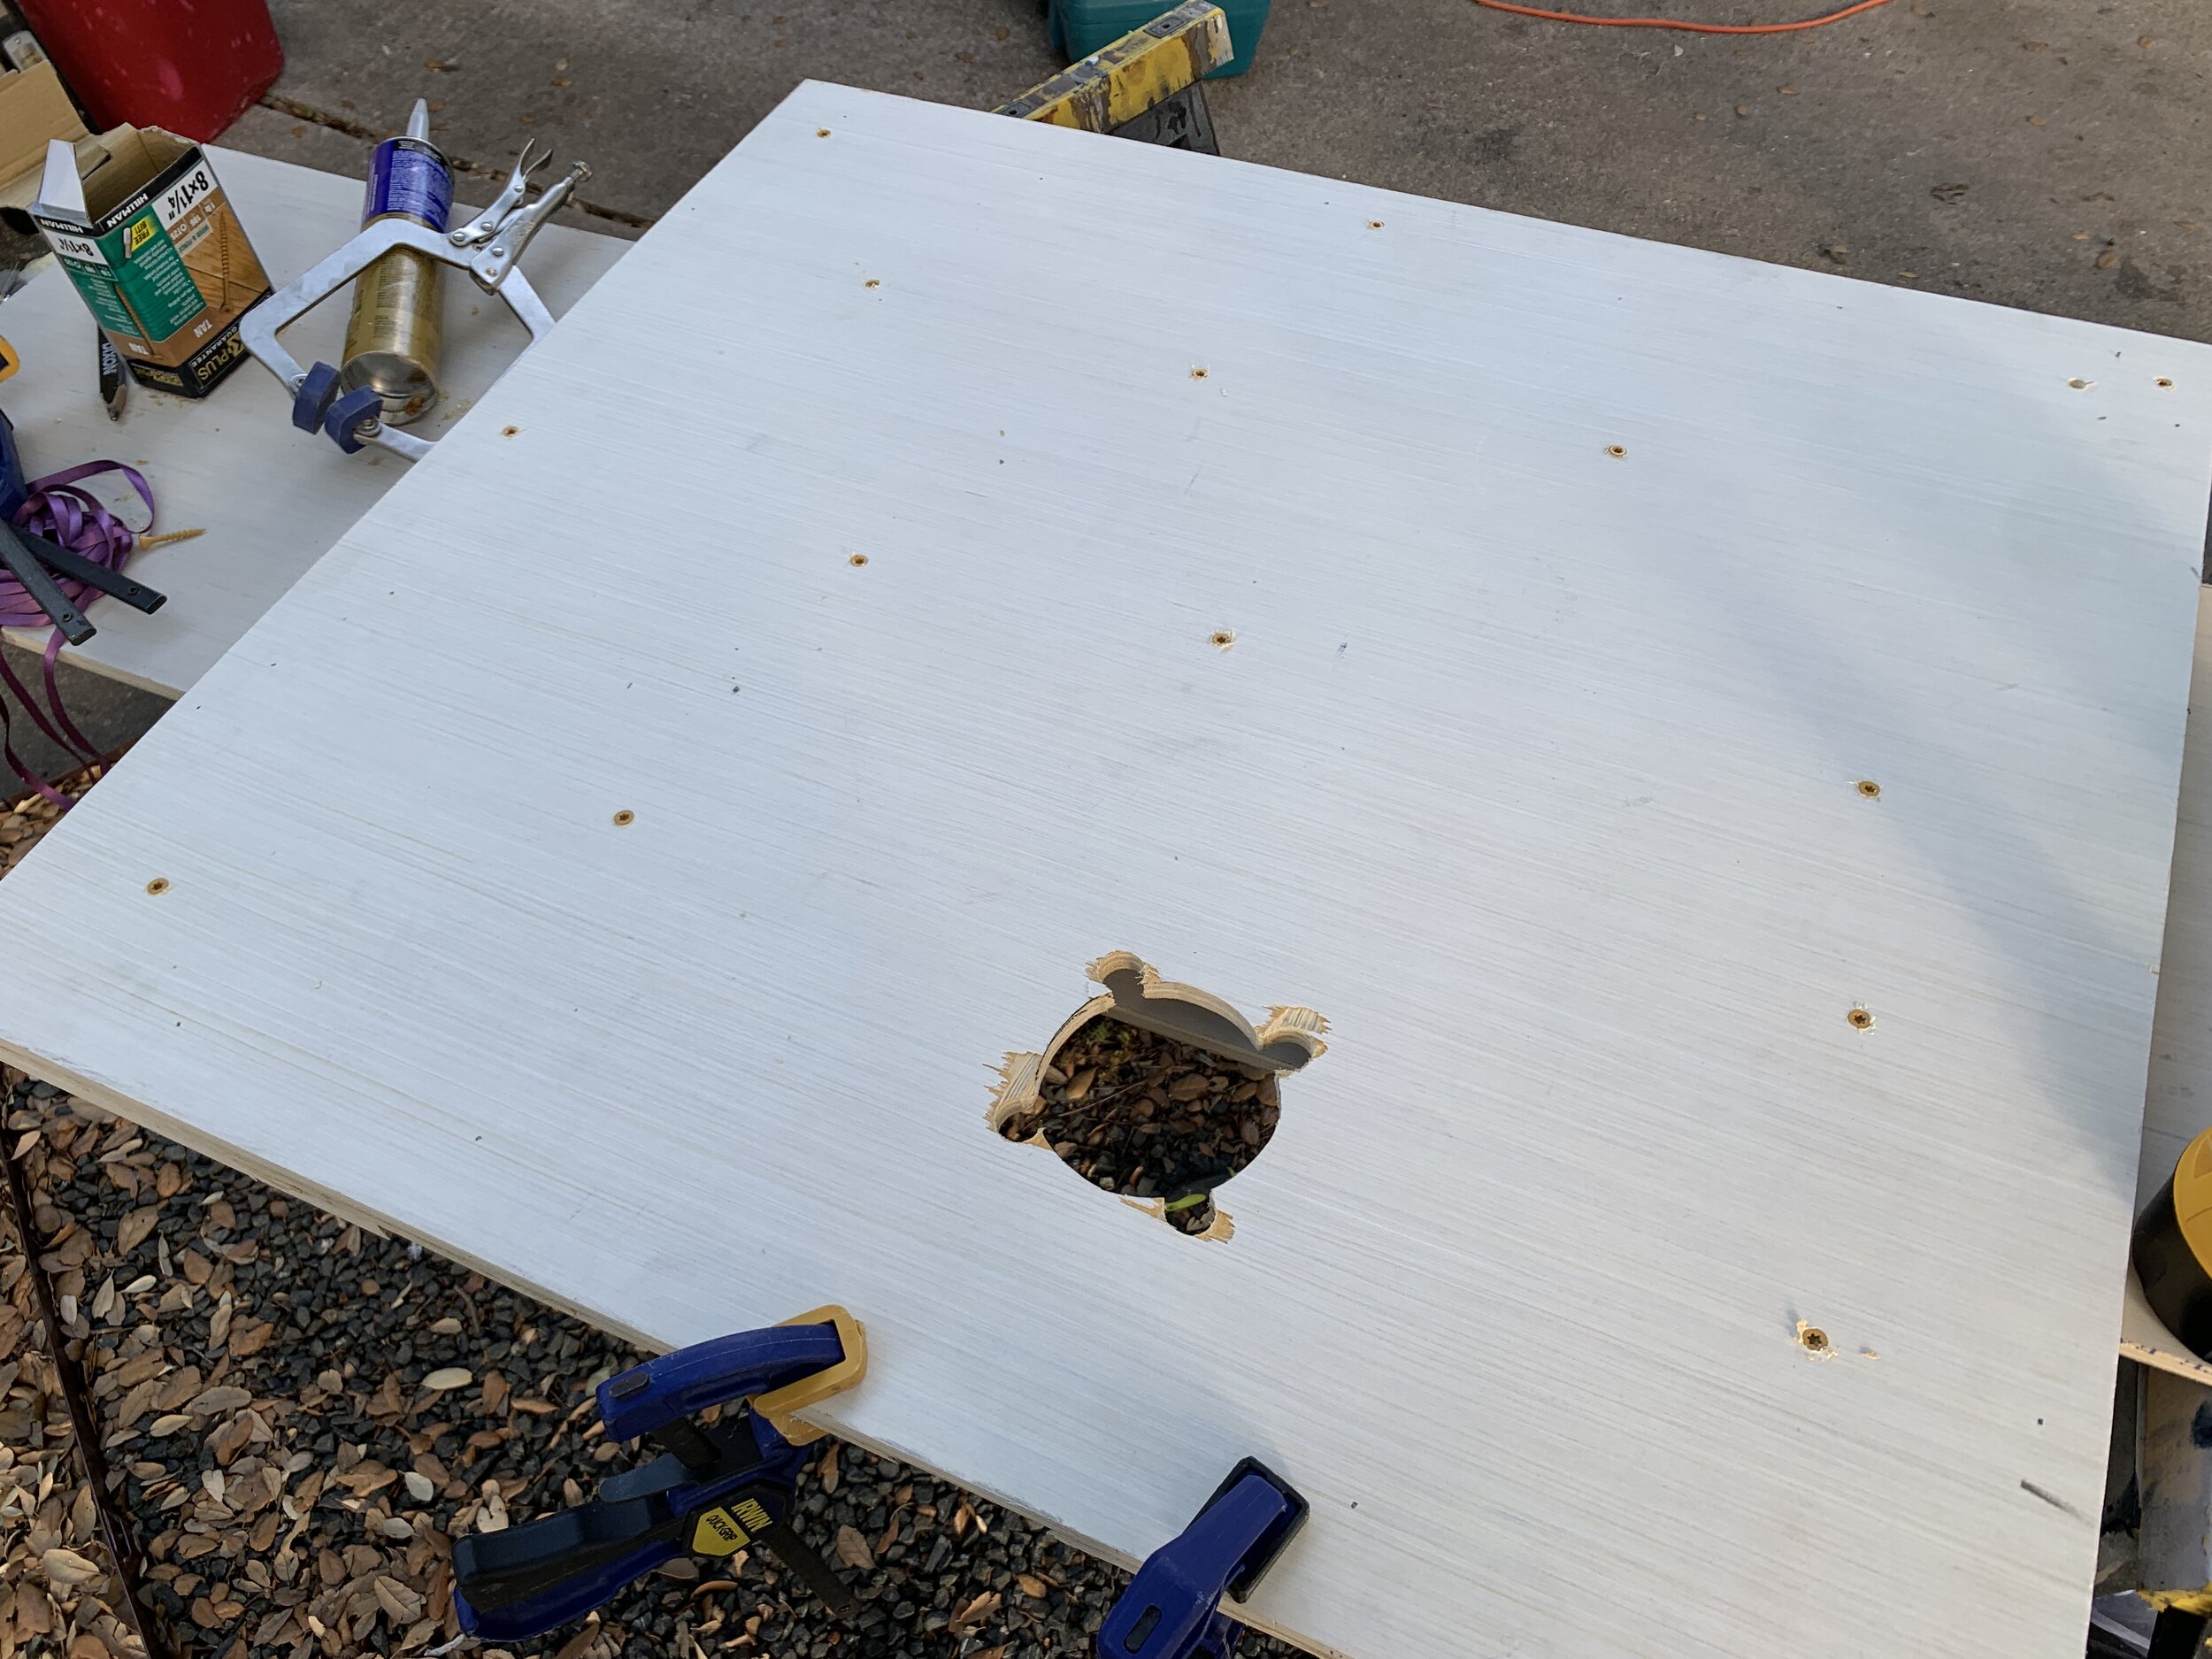
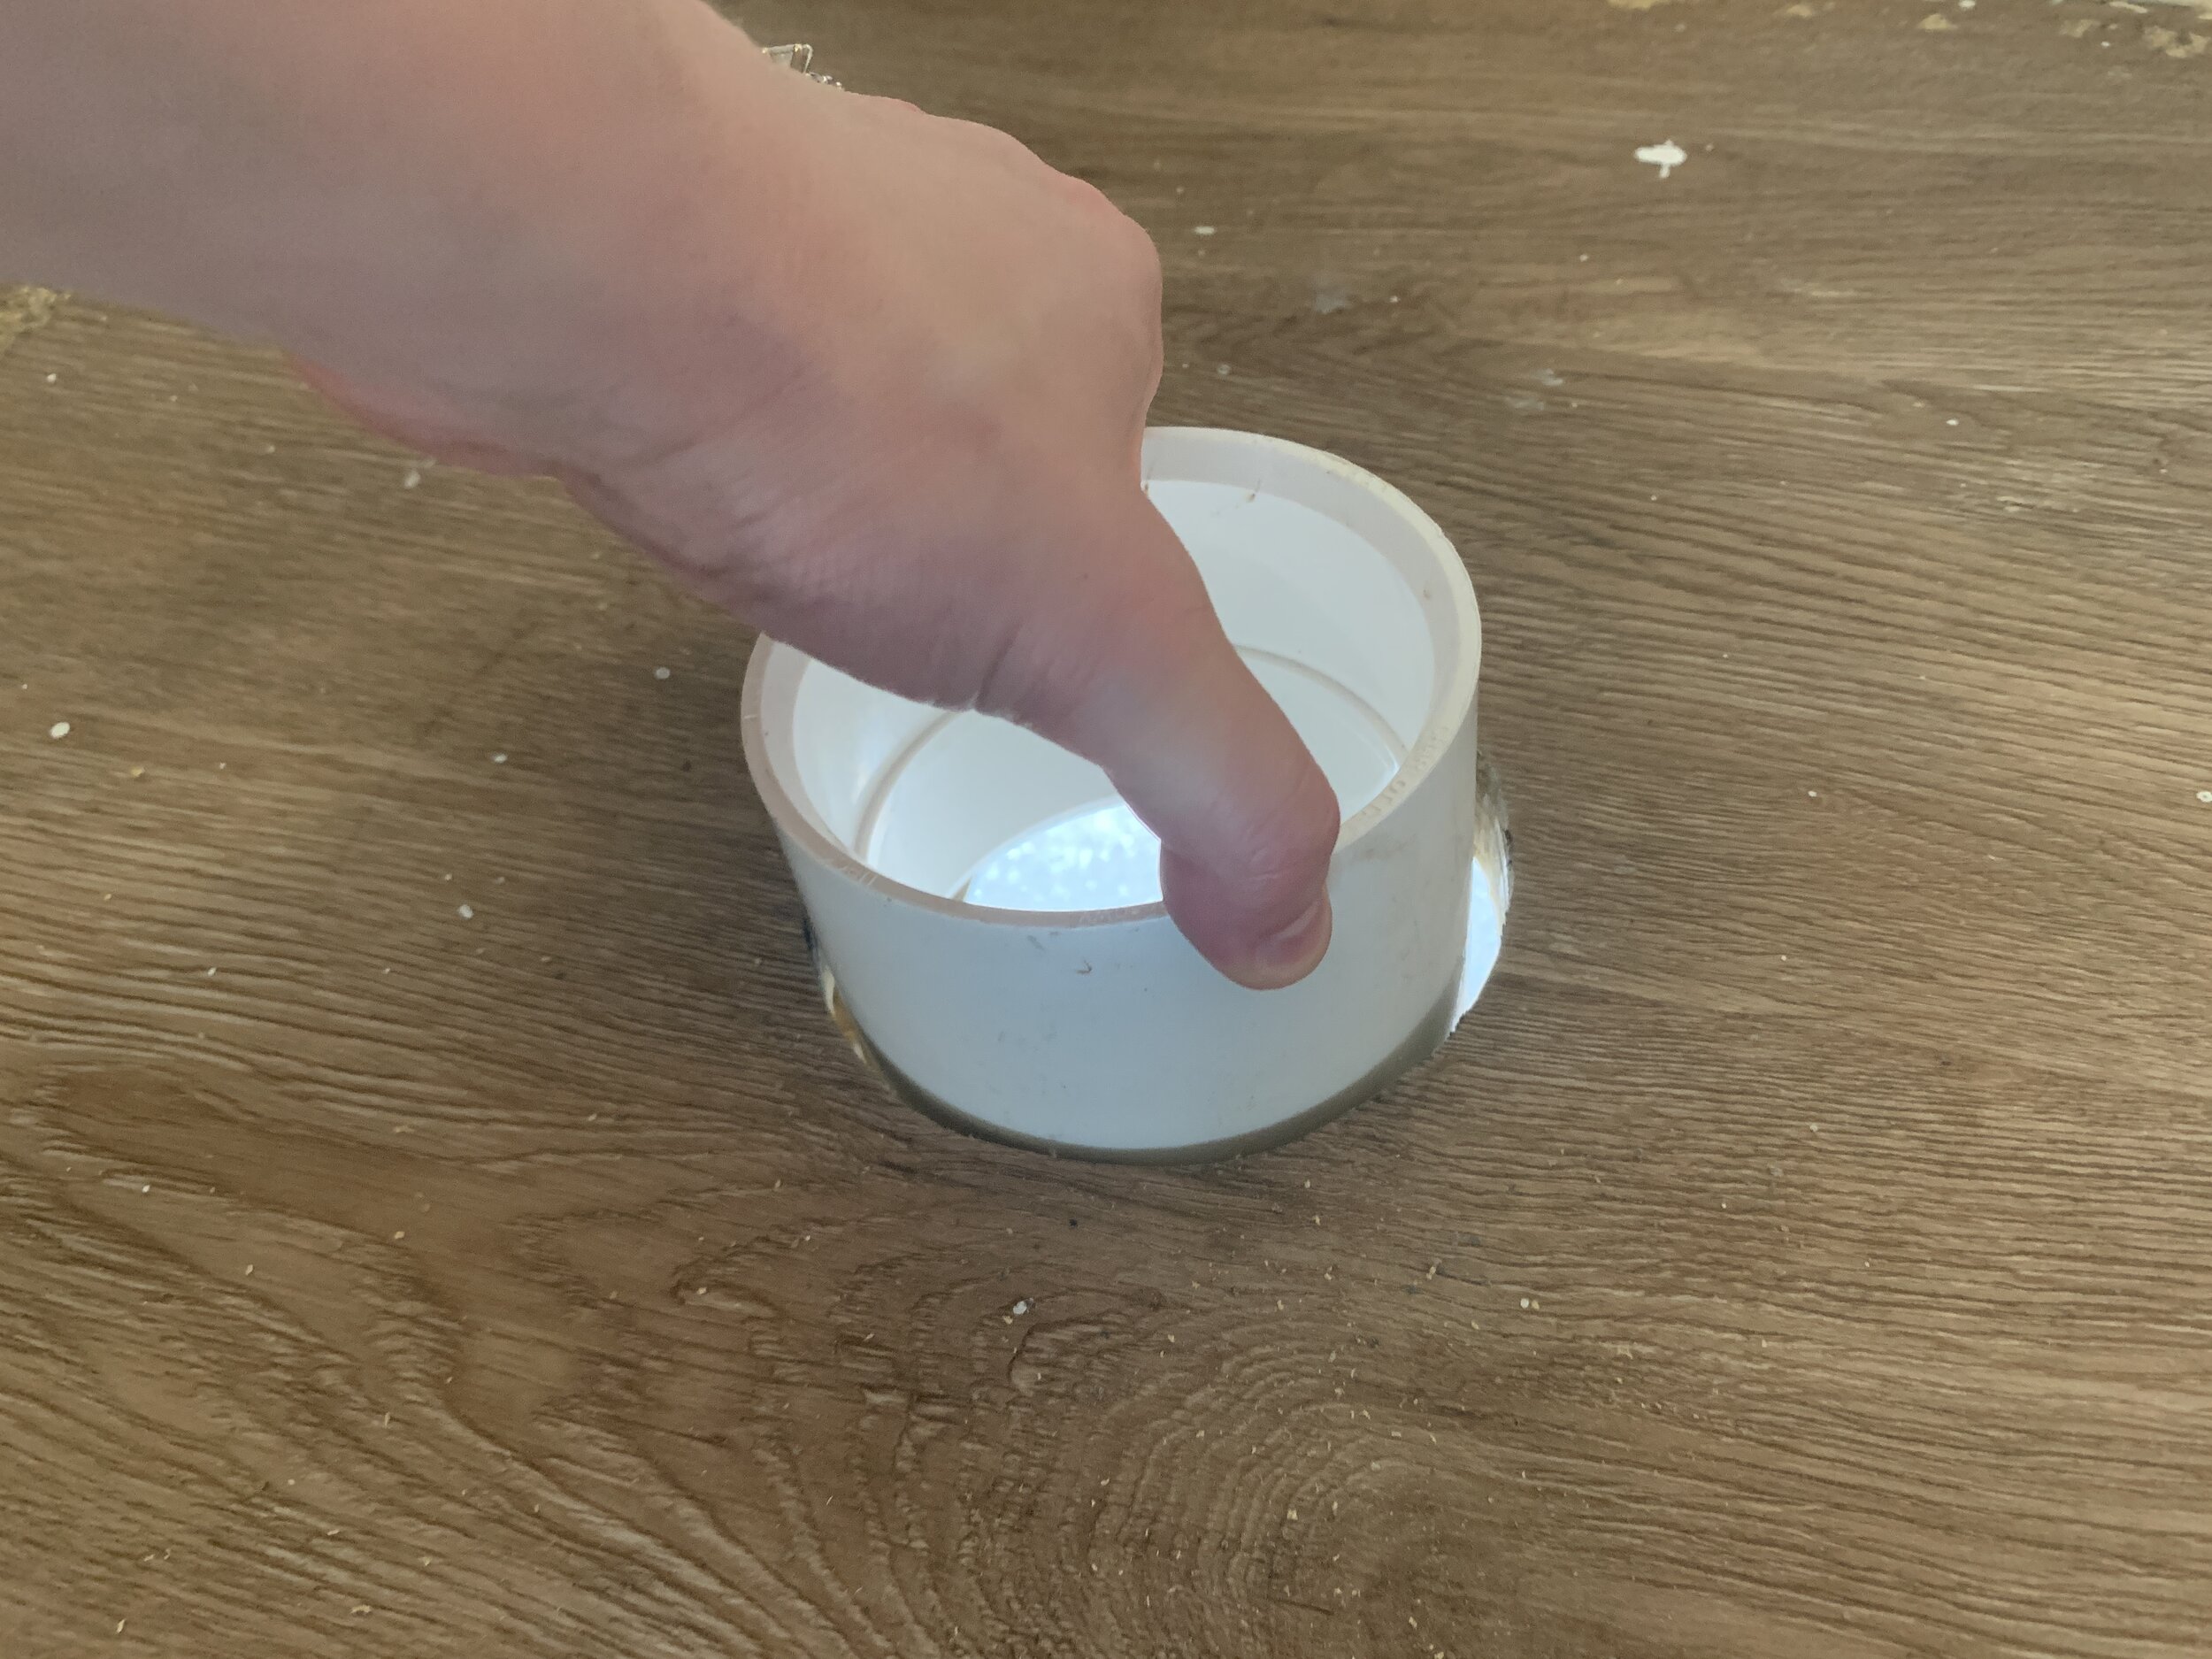
Step 5: Cut the shower drain hole
Using a 3/4” spade bit and our jigsaw, we cut out “bubbles” the shower drain hole from base 1 and dry fit the shower drain piece to make sure it fit snugly.
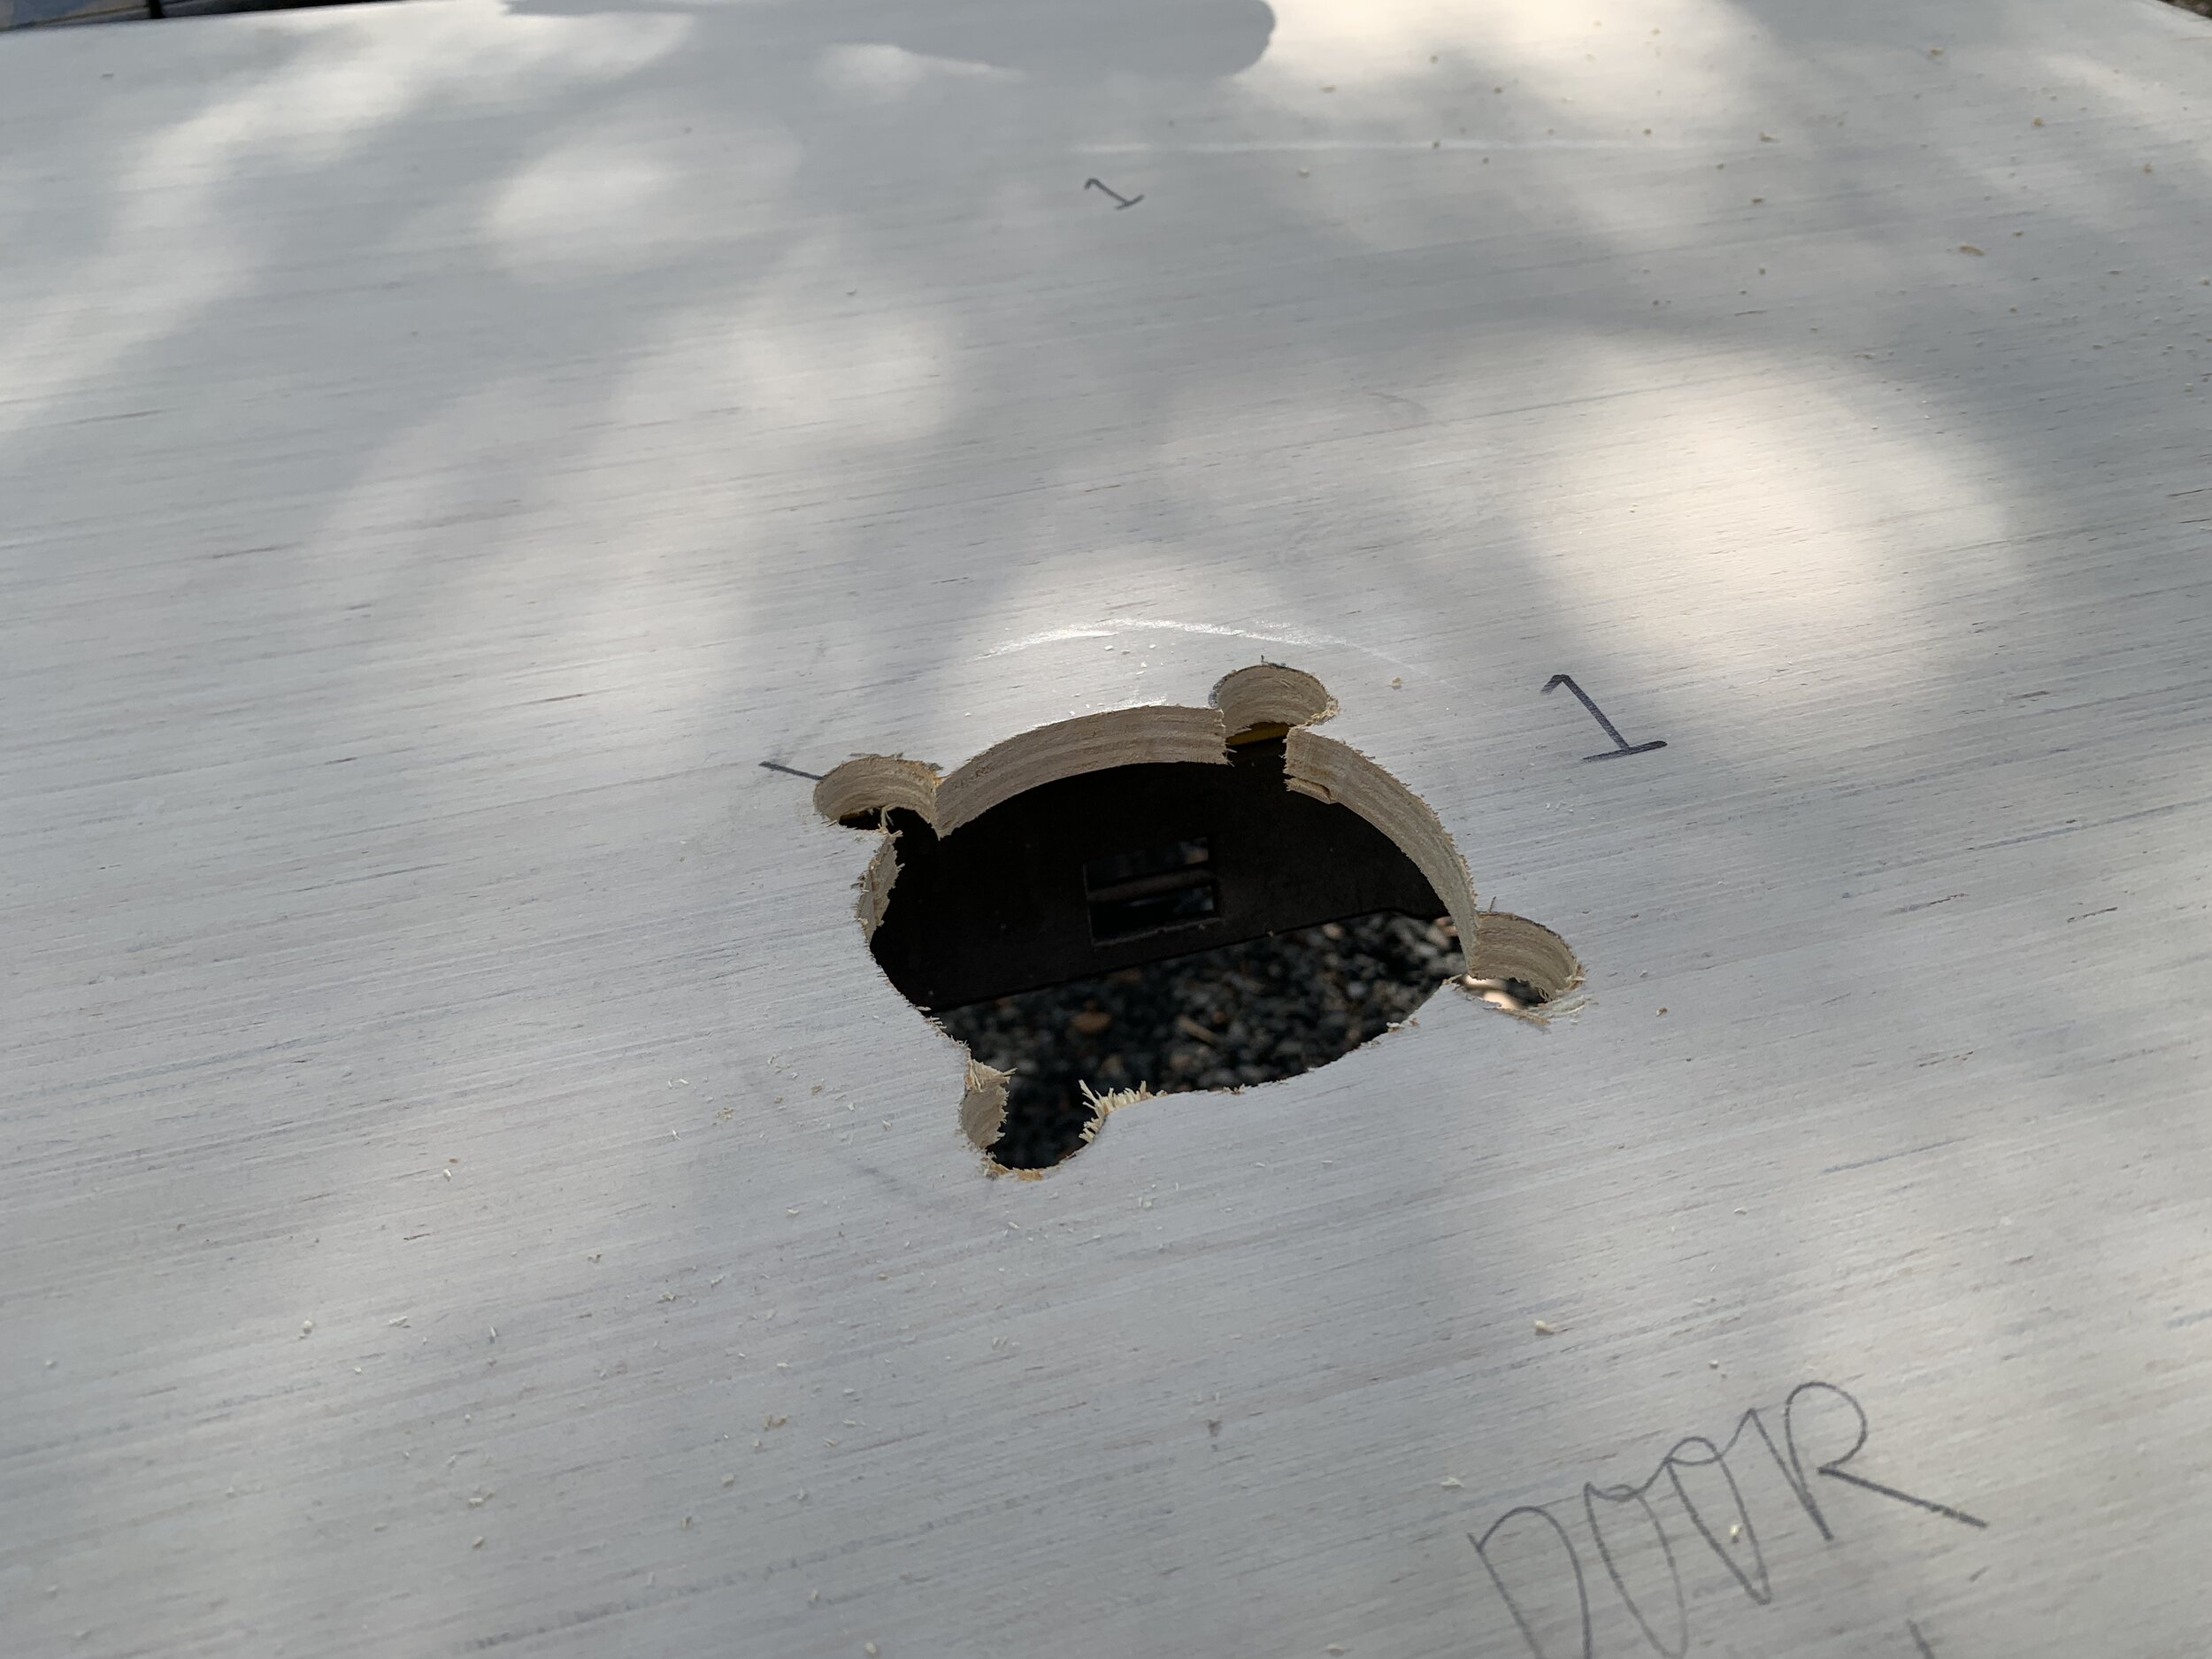

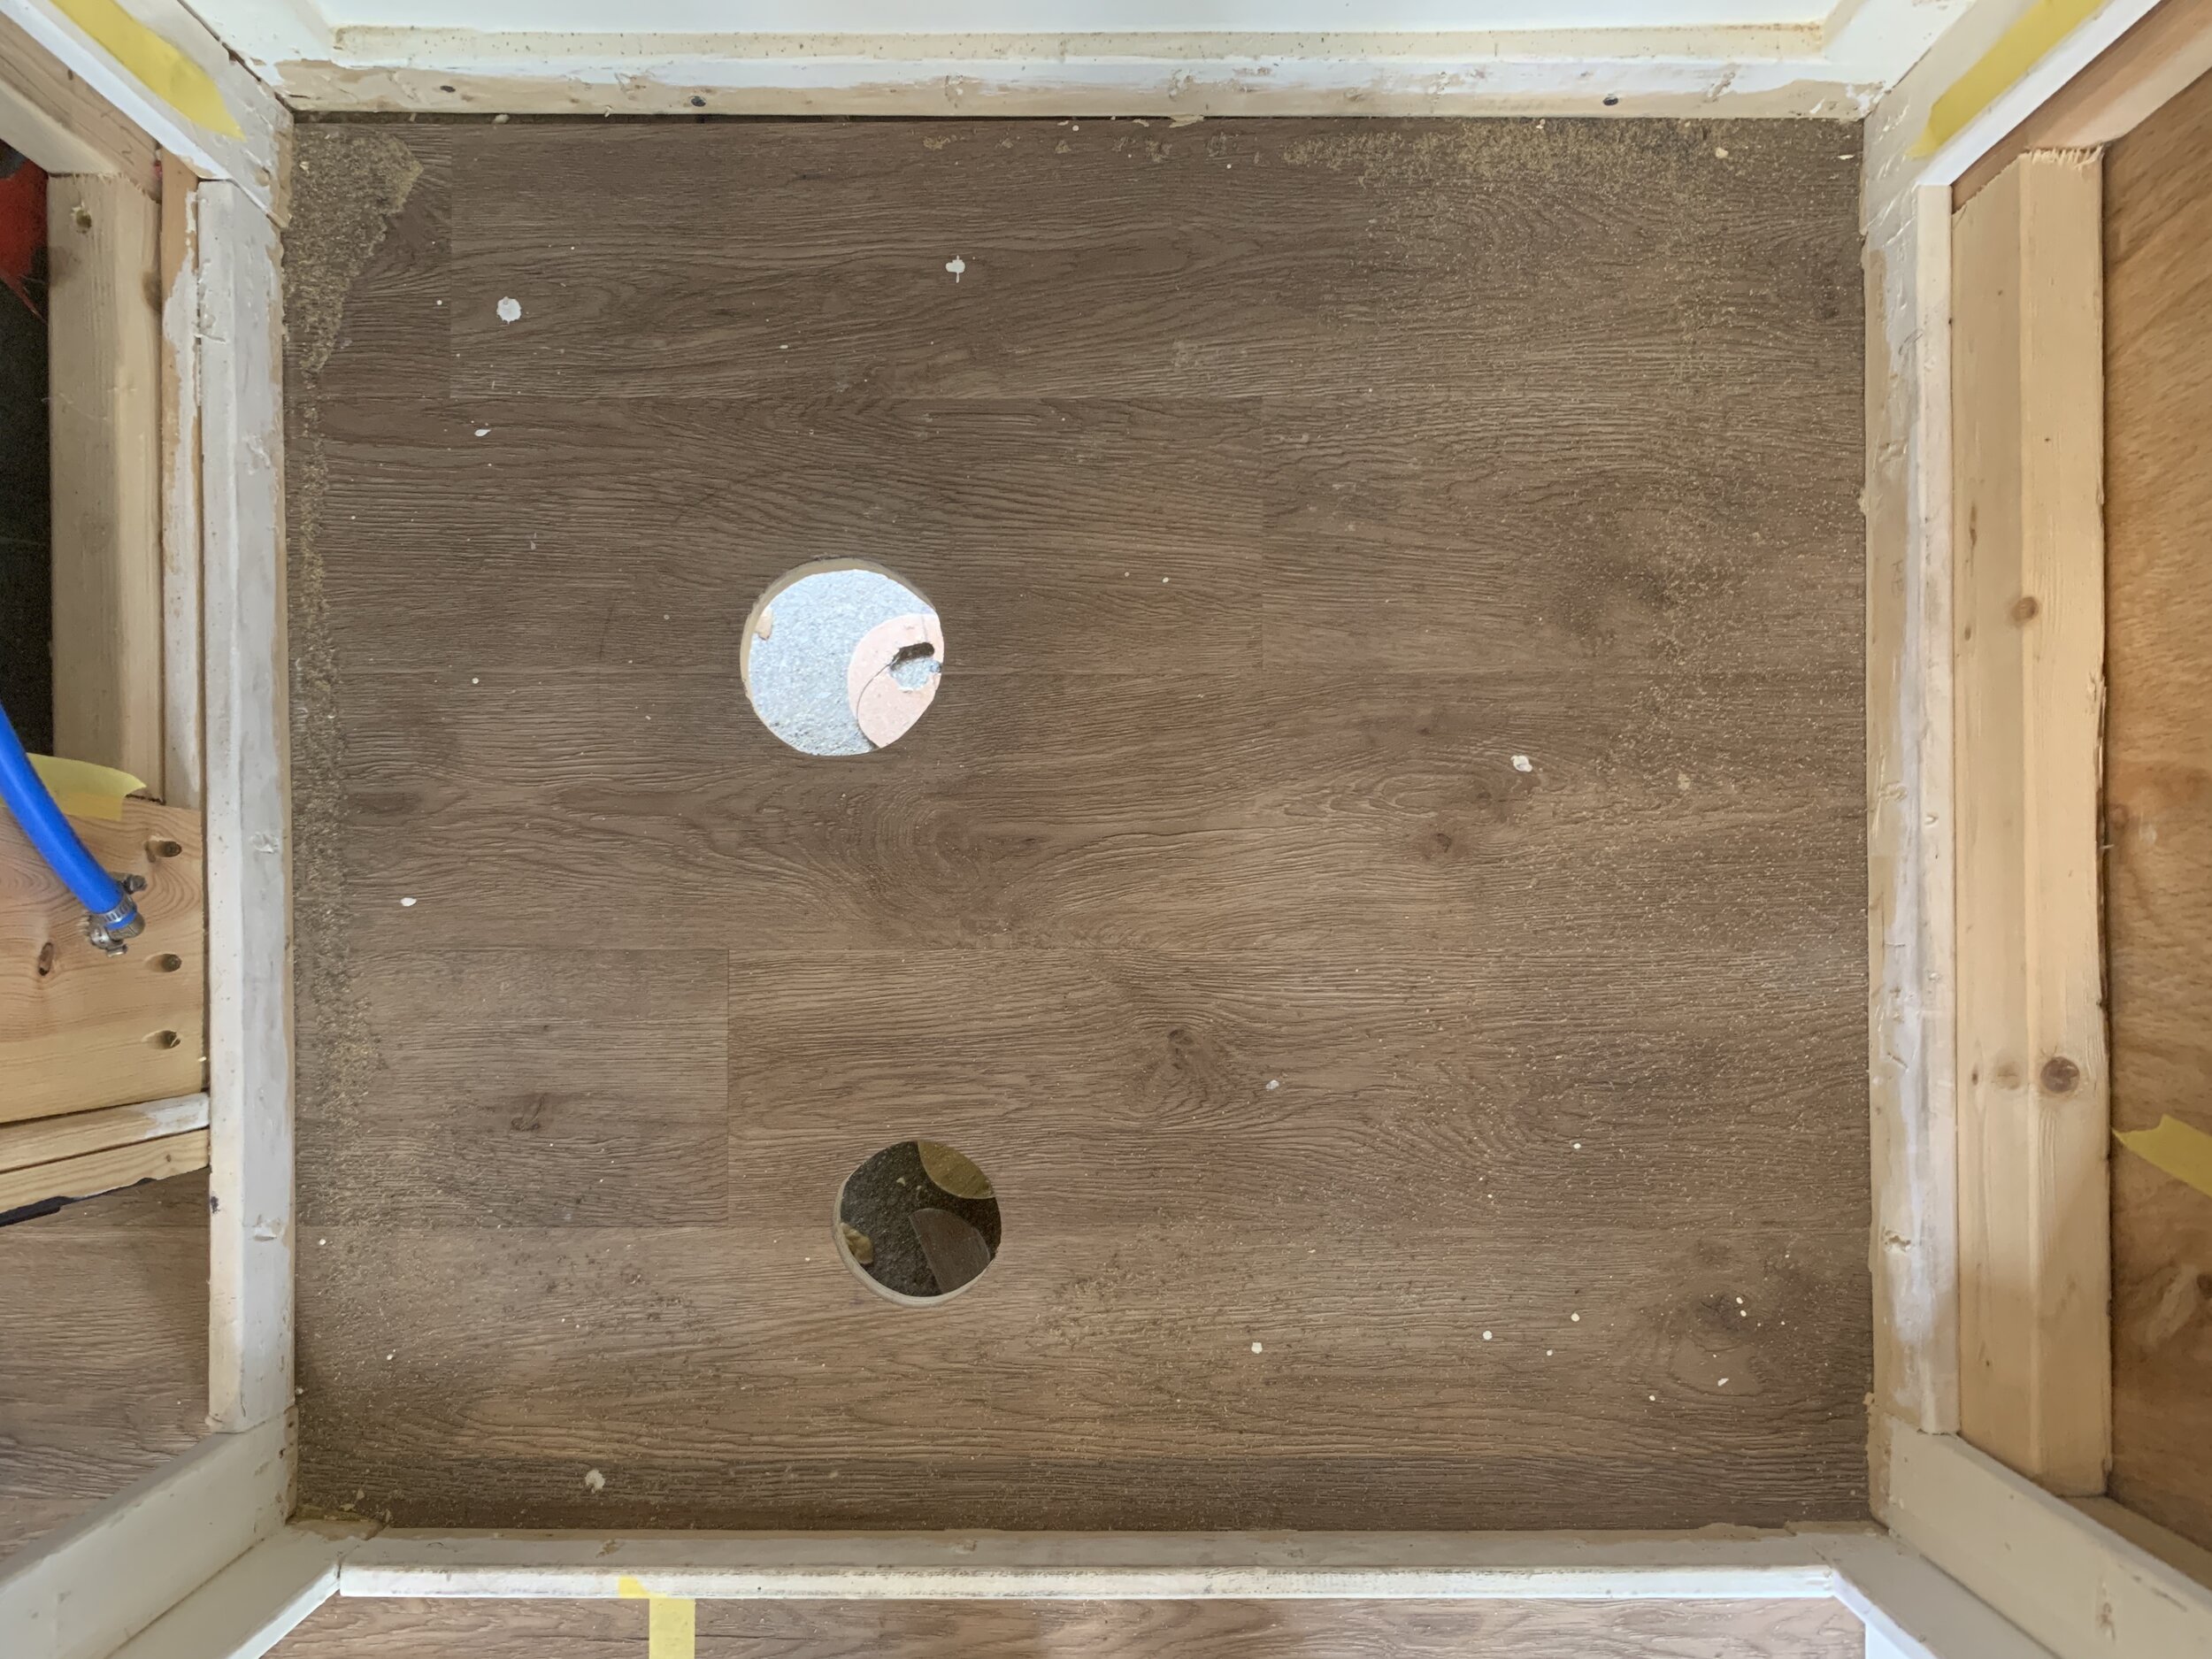
Using the newly cut shower drain hole, we used base 1 to mark out the exact drain placement on our vinyl floor. We used a drill bit and jigsaw to cut a drain hole for “bubbles” the shower drain into the camper subfloor, this time only cutting the main drain hole and not adding in the 4 smaller circles on the perimeter of “bubbles”.

Step 6: Join the layered base together
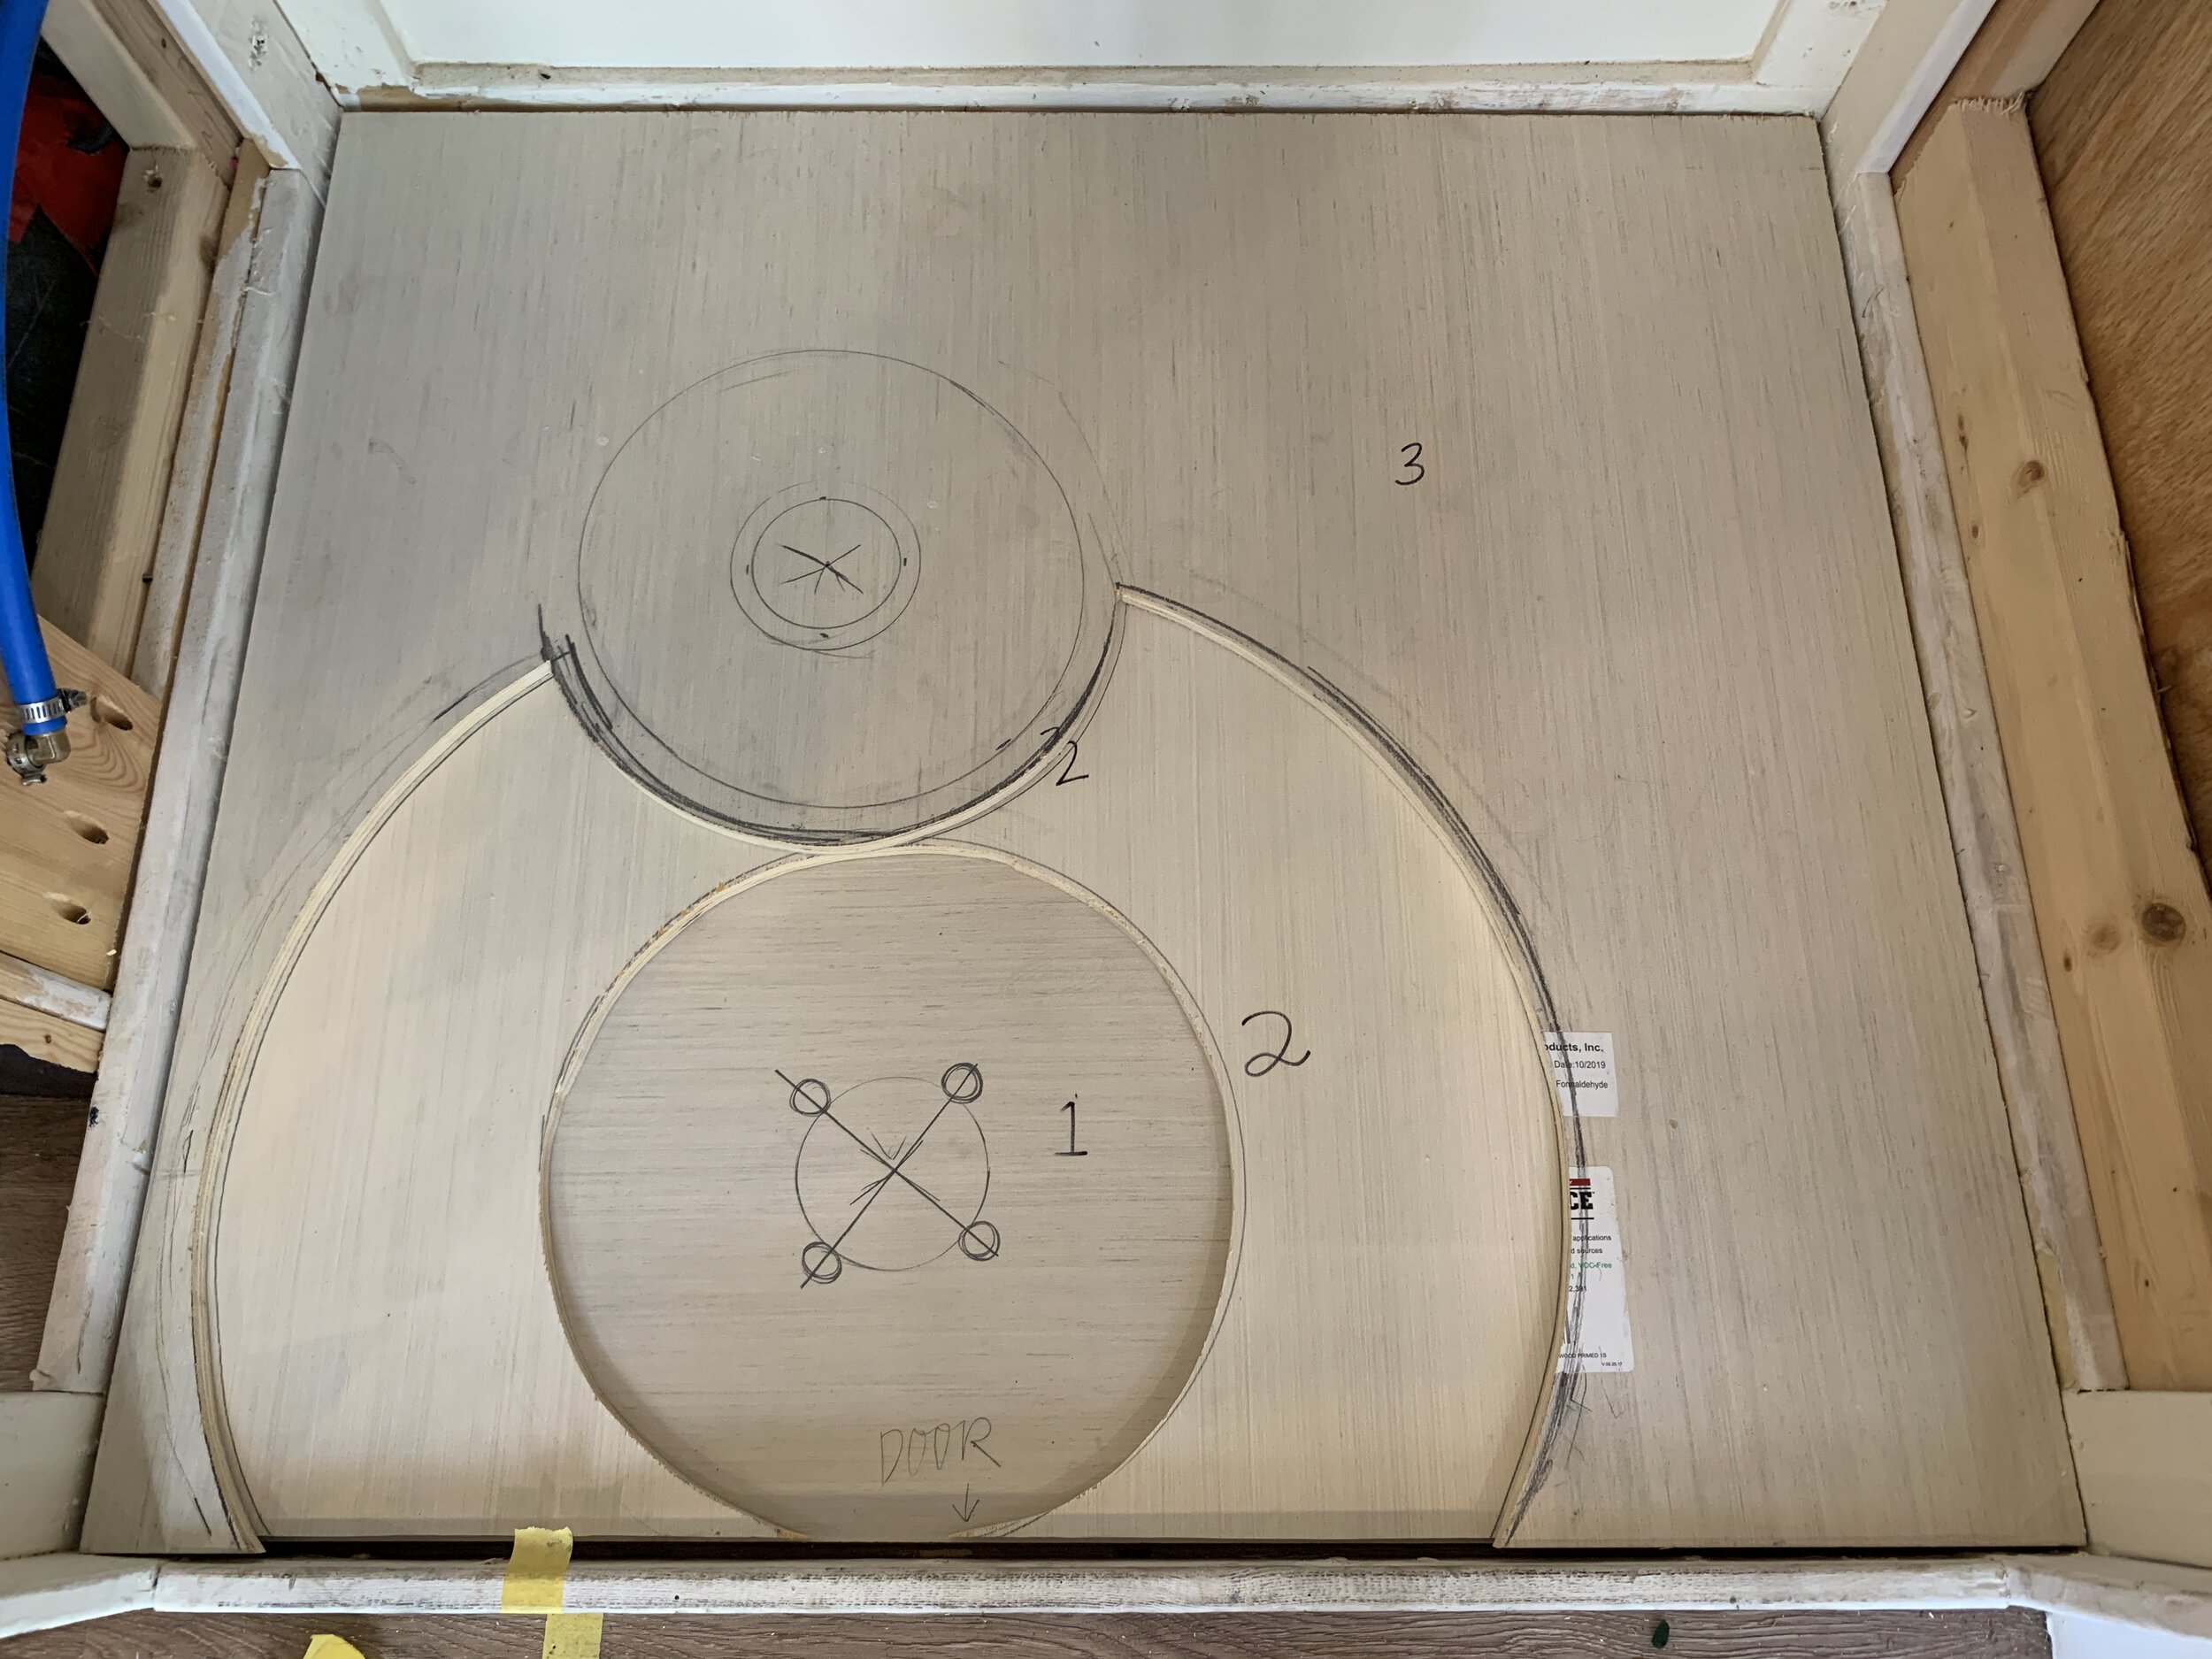
By now, the 3-layer base stack should like this, with layer 1 on bottom, 2 in the middle and 3 on top when dry fit together.
We removed all of our layers and glued everything together with construction adhesive, starting with layers 1 and 2. With glue in between, we clamped layers 1 and 2 together and from the bottom of layer 2 used wood screws to secure it all. We repeated the process between layers 2 and 3 until we had one solid three-tier base that was glued and screwed together (from the bottom to minimize points of water entry on the top of the base). It’s important that the screws are drilled deep enough to be flush with or countersunk into the bottom of each layer so the base sits flat and makes good contact with the camper floor later.

We let it dry overnight.
Step 7: Cut the toilet drain hole
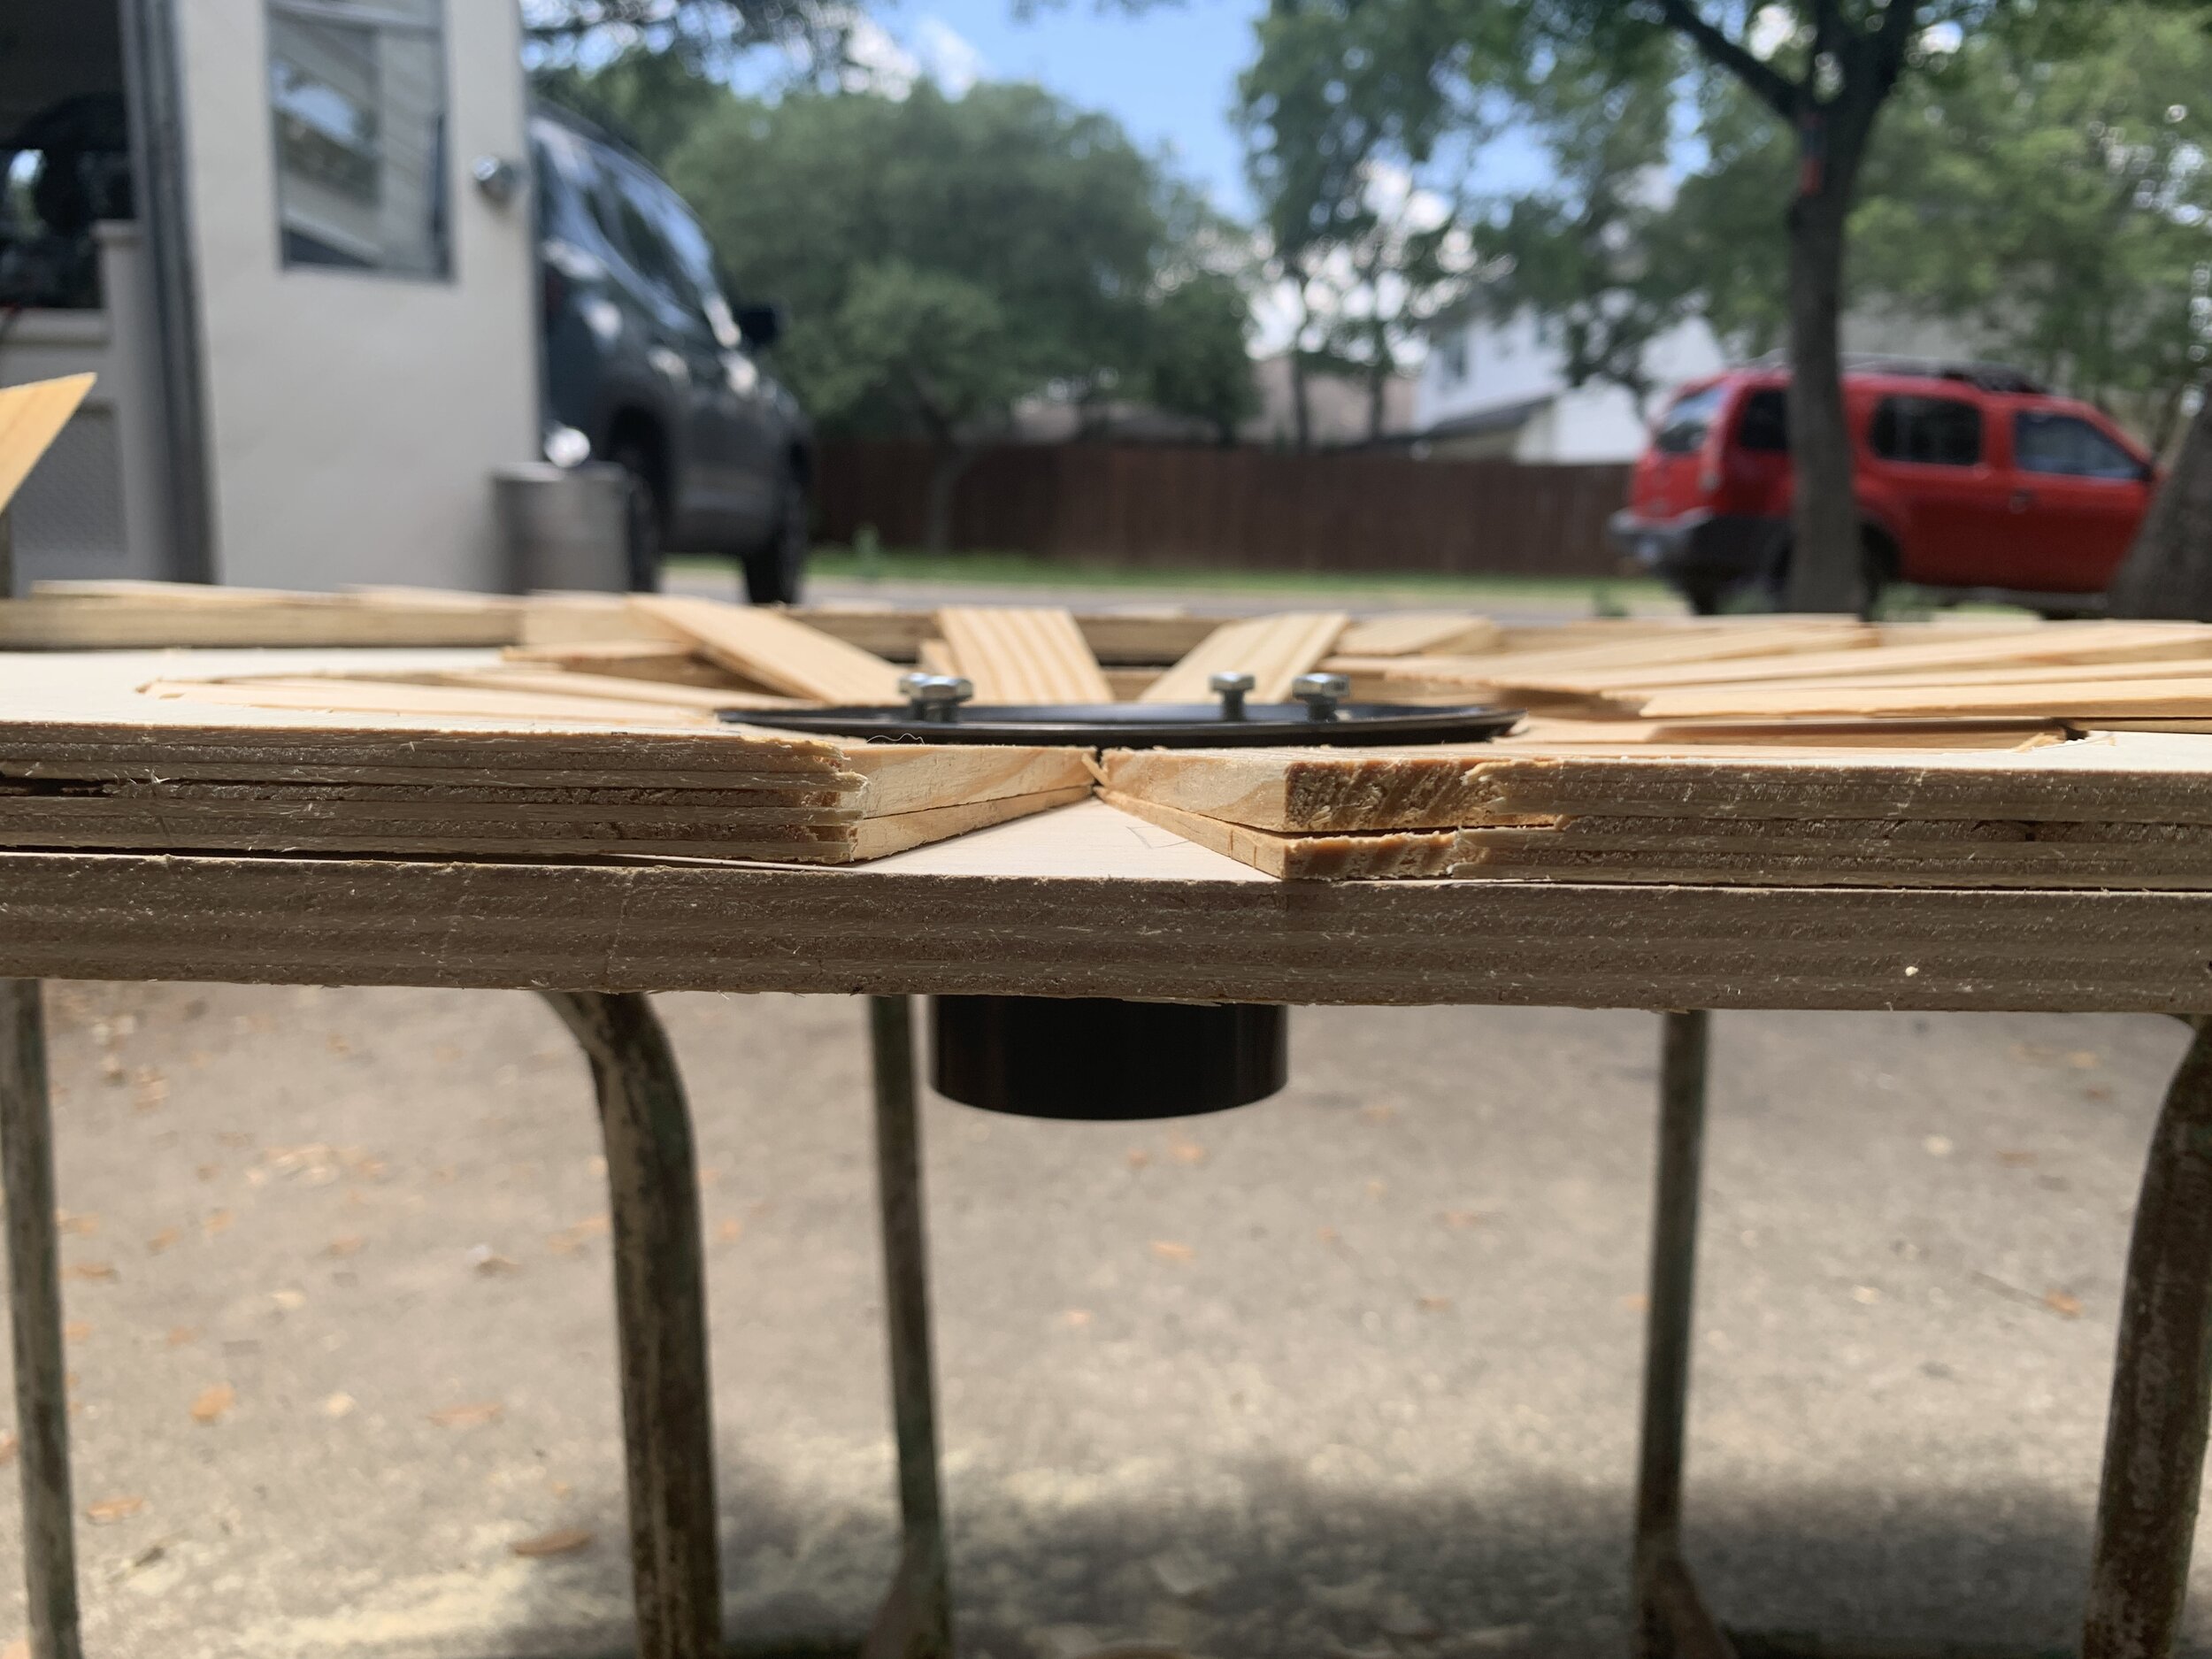
Once the three-layer shower base was cured, we dry fit the whole thing in the shower and marked out our toilet drain, making the whole a little bigger than what we’d marked before to account for the PVC coupler we were planning on using to plumb it to our black tank later. We used the drill and jig saw to make the identical cuts in the wood base and again through our subfloor.
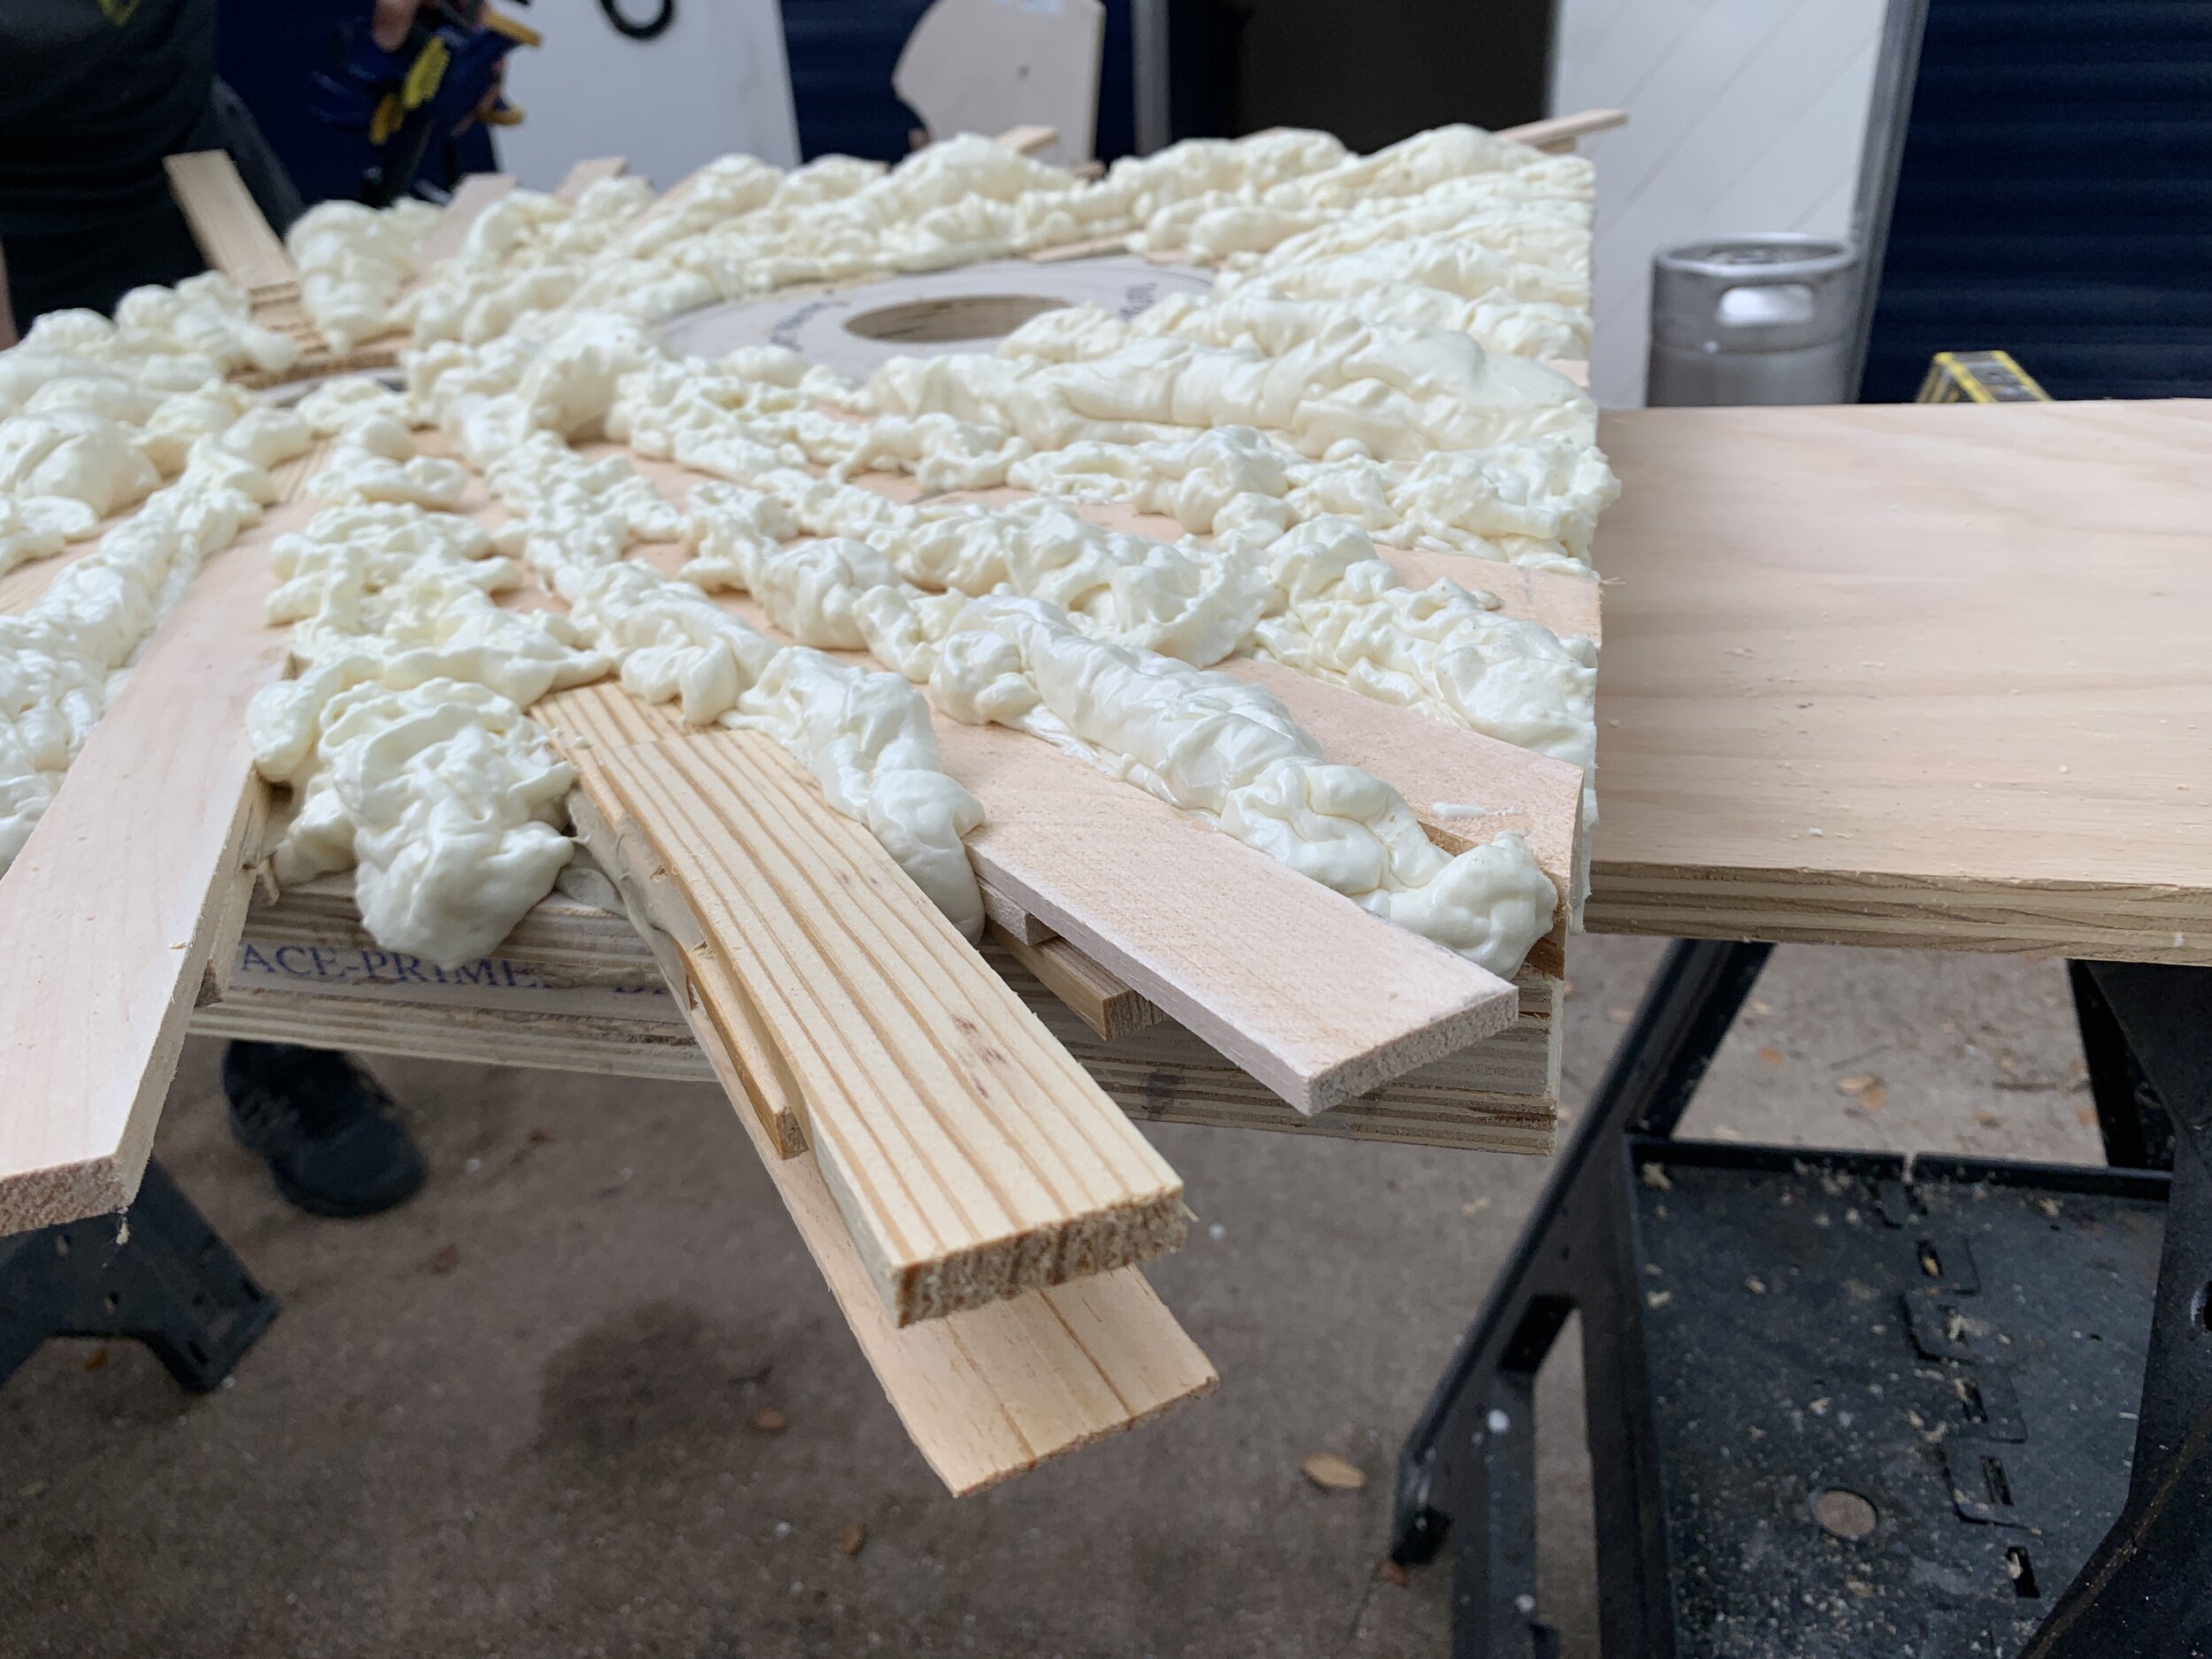
Step 8: Create the slope
With the shower base removed and on a stable workstation (and might I recommend in the shade, so you don’t get a bad sunburn like I did from being hunched over in the sun all day), I dry fit “bubbles” – the lowest shower drain part – and began using shims, layered on one another to connect our layers. The goal here being to create an even ramp between the high side of a lower layer and the low side of an upper layer and going right up to the edge and height of “bubbles”.

As I planned our slope, I made sure the entire floor radially sloped toward the shower drain, acting as if the toilet drain wasn’t there since we wanted it all to flow around the toilet and not to it. (This is harder than I thought since my brain kept wanting to make these nice radial sunbursts out from each drain hole.)
Again, if you’re doing this with just two layers (what we’d recommend after having done it with three) you won’t have to stack as many on top of one another. Either way, the principle of shimming down toward the shower drain and leaving a flat toilet area is the same.
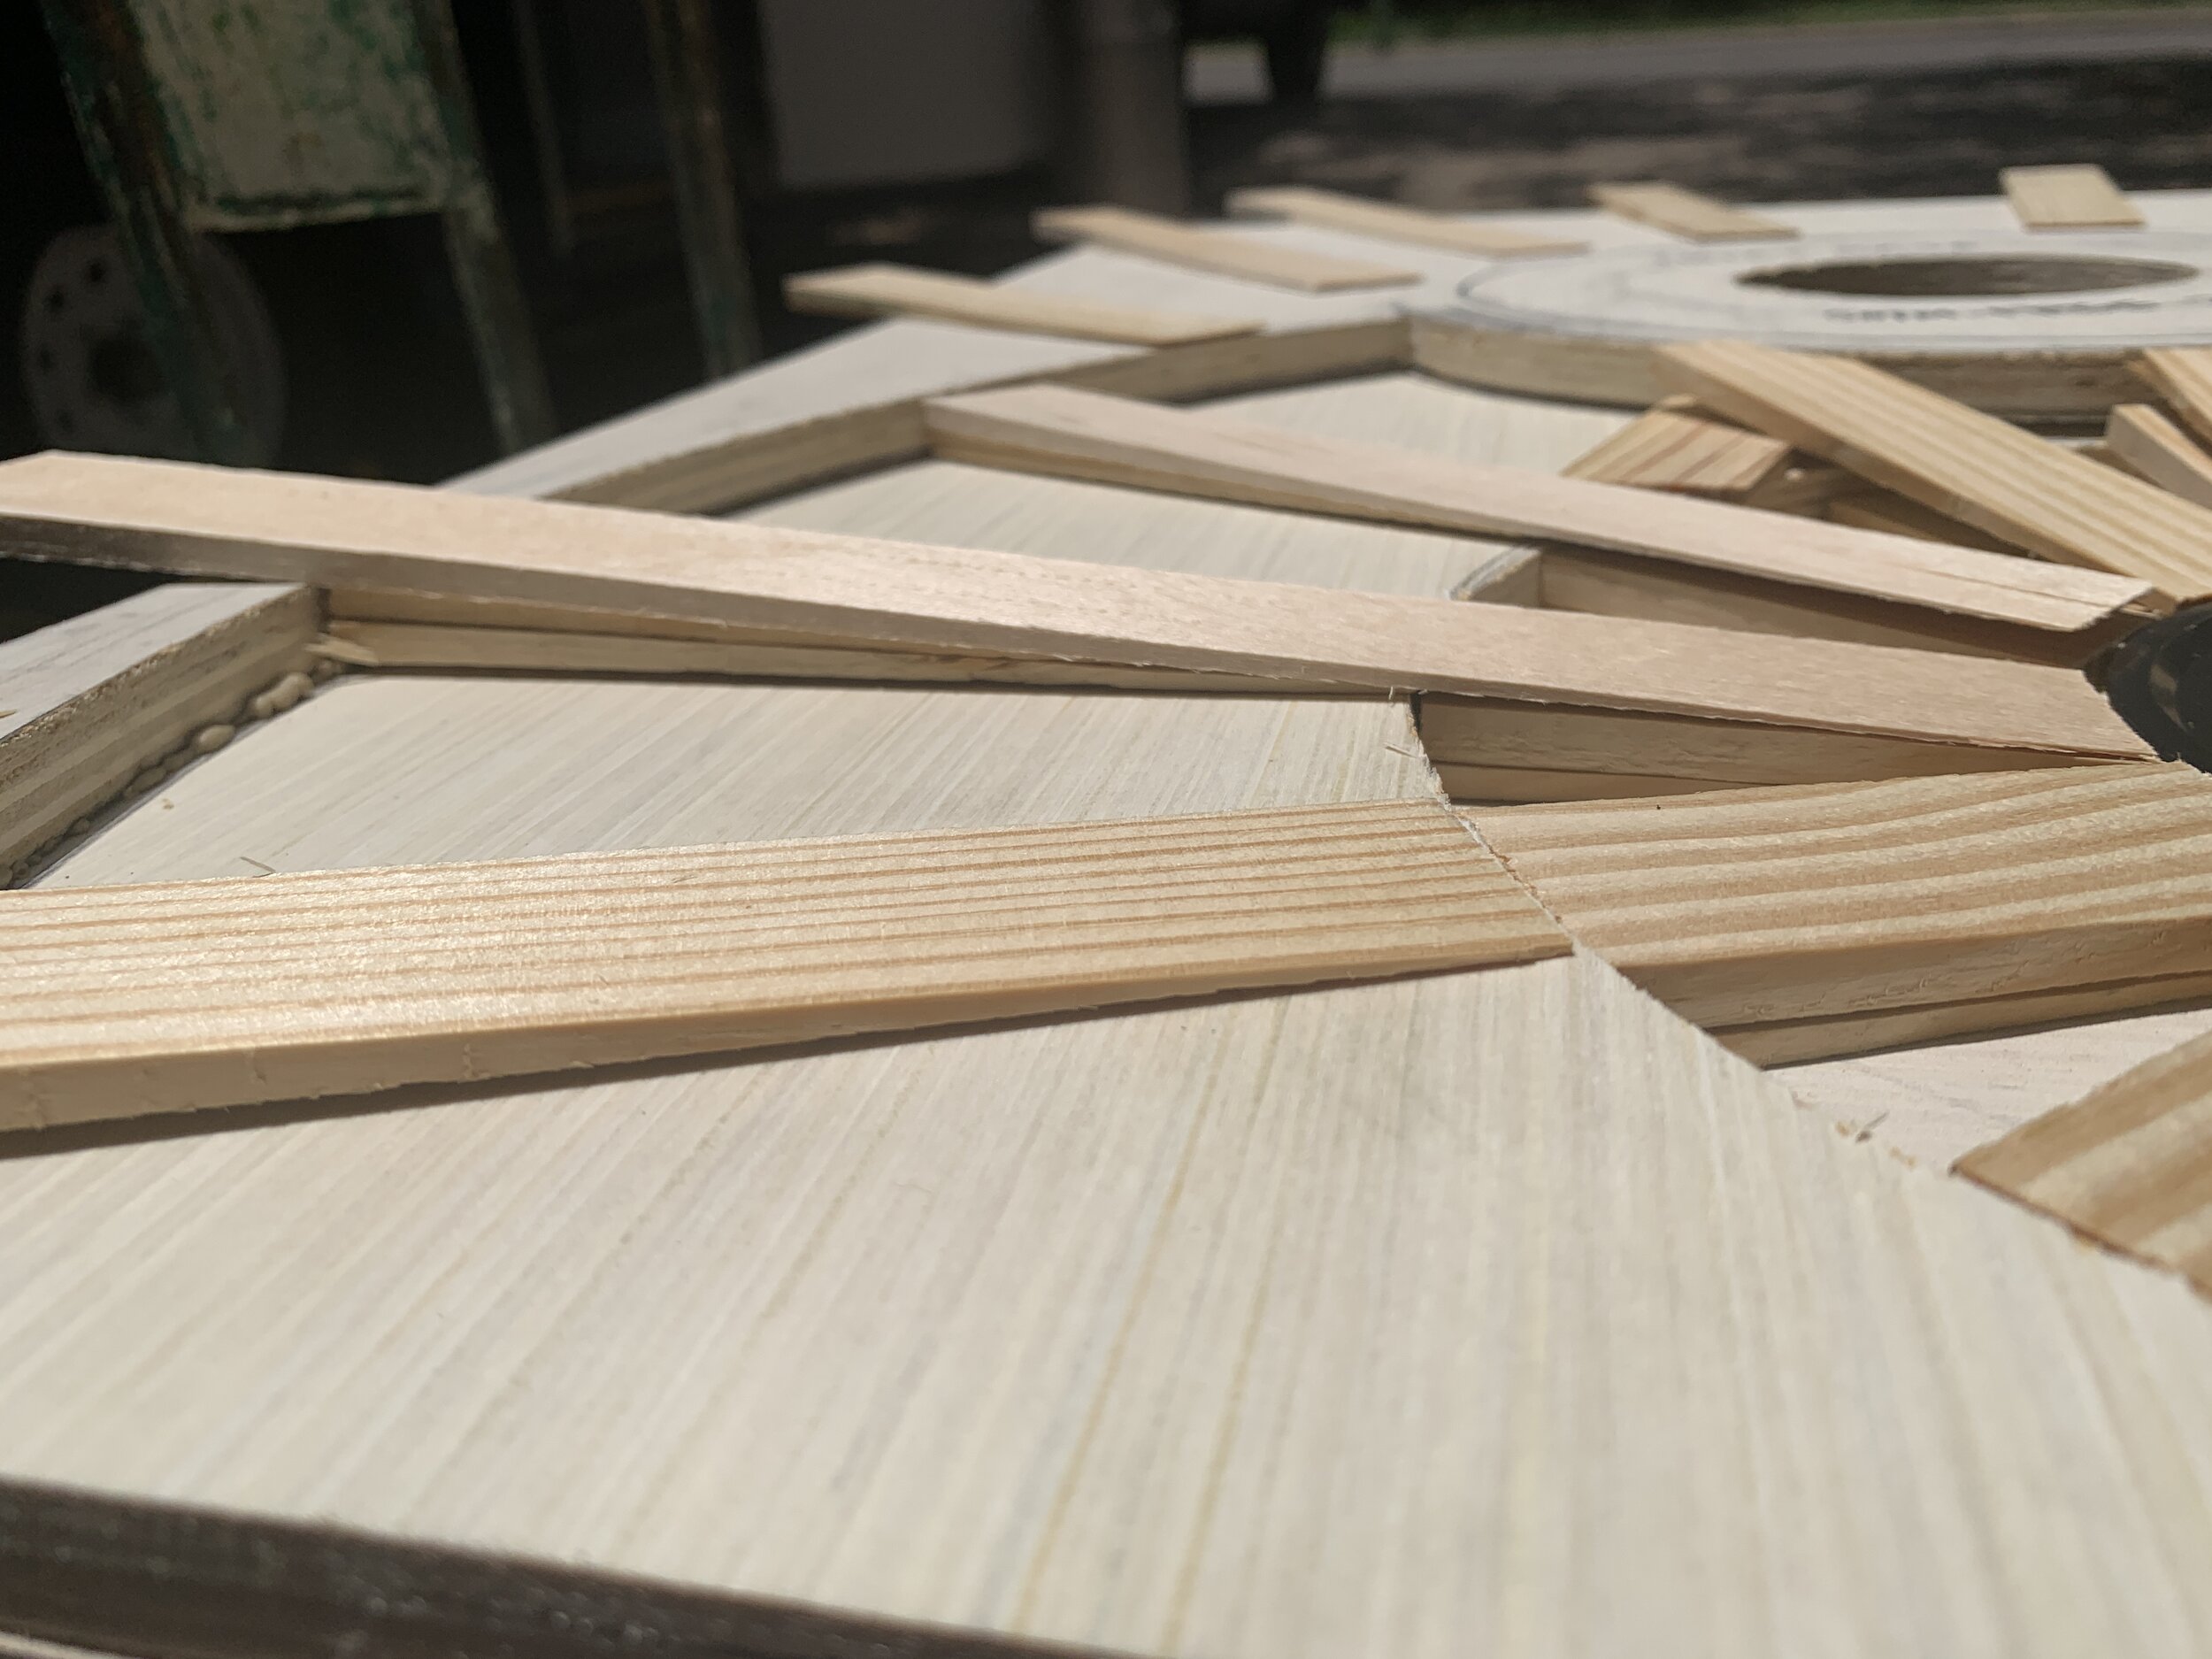
I held up each shim and marked the approximate length before cutting them with the miter saw. In some areas, like around the front of the toilet flat, I used some sideways shims underneath the top shims to help angle it sideways and down to keep it all flowing toward the drain.

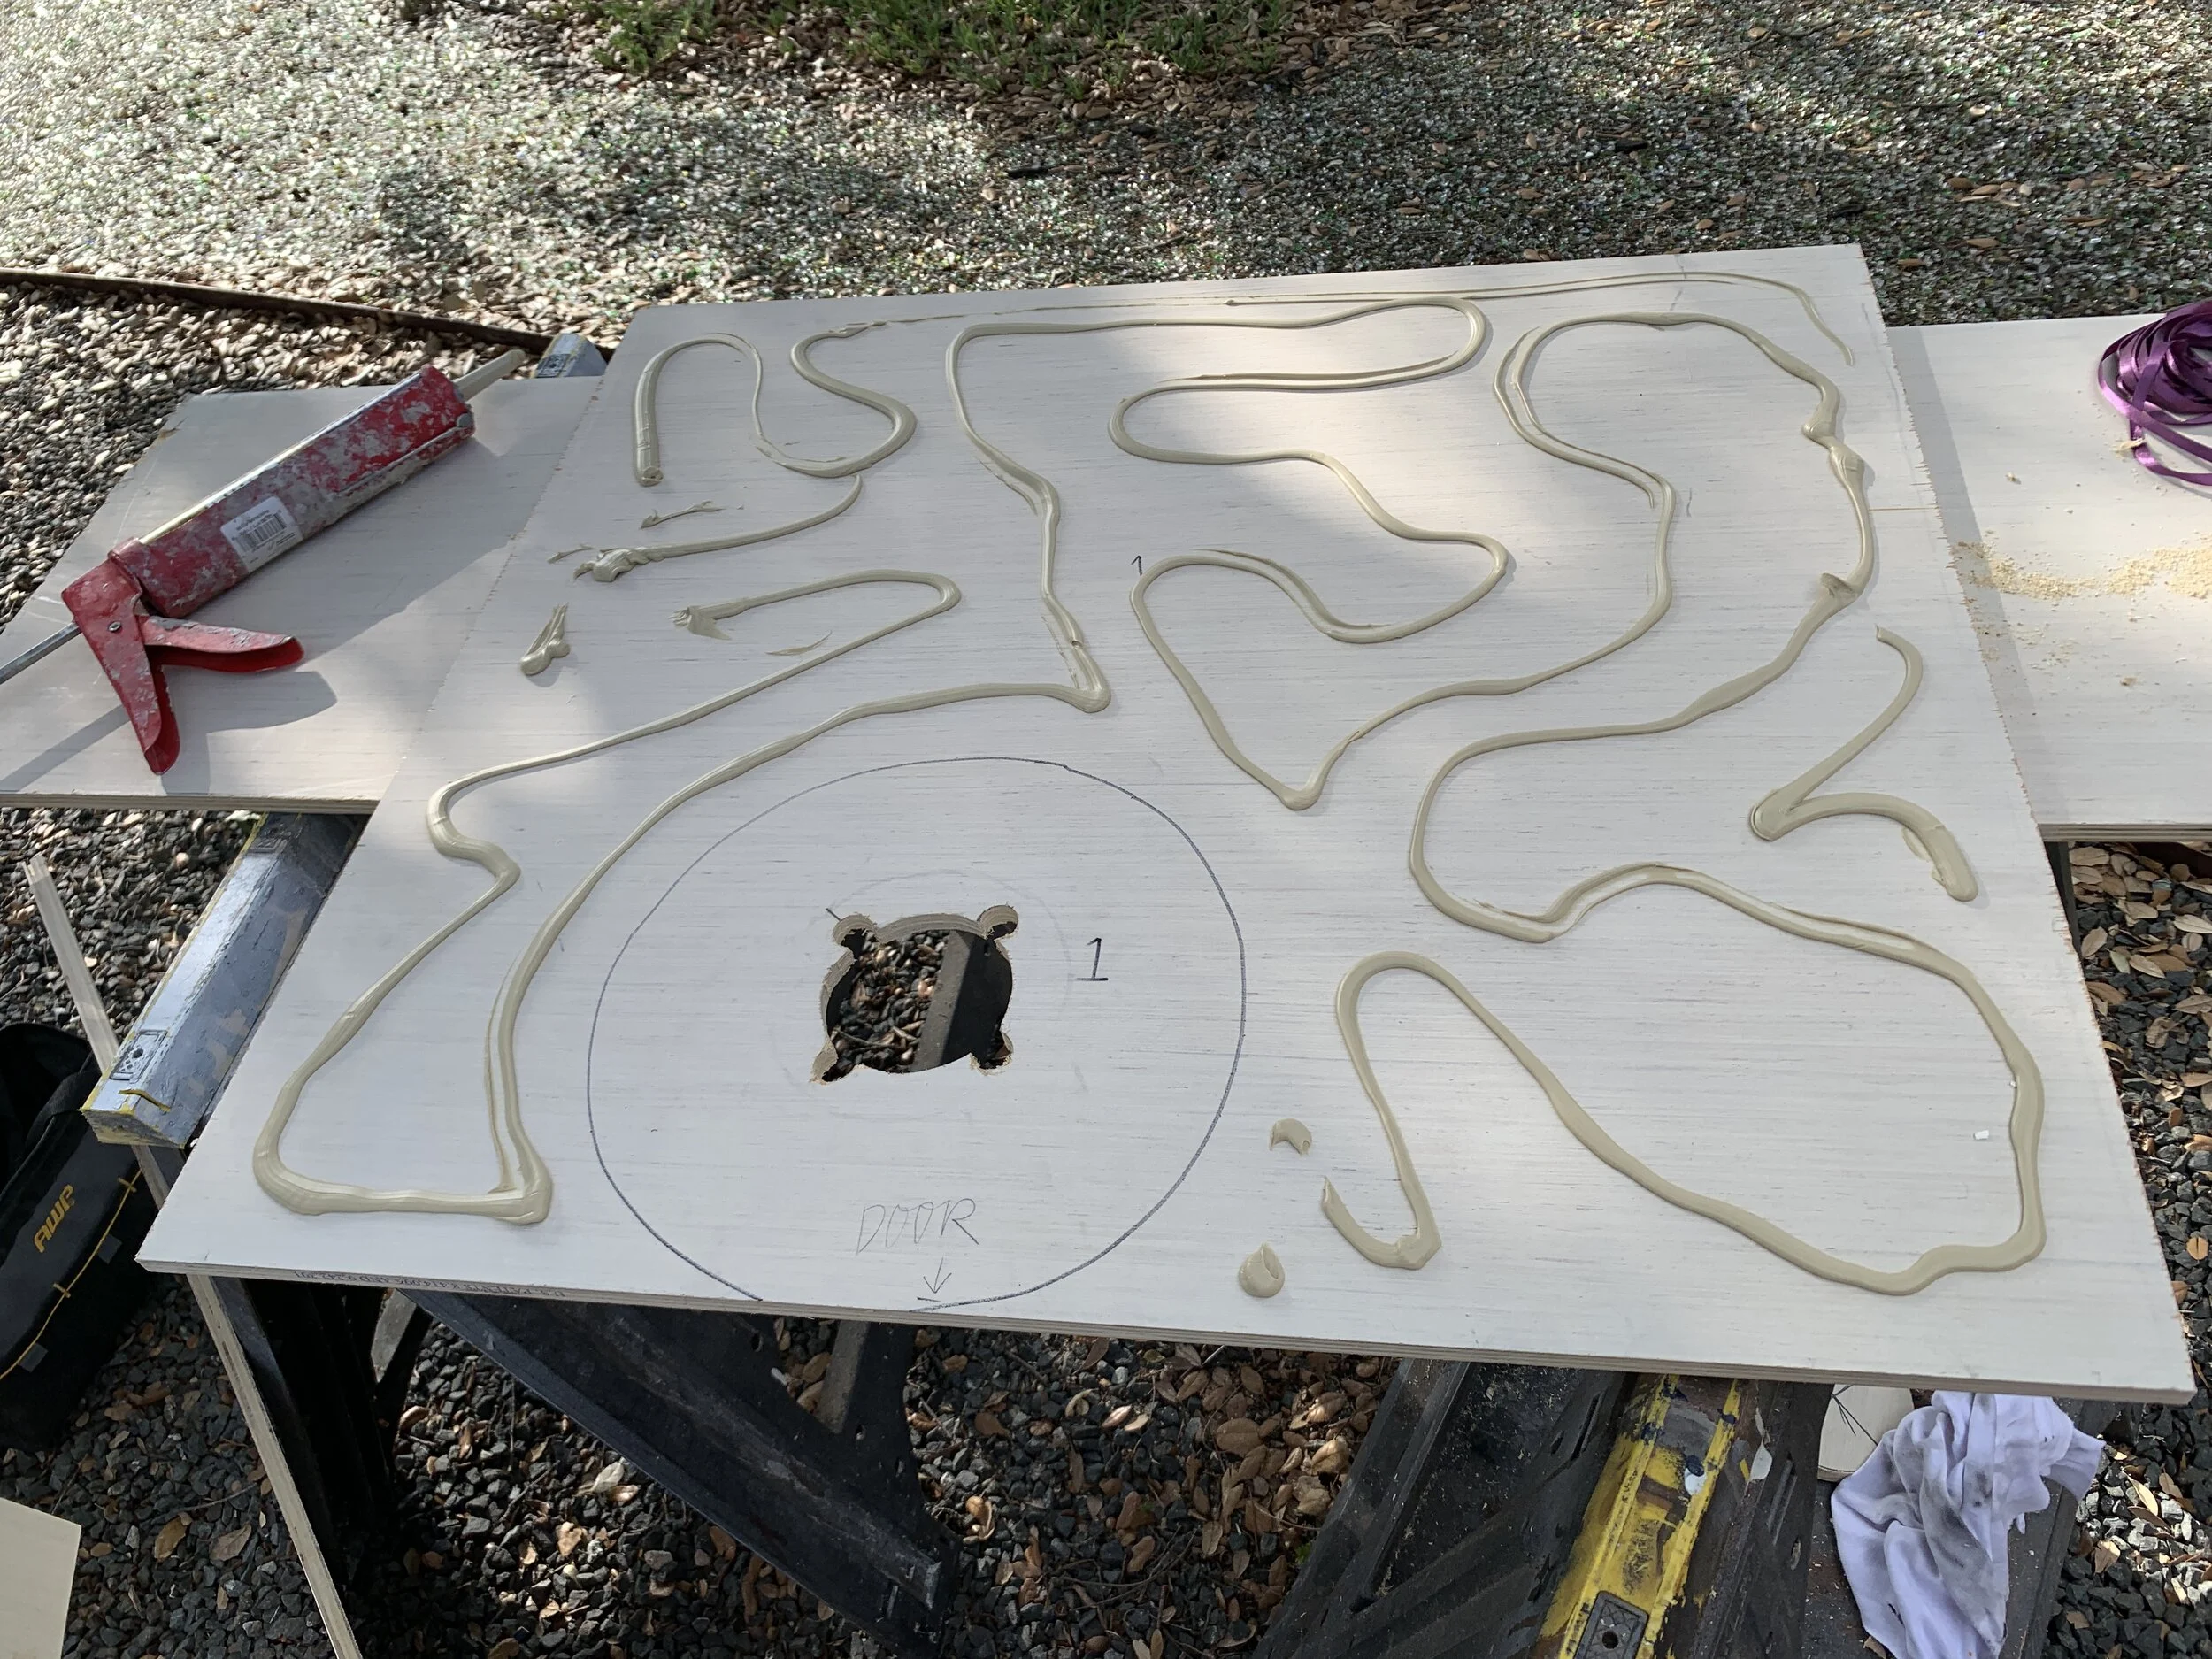
Step 9: Glue the slope
After our shims were dry fit where we wanted them, I used construction adhesive to glue them all down, careful to not get glue on “bubbles” before I removed it to do the rest of the pan. (You could probably also use wood glue here – which also might make for a cleaner-looking pan if you have an over-zealous tube of adhesive like I did – but it really doesn’t matter since this will all get covered with many layers anyway.)

With our shower drain being off-center, our floor (and therefore the shims) are not symmetrical. Ultimately, we want the shower pan height to be the same thickness on each edge so we have a nice straight tile line and consistent bottom of the shower walls and not a wavy, uneven one. This meant some of our shim stacks needed more and others less, depending on how far out from the shower drain it was.

To try and maintain a consistent pan edge thickness/height, I used our long 4’ level to on each edge to see where I needed to add and fill, gluing as I went since the perimeter shims often were off-balance and did not like to stay put on the base edge without glue.
Don’t worry about cutting the shims hanging over the edge yet. It’s easy to do once it’s dry.
Step 10: Fill the slope
Now this step isn’t really a must, especially if your shims are very tight together, but we’d already done all this work so we figured what’s another baby step to help even out the gaps a little? Wearing gloves and safety glasses (you do not want to get this stuff on your skin), we used our gap filler to fill all the nooks and crannies in and around the shims.
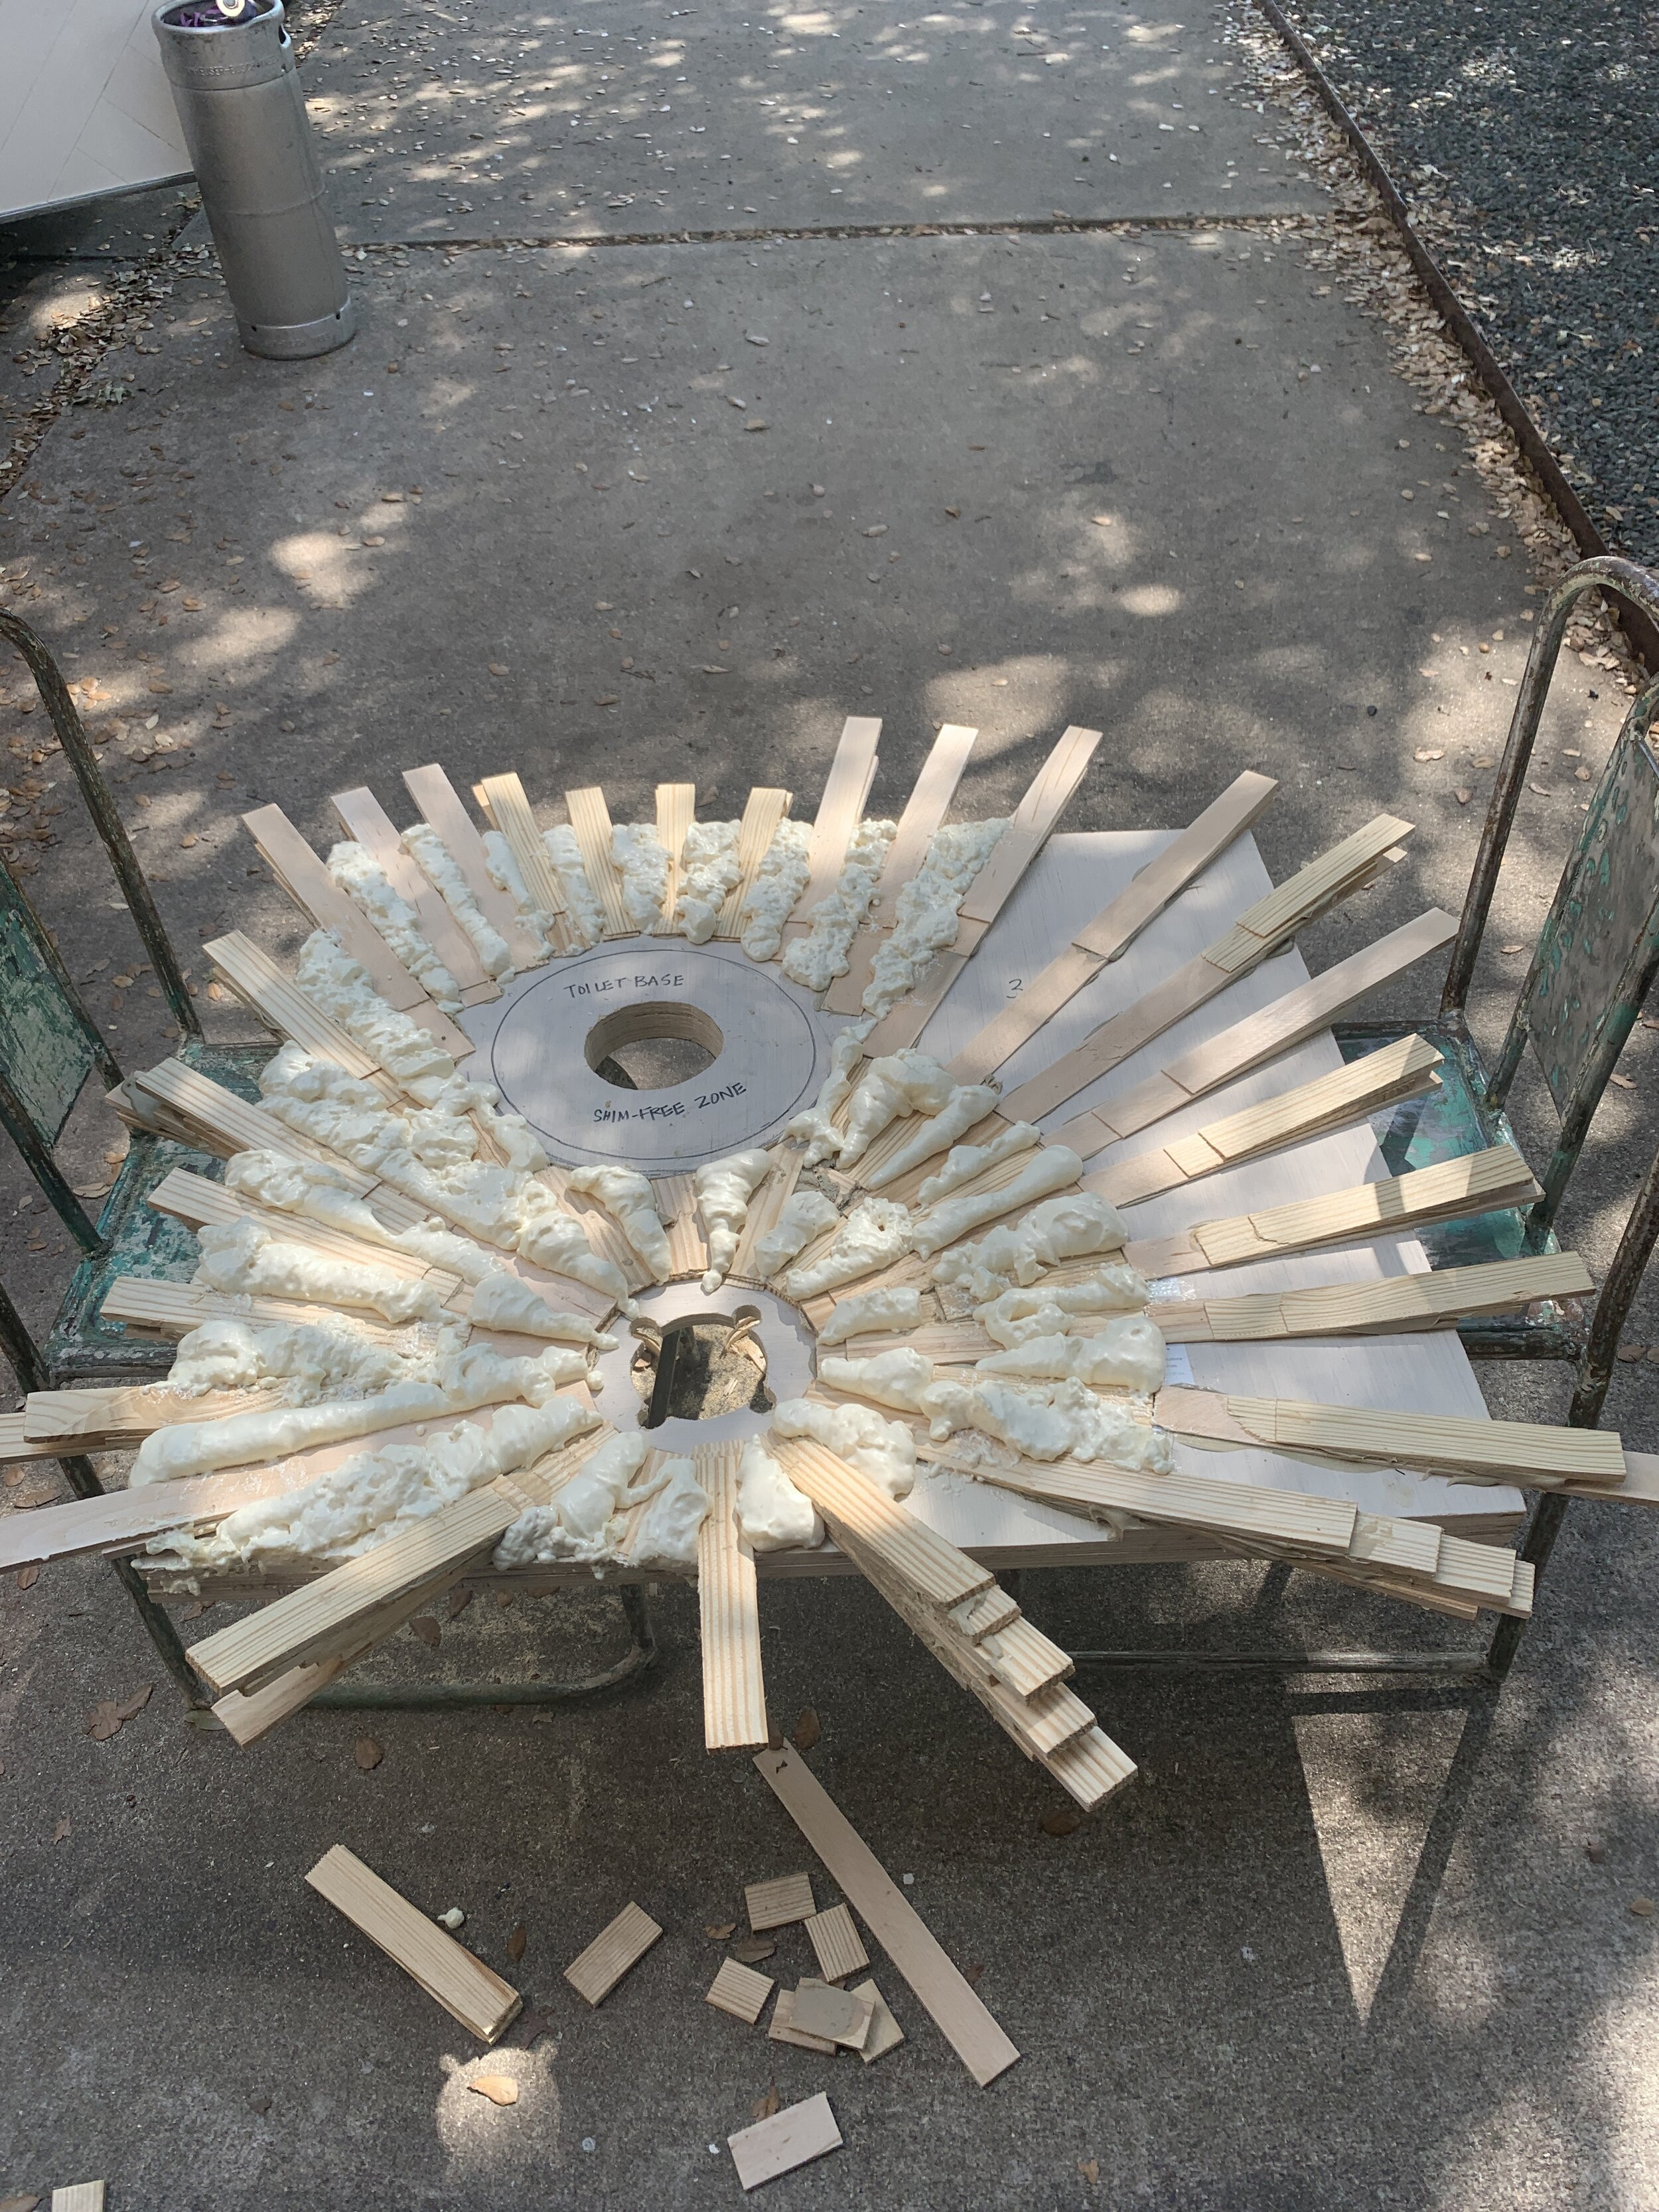
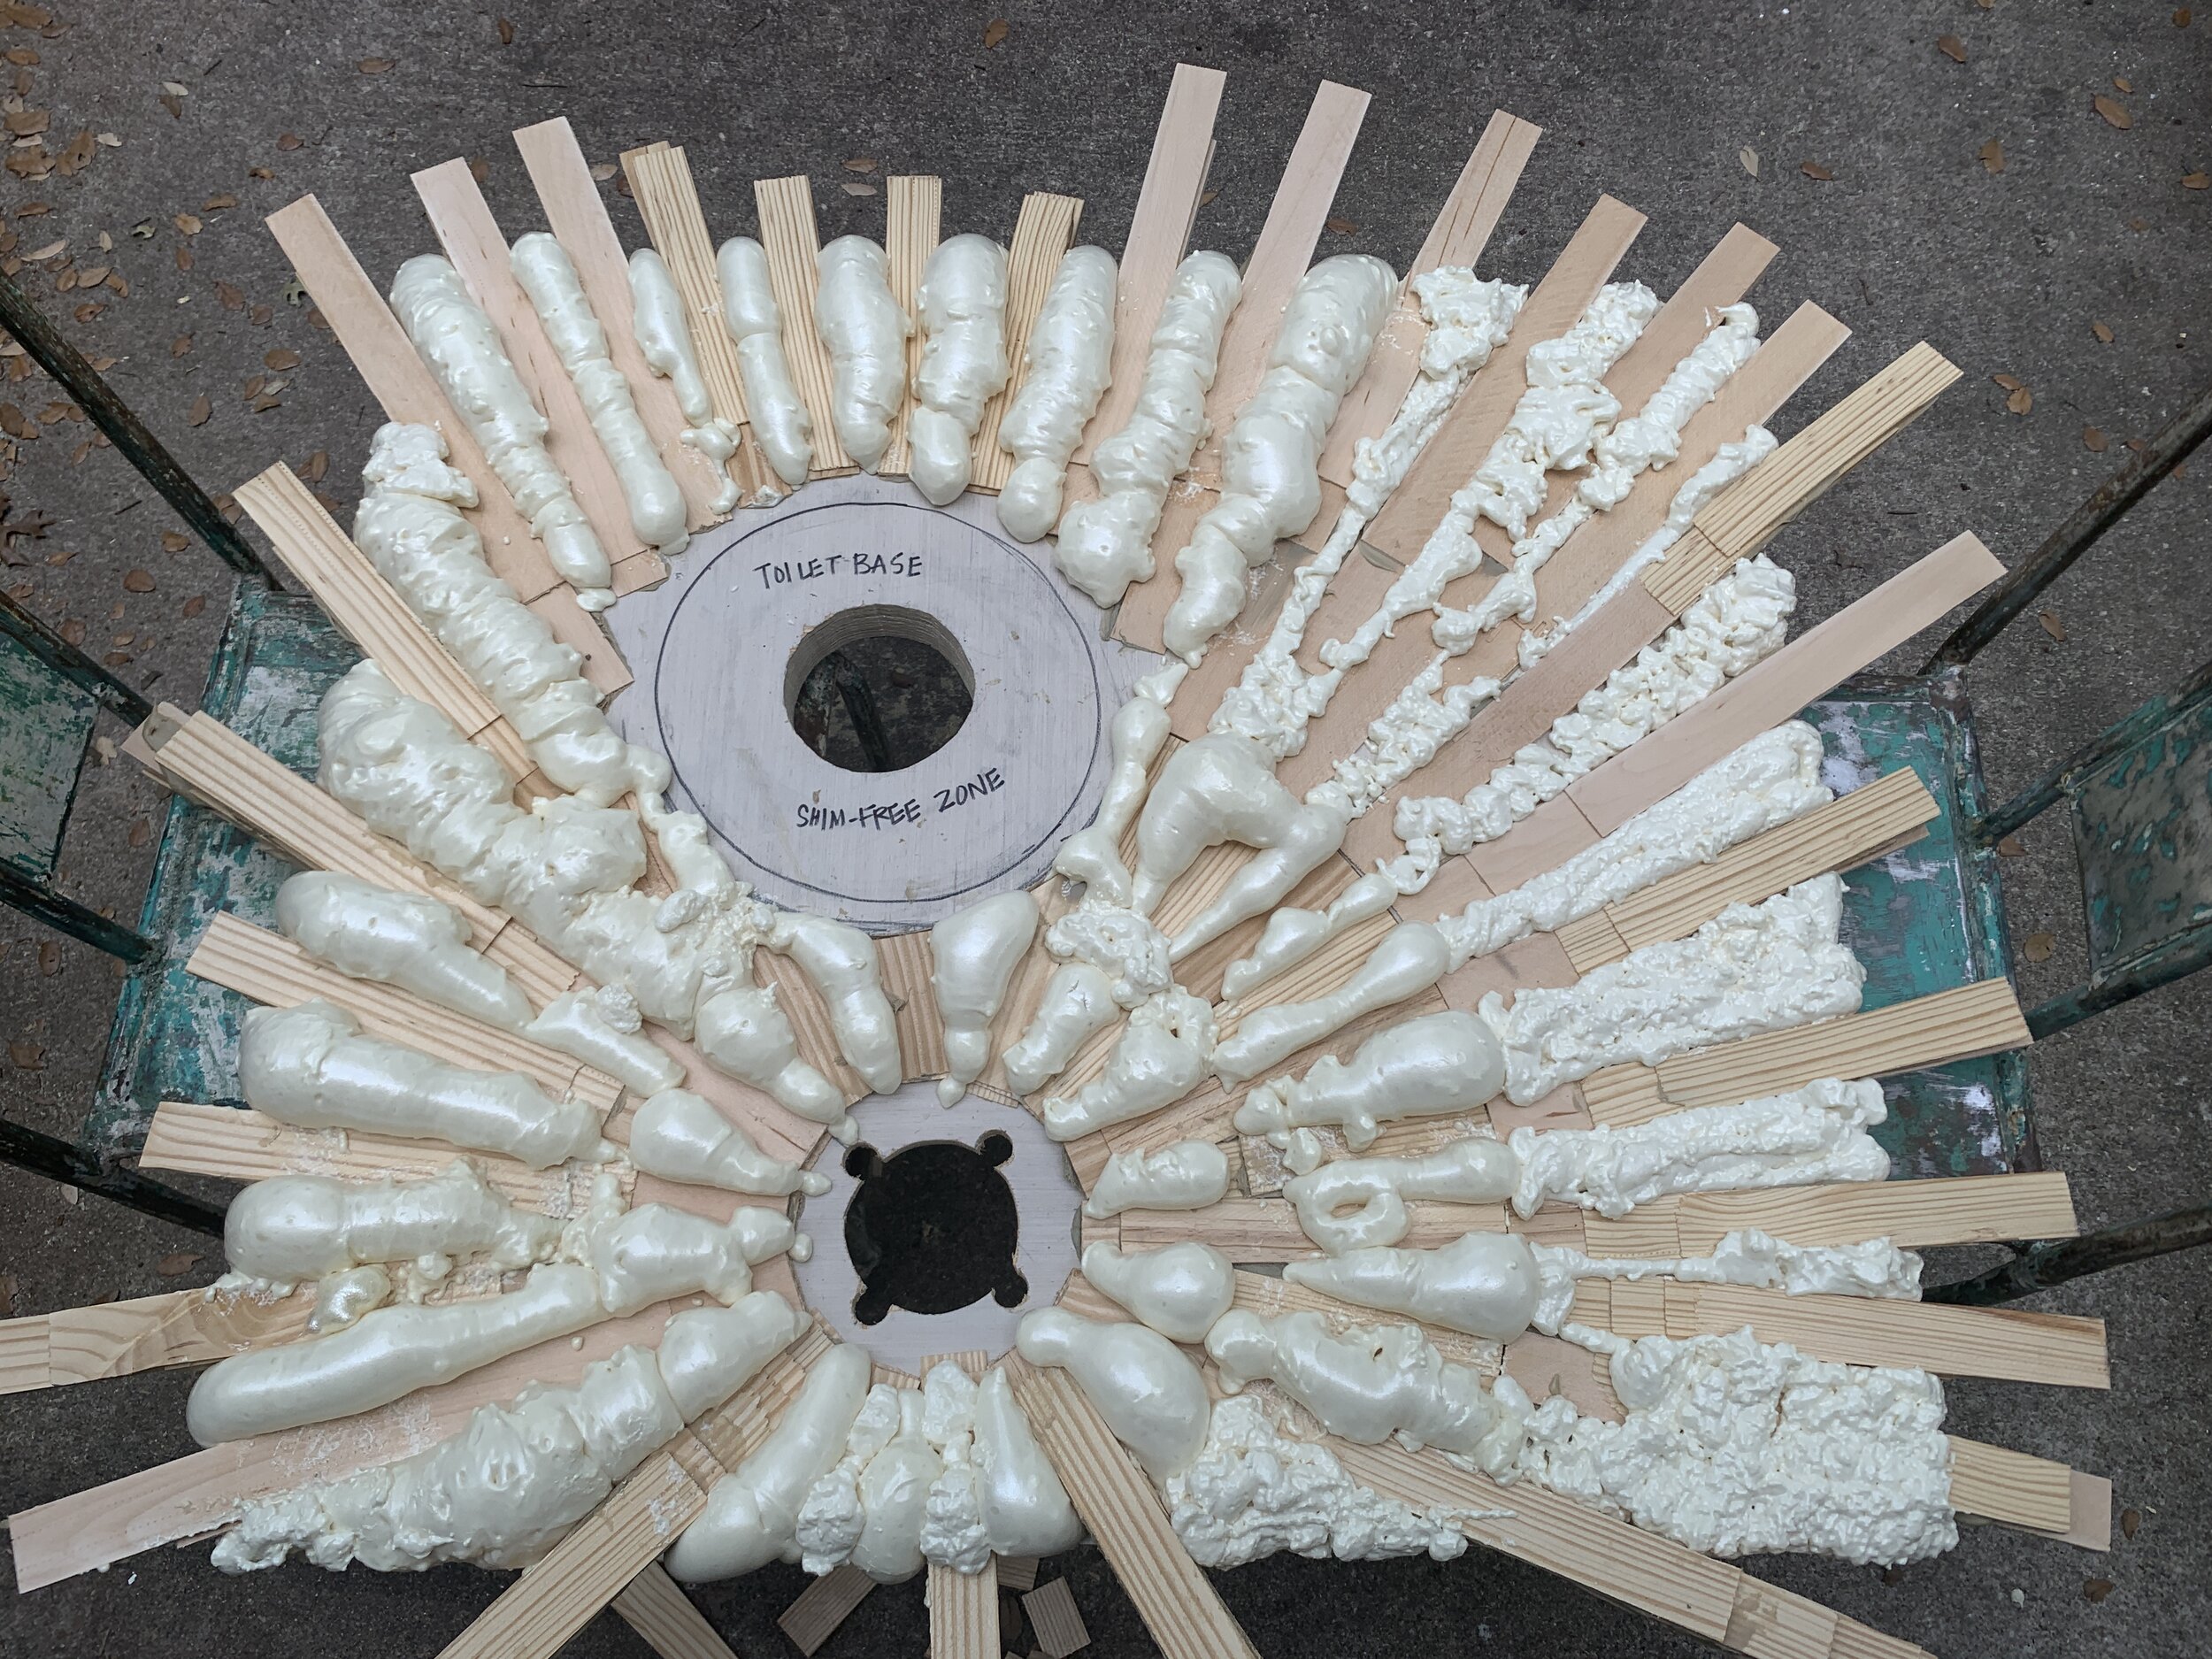
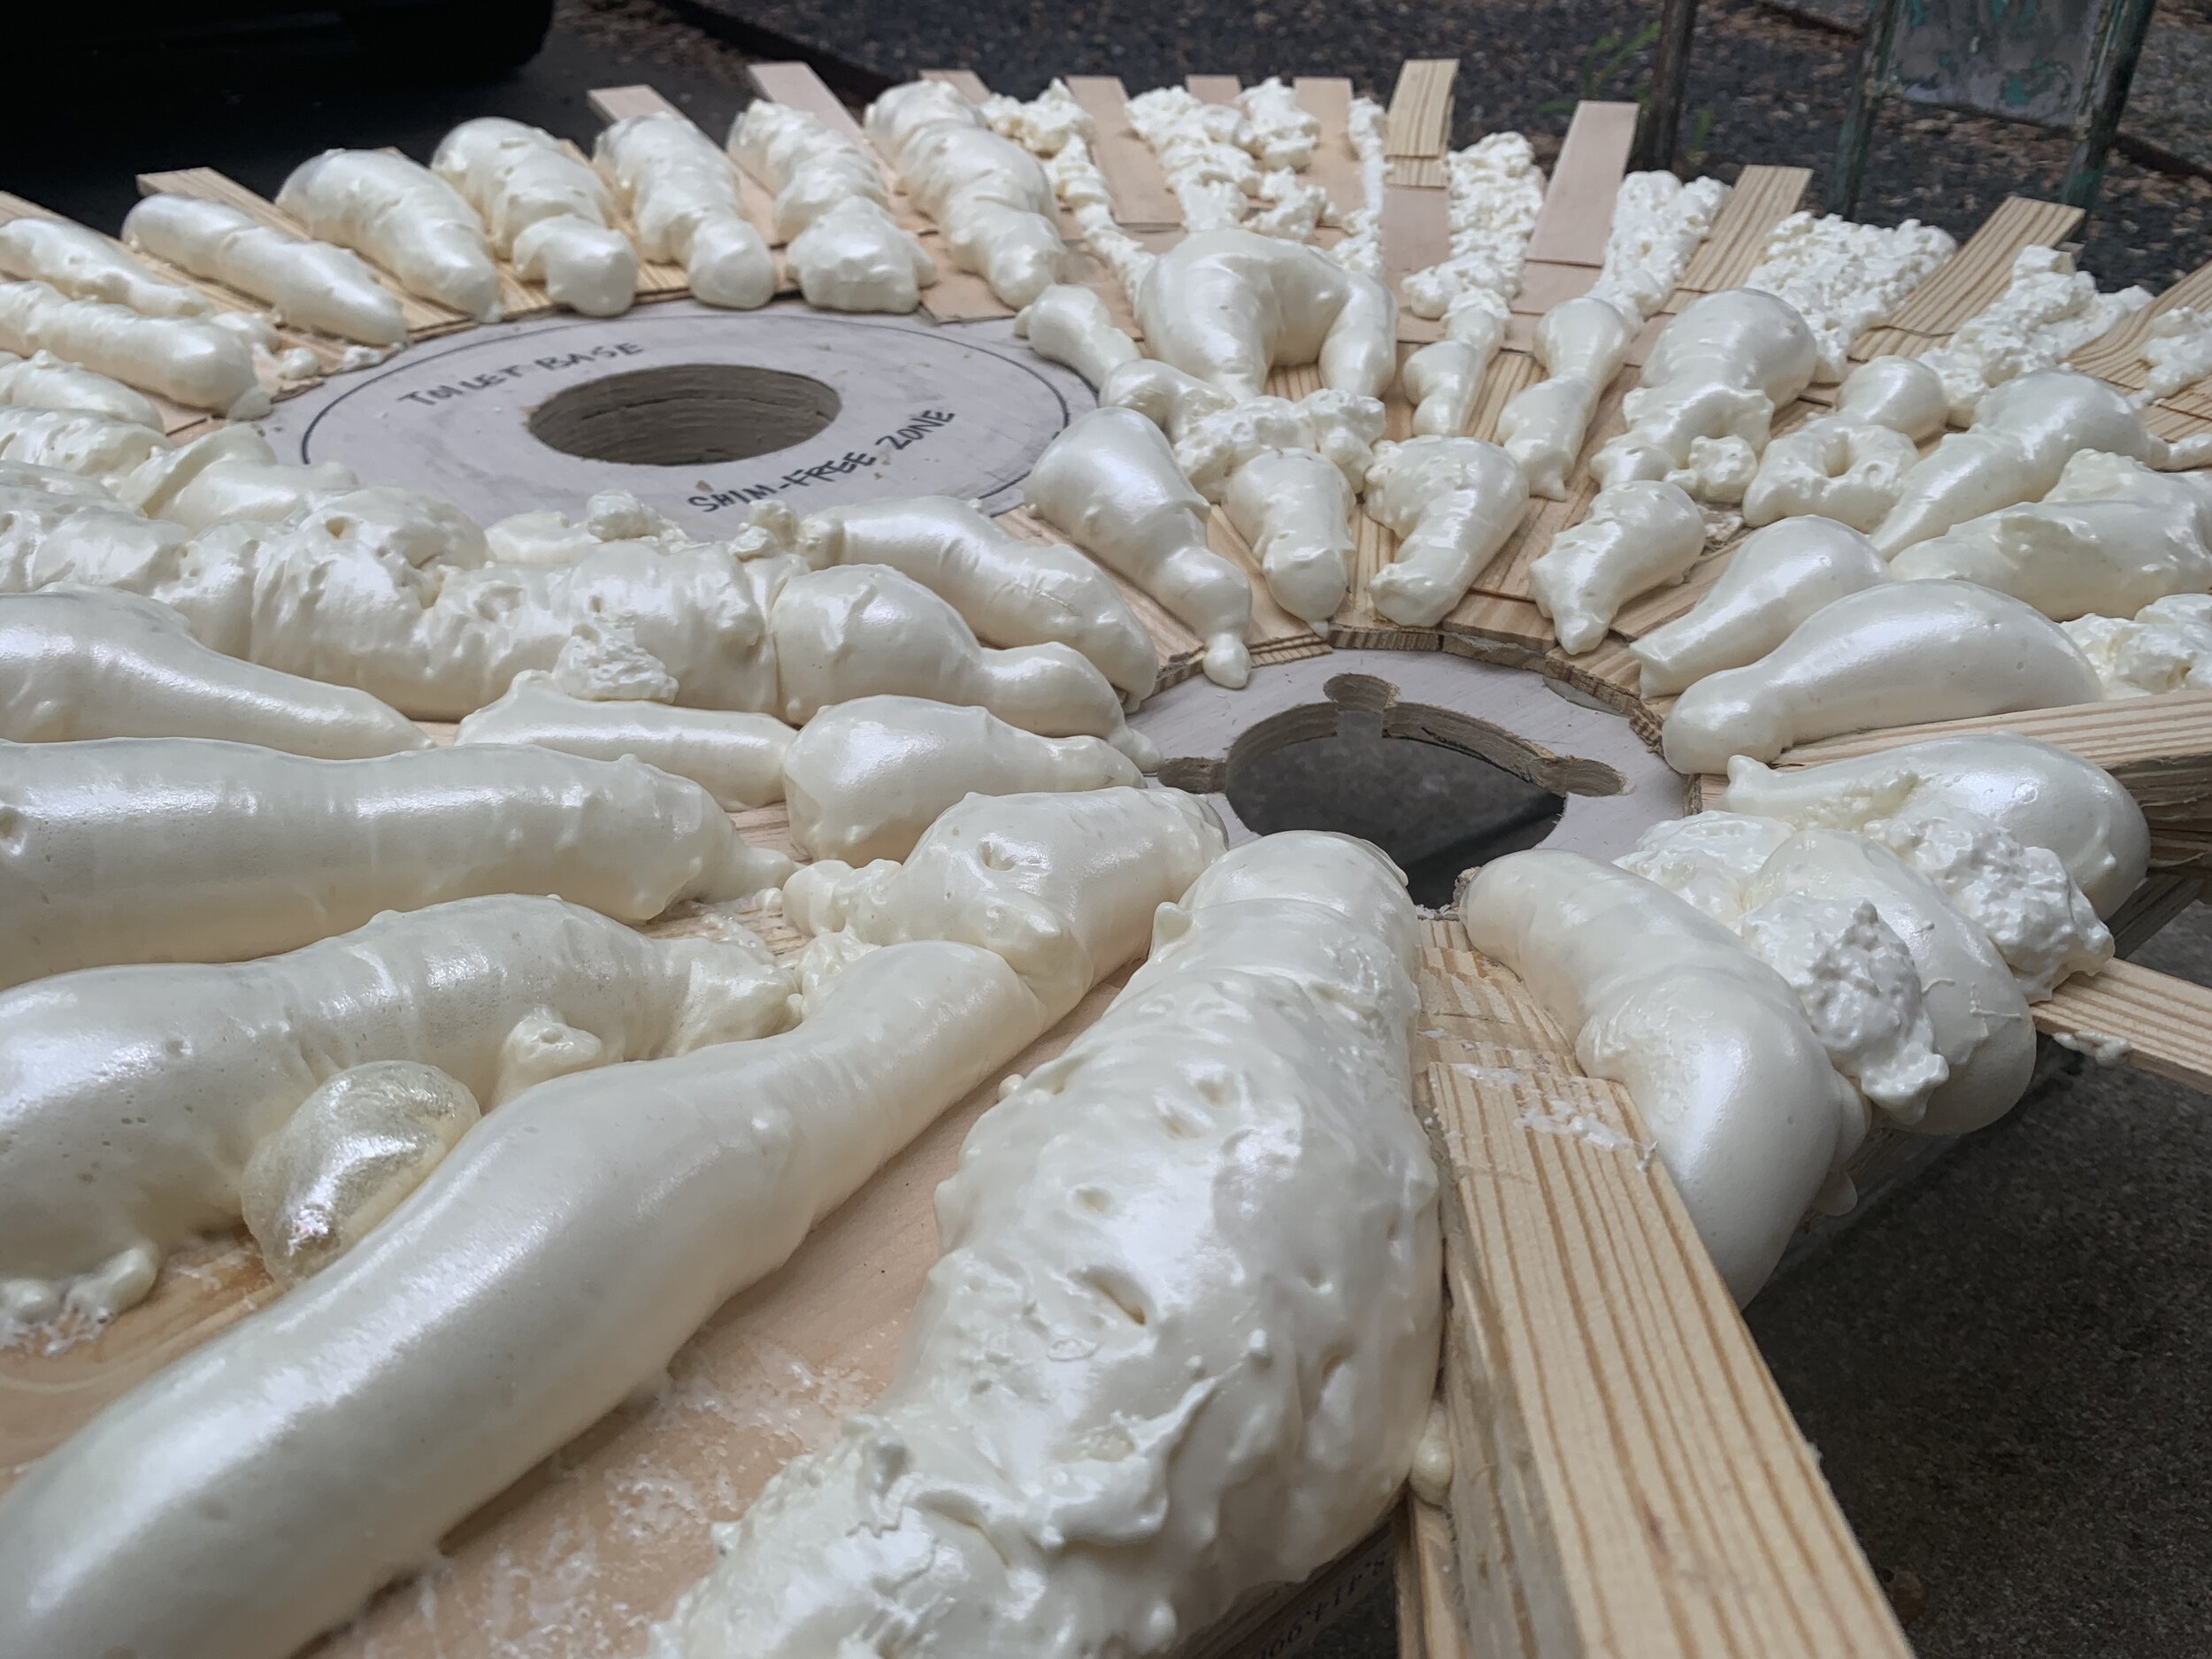
We let the foam dry and harden overnight.
Step 11: Trim
After the sloped and filled pan was cured, we used a jigsaw to cut the overhanging shims around the edges. Then, working from the outside in, I used a sheetrock knife to rough cut the excess foam down to meet the shim tops and used a flat razor to finesse the areas I couldn’t reach with the sheetrock knife.


I used our orbital sander and 150 grit paper to further smooth the foam.

Step 12: Attach the sloped base to the camper
After vacuuming and wiping down the vinyl floor and bottom of the shower base with paint thinner, we used Liquid Nails to glue it to the camper floor. While I stood in the wet bath (on top of the glued shower base) Nick drilled wood screws through the bottom of the subfloor up into the bottom of the shower base to really lock it down. Probably not necessary, but we kept heavy weights on top of the base overnight while the adhesive dried.
Note: You probably don’t need to wait overnight before you move onto waterproofing that’s covered in the next post, we just were ready to end our day at this step.

What’s next for the wet bath
In the next post we’re sharing how we waterproofed our newly-built shower pan.
Coming up afterward will be additional posts covering tiling and grouting the shower floor, plus this super cool thing we’ll be doing for the interior walls, our shower fixture hardware install, plumbing the toilet and shower drain into our black and gray tanks and building the bathroom door, plus playing catchup on somethings we’ve already completed and haven’t shared in detail yet.