The Cameo Camper Renovation: Building a Custom RV Shower Pan Part 2
This is part two of a series. Don’t forget to check out out part one.
Last time we covered how we built our sloped shower base, leaving a flat area for our toilet. This post starts where that one left off and will cover how we waterproofed the shower/wet bath floor.

DISCLAIMER:
We do not yet know if this whole thing worked since it’s so new and we’ve not driven it around yet. We’ll update as it gets more use and let you know how it’s holding up over time.
March 2021 update: It’s holding up great so far!
For ease of shopping, here’s our full list for the whole shower floor project again.
Our shower/wet bath floor shopping list
Most of this you can find at your local hardware store, but some of the things we ordered online (like the brass drain and the waterproofing tape).
1/2” high-quality marine-grade plywood – cut to the size of the bathroom floor. (We used 3 pieces that were approximately 33 x 29”, but read below and plan for just 2)
Shims – we used about 8-10 packs of mostly the standard size but also used the longer ones, which were helpful in some areas
Liquid Nails construction adhesive + caulk gun – (We used about 6 small tubes)
Wood screws in varying lengths – to secure the 1/2” plywood layers together and the base to the camper floor. (We used 1-1/4” for our 3-plywood layer base and 2” to secure the triple-layer base to the camper floor)
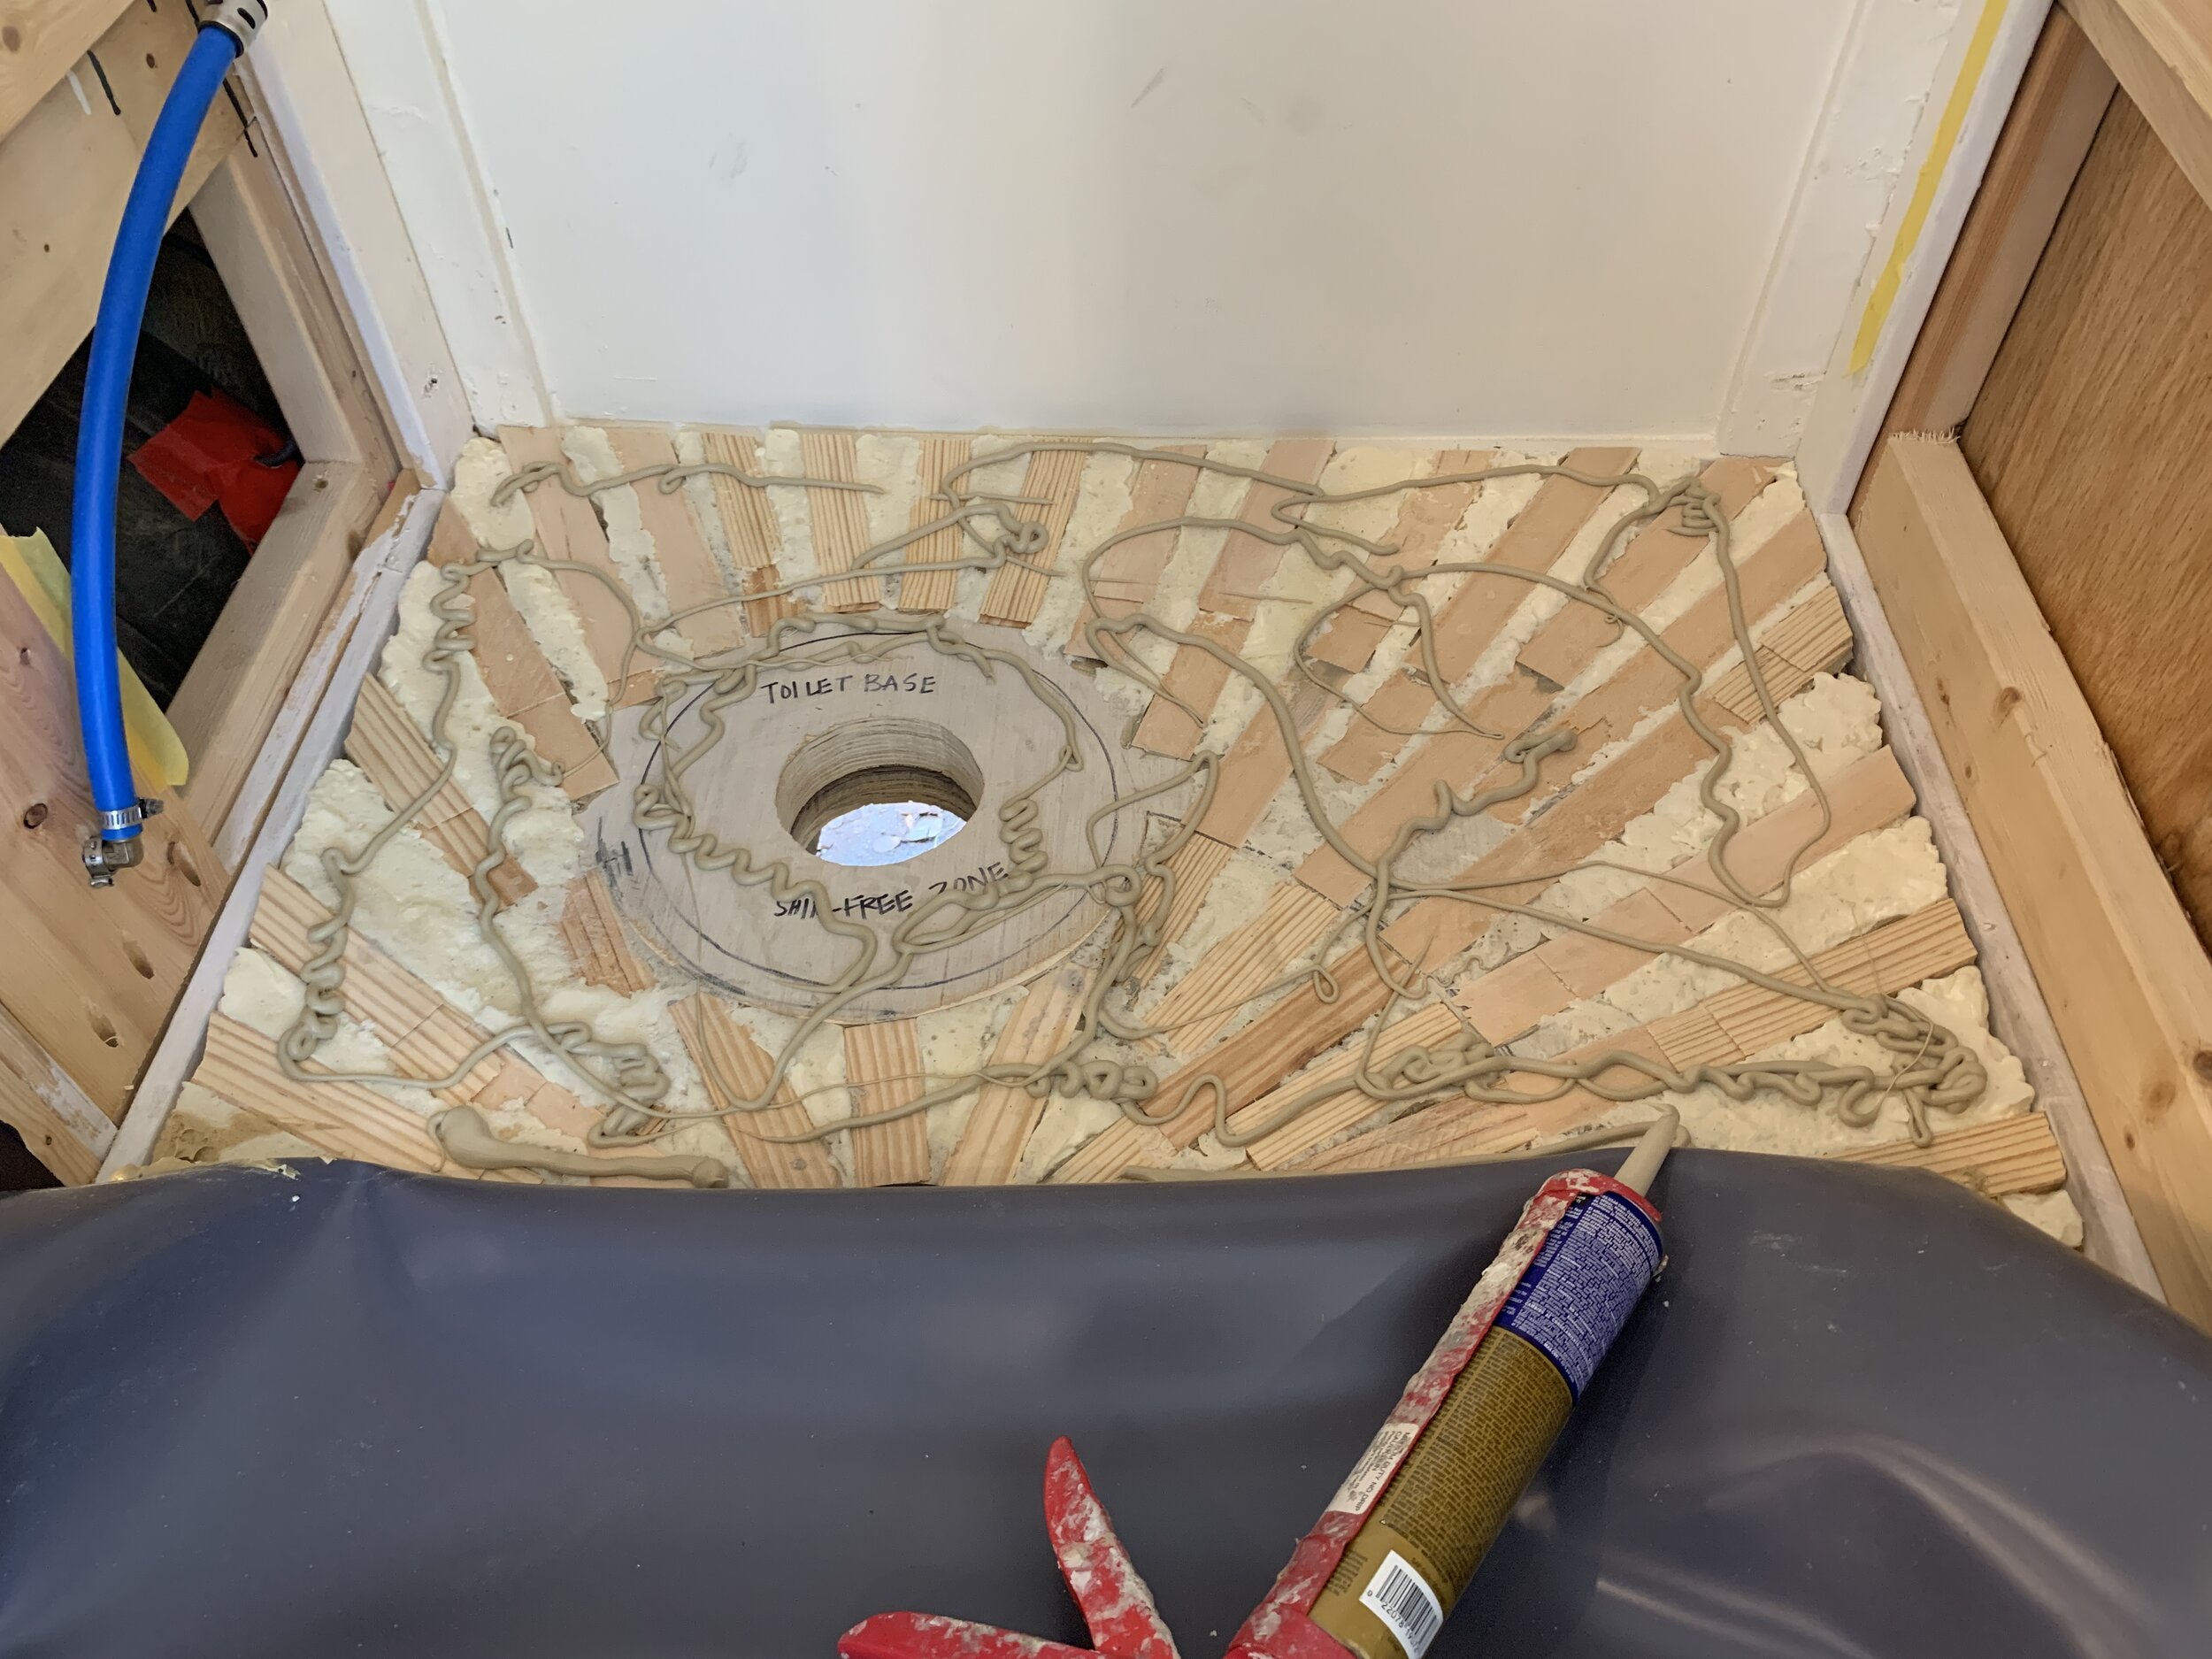
Gap and crack filler spray insulating foam – (We used a little less than 2 cans)
Toilet flange – the type you need may vary depending on your floor’s thickness and the toilet you’ve chosen. We were able to use a standard 3” toilet flange from the hardware store.
Silicone – We used Lexel since we already had it on hand from all of our other waterproofing projects
1/4" high-quality marine-grade plywood – cut to the size of the bathroom floor. (Ours was approximately 33 x 29”)
RedGard Waterproofing and Crack Prevention Membrane – 1 gallon should be more than enough for a small camper bathroom. We used about 2/3 of a gallon.
Paint brush/roller(s) + trays – to apply the RedGard Waterproofing Membrane
Notched tile trowel (1/4” square notch) – this depends on what your specific tile size is, but likely with a shower floor it’ll be a 1/4” notch
Tile – the smaller the better for a sloped shower floor. We went with penny tile, which has a lot of grout lines and that helps the floor not be super slippery (especially since we went with glass!)
Rubber grout trowel
Grout – we went with an unsanded grout since our tile is glass, which can scratch with sanded grout
Tools needed to complete the job:
Circular saw – for cutting plywood base(s) to size. Could also use a table saw if you have one.
Sliding compound miter saw – to cut shims to length before gluing in place
Drill – for making drain holes + securing layers with screws
Jigsaw – to trim the shims after gluing in place
Knives – for trimming/shaving insulation foam. (We used a combination including our drywall knife, flat blade and box knife)
Orbital sander + sandpaper – for smoothing the insulation foam
Misc. heavy (but small) stuff – for weighing down the floor while it cures
Electric staple gun + staples shorter than the thickness of your framing lumber – for securing the extra pan liner edges on the outside of the shower
Waterproofing a custom mortar-free shower floor
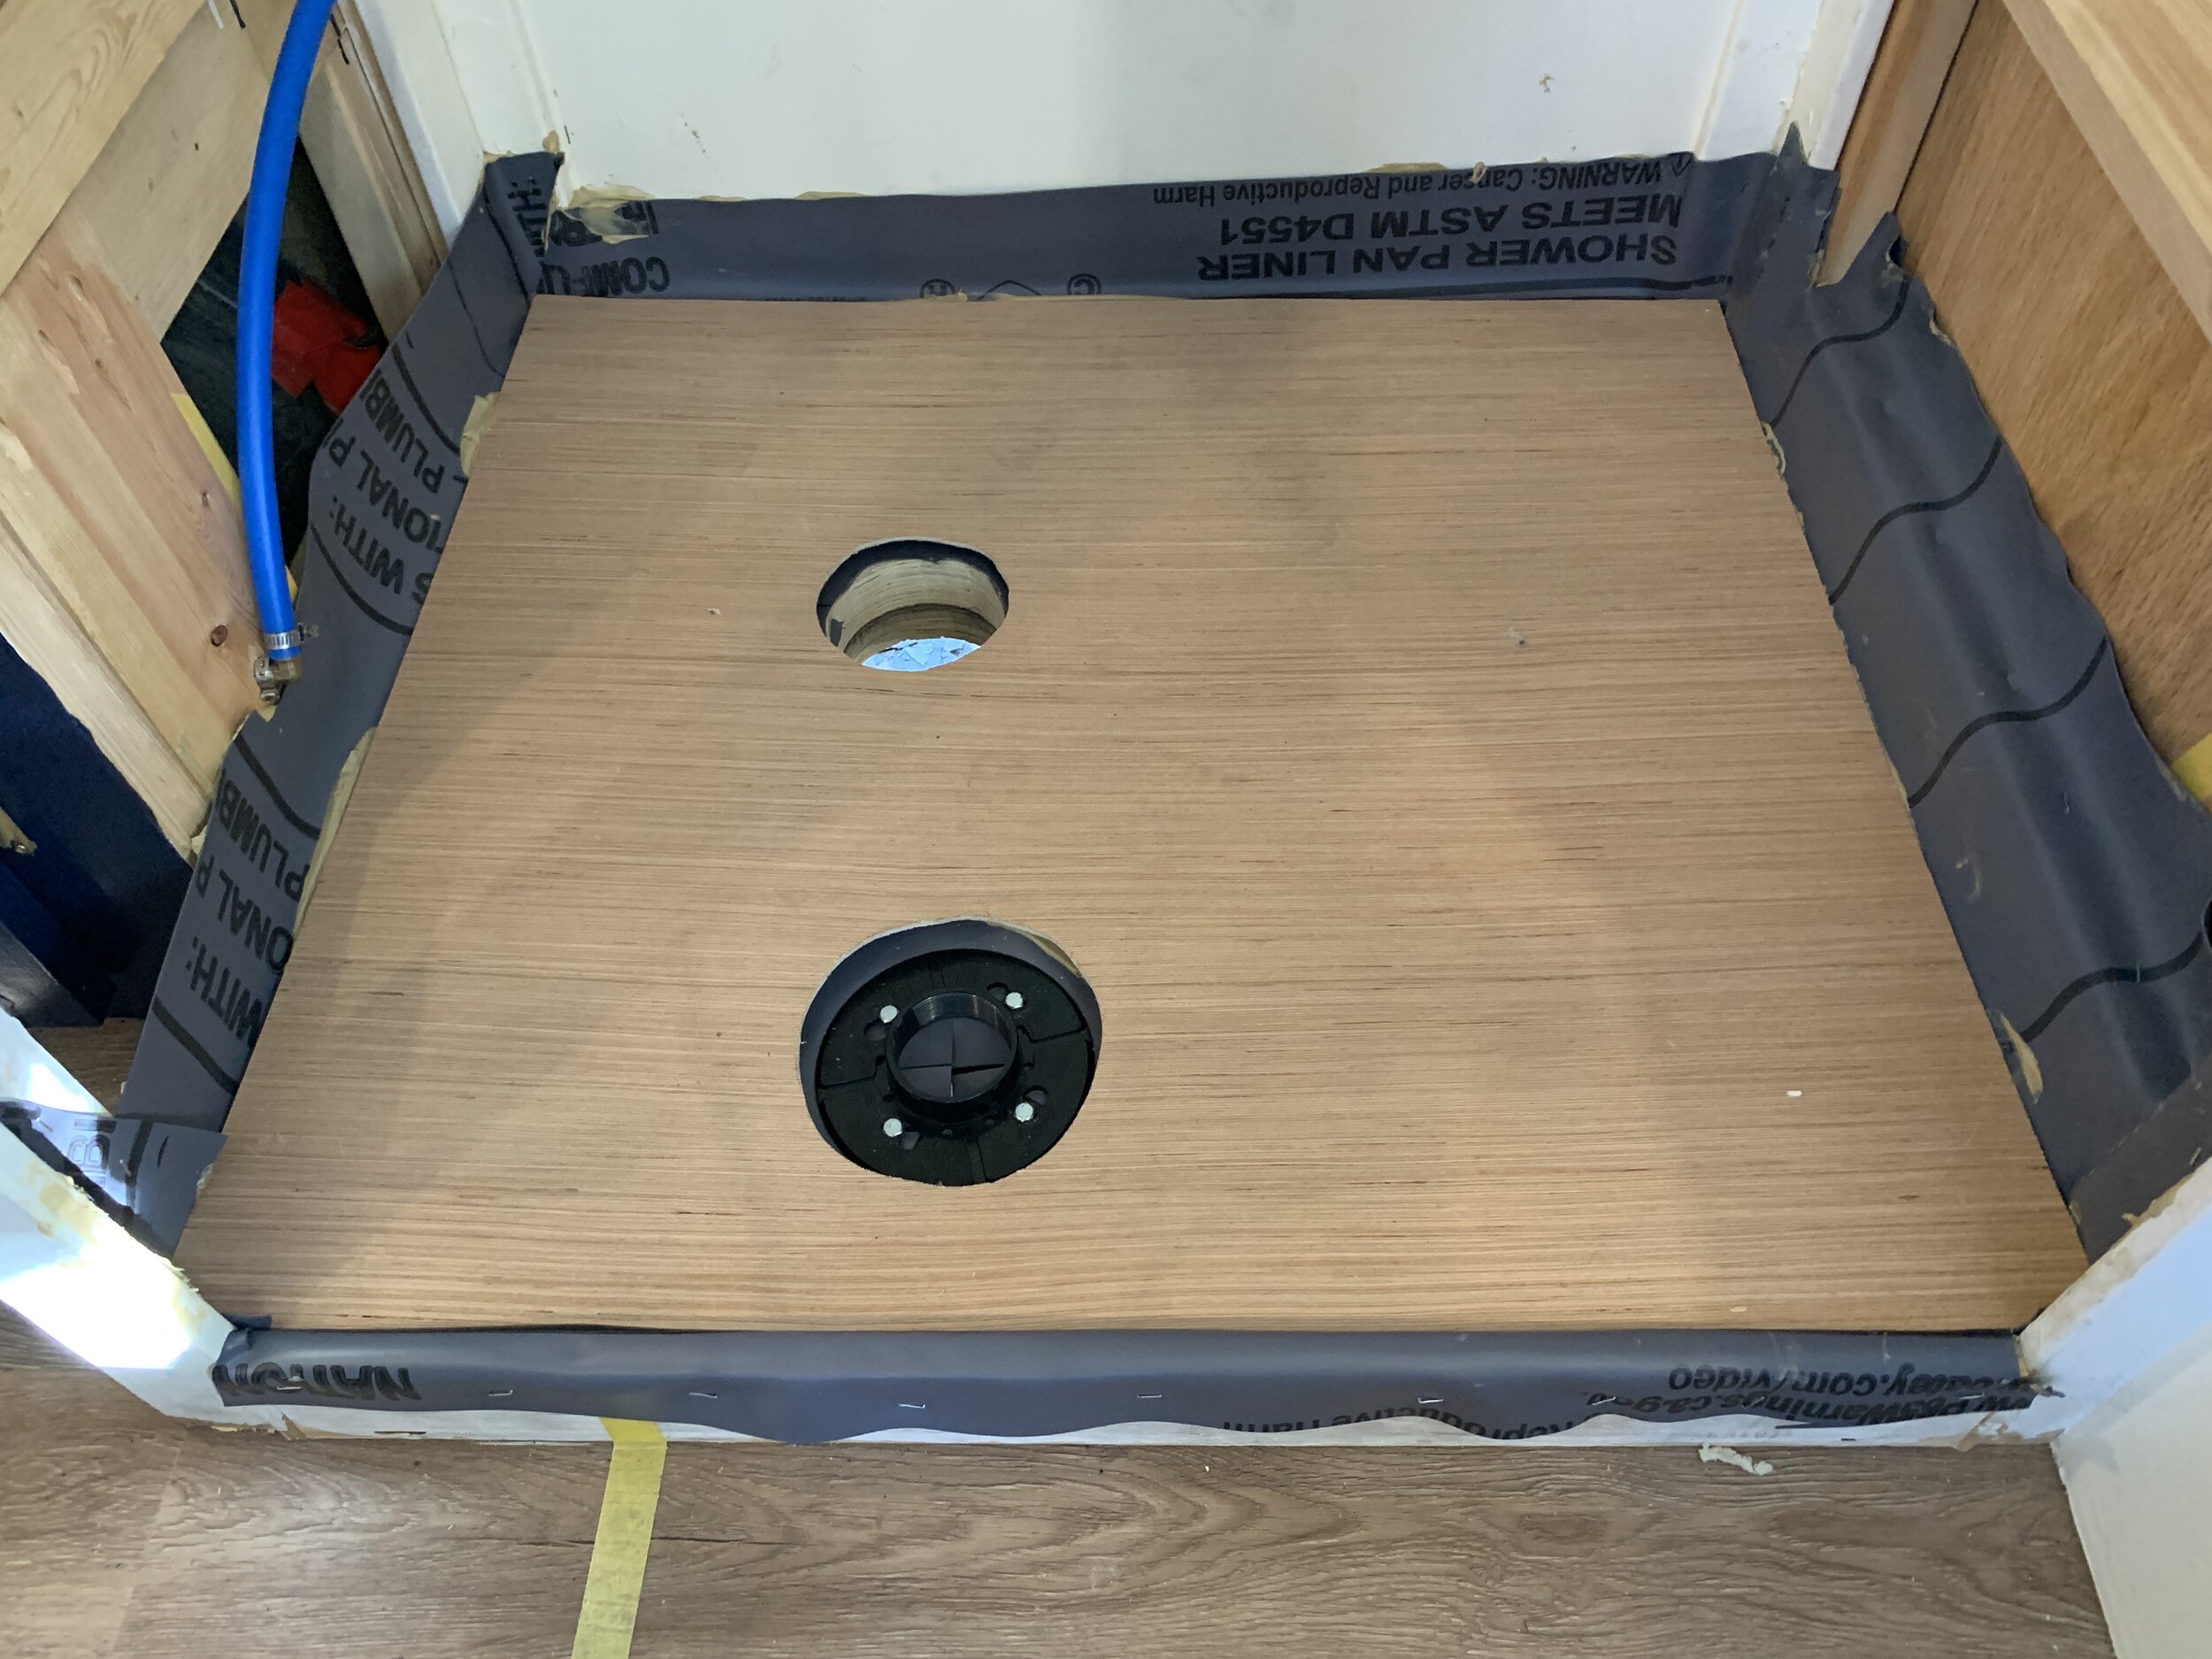
At the start of waterproofing our shower pan, it looked like this:
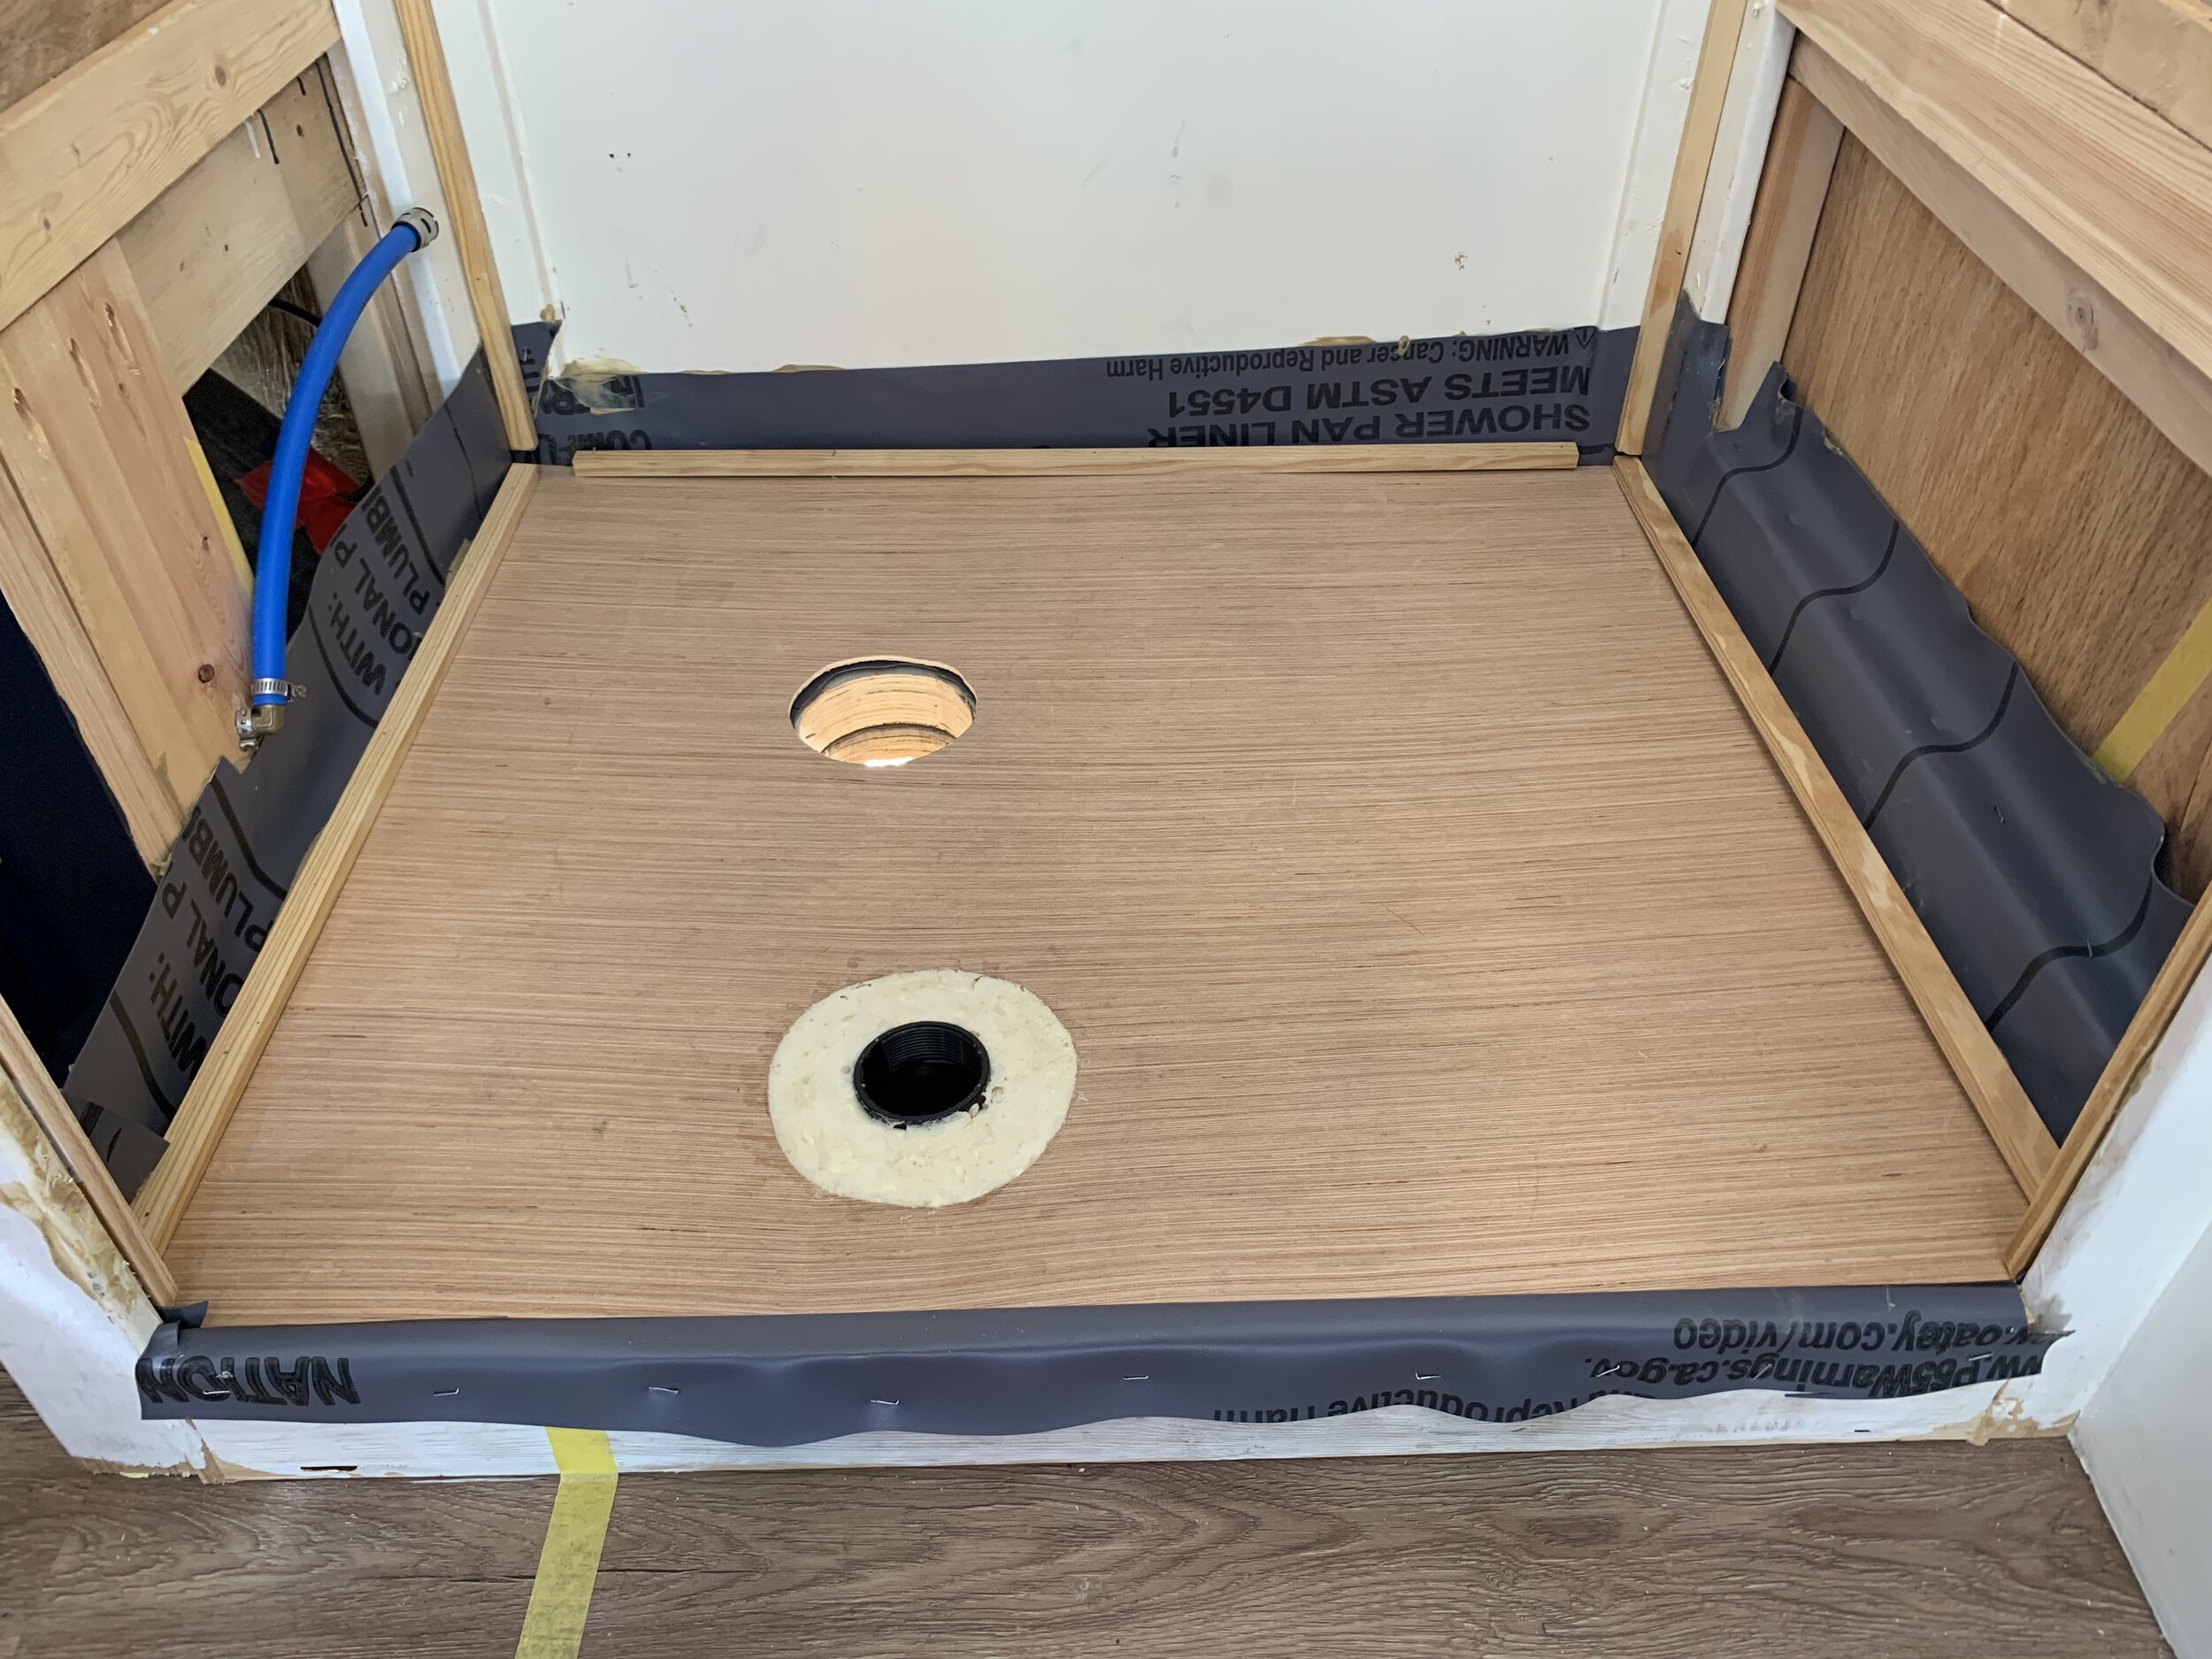
We had just built it and it was now secured to the camper floor with construction adhesive and screws. (For the purposes of today’s post and waterproofing, ignore the small wooden trim around the floor’s perimeter and in the corners of the walls – that’s needed for later and what we have planned for our walls.)
For the waterproofing steps, we more or less followed the process recommended by Oatey for their PVC pan liner/membrane in the video below. The exception of course is their “mortar bed” is our wood shim and foam base (and then later when tiling, our 1/4” plywood layer). While there is helpful info the whole way through and we recommend watching it all, our process starts at around the 2:20 mark.
In such a small space, we did not need to seam our liner and instead of the pan liner adhesive, we used construction adhesive. We also did not use any dam corners for our install.
We get into more specific detail about where we deviated from the video in the steps below.
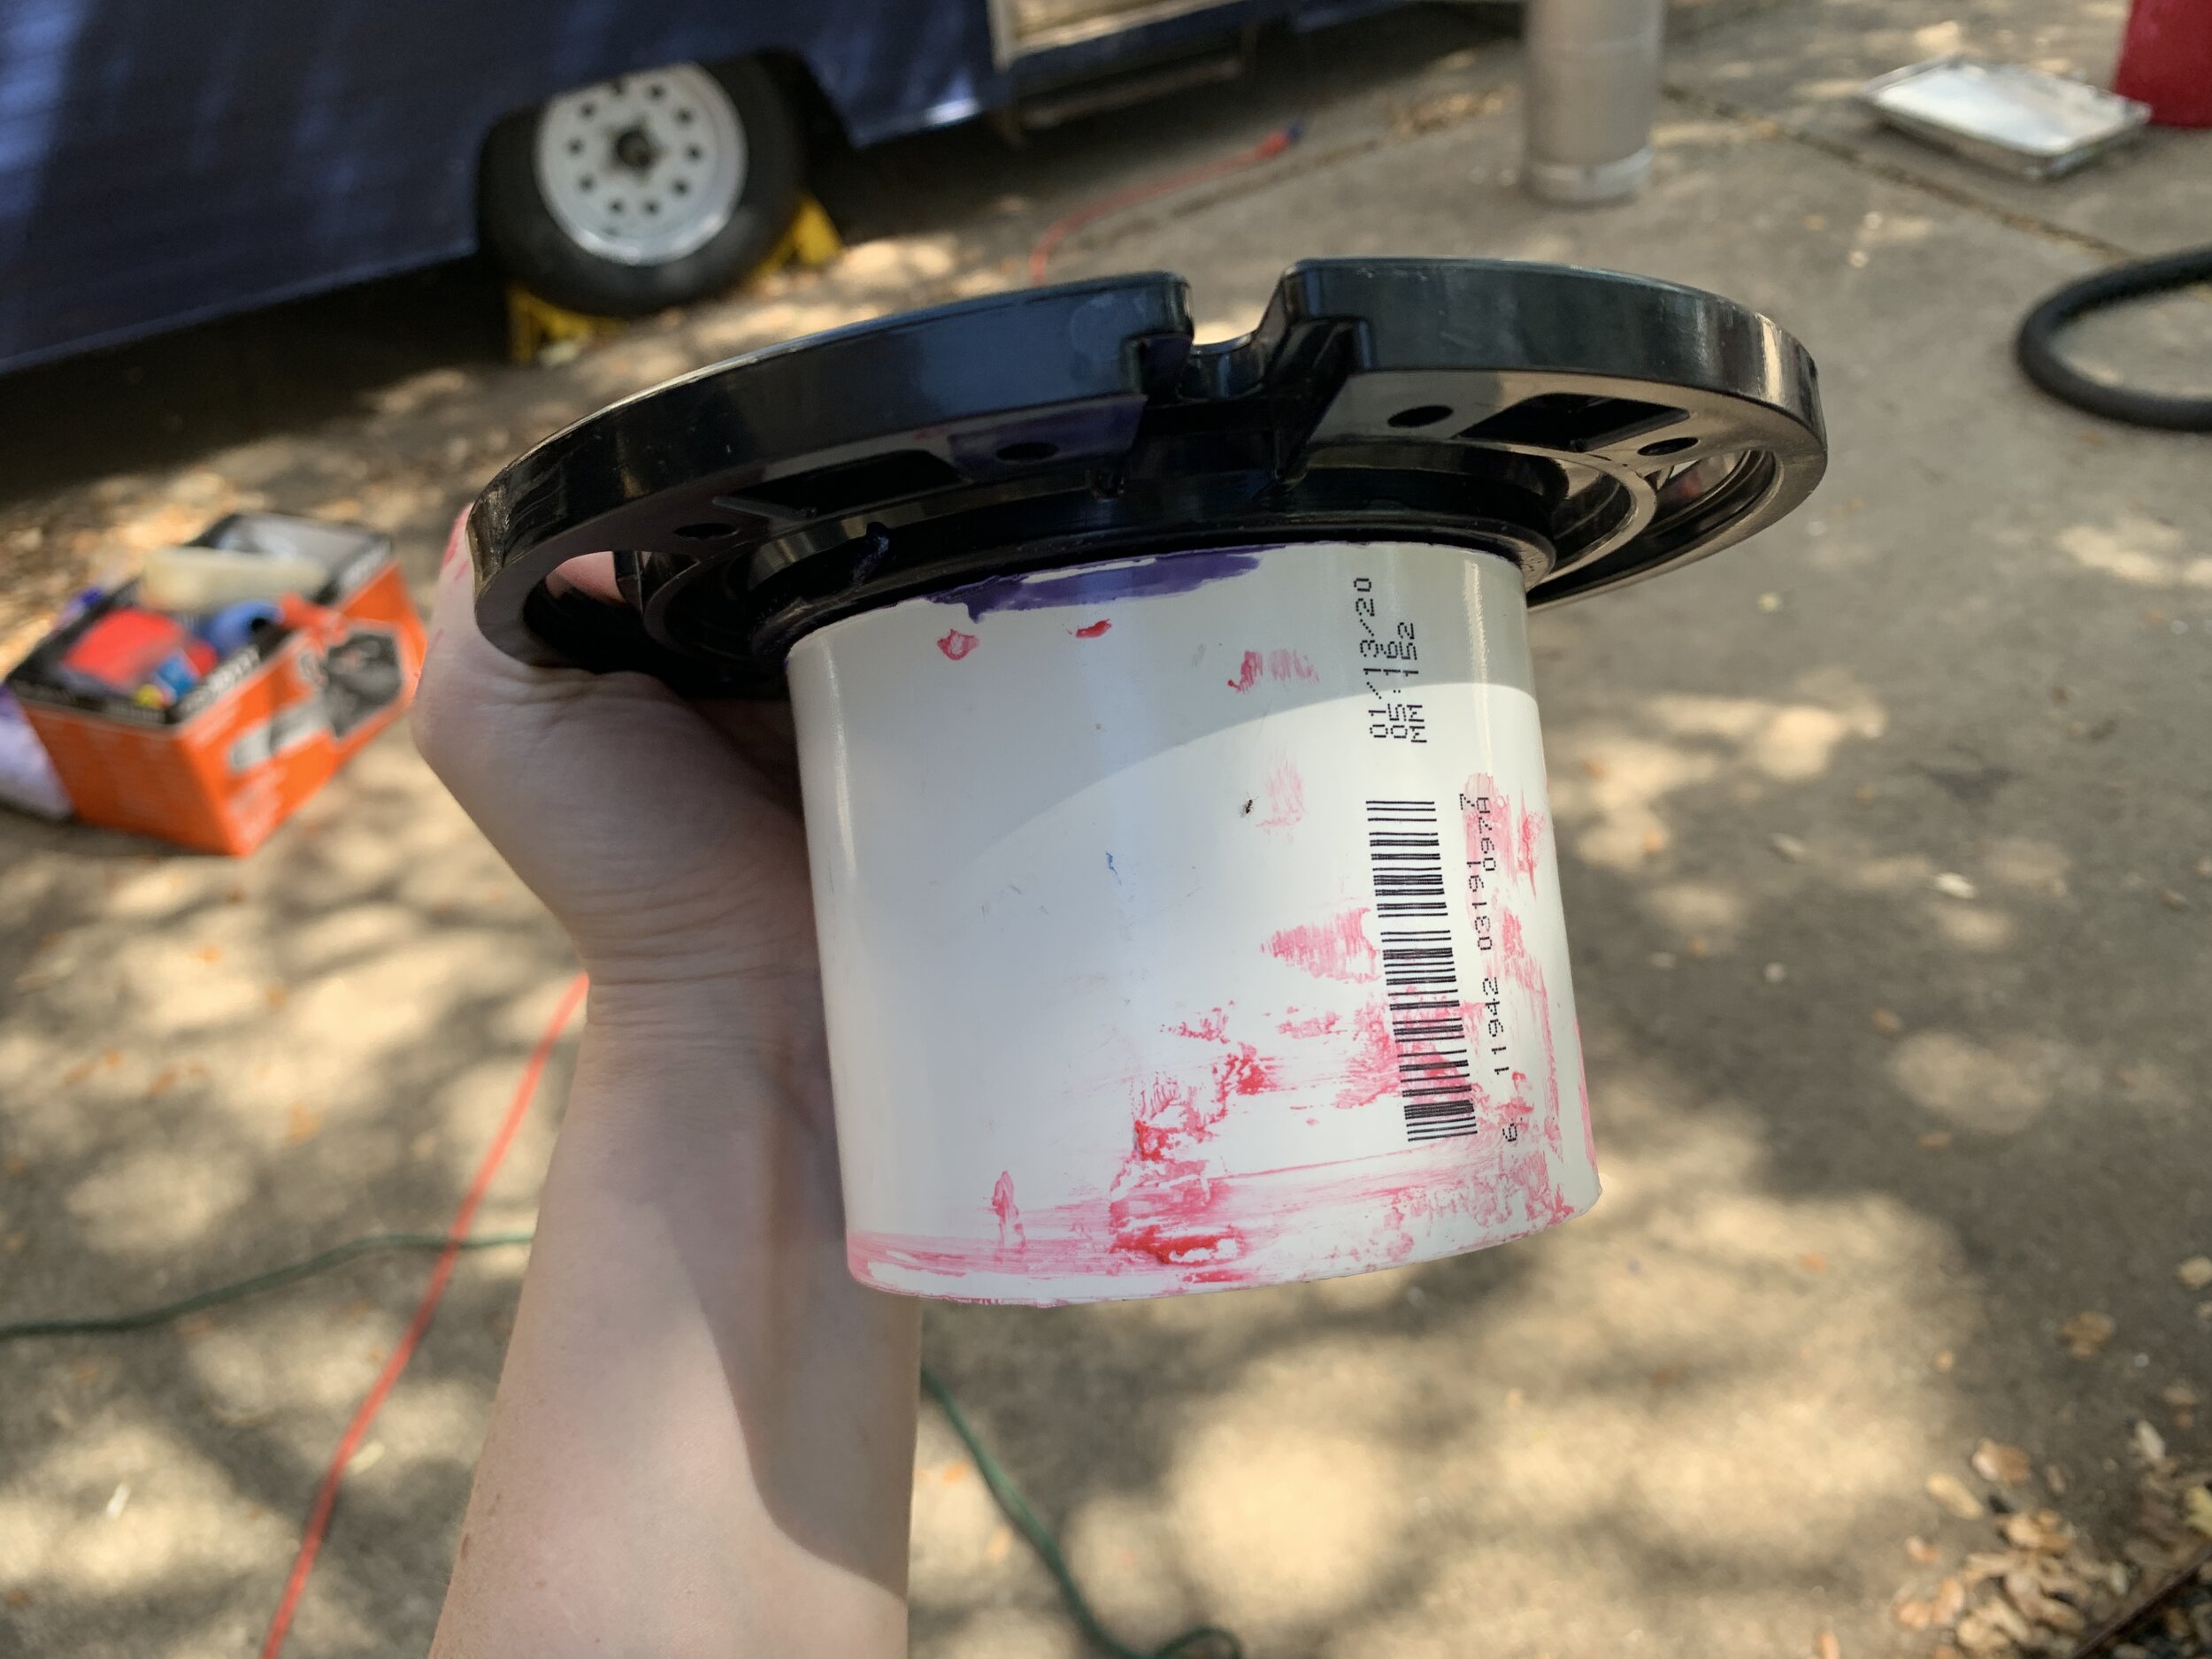
Step 13: Install the lower shower drain (piece 1)
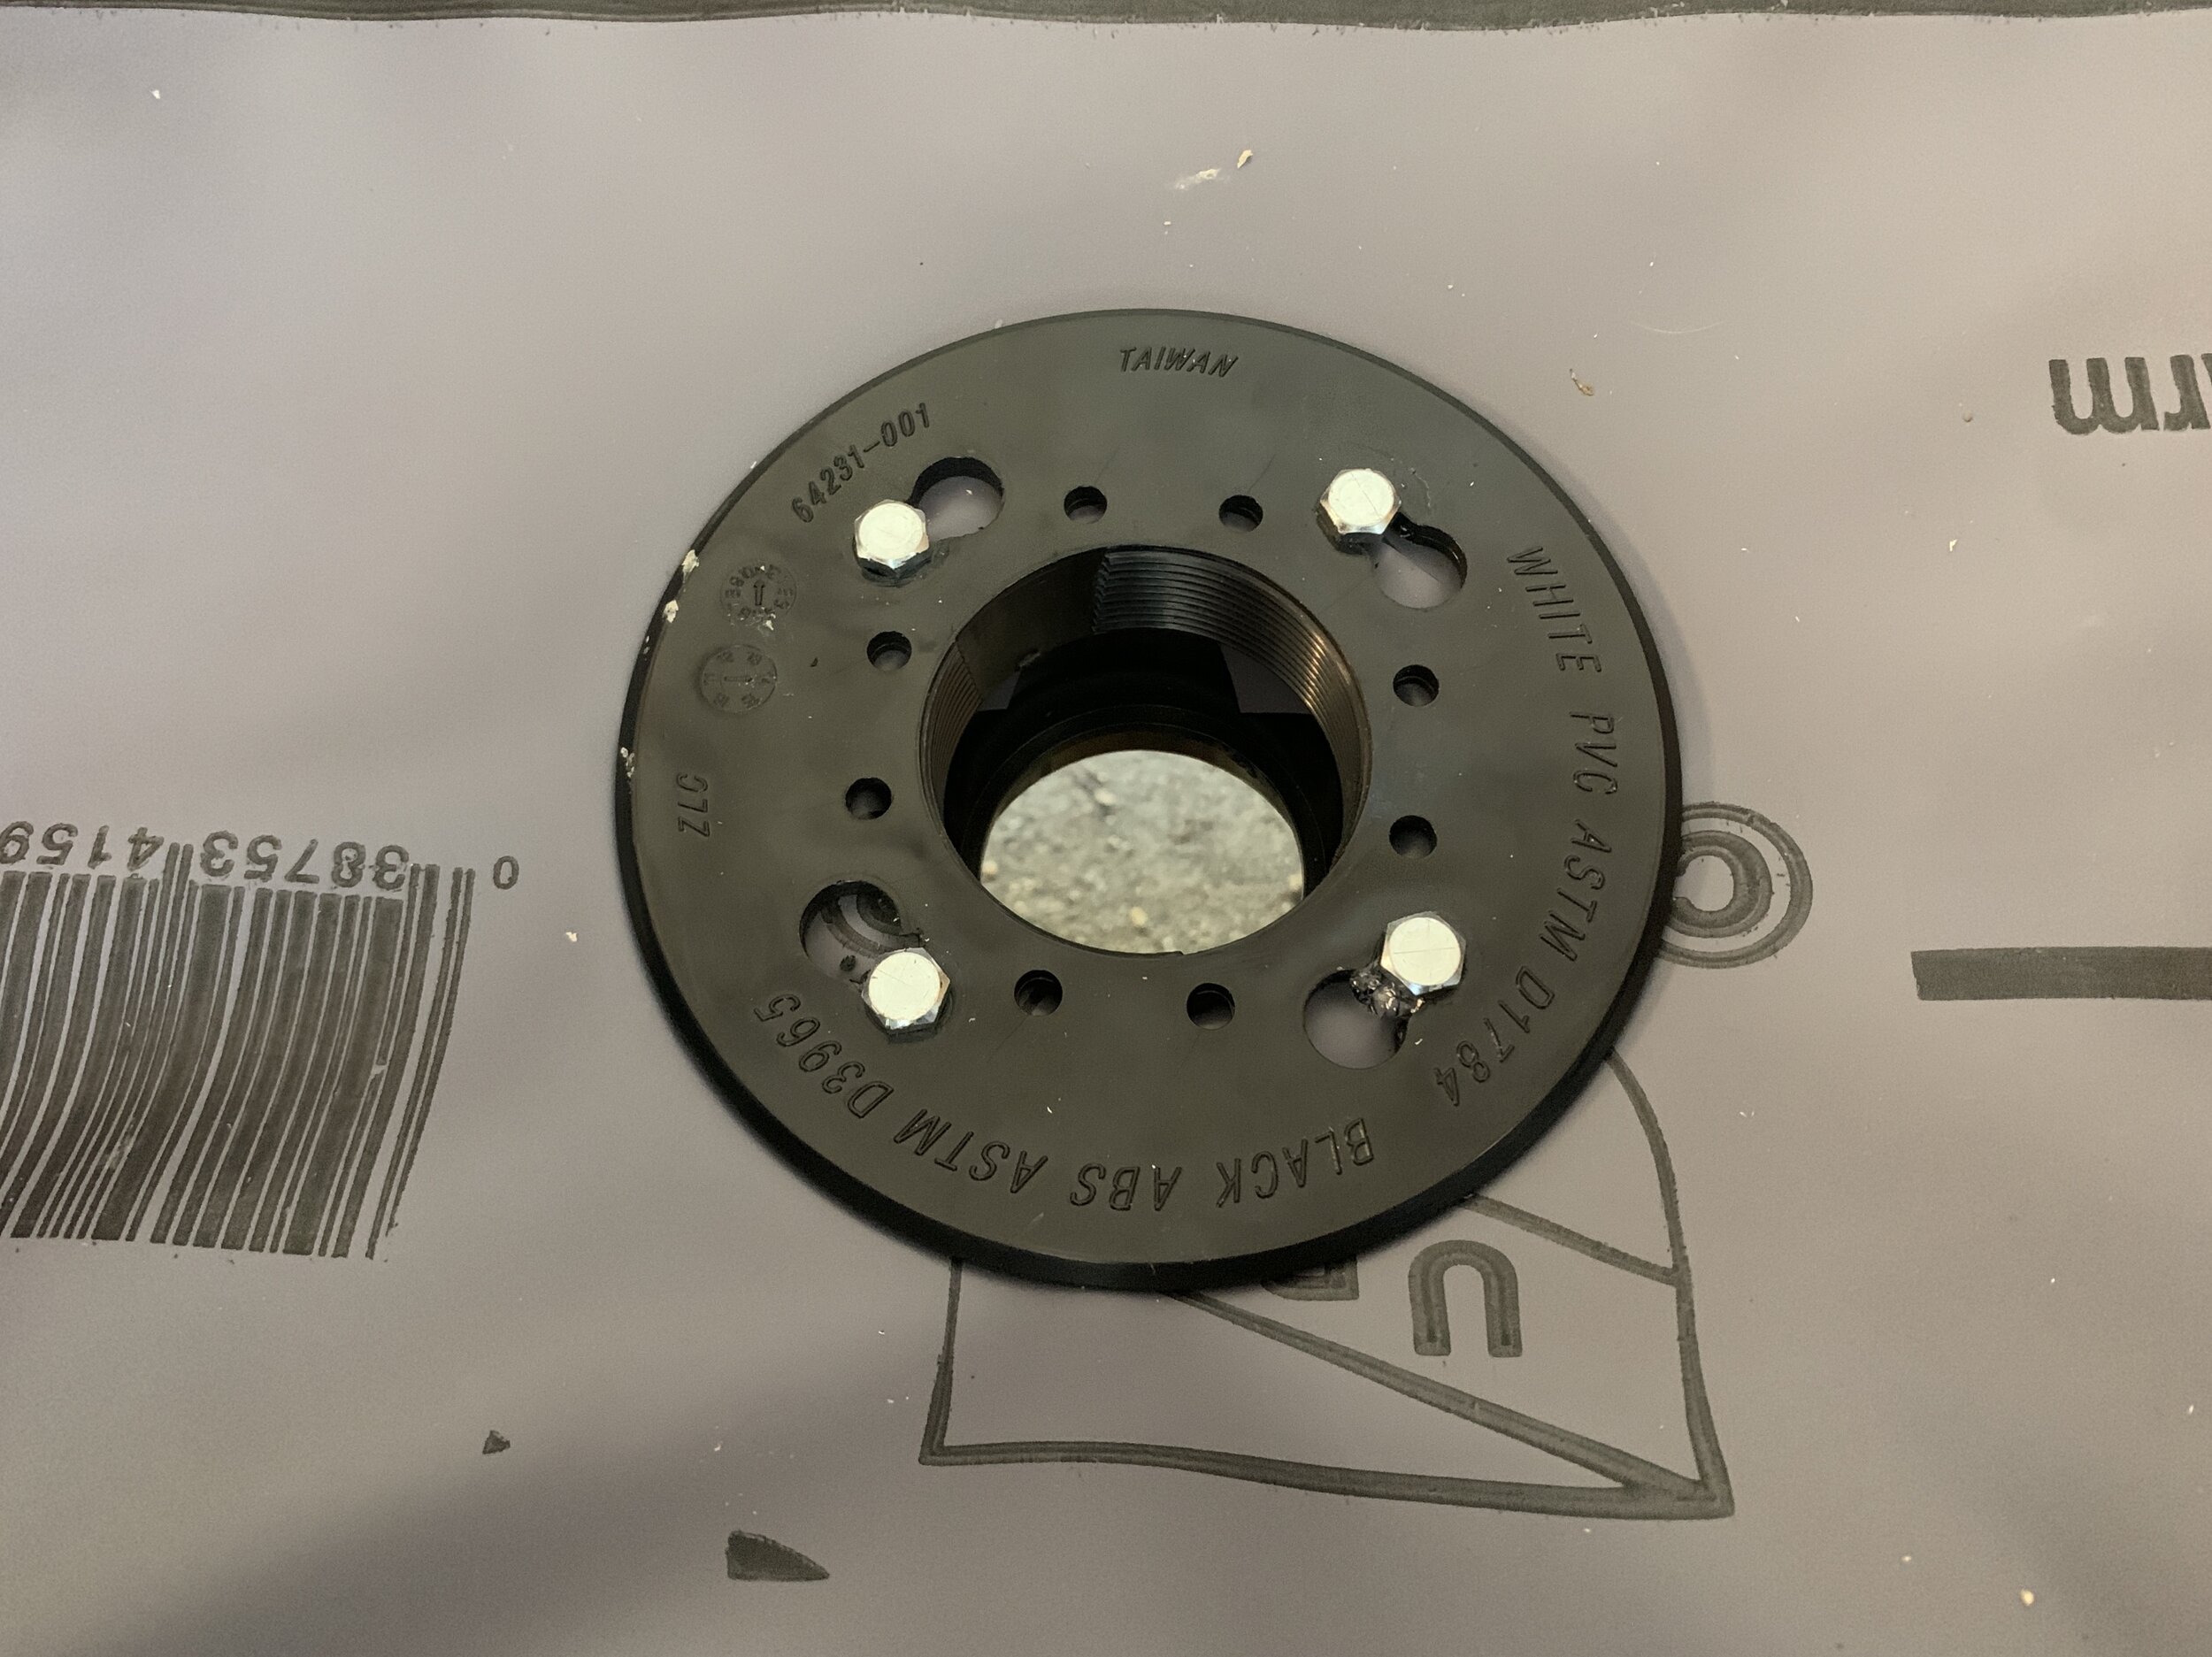
This is “bubbles”, the lower part of the plastic shower drain fitting that has the four nobby circles on the bottom from the last post. We used Liquid Nails construction adhesive to secure this lower shower drain piece to the plywood base, making sure the four plastic nobs on the bottom of the drain fit into the holes cut into the wooden floor base during step 5 of part one of this install series.


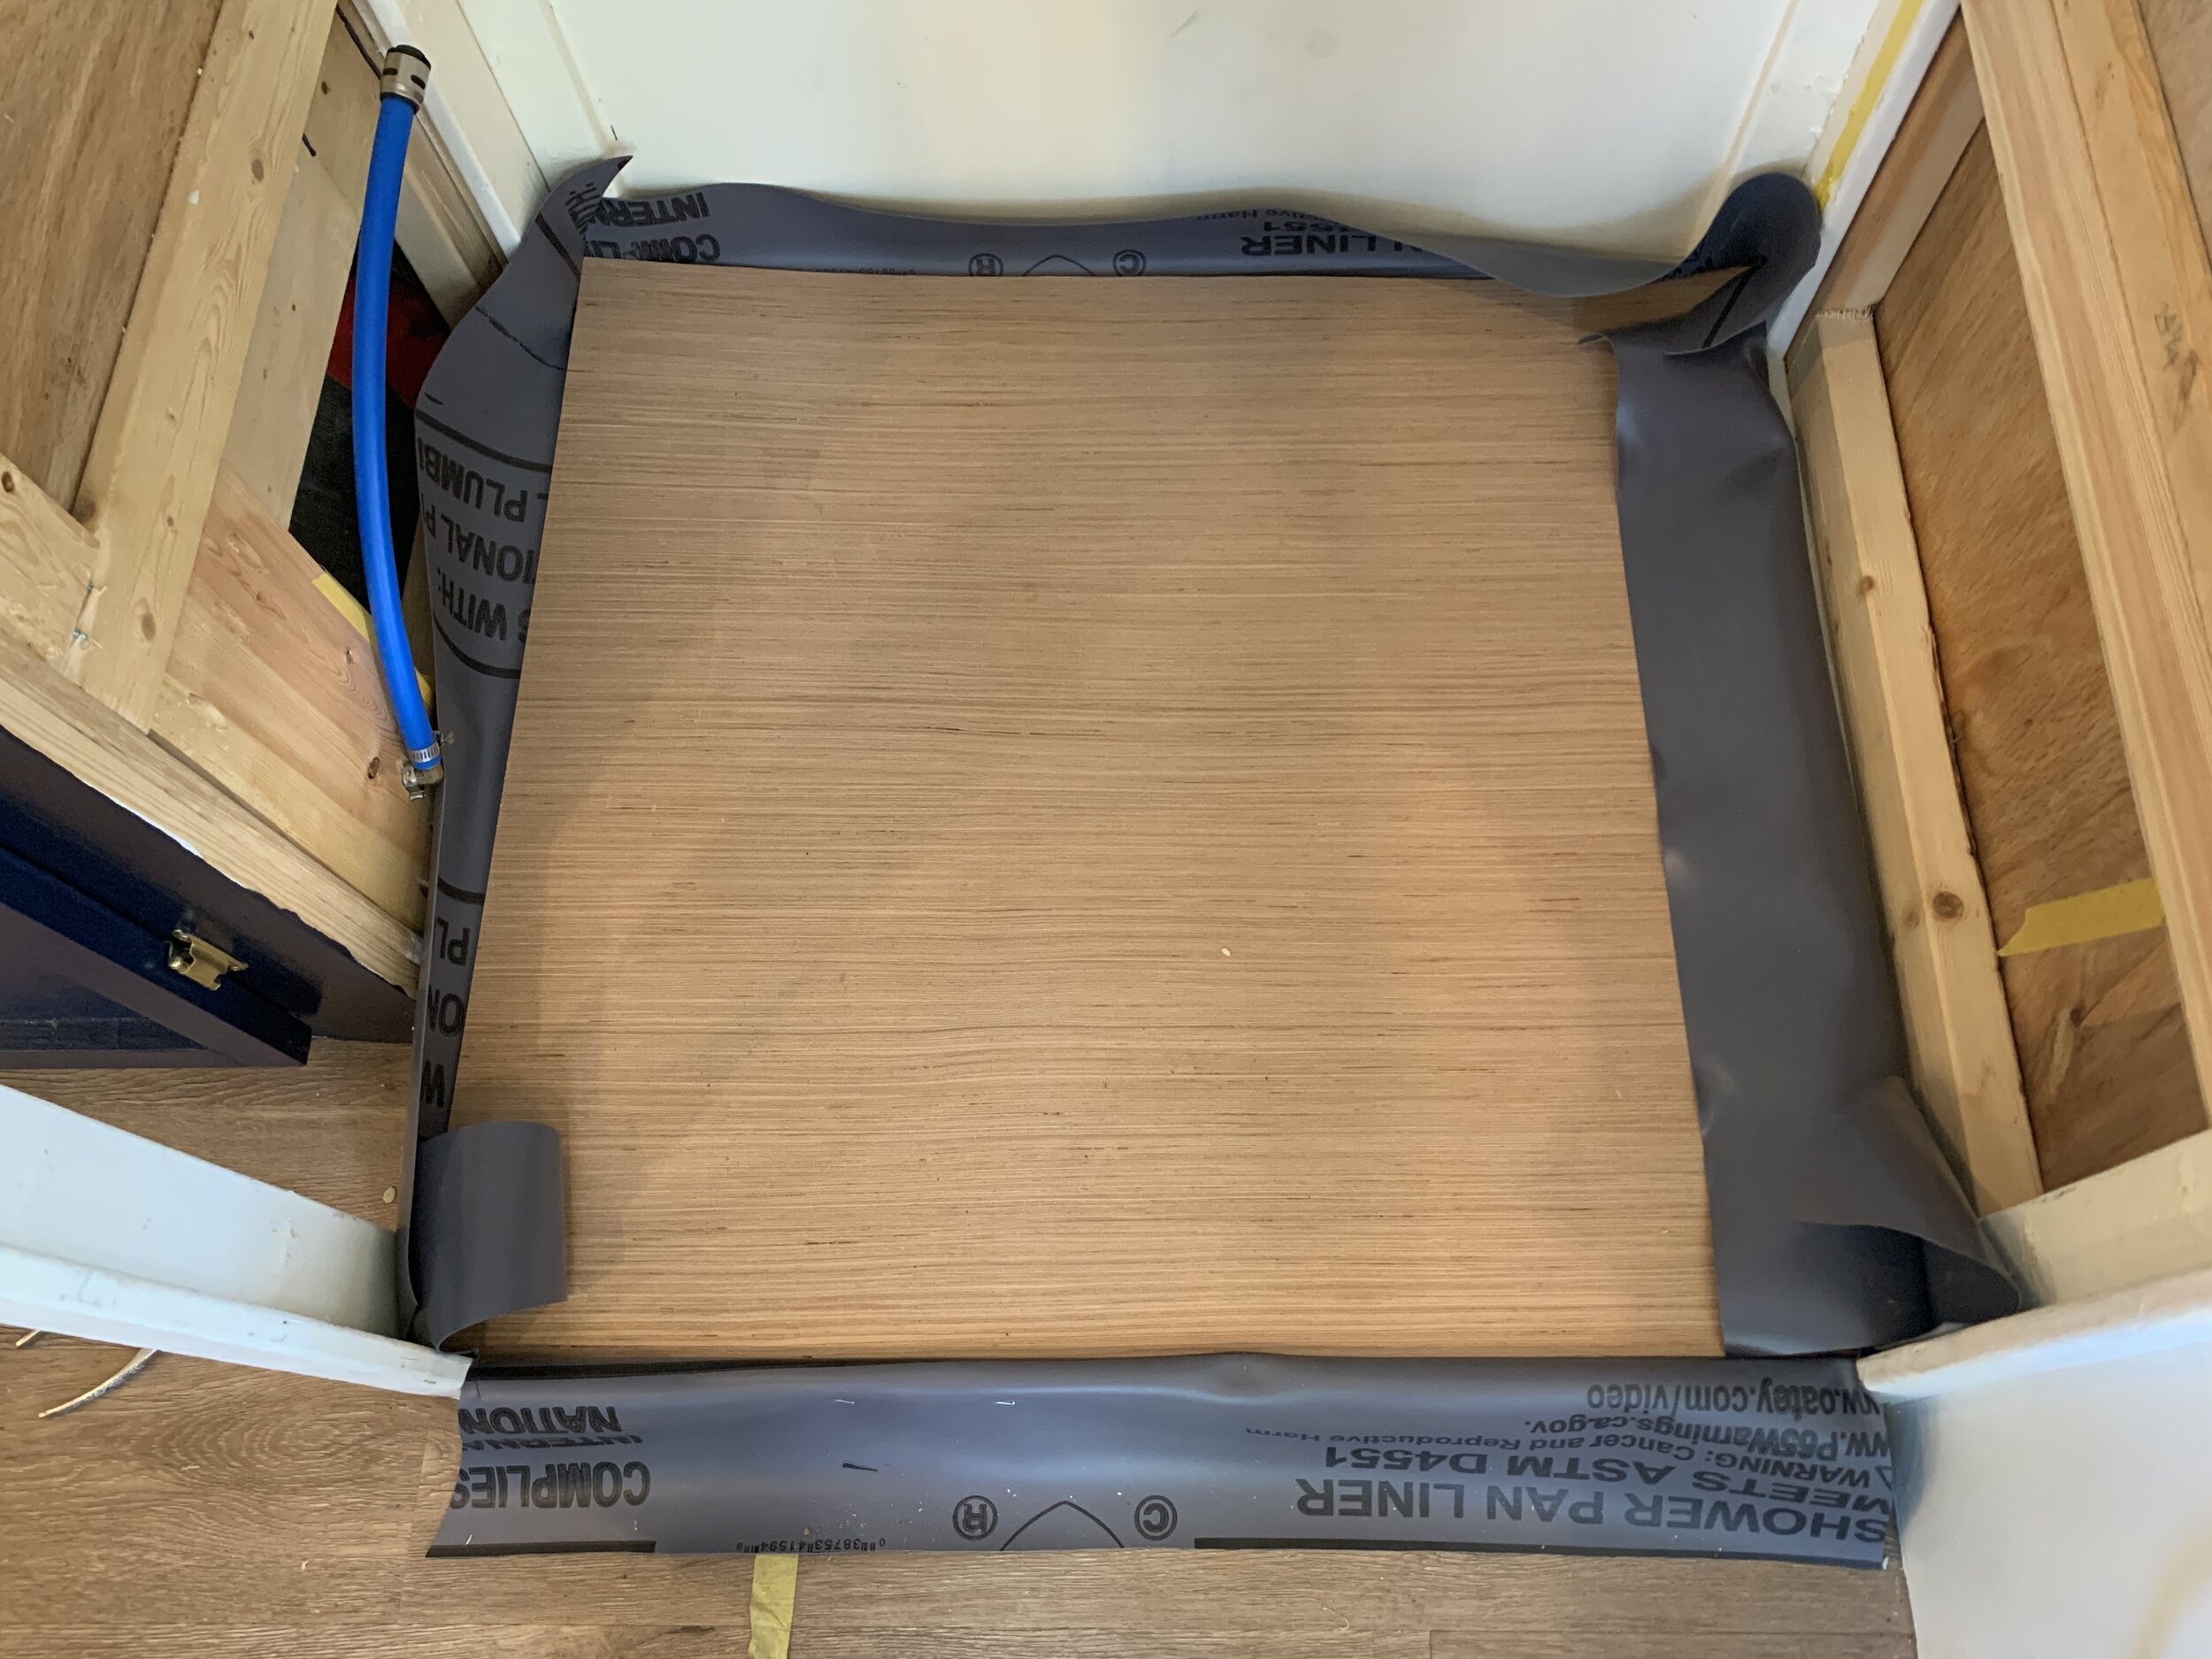
Step 14: Install the pan liner
We trimmed out the Oatey pan liner/membrane to be the size of our shower floor, plus an extra 4” or so added to each side for good measure. Oatey says 2” on each side, but that seemed awfully close for us so we added some extra. You can always trim it down more once it’s in place so we think it’s best to err on the side of bigger here.
Our wet bath floor is 33 x 29”. We cut our pan liner to be 41 x 40” so we had 4” on each side, and then extra on the door side so it could wrap out and over the curb.
After we dry fit our now-cut liner, we used a ring of Lexel/silicone on top of the bottom drain piece’s perimeter and, working in sections, added construction adhesive on top of our shim + plywood base. As we flopped the pan liner back on top of the adhesive, we smoothed out our wrinkles and air pockets, working from the shower drain out.
With the pan liner/membrane in place and smoothed out, we used our box knife to cut small Xs into the pan liner on the top of each of the clamping ring bolts to expose the heads.

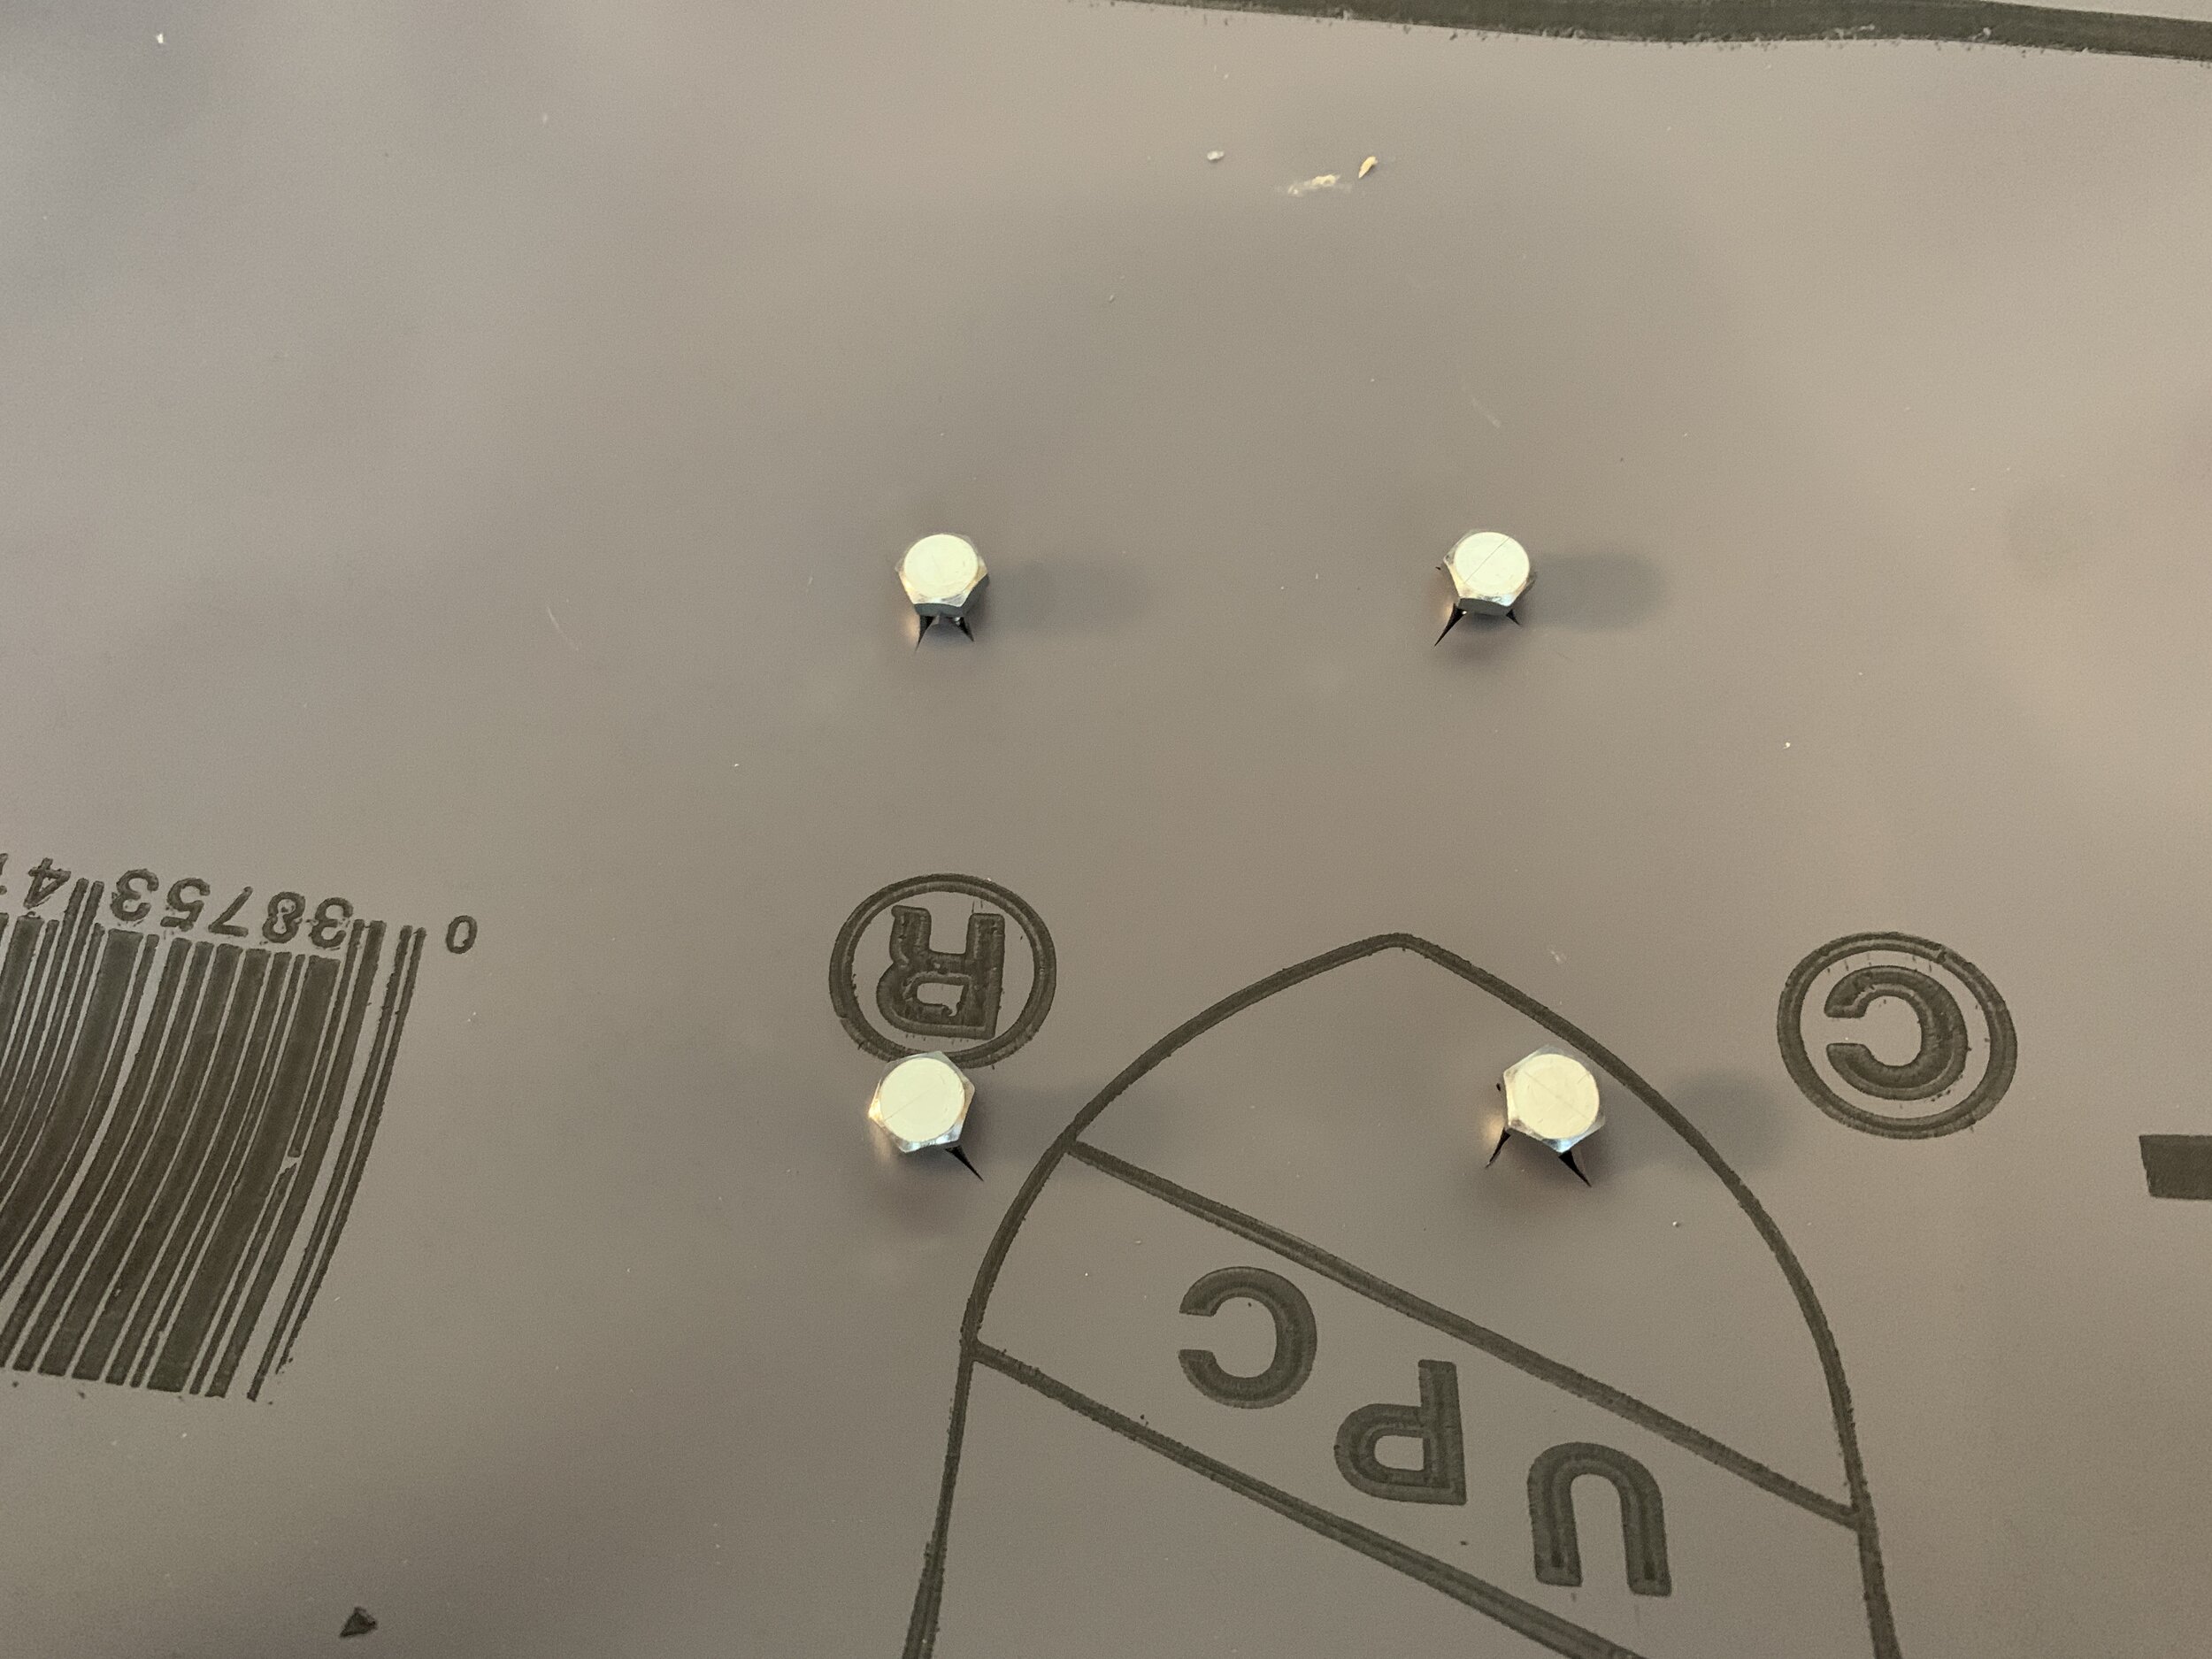
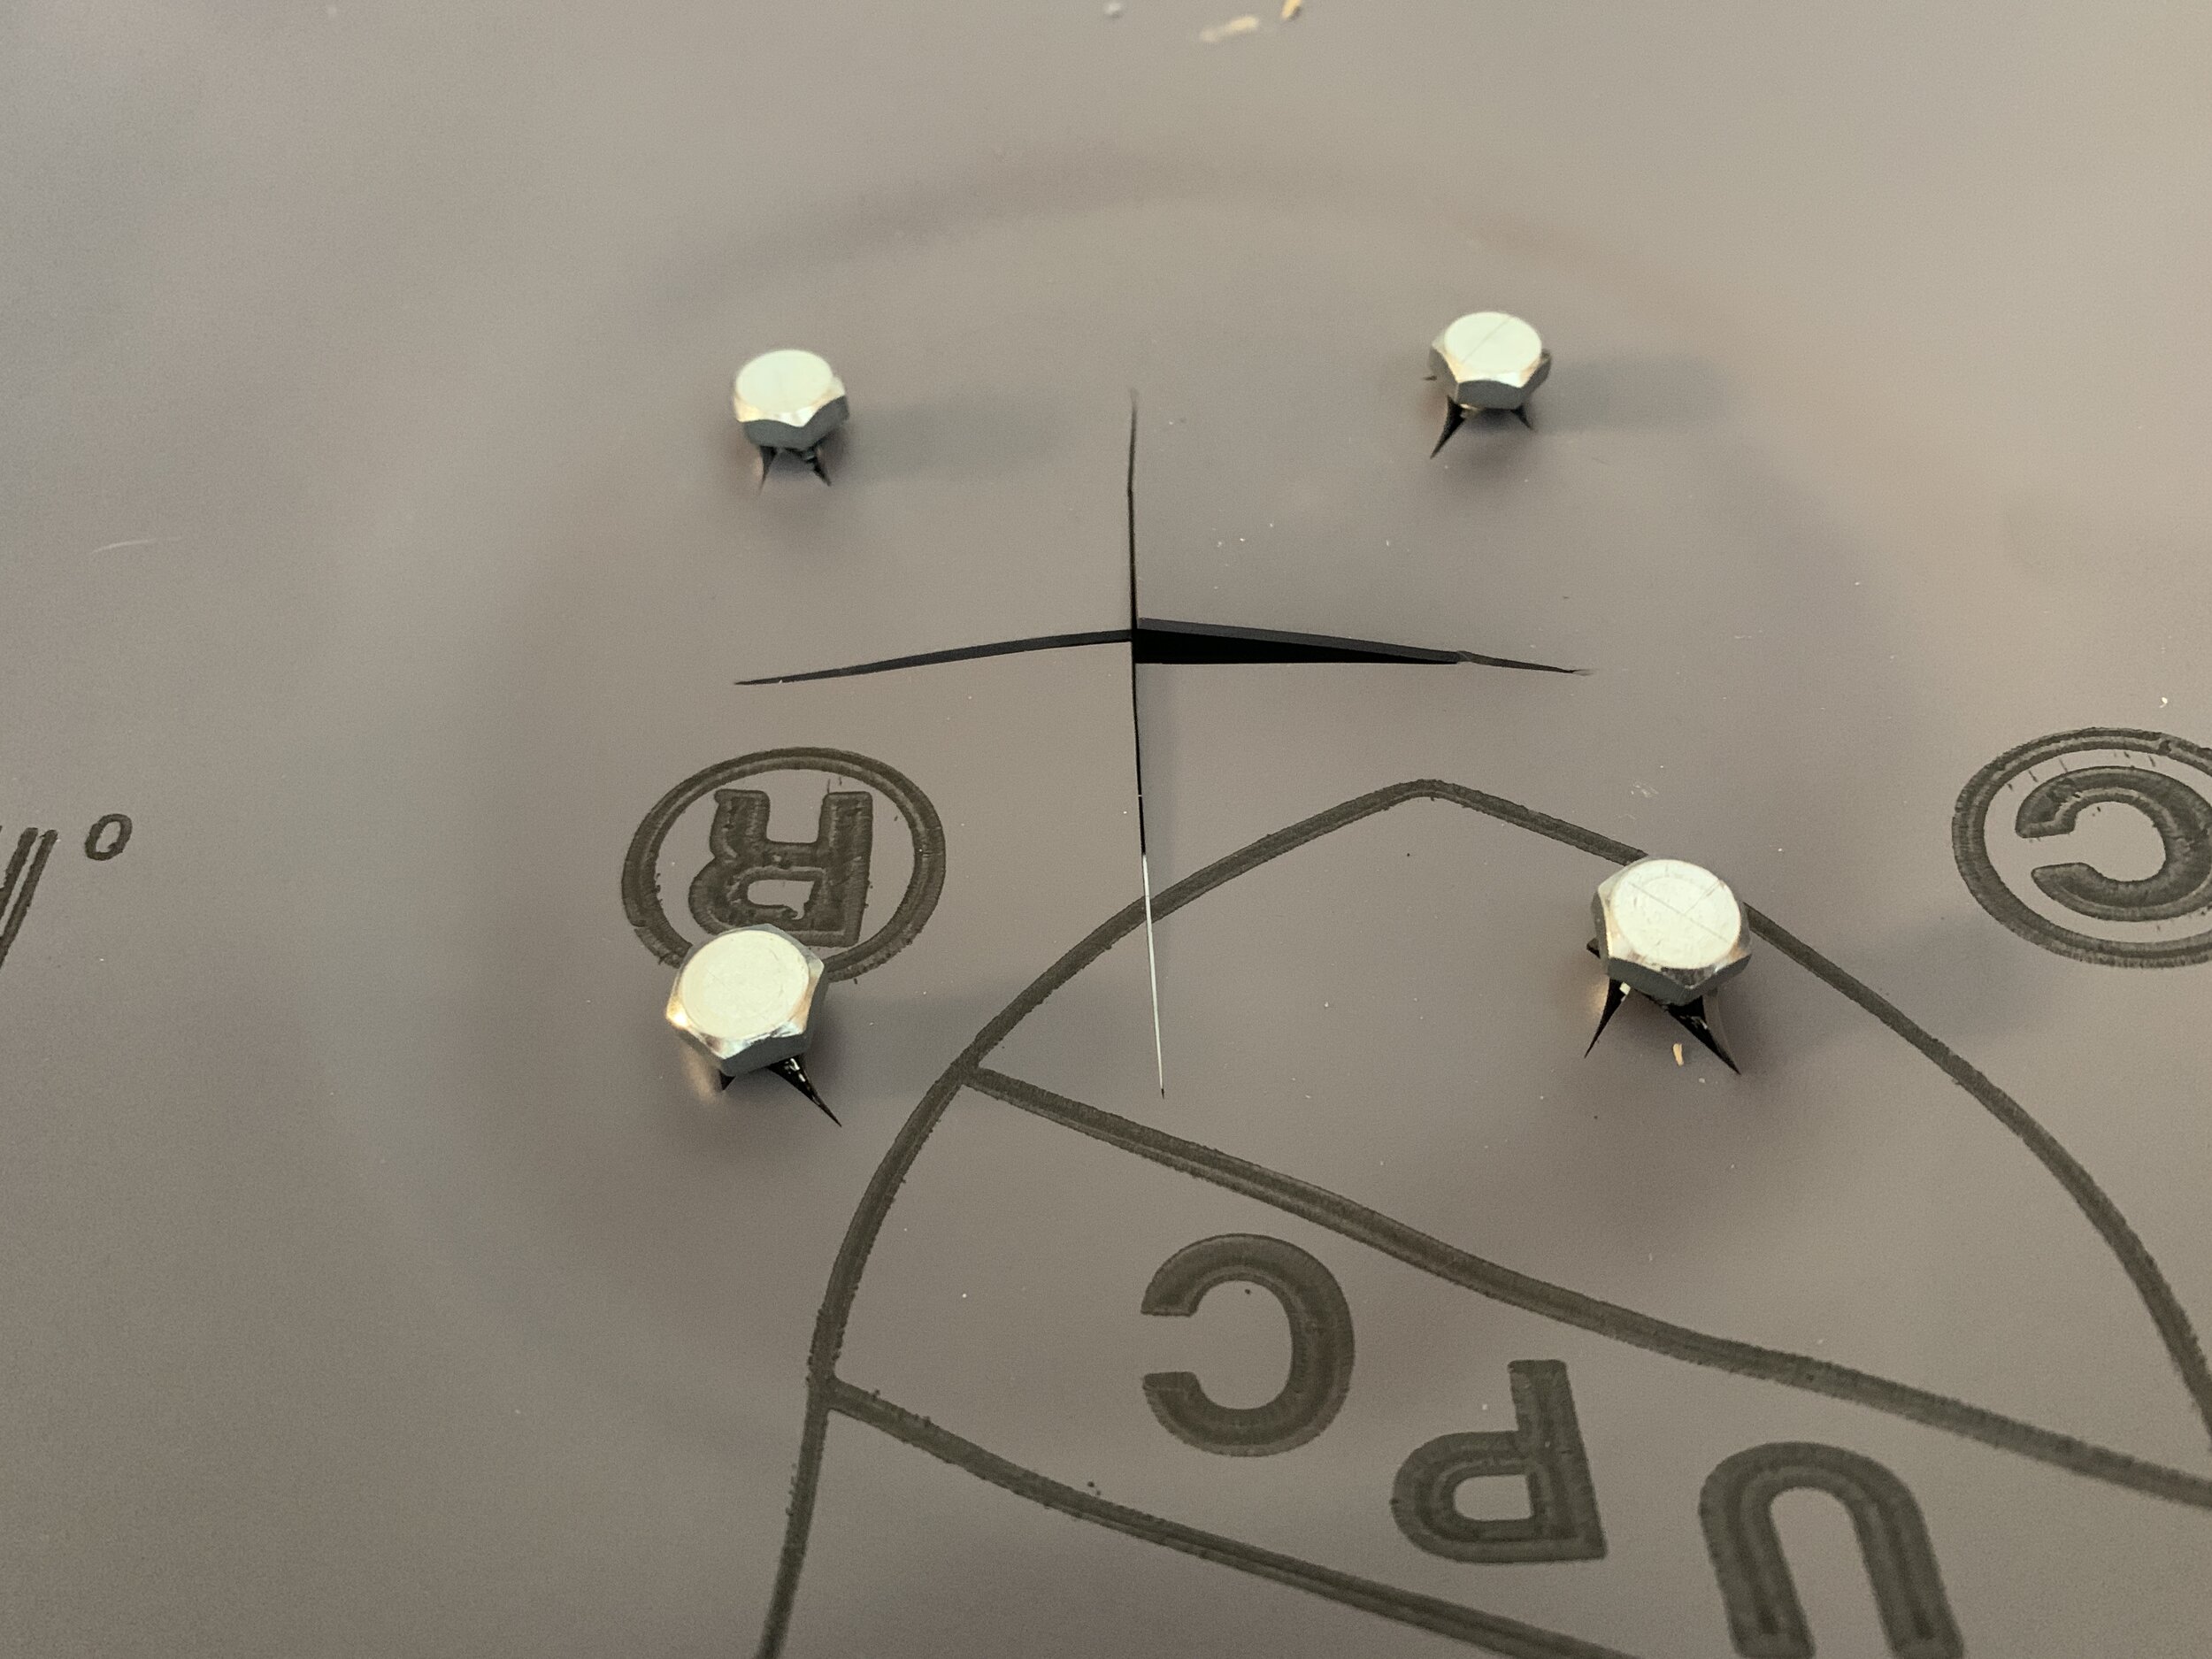
With the head of each bolt exposed, we pushed down on the pan liner where it meets the drain to make sure it made good contact with the siliconed lower drain piece. Then we used a box knife to cut an X in the pan liner on the inside of the drain, then cut around the inside of the drain perimeter and removed the pieces of pan liner from the inside of the shower drain. (Actually we didn’t actually cut out and remove the pieces until later, but just save yourself the trouble later and just completely cut out the liner from inside the drain now.)
We smoothed out the pan liner again – working our way toward the curb/door-side – to make sure the whole thing was making good contact with the shower floor before we added a healthy bead of construction adhesive along the top of the curb and used our staple gun to secure the pan liner to the outside of the shower curb. It’s important to make sure you staple well on the outside of the shower/wet area so you do not puncture the liner where it will be exposed to water.

We let this dry overnight.
Step 15: Cut the 1/4” plywood
Using our paper template (that we kept from part one of our shower floor install) we traced out our floor and marked out our shower drain, this time using the top shower drain piece to mark and drill our hole. This hole should be just barely larger than the top drain piece so that the drain piece fits right inside the plywood hole with as small a gap as possible around it. We dry fit our 1/4” plywood piece to make sure everything lined up like it should.

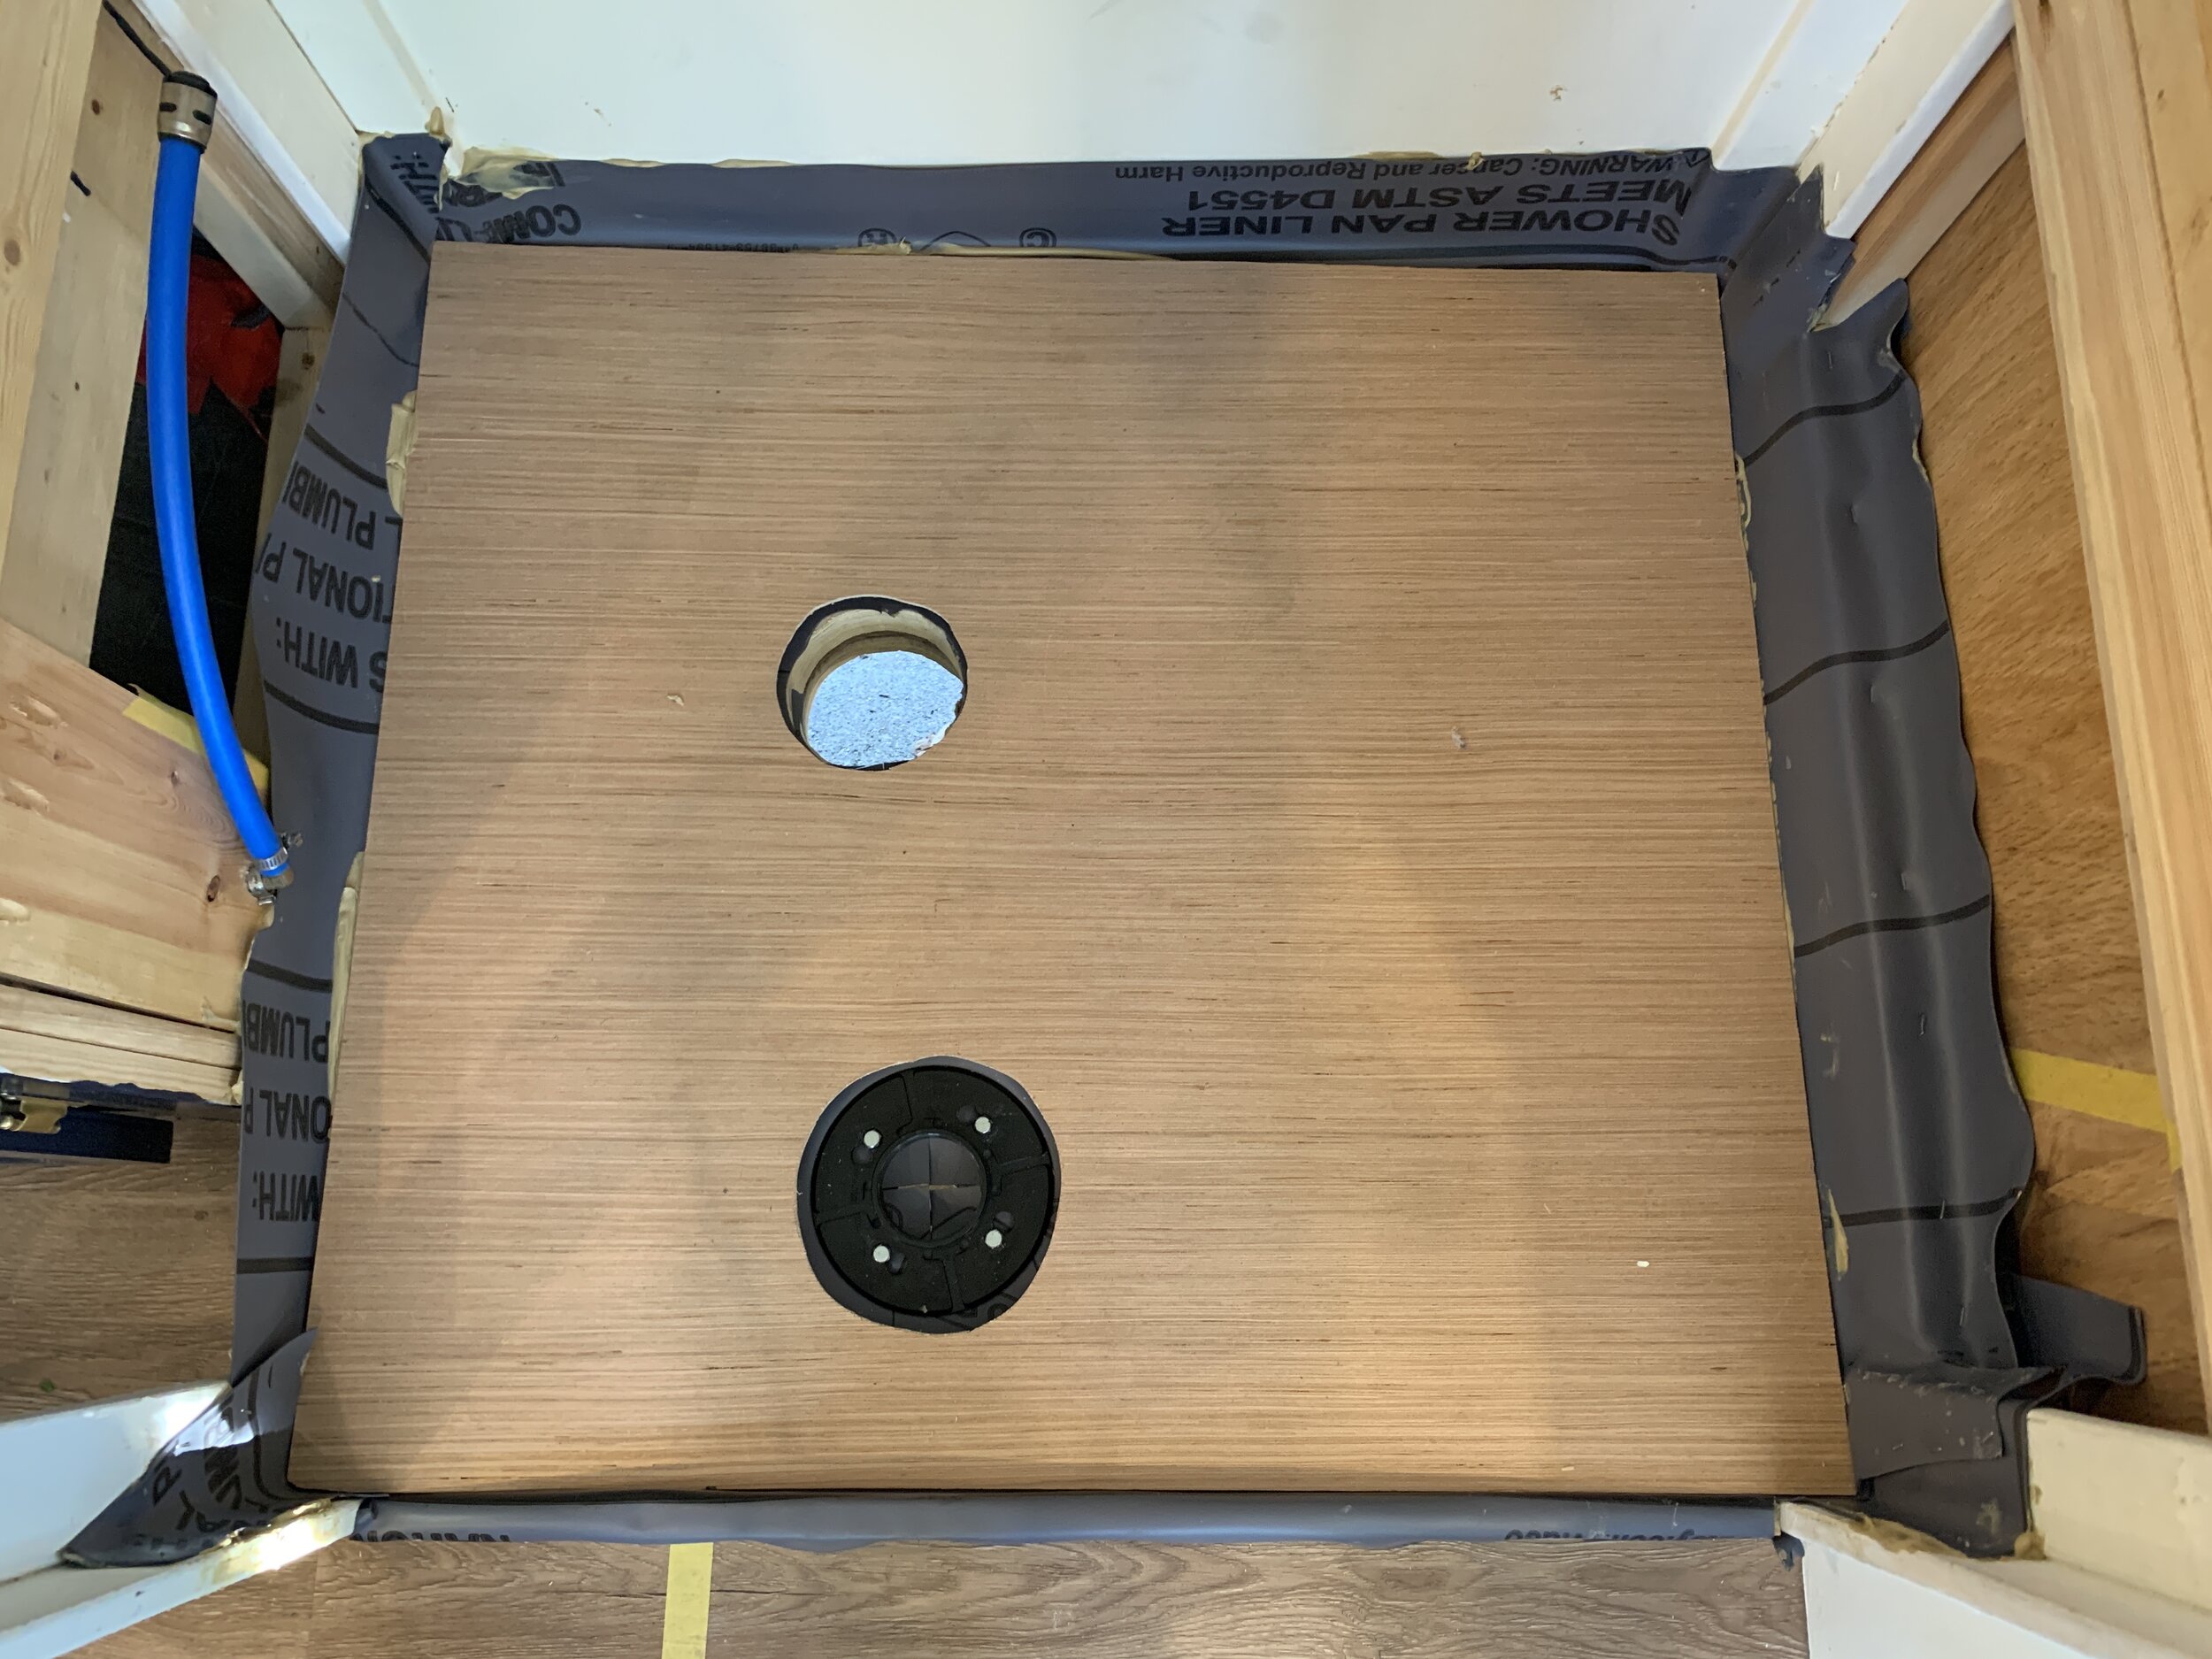
Step 16: Install the shower drain (piece 2)
With the four drain clamping ring bolt heads exposed and inside drain area cut out, we popped on and twisted the top drain piece, then tightened the bolts until the top drain ring piece was tight.

Step 17: Install the 1/4” plywood
With our pan liner cured and dried at least overnight, the two lower drain pieces installed and 1/4” plywood cut out, we used construction adhesive to glue the 1/4” plywood down on top of the pan liner and used all of the heaviest (and smallest) items we could find to weigh it down overnight. For us that included a set of 50-lb. weights, our fullest paint cans and a large construction bucket filled to the brim with water.
You may be wondering why we’re adding plywood after we just waterproofed. This layer provides a solid base you can tile on top of (comparable to the mortar bed in the video above), as well as helps distribute any subtle weird spots in your shim base. (But mostly the tile thing – you shouldn’t tile directly on top of the Oatey pan liner per their instructions.)

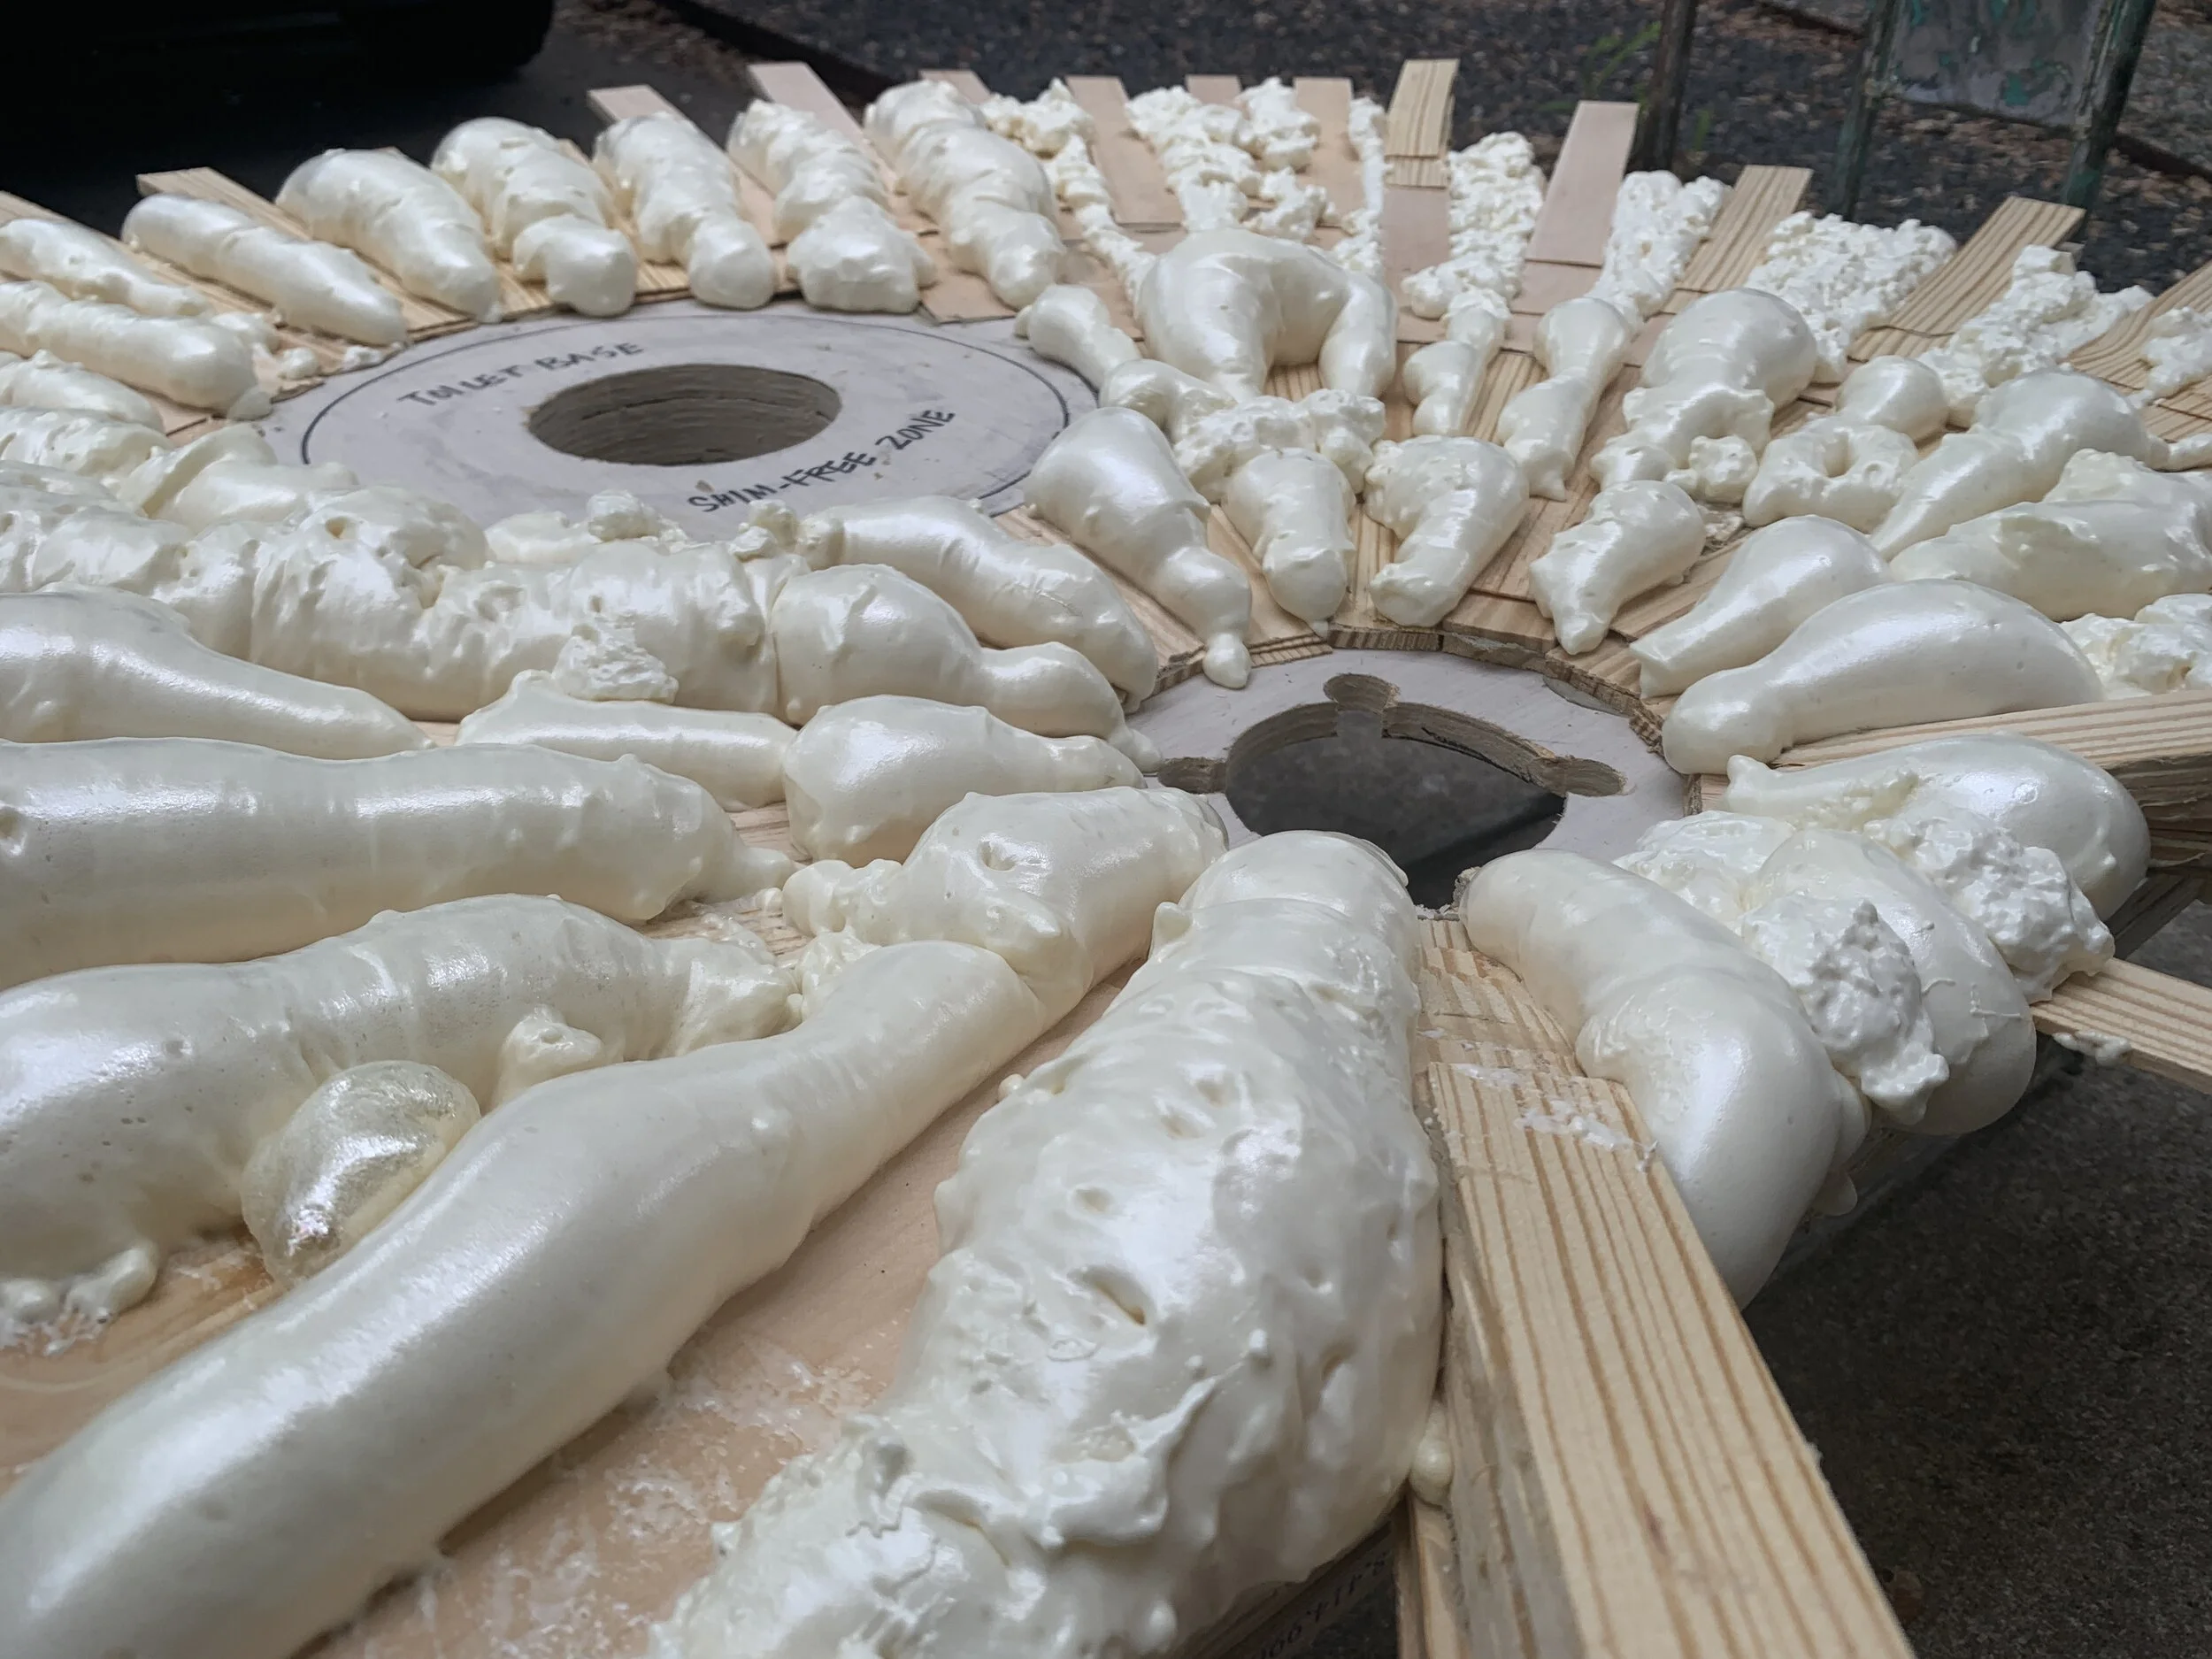
Detour step 18: Fix your mistake/learn from ours
Our cautionary tale:
This is where, if you only used two pieces of 1/2” plywood (like we recommended in part one), you’d probably have no problem with everything lining up perfectly at this point. For us, our more dramatic slope from using three pieces of 1/2” plywood meant the 1/4” plywood struggled to bend as much as we needed, so we had to lift our drain to make up for a gap around the hole in the 1/4” plywood.
THANKFULLY, that was a relatively easy fix since the top (second) piece of the drain can be installed either way depending on the situation. So, we un-tightened our four bolts and flipped the top piece “upside down” (not really upside down since it’s 100% interchangeable) and re-tightened our four bolts like we did up in step 16 above.
You can kind of see in the photo above the gap underneath the plywood around the drain (and this was after we’d already flipped the drain piece so the threaded part was sticking up, instead of down into the floor).
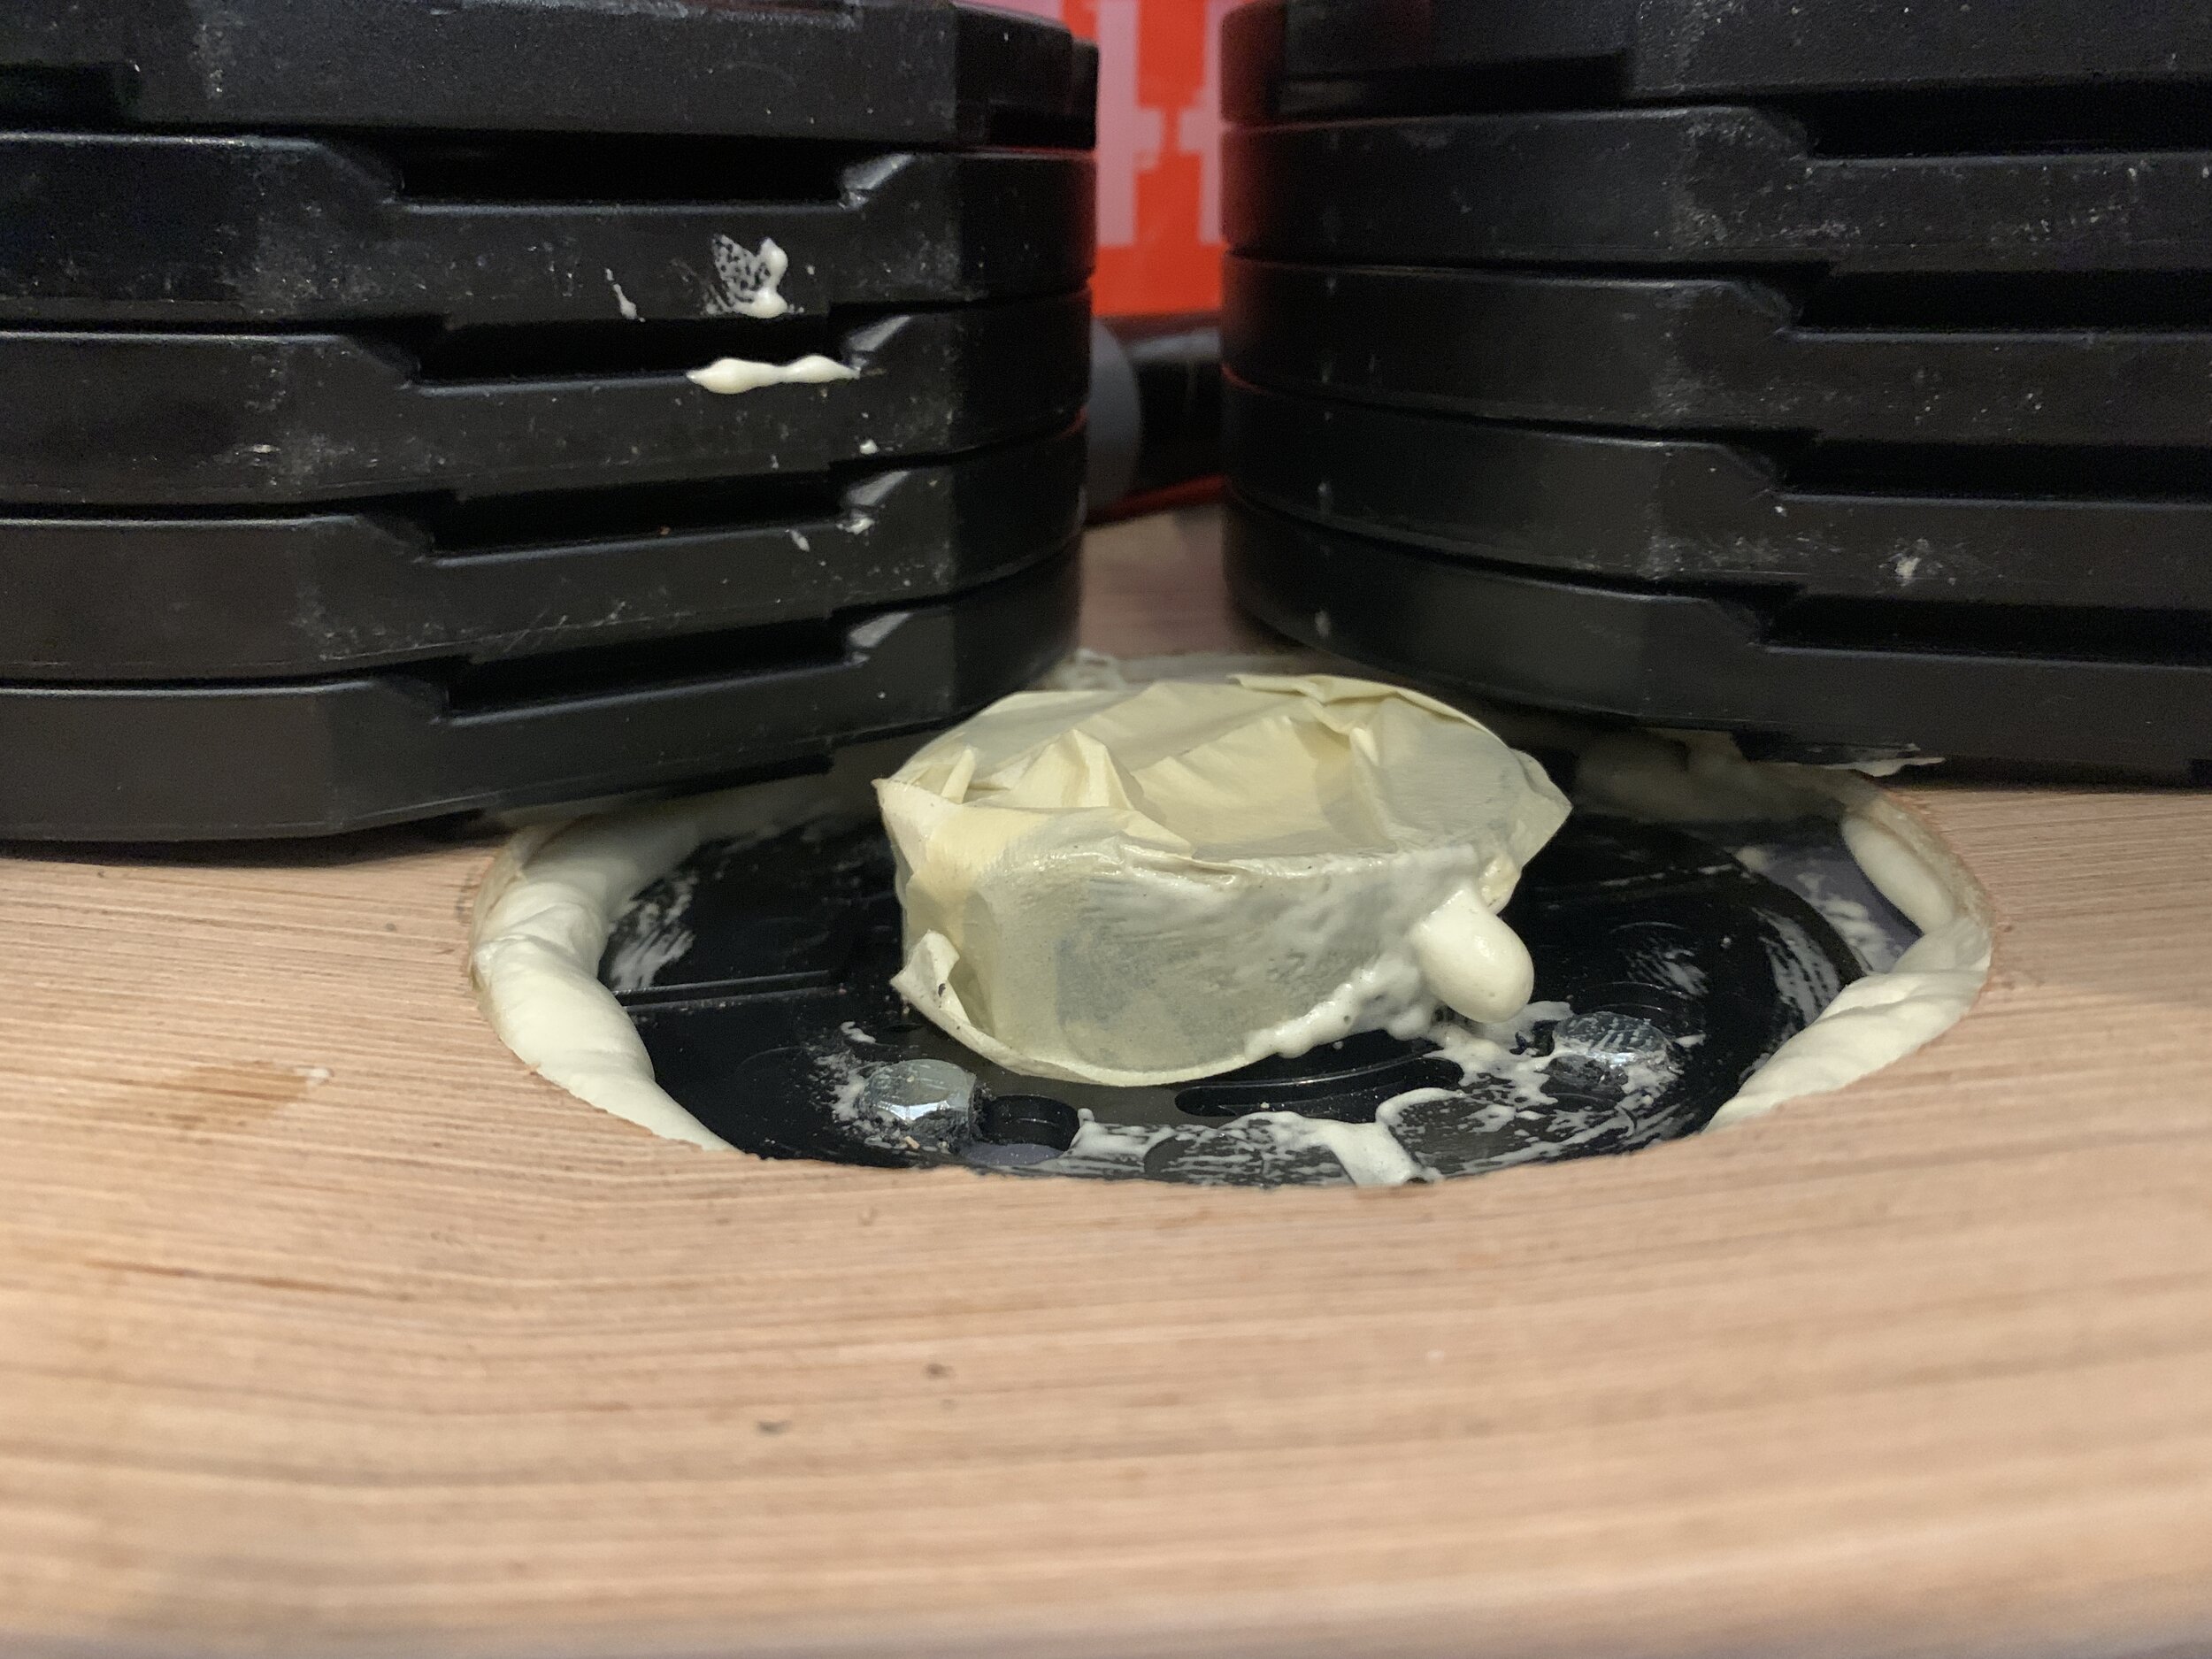
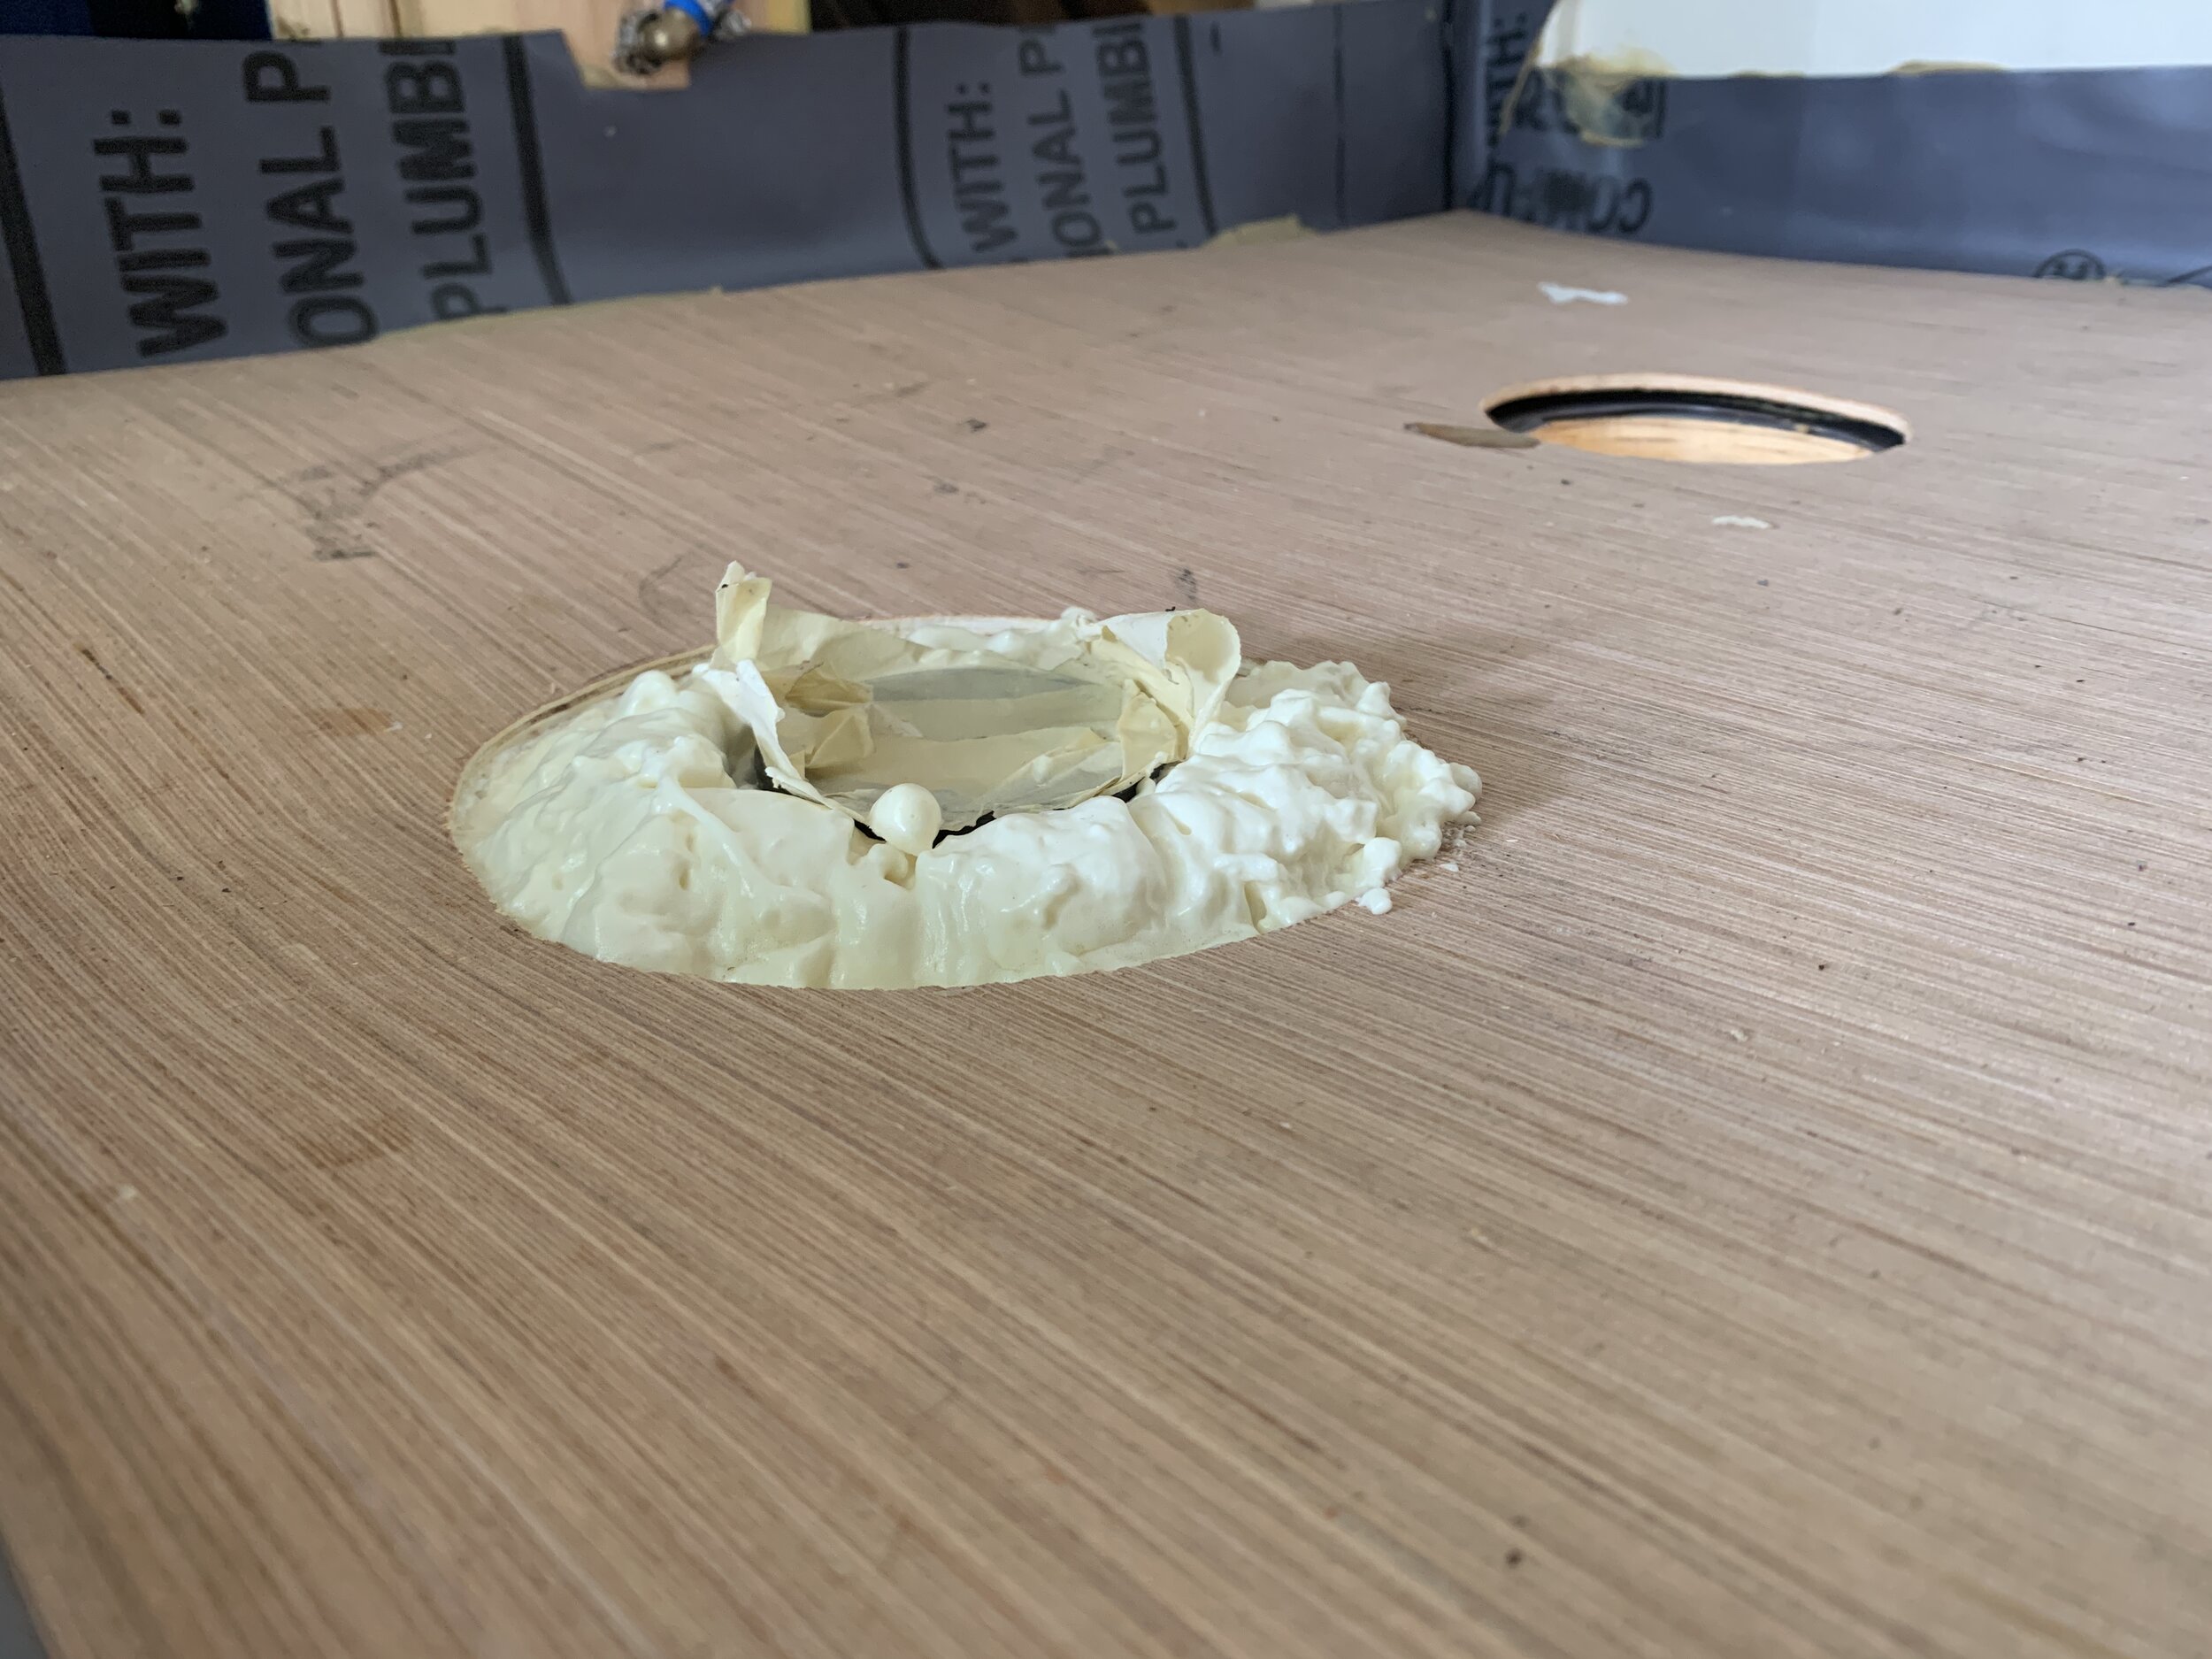

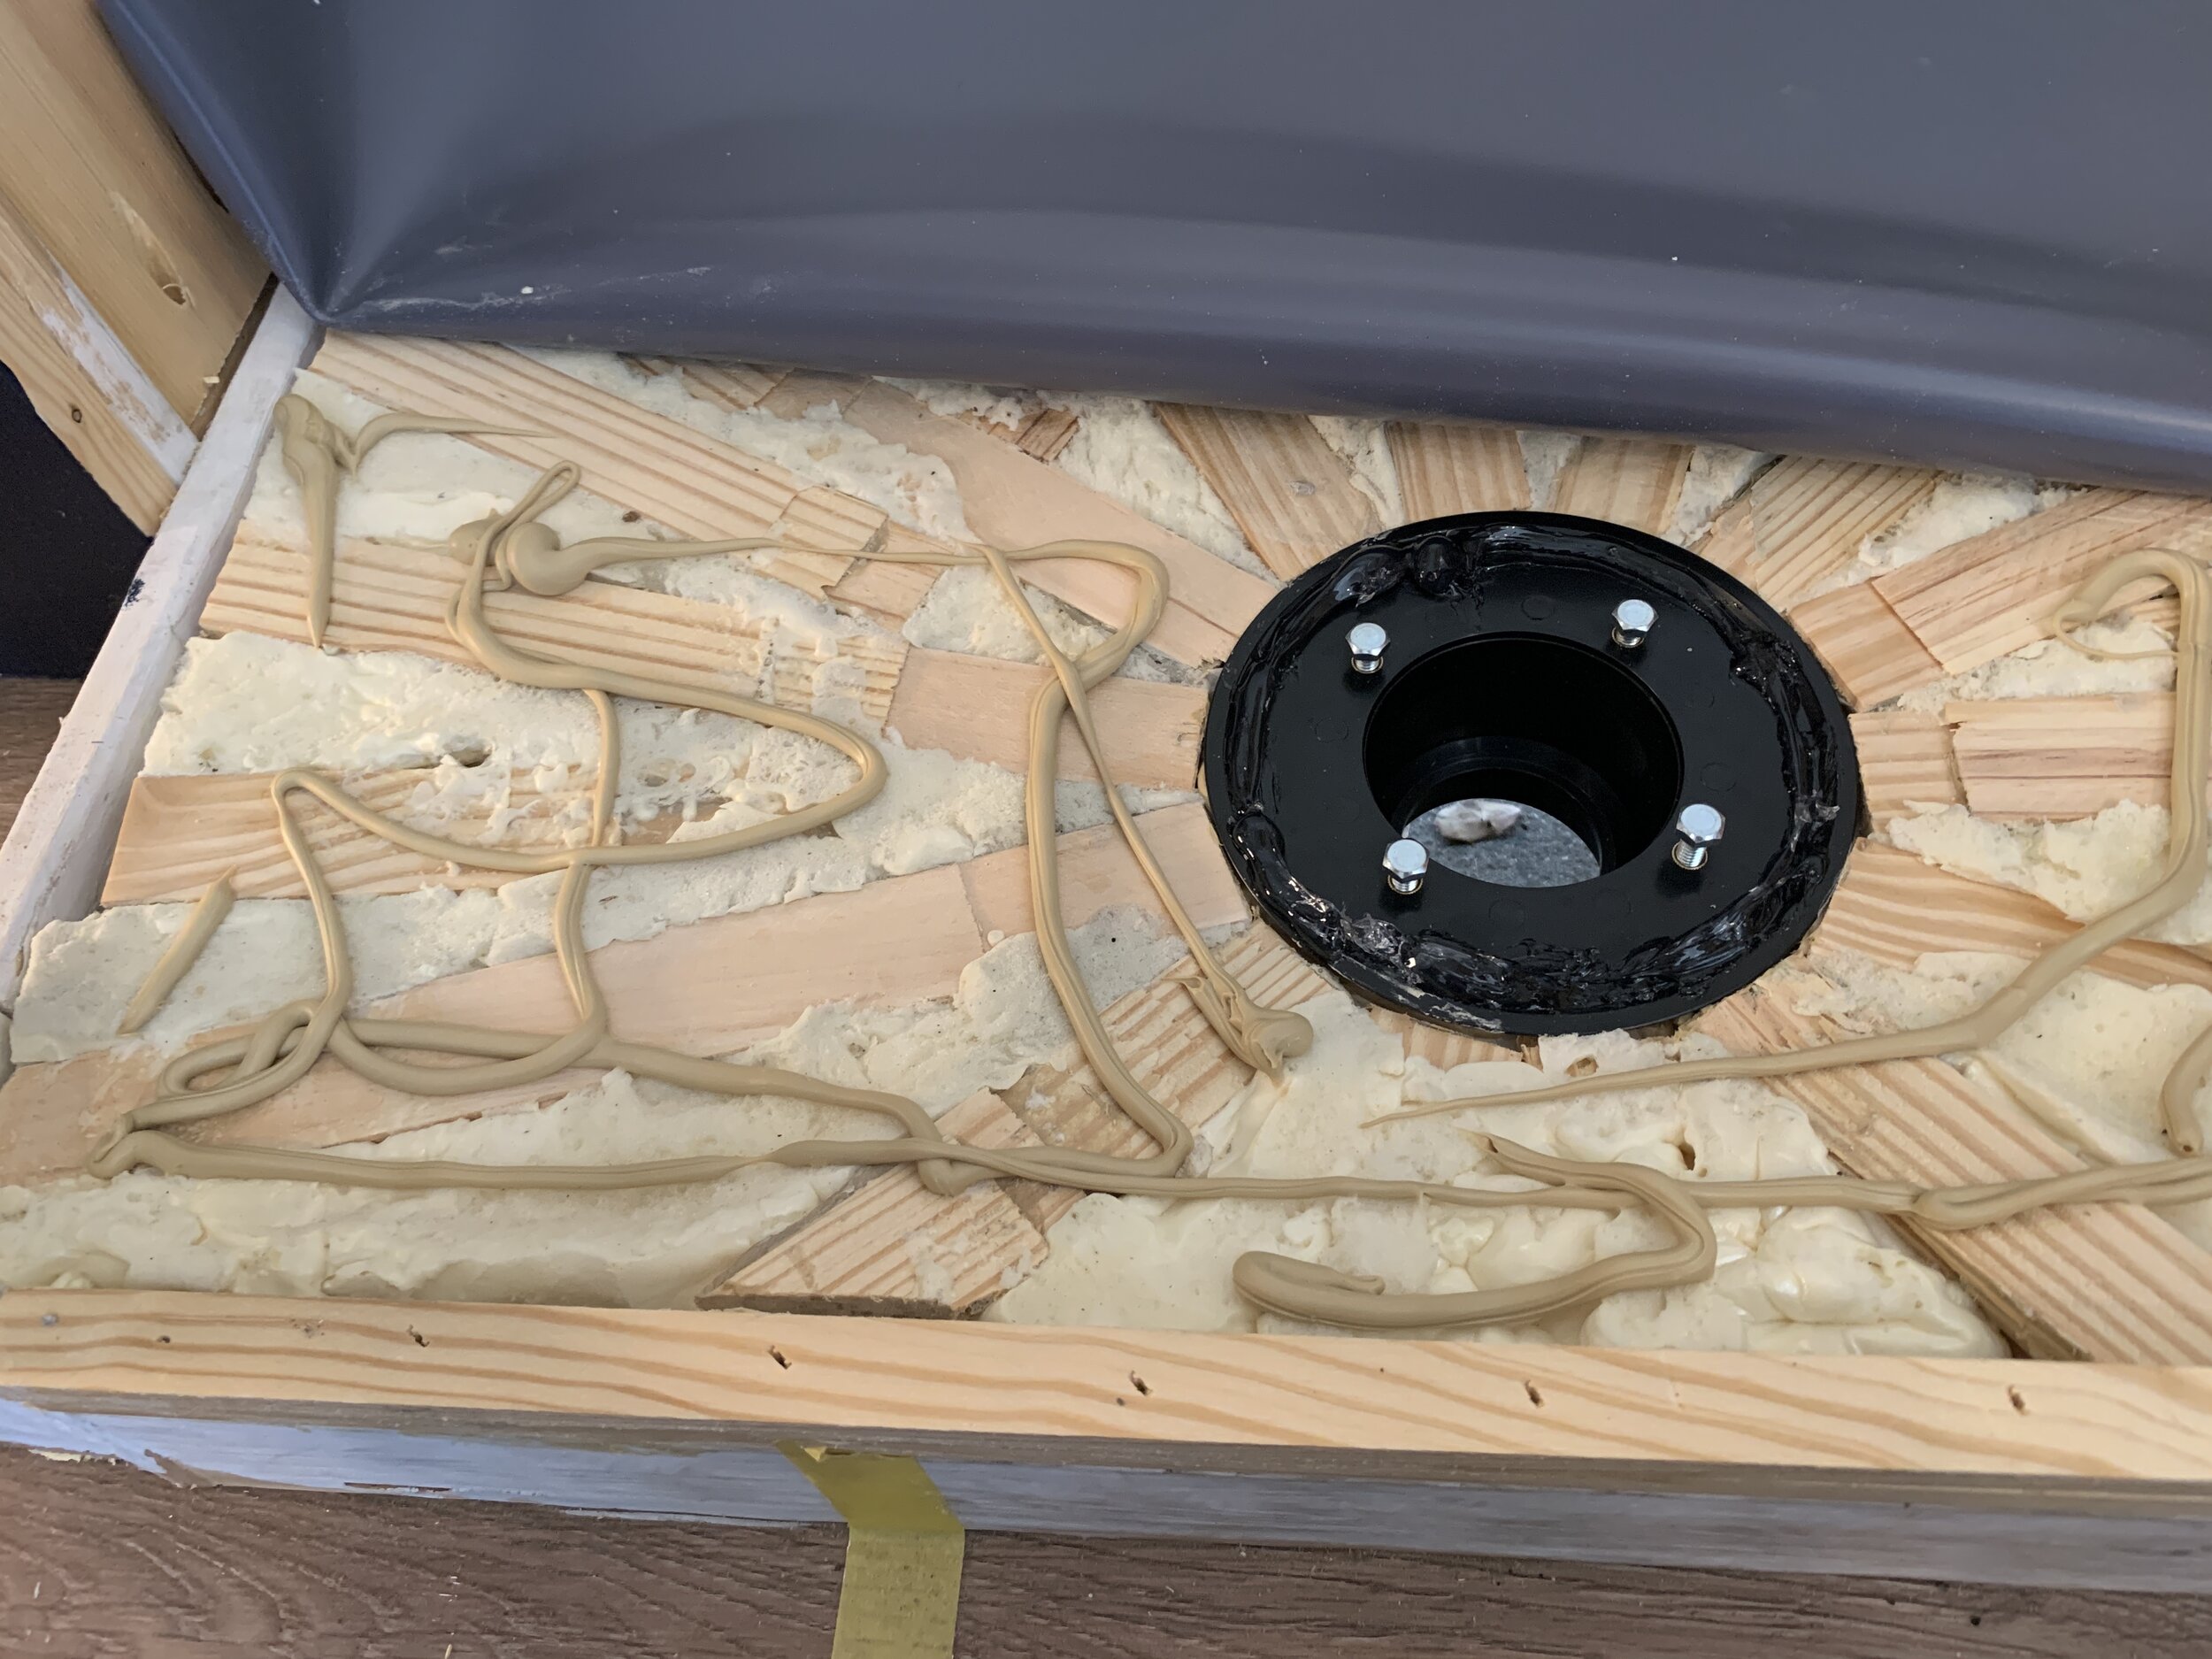
To fix the gap we weren’t planning on (and you shouldn’t have if you listen to us when we say don’t do three layers of 1/2” plywood), we used our spray foam gap filler and filled in the area under the plywood layer all around the drain. Before we sprayed the filler, we made sure to tape up the drain to protect the inside rings from getting accidentally filled.
We let it dry overnight and trimmed it down with a razor.
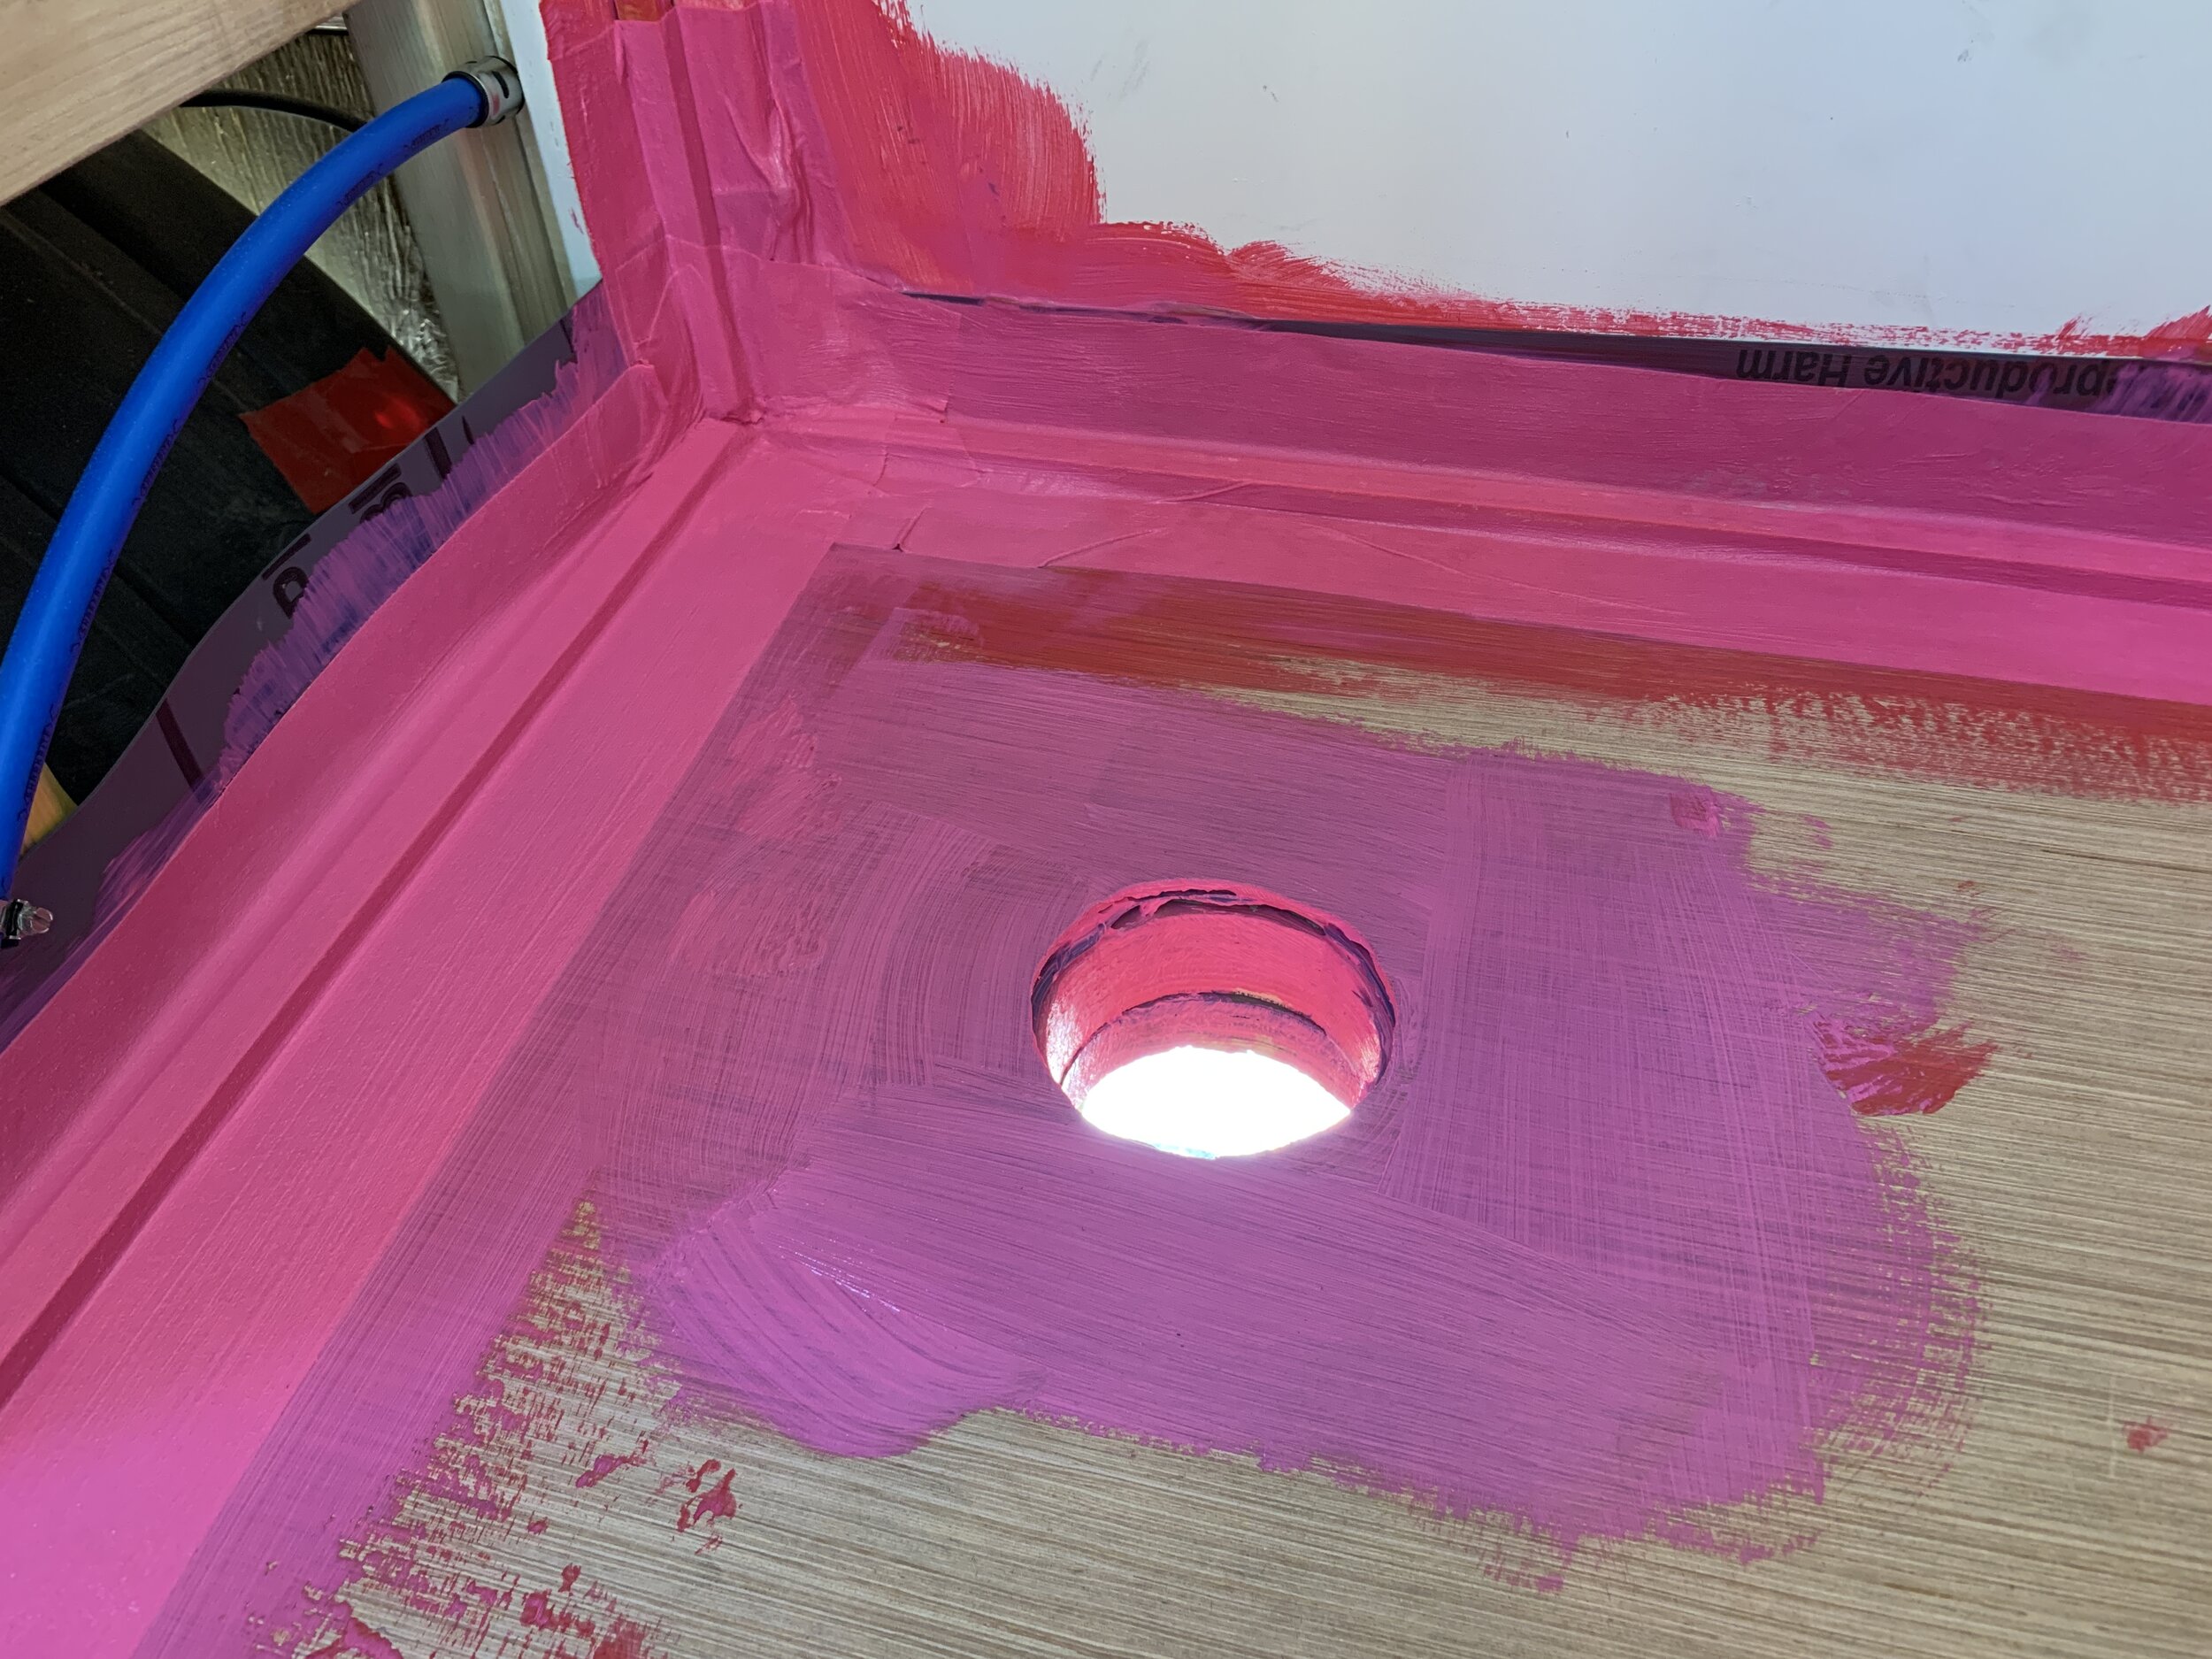
Step 18 (if you didn’t make our three-layer mistake): Apply waterproofing membrane liquid
Now you may be thinking, didn’t we already waterproof this thing? Yes, and no. We did – kind of – but we also just added another layer of plywood (not waterproof) on top of the membrane. Plus this stuff is pretty much THE standard in waterproofing your shower no matter if it’s in a camper or house, etc. We chose to go with RedGard (a super retina-burning red as the name suggests), probably the most well-known of the paintable waterproofing membranes out there, but there are others that would work here as well like Durock (a gorgeous light blue color), or Mapei Aquadefense, etc.


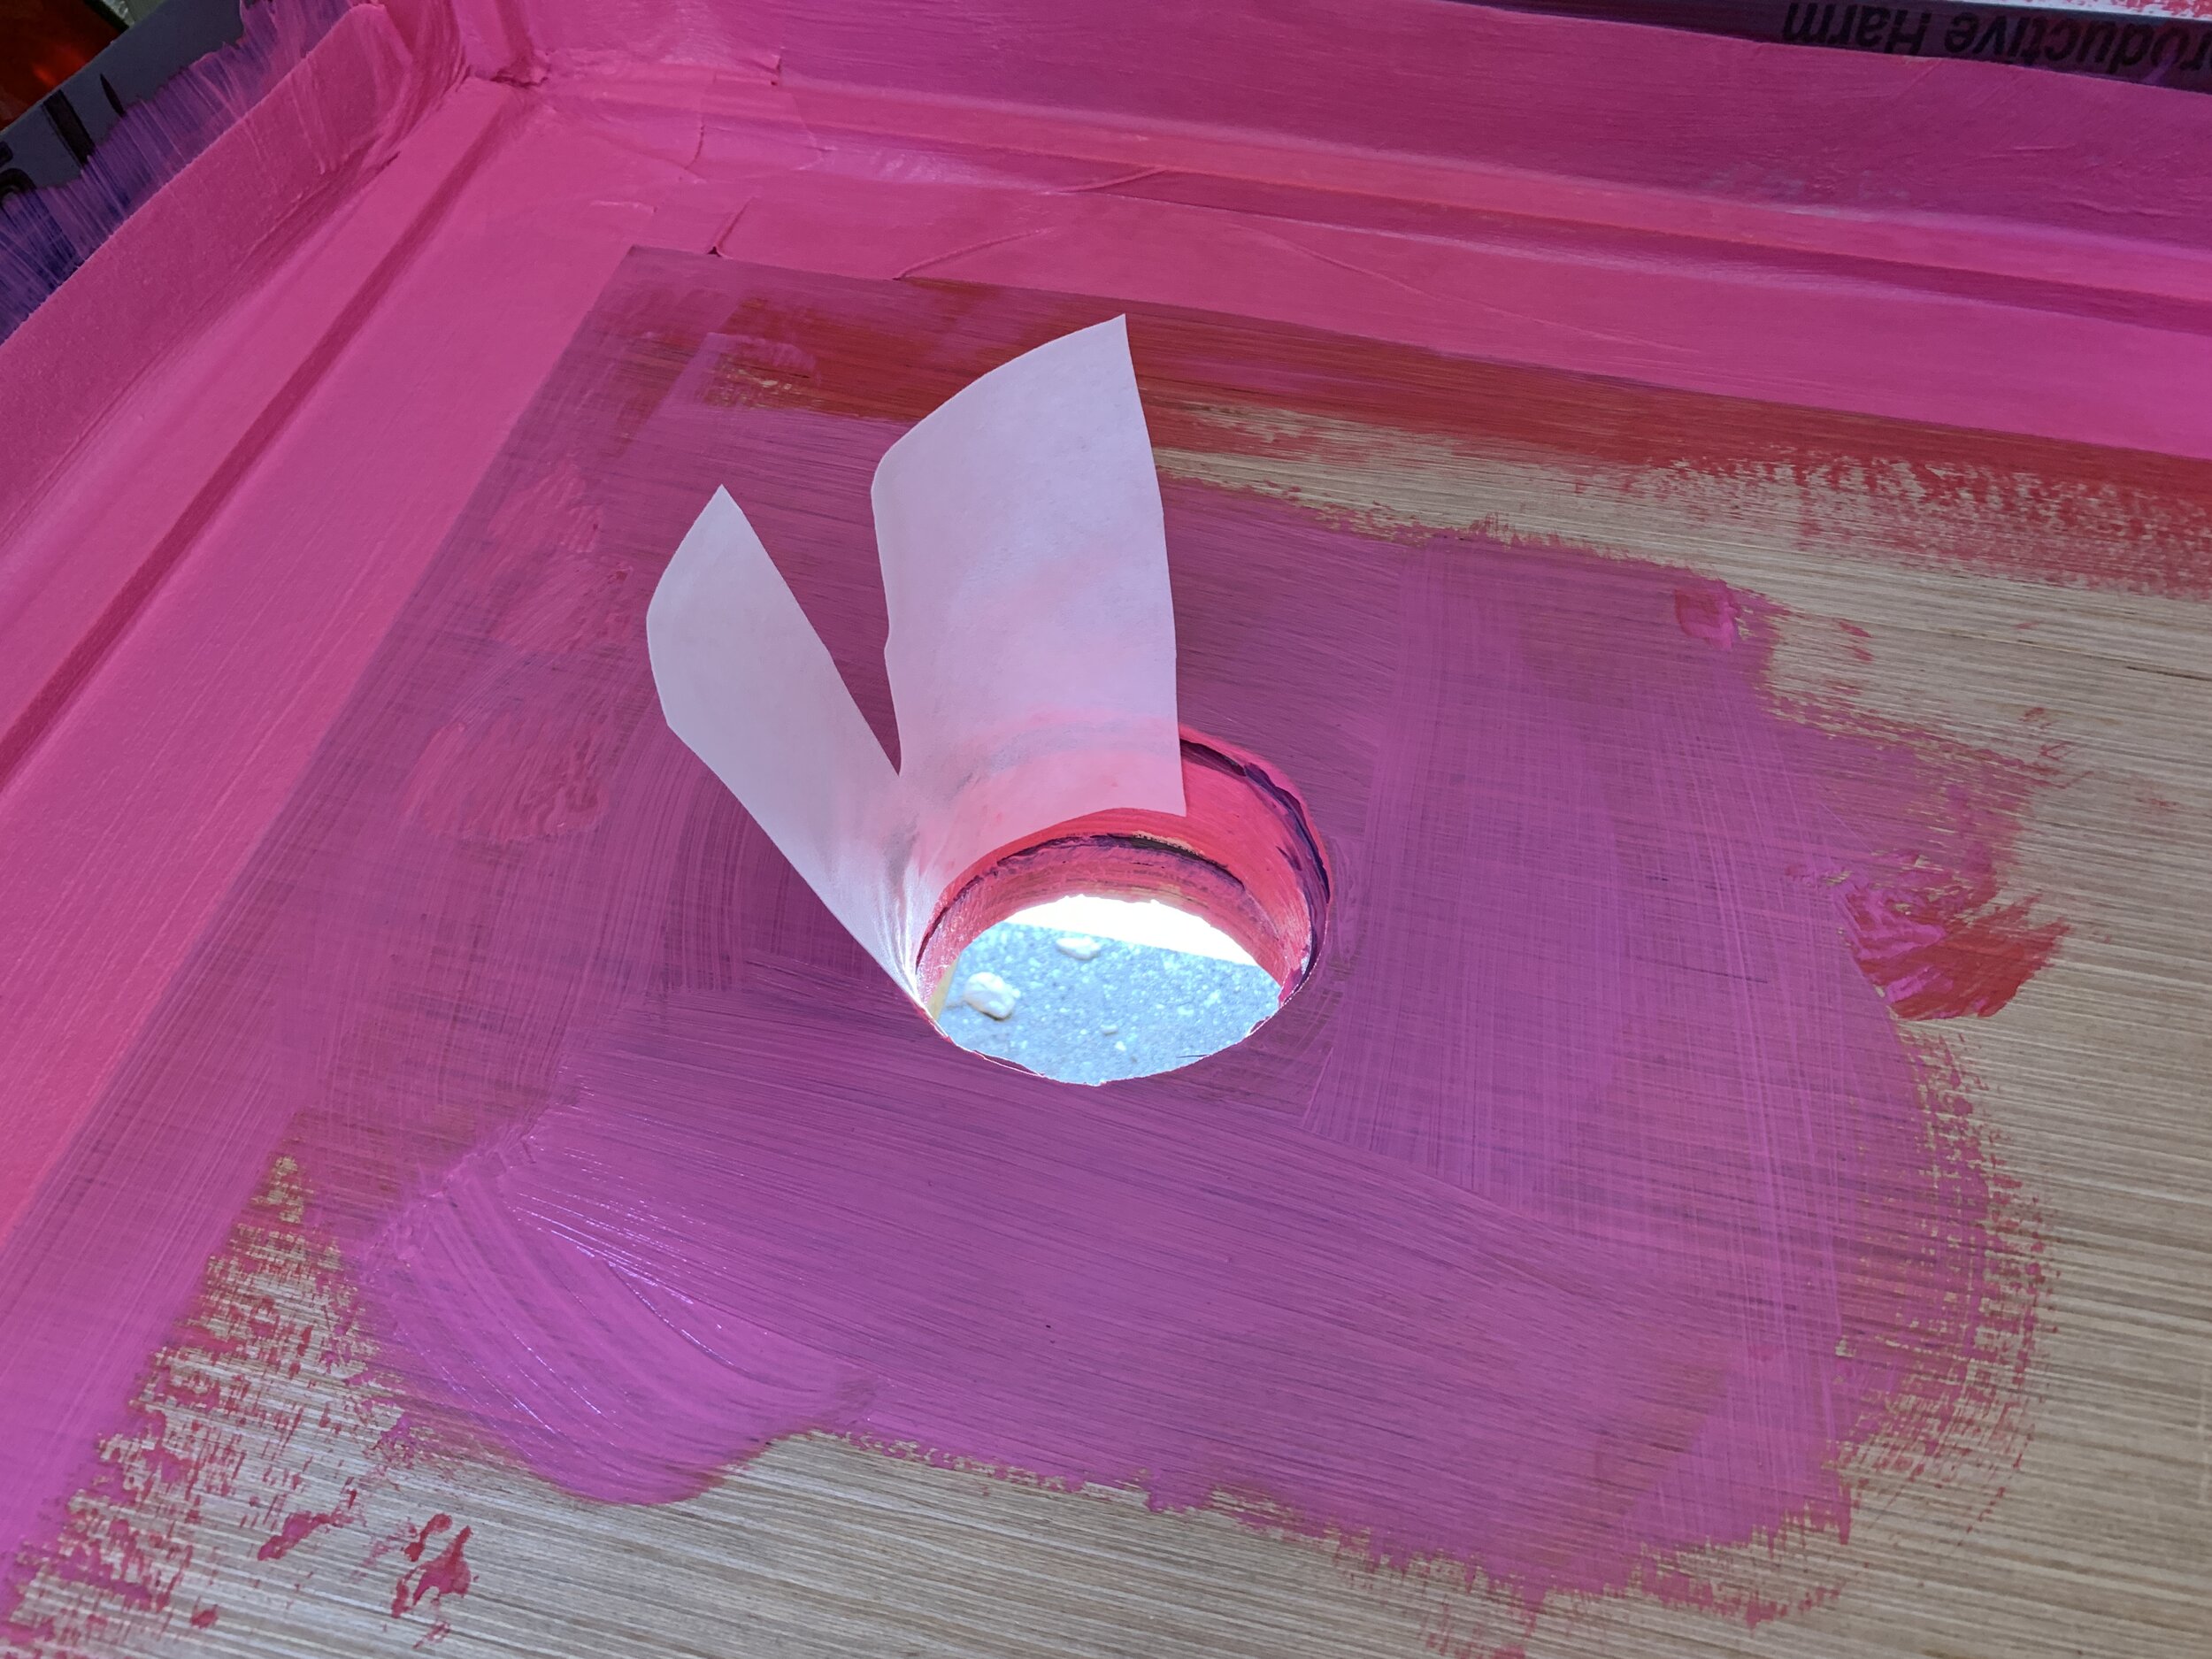
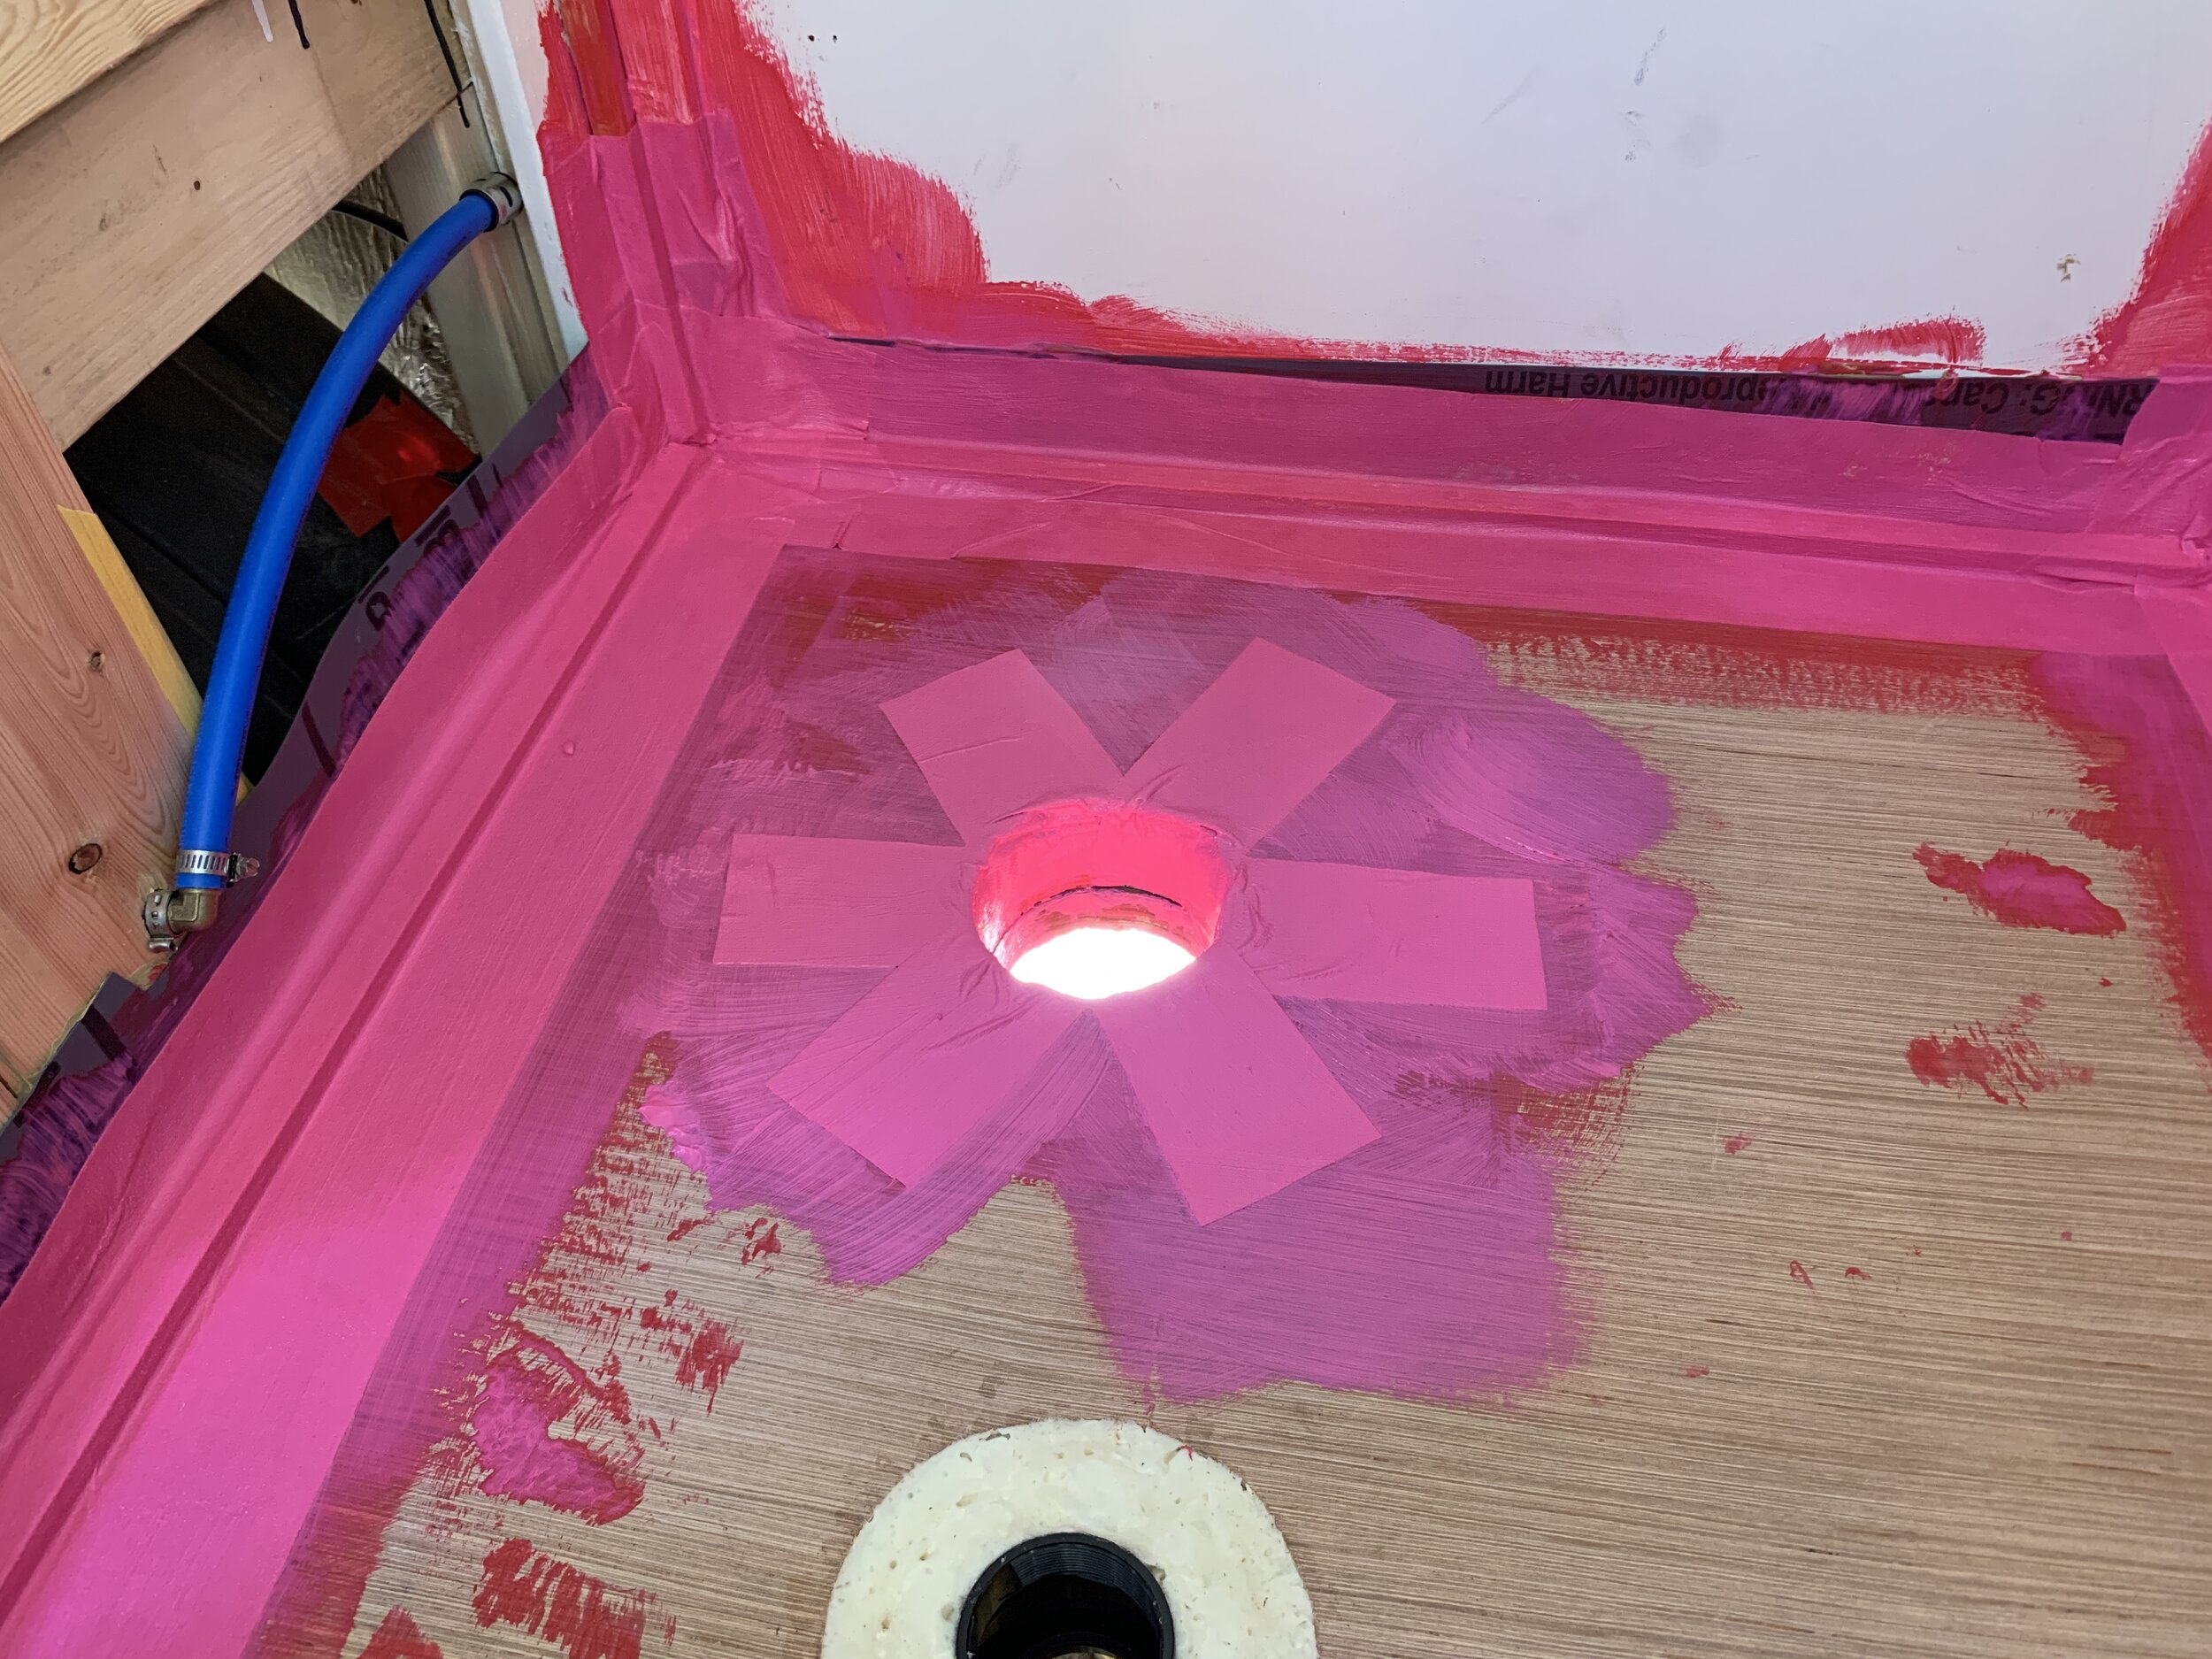
It is applied similarly to how you tape and float drywall – there is a special tape (that to be honest feels like thin felt) that is used on all of the corners, seams and cuts. For the areas that needed tape, we first applied some RedGard with a brush, then cut and applied our tape on top of the freshly painted RedGard, and then immediately painted more RedGard on top of the tape, like a soggy little RedGard + tape sandwich. When painting the top layer, we made sure to keep the tape as smooth and wrinkle-free as possible.
We followed the edges around where the floor meets the wall, then worked on the drains.


For the toilet drain, I overlapped the tape pieces on top of one another and installed it down into the drain to help protect the cut layers of subfloor, vinyl flooring and plywood shower base. (I checked while it was still wet to make sure our toilet drain coupling would still fit in the hole with the added bulk of the tape.)
I used the same overlapping technique around the shower drain, but did not put the tape/waterproofing down into the drain, just arranged it around the plastic drain as close as I could.

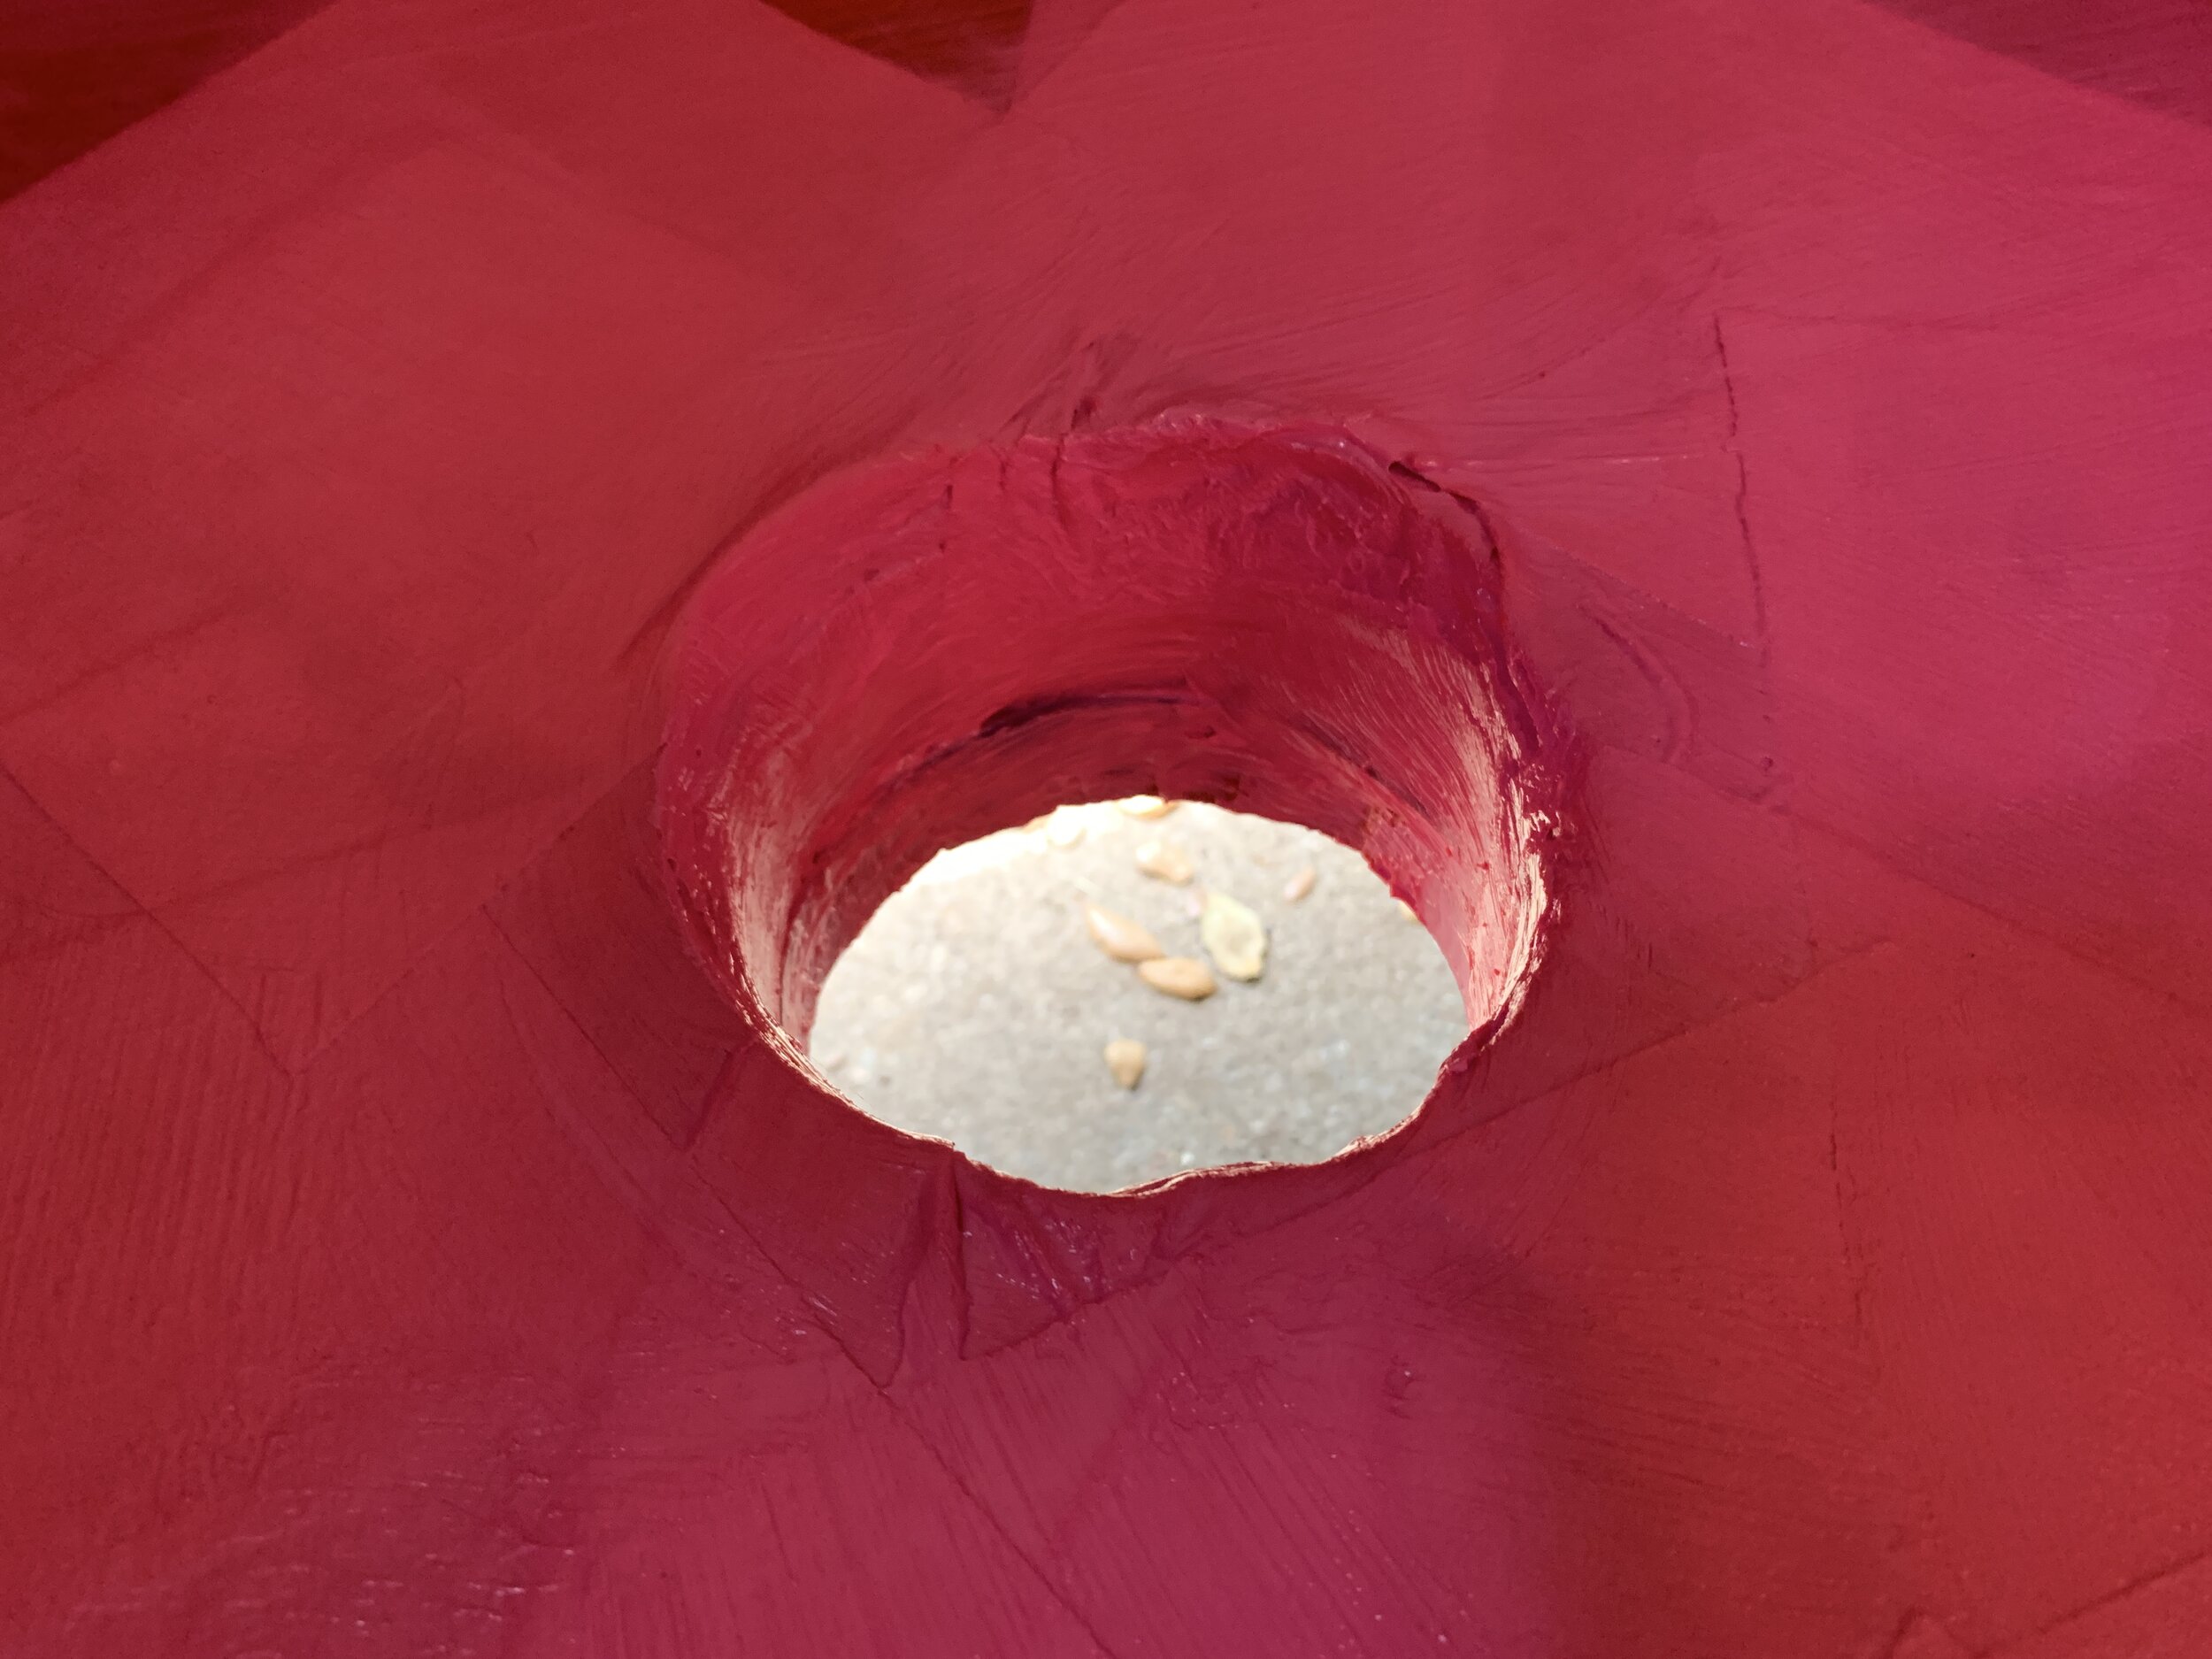
We applied three layers of this stuff to the whole shower floor and a one coat to the surrounding walls and ceiling all on one hot Texas day. It brushes on really easily and goes on hot pink. You’ll know when it’s dry and ready for another layer when it turns from pink to red.
To work properly, RedGard should be applied to the thickness of a credit card. It can be rolled or brushed on as long as it is at least that thick in the end. Remember, this is what you’re tiling on top of and grout is most certainly NOT waterproof – water will be touching this layer so you want this step to absolutely be done right.

Note: If we were tiling our walls we would have painted three coats of RedGard there too. We have other plans for our shower walls where these interior wood walls will be protected from direct contact with water.
(If you follow us on Instagram or Facebook, you might’ve seen/been confused by our shower walls going from red to mint green overnight. Because of what we have planned for our walls, we needed to knock down the vibrant red color for purely aesthetic reasons. This step is not necessary, and is honestly probably not recommended as it might bubble up and separate from the membrane or something if saturated with water. If you’re tiling, the red color shouldn’t be an issue.)
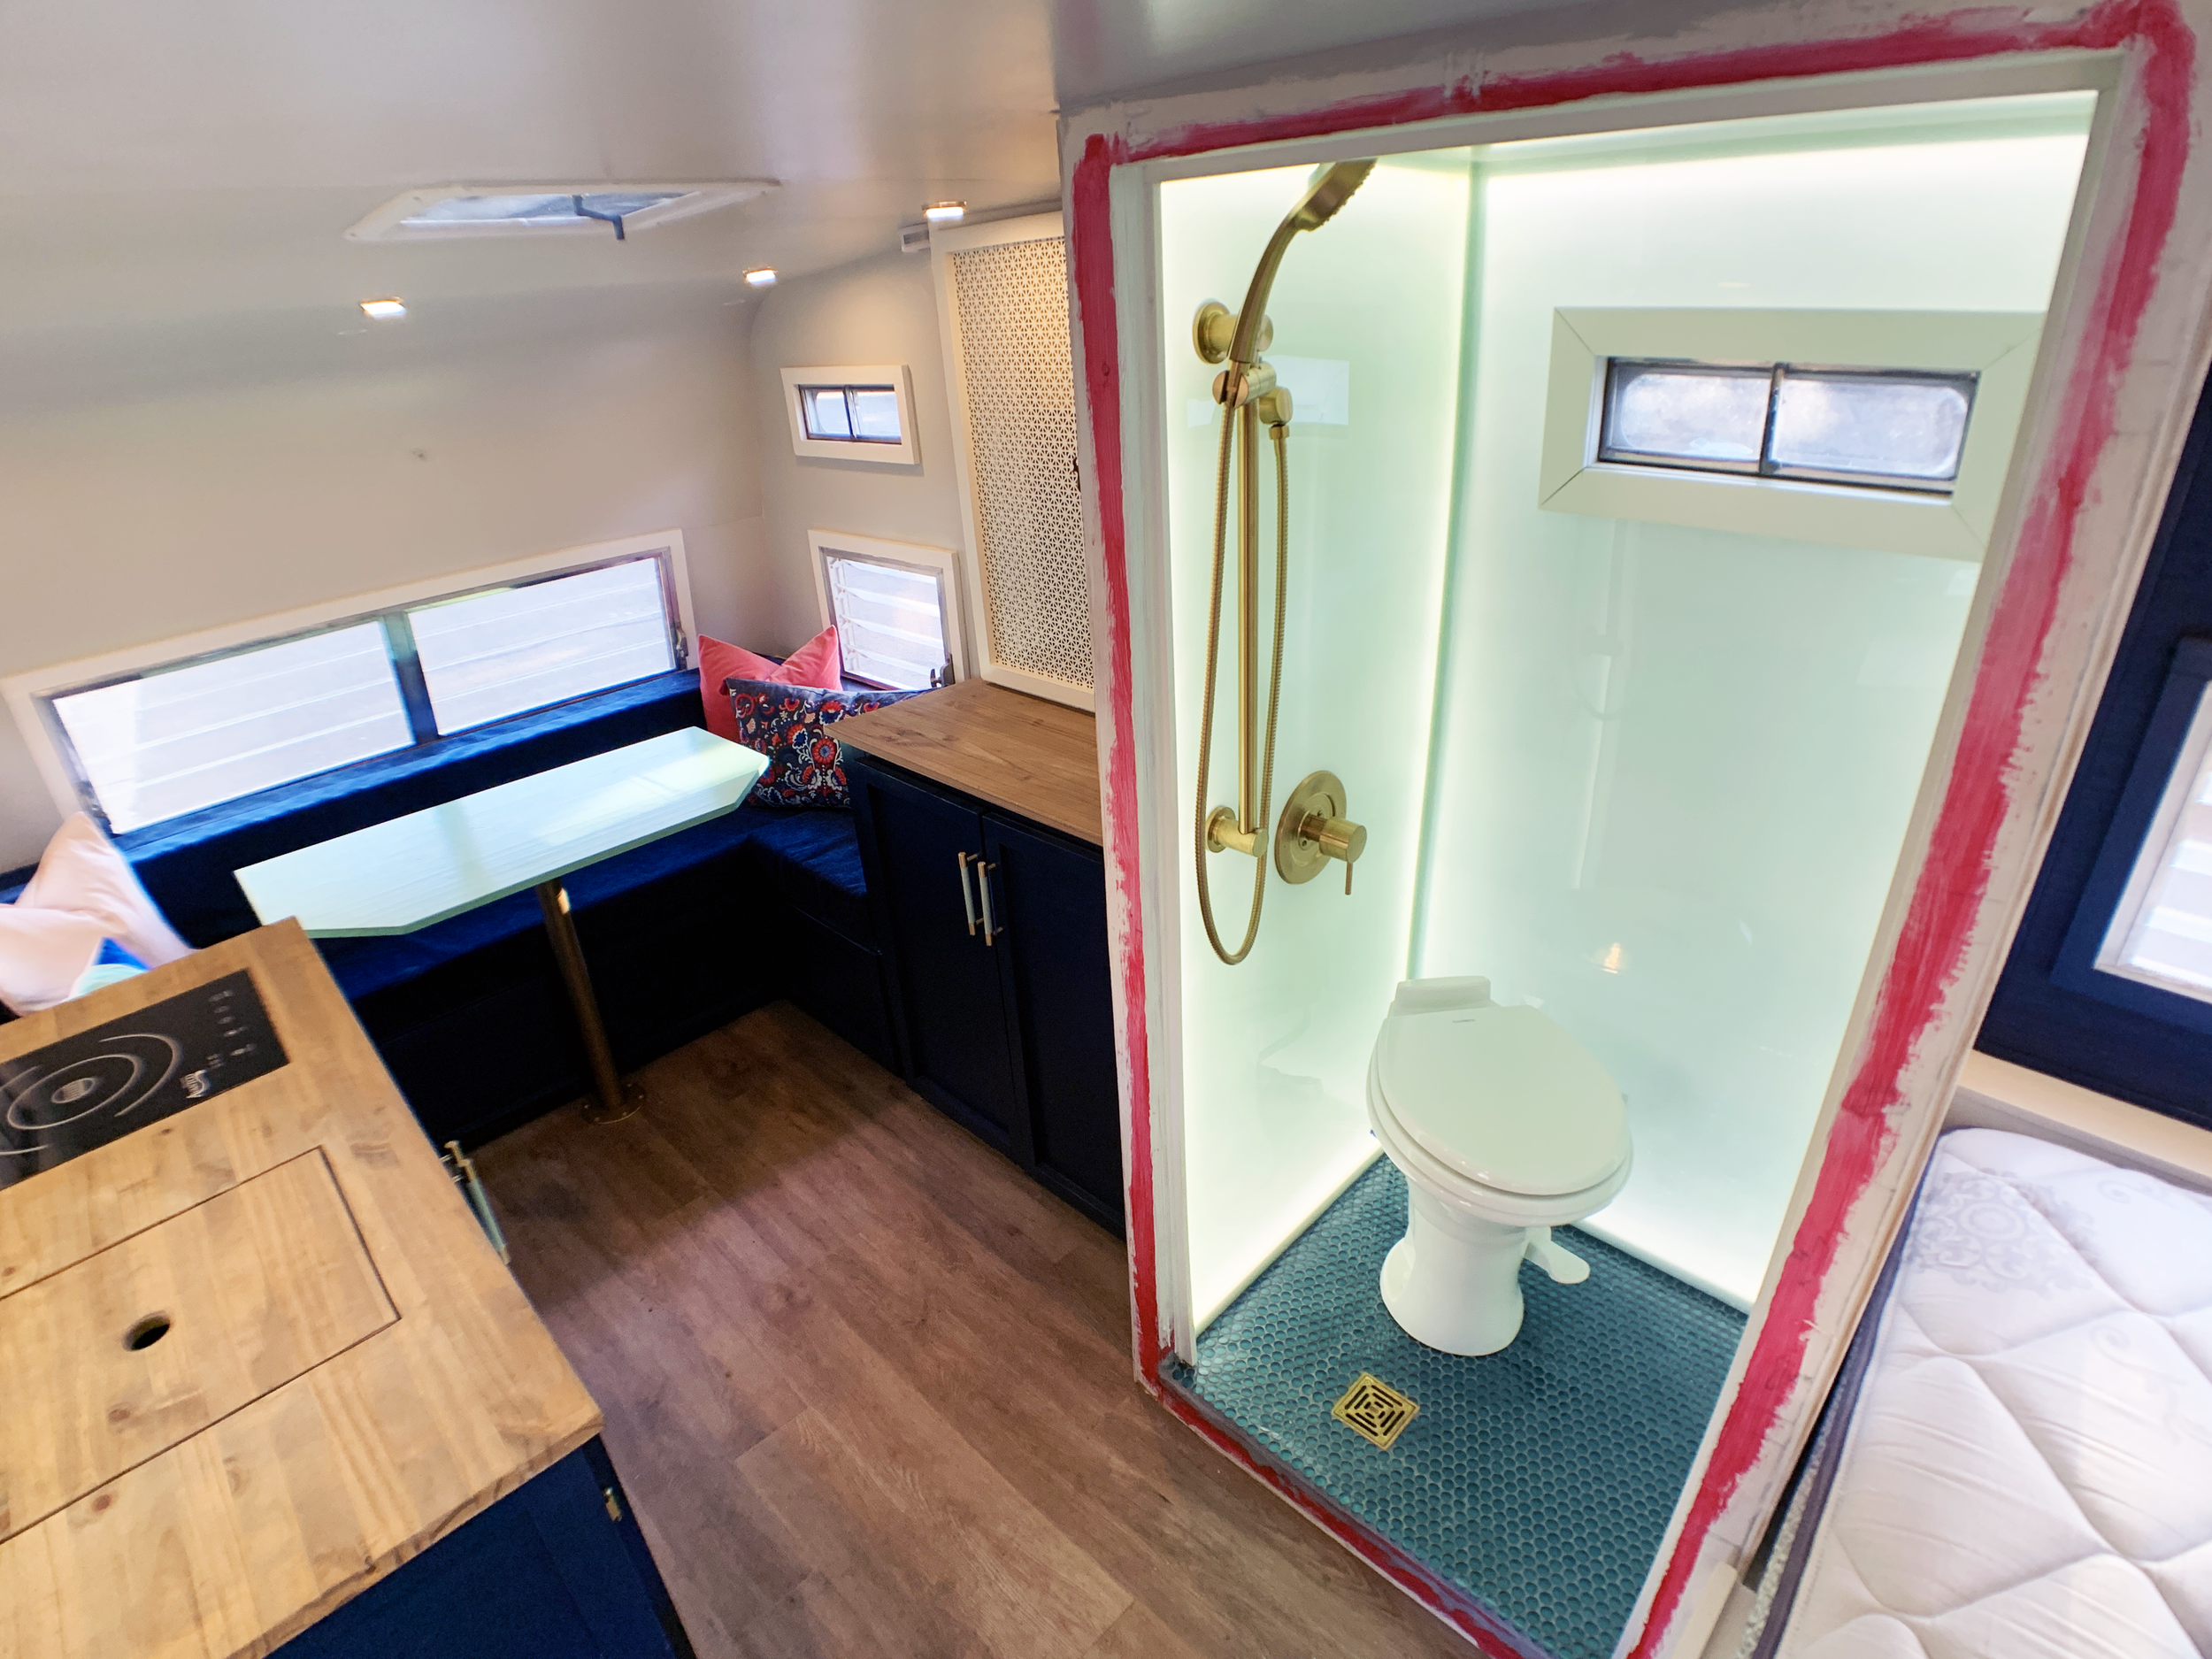
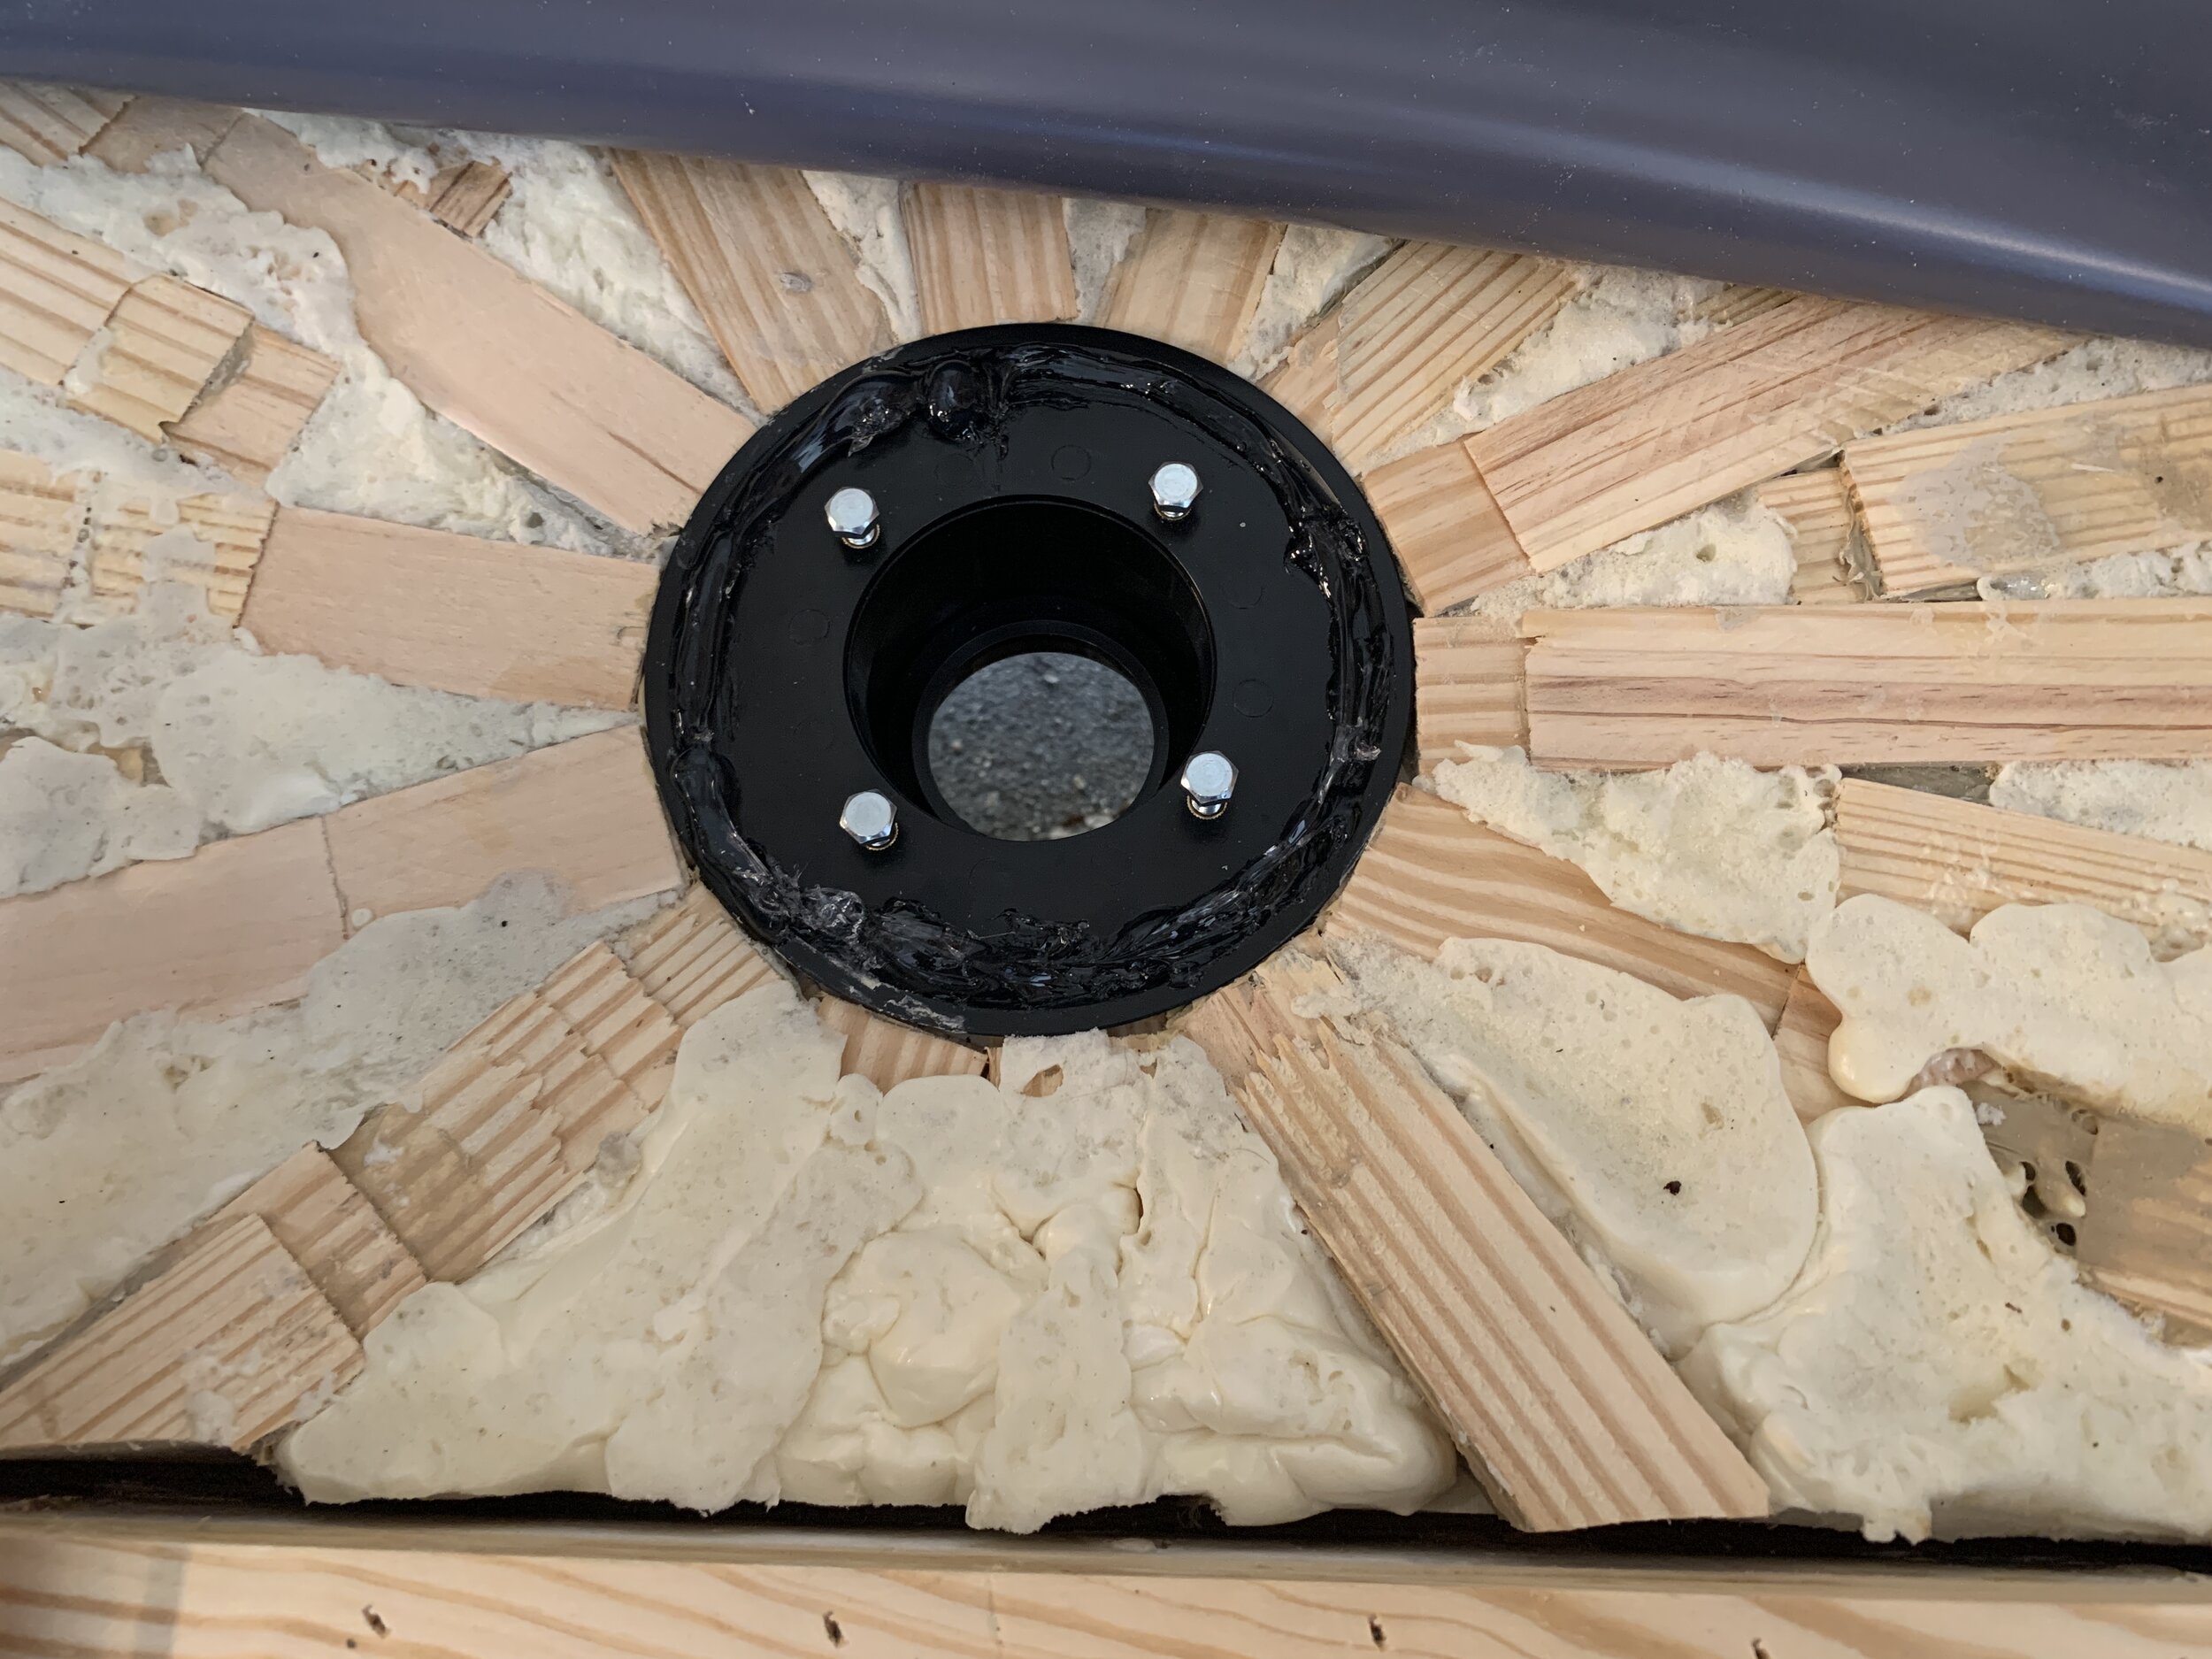
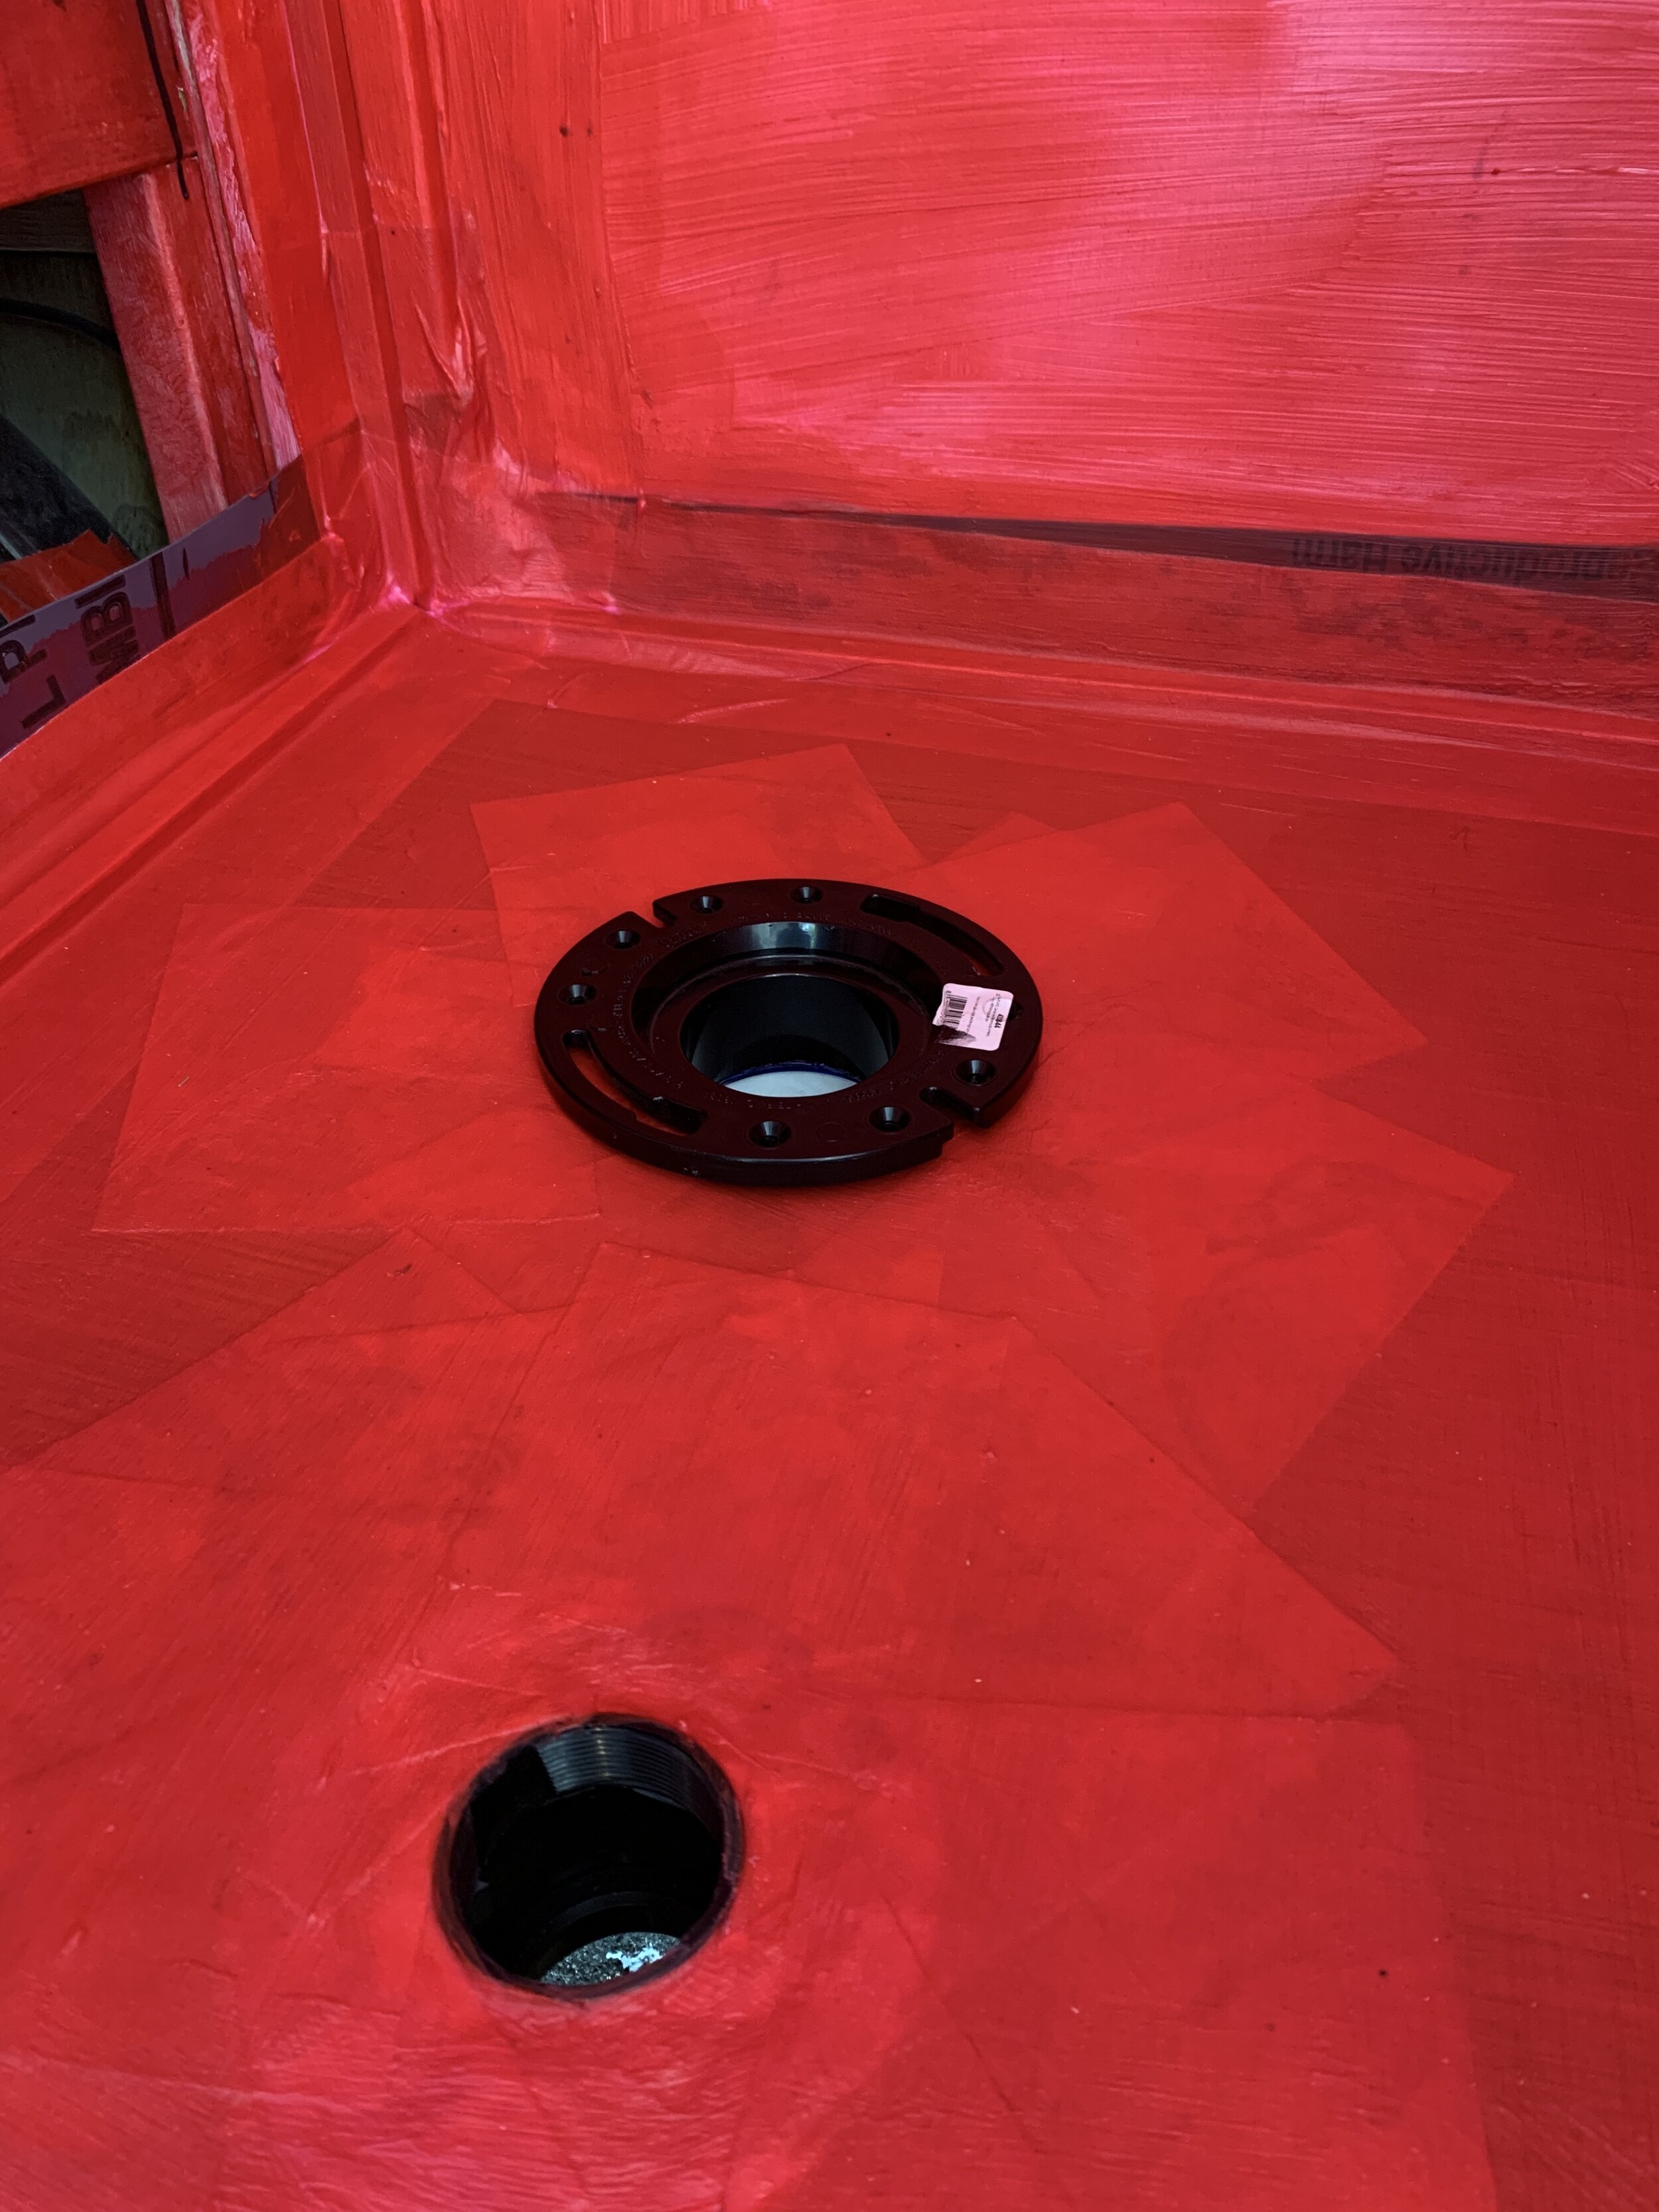
Step 19: Install the toilet flange
With three layers of RedGard down on the floor, we used PVC glue to install a coupling to the bottom of our toilet flange (in preparation to attach it to the black tank later since we’ll have limited space inside the floor hole and between the floor/trailer joists) and used wood screws to secure the toilet flange to the floor from the top.
Step 20: Screw in the shower drain (piece 3)
This is the final shower drain piece and the pretty one you see when standing in the shower. We screwed it in as low as it would go while still keeping the square sides parallel to the shower door and walls. Unfortunately we didn’t get any photos of just the brass drain screwed in before we began tiling, but this one is pretty straightforward.
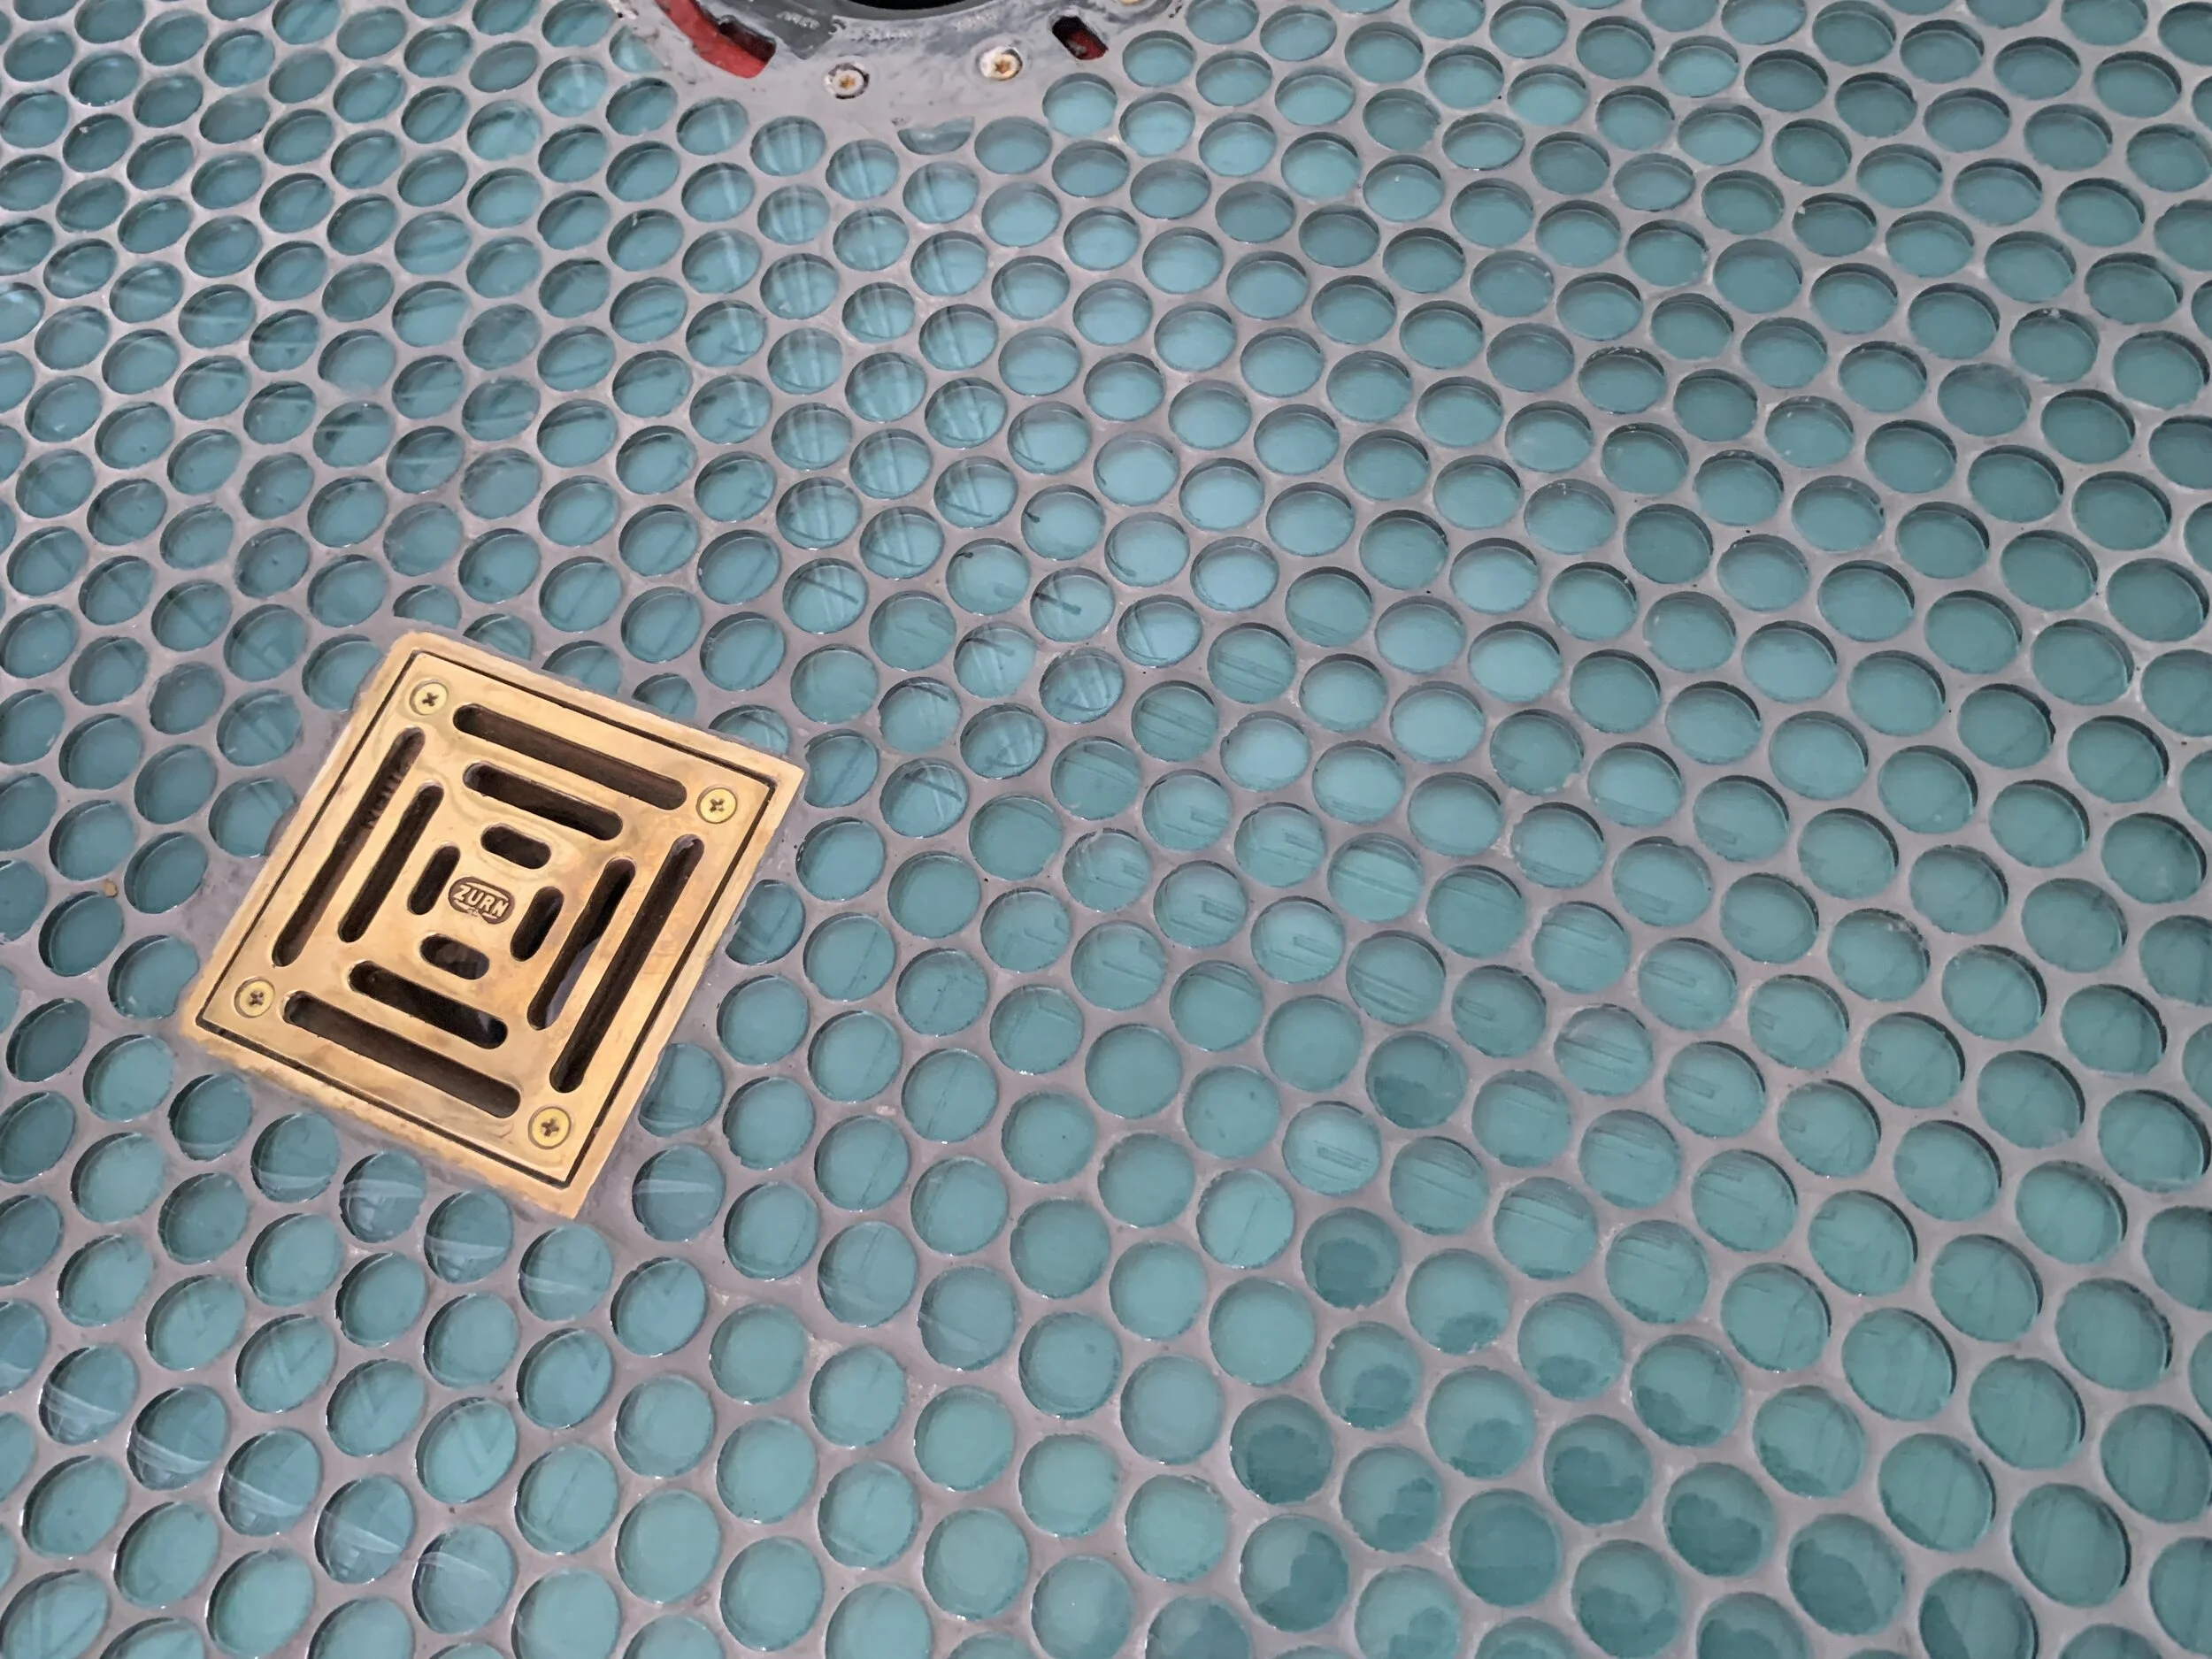
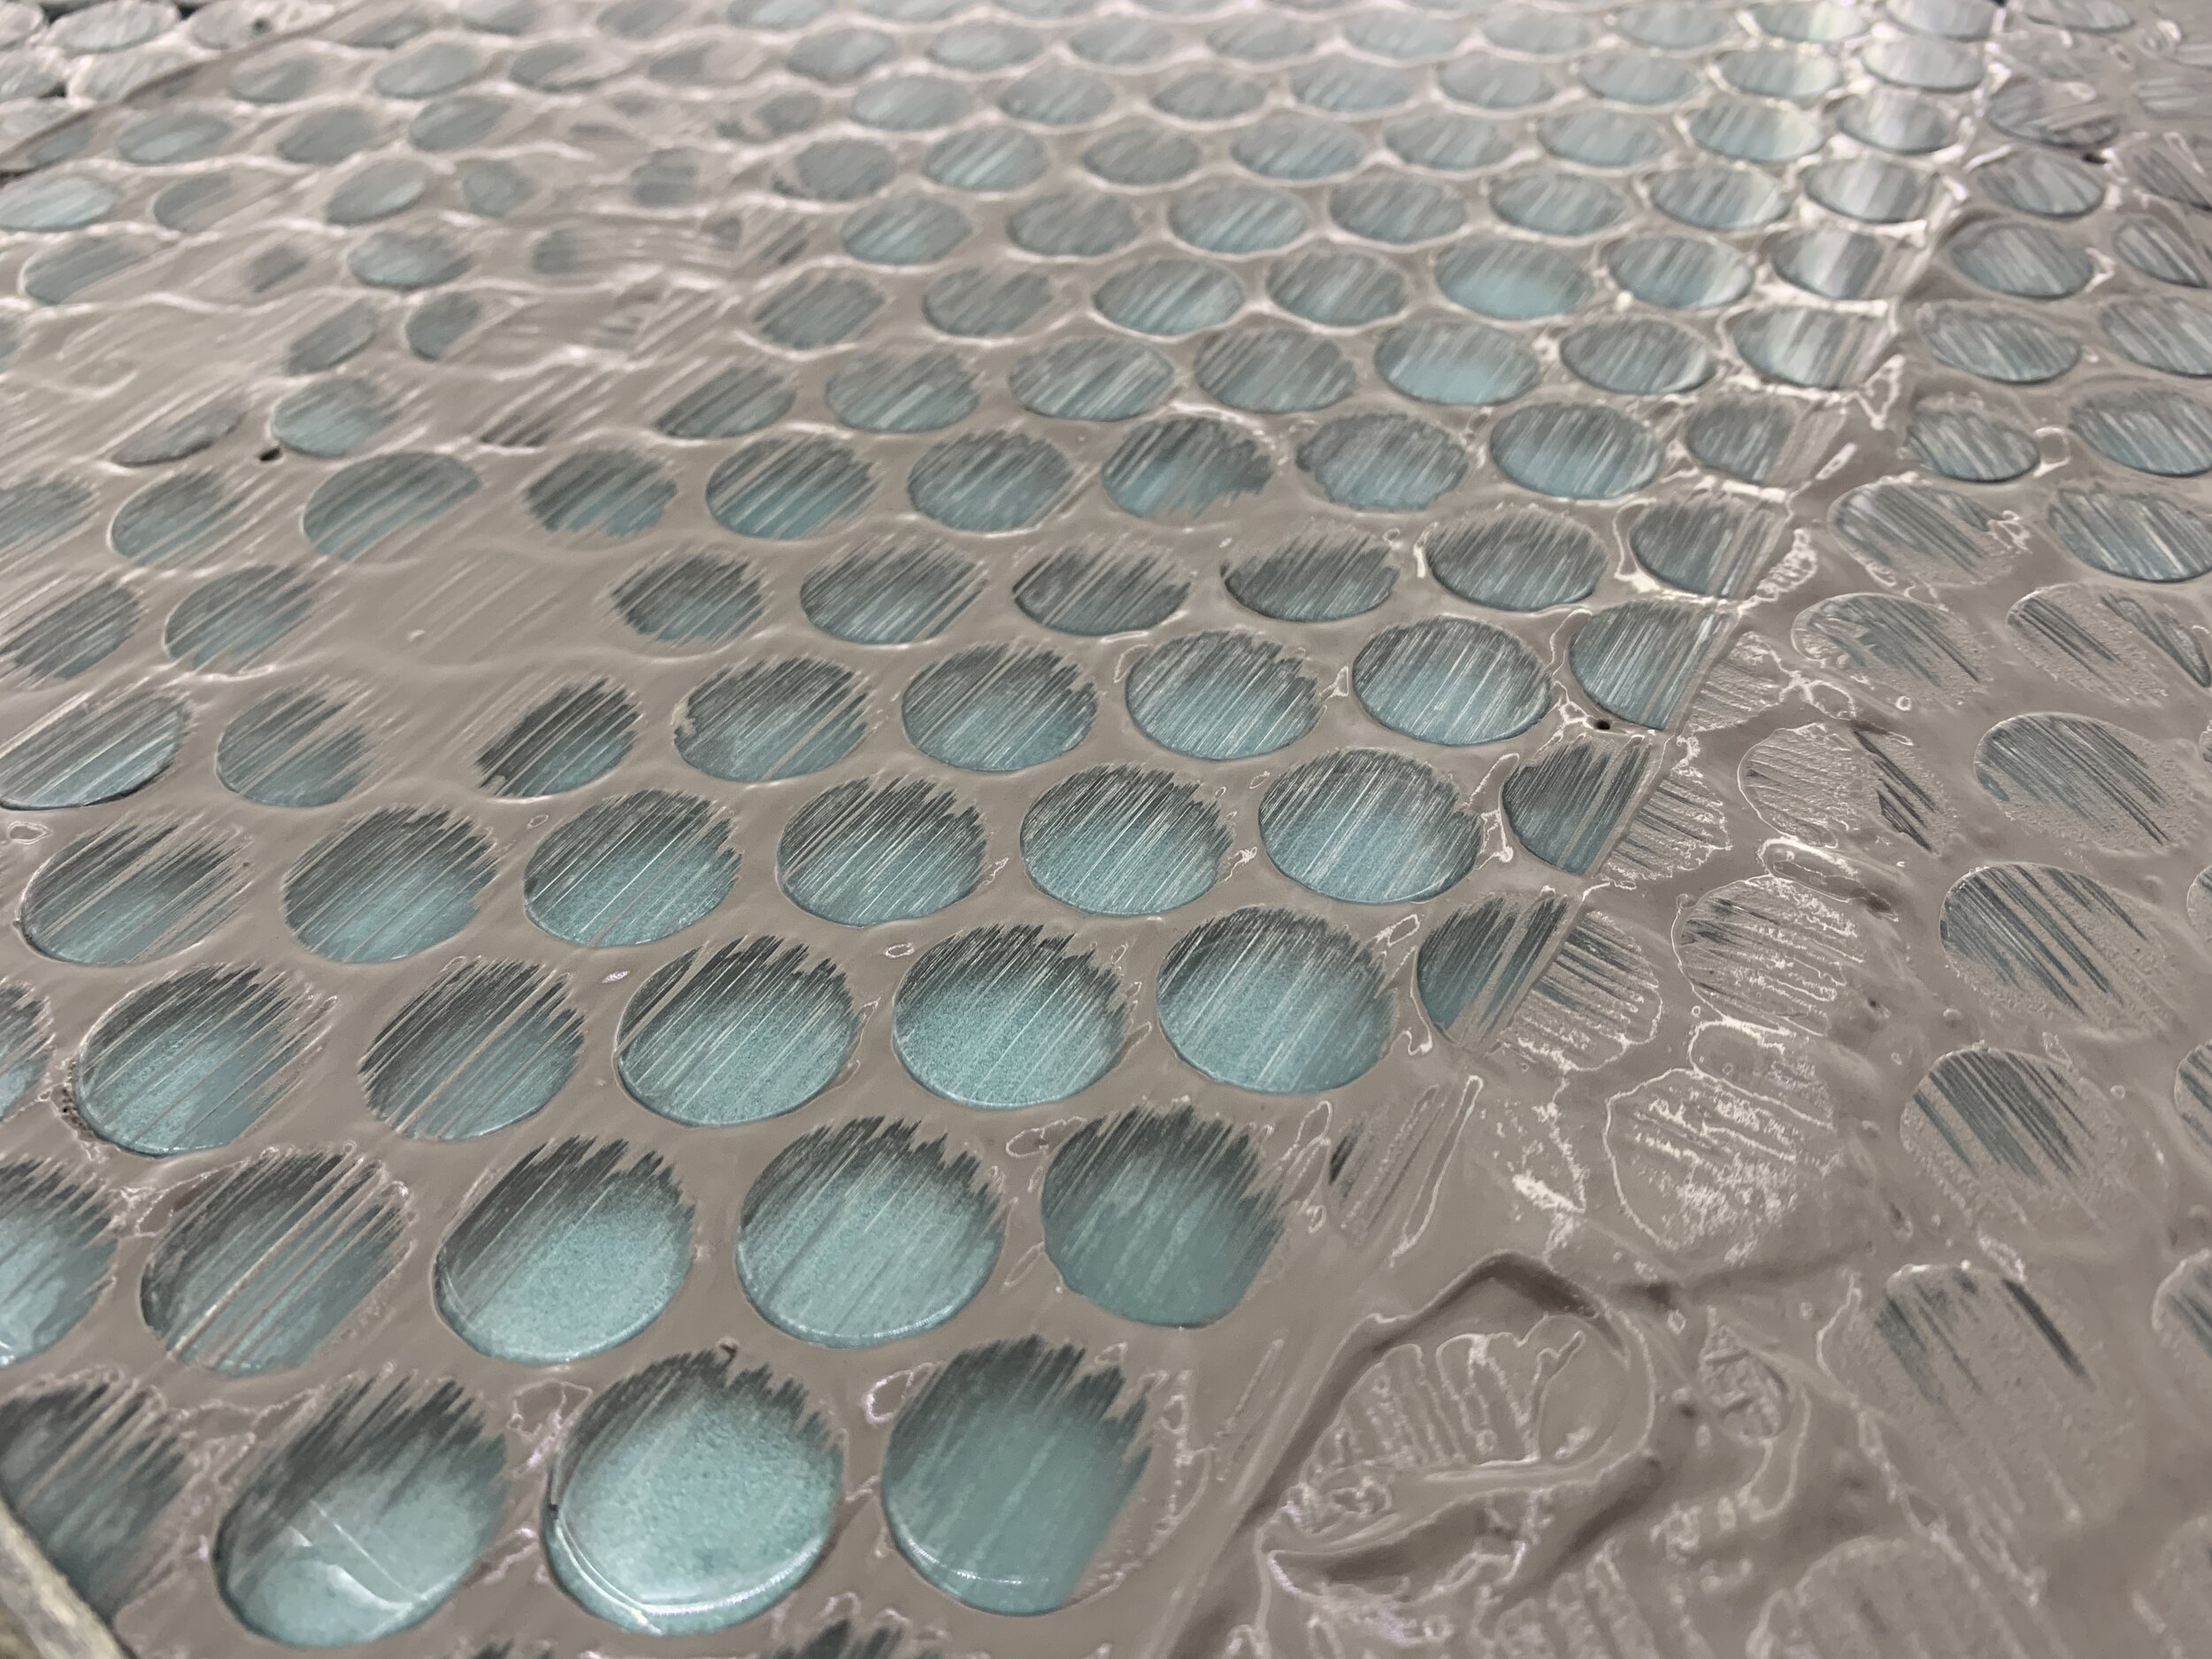
Step 21: Tile the floor
This is where it finally gets pretty and one of the parts I’d been imagining done for the last two years!
To keep this floor as flexible and crack-free as we can think, we used a special flexible thinset mortar. It’s fortified" and has polymers added to it (according to the bag) which gives it some flex in addition to its strength. It is applied just like normal thinset/mastic and goes on right on top of the (now hard) liquid waterproofing membrane (aka the RedGard layer). Since our floor tiles are glass, we used an unsanded grout – which we did not get for any special flexing abilities – and are hoping will be flexible enough to not crack over time.
When tiling, the goal is to have the top of the tile be even with the top of the toilet flange so the toilet makes good, solid contact with it and the floor all the way around for a good seal, and for the top of the tile to meet the top of the finished shower drain, which for us is our square brass drain that’s screwed into the threaded plastic one (drain piece 2).

If you RedGarded your walls to the right thickness in the step above, this is also where you could tile the walls, if that’s what you’re doing. We have other plans so this is where we’ll leave you on this post.
We’ll be back with a post covering more details on our specific floor tile (that is so gorgeous) plus lessons learned during that install, and another one (or probably more, if needed) sharing all of the weird layers and things we did and are still doing to make my hair-brained idea for backlit shower walls come to life. (They squeeze in between the RedGard and tiling steps.) This might have been the first idea I had when we got The Cameo home and I have been problem solving and imagining it for over two years now! As of the writing of this post it’s still not completely finished, but I cannot wait to show you how how it looks and share how we did it, hopefully successfully.