The Cameo Camper Renovation: Demo Day 3 – Is it bigger in here?

Back and ready to tackle demo day 3 with more appropriate footwear. Fool me once...
Go to the bathroom now, get a drink and get comfortable because this is a meaty post. Don't say I didn't warn you.
We're back for what now feels like the never-ending camper demo! For just 94 square feet and basically nothing inside, this stumpy little 14' nugget of camper has deceptively a lot of "stuff". If you've missed the other two phases of demo – including why proper footwear is a must – or the adventure that was getting her home, follow along from the beginning.
Everything + the kitchen sink
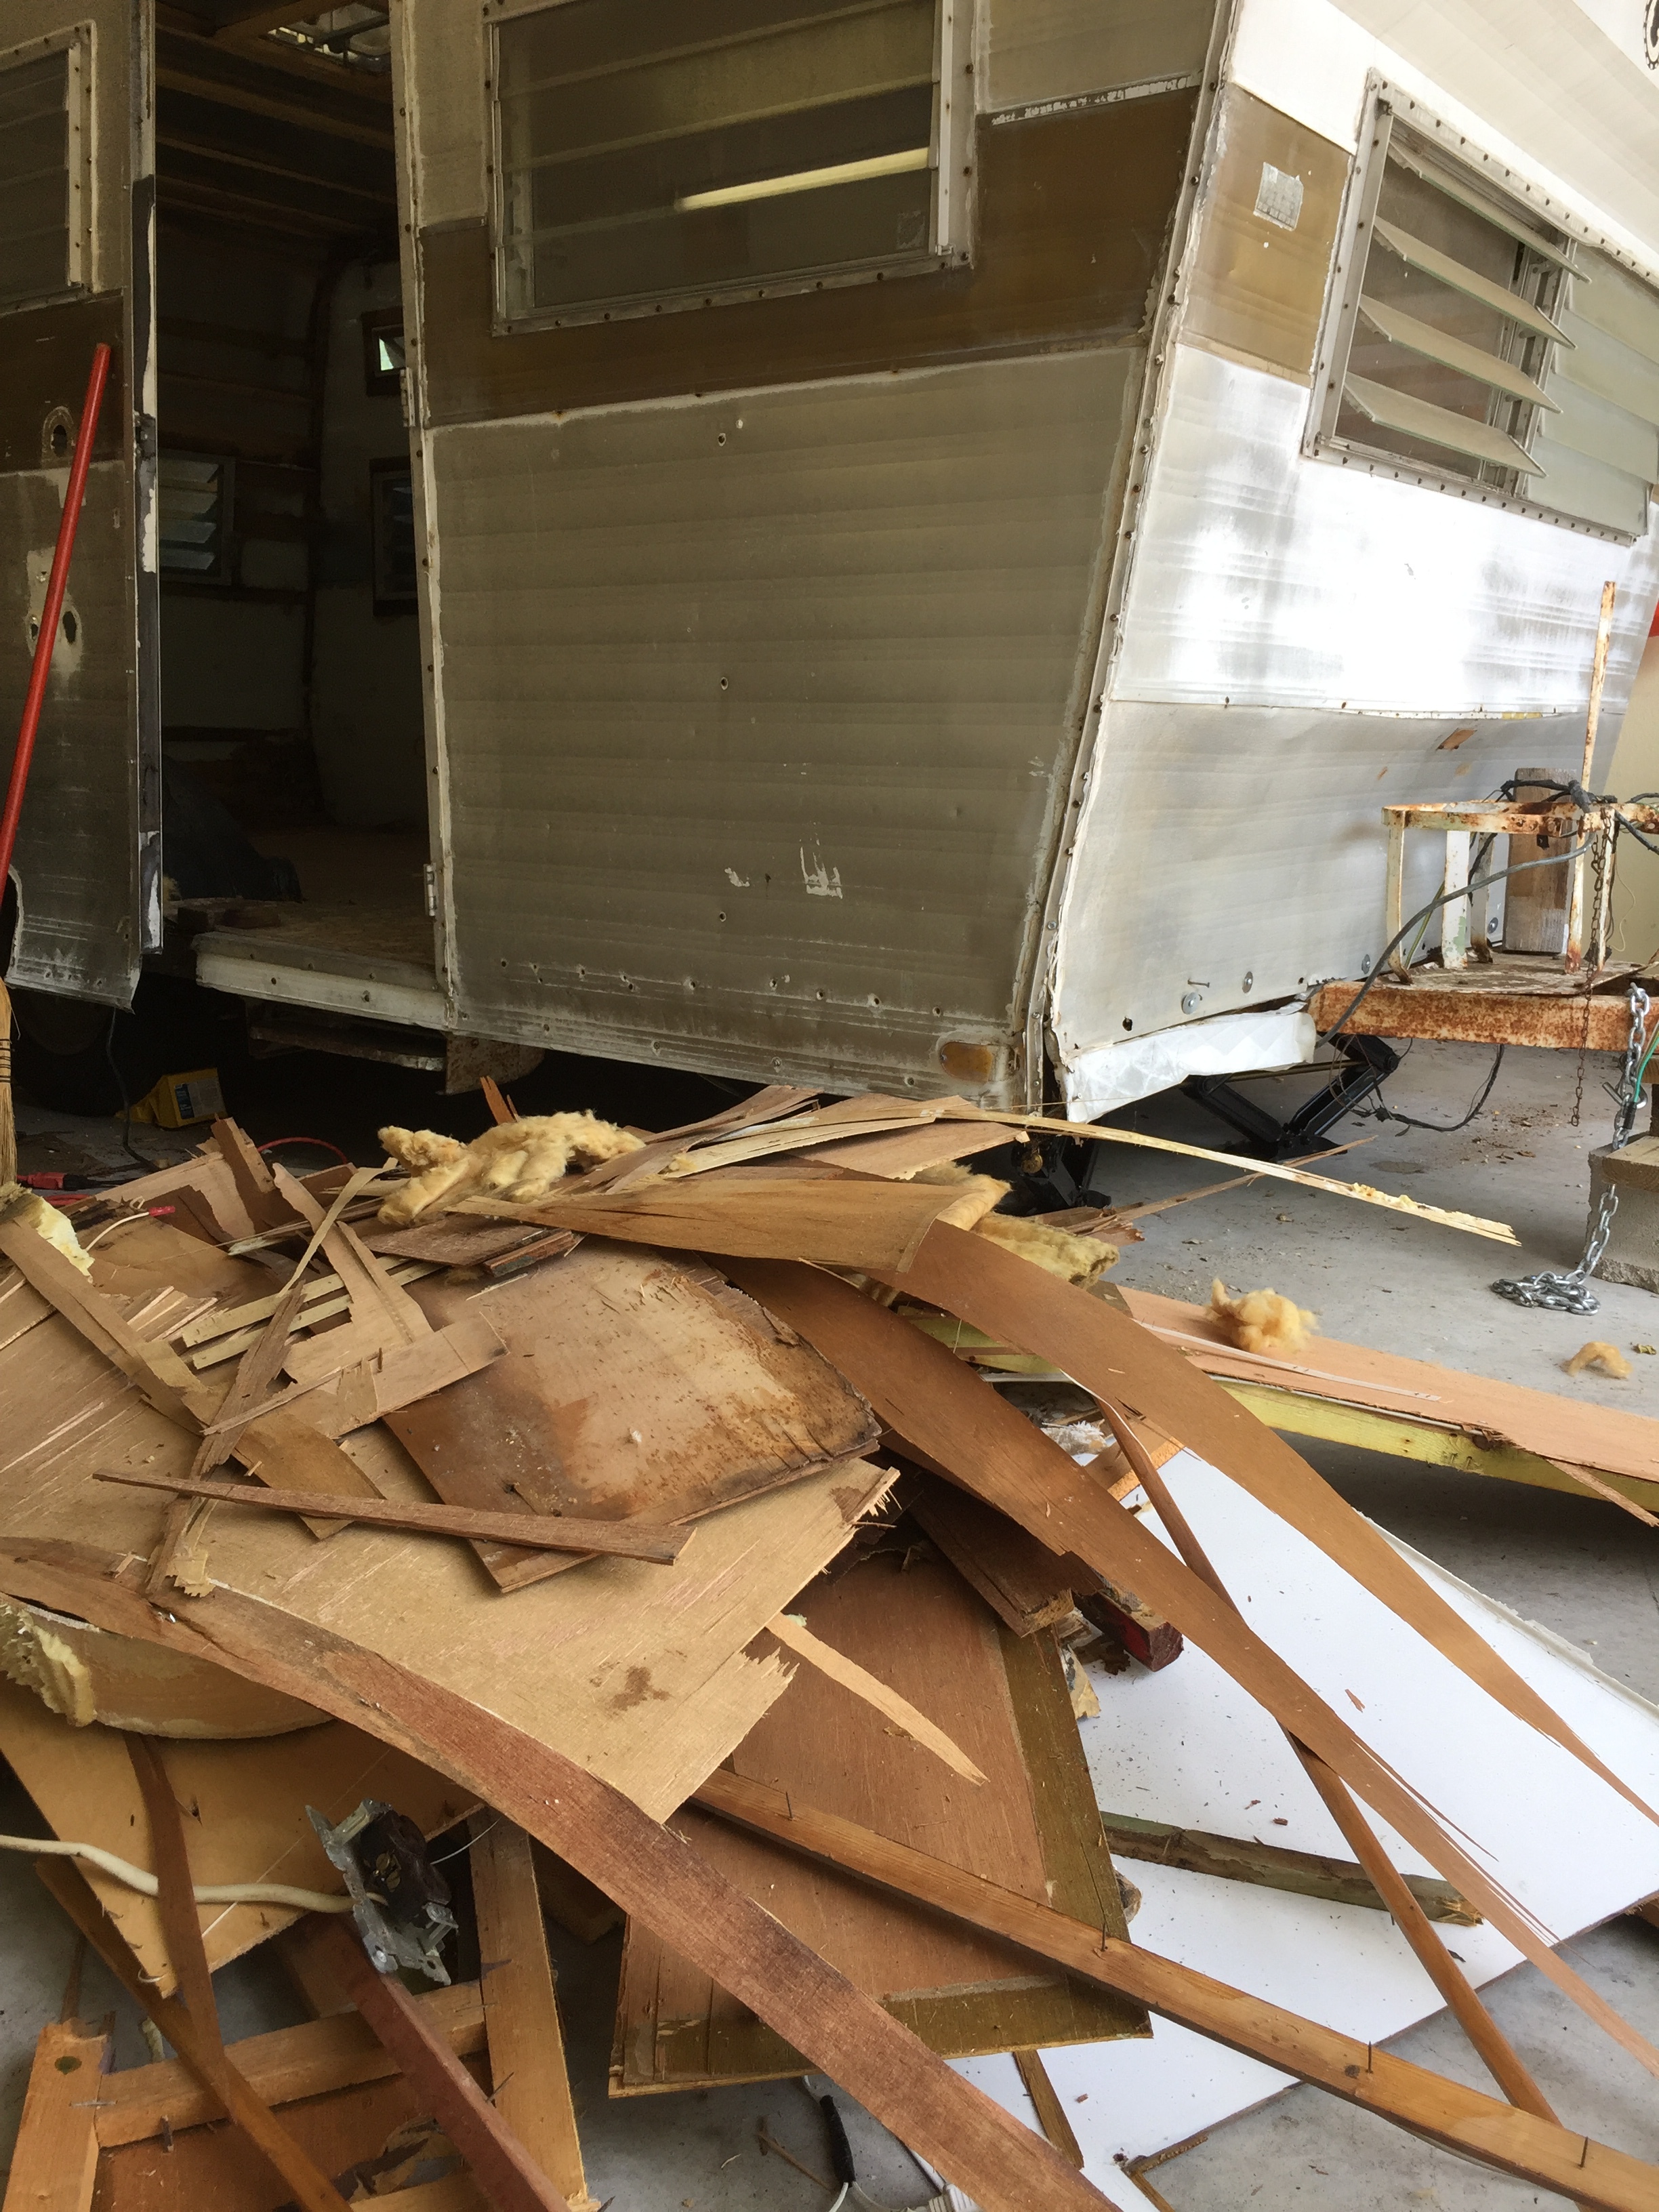
Ok y'all. I know there aren't actually any photos of me doing work (which Nick so sweetly razzed me about yesterday, asking if he needed to take some staged pictures of me a la "mending my fences" AKA just holding a hammer after all the work had actually been done... I get no respect around here), but trust me, I'm not getting punctures, scrapes and maintaining my less-than ladylike man hands status for no reason. With an aching big toe and lots of determination, we showed up (some of us a little limpy from the day before) with a goal to finish cleaning out the rotten bits from The Cameo so we can finally know what we really have to start with. So here's a snapshot of a lot of what has been removed so far. (I would say "all of the things that have been removed so far", but we've been slowly disposing of pieces here and there, so while it's close to everything, this isn't entirely everything. Hard to believe there was even more than this in such a small space!)

This is the pile starting demo day 3. So much stuff!
At this point we discussed renting a dumpster since there was still more to go and this is just a critter shanty town waiting to happen, but even the small 10-yard suckers were $400 even though we only needed it for a day! Ugh... ish don't think so... mama is on a budget. So while we figure that one out, let's complete this demo already so we can get to the fun stuff!
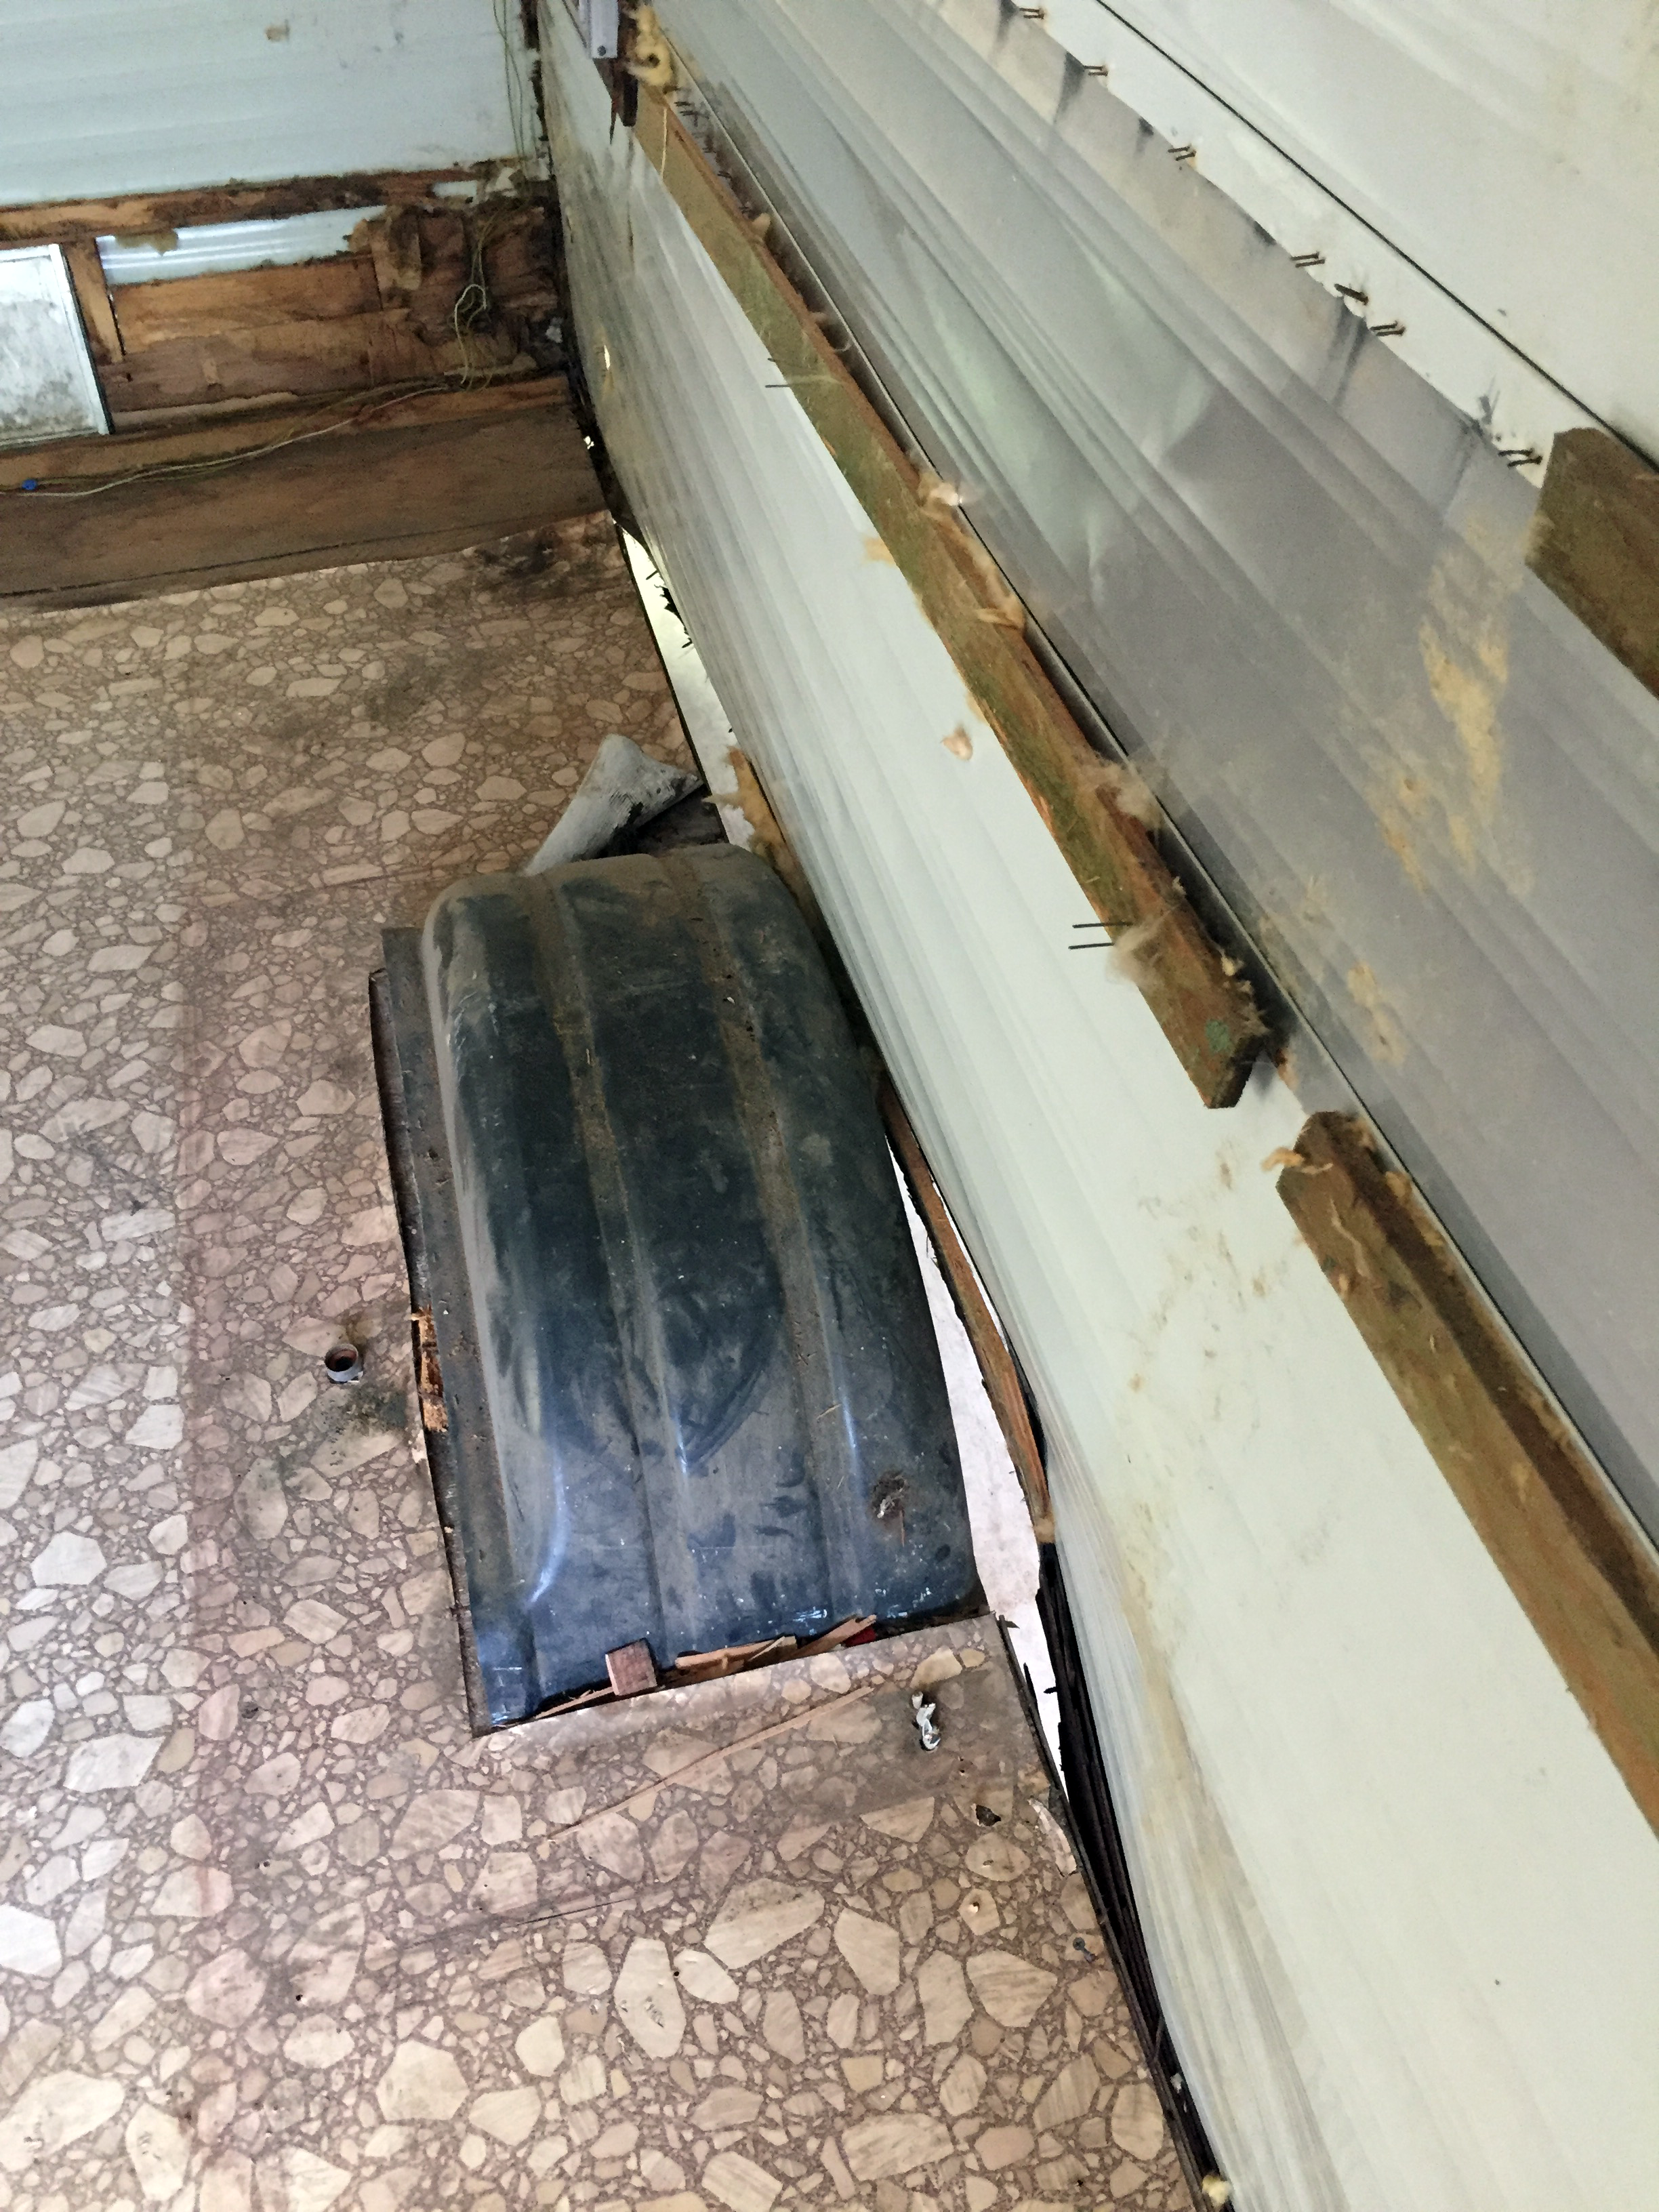
Inside The Cameo we continued our "let's just follow the damage" mantra, saving what we could where we could. Remember how I told you we removed and saved the little aluminum interior window frames so we could get the damaged wall and ceiling panels off without breaking the frames and windows? Well, we found out after removing the frame in the bathroom that the "waterproofed" shower/toilet area was made of none other than, wait for it... white masonite. As in, the stuff they use to make dry erase boards. Now I know you can't see my face, but I'm rockin' a mean side eye right now because that's just not gonna fly. (Full disclosure: I also might've been harboring some new-found dislike for this shower area since the door frame is what attacked my toe the day before.) So out it went, and since the bottom was unsurprisingly water damaged and spongy, it came out relatively easy, until we got to the shower floor, which had a thick, painted on fiberglass coating that was covering up rusted out and stripped screws securing the plywood base to the camper floor.

Scraping and chipping off the waterproof, fiberglass coating bit by bit to uncover the screws and rotted shower floor.
The last remaining piece of shower wall left + that dang plywood shower subfloor.
In addition to the hard-to-remove screws, the rubber toilet flange (which Nick basically melted off using our Bosch grinder, much to the detriment of our noses) and metal shower drain flange were also keeping the plywood shower subfloor locked in place, which meant there was a lot of sweat, maybe a little swearing, and Nick climbing under the camper (because, man work). So naturally I helped out by snapping a couple of pics through the toilet hole in the floor while I held on to some bolts and stuff from inside the comfort of the camper, because I'm a multitasker that way.

Oh, hi Nick. Smile for the camera.
Onwards & upwards
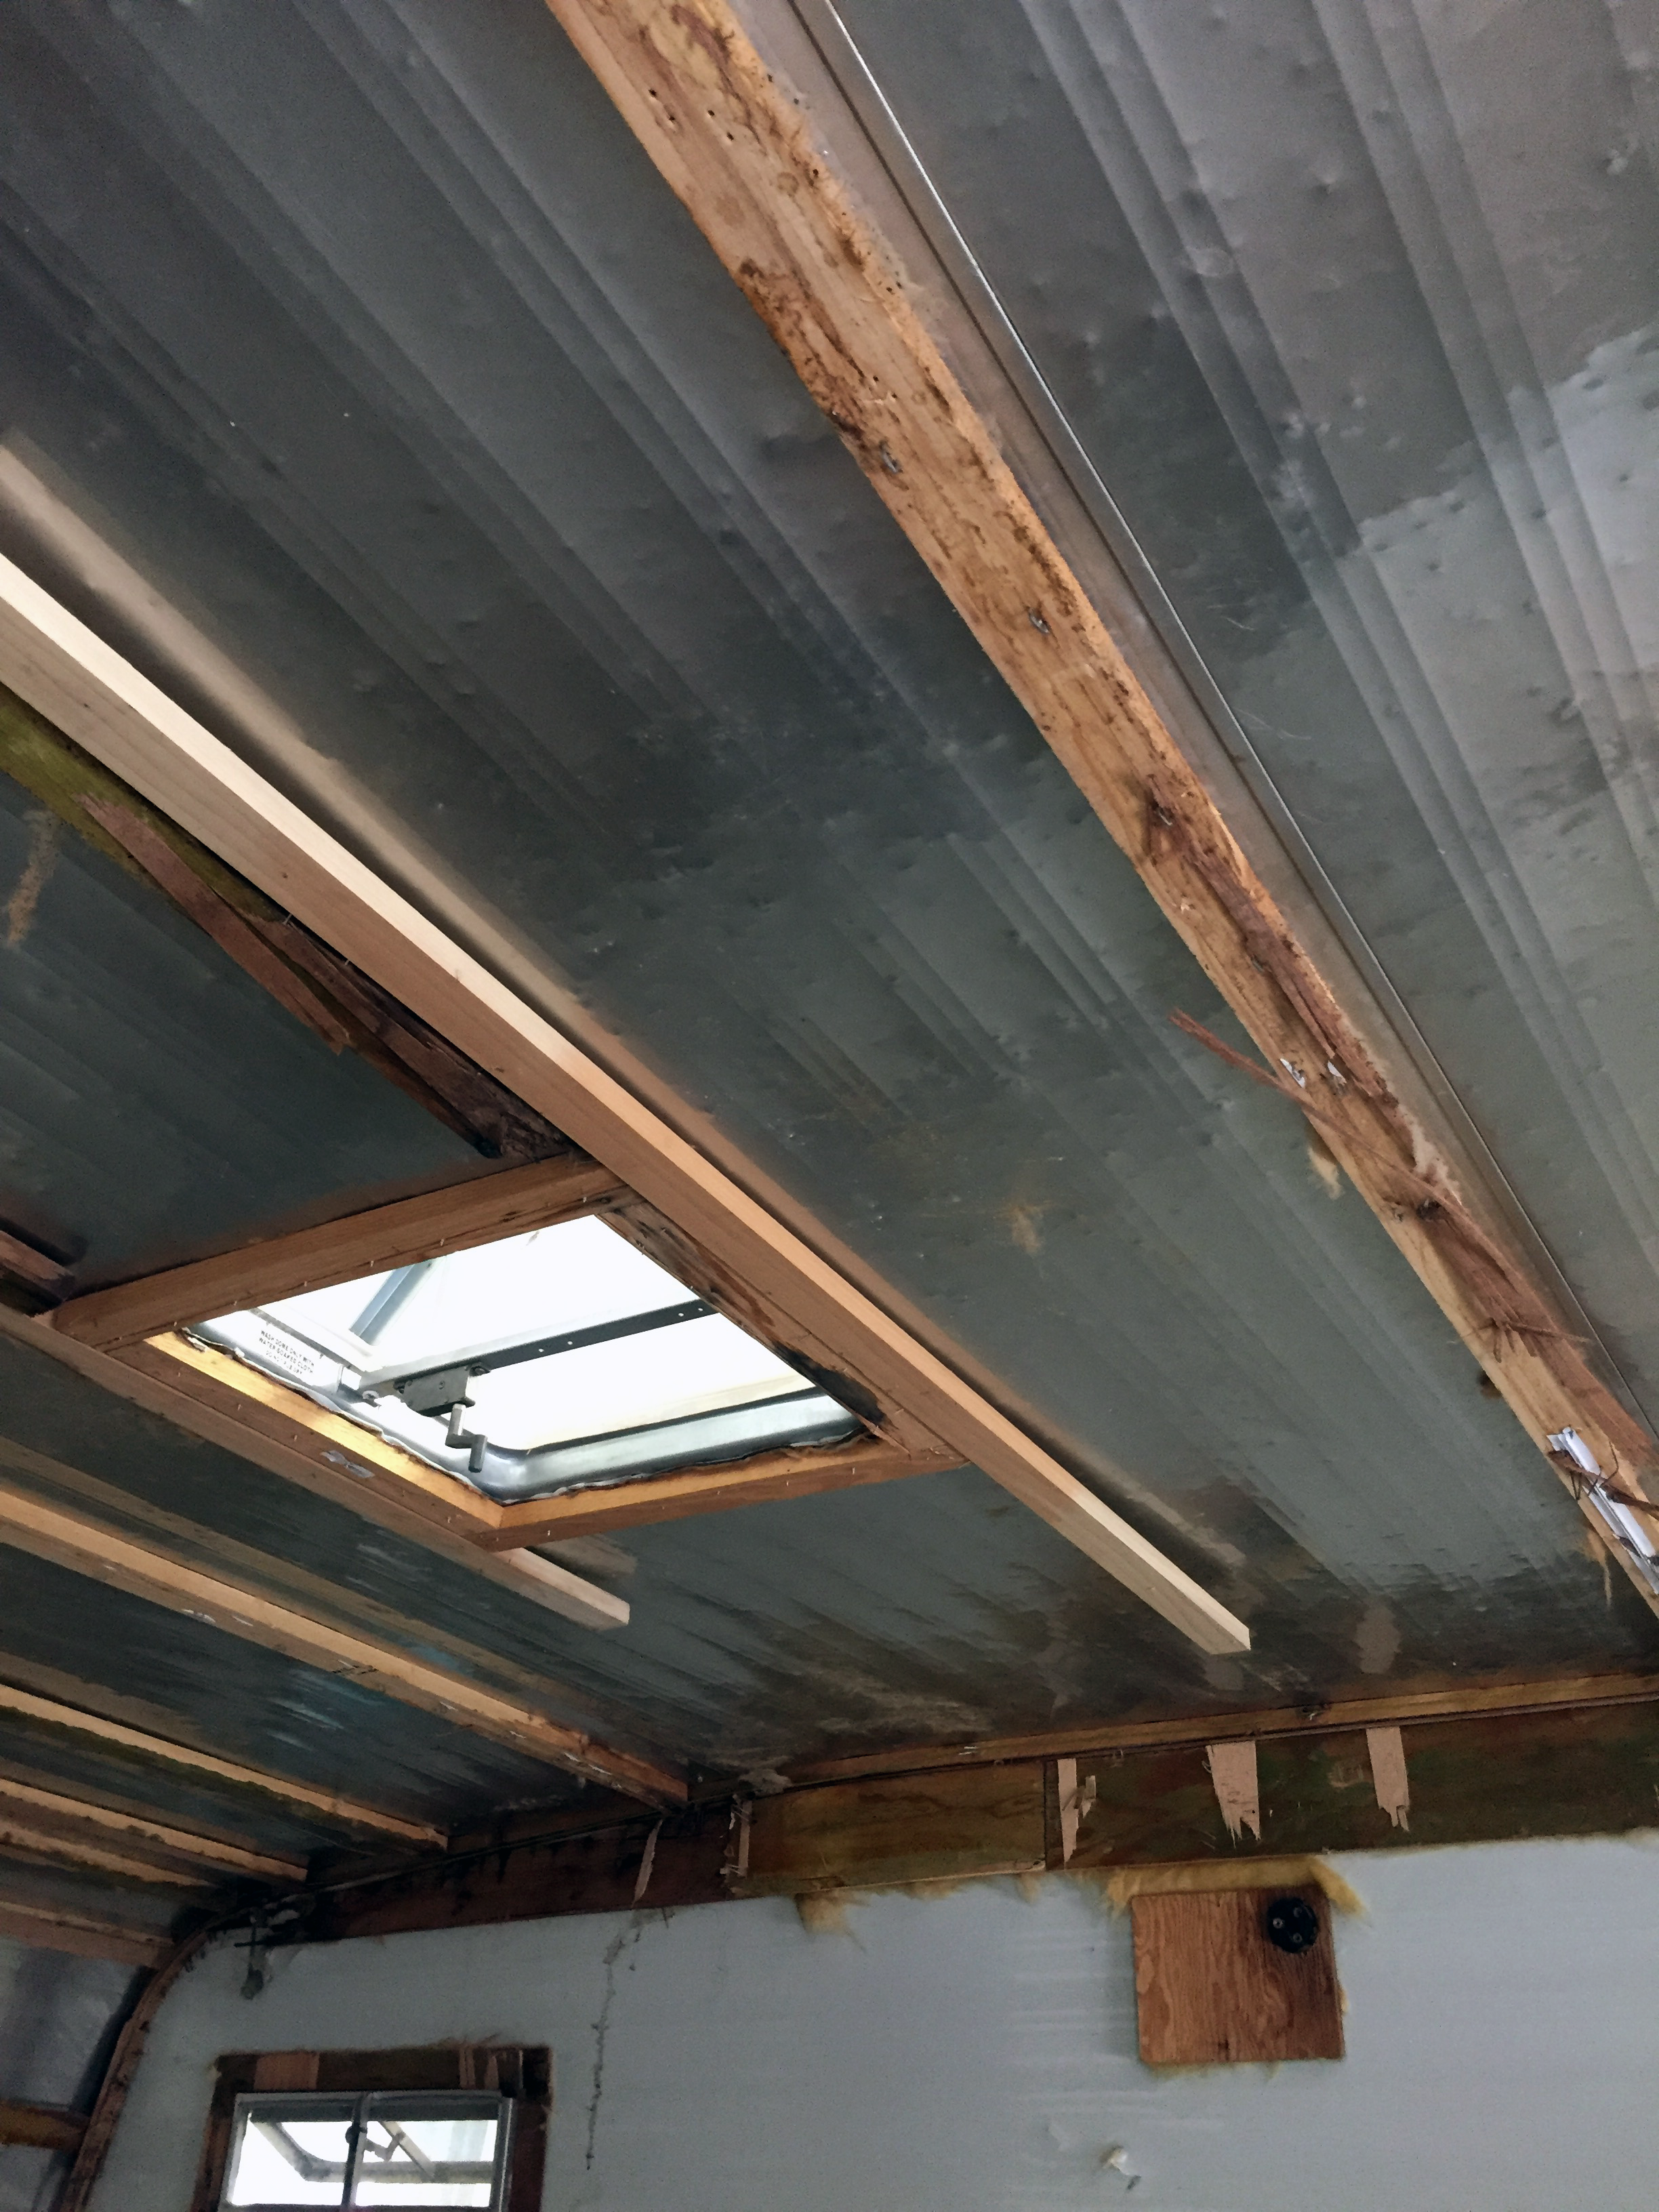
Once the shower area (floor included) was removed, we finally could access all of the wall and ceiling paneling throughout the camper without obstruction – if you don't count the thousands of staple and nail daggers sticking out everywhere. This thing is literally held together with staples.

The ceiling before it started raining staples in The Cameo.
At this point we've come to the sad realization that every surface has some level of water/critter damage and decided everything must go to be safe moving forward. The walls. The ceilings. The insulation. The studs. Possibly the floor, but that's a story for another day.


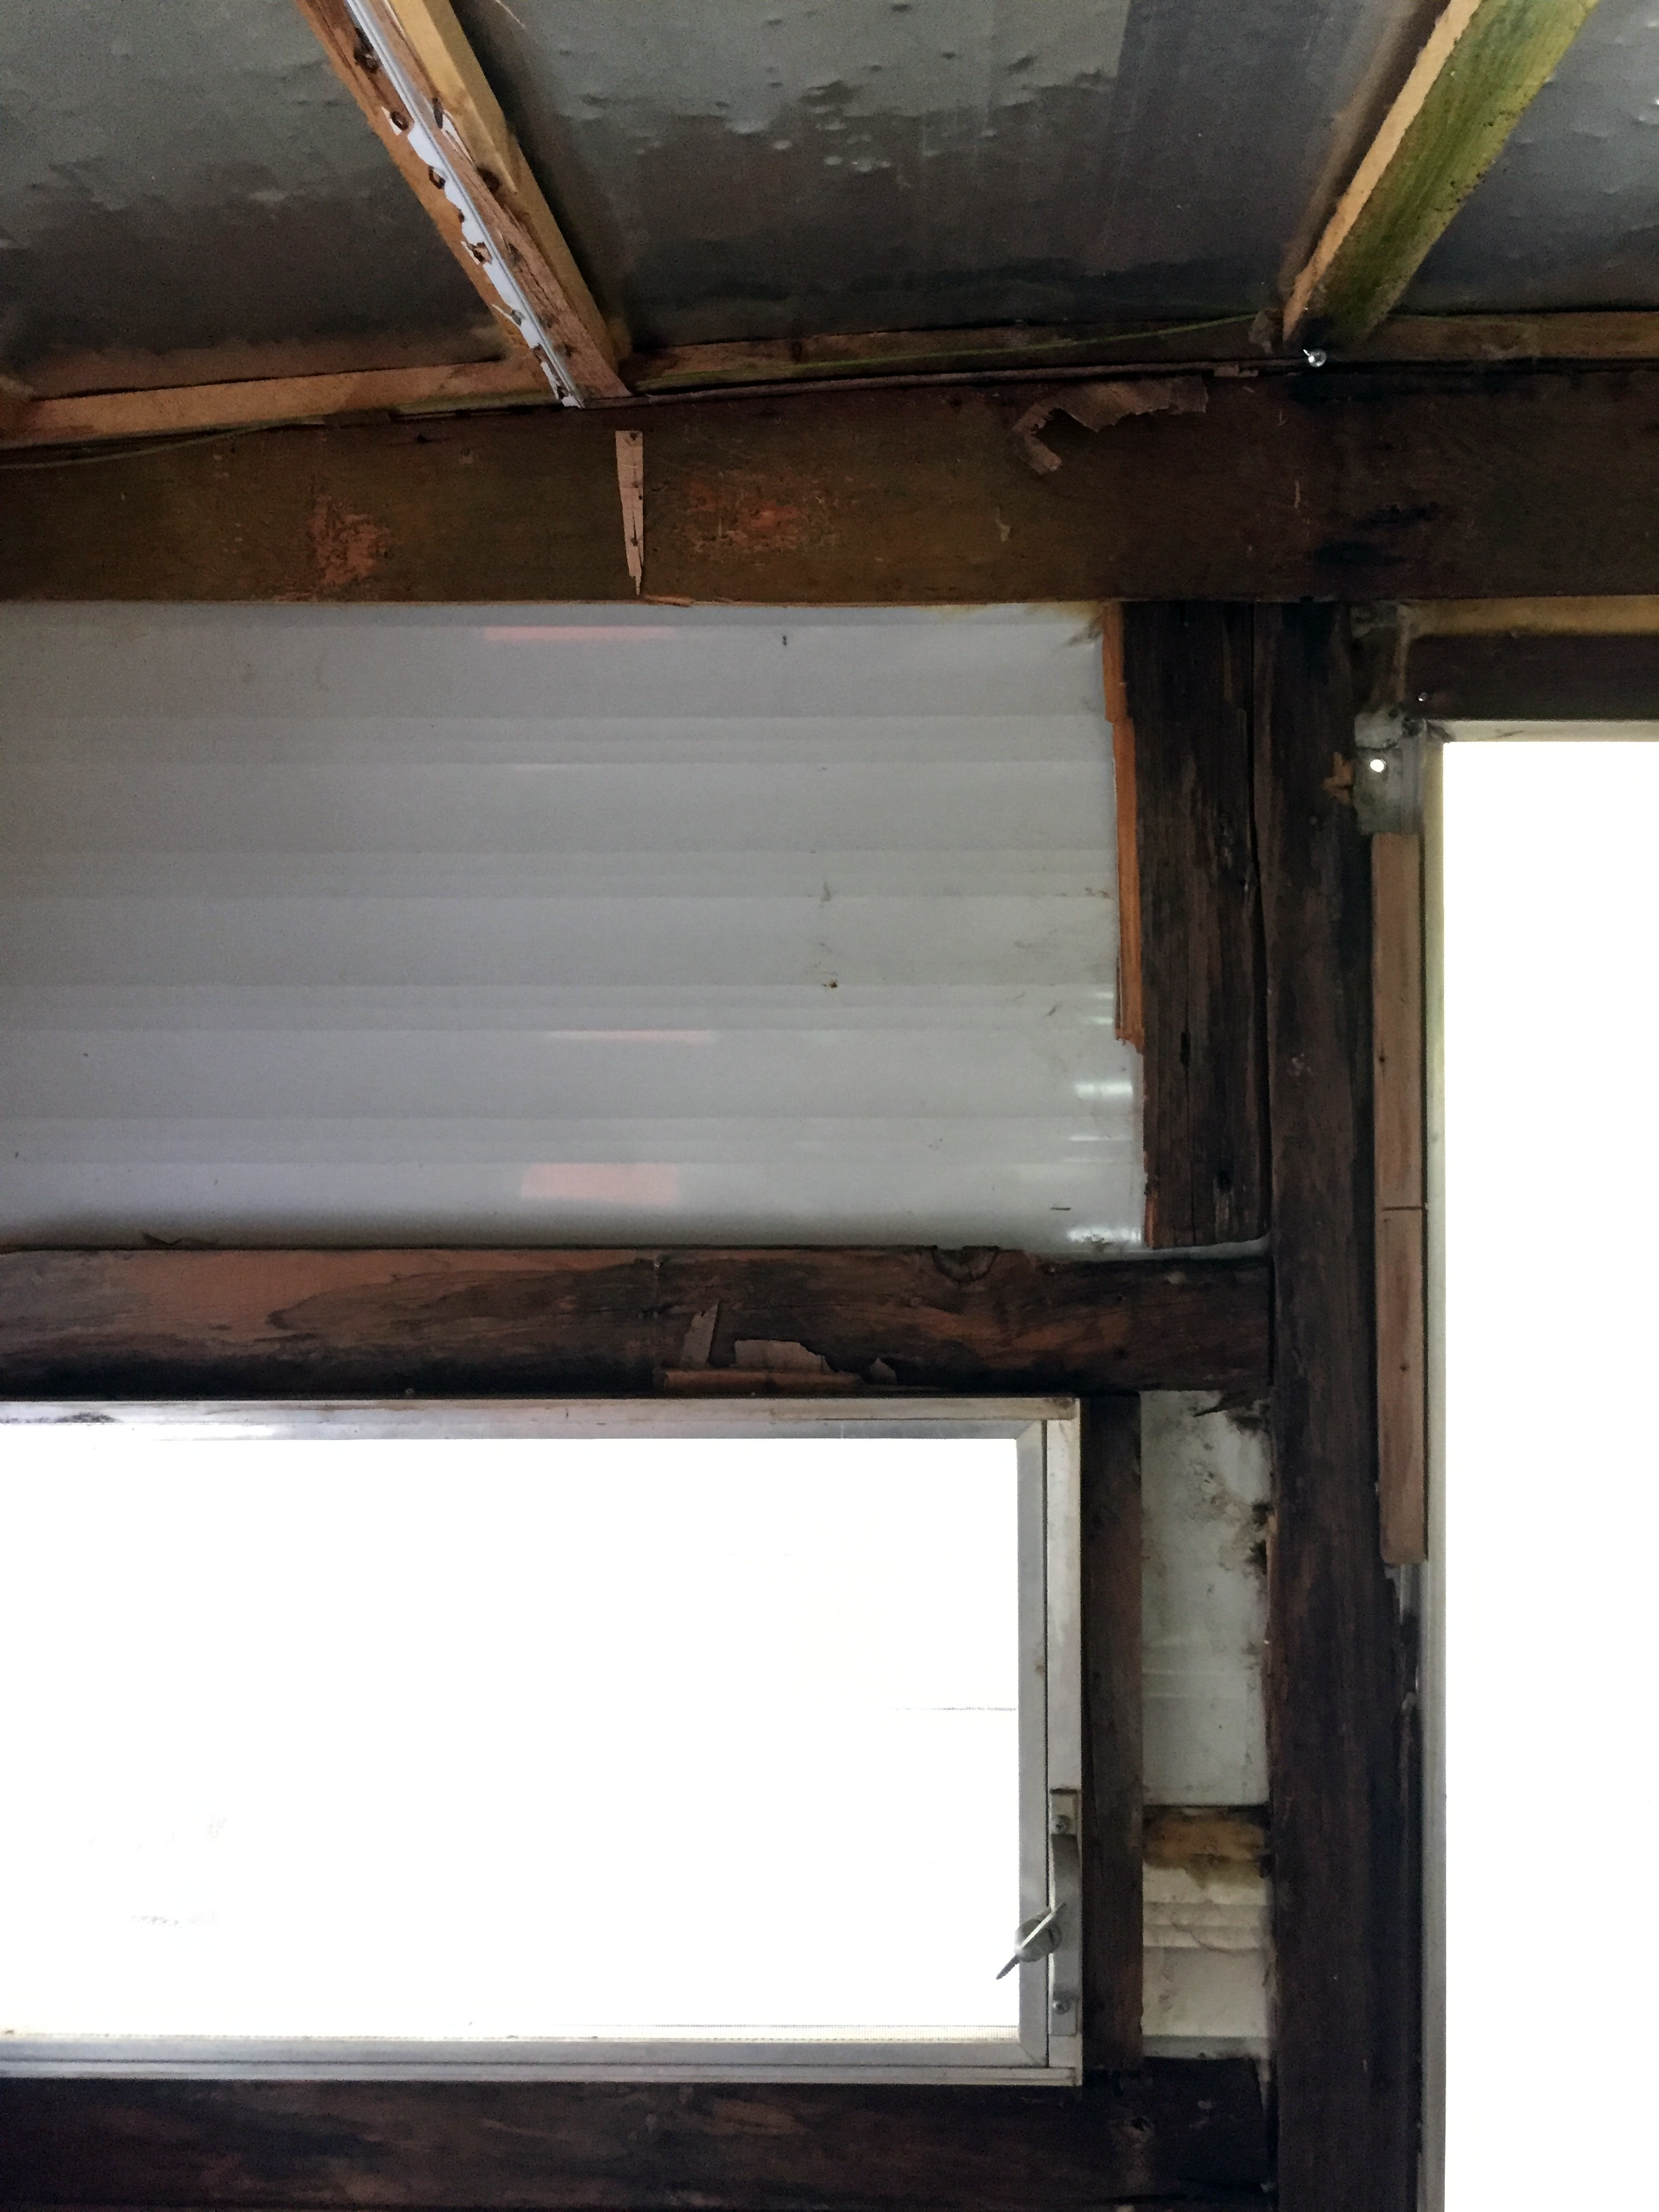
Two flappy walls for the price of one
As we mentioned in the last post, the studs in the walls and ceiling are less than desirable, with most either rotted through or cut too short to really do much of anything to help the structure of the camper. A lot of them actually got knocked loose despite our best efforts to be gentle when removing the paneling and fiberglass insulation, mostly due to lack of leverage but also because the adhesive used to secure the insulation was stronger than the staples barely still doing their job in the crumbling joints. (Side note: if you're ever messing with fiberglass insulation like this, please please please wear long sleeves and respirators even if it's an oh so humid 95 degree Texas day. Our itchy forearms and gnarly coughs – two days later – implore you to do as we say and not as we do. But hey, what doesn't kill you now will probably kill you down the road, er, something like that.)
The wall across from the exterior door doing its best to run away from the floor.
No you're not imagining things. The wall along the other wheel well is starting to imitate the flappy wall from day 1. Just add it to the list.
As we worked our way around to the front of the camper (the area formerly known as the dinette) we found something very interesting... Not only did this portion of the camper contain hard, styrofoam-like spray insulation instead of the soft batt insulation used everywhere else, but it also had another little surprise.

Can you guess what's wrong with this picture? (Or maybe it's easier to guess what's right.)
If you haven't spotted what I'm talking about, maybe this will help.
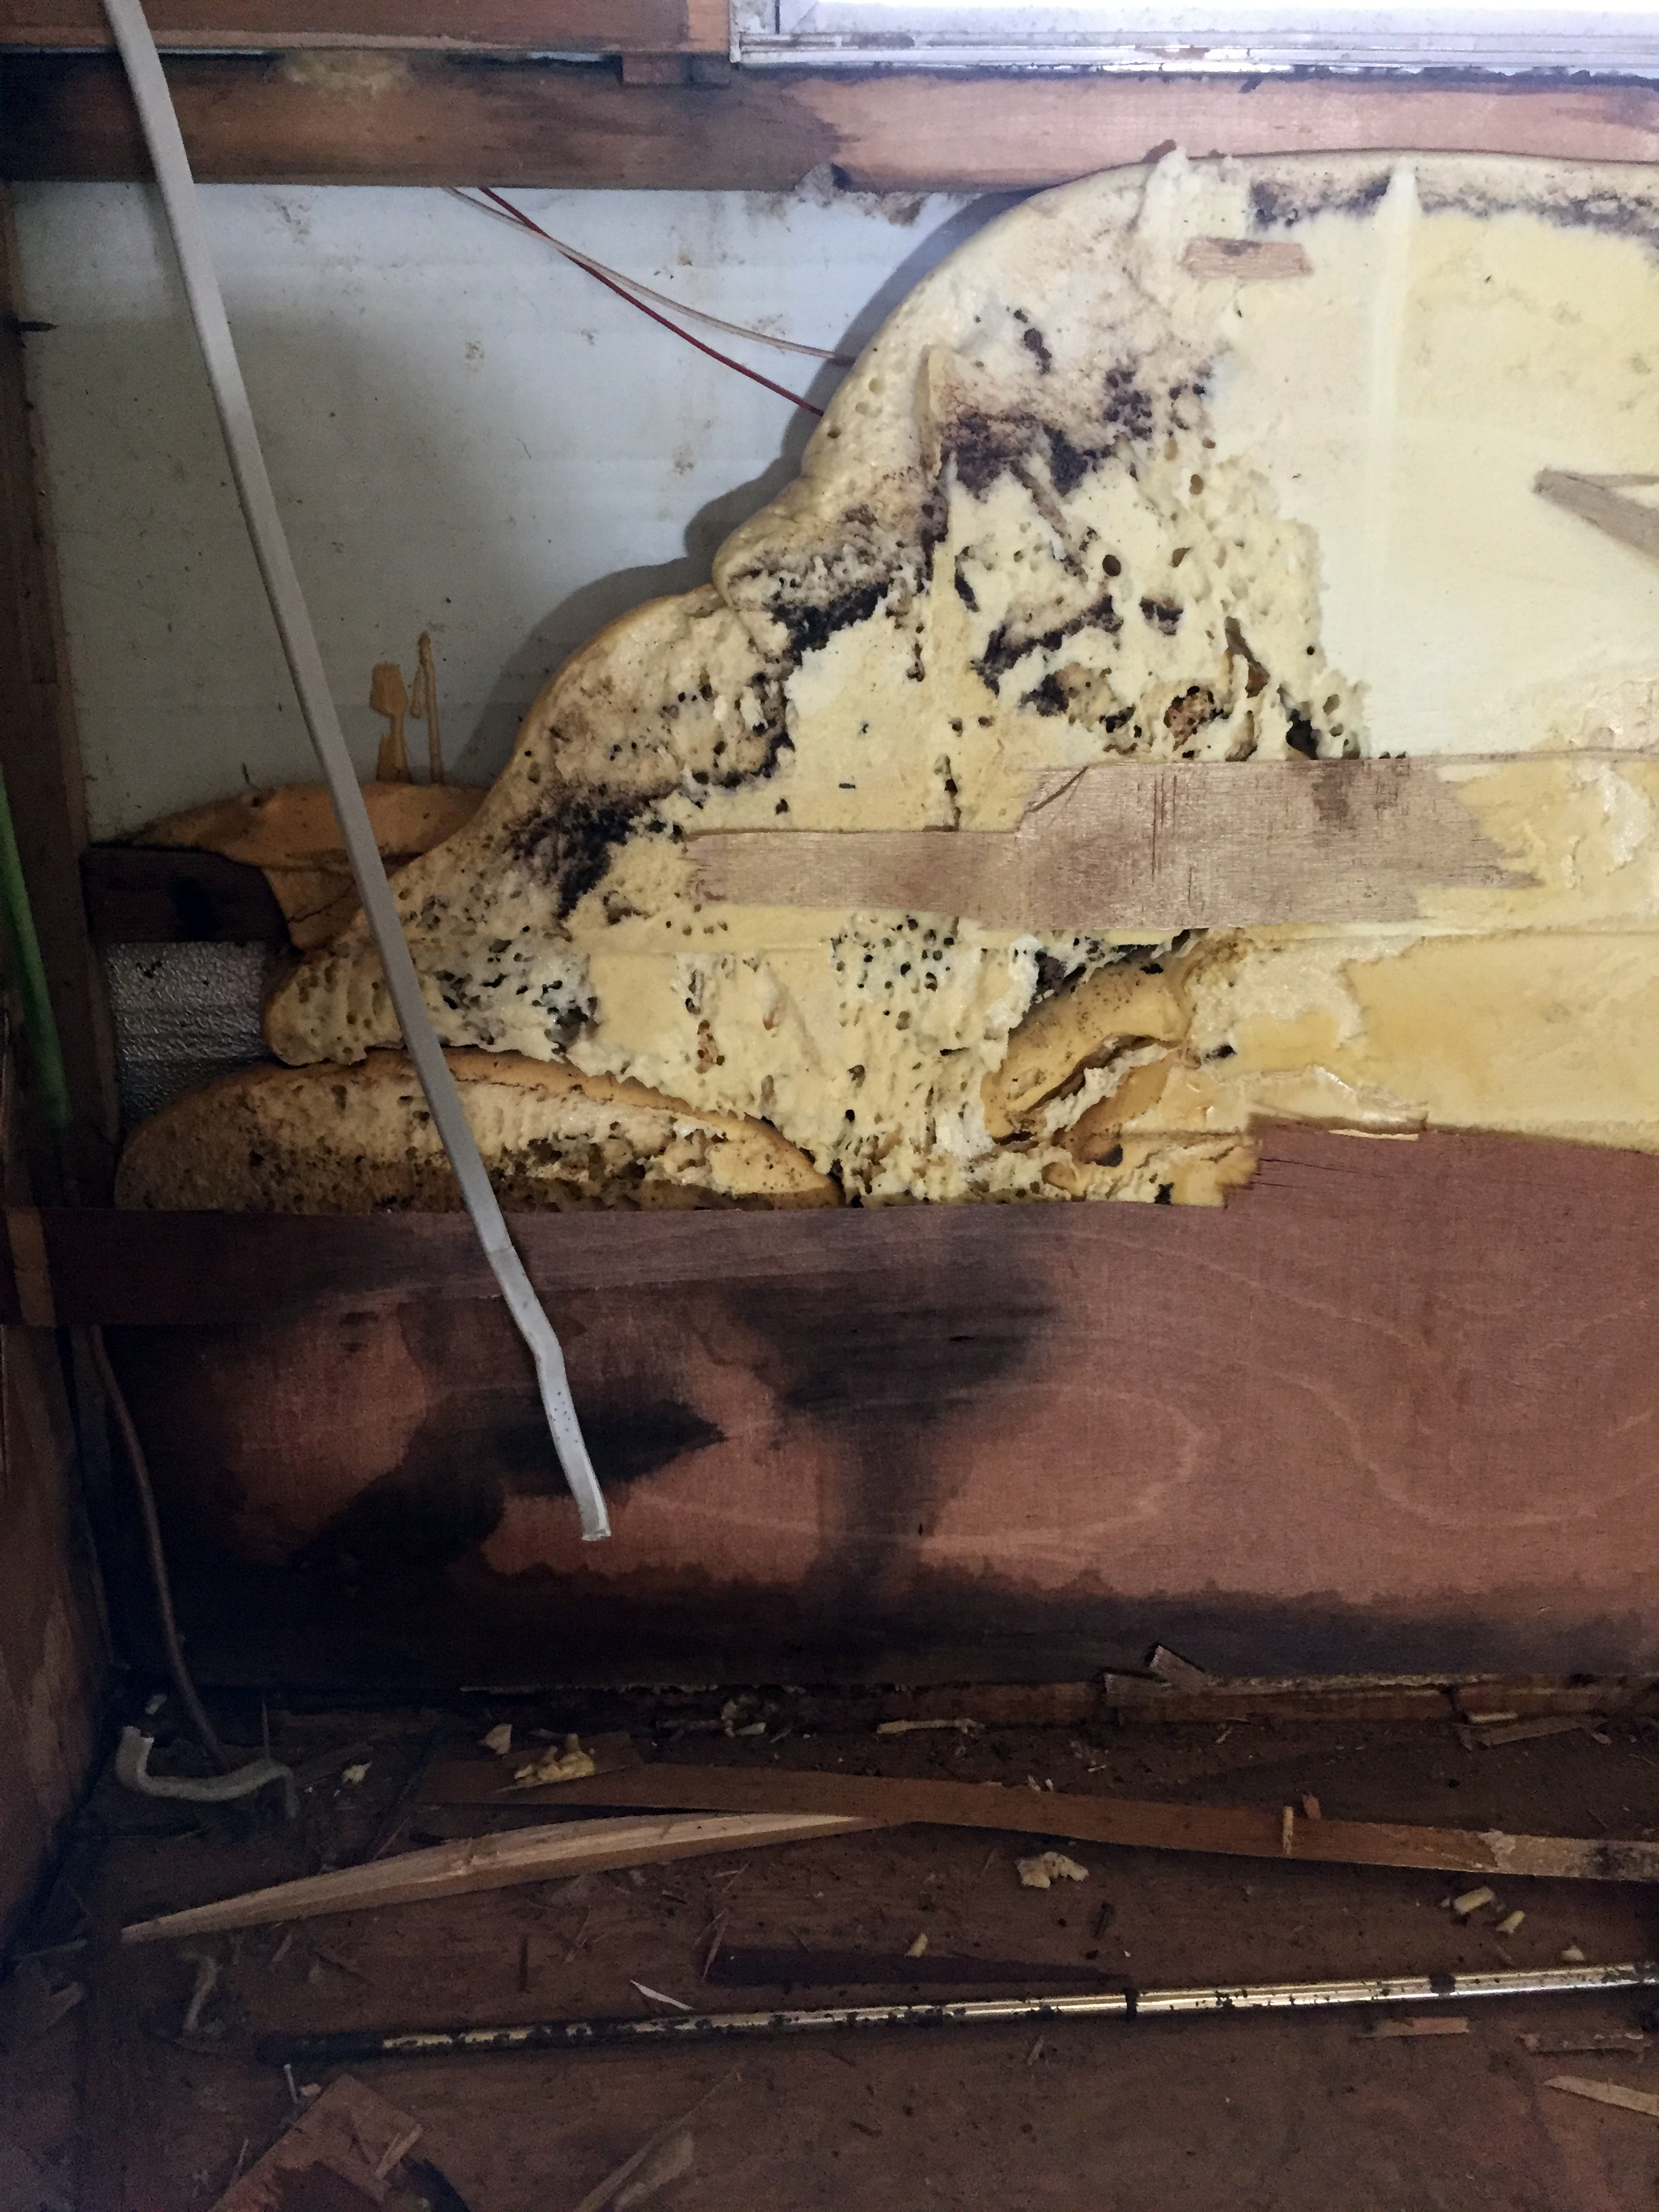
All that black stuff is definitely not pepper. Yuck.
In addition to the water damage along the bottom of the wall, we have what looks (and smells) to be mold growing on and in the foam. Yay. On the plus side, there doesn't appear to be any signs of termite life in this corner like I had originally thought this was. Phew. On the downside, this spray insulation is a real pain to get off, especially considering the complete lack of support in the exterior metal. I don't readily admit my faults, but I stunk at this something fierce. Thankfully Nick had the magic touch (and the patience) and was able to use the putty knife to pop off all the spray foam without puncturing any of the exterior metal. Hazzah!


Time for another edition of "what weird stuff did you find in that camper?"
If you've been following along from the beginning, you might remember some of the more interesting things we found on our first demo day, including decrepit mice and some anti-friction hiney powder. Depending on your idea of a good time today's finds may or may not be better. No judgement. Along with a couple basic blue Bic pens, a pencil, a shotgun shell, a few old coins, and a ton of BBs (of the gun variety not like the face cream), we also found this original handwritten verification of our specific camper above the rear window.

Original handwriting found above the rear window under the insulation reads "Cameo 17 ft. T.T.", which I think stands for "travel trailer".
In addition to the handwriting that I think is pretty cool, we also found this stuff:
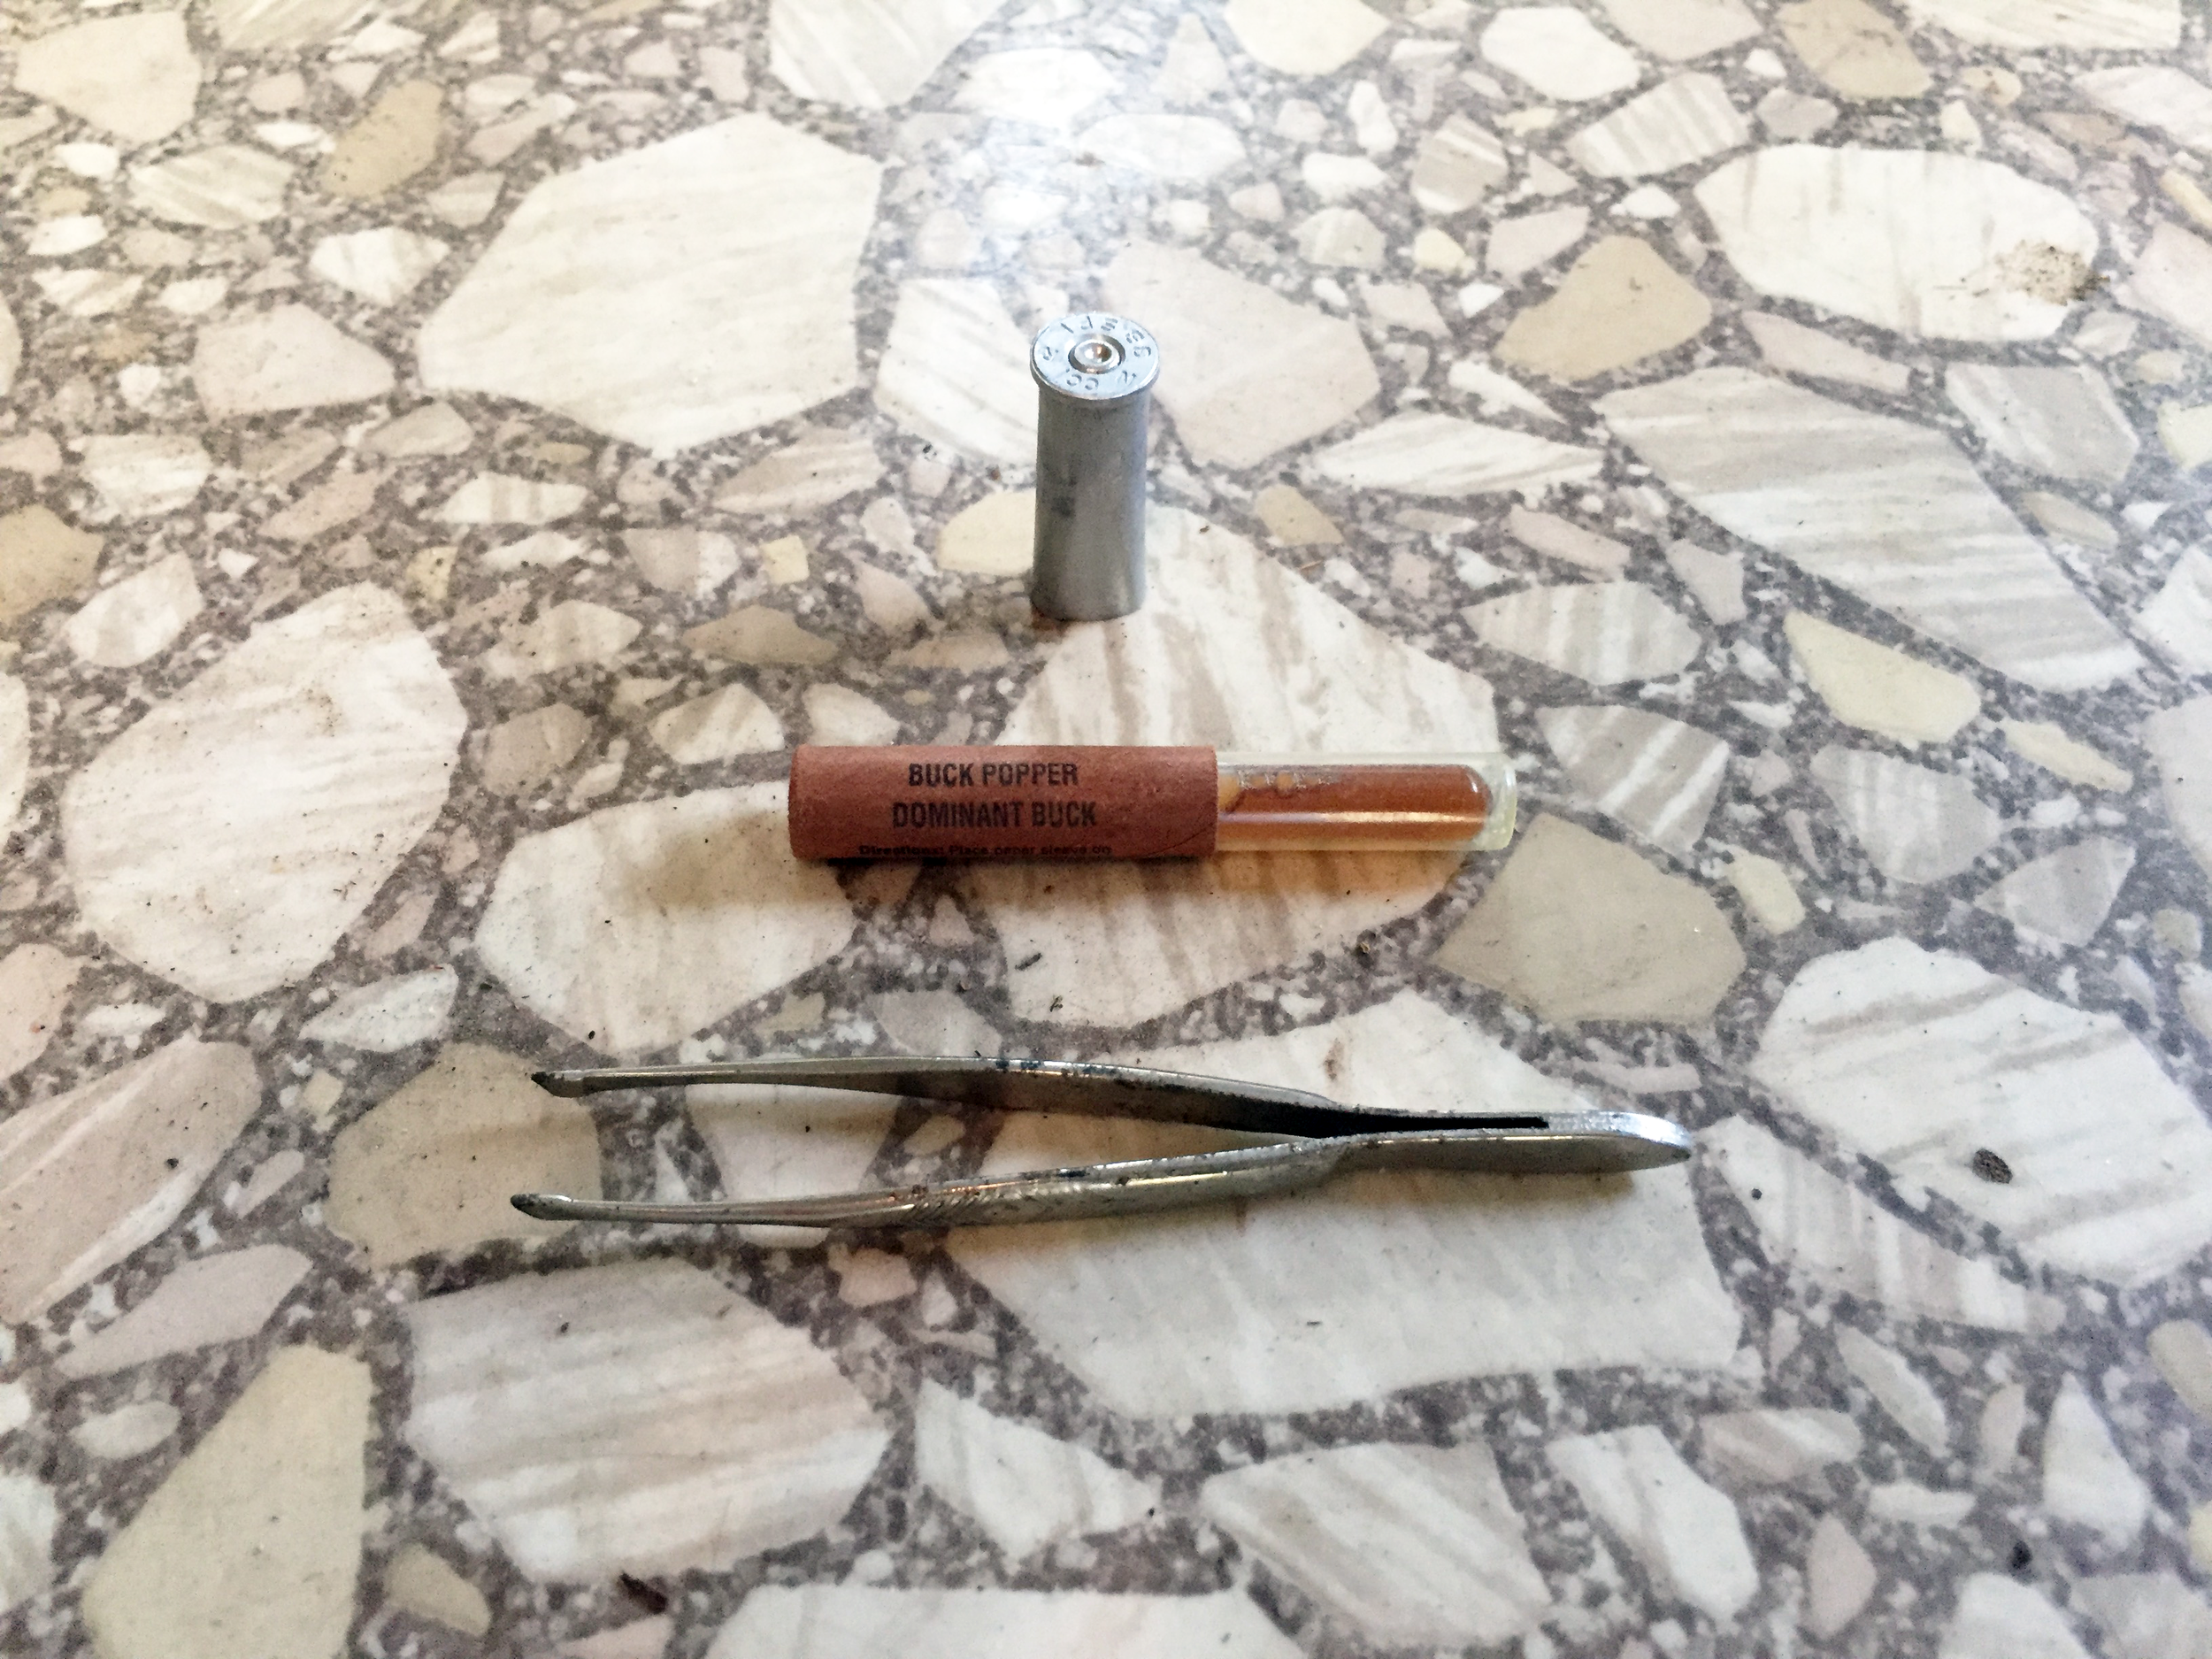
A bullet casing, an I have no idea what (obviously the official scientific name), and some old tweezers.
Does anyone know what the heck the thing in the middle is? It's about 2 inches long, full of brown liquid and when you remove the paper cap thing on the left that says "BUCK POPPER DOMINANT BUCK" (what the...?!) the end has some kind of weird felt-like filament thing on the end. I think I can rule out that it's something of the perfume sample variety and instead I'm leaning toward it's more of an animal tranquilizer dart gun kind of thing. Please help me clear this from my mind and give me your best guesses in the comments.
For my favorite craftsman
I'm gonna get serious and a little smooshy on you for a hot second, so bear with me. Despite the various funky smells throughout the day (melting rubber, mold, fiberglass micro-fragments I'm still regretting), the removal of the top-most layer of paneling (yes, there were multiples) in the dinette area brought me back if only for a few seconds to time spent as a kid at my grandpa's house. That unmistakable smell of old, longleaf wood crafted by hand and made with intent and ingenuity long before the days of Google searches and YouTube tutorials. I think that my creativity, passion for problem solving and compulsion to work with my hands on what most would consider crazy and overwhelming projects like this is my grandpa's heart and soul living on through our family and I could not be more grateful that passion flows in my veins. As is my goal with all of our projects, I hope The Cameo renovation makes him proud and finishes with even half the level of skill and precision he would've no doubt infused if it were his own project. And as quickly as the memory of making bird houses together and perusing his workshop loaded with all sorts of tools (each with its own special place) flooded into my brain, I pull another piece of wood off the wall and the smell of mold and mildew once again flood my nose.
Time to dry your tears (mom, I'm talking to you) so we can all take a gander at what Nick and I are noodling around with this week until we can get our hands on her again over the upcoming three-day Memorial Day weekend. Score!


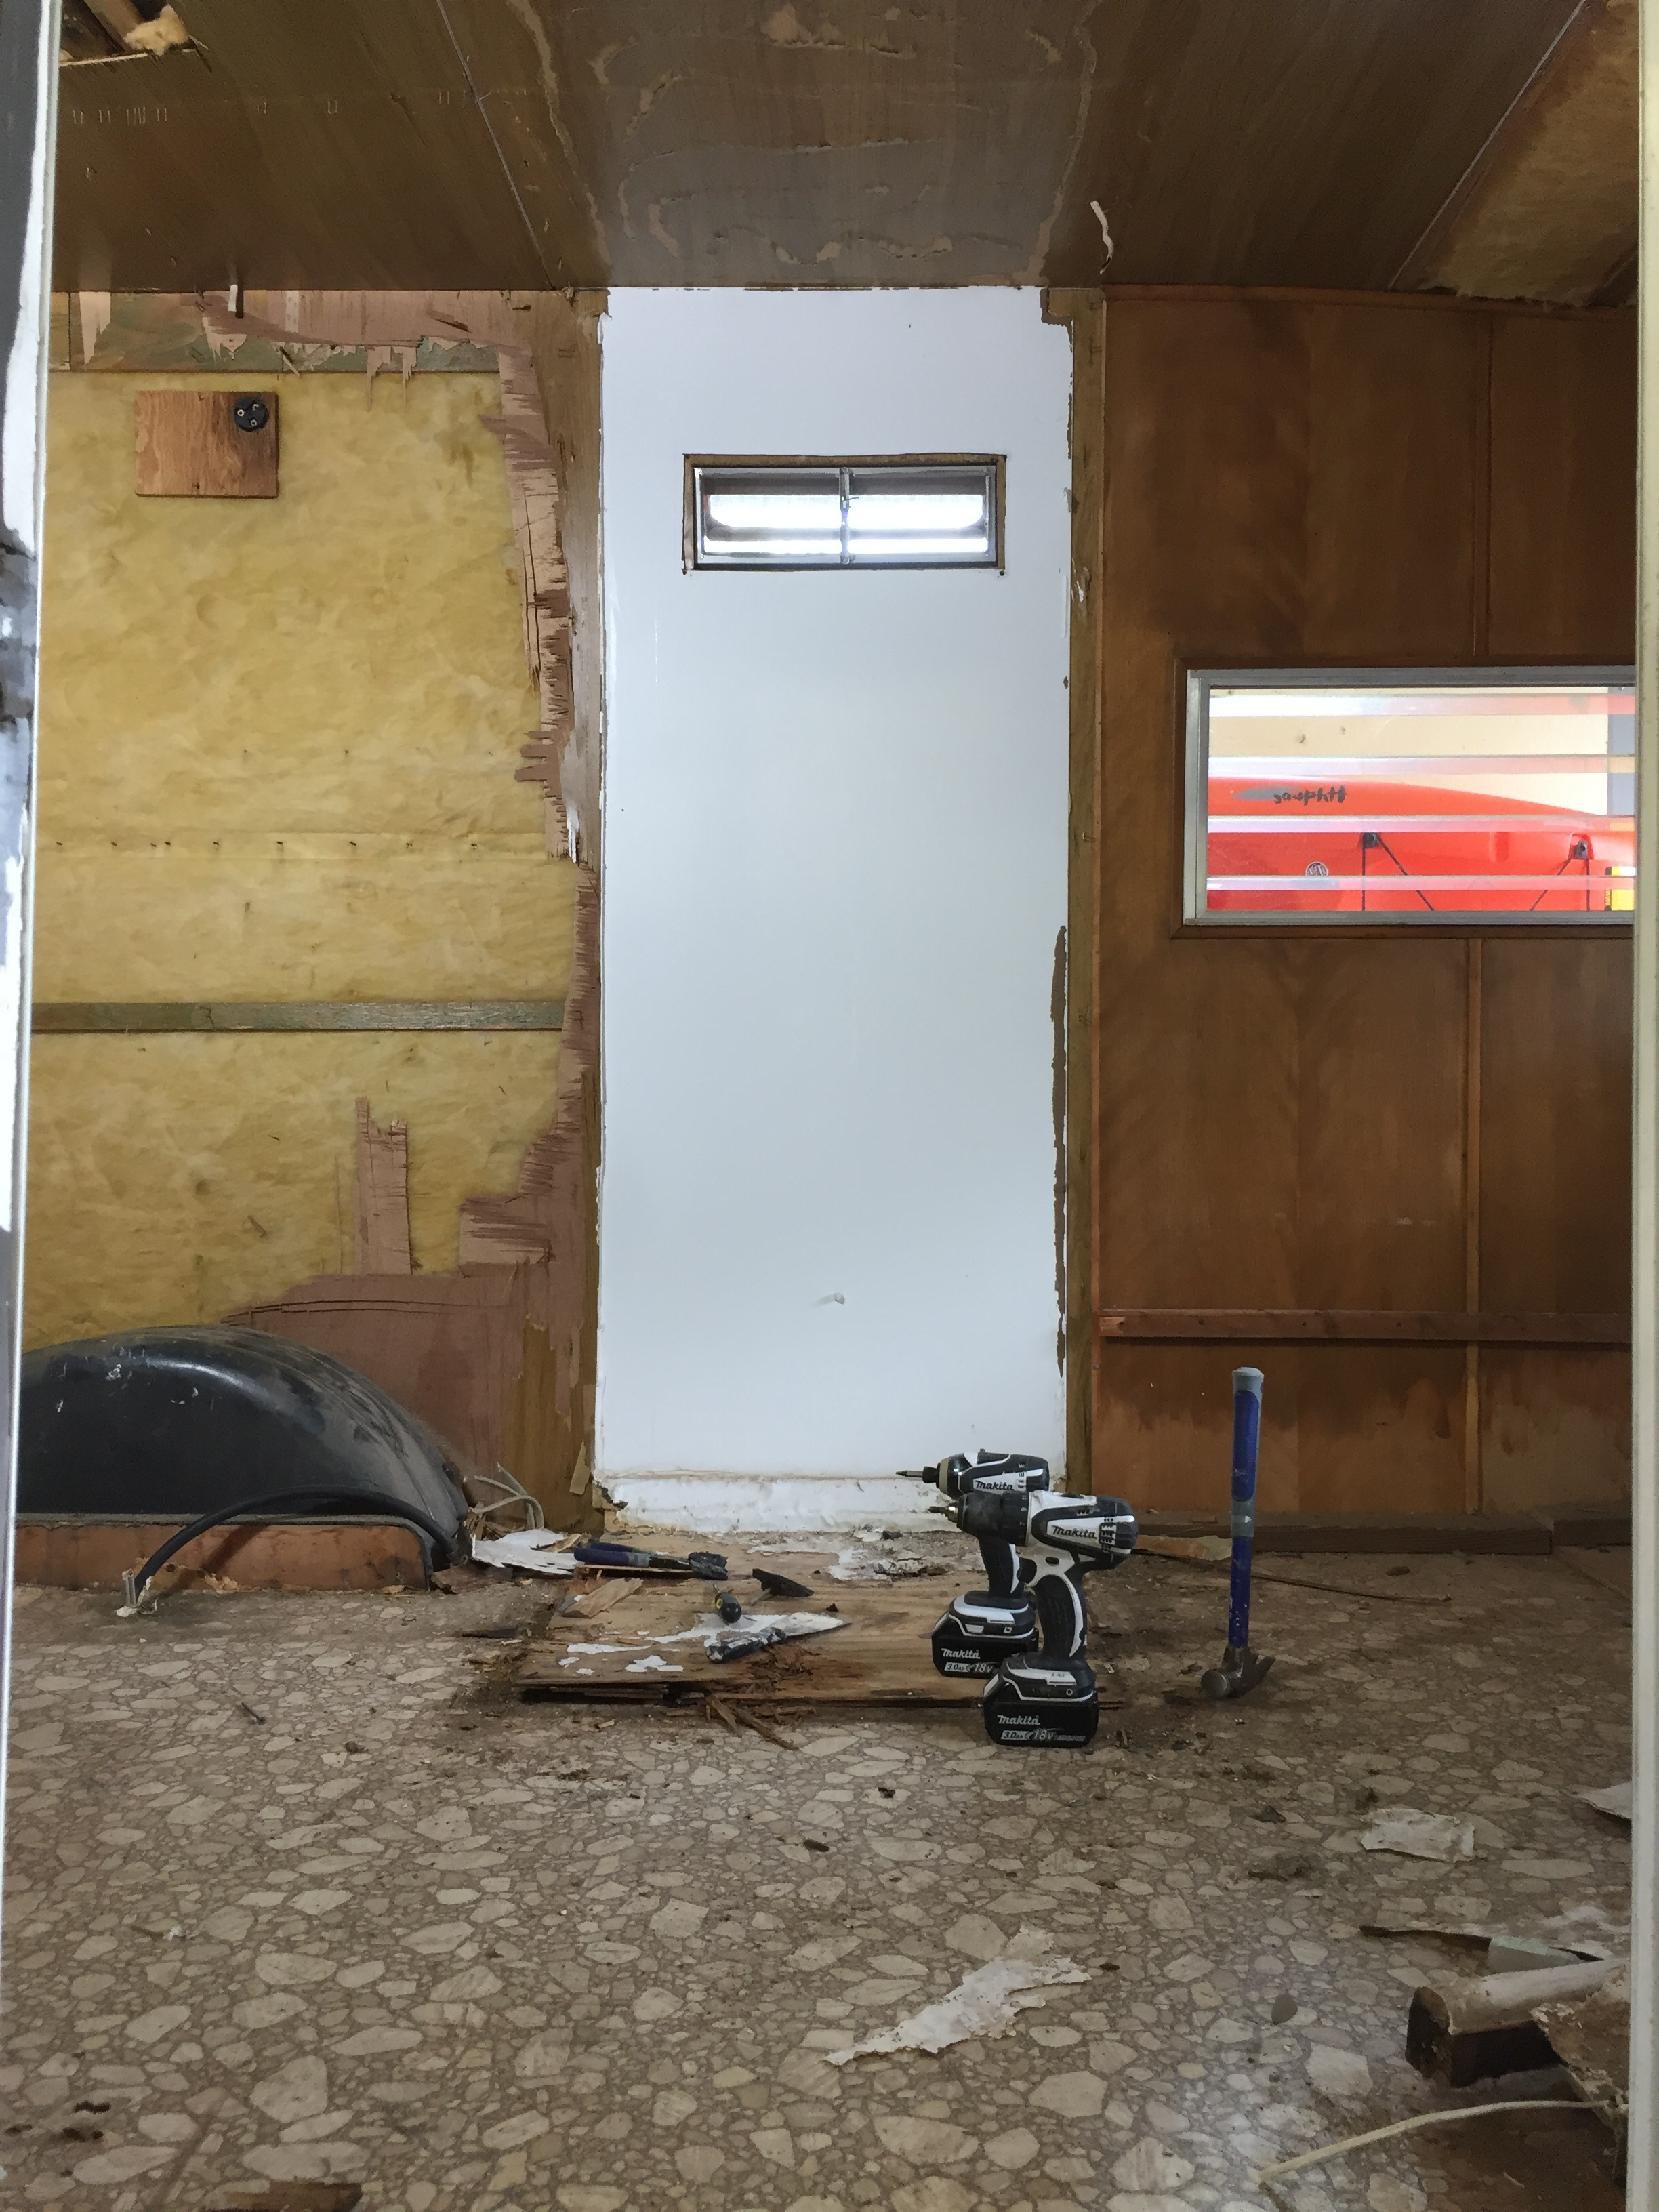
Post-demo view from the back, door-side corner of The Cameo.
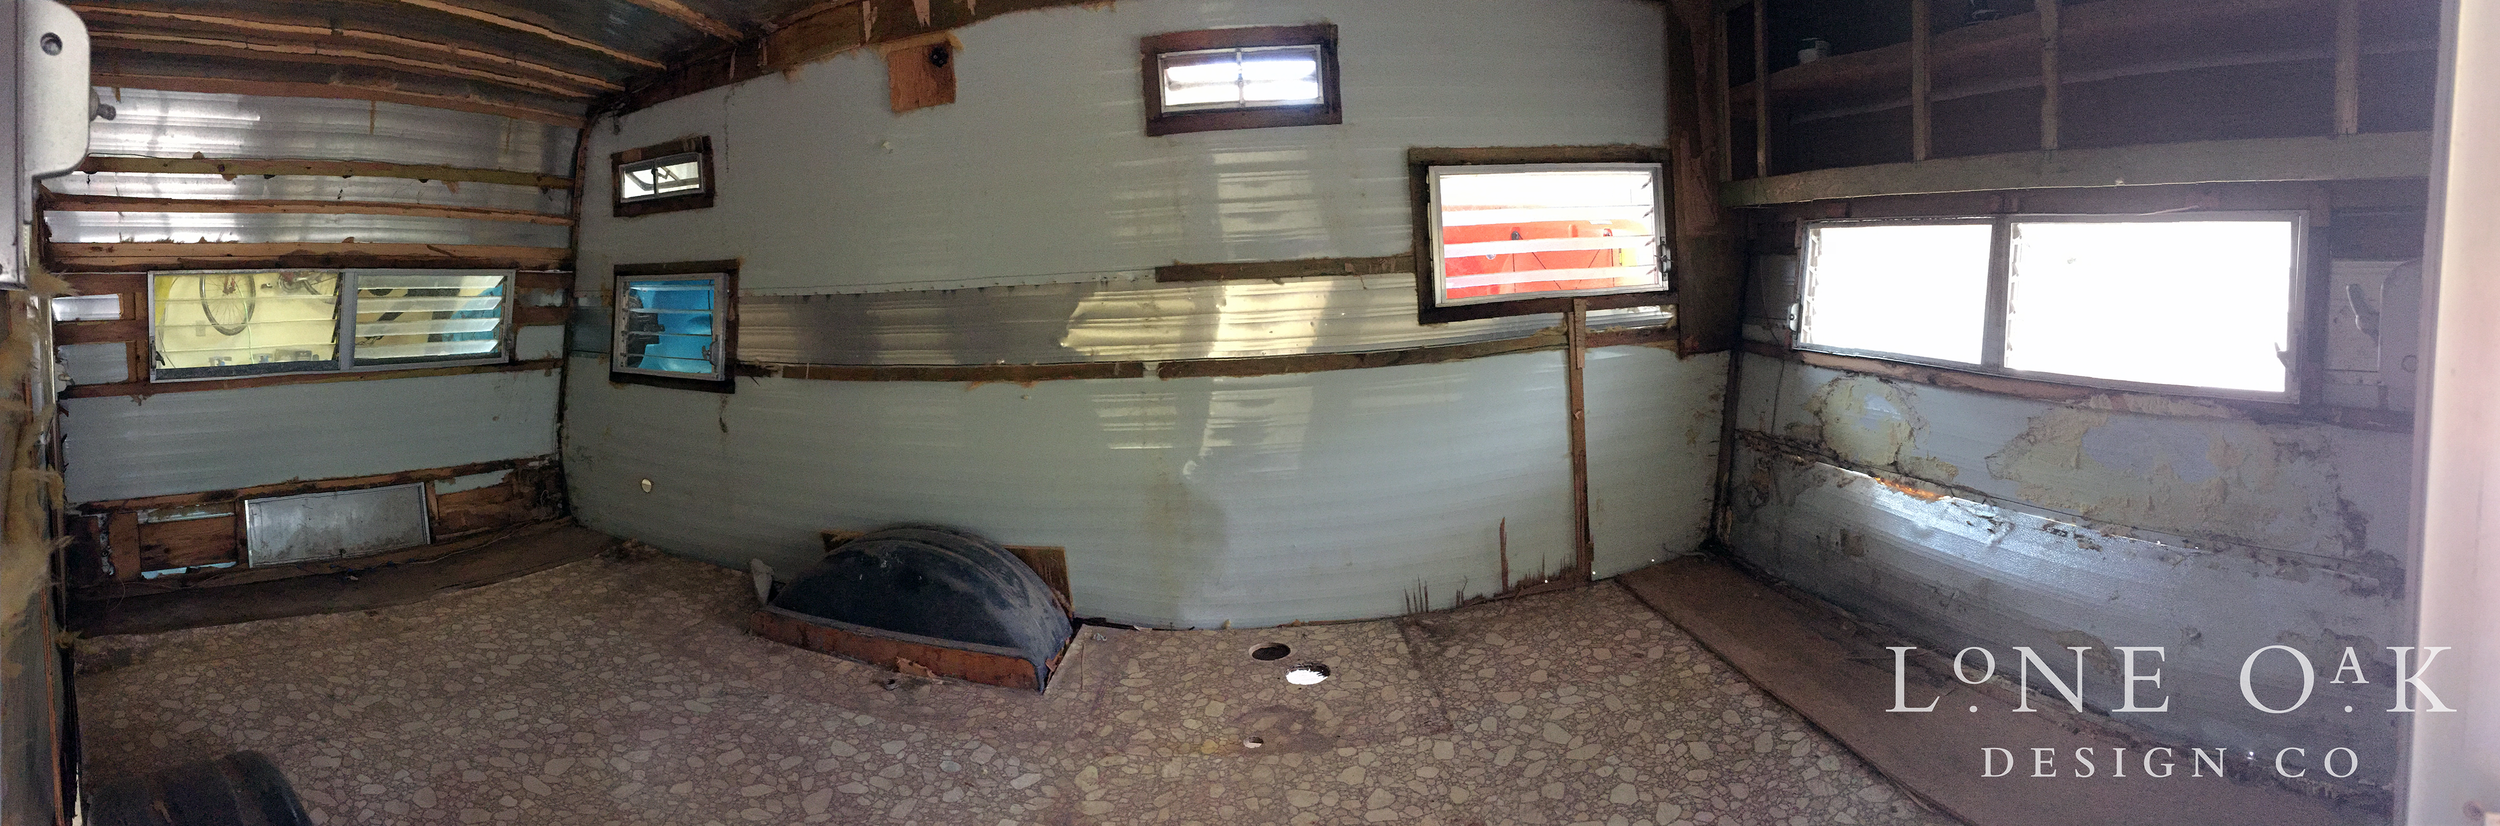
Post-demo view from the exterior door of The Cameo.
Just when you thought our canvas couldn't get any blanker, she goes and surprises you. A girl after my own heart. Good news is we can have peace of mind knowing she's extra safe and secure once we build her back up, and flex some design muscle and ingenuity along the way, just like I like it. At this point how are you envisioning The Cameo coming across the finish line? Are you as surprised as we are that we only have a hollow box on wheels left after our "follow the damage" mantra?